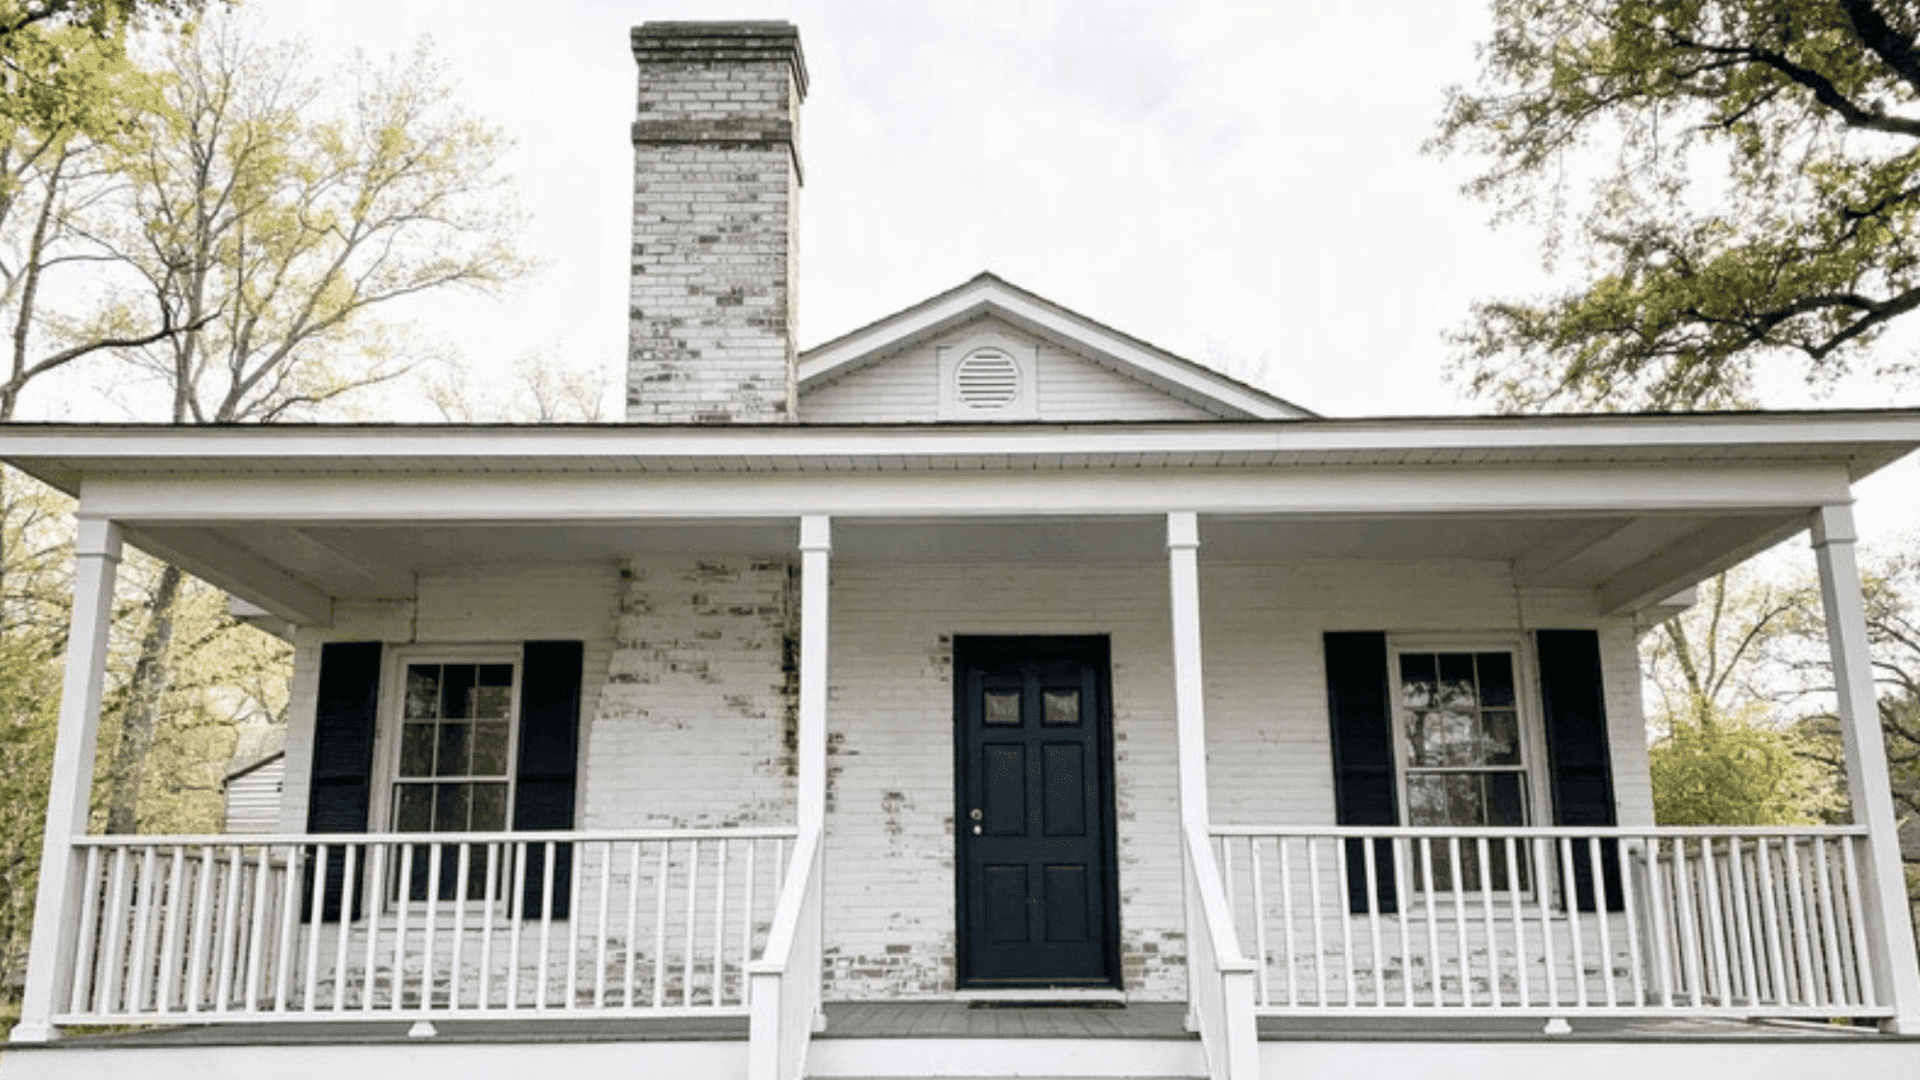
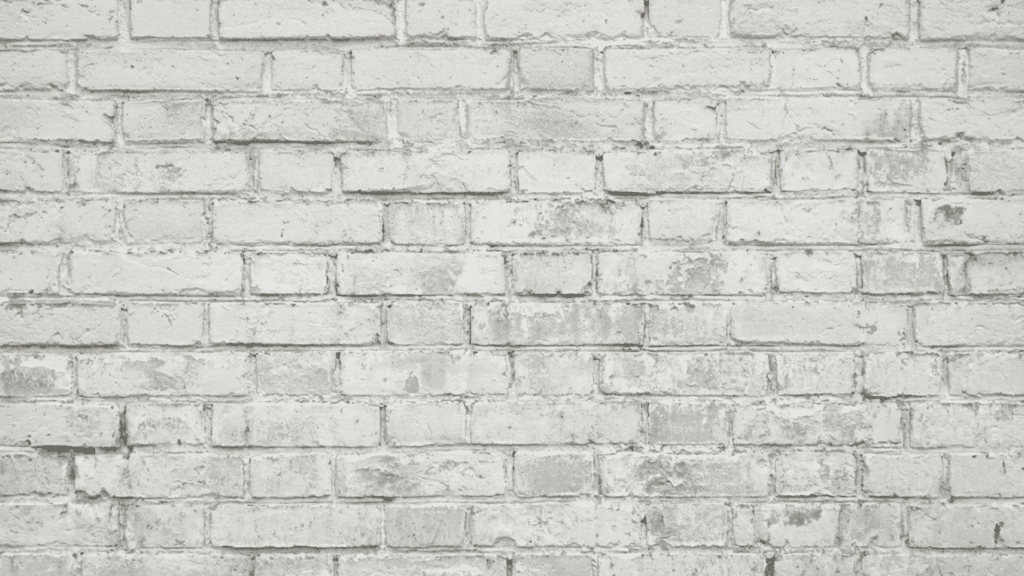
There’s something about a lime-washed brick wall that stops you mid-scroll. That soft, chalky, textured finish looks like it belongs in a Tuscan villa, but it’s far more achievable than it looks, even as a weekend DIY project.
The thing is, most people assume lime-washed brick requires professional help or expensive materials. It doesn’t.
With the right technique and a little patience, you can completely change a brick surface at home without breaking the bank.
This guide outlines the process, the materials, the steps, the mistakes to avoid, and what real people actually think of the results.
What Is Lime-Washed Brick?
Lime wash is a coating made from slaked lime mixed with water, sometimes with a small amount of pigment added to shift the tone. Unlike regular paint, it doesn’t sit on top of the brick as a solid film.
Instead, it soaks into the surface, bonding with the material beneath and creating that characteristic chalky, aged finish that makes lime-washed brick so distinctive.
Because it’s a breathable coating, moisture can still move through the wall naturally.
This makes it a genuinely better option for older brick than standard paint, which can trap moisture and cause damage over time.
Lime-Washed Brick Vs Regular Painted Brick
The difference between the two comes down to how they look, how they last, and how they behave on the wall.
- Appearance: Regular paint sits on the surface and dries flat and uniform. At the same time, lime wash brick settles into the natural texture, giving it a layered, more organic look that painted brick can’t replicate.
- Durability: Painted brick can peel or bubble on exterior walls over time, while lime wash handles moisture much better and is easier to touch up.
- Reversibility: lime-washed brick can be lifted with a stiff brush and water when the application is fresh, whereas standard masonry paint usually requires chemical strippers to come off.
Full Tools and Materials List
Before you start, it’s worth getting everything together in one place. Running out of supplies mid-project is frustrating, and with lime wash, timing matters since you need to work back into the coating while it’s still wet.
| Material | What It’s Used For |
|---|---|
| lime wash paint | The main coating applied to the brick surface |
| Water | Used to dilute the lime wash to the right consistency |
| Large masonry brush or brush with stiff bristles | Applies the lime wash across the brick surface |
| Spray bottle | Keeps the brick damp during application |
| Bucket | For mixing and holding your lime wash |
| Scrub brush or sponge | Used to work the lime wash into the brick texture |
| Protective gloves and eyewear | Safety during mixing and application |
How to Lime Wash Brick: Step-by-Step Guide
This is where most people either get it right or make it harder than it needs to be. Follow these steps in order, work in manageable sections, and the process is a lot more straightforward than it looks.
Step 1: Clean the Brick Surface
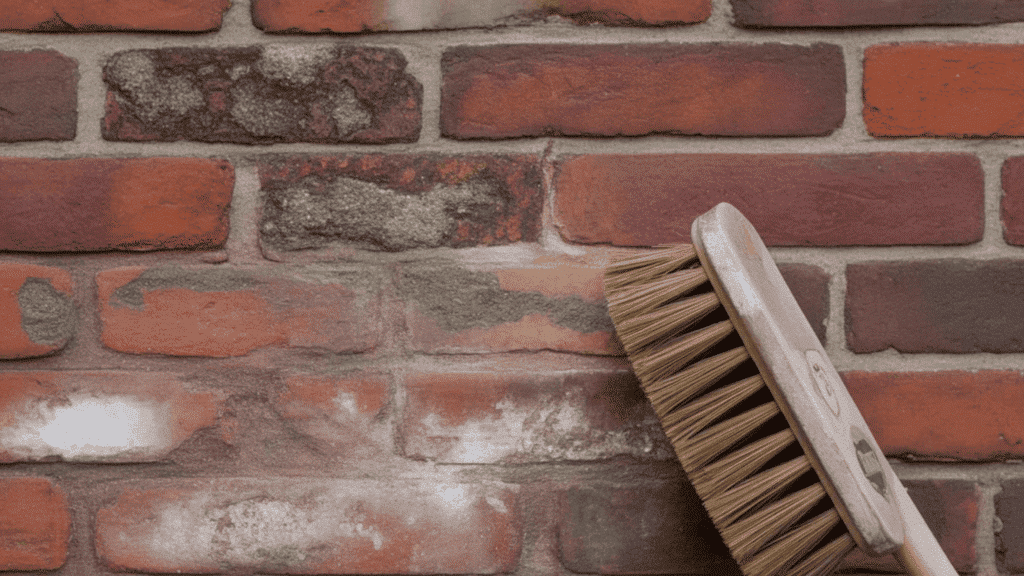
- Remove dirt, dust, mold, or efflorescence using a stiff brush or pressure washer
- Allow the brick to dry completely before moving on
- Check for any damaged or crumbling mortar and repair it first
Step 2: Dampen the Brick
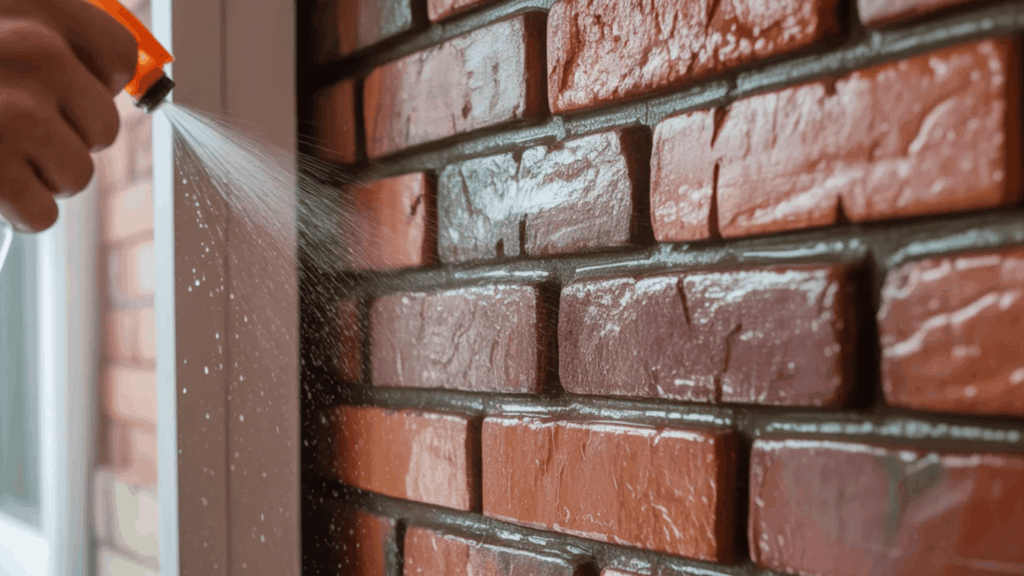
- Use a spray bottle or garden hose to lightly wet the brick before applying lime wash
- Damp brick absorbs the lime wash more evenly and prevents it from drying too fast
- Work in sections so the brick doesn’t dry out before you get to it
Step 3: Mix Your Lime Wash

- If using pre-mixed lime wash, stir thoroughly before use
- If mixing from scratch, combine hydrated lime with water in a 1:1 ratio as a starting point
- Add more water for a more transparent, washed-out finish or less for a more opaque look
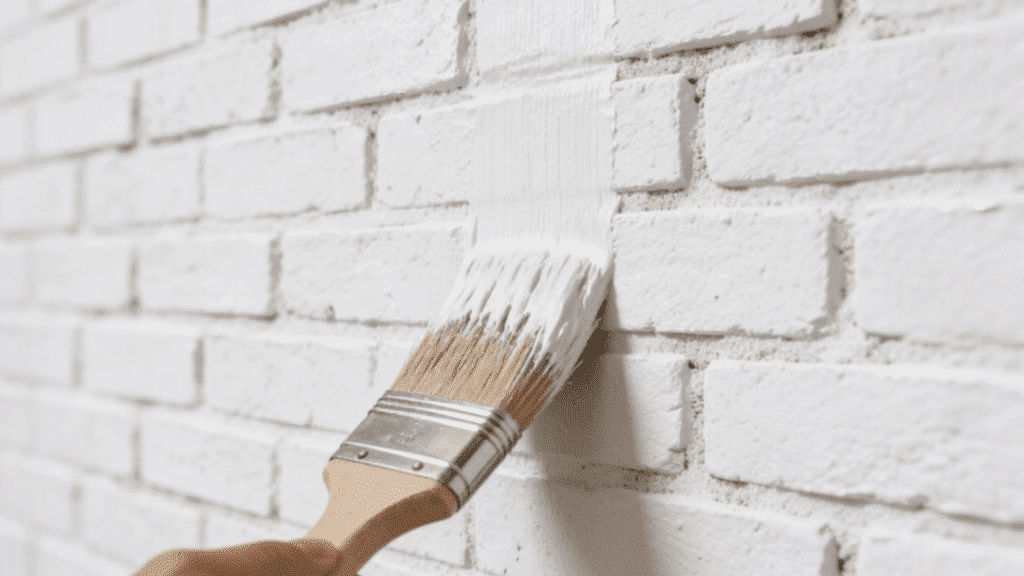
Step 4: Apply the First Coat
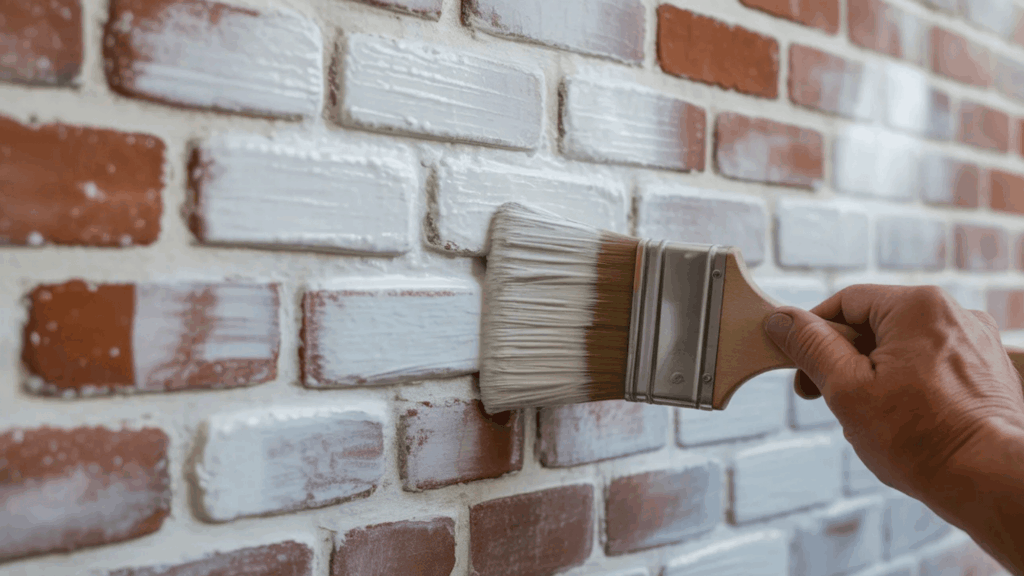
- Load your brush generously and apply the lime wash using scrubbing, circular motions
- Work it into the mortar joints and the surface of each brick
- Don’t worry about complete coverage on the first coat; uneven application is part of the look
Step 5: Work Back Into the Wet Lime Wash
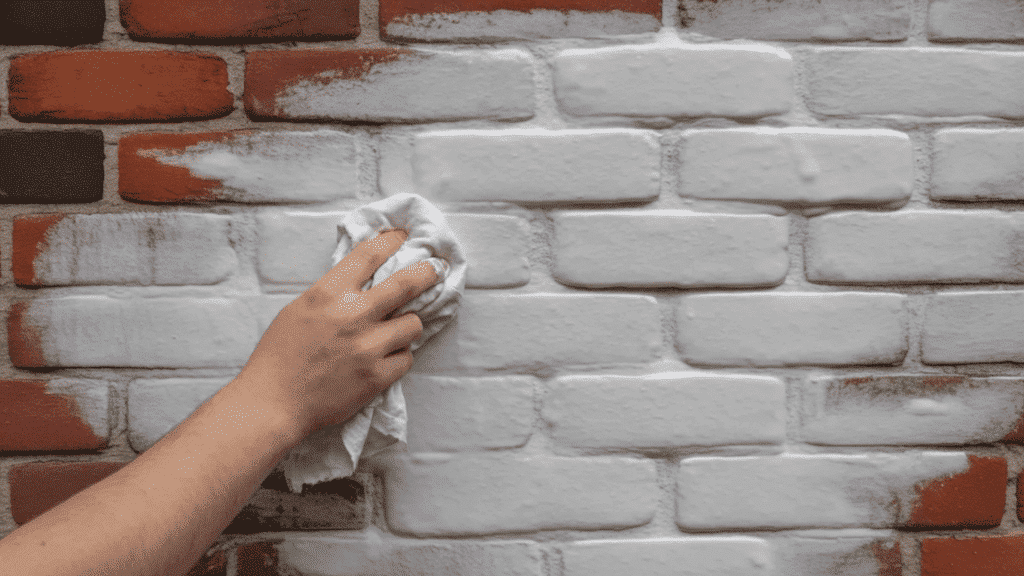
- While the lime wash is still wet, use a damp rag or brush to wipe back some of the coating
- This reveals more of the brick beneath and creates that characteristic layered, aged effect
- Focus the wipe-back on the raised surfaces of the brick and leave more in the recesses
Step 6: Let It Dry and Assess
- Allow the first coat to dry fully, usually 24 hours
- The color will lighten significantly as it dries, so don’t panic if it looks too dark when wet
- Assess the coverage and decide if a second coat is needed
Step 7: Apply a Second Coat (if Needed)
- Repeat the same process for a second coat if you want more coverage
- For a lighter, more rustic look, one coat with aggressive wipe-back is usually enough
- For a more uniform finish, two coats with minimal wipe-back work better
Before and After: What to Expect
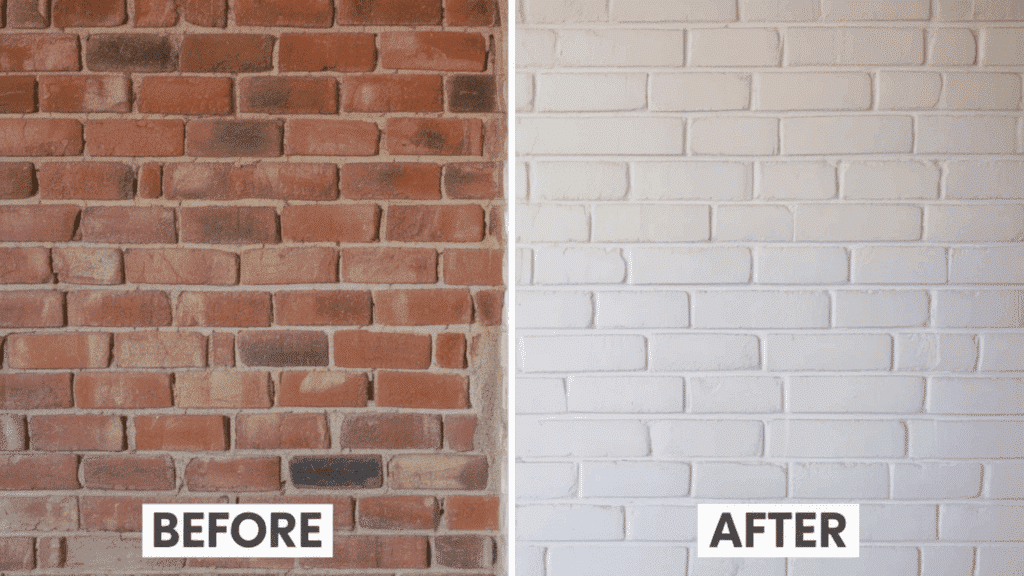
The difference between before and after is usually more dramatic than people expect, and that’s a big part of why it’s so satisfying to do.
Before lime washing, most brick walls look flat, uniform, and a little dated. The color tends to be too bold, and there’s not much visual interest in the surface.
After, the same wall feels entirely different. Softer tones, visible texture, and a finish that looks like it was always meant to be there.
Common Mistakes to Avoid with Lime-Washed Brick
Most lime wash projects that go wrong come down to a few avoidable missteps. Getting familiar with these before you start saves a lot of time and frustration later.
- Skipping the Surface Prep: A dirty or dusty brick prevents the lime wash from adhering properly, leading to patchy, uneven results. Always clean the surface thoroughly and dampen the brick before you start.
- Applying lime wash to Dry Brick: Dry brick pulls moisture out of the lime wash too quickly, causing it to dry unevenly and making it nearly impossible to work back into. Keep the surface damp as you go.
- Going Too Thick on the First Coat: A heavy first coat is harder to control and leaves little room to manipulate the finish. Thin, workable coats give you far more flexibility and a better overall result.
- Expecting a Perfectly Uniform Finish: lime wash is supposed to look varied and textured. Chasing a perfectly even coat defeats the purpose of the finish and usually just leads to frustration.
- Not Testing on a Small Area First: Always test your dilution ratio and technique on a hidden section of brick before committing to the full wall. It takes five minutes and can save you from a result you’re not happy with.
What the Community Says About Lime-Washed Brick?
People have a lot to say about lime-washed brick, and the opinions are mostly positive, with a few honest warnings thrown in. Here’s what real people and DIYers have shared from their own experiences.
I have lime-washed in the past. It’s super cheap compared to paint, and better for the brick. If you put it on too thick all at once, it will be powdery, so do many thin coats. It will end up looking bright white, with a little bit of sparkle. It’s really pretty. -Wriiight (Quora)
We went from orange brick to a soft, creamy white finish that feels fresh, modern, and totally US! It’s now one of the most commented-on features of our home!! And knowing we did it ourselves makes it even better. –Liz Pacini (lizpacini.com, real DIY enthusiast)
I’ve been limewashing homes and graves for many years, and I will always recommend lime wash over paint. The upkeep or touch-up is so simple; there’s nothing you can do to mess it up. If you don’t like the way it looks, keep playing with it until you get the look you want. I did some graves 25 years ago, and they still look like the day I first did them. –Anonymous Professional (Plank and Pillow comments section)
Mixing your own limewash for exteriors is one of the best budget-friendly ways to refresh your brick walls. You can easily prepare it at home and can use it for your interiors as well. It’s helpful in removing the odors (including harmful CO2) and improving the overall air quality in your home. –Jack Luis (Quora, home painter)
Conclusion
Lime-washed brick is one of those things that genuinely delivers on its promise. The finish is evergreen, the process is manageable, and the results speak for themselves.
The key is going in prepared. Clean the surface, keep the brick damp, work in sections, and don’t panic when the first coat looks nothing like the finished product.
That’s just how lime-washed brick works, and once it dries and settles, most people wonder why they waited so long.
If you’re updating a dated exterior or refreshing an interior fireplace wall, this is one project where the effort put in is absolutely worth what you get out.

With a Master’s in Architecture from the University of California, Berkeley, Alexander Martin has dedicated the last 18 years to enhancing outdoor living through thoughtful and robust structure design. His career kicked off in urban planning, giving him a unique perspective on integrating structures into diverse environments. In 2019, Alexander brought his expertise to our website, offering insights into creating versatile outdoor spaces. Since then, he has been the lead advisor for our outdoor design projects and is known for his ability to merge functionality with environmental consciousness. Alexander enjoys rock climbing outside of work and participates in community development projects, activities that reflect his passion for the outdoors and sustainable design.