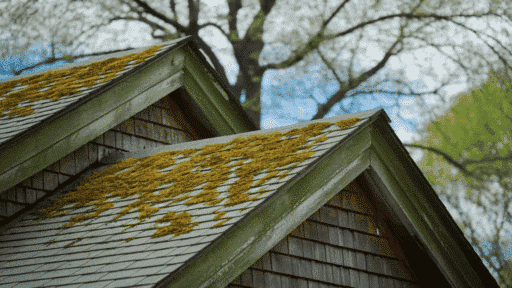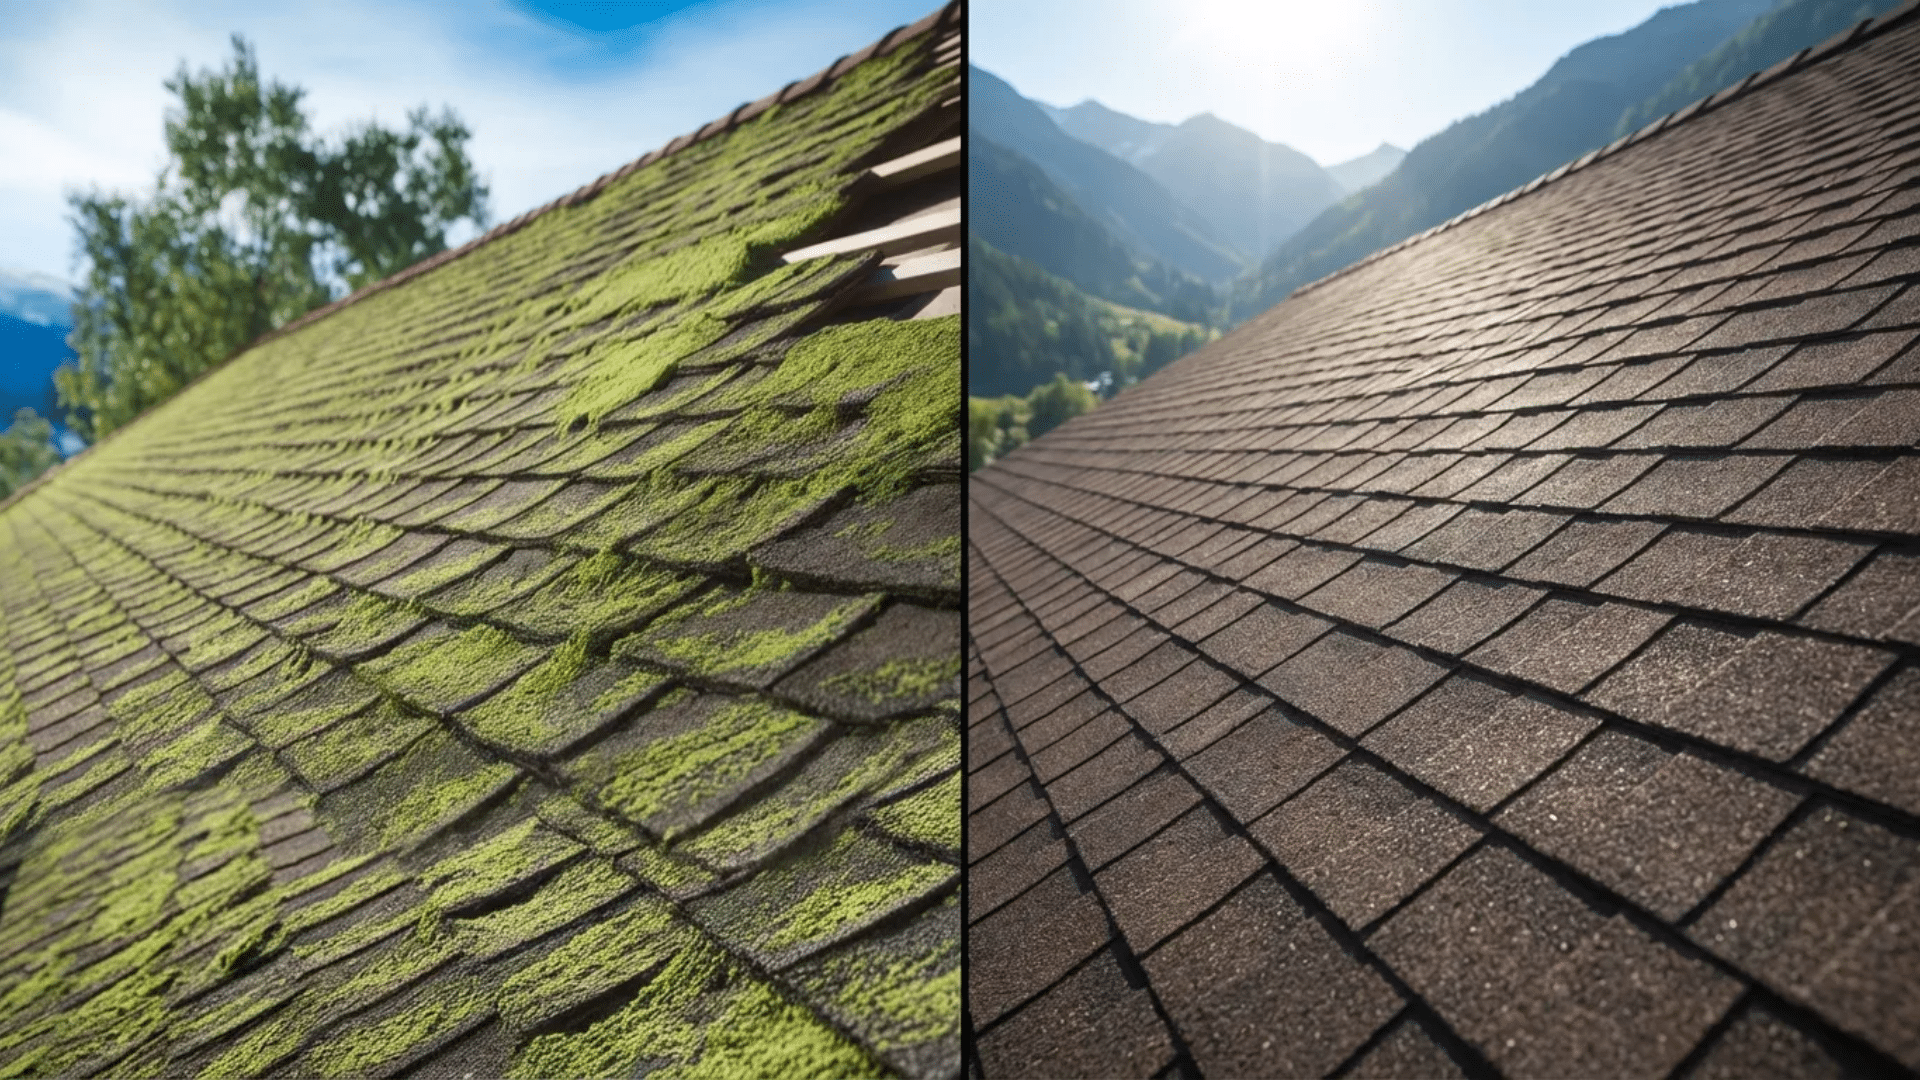
That green, fuzzy layer creeping across your roof might look harmless, but left untreated, roof moss is one of the most damaging things that can happen to your home.
It retains moisture, lifts shingles, accelerates decay, and over time can cost thousands in repairs. You don’t need to hire a professional for most moss removal jobs.
With the right tools and techniques, clearing your roof and keeping it moss-free is something any homeowner can manage. This blog covers everything from root causes and removal to long-term prevention strategies that actually work.
What Causes Moss on the Roof?
Roofs that sit in shade, collect moisture, or sit beneath overhanging trees create the perfect conditions for moss to grow.
Spores land on the surface and take root quickly, clinging easily to the rough texture of asphalt shingles. Over time, the moss traps moisture underneath, softening and cracking the shingles from below.
Left untreated, a small patch in spring can spread across the entire roof by autumn. The damage doesn’t stop at the surface either; prolonged moisture penetration can reach the roof deck and attic, leading to rot, mould, and costly structural repairs.
Do’s and Don’ts of Cleaning Your Roof
Roof moss removal is straightforward, but only if you approach it correctly.
The wrong tool or technique can cause more damage than the moss itself, creating new problems. Before getting started, know what works and what to avoid.
Do’s
- Work on a dry, calm, overcast day.
- Use a soft-bristle brush or a low-pressure washer carefully.
- Apply the moss killer evenly from top to bottom.
- Always wear non-slip footwear, gloves, and eye protection.
- Rinse nearby plants and gutters thoroughly after treatment.
- Inspect your roof carefully every year for early moss growth.
Don’ts
- Avoid using a pressure washer, as it can strip away protective shingle granules.
- Avoid scrubbing aggressively, since it can loosen or damage roofing shingles.
- Stay off wet or moss-covered roofs without safety gear, as the surface becomes slippery.
- Keep gutters clear of debris, because moss buildup can clog drainage.
- Avoid applying moss killer during rain, since the solution becomes diluted and less effective.
- Always wear protective gear, as moss treatments and chemicals can irritate skin and eyes.
Tools and Materials table
Before heading up, make sure you have these essentials ready. Having everything prepared before you climb saves time, reduces risk, and gets better results.
| Tool | Use |
|---|---|
| Soft-bristle brush | Removes moss |
| Garden hose | Rinses surface |
| Low-pressure washer | Light cleaning |
| Moss killer solution | Kills moss |
| Zinc or copper strips | Stops regrowth |
| Safety harness | Fall protection |
| Non-slip shoes | Roof grip |
| Goggles and gloves | Chemical protection |
| Plastic tarp | Protects plants |
| Garden sprayer | Applies solution |
Simple Steps to Remove Roof Moss
Taking the right approach and using safe methods will help you remove moss effectively while protecting the integrity of your roof.
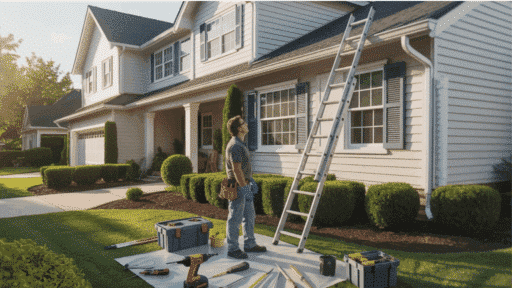
Step 1: Prepare Before You Climb
Step 1: Prepare Before You Climb
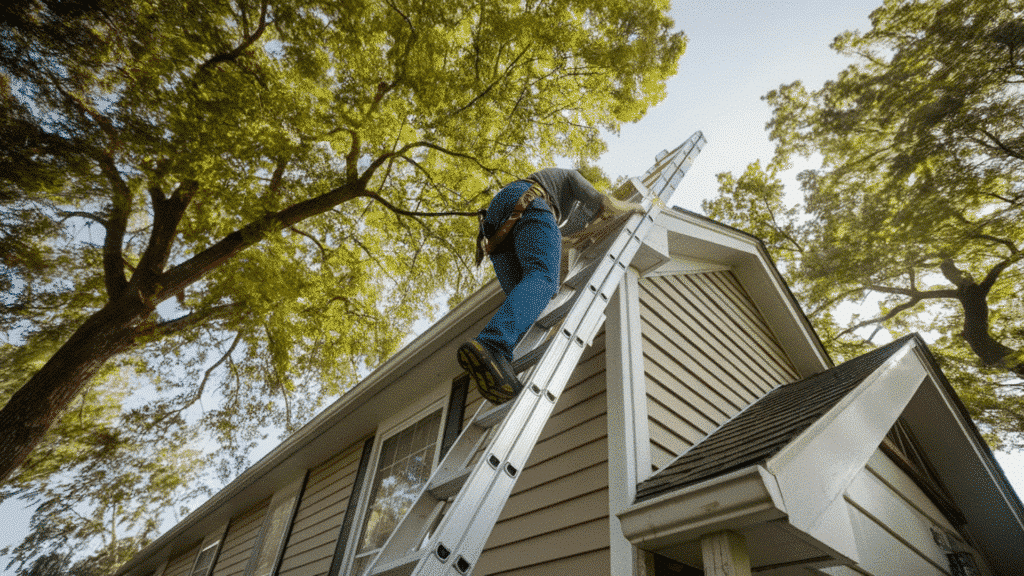
Set up a stable ladder on flat ground and secure it at the top. Wear rubber-soled shoes and a safety harness on any steep-pitched roof.
Cover garden beds and outdoor furniture below with plastic sheeting to protect from chemical runoff. Always have a partner on the ground before you head up.
Step 2: Dry Brush the Moss
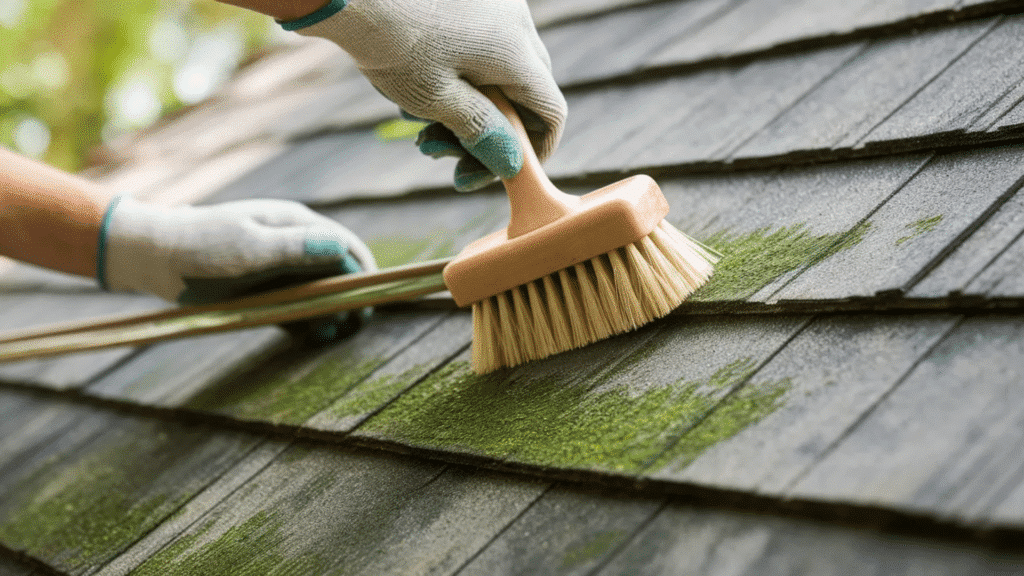
Before applying any solution, use a soft-bristle brush to sweep loose moss downward, from the ridge toward the eaves. Never brush upward as it lifts and damages shingles.
Keep pressure light; the goal is to dislodge only dry, surface-level moss. Bag the debris rather than letting it wash into the gutters.
Step 3: Apply Moss Killer Solution
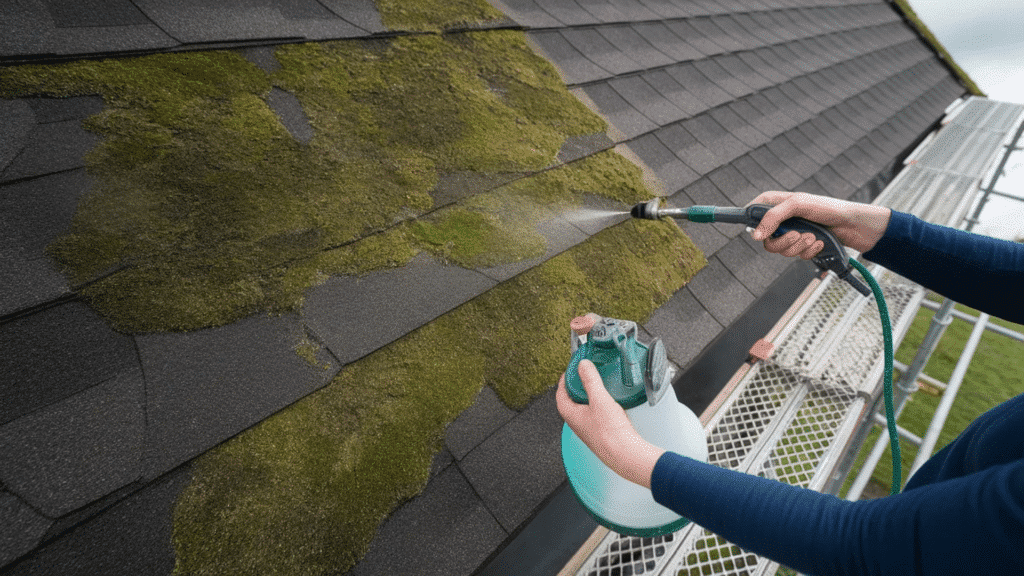
Using a garden sprayer, apply moss killer evenly across affected areas: a commercial product, equal parts water and vinegar, or one part bleach to three parts water.
Always apply from the top of the roof downward. Allow the solution to sit for 20–45 minutes to penetrate and kill moss at the root.
Step 4: Scrub and Rinse
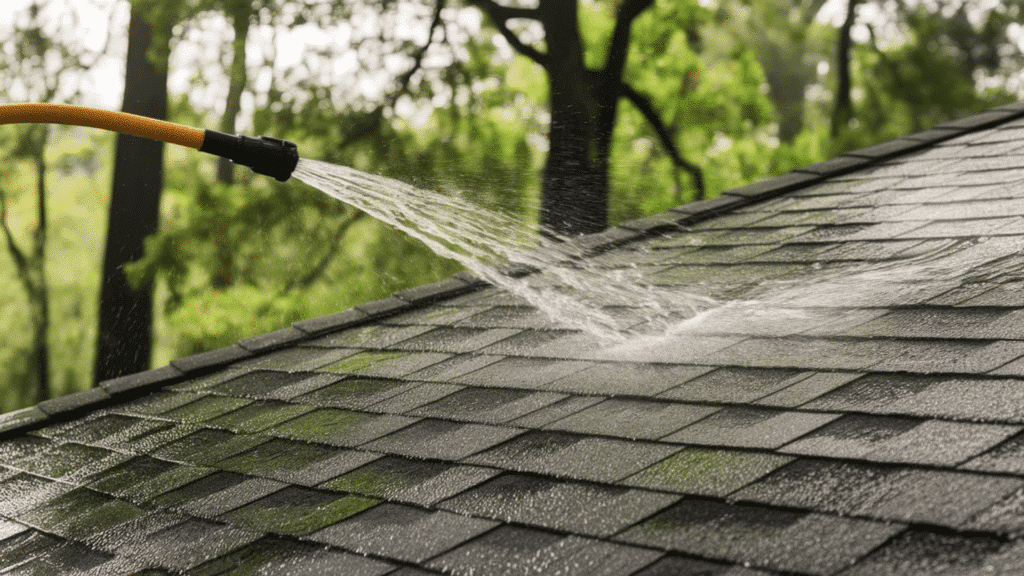
Use a soft brush to loosen treated moss, working from the ridge downward. Follow with a garden hose on a gentle setting, never a pressure washer.
Rinse thoroughly around gutters and downspouts to remove all residue from the solution. Stubborn patches may need a second application rather than harder scrubbing.
Step 5: Clear the Gutters
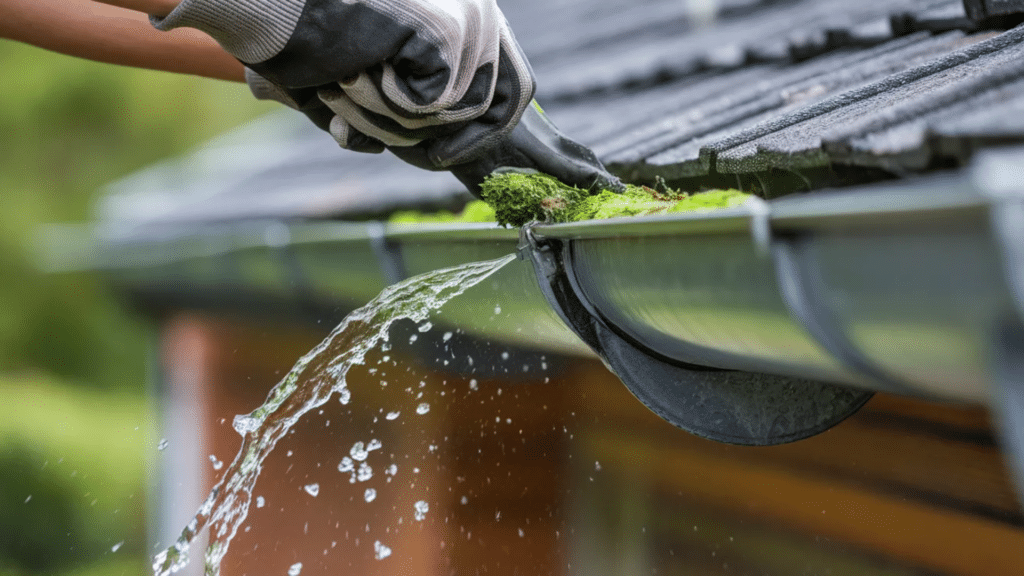
Once the roof is rinsed, clear all moss debris from the gutters. Blocked gutters back up water under the roofline, one of the leading causes of interior water damage.
Flush the gutters and downspouts with a hose to confirm they’re draining freely.
Step 6: Inspect the Roof Surface
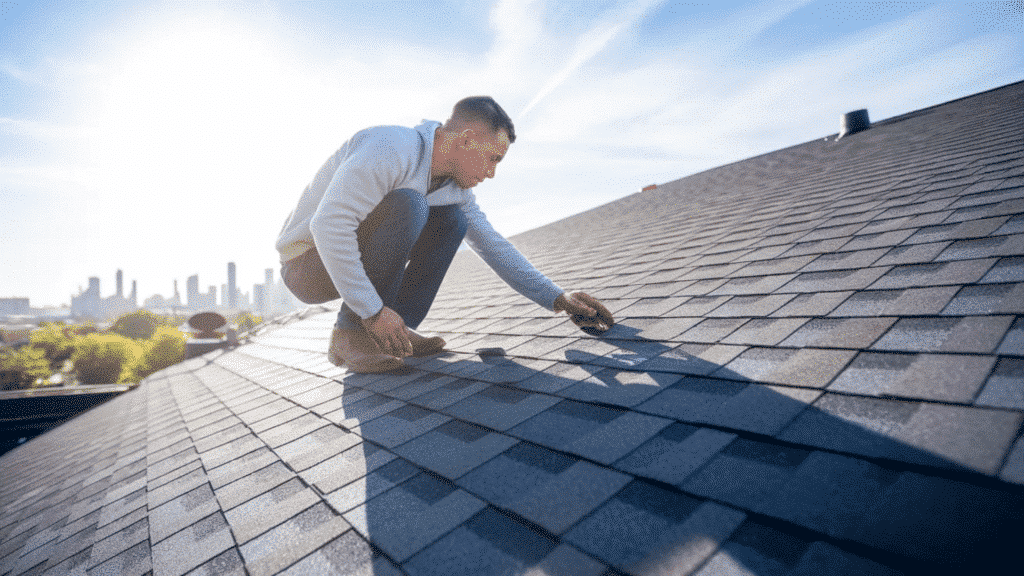
With moss removed, check the shingle surface for cracks, curling, or missing sections. Areas where moss has been feeding longest are usually the most damaged.
Look for granule loss and soft spots in the decking beneath. If significant damage is found, consult a roofing professional before applying any preventive treatment.
Tips to Prevent Further Moss Growth
Removal is only half the job. Without prevention, moss will return, often faster the second time, since it already has an established root system on the shingles.
- Install zinc or copper strips near the roof ridge to prevent moss growth.
- Trim overhanging branches to increase sunlight and reduce debris.
- Keep gutters clean to prevent water buildup along the roofline.
- Apply a moss-inhibiting treatment yearly, ideally in early spring.
- Improve roof ventilation to reduce trapped heat and moisture.
- Use algae-resistant shingles if replacing or repairing your roof.
Final Thoughts
Moss might start small, but the damage it causes rarely stays that way. Left unchecked, it works its way through shingles, into the roof deck, and eventually into your repair bill.
Clean it, protect it, and check it once a year. That is the entire formula for a roof that stays in great shape long term. A little effort now saves a significant amount of money later.
Regular maintenance not only protects your roof but also extends its lifespan and preserves your home’s value. Staying proactive helps you avoid sudden leaks, structural issues, and expensive emergency repairs.
In the long run, consistent roof care is one of the simplest ways to protect your home and your budget.

Tommy Hardy, an alumnus of the Georgia Institute of Technology with a degree in Mechanical Engineering, has been a go-to figure in residential upkeep and innovation for over 18 years. His career commenced in a leading home appliance manufacturing company, where he mastered the intricacies of household systems. Joining our platform in 2020, Tommy quickly became a reader favorite for his practical and easy-to-follow guides. He took the helm of our DIY section in 2019, consistently delivering content that empowers homeowners. Beyond his professional pursuits, Tommy is a passionate gardener and enjoys woodworking, skills enhancing his hands-on approach to home care.