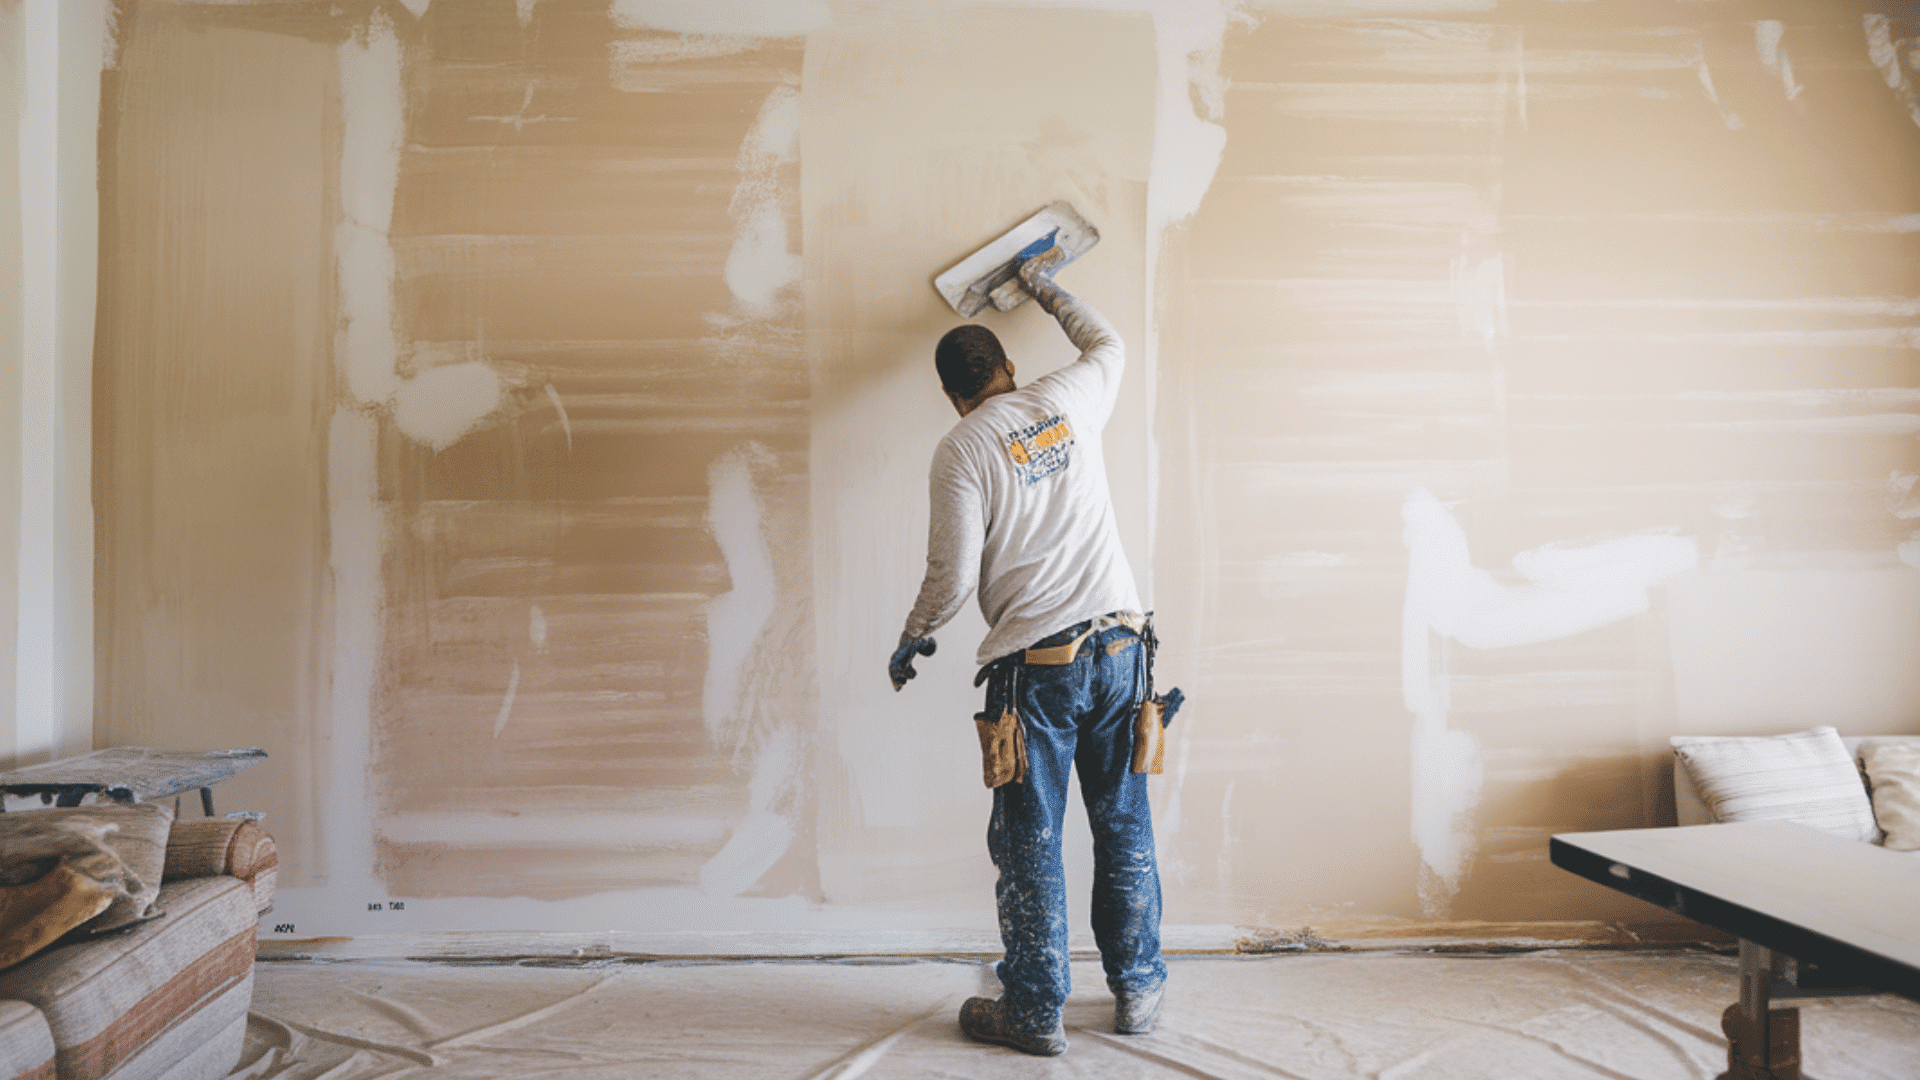
Skim coating walls is a great way to get that flawless, smooth finish you’ve been dreaming of, whether you’re prepping for fresh paint or fixing up imperfections.
It might sound a little tricky at first, but with the right tools and techniques, anyone can achieve pro-level results at home.
This blog will walk you through everything you need to know about skim coating walls, from mixing the compound to applying it evenly.
So, roll up your sleeves and get started!
What is Skim Coating?
Skim coating is a technique used to apply a thin layer of joint compound over a wall or ceiling to create a smooth, even surface.
It’s commonly used to repair damaged drywall, cover old textures, or prepare surfaces for painting.
This method helps to eliminate imperfections like cracks, bumps, and holes, providing a fresh, flawless finish.
Skim coating is a cost-effective solution for homeowners looking to upgrade the appearance of their walls without major renovations.
Tools and Materials Required
Before jumping into the actual process, it’s essential to have all the right tools and materials. Having everything on hand will make the process easier and more efficient. Here’s what you’ll need:
| Tools | Materials |
|---|---|
| Paint roller | Joint compound (drywall mud) |
| 14-inch drywall knife | Water (for mixing) |
| Drywall pan | Primer (optional, for wall prep) |
| Bucket (for mixing) | Sandpaper (for finishing) |
| Mixer (or stir stick) | |
| Tape (optional for edges) |
Step-by-Step Process for Skim Coating Walls
Now that you’ve got your materials ready, let’s walk through the process of skim coating walls.
Step 1: Prepare Your Bucket and Compound
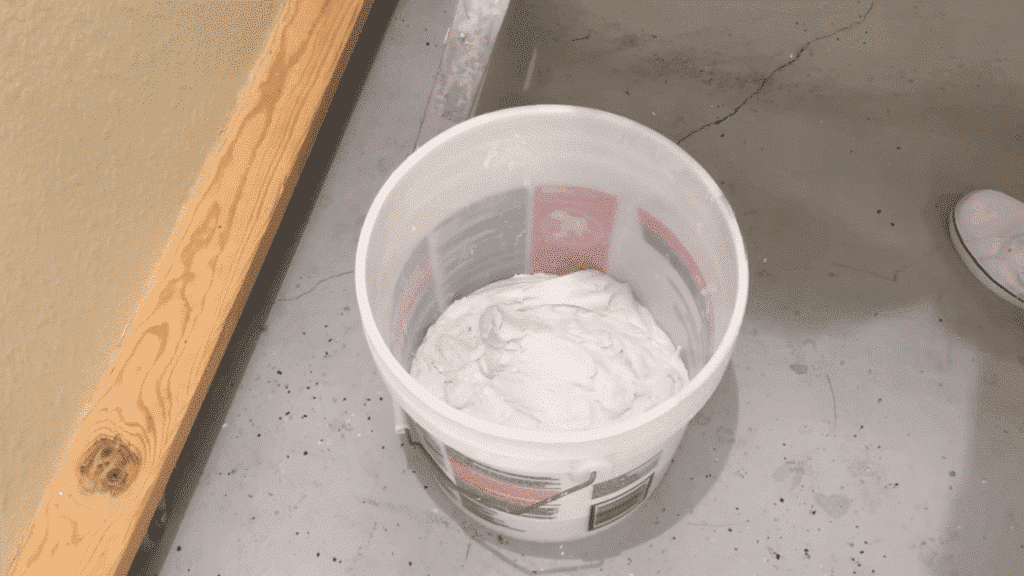
Start by dividing your joint compound into two portions in separate buckets to make mixing easier. This way, you won’t struggle to mix the whole batch at once in one large bucket.
Add water gradually, mixing until you reach a yogurt-like consistency. Be careful not to make it too runny, just enough to ensure smooth application.
Step 2: Mix the Compound Properly
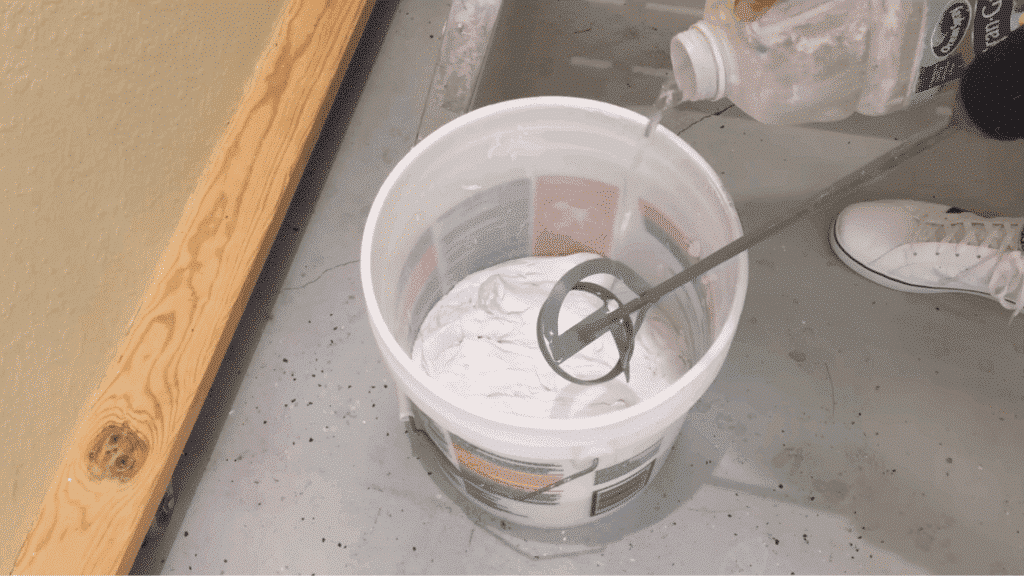
Gradually add a little water to the compound as you mix. Work the water into the compound starting from the bottom to ensure an even saturation of the mixture.
Keep mixing until the texture is smooth and lump-free. If you’re not sure, think of it as having the thickness of yogurt, neither too thick nor too runny.
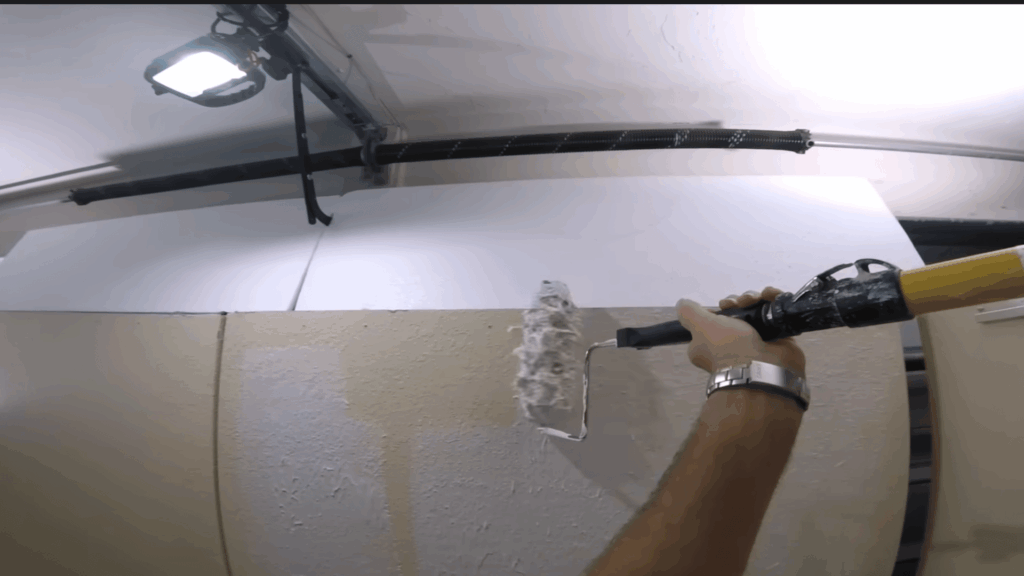
Step 3: Use the Paint Roller for Application
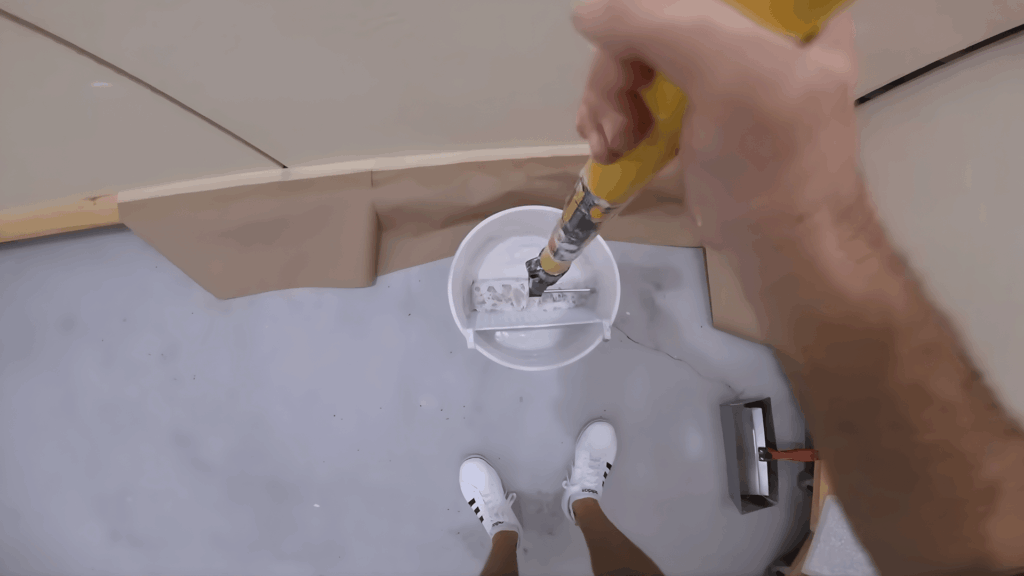
Dip your paint roller fully into the joint compound, ensuring it’s completely coated with a generous amount of mud.
The key here is to use enough mud to cover a significant area without overloading it, which can cause drips. For larger walls, work in sections to keep the application consistent and manageable.
Step 4: Roll the Compound onto the Wall
Apply the compound in an even, rolling motion. Roll it out across the wall, ensuring a smooth and consistent layer of mud.
Unlike painting, the goal isn’t to spread the material thin. You want to leave enough compound on the wall for an even skim coat. Work across the wall to maintain consistency and avoid gaps.
Step 5: Smooth the Coating with the Roller
Keep the pressure light and use the roller’s weight to spread the compound across the wall. Don’t press too hard, as this could leave lines behind.
If you apply the compound evenly, it’ll be easier to smooth out and look consistent. This is where the roller trick comes in handy for achieving an even application, especially if you’re new to skim coating.
Step 6: Check for Coverage and Correct Imperfections

As you roll, check for any areas that may require more mud. Focus on spots where the texture is still visible.
Once the first coat is applied, you may see slight imperfections or uneven areas. Don’t worry about these now; they’ll be addressed in the second coat.
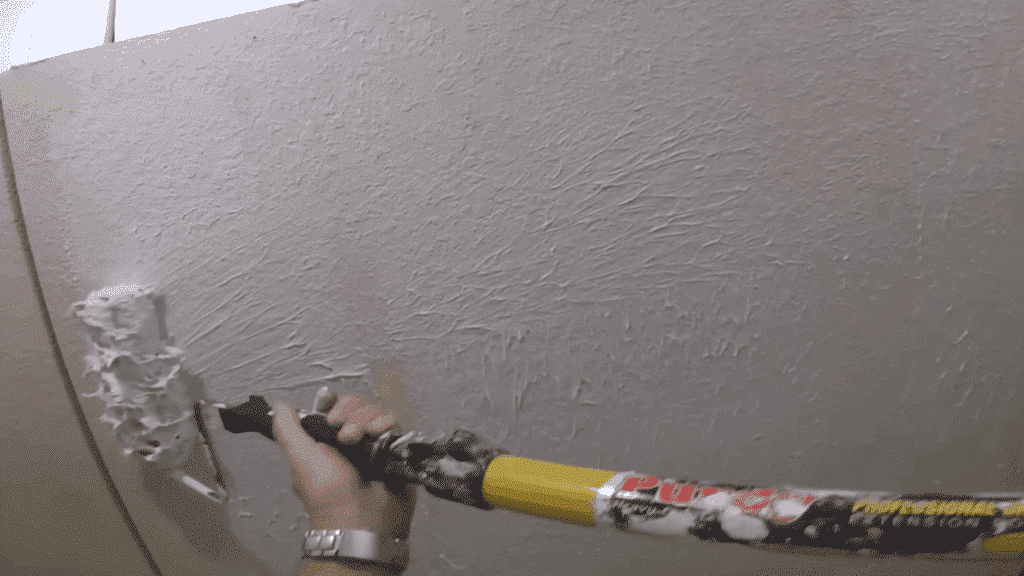
Step 7: Smooth Out the Coating with a Drywall Knife

After the first coat dries, use a 14-inch drywall knife to smooth out any texture lines or excess compound. Start from the bottom and work your way up.
If you notice any ridges or lines from the roller, don’t stress; these can be fixed with the second coat. The goal is to create an even, smooth surface.
You can check out the full video below:
Pros and Cons of Skim Coating Walls
Skim coating is a popular method for achieving a smooth, flawless wall finish, but like any DIY project, it comes with both advantages and challenges. Understanding the pros and cons will help you decide if this technique is right for your walls.
| Pros | Cons |
|---|---|
| Smooth Finish: Provides a flawless, smooth surface ideal for painting or retexturing. | Time-Consuming: Requires multiple layers and drying time, which can take days. |
| Cost-Effective: A DIY-friendly option that saves money compared to hiring professionals. | Skill Required: Requires practice to achieve an even and professional-looking finish. |
| Hides Imperfections: Excellent for covering cracks, holes, and old textures. | Messy Process: Can get messy, especially when mixing and applying the compound. |
| Prepares Walls for Paint: Perfect base for painting, ensuring a professional-looking result. | Requires Proper Drying Time: Needs adequate drying time between coats to avoid uneven results. |
| Improves Home Value: A well-done skim coat can enhance the aesthetic value of your home. | Heavy on Materials: Requires a fair amount of joint compound, which can be costly for larger projects. |
Tips for Achieving a Professional Finish
Skim coating may seem like an easy task, but avoiding some common mistakes and following a few pro tips will help ensure your walls get that flawless finish.
- Over-applying the compound: Using too much compound can make the wall difficult to smooth and create unwanted texture.
- Skipping wall prep: Properly clean and prep your wall before applying compound. This step is crucial for ensuring the best results.
- Use the right pressure: Don’t press too hard with the roller. Let the roller’s weight do most of the work, ensuring an even coat without unwanted lines.
- Work in sections: For larger walls, divide the surface into smaller sections. This prevents the compound from drying before you can smooth it out.
- Sand thoroughly: After each coat, be sure to sand down any rough spots for a smooth, polished finish.
Conclusion
Skim coating walls may seem like a daunting task, but with the right tools and techniques, you can easily achieve that smooth, polished look.
It’s a great way to fix up imperfections and prepare your walls for fresh paint. Whether you’re a seasoned DIYer or just starting, skim coating is a useful skill that can make a big difference in your home’s appearance.
Ready to get started? Grab your tools and begin skim coating your walls for a flawless finish today!

Tommy Hardy, an alumnus of the Georgia Institute of Technology with a degree in Mechanical Engineering, has been a go-to figure in residential upkeep and innovation for over 18 years. His career commenced in a leading home appliance manufacturing company, where he mastered the intricacies of household systems. Joining our platform in 2020, Tommy quickly became a reader favorite for his practical and easy-to-follow guides. He took the helm of our DIY section in 2019, consistently delivering content that empowers homeowners. Beyond his professional pursuits, Tommy is a passionate gardener and enjoys woodworking, skills enhancing his hands-on approach to home care.