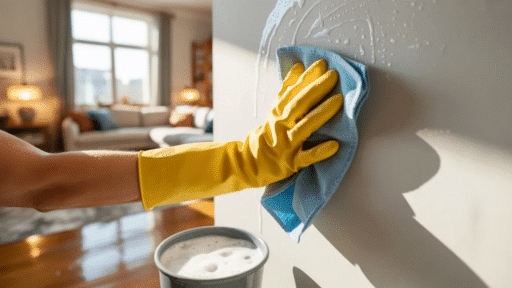
Stripping old wallpaper sounds simple until you’re twenty minutes in, staring at a wall that looks worse than when you started.
Even if it’s your first time tackling this project, it’s completely manageable as long as you know what to do before you begin.
This covers how to remove wallpaper properly, step by step, regardless of your wall type or the age of the paper.
You’ll find the right tools, proven techniques, and the fixes most guides skip entirely. Clean walls are closer than you think.
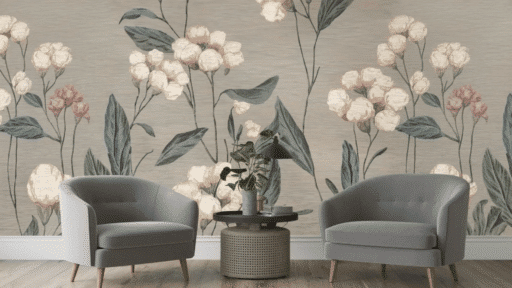
Knowing Your Wall and Wallpaper Type
Taking five minutes to identify what you’re working with prevents hours of unnecessary damage later. This is especially true when learning how to remove wallpaper from drywall, which requires a much lighter touch than plaster.
Wall Types
- Drywall is the most common surface in modern homes, but it is very sensitive to excess water and aggressive scraping. Needs careful technique throughout
- Plaster walls found in older homes are generally more forgiving and can handle more moisture without damage
- Painted wall surface, if wallpaper was applied over a painted wall rather than bare drywall, removal is generally easier. The paint layer acts as a barrier between the adhesive and the wall surface, which significantly reduces the risk of tearing.
Wallpaper Types
- Strippable wallpaper peels off dry in large sheets from a seam or corner; it is the most straightforward type to handle
- Vinyl-coated wallpaper has a plastic surface that blocks moisture, so scoring is essential before applying any solution
- Fabric-backed wallpaper comes off in two separate layers; always remove the top fabric layer first, then re-soak and lift the backing.
- Old paste wallpaper is the most stubborn type; it requires a longer soaking time and firm but controlled scraping.
Quick test: Lift a corner near a seam or outlet cover. If it pulls away cleanly in a large section, you have strippable paper. If it tears or leaves sticky residue, plan for a longer process with a removal solution.
Tools and Materials Required
Here are some tools and materials to gather before you start your work. Having all things handy always helps.
| Tool/Material | Purpose |
|---|---|
| Wagner 915 E-Powered Steamer | For applying steam to loosen wallpaper. |
| Wallpaper Scoring Tool | To score the wallpaper for easier removal. |
| Putty Knives (small & large) | To help scrape off wallpaper after steaming. |
| Towel | To absorb excess moisture during the process.Painter’s |
| s Plastic & Tape | For protecting floors from water damage. |
| Razor Blade | To cut wallpaper near electrical outlets. |
| Primer | To seal any wallpaper residue before painting. |
| Wall Texture (Orange Peel) | To apply a textured finish if needed. |
| Caulk | To seal gaps around new trim and edges. |
Step-by-Step: How to Remove Wallpaper the Right Way
Follow these easy steps to remove old wallpaper and transform your walls with minimal effort and maximum results:
Step 1: Preparation of the Room

Start by preparing the space. This includes removing any old trim, baseboards, or electrical plates. If you plan to leave the new trim in place, avoid removing it. For safety and convenience, cover the flooring with painter’s plastic and secure it using painter’s tape.
This will protect your floor from any water or steam that may drip during the process, especially if you have hardwood floors.
Ensure that the walls are free of obstructions and clear any furniture that might be in the way. By doing this, you create a safe, clean environment for wallpaper removal.
Step 2: Set Up Your Steamer
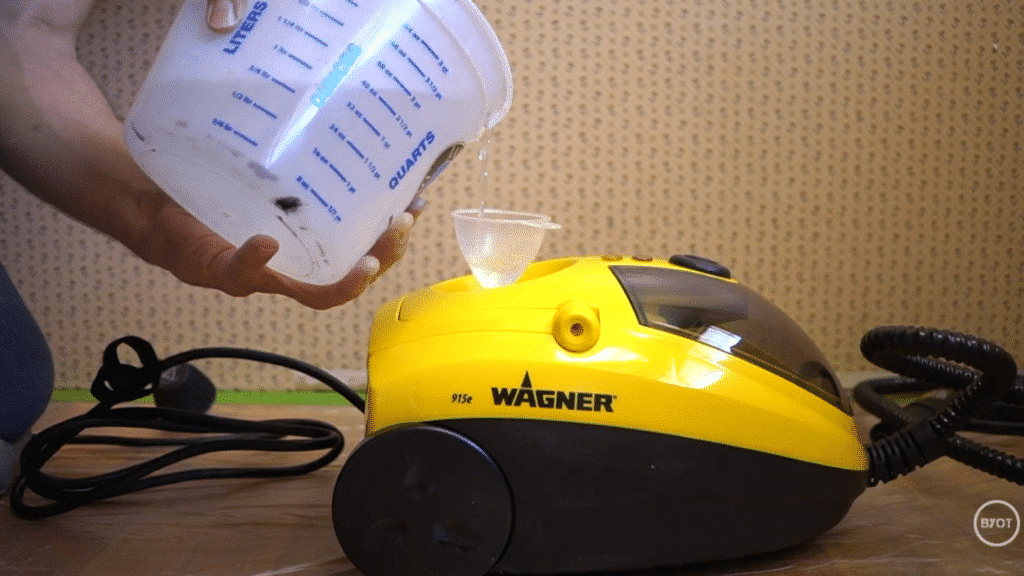
The Wagner 915 E-Powered Steamer is an essential tool for removing wallpaper. To get started, unscrew the top of the steamer and fill it with water. Once the steamer is filled, securely screw the top back on and plug the steamer in.
Press the big black button on the top to turn it on. Once the orange light turns off, it’s ready for use. Make sure the steamer plate is properly attached.
This device works wonders by emitting steam that penetrates the wallpaper, loosening the adhesive behind it. This step makes the removal process smooth and efficient.
Step 3: Score the Wallpaper
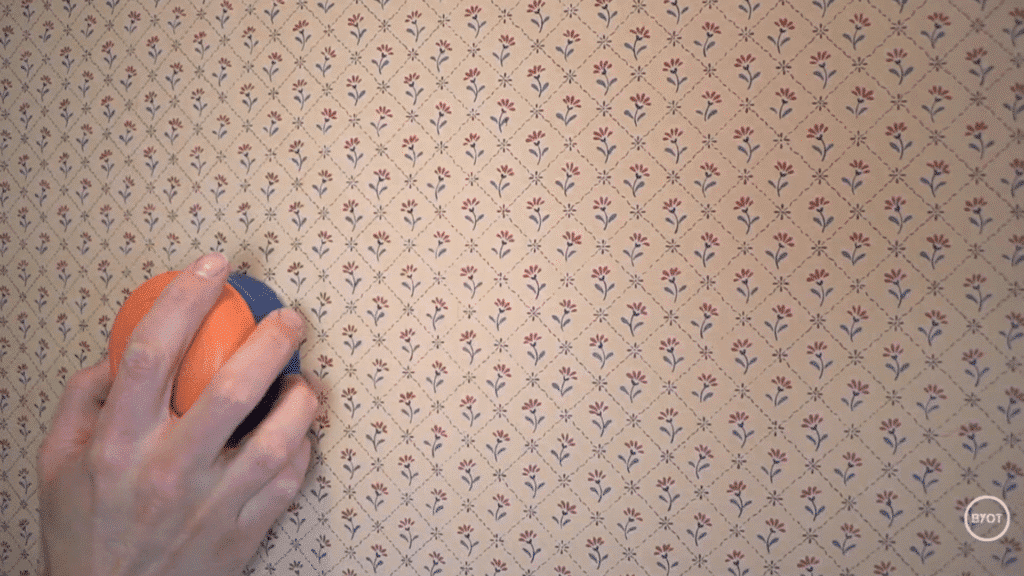
Use a wallpaper scoring tool to score the surface of the wallpaper before applying steam. The tool should be gently dragged across the wall to create tiny perforations in the wallpaper.
These small holes allow steam to seep beneath the surface, working its magic on the adhesive. The scoring process is essential to ensure that steam can reach the adhesive.
Without scoring, the steam will have a harder time breaking down the adhesive bond in the wallpaper, making removal much more difficult.
Step 4: Apply Steam and Remove Wallpaper
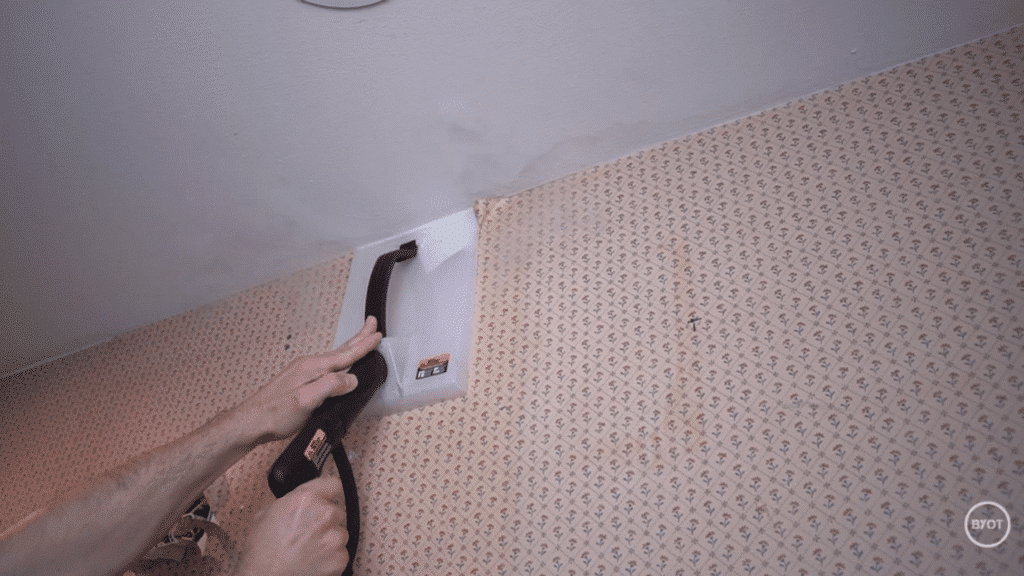
Once the wallpaper is scored, it’s time to start removing it. Begin by applying steam to a section of the wallpaper for about 10-15 seconds, focusing on the areas where you’ve scored.
After that, gently pull the wallpaper off in larger sections. Try to peel the wallpaper away slowly, taking care not to rip it into small pieces. If you encounter any resistance, apply more steam.
If you’re dealing with tight spots, like around electrical outlets or corners, be extra cautious. Use a towel to absorb excess moisture and avoid any water from getting into electrical outlets.
Step 5: Use Putty Knives to Scrape Off Remaining Wallpaper
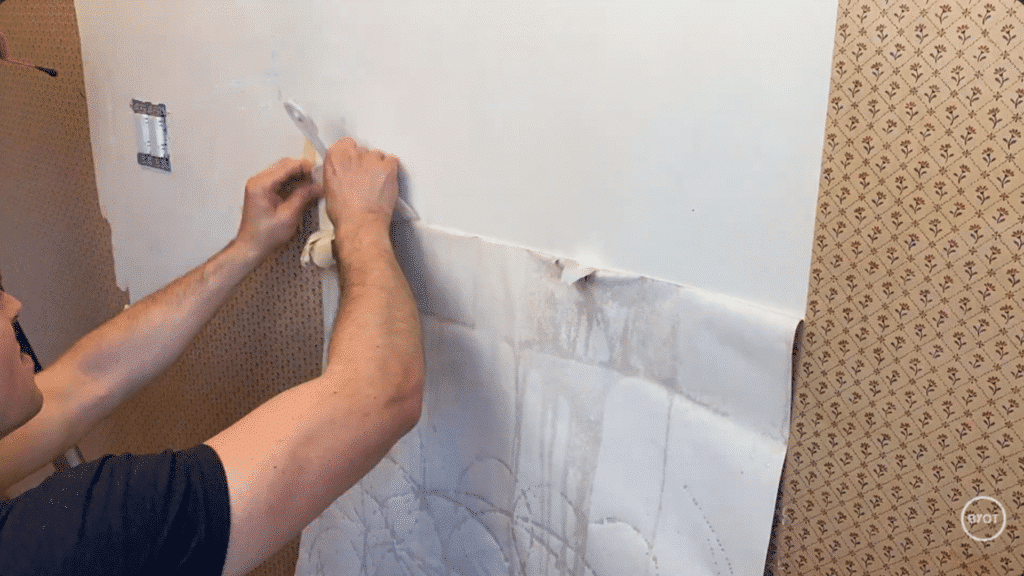
After steaming, some sections of wallpaper may still be stuck to the wall. This is when your small and large putty knives come in handy. Use the putty knives to gently scrape the wallpaper off the wall.
If there are stubborn areas, apply steam again and then scrape. The steam loosens the wallpaper, making it easier to remove.
If you have remaining wallpaper near the trim or in hard-to-reach spots, use the smaller putty knife for precision. Be patient and continue applying steam until all wallpaper is removed.
Step 6: Clean Edges and Apply Caulk
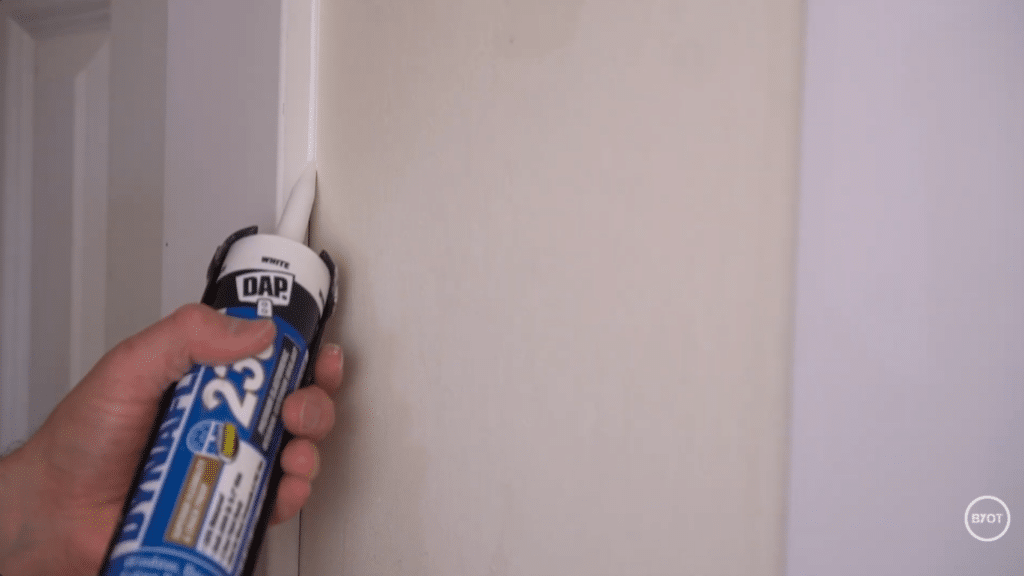
Once the wallpaper is fully removed, take a razor blade and carefully cut away any remaining wallpaper around the electrical boxes or trim. Once these areas are clear, reinstall any electrical plates you removed earlier.
Use caulk to seal the edges around the new trim. This will help create a clean finish and ensure that no wallpaper remnants are visible once everything is in place.
Step 7: Paint and Finish
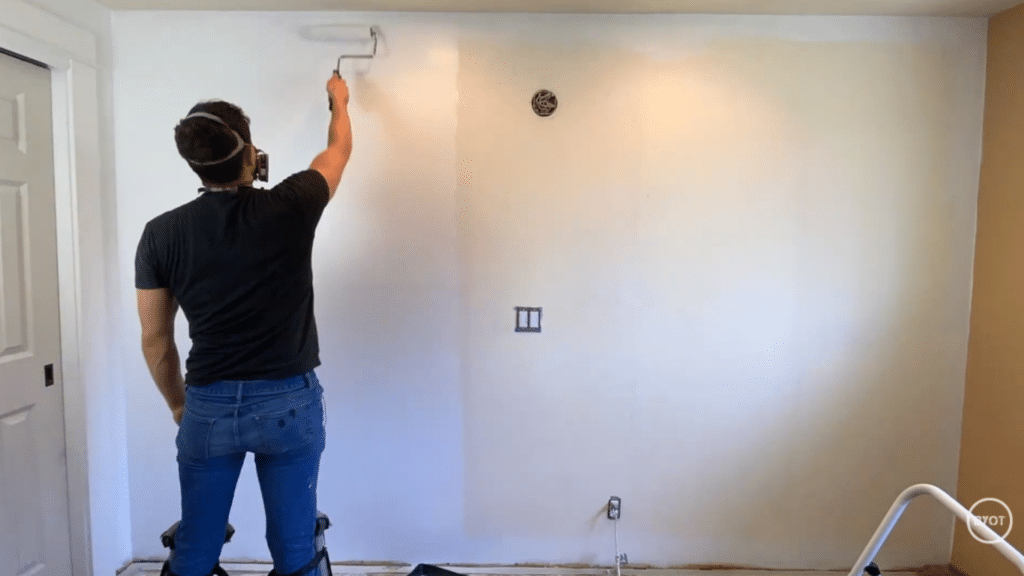
Now that your wall is prepped and primed, you are ready to apply paint. Choose the paint color that best suits your space and transform the room. Once the paint is dry, your wall is now clean, fresh, and ready for any further decoration.
Check out the full video below:
Common Mistakes That Make Wallpaper Removal Harder
These are the errors that turn a half-day project into a full weekend:
- Over-Saturating the Drywall: Excess moisture can damage drywall by causing it to bubble or tear. Over-saturating the wallpaper can also increase the risk of mold if the walls are not allowed to dry properly.
- Scraping at a Steep Angle: Scraping wallpaper too aggressively or at a steep angle can cause deep gouges in the wall. These gouges require significant patching, which could add more time and cost to the project.
- Painting Over Residue or Damp Walls: Painting over residue or damp walls can result in uneven color and peeling paint within a few weeks. The moisture in the walls or leftover adhesive can cause the paint to fail.
- Using Harsh Chemicals: While some wallpaper removers contain strong chemicals, these can be harmful to your walls or the environment. It’s better to use a more natural solution, such as a water-vinegar mixture.
- Ignoring Wall Prep After Removal: Once the wallpaper is off, it’s essential to prep the wall for painting or reapplication of new wallpaper. This includes filling any holes or gouges, sanding the surface to a smooth finish, and ensuring the wall is clean.
What Experts and Real Owners Say About Removing Wallpaper
This section brings together advice from professional contractors, interior specialists, and real homeowners who have been through the process. Their firsthand experience fills in the gaps most leave out and gives you a clearer picture of what to expect when you start removing wallpaper from your own walls.
“If the wallpaper is extremely stubborn, the steamer is like the last line of defense. It’s like you’re losing the war, and you’re going to pull out this cannon.” — Dina Cintura, Project Manager, Women Who Wallpaper (via Family Handyman)
“Time is your friend. Go around the room four or five times with a sprayer, then let the solution sit for about 45 minutes.” — Michael DiGilio, President, Wallcoverings Installers Association (via Family Handyman)
“Impatience causes a multitude of problems. Warm water is key just good, solid hot water from a pump sprayer is usually sufficient.” — Professional Painting Contractor, PaintTalk Contractors Forum
“Be more gentle when scraping wallpaper off drywall than plaster. Drywall is softer, and you may damage the wall if you’re not careful.” — Home Improvement Expert, Family Handyman
The pattern across all of these perspectives is consistent: proper soaking time, controlled moisture, and the right primer afterward are what separate a clean removal from a wall full of damage.
Conclusion
You now have everything you need to handle wallpaper removal the right way, from identifying your wall type and gathering the right tools to scraping, cleaning, and getting your walls ready for what comes next.
The key is preparation and patience. Rush the soaking time, skip the adhesive cleanup, or go too hard with the scraper, and the job gets harder fast. Take each step as it comes, and the results will show it.
If the job turns out to be bigger than expected, with multiple layers, significant damage, or a tight timeline, getting a free quote from a local wallpaper professional is a smart next step.
Either way, those clean walls are well within reach.

Tommy Hardy, an alumnus of the Georgia Institute of Technology with a degree in Mechanical Engineering, has been a go-to figure in residential upkeep and innovation for over 18 years. His career commenced in a leading home appliance manufacturing company, where he mastered the intricacies of household systems. Joining our platform in 2020, Tommy quickly became a reader favorite for his practical and easy-to-follow guides. He took the helm of our DIY section in 2019, consistently delivering content that empowers homeowners. Beyond his professional pursuits, Tommy is a passionate gardener and enjoys woodworking, skills enhancing his hands-on approach to home care.