
If you’ve tried to fold a fitted sheet before and ended up with a lumpy, elastic-edged ball of chaos, you’re in very good company.
The elastic corners that make fitted sheets so great on a mattress are exactly what make them such a nightmare to fold neatly.
But here’s the thing: learning how to fold fitted sheets doesn’t have to be frustrating. There’s no single “right” way to do it.
This blog will walk you through different techniques, from the most popular solo fold to the ultra-organised KonMari approach, so you can find what clicks for you.
What are Fitted Sheets and Why Proper Folding Matters
Fitted sheets are designed with elastic edges that stretch to fit snugly over a mattress, keeping them in place during sleep.
They act as the base layer of bedding, providing a smooth surface while protecting the mattress from dust and wear.
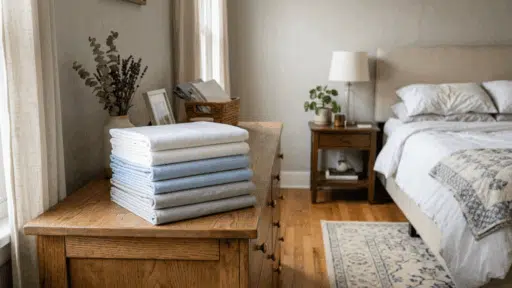
Learning how to fold them properly helps keep your linen storage neat and organized. A well-folded fitted sheet takes up less space and makes it easier to manage multiple sets.
It also allows you to store complete bedding sets together, so you can quickly grab everything you need without searching through your closet.
What You’ll Need Before You Start
Good news: this doesn’t require any special equipment, gadgets, or trips to the shop. Everything you need, you almost certainly already have.
But there are a few simple conditions that make the process noticeably easier.
| Requirement | Why It Helps |
|---|---|
| A freshly laundered sheet | Clean sheets are easier to handle and fold more neatly compared to wrinkled or piled sheets |
| A warm sheet from the dryer | Slightly warm sheets are softer and more flexible, making folding easier with fewer creases |
| A flat surface nearby | A bed or table provides space to spread and fold the sheet properly |
| About two to three minutes | With a little practice, the process becomes quick and efficient |
How to Fold a Fitted Sheet: Step-by-Step
This is the method. The one that actually works, that professional organisers use, and that once you’ve done it two or three times, will feel completely natural.
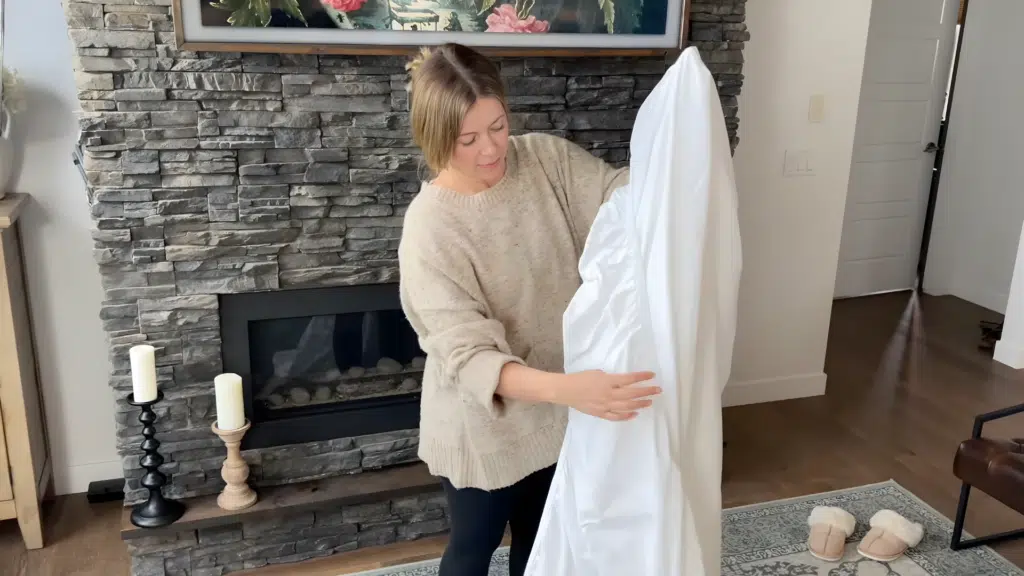
Step 1: Lay the Sheet Inside Out
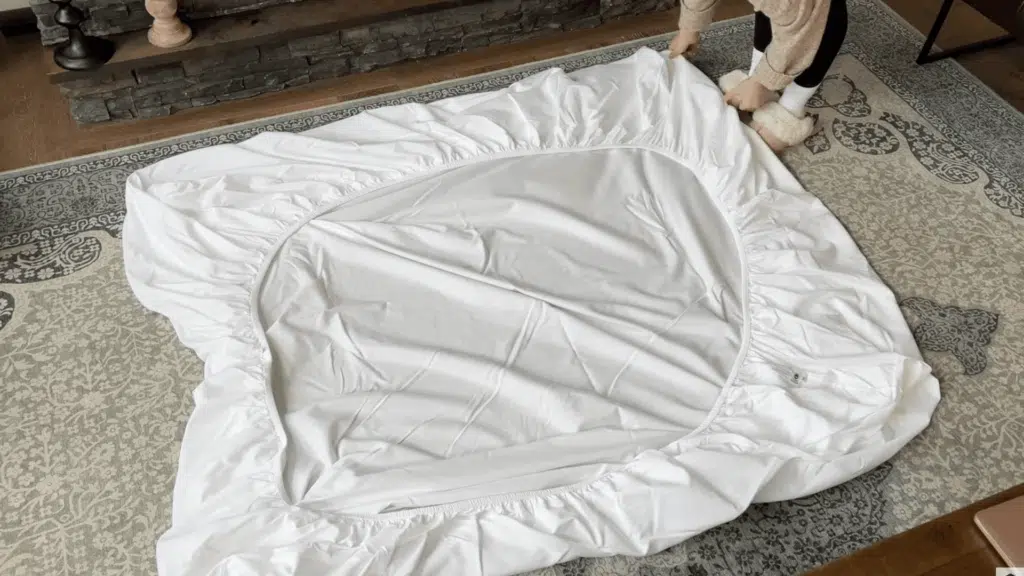
Begin by spreading your fitted sheet on a clean, flat surface, such as a bed or the floor, with the inside facing up.
Take a few seconds to gently pull at the edges so the fabric lies flat without any twists or bunching. This step helps you clearly see all four elastic corners, which can otherwise get hidden.
Having the sheet positioned this way makes the folding process much easier and ensures a neat result.
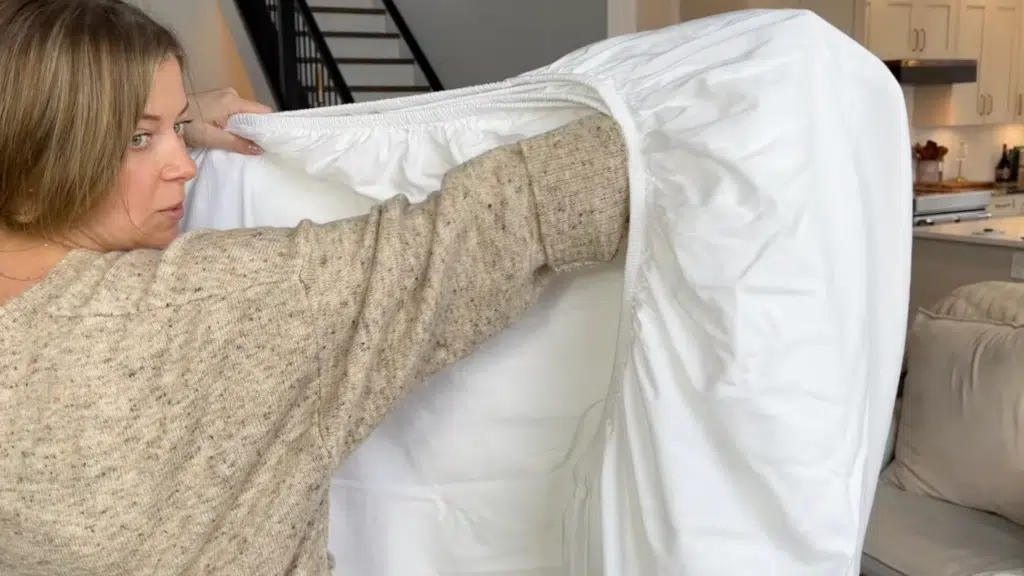
Step 2: Hold Two Corners Firmly
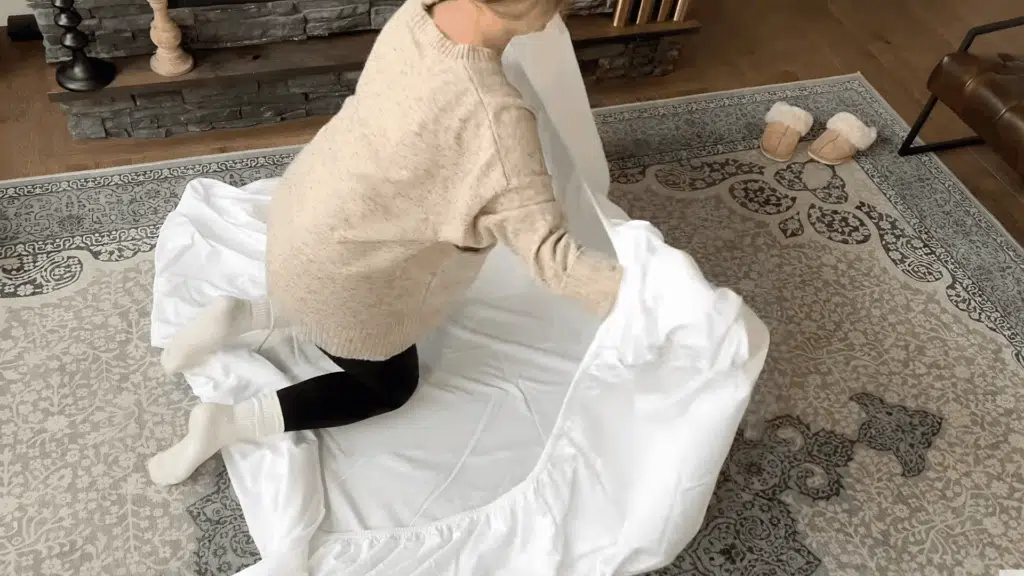
Stand at one of the shorter ends of the sheet and slide your hands into two adjacent corners. Make sure your fingers go fully into the seams so you can hold them securely.
Lift the sheet slightly off the surface and let the rest of the fabric hang freely. This helps prevent tangling and keeps the sheet aligned.
Keeping a firm but relaxed grip will make the next folding step feel much more controlled and natural.
Step 3: Create the First Pocket Fold
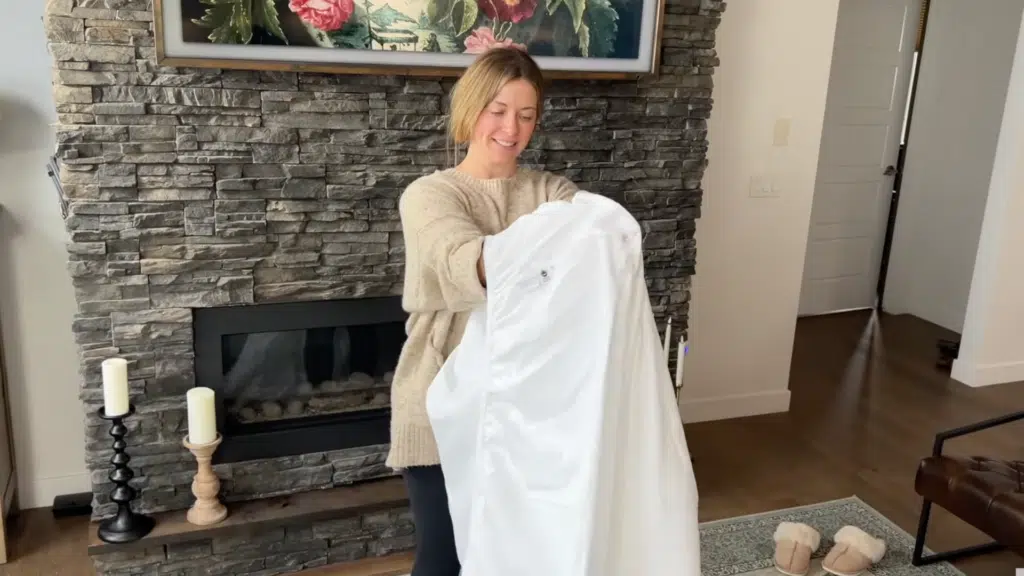
With both corners in your hands, slowly bring your hands together in front of you. Then, take one corner and flip it over the other, turning it inside out so it wraps neatly around your opposite hand.
This creates a pocket that holds both corners together. Adjust the fabric slightly so the edges line up as much as possible. This pocket is the base of your fold and helps keep everything organized as you move forward.
Step 4: Gather the Remaining Corners
Keep one hand inside the pocket you just created and use your other hand to trace along the edge of the sheet. As you reach the third corner, tuck it into the same pocket, making sure it fits smoothly without twisting.
Repeat this with the final corner so that all four corners are now stacked together inside one pocket. Take a moment to adjust them so they sit evenly, as this will make the rest of the folding process much cleaner.
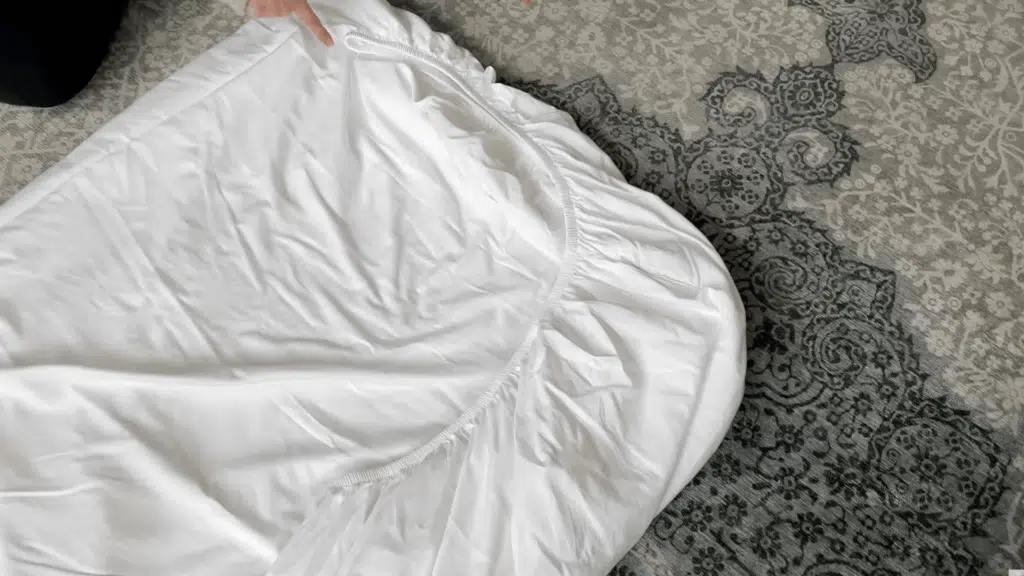
Step 5: Align and Smooth the Corners
Once all the corners are gathered, bring your hands together again and, if needed, fold the stacked corners neatly over each other.
Give the sheet a gentle shake to help the fabric fall into place and reduce any bunching. Use your fingers to smooth along the elastic edges so they lie flat and aligned.
At this stage, the sheet may look loose, but with a little adjustment, it will become more structured.
Step 6: Shape Into a Neat Rectangle
Carefully place the sheet back onto your flat surface, keeping the folded corners together. You may notice the edges are uneven, so take a moment to tuck in any loose or rounded parts.
Run your hands over the fabric, smoothing it outward until the sheet forms a clean, straight rectangle. This step is key to making the final folds look neat, so don’t rush small adjustments here make a big difference in the final result.
Step 7: Fold Into Compact Sections
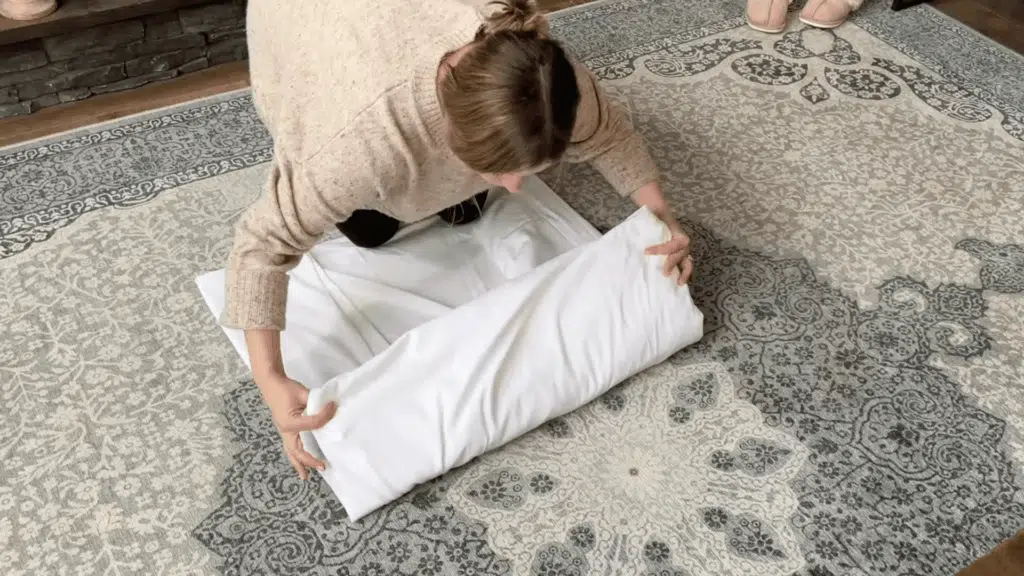
Now that you have a rectangle, fold the sheet into thirds lengthwise, pressing gently to remove any air pockets and wrinkles as you go.
Keep the edges aligned with each fold for a tidy finish. After that, fold it again into thirds, or into quarters if the sheet is larger, like a king-size.
Make final adjustments so the bundle holds its shape. You’ll end up with a neat, compact fold that fits perfectly in your linen closet.
Watch the full video here:
Other Ways to Fold a Fitted Sheet
Here are four different techniques, from the most popular solo fold to the ultra-organised KonMari approach, so that you can find what clicks for you.
| Method | How It Works | Best For | Time | Needs a Surface? | Difficulty |
|---|---|---|---|---|---|
| Corner-Tuck (Solo) | Tuck fitted corners into each other, align edges, then fold into a neat rectangle | Most people, all sizes | ~2 min | Optional | Medium |
| Flat Surface | Lay the sheet flat, smooth corners, fold edges inward, then fold like a regular sheet | Beginners, visual learners | ~3 min | Yes | Easy |
| Two-Person | Each person holds the corners, stretches them tight, tucks the corners together, and then folds neatly | King/queen sizes, couples | ~2 min | No | Easy |
| KonMari | Fold into a long rectangle, then fold into thirds so it stands upright in storage | Vertical shelf storage | ~3 min | Yes | Medium |
How to Take Care of Neatness
Folding the sheet is just half the battle. Storing it well keeps it that way. One of the most popular approaches is the pillowcase bundle method.
Once you’ve folded your fitted sheet, flat sheet, and a matching pillowcase, tuck all three pieces inside the remaining pillowcase. You end up with a tidy, self-contained bundle that makes changing your bedding effortless.
If you’re using shelves, stack sheets with the fold facing outward so you can see what size or set you’re grabbing without pulling everything down. Deeper shelves suit the bundle method; shallow shelves work best with sheets folded flat.
Tip: Rotate your sheet sets so the freshly laundered ones go to the back and the older sets get used first. This prevents fabric wear from always using the same set.
Tips to Make Folding Fitted Sheets Easier
Folding gets simpler with the right approach and a few small habits. These tips can help you get neat results without frustration.
- Fold right after drying: Folding sheets while they’re still warm helps reduce wrinkles and makes them easier to handle.
- Use a flat surface: A bed or table gives better control and helps you keep edges straight while folding.
- Take your time: Slow, steady movements work better than rushing, resulting in less messy folds.
- Smooth as you go: Run your hands over the fabric before each fold to keep everything even and flat.
- Tuck all four corners properly: Getting the corners right at the start makes the rest of the folding process much easier.
- Stick to one method: Using the same technique every time helps build muscle memory and speed.
- Practice a few times: It may feel tricky at first, but it gets easier with repetition.
- Keep your folding space clear: A clean, open area makes it easier to focus and fold neatly.
Final Thoughts
Learning how to fold fitted sheets is one of those small wins that quietly make your whole week feel more organised.
If you go with the beginner-friendly flat surface method or graduate to the speedy in-hand technique, the result is the same: a neat, stackable rectangle that actually fits your linen shelf.
Pair it with the pillowcase bundle trick, and your entire bedding storage situation will feel completely different.
The best part? It genuinely takes under two minutes once you’ve got it down. That’s a pretty good return on a five-minute practice session.

Tommy Hardy, an alumnus of the Georgia Institute of Technology with a degree in Mechanical Engineering, has been a go-to figure in residential upkeep and innovation for over 18 years. His career commenced in a leading home appliance manufacturing company, where he mastered the intricacies of household systems. Joining our platform in 2020, Tommy quickly became a reader favorite for his practical and easy-to-follow guides. He took the helm of our DIY section in 2019, consistently delivering content that empowers homeowners. Beyond his professional pursuits, Tommy is a passionate gardener and enjoys woodworking, skills enhancing his hands-on approach to home care.