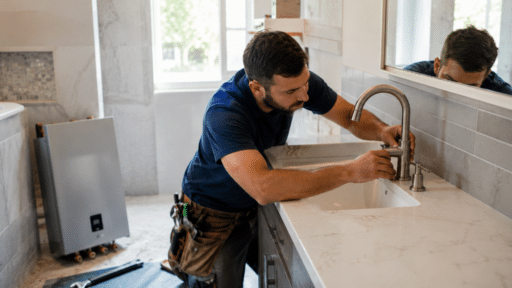

Could your kitchen use a fresh focal point that also makes daily tasks easier?
Yes, it can!
A kitchen island remodel can improve storage, seating, workspace, and overall appearance without changing every part of the room. Small updates and major design changes improve the space’s practicality and enjoyment.
Keep reading; you’ll find inspiration for materials, lighting, built-in features, and smart layout updates.
Is Your Island Worth Remodeling?
A kitchen island remodel directly changes how the space functions day to day. An outdated island with limited storage, no seating, and poor lighting creates friction in a room that sees constant use.
Updating it resolves those problems at the source.
Well-designed kitchen islands improve workflow, seating, and storage.
The remodel does not have to be extensive to deliver results.
Surface-level changes like new cabinet fronts, fresh paint, and updated lighting can alter the island’s character.
For greater functional improvements, structural changes like added seating, a prep sink, or relocating a cooktop address issues that cosmetic work can’t solve.
How to Choose the Right Remodel Idea for Your Kitchen Island
The right remodel starts with clarity, not inspiration. Work through these steps before committing to any idea.
- Step 1: List what the island lacks: storage, seating, or workspace. That gap defines the direction.
- Step 2: Decide on the ceiling before browsing ideas; the budget decides if changes are cosmetic or structural.
- Step 3: Measure walkways around the island. Never let any side drop below 42 inches.
- Step 4: Frequent cooks need prep upgrades. Entertainers need seating and lighting. Let daily habits decide.
- Step 5: Run plumbing and electrical before finishing; reversing adds cost.
Kitchen Island Remodel Ideas for Every Budget and Layout
Remodeling a kitchen island involves far more than a fresh coat of paint. This list walks through specific ideas across storage, seating, lighting, finishes, and style so every decision is informed and intentional.
1. Full Overlay Cabinet Conversion
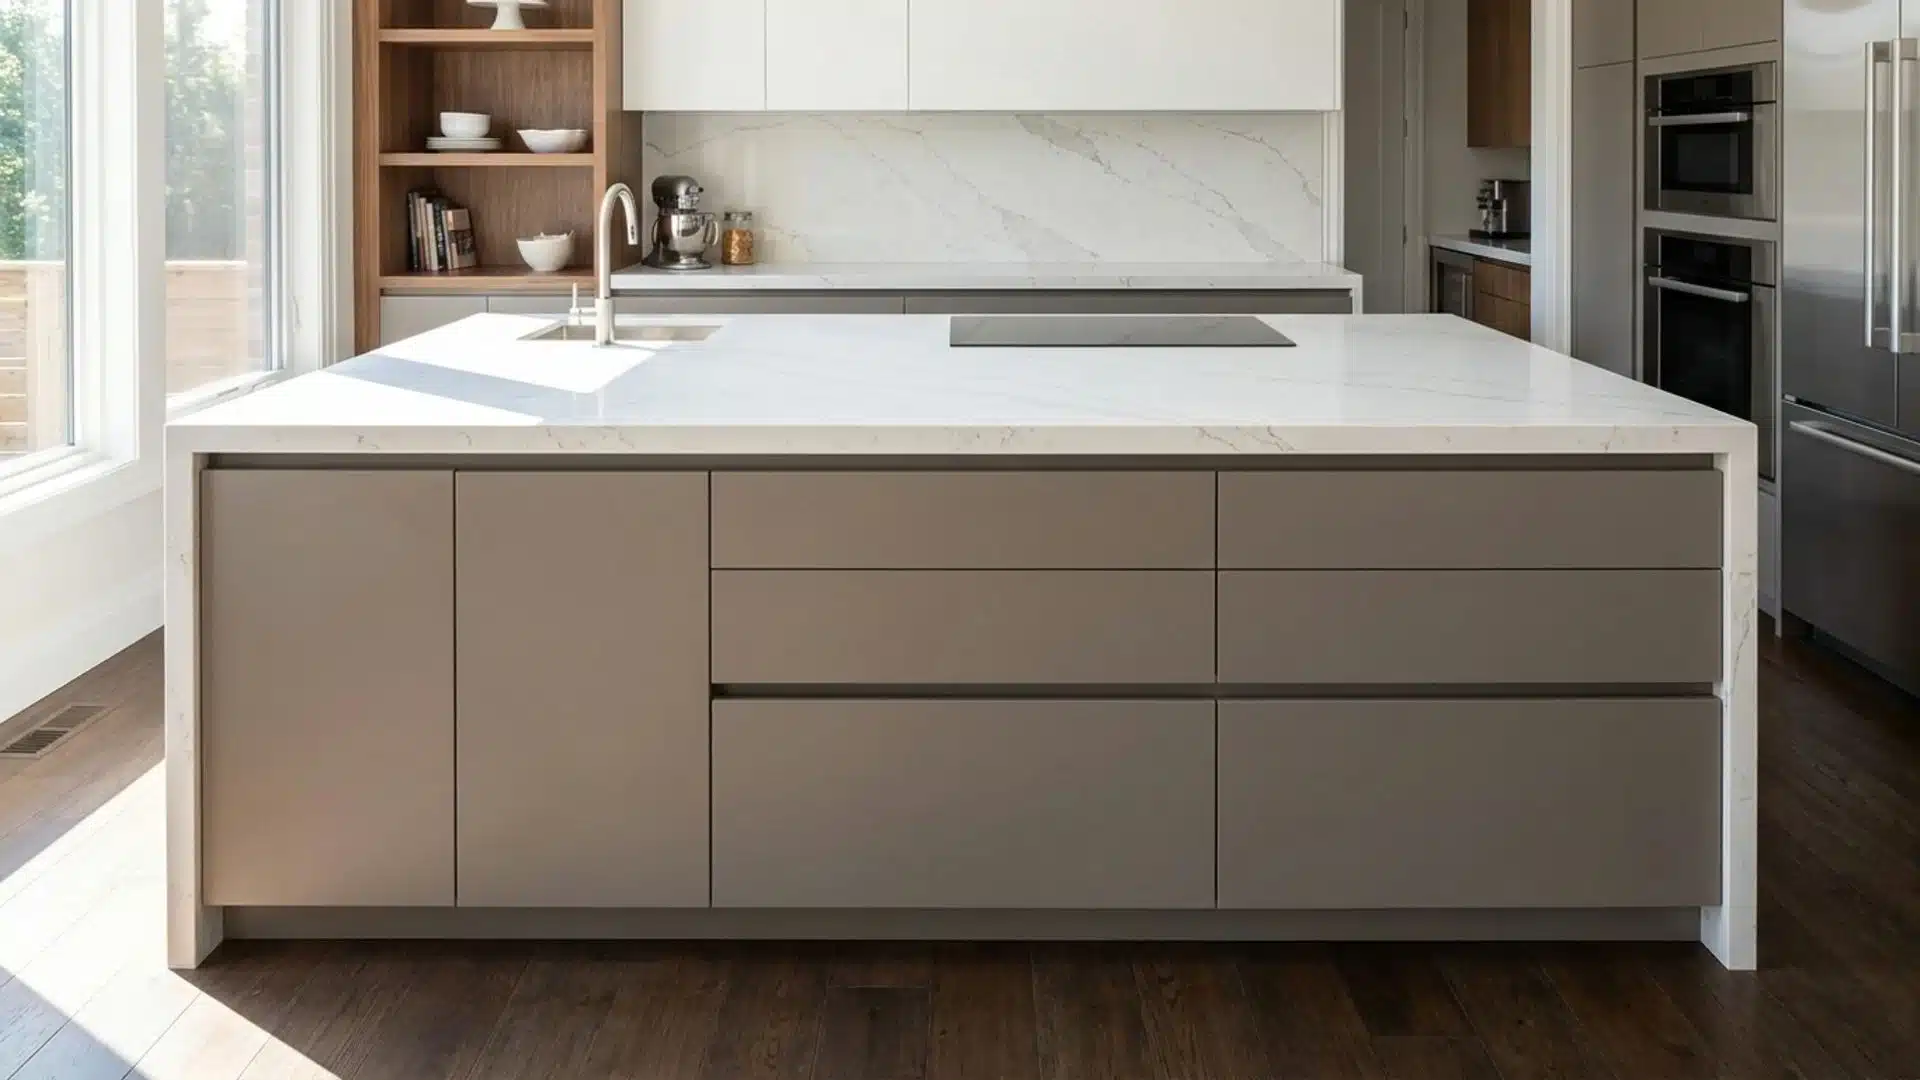
A full overlay design reduces the amount of visible cabinet frame around doors and drawers. Larger front panels cover more of the cabinet box, creating a cleaner and more continuous appearance across the island.
This remodel helps older cabinetry feel newer and more custom-built.
The smooth visual flow works well in modern and transitional kitchens, emphasizing simplicity and consistency.
Budget: $1,000 – $3,000
2. Flat Slab Door Upgrade
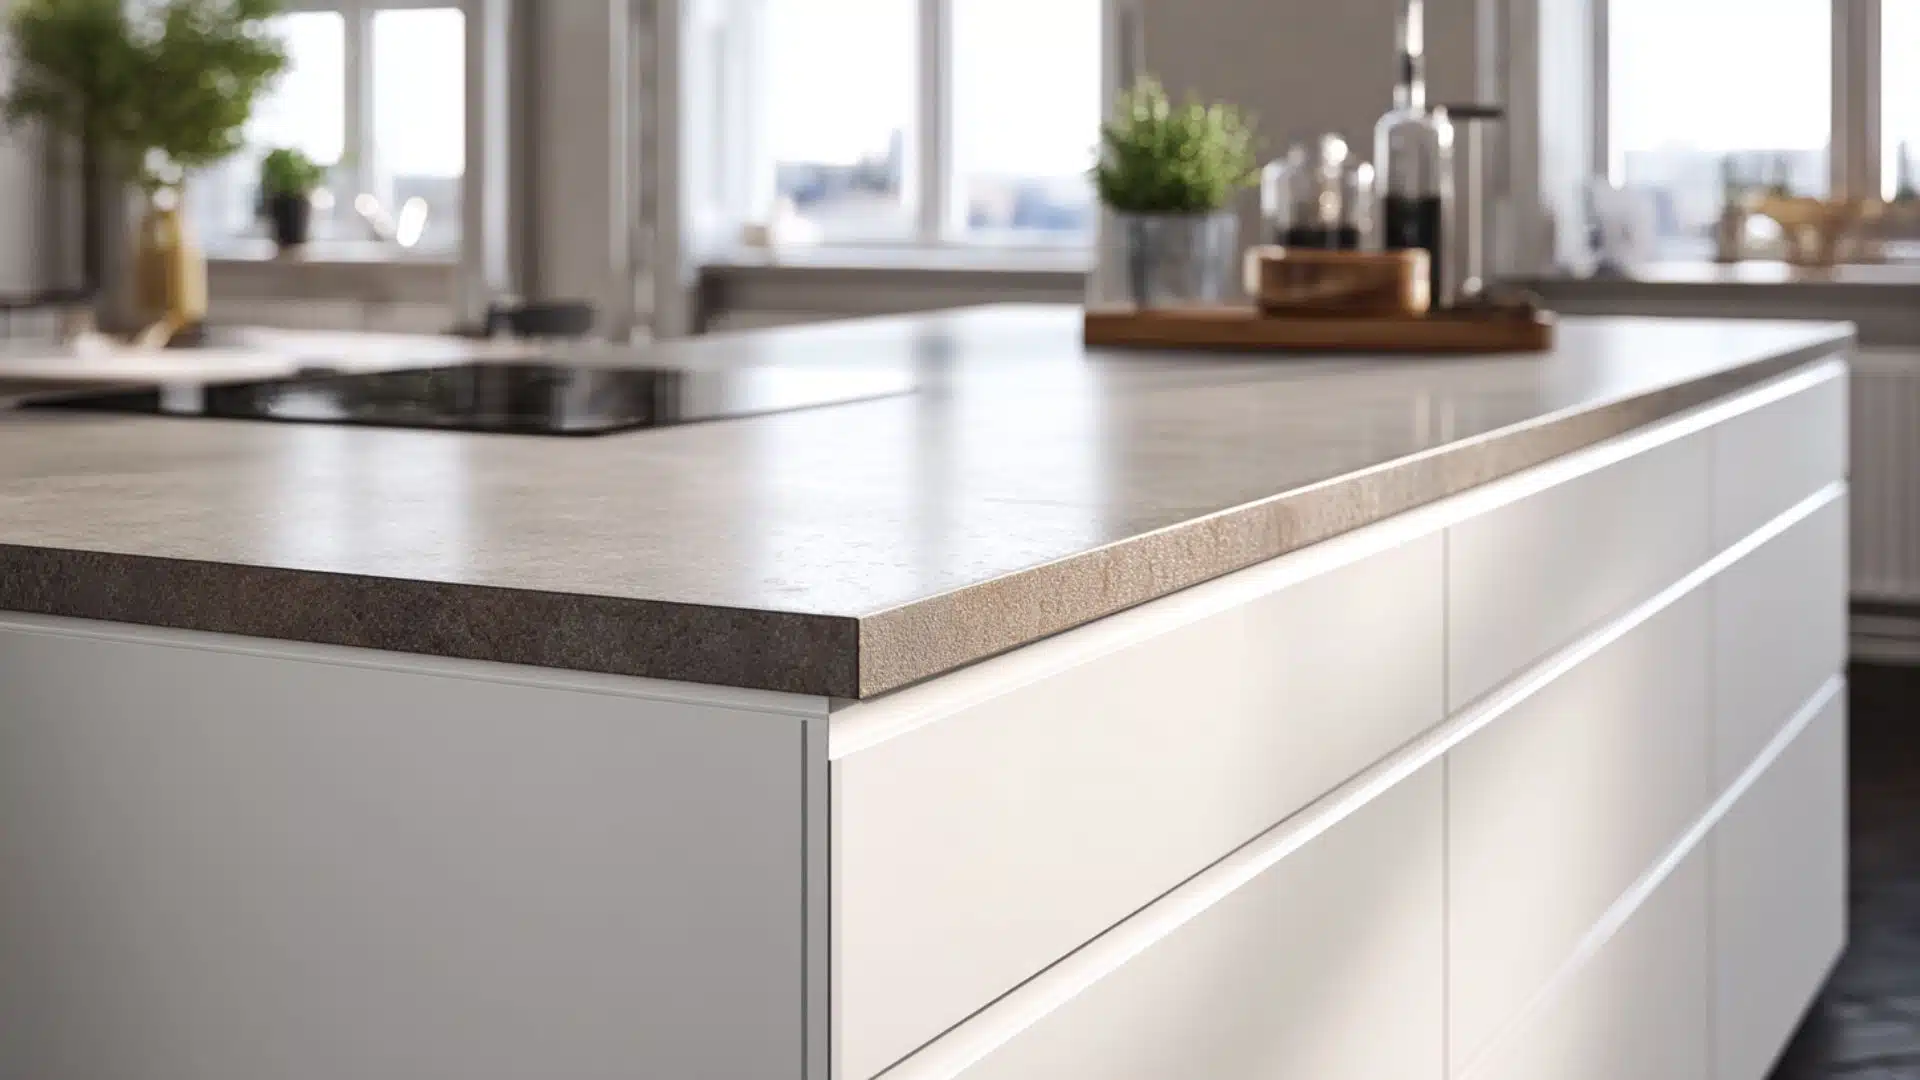
Raised-panel or shaker fronts are being replaced with smooth-slab doors on existing cabinets, featuring hidden hinges.
The flat surface removes shadow lines and panel detail from the island exterior, creating an unbroken face.
Slab doors are available in painted finishes, wood veneer, lacquer, and high-gloss materials, making this update adaptable to multiple contemporary style directions.
Budget: $900 – $2,800
3. Hardware Replacement
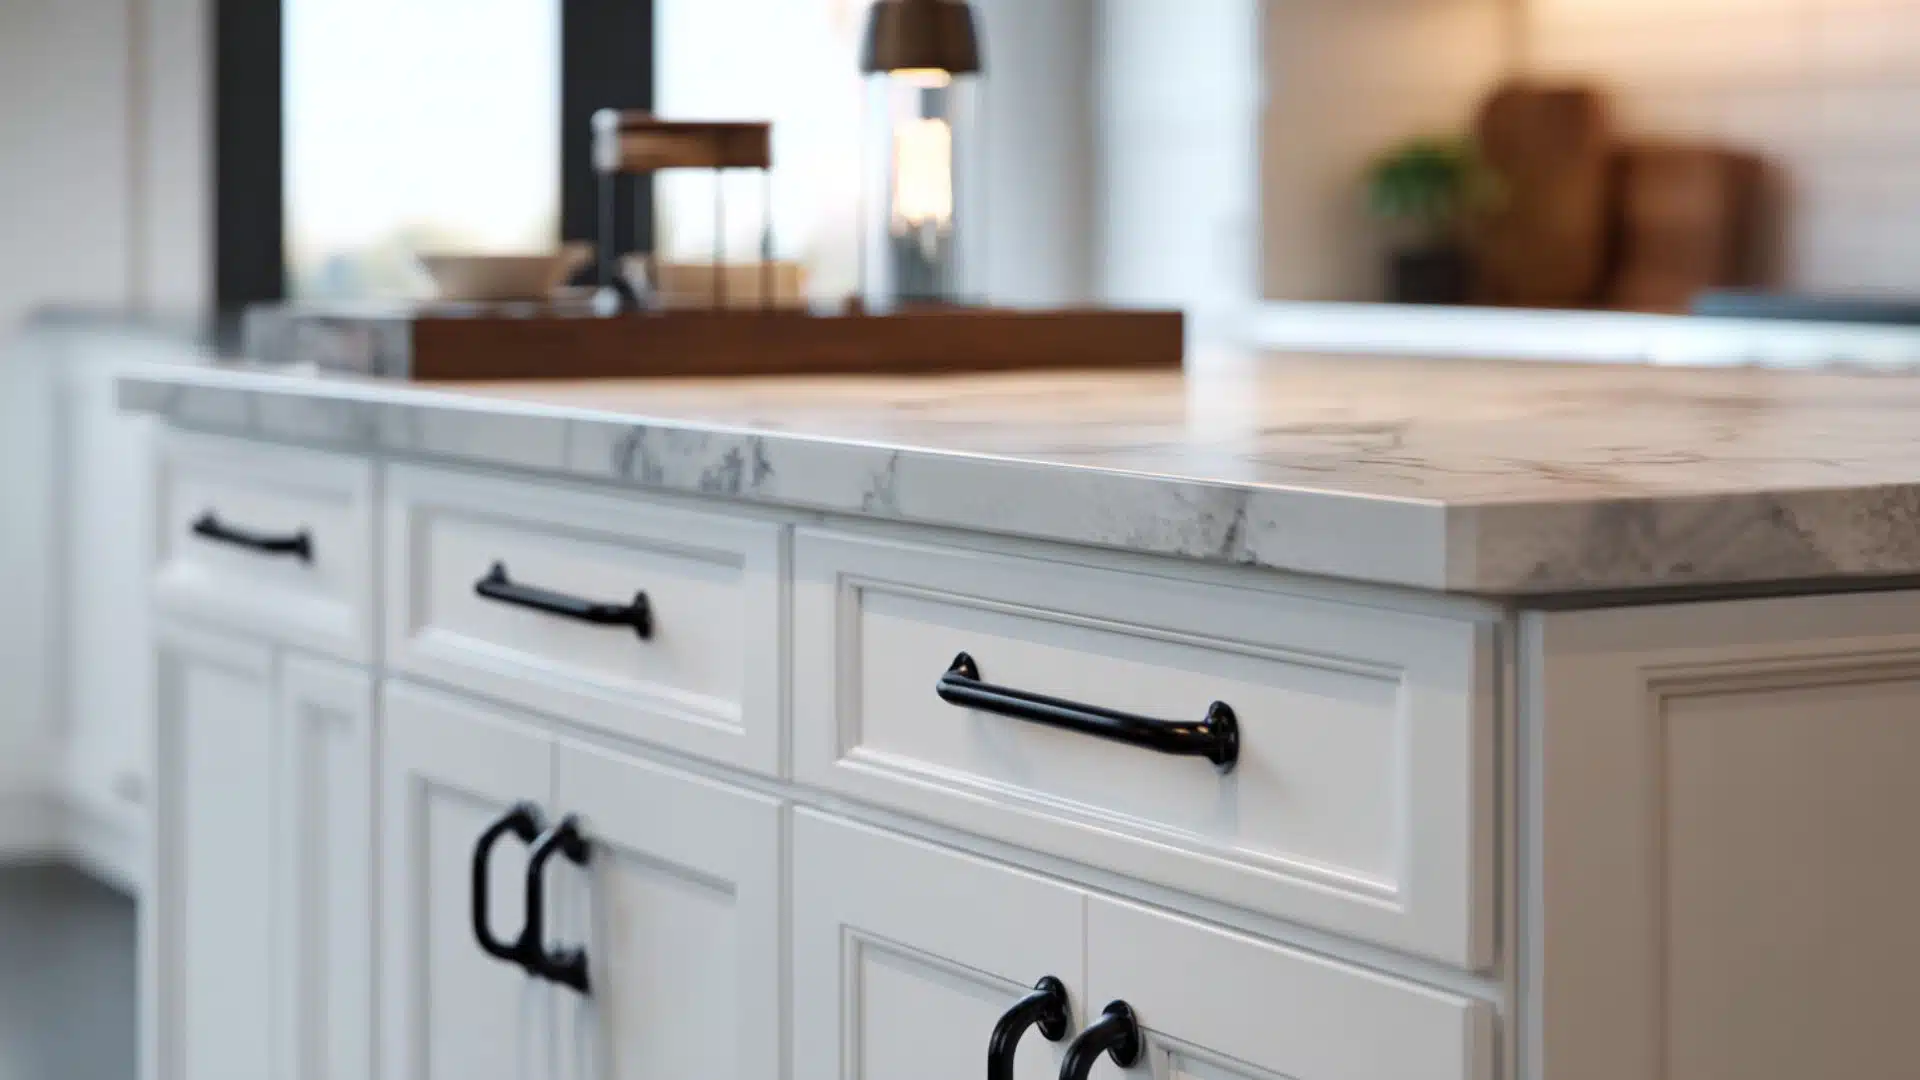
Existing pulls, knobs, and handles are removed and replaced with new pieces in a different metal finish.
Unmatched holes are filled, refinished to match the cabinet color, and new hardware is fitted.
Matte black delivers a sharp, modern result; unlacquered brass adds warmth; and satin nickel keeps the look clean.
The change in finish shifts the entire character of the island at minimal cost.
Budget: $150 – $600
4. Fluted Vertical Side Panels
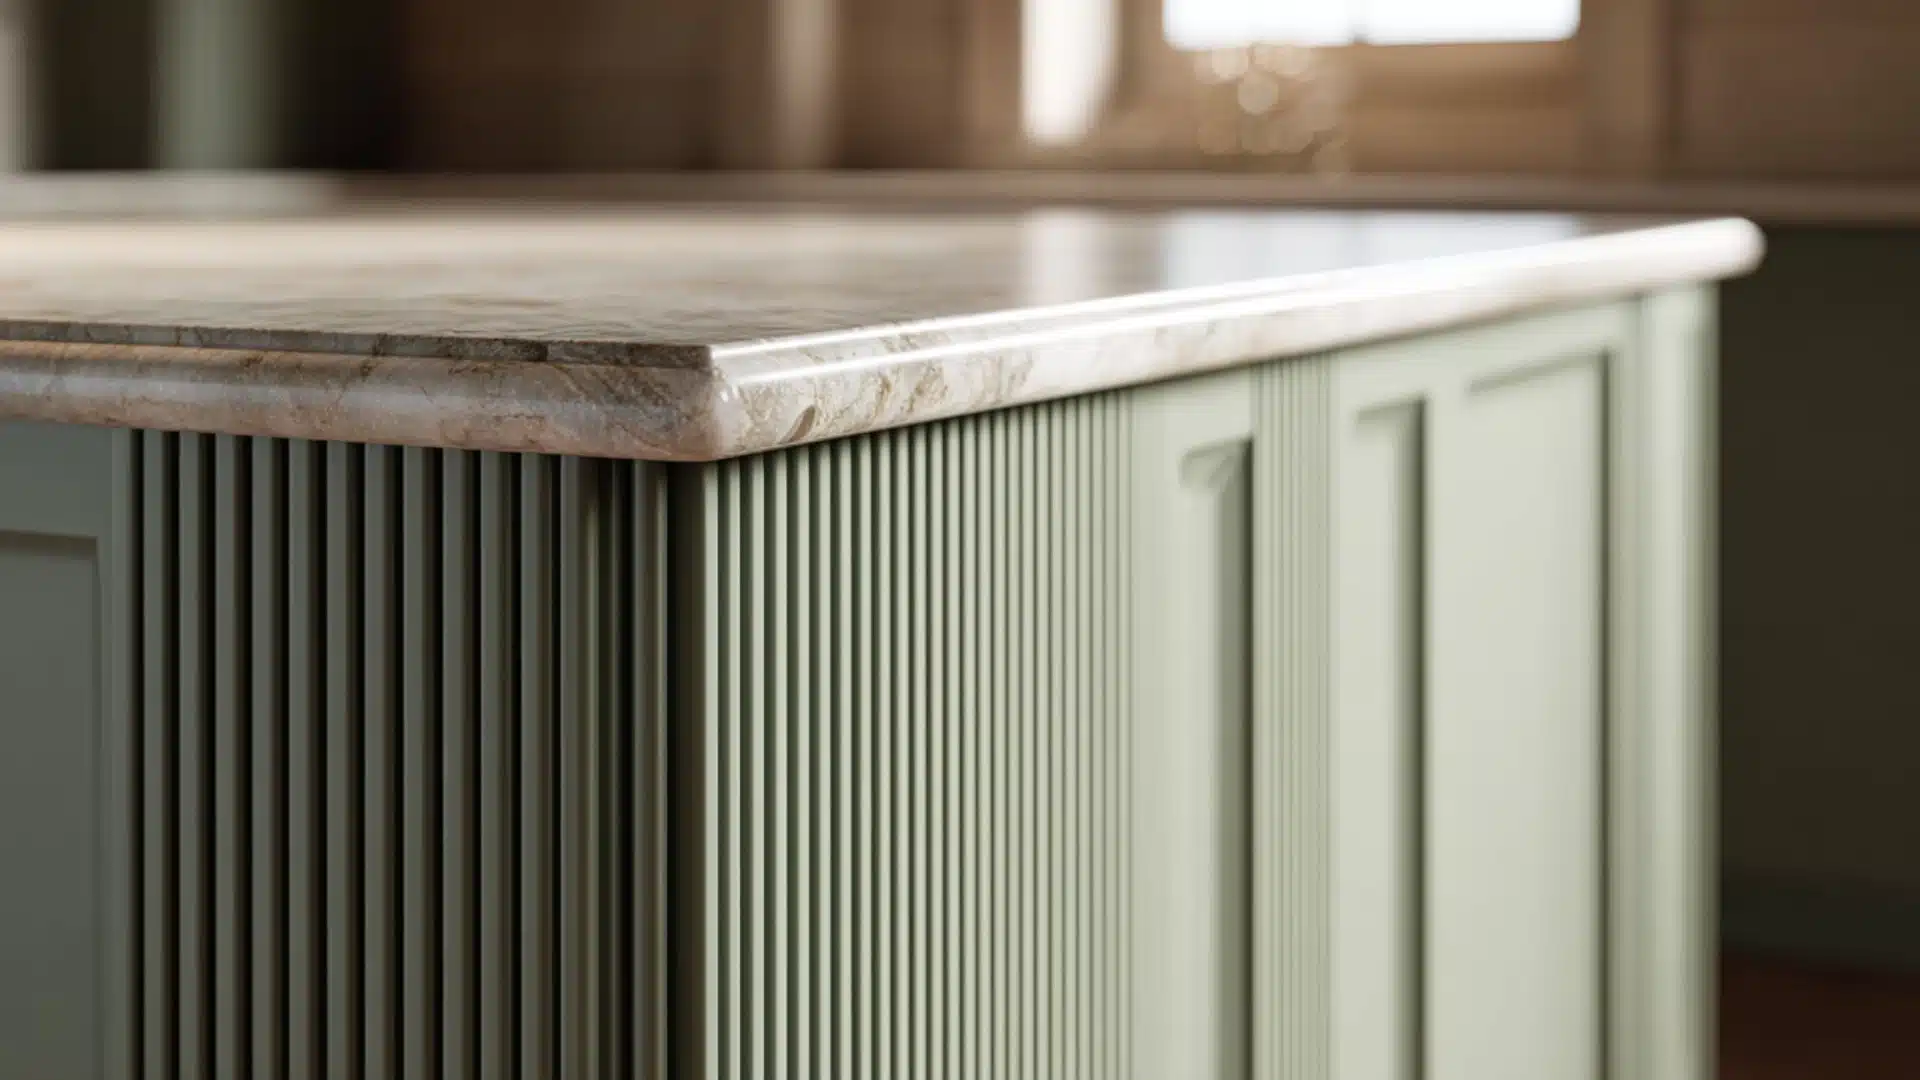
Grooved vertical panels are mounted on the island’s visible exterior after the flat cladding is removed.
Made from wood, MDF, or stone-effect material, they are cut to size, attached to each side face, and finished flush with the countertop edge above and the toe-kick below.
The vertical grooves catch light at different angles, creating depth and shadow unlike flat painted sides.
Budget: $600 – $1,800
5. Encaustic or Patterned Tile Base Cladding
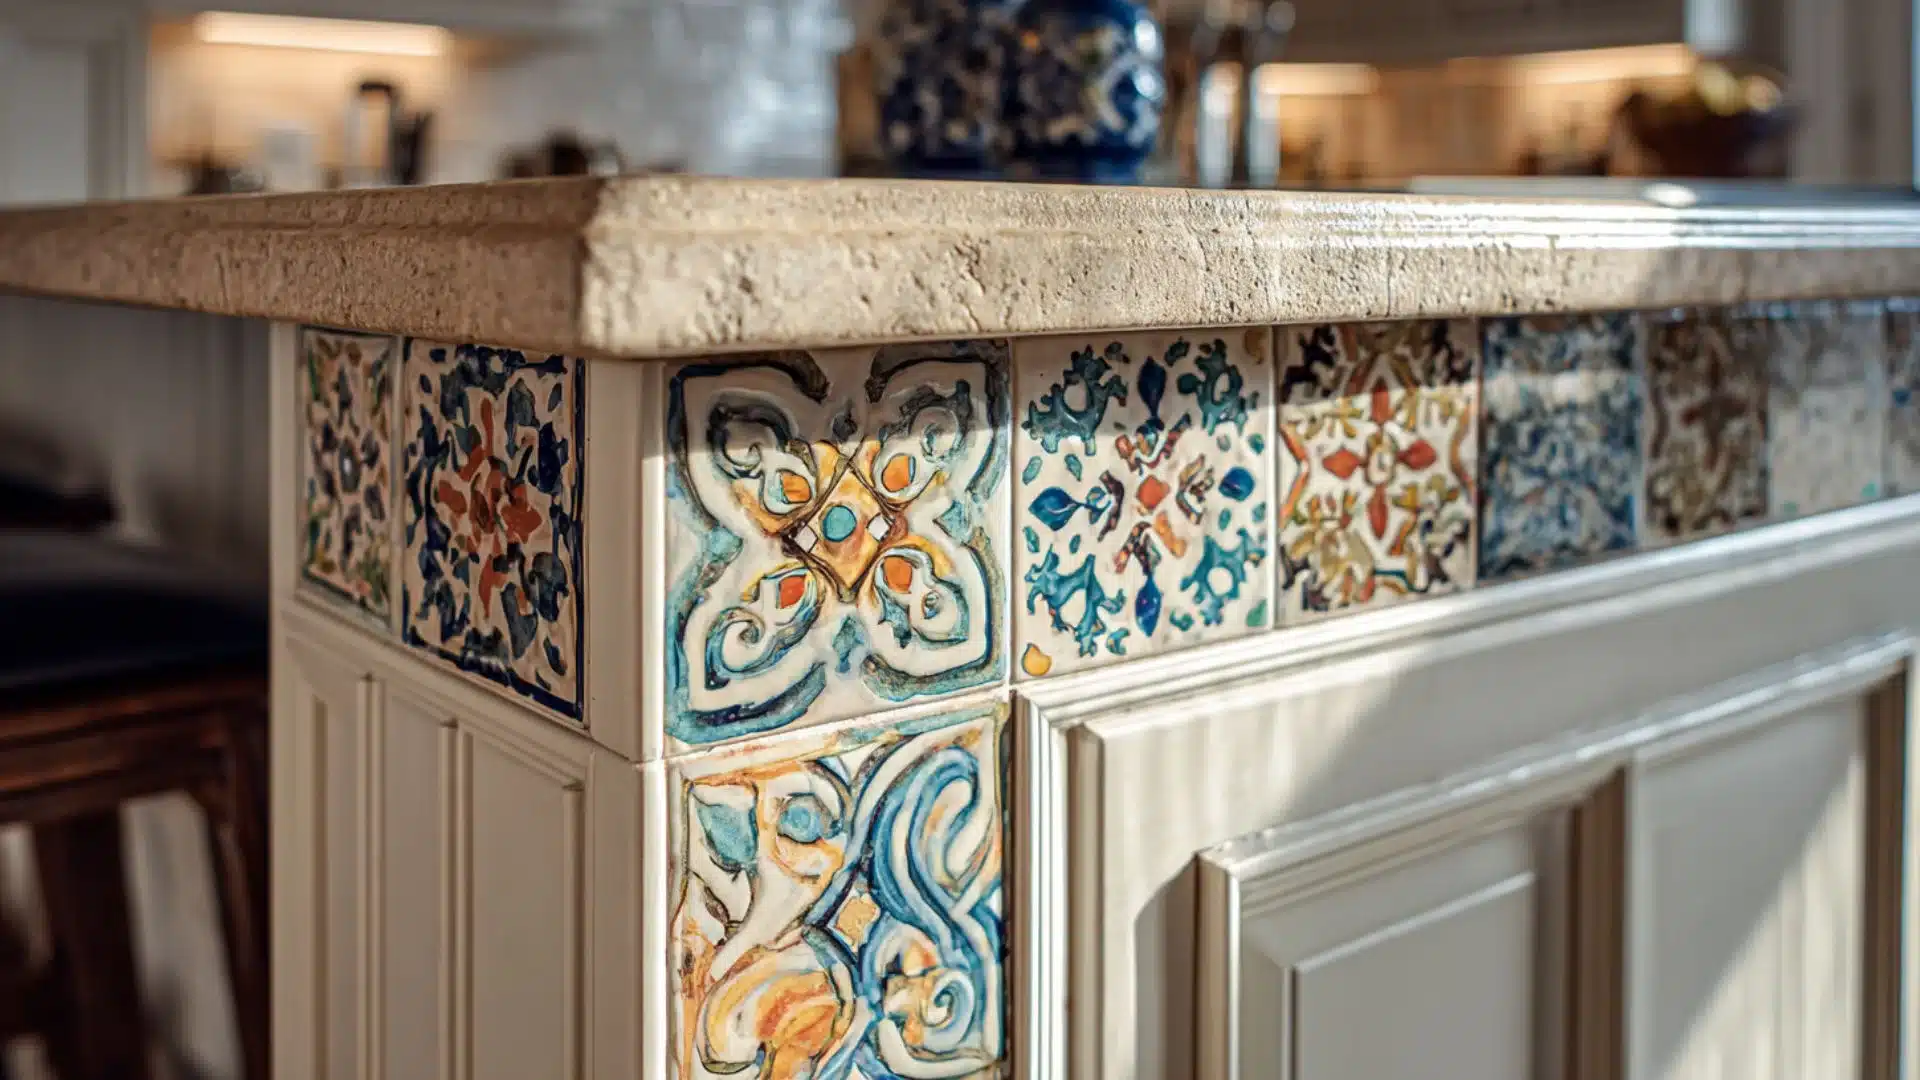
Decorative encaustic or ceramic tiles replace the plain painted or wood surface on the island base panel.
The cladding is removed, the substrate is prepared, the tiles are set in pattern, and the joints are grouted.
The tile panel runs from the toe-kick to the underside of the countertop across all visible faces. Color, geometric pattern, and surface texture at the base make the island the most visually active element in the kitchen.
Budget: $800 – $2,500
6. Sliding Barn Door on Island Shelving
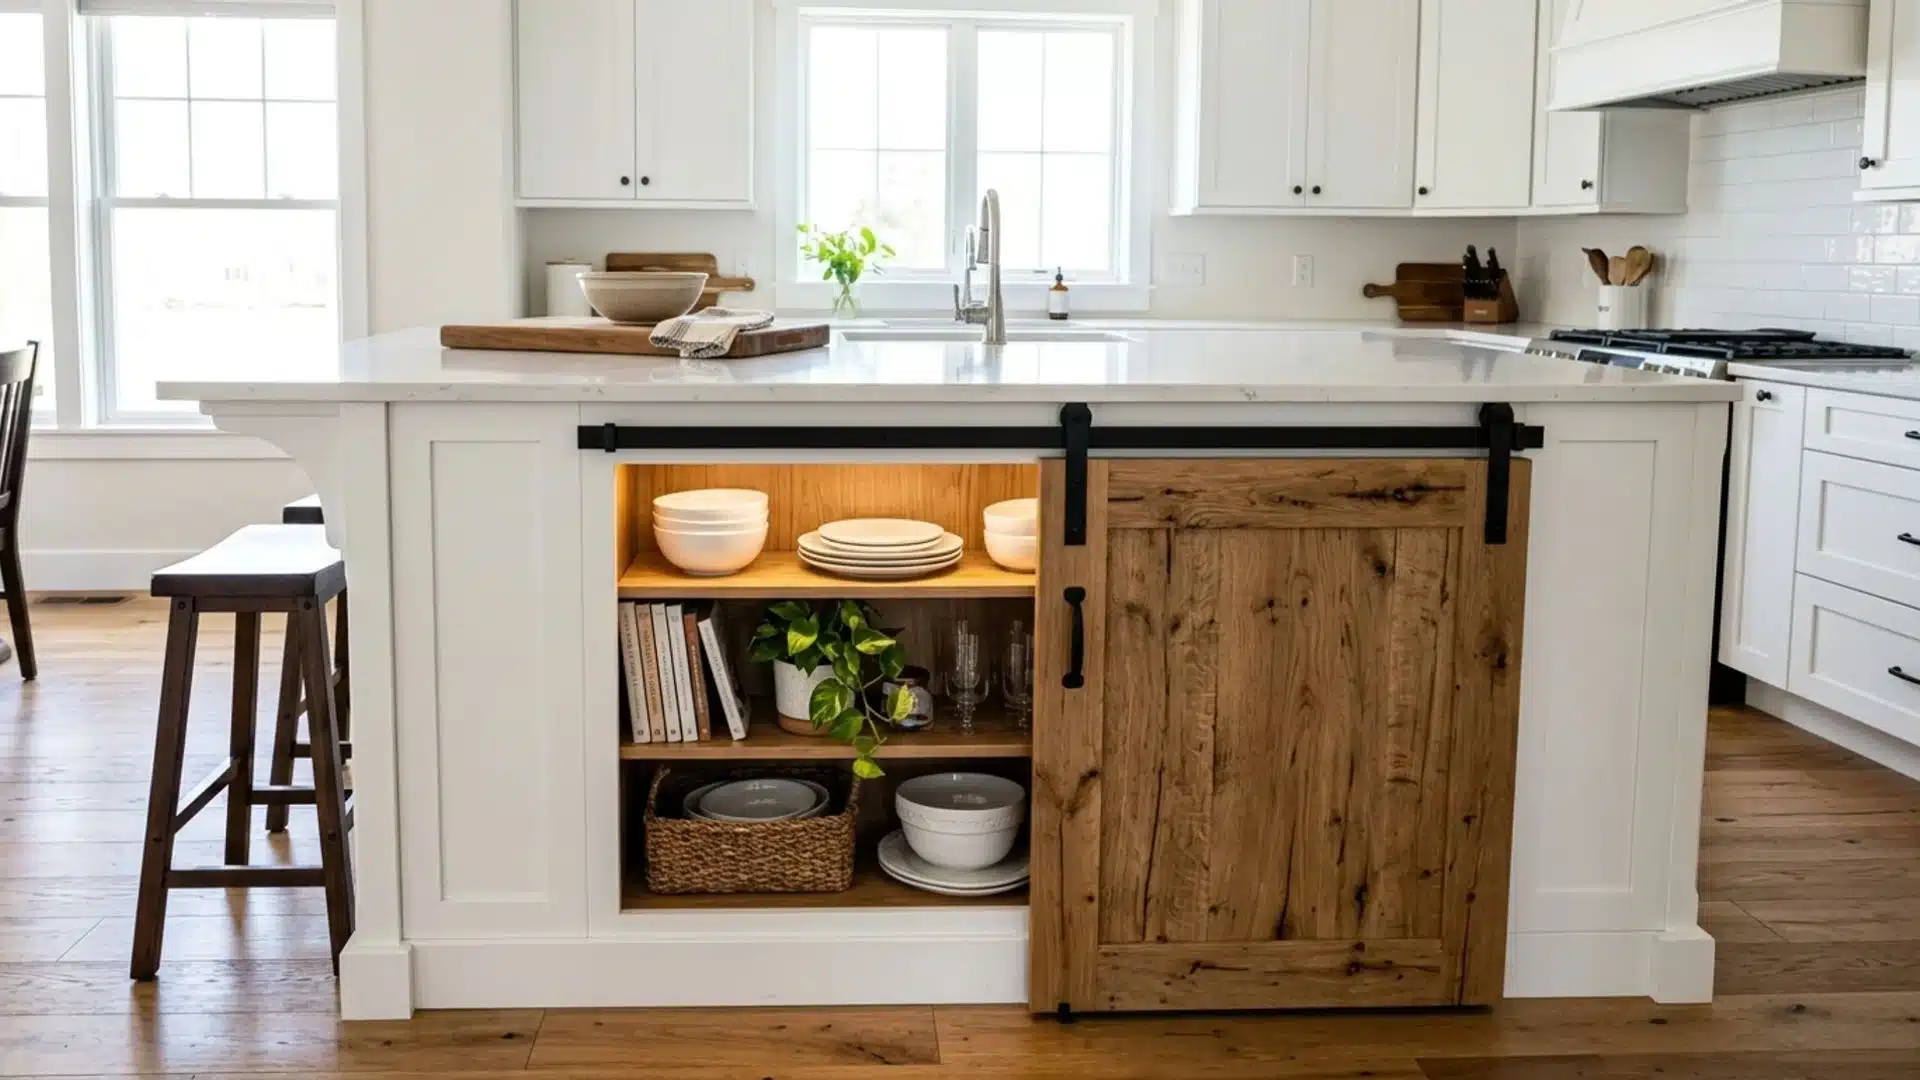
A barn door panel mounted on a surface rail track covers open shelving or cabinetry on one side of the island.
The track hardware is fixed to the island structure above the opening, and the door panel hangs from it, sliding cleanly in either direction. The door can match the island finish or deliberately contrast it.
The shelving is fully accessible when open and hidden when closed, giving the island two distinct looks.
Budget: $500 – $1,500
7. Reeded Glass Cabinet Door Insert
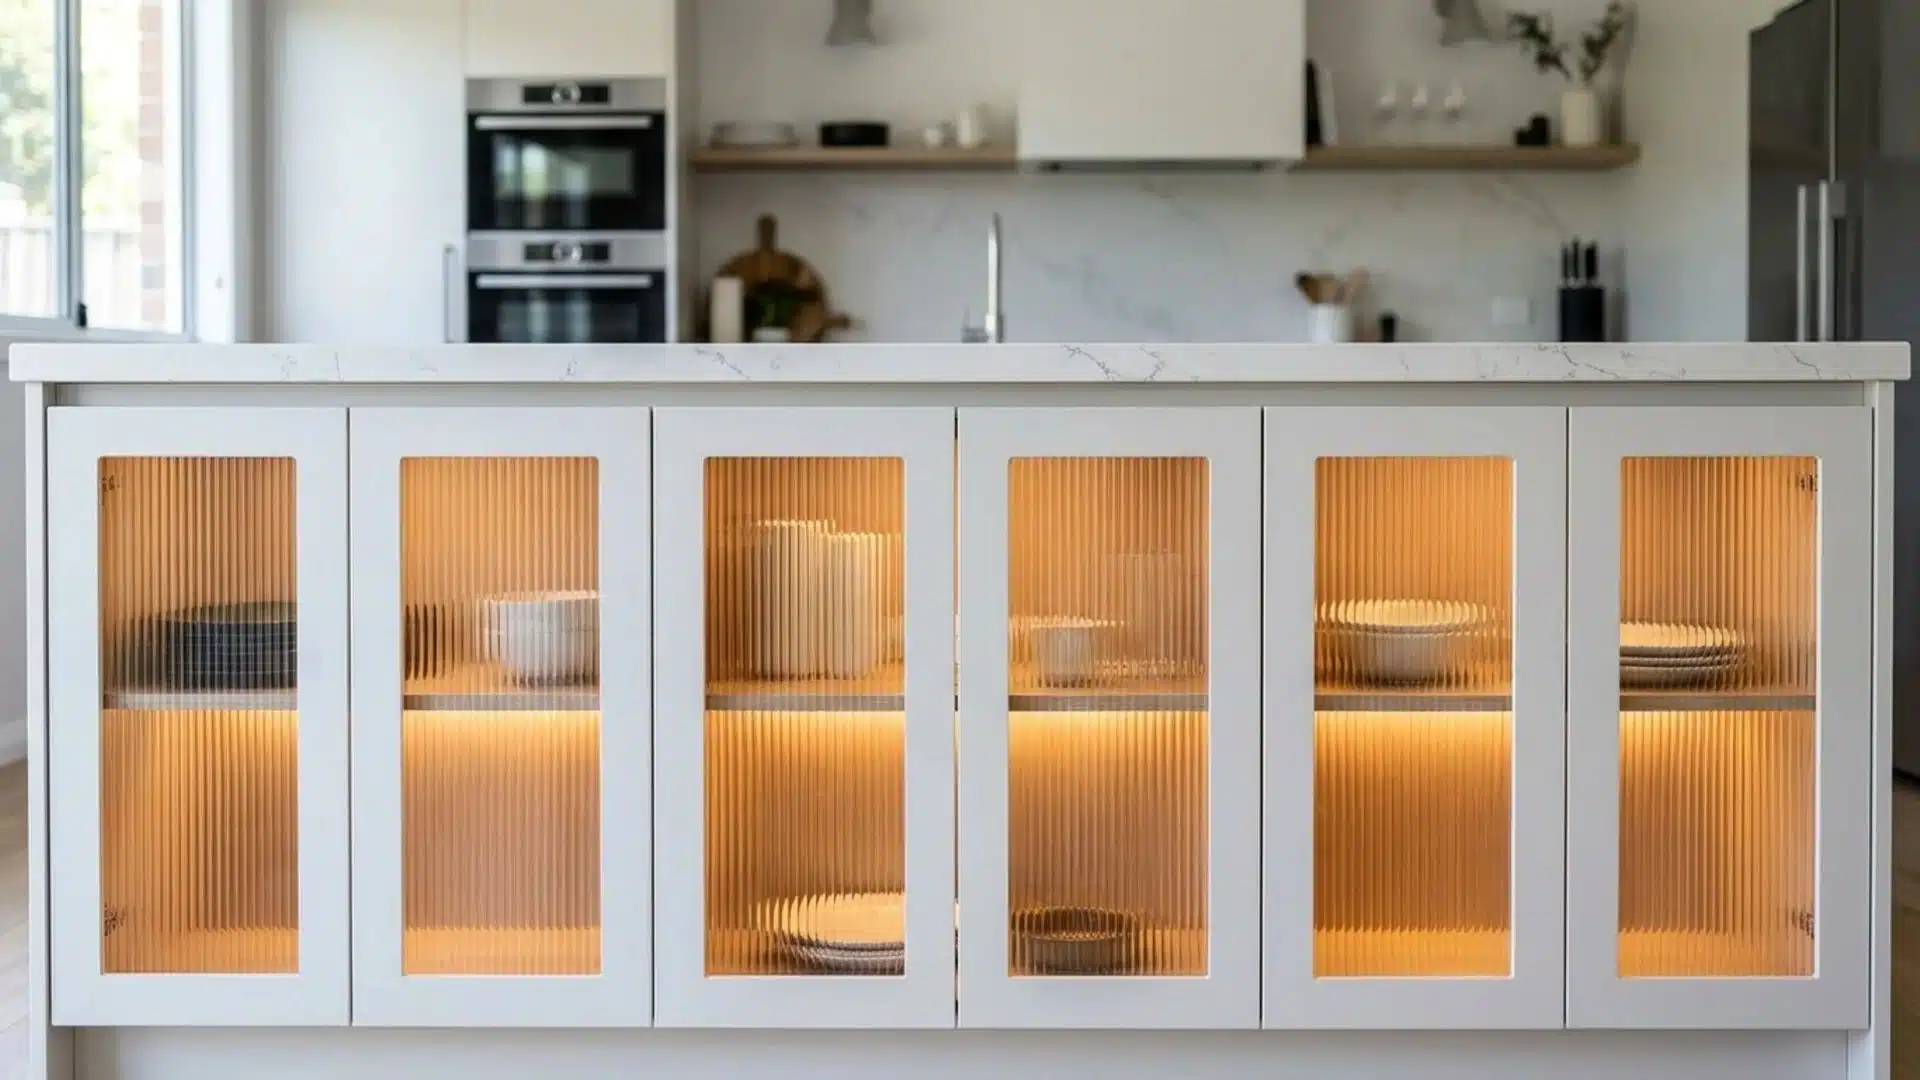
Solid cabinet door panels on the island are replaced with reeded or fluted glass inserts in existing frames.
The glass has a ribbed texture that allows light to pass through while obscuring the contents behind it.
Interior cabinet lighting amplifies the effect after dark.
The ribbed surface adds a tactile visual detail to the island face that is distinct from both solid panels and clear glass, suiting modern, art deco, and transitional kitchen styles.
Budget: $800 – $2,200
8. Cane Webbing Panel Insert
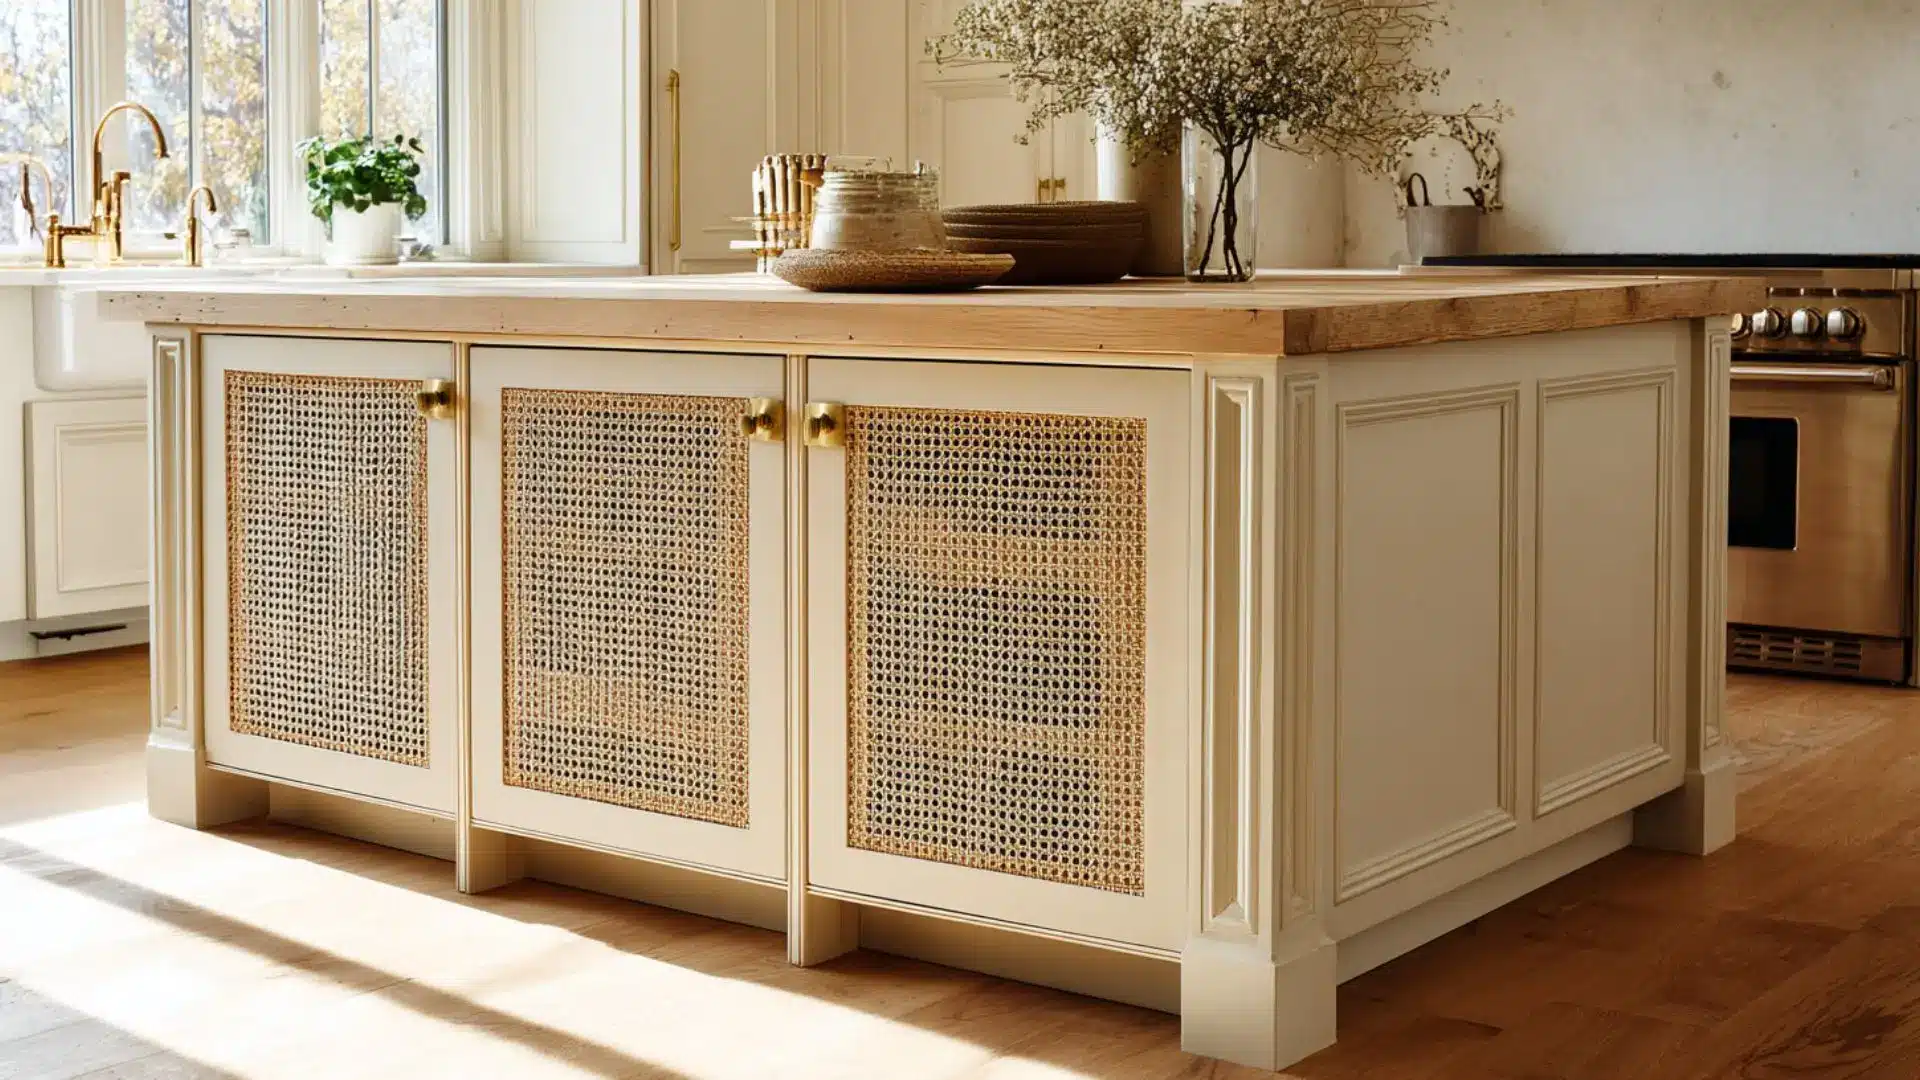
Cane webbing panels replace solid door centers, converting them into partially open fronts with woven fiber.
The frames remain, but solid panels are removed, and webbing is stretched and stapled into the frame.
The woven surface adds natural texture and subtle openness to the island base without fully exposing the interior.
It suits coastal, Japandi, bohemian, and mid-century kitchen styles equally well.
Budget: $300 – $900
9. Chamfered Countertop Edge
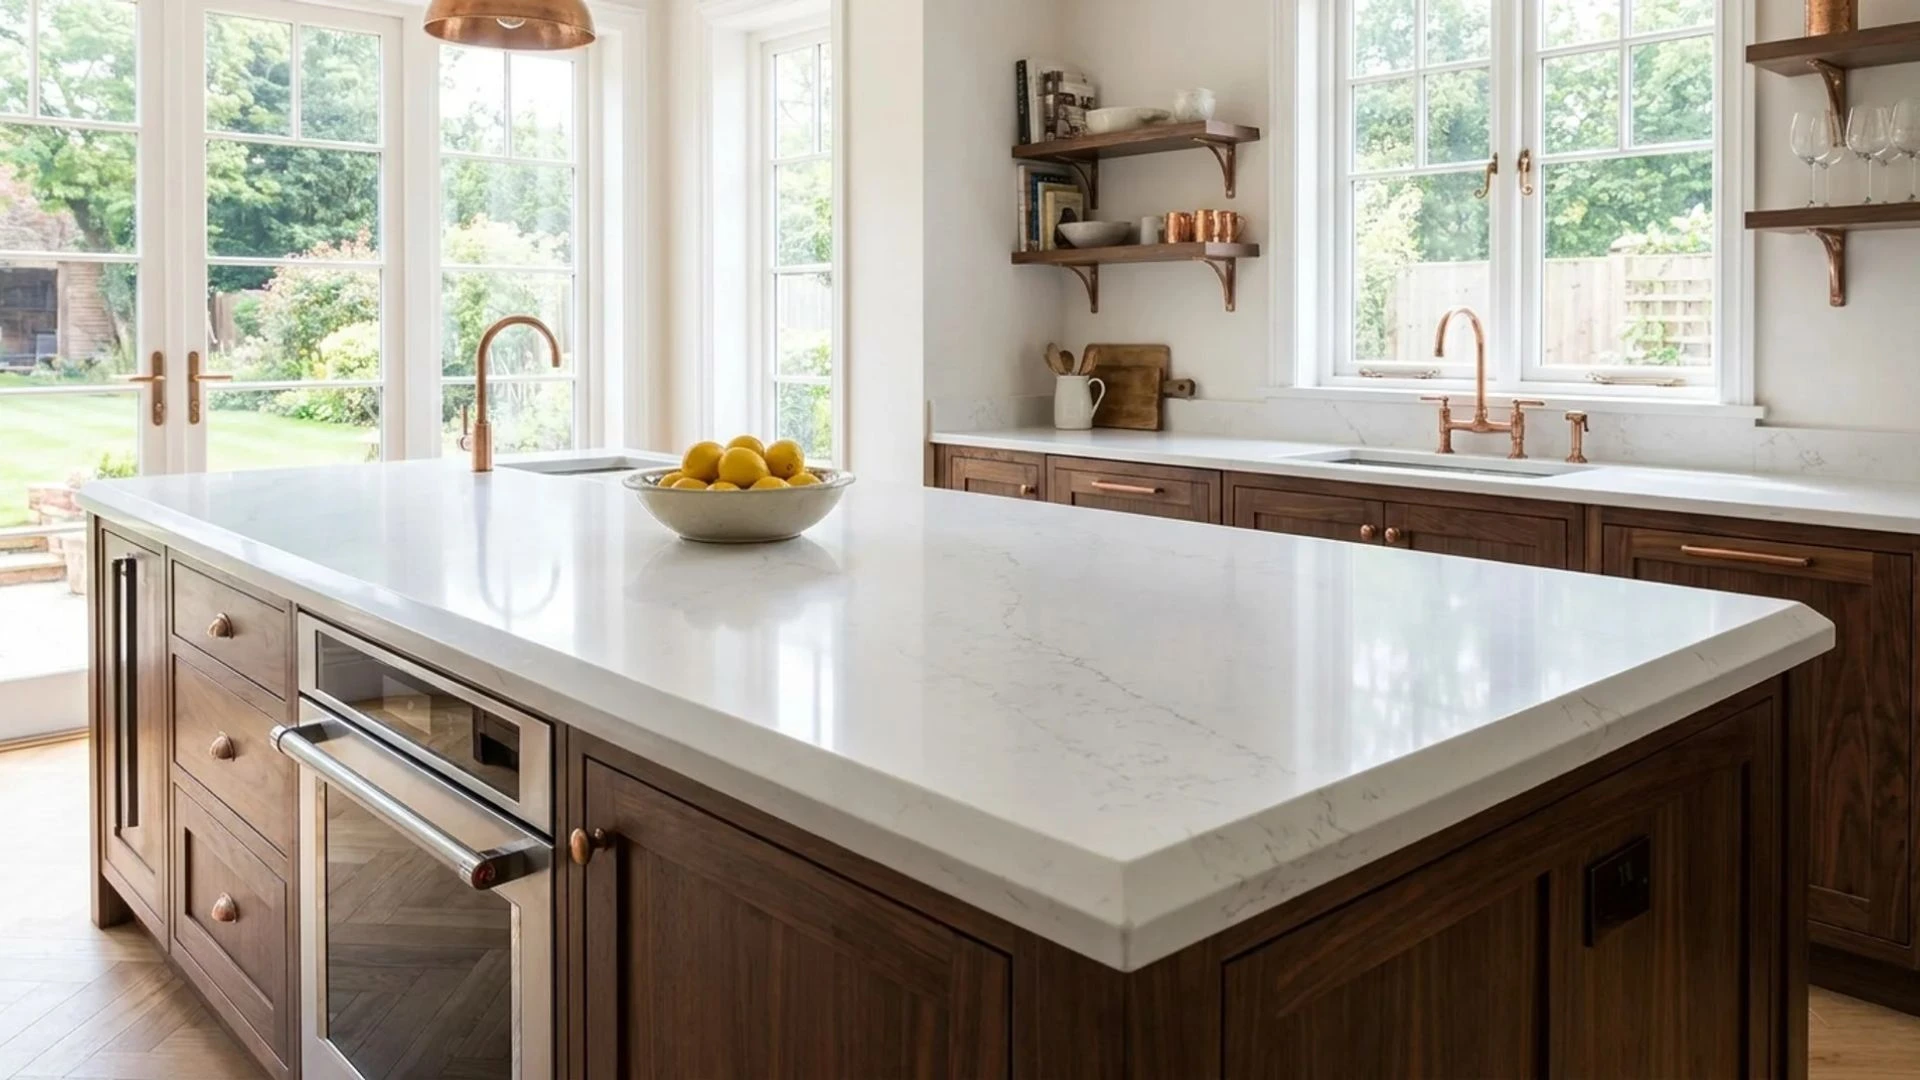
A chamfered edge removes a small, angled section along the perimeter of the countertop. While the change is subtle, it introduces more detail than a simple square edge and gives the countertop a sharper profile.
The angled cut catches light differently and adds visual definition without becoming overly decorative.
Stone and quartz surfaces suit this edge, making it easy to refresh an island surface.
Budget: $300 – $1,200
10. Bullnose Countertop Edge
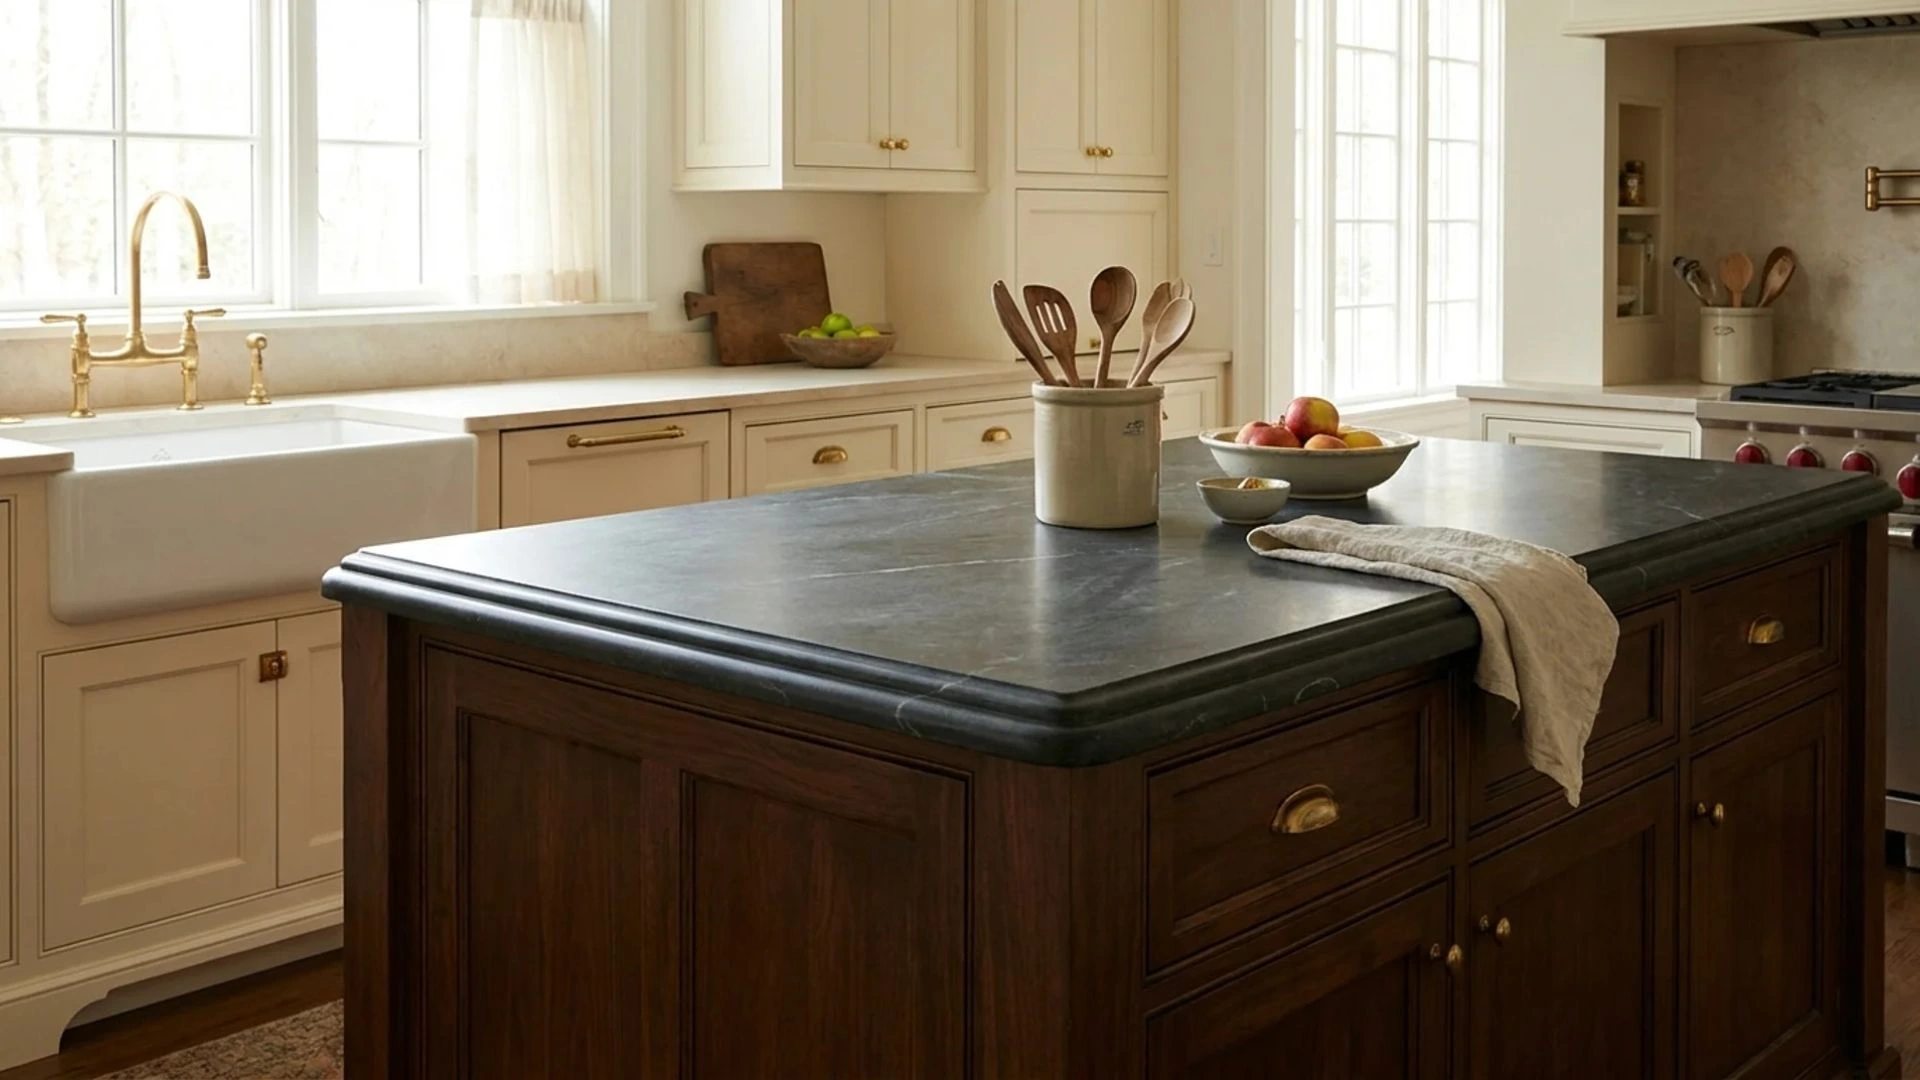
A bullnose edge rounds the entire countertop corner into a smooth, curved profile.
The softer shape reduces hard lines and creates a more relaxed appearance around the island. This edge style has remained popular for years because it pairs easily with many kitchen designs and countertop materials.
People often choose it to soften the island’s sharpness and give the countertop a more polished, finished look.
Budget: $300 – $1,200
11. Ogee Countertop Edge Detail
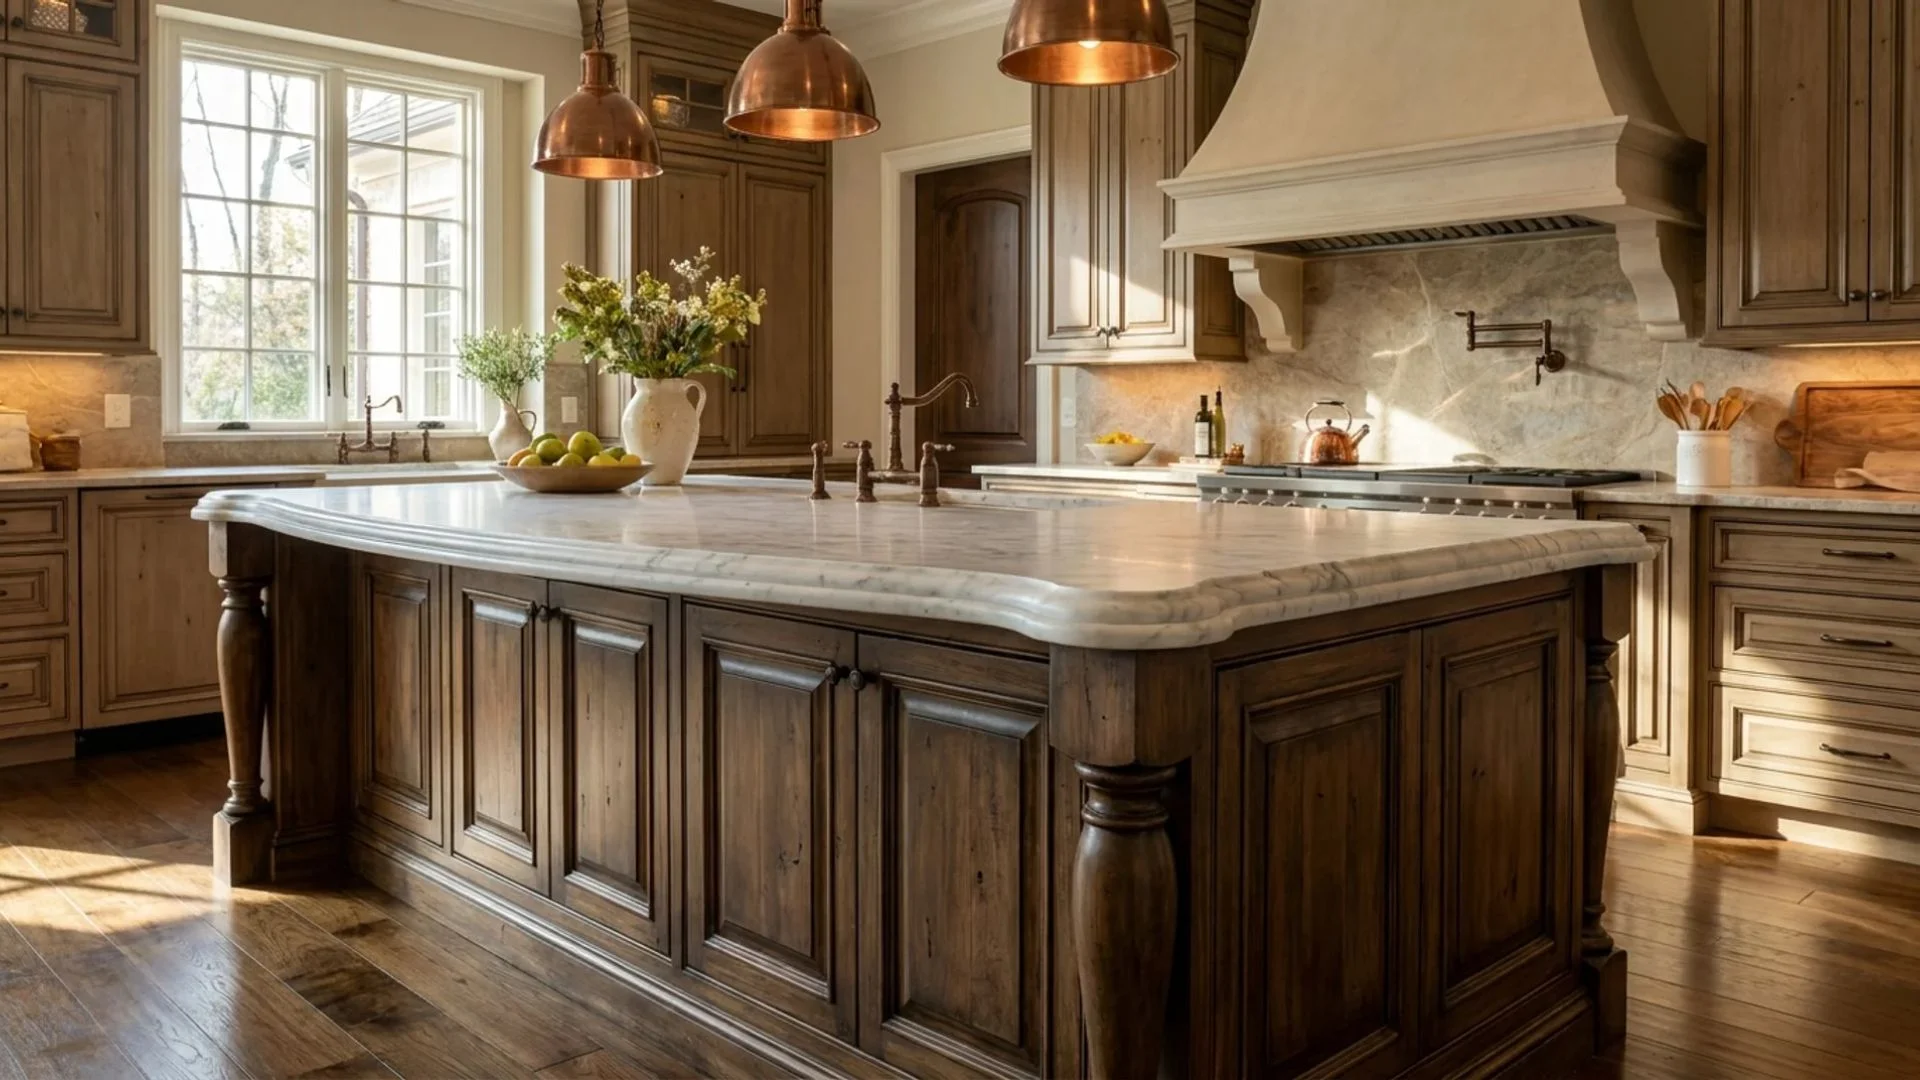
The ogee profile features a flowing, curved shape along the countertop edge, adding decorative detail.
Unlike simple edge treatments, the profile creates shadows and depth that become noticeable when viewed from different angles. Natural stone surfaces often highlight this detail particularly well.
People choose this edge style for a formal kitchen look as it adds character without changing the island.
Budget: $500 – $1,500
12. Picture Frame End Panels
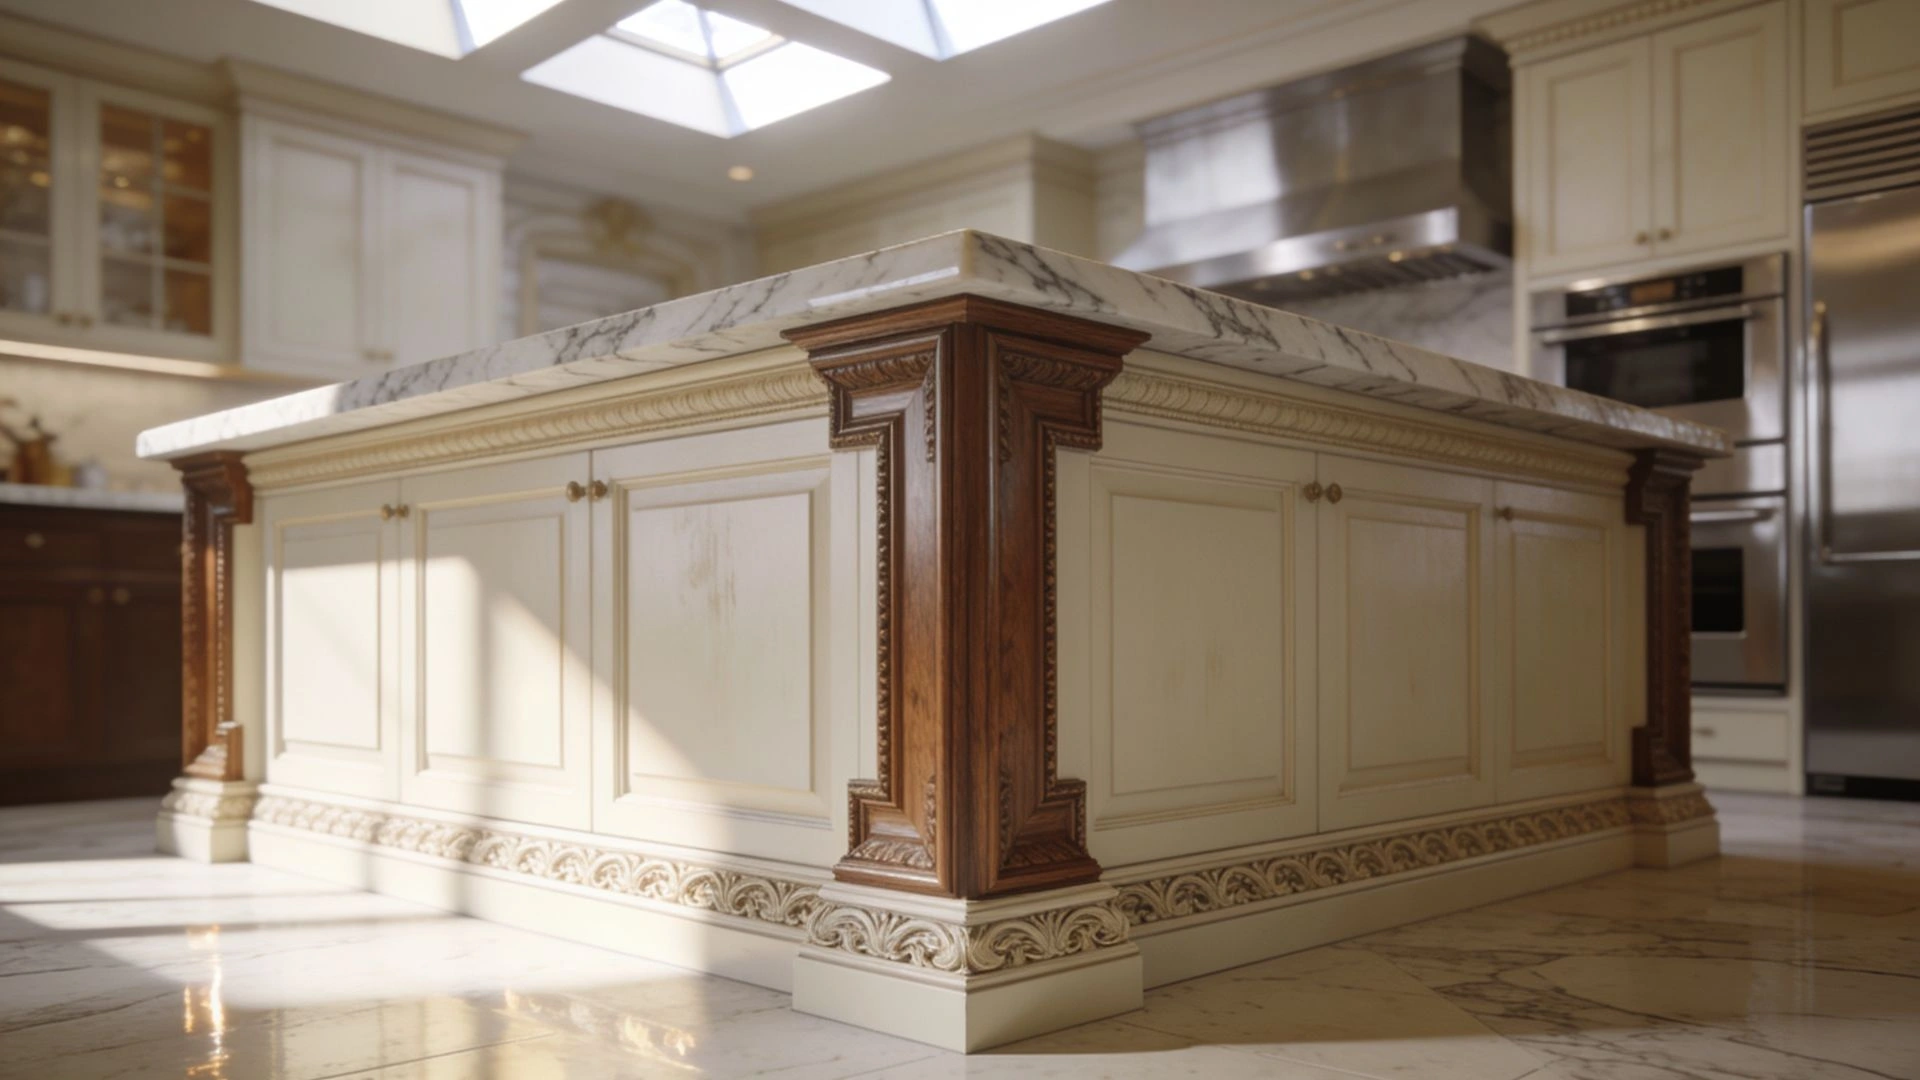
Picture frame molding introduces structure by surrounding the panel with clean trim details.
The framed appearance creates a furniture-inspired look that feels more intentional than a plain flat panel.
This cabinet upgrade adds depth and definition to visible island ends while maintaining a clean appearance that complements both traditional and contemporary kitchen styles.
Budget: $400 – $1,500
13. Bookmatched Stone Waterfall Sides
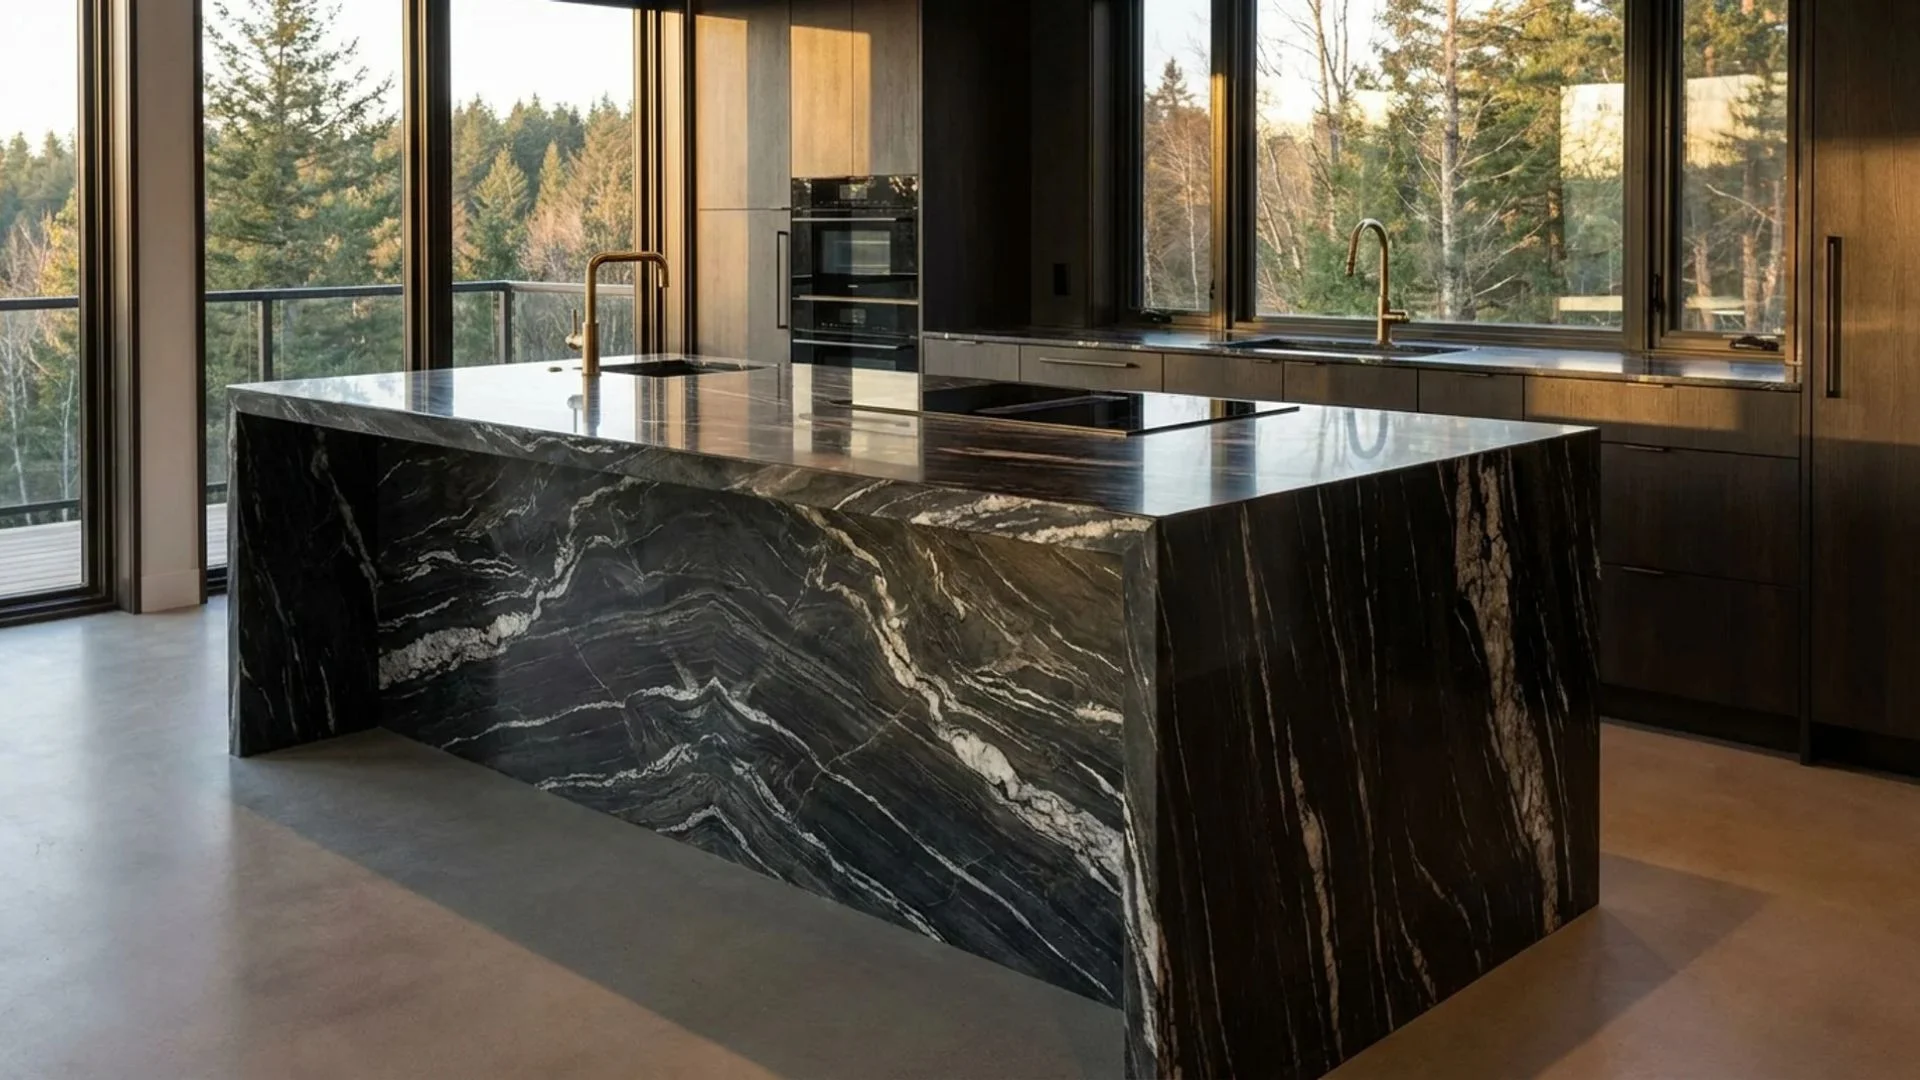
Bookmatching arranges stone slabs so the veining flows naturally across connected surfaces. When paired with waterfall sides, the countertop pattern continues down the ends of the island in a coordinated way.
The continuous movement of the stone draws attention to the material itself and highlights its natural patterns.
Many luxury kitchen designs use this technique to create a focal point and keep a clean look.
Budget: $4,000 – $12,000
14. Radius Corner Cabinet Design
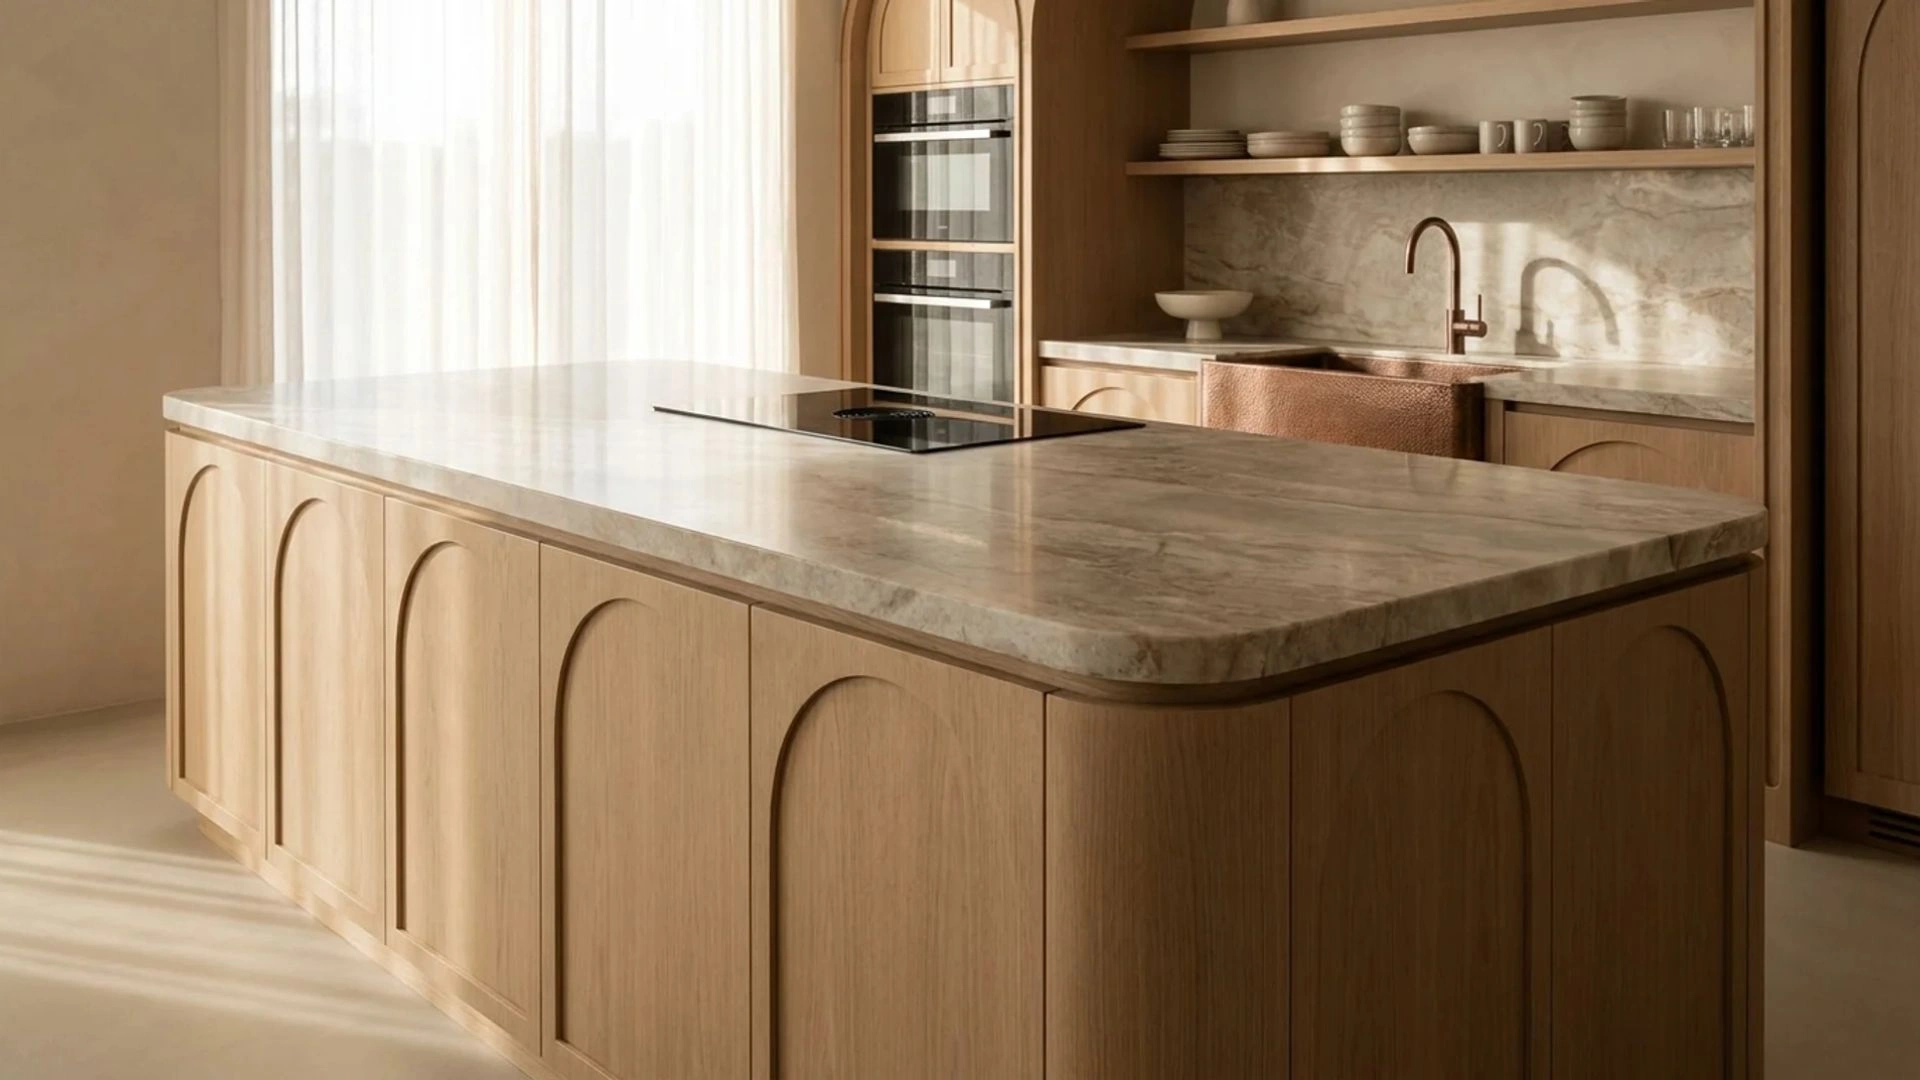
Sharp cabinet corners can make a kitchen island feel rigid and boxy.
A radius corner design softens the edges by introducing smooth curves where cabinet faces meet.
The rounded shape creates softer lines and makes the structure more inviting. This cabinet upgrade completes the painted and wood finishes, giving the island a unique, custom-built look that stands out from typical designs.
Budget: $1,500 – $4,500
15. Metal Inlay Cabinet Detailing
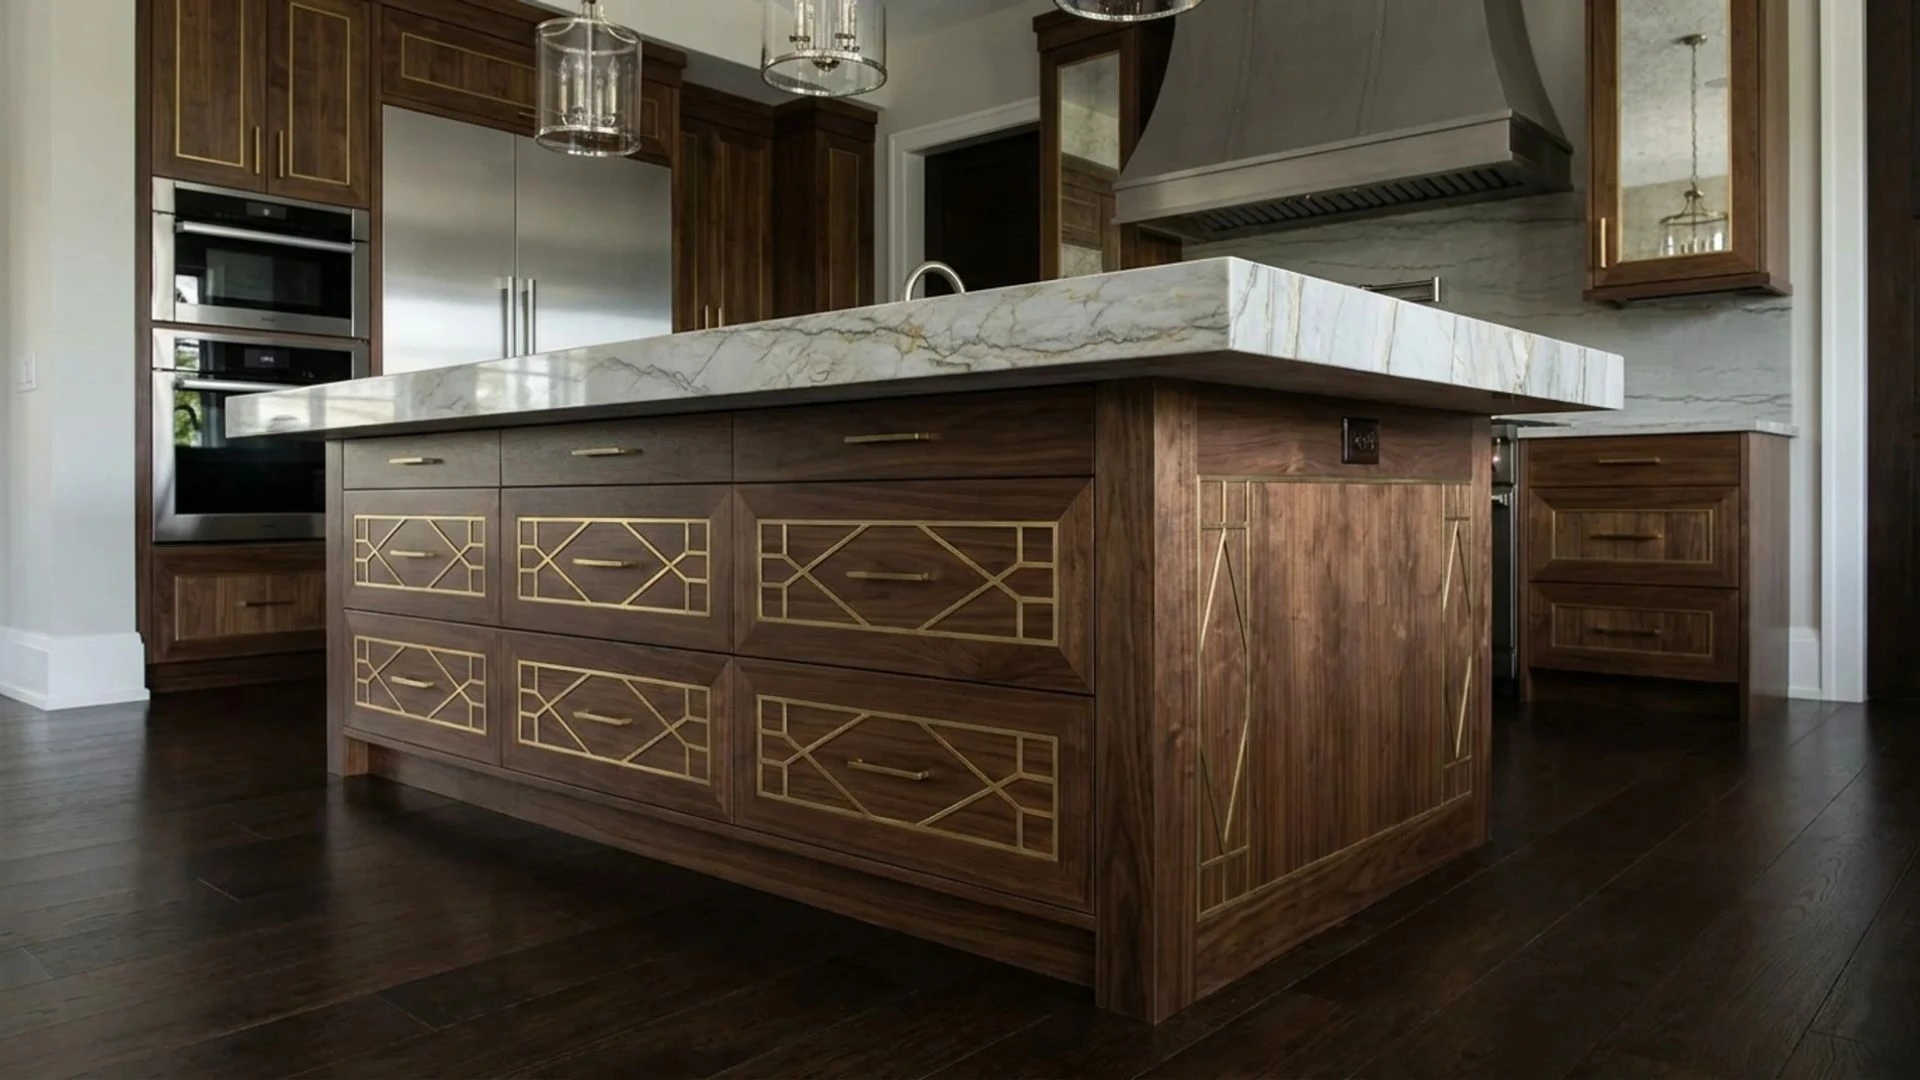
Thin metal strips can be integrated into cabinet doors and panels to introduce subtle contrast. Materials such as brass, bronze, or black metal create clean lines that highlight the shape of the island without crushing the design.
The detailing adds a custom look and draws attention to cabinet craftsmanship.
This upgrade works well in both modern and transitional kitchens where refined details matter.
Budget: $1,500 – $4,500
16. V-Groove Panel Cabinet Doors
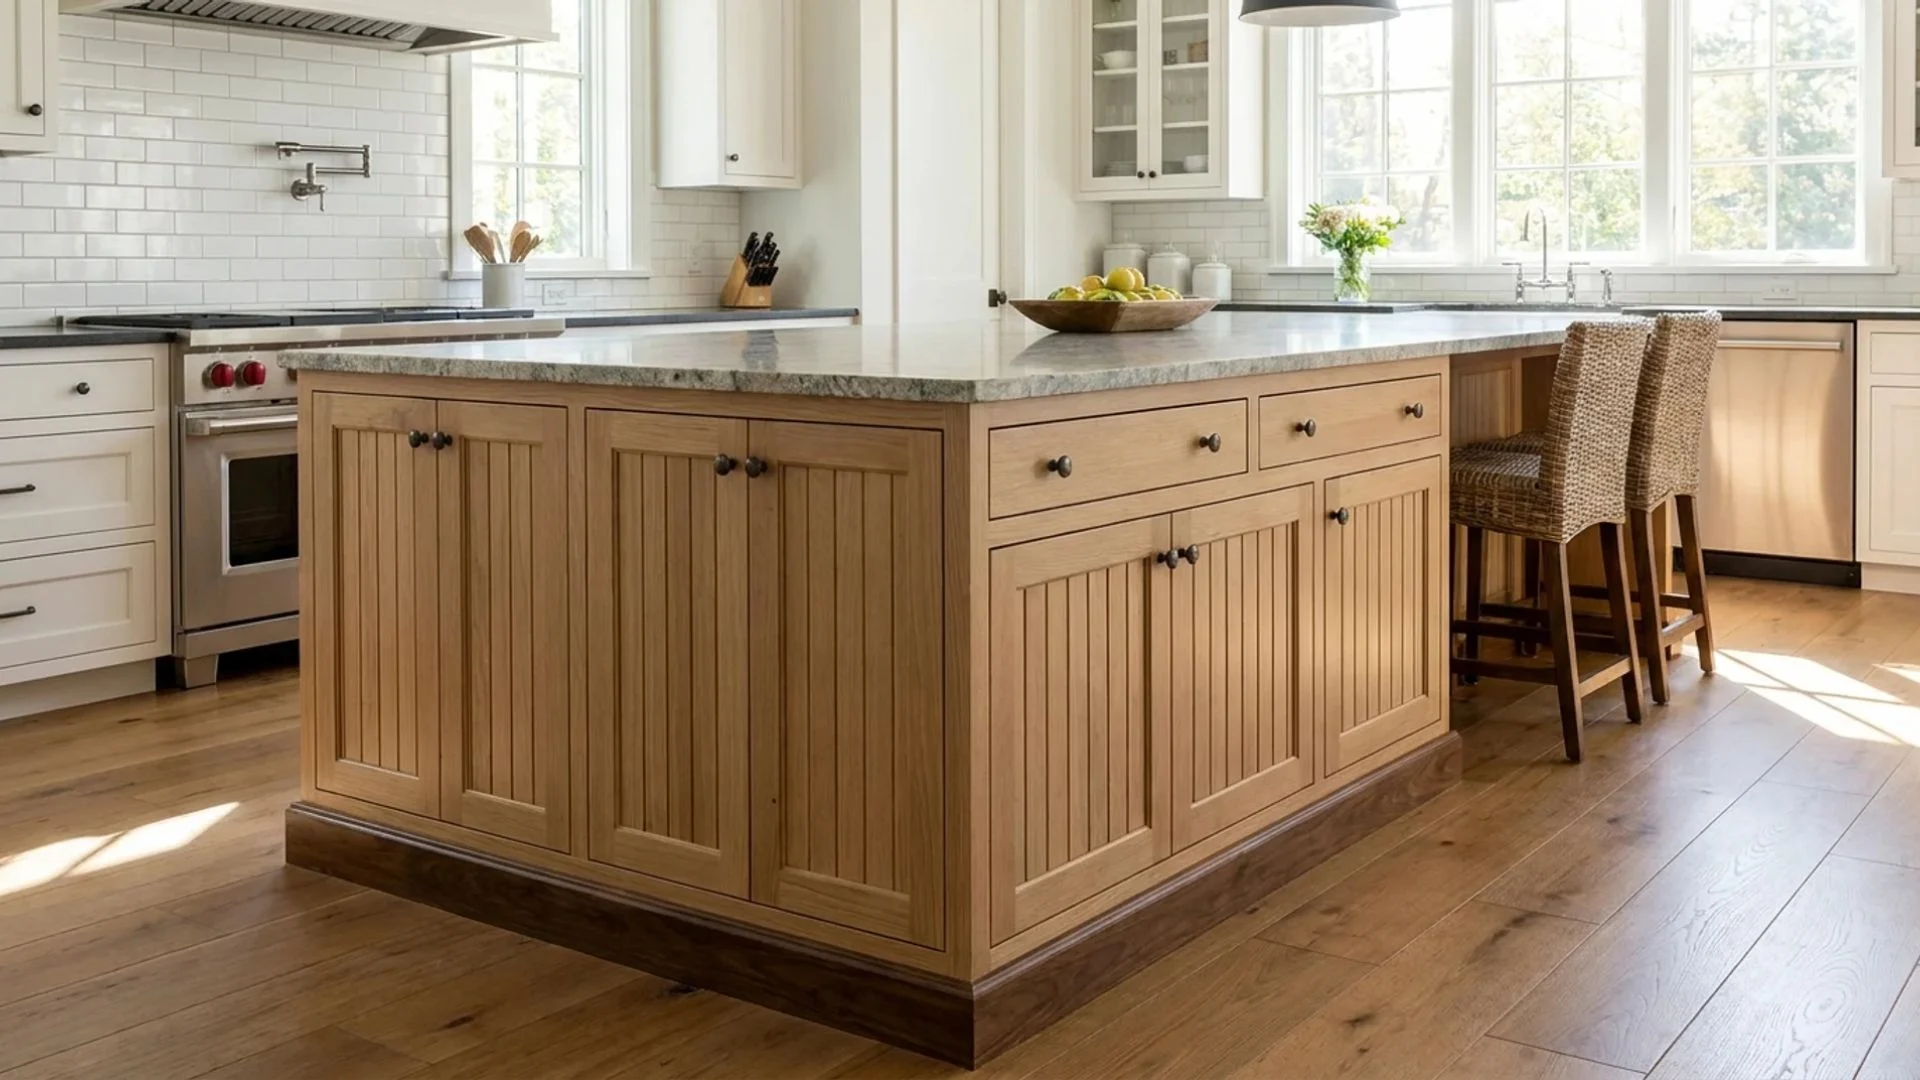
V-groove cabinet doors have narrow vertical grooves in the panels, creating a fine texture on the island surface.
The detailing adds character without making the cabinetry feel overly decorative.
This door style suits farmhouse, coastal, cottage, and transitional kitchens with a simple design.
Vertical lines draw the eye upward, making the island appear more structured and finished while keeping a clean, easy-to-maintain design.
Budget: $900 – $2,800
17. Geometric Routed Cabinet Doors
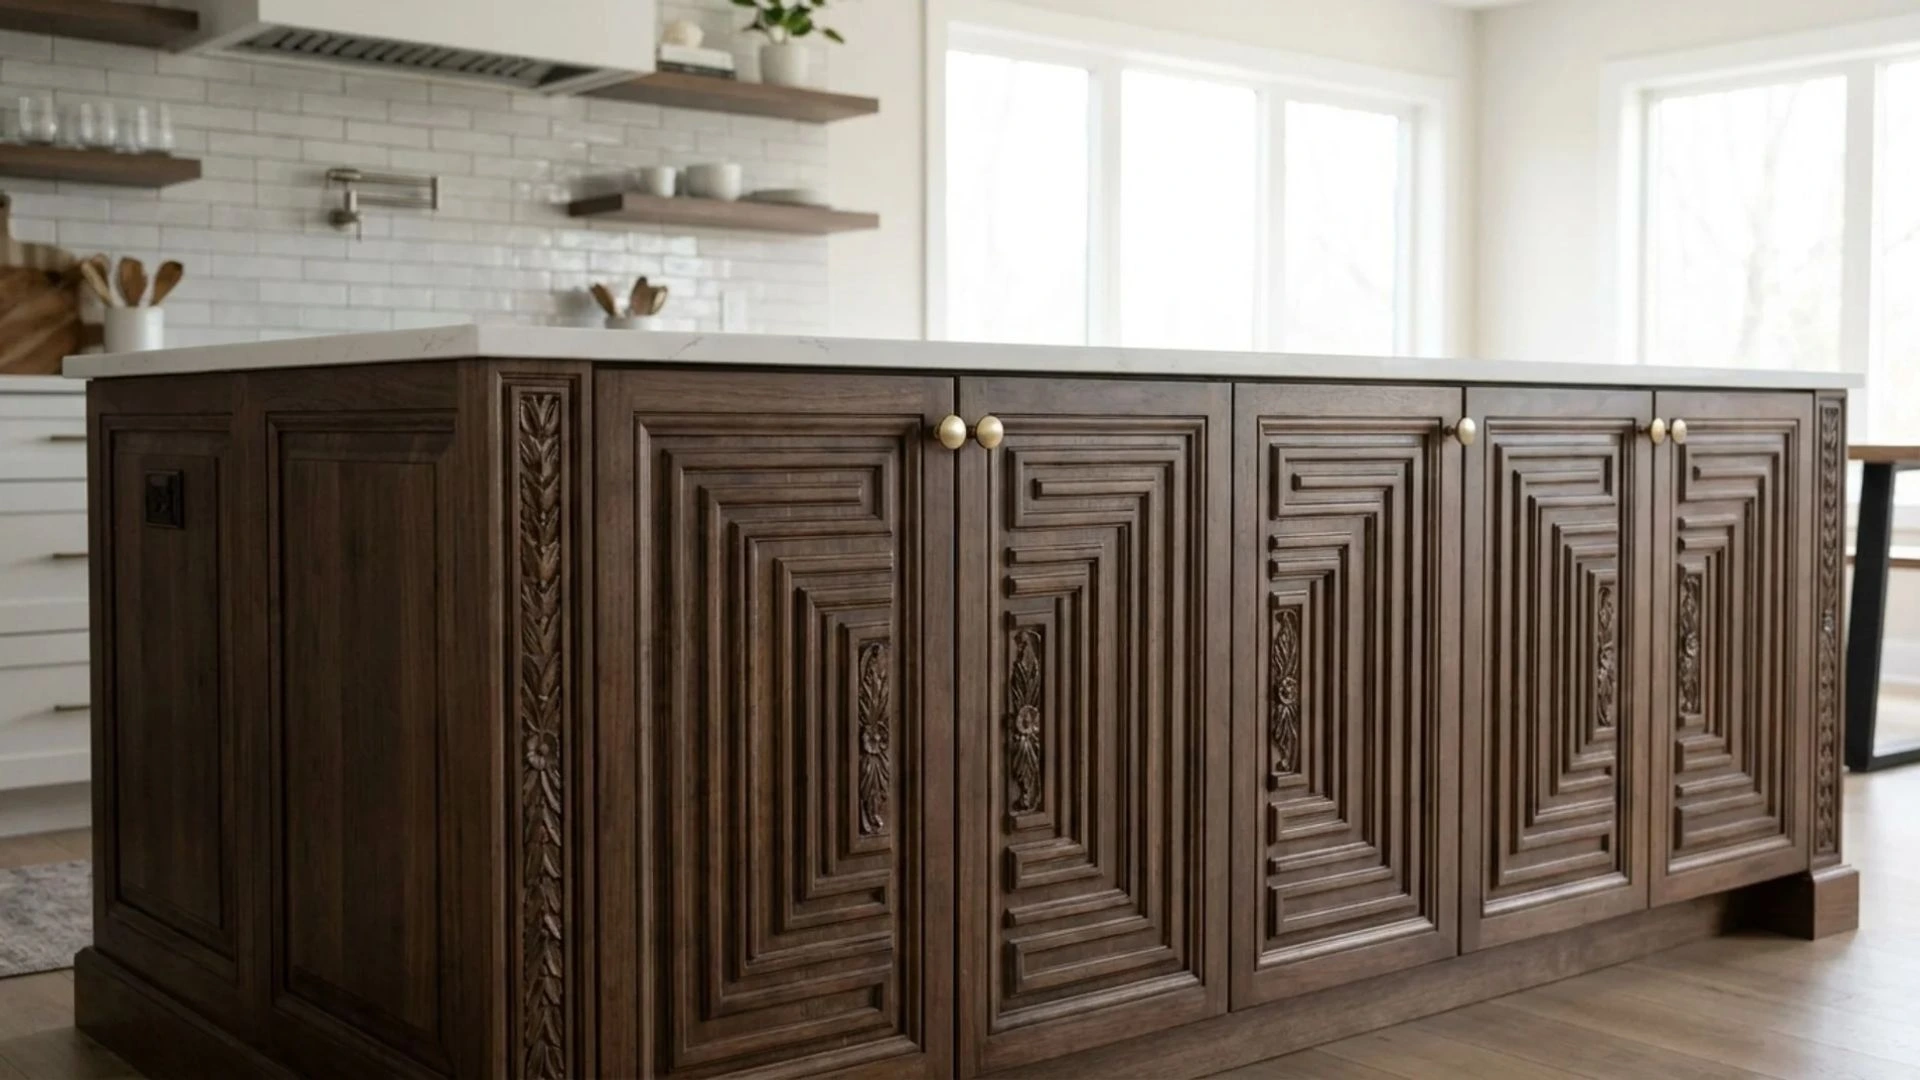
Geometric routed cabinet doors feature custom-carved patterns cut directly into flat cabinet fronts.
Shapes like rectangles, squares, or repeating lines add depth and interest without extra trim.
This approach turns the island cabinetry into a design feature while maintaining a clean overall appearance.
The routed detailing can be subtle or bold, depending on the selected pattern, making it a suitable choice for homeowners who want a more distinctive kitchen island.
Budget: $1,500 – $4,500
18. Toe-Kick Drawer for Flat Items
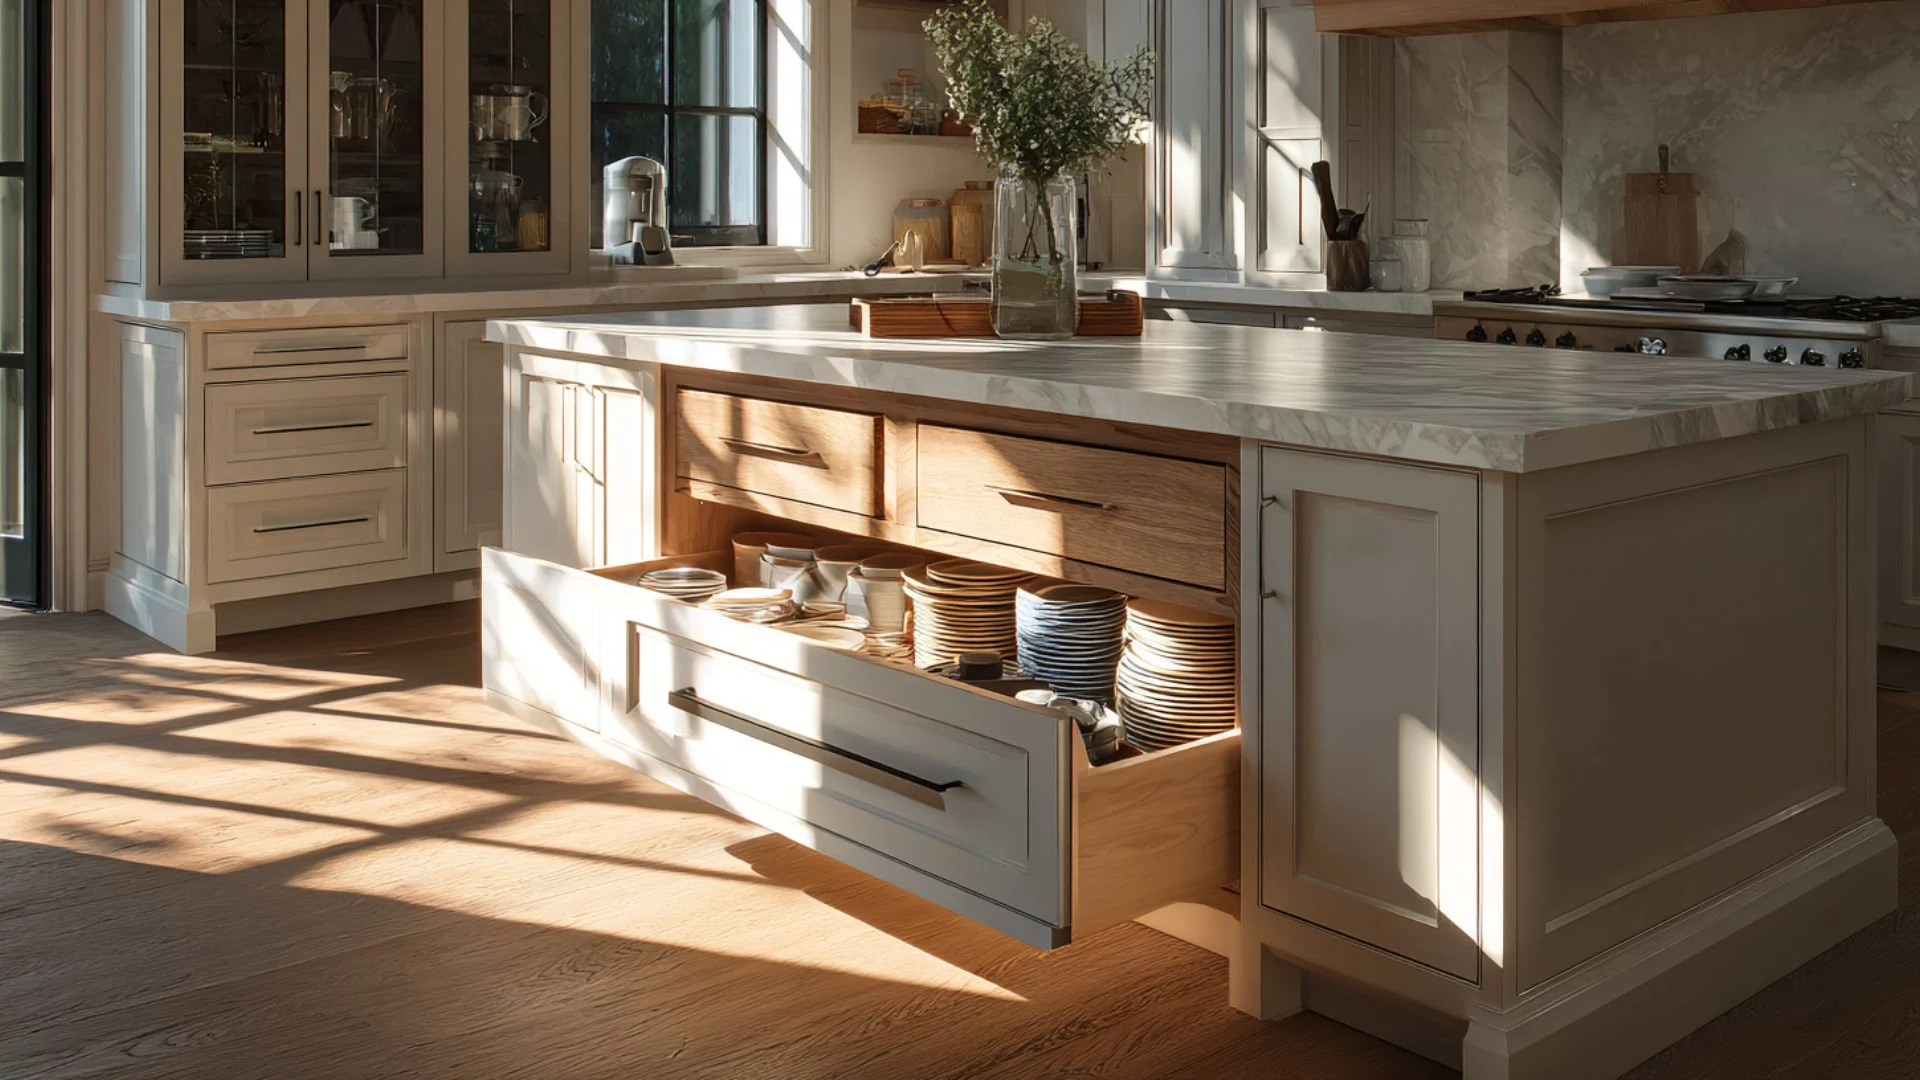
Shallow drawers replace the toe-kick in the island base, turning wasted space into accessible storage.
The toe-kick is removed, drawer openings are framed, and hinged or push-open drawers are installed. Baking sheets, cutting boards, and serving platters slide in flat and stay organized.
The fronts sit completely flush when closed, making the addition invisible and keeping the base looking clean.
Budget: $200 to $600
19. Built-In Wine and Bottle Storage
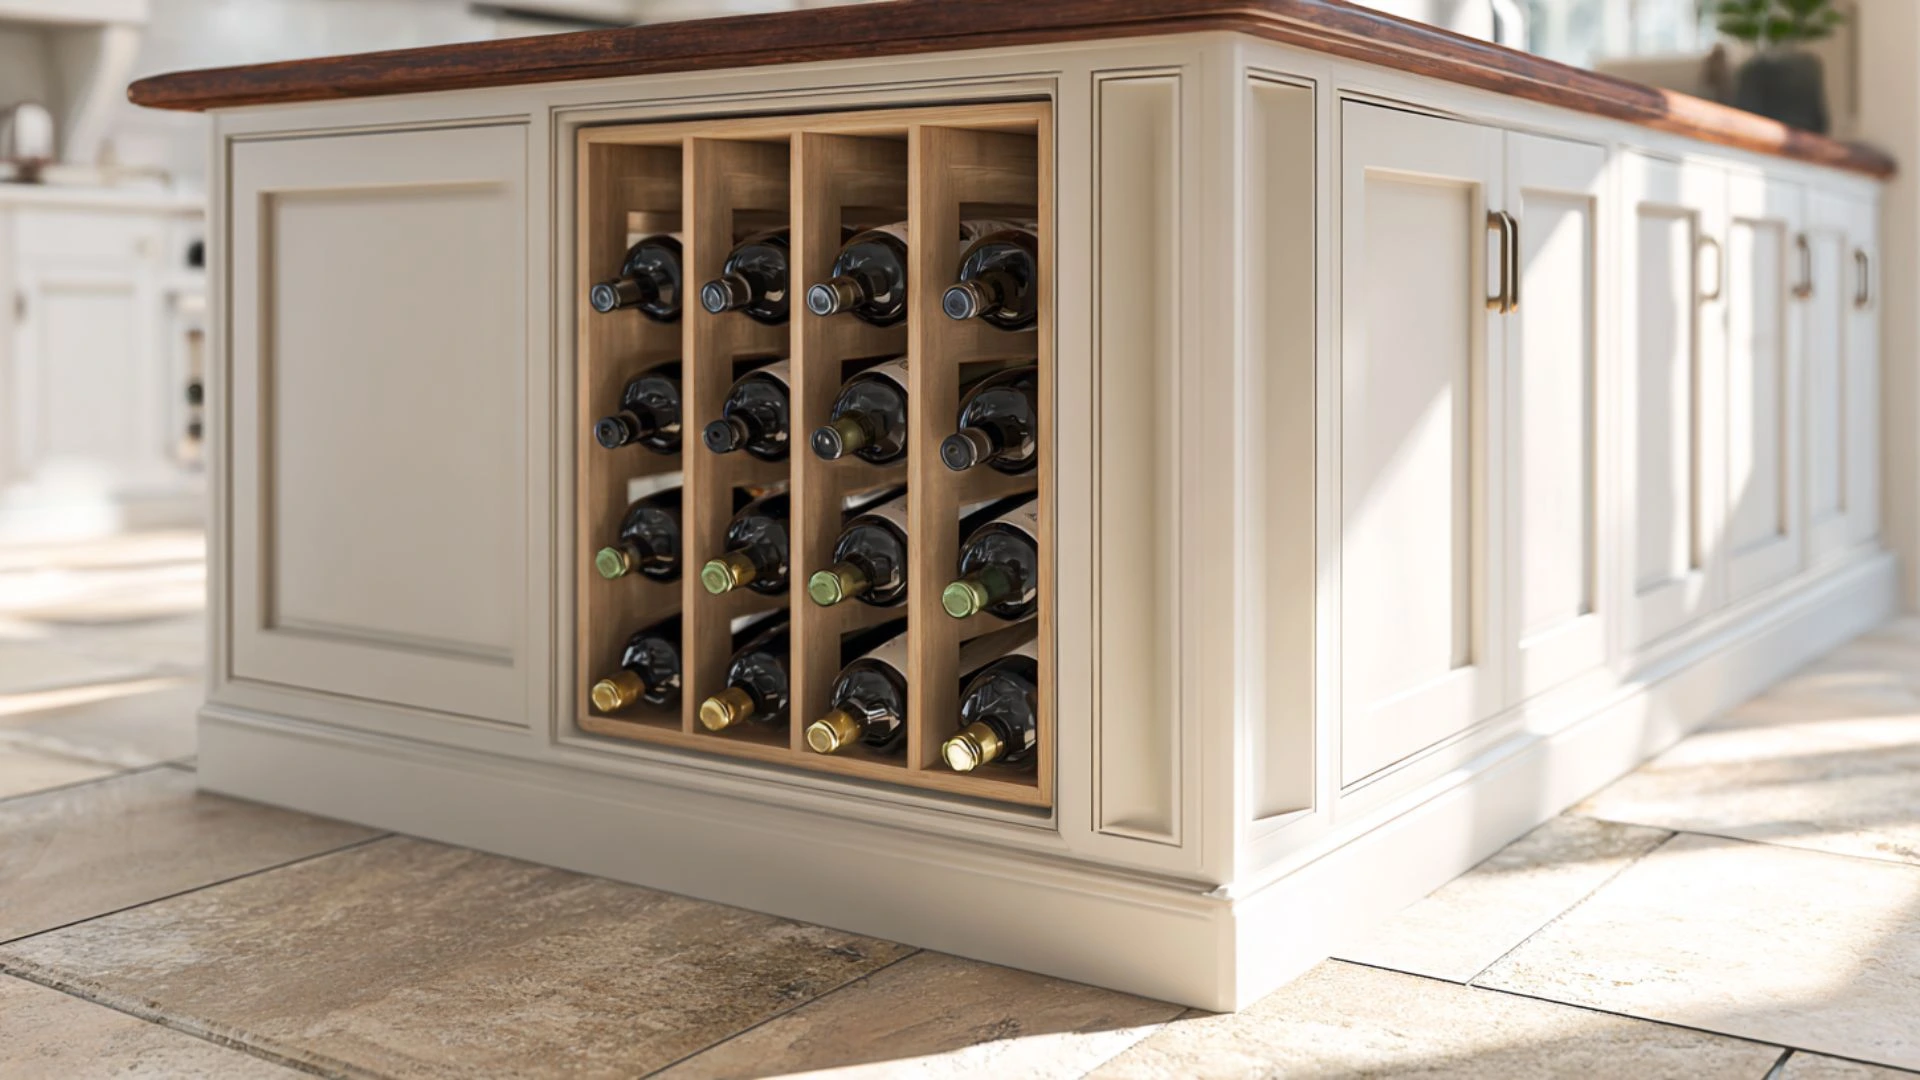
A wine rack section at one end of the island stores bottles horizontally at the right angle. The end cabinet is replaced with a custom rack frame featuring angled bottle slots, finished with an open face or a glass door.
Bottles are organized within reach, and the rack sits flush with the island, adding a refined detail to the end panel.
Budget: $500 – $1,200
20. Lazy Susan in Corner Island Cabinet
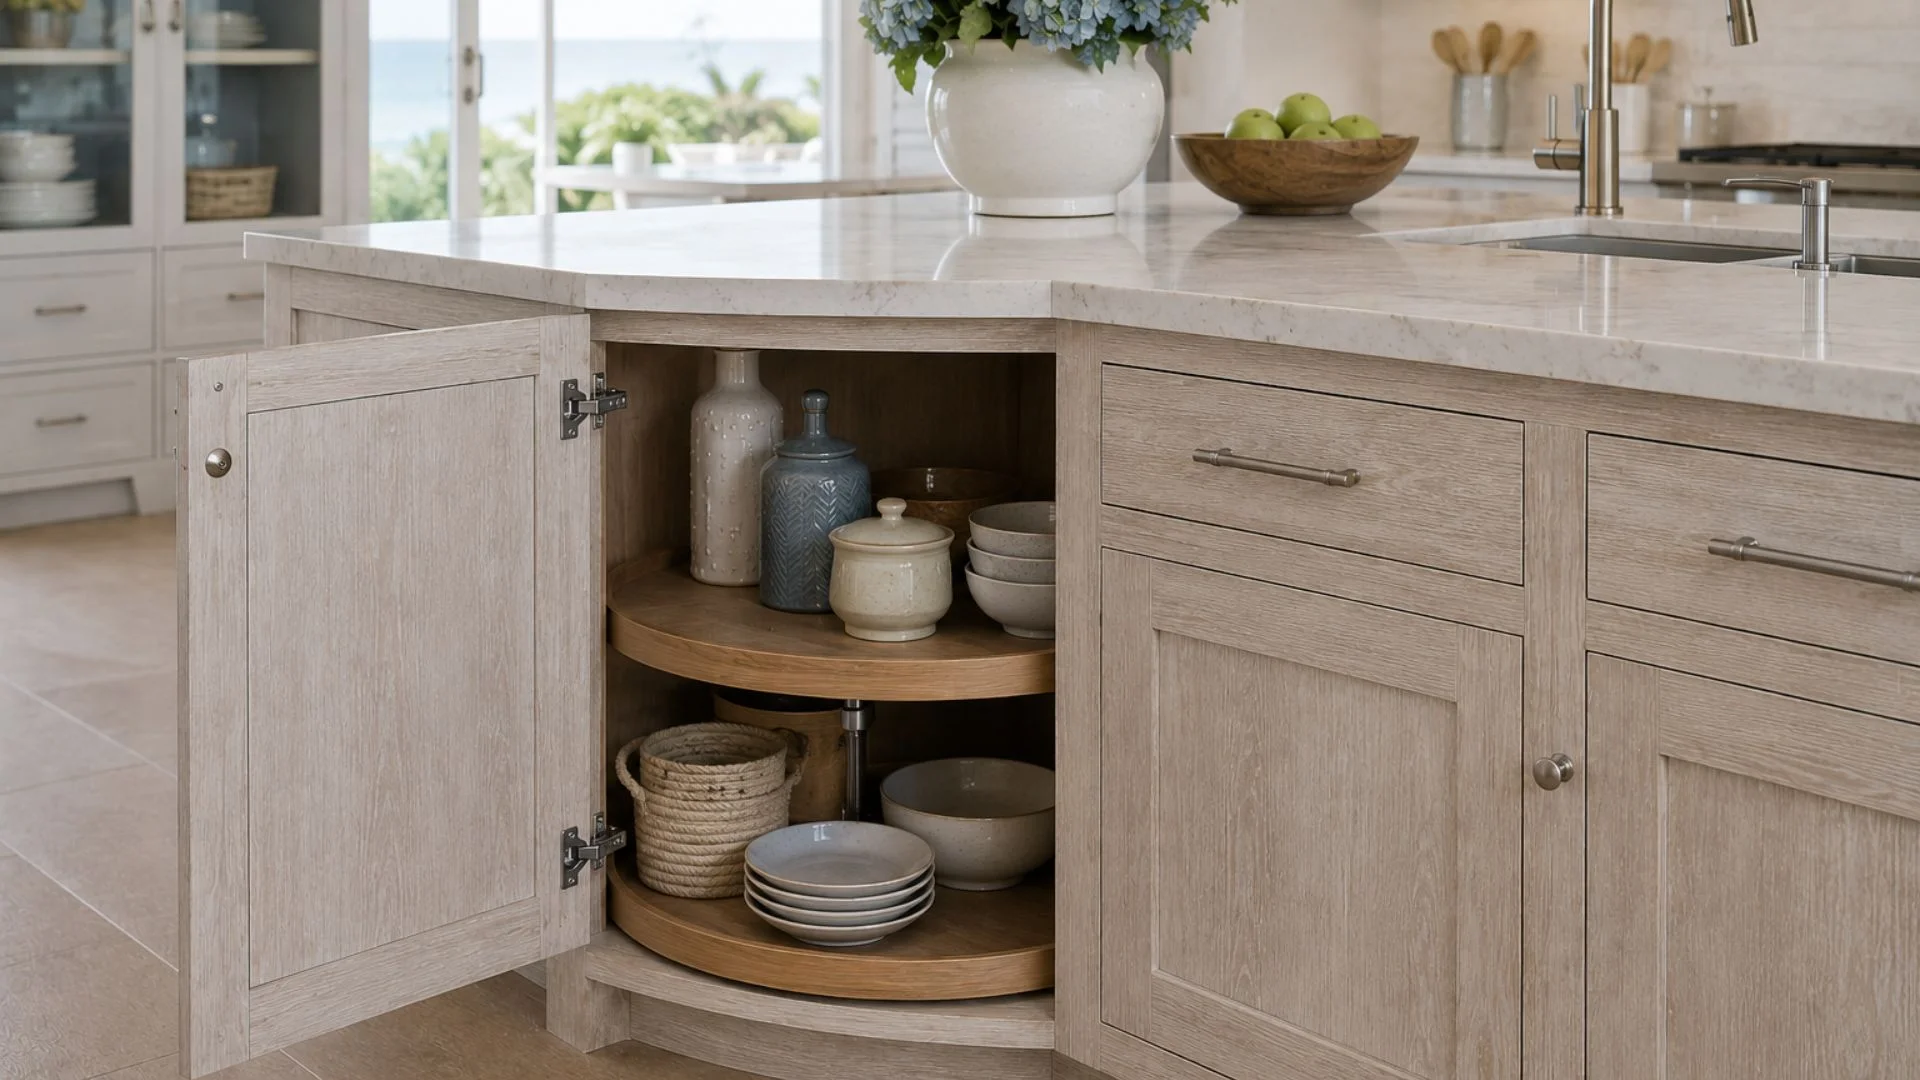
A Lazy Susan in a corner cabinet eliminates dead space on deep shelves.
A full-circle or kidney-shaped rotating unit is sized to the cabinet interior and installed on a central pivot.
Items at the back rotate forward in one turn without reaching or repositioning. The exterior changes nothing, but the corner changes from the least accessible spot on the island into one of the most practical.
Budget: $250 – $600
21. Built-In Foil and Wrap Dispenser
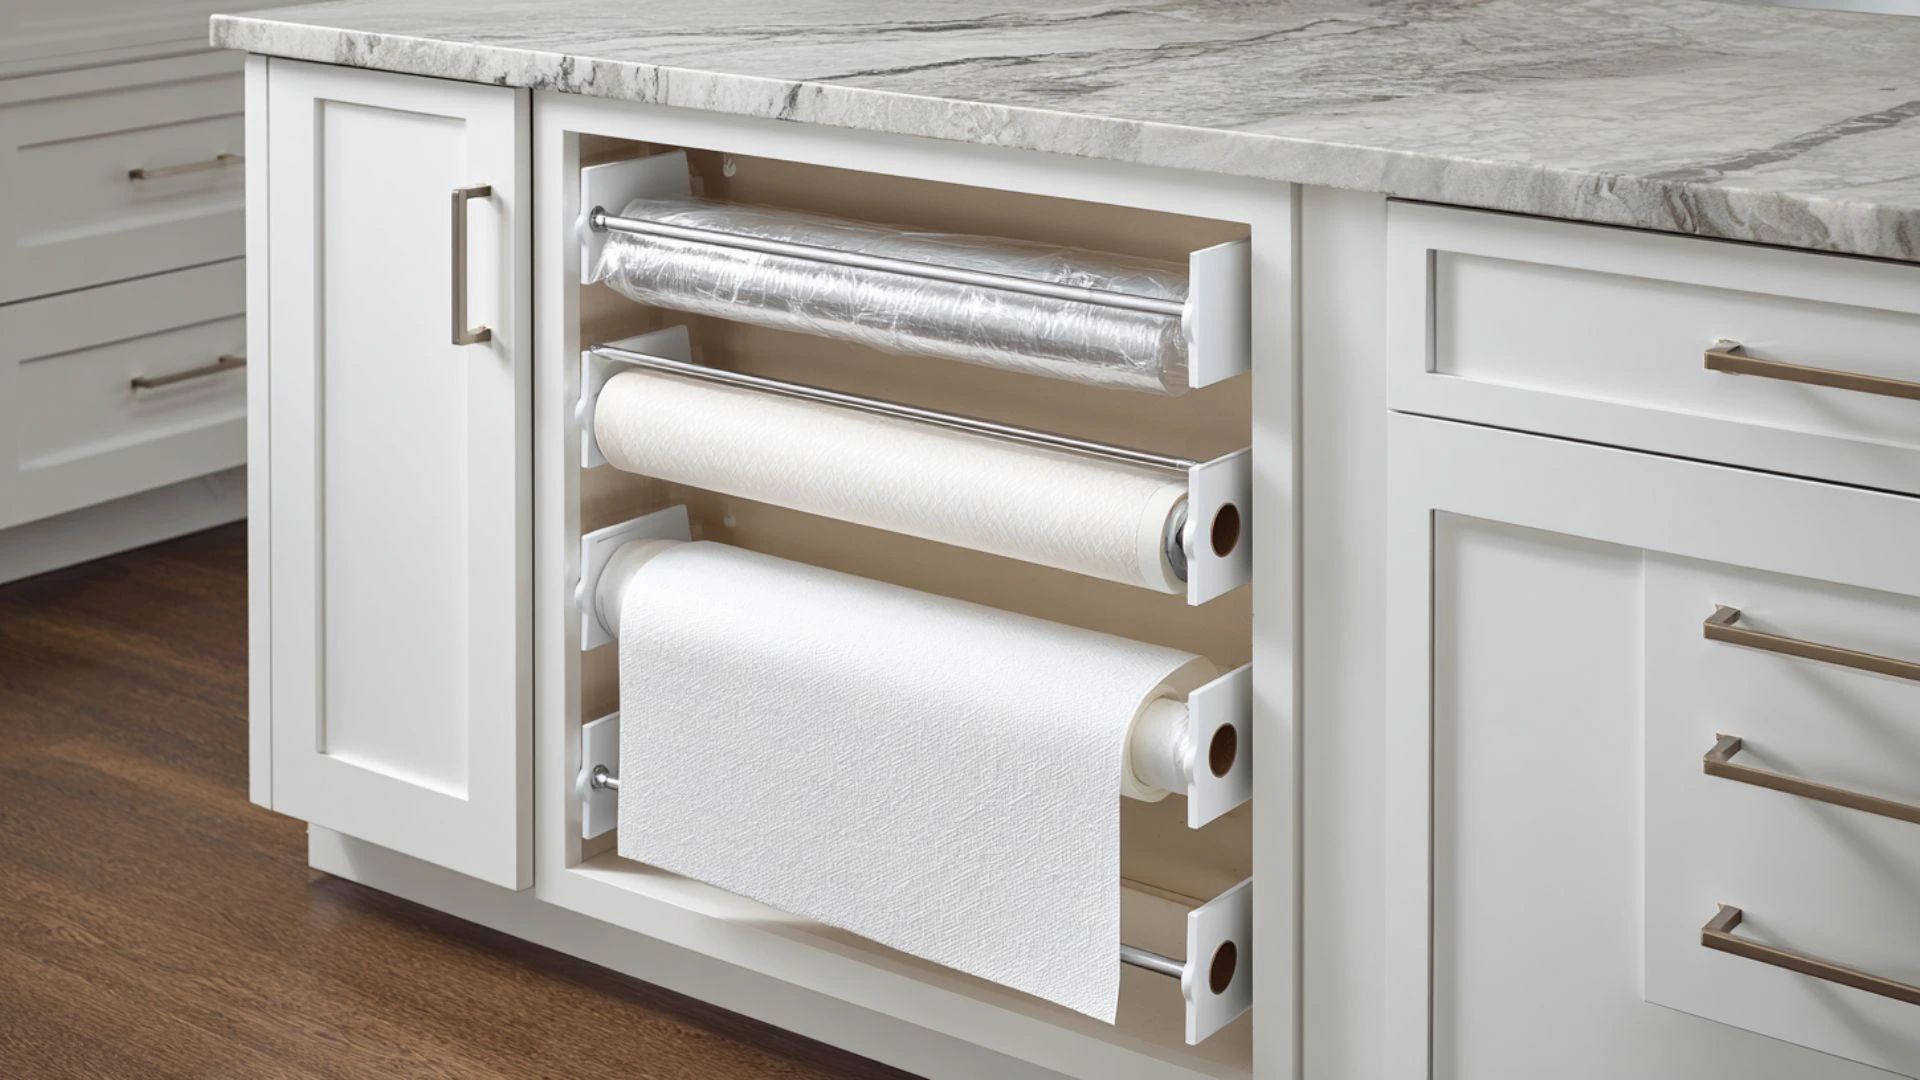
A narrow pull-out unit in the island stores parchment, foil, and plastic wrap rolls vertically.
The unit is framed into an unused cabinet section with a cutter bar mounted on the inside panel door.
Each roll dispenses cleanly without a separate holder on the counter. Bulky roll storage is removed from drawers, and the island base gets a neat, purpose-built feature without disrupting the exterior.
Budget: $200 – $500
22. Built-In Island Dishwasher
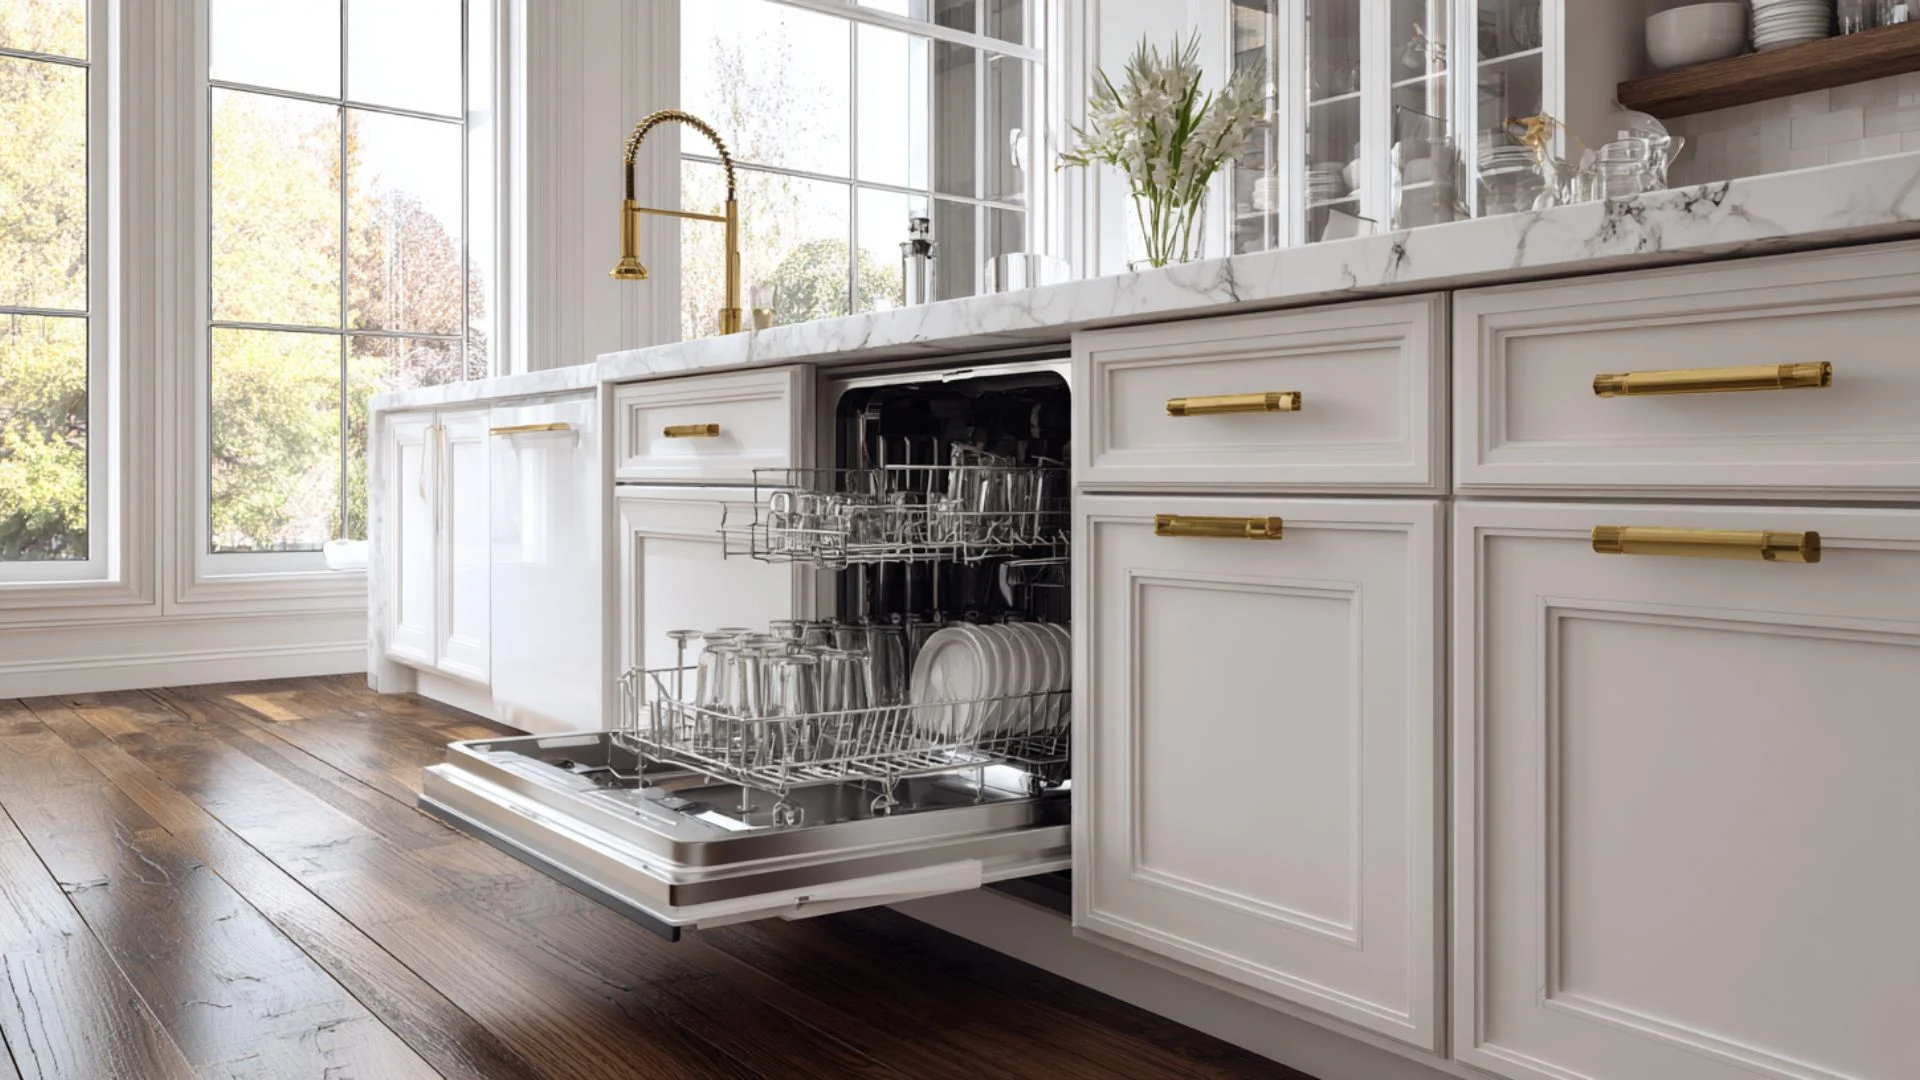
A dishwasher is built into the island base, replacing a cabinet and fitting flush with the surrounding fronts.
Dishes, glasses, and tools are washed near the prep surface, avoiding crossing to the perimeter sink.
The exterior panel precisely matches the island cabinetry and conceals the appliance when closed.
Budget: $1,500 – $4,500
23. Integrated Induction Charging Surface
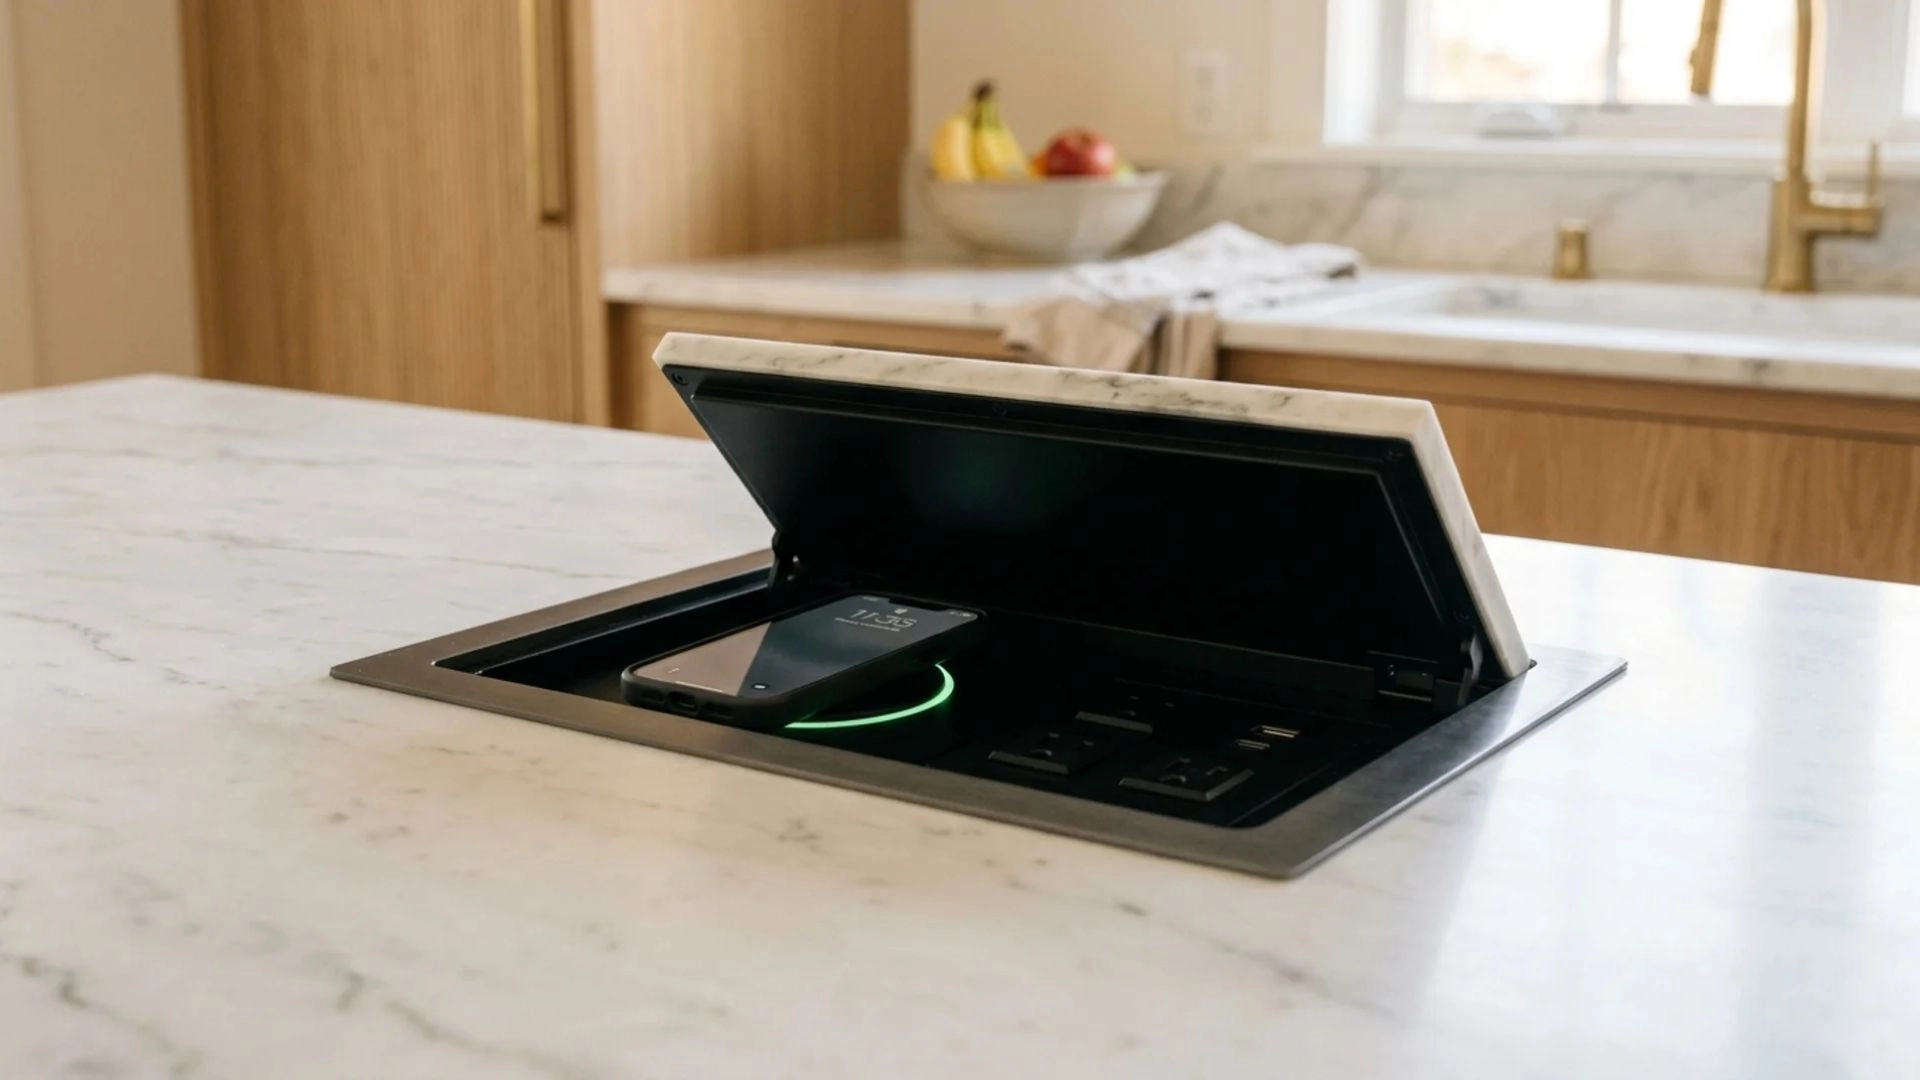
Part of the island countertop is replaced with a flush, Qi-compatible wireless charging surface that is invisible from above and activates only when a compatible device is placed on it.
No cables, ports, or hardware disrupt the countertop.
Phones and tablets charge at the island without a charging drawer, cable management, or visible power access.
Budget: $1,200 – $3,500
24. Tambour-Covered Appliance Bay
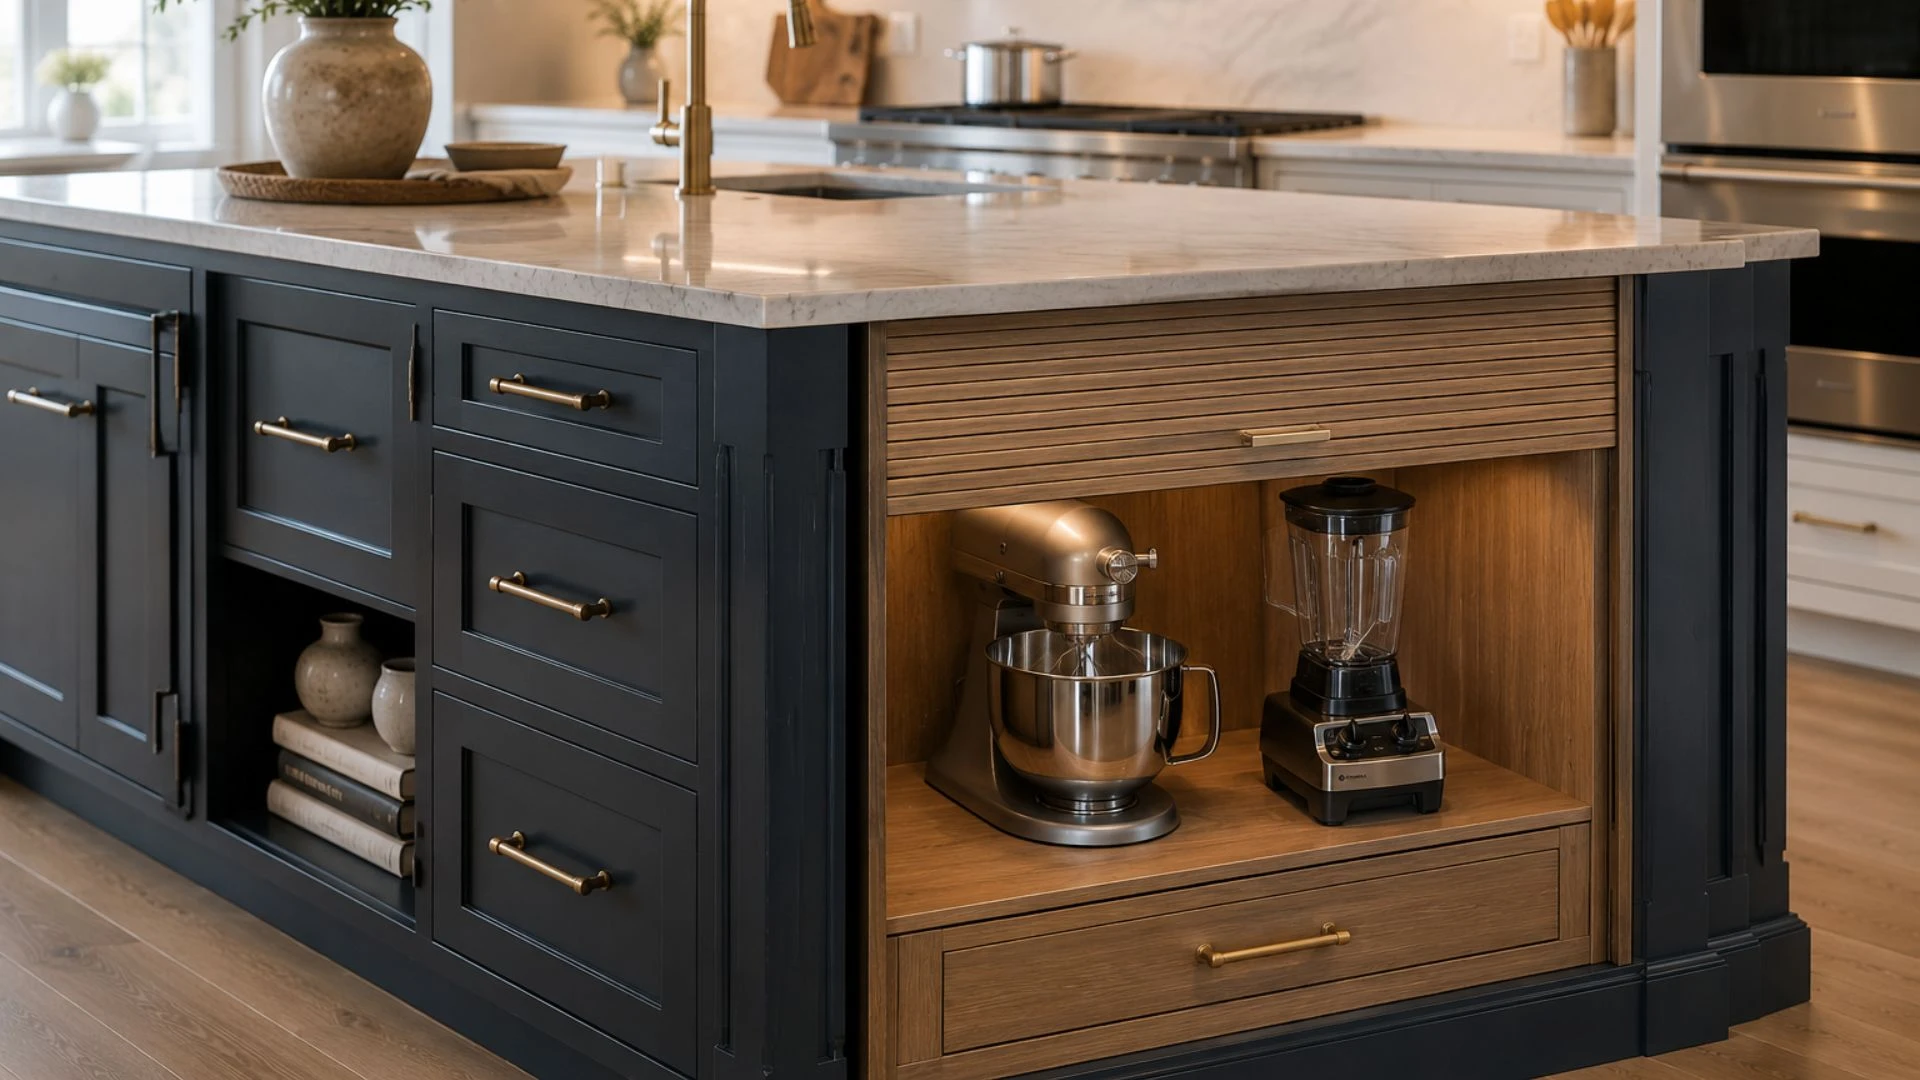
A full-width tambour roll-up door spanning one entire side of the island conceals a deep appliance bay sized to house a microwave, coffee machine, and toaster in a single dedicated zone.
The panel rolls up on a track and hides in the cabinet top when the cabinet is open, making the bay accessible.
When closed, the island shows a flat, uninterrupted face with no handles, gaps, or hardware breaks.
Budget: $2,000 – $5,500
25. Island-Mounted Pot Filler
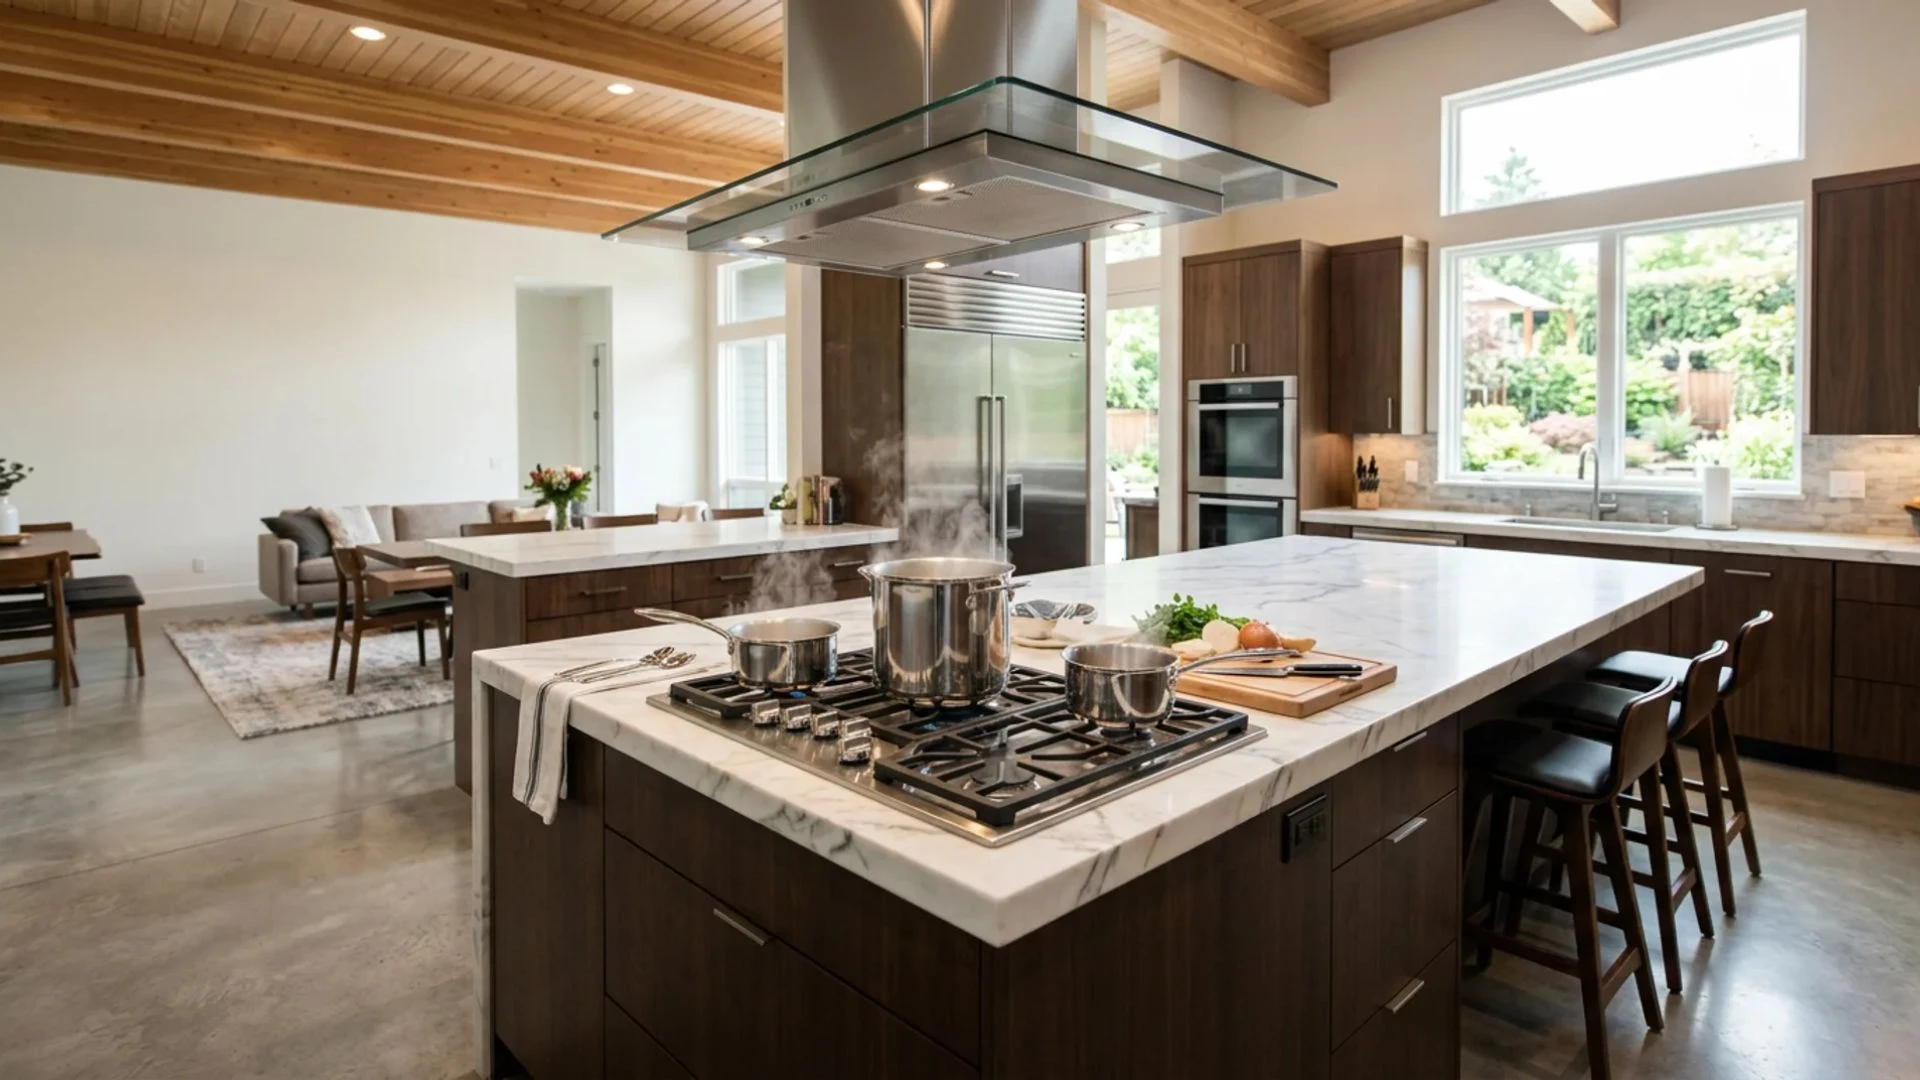
A cold-water tap on a double-jointed arm is installed above the cooktop and joined to a supply pipe via the island.
The arm extends over the cooking surface to fill large pots directly on the burner and folds flat when not in use. Carrying heavy water-filled pots from the main sink to the cooktop is eliminated entirely.
The fitting adds a professional kitchen detail that is visually prominent above the cooktop surface.
Budget: $800 – $2,500
26. Integrated Cutting Board with Juice Groove
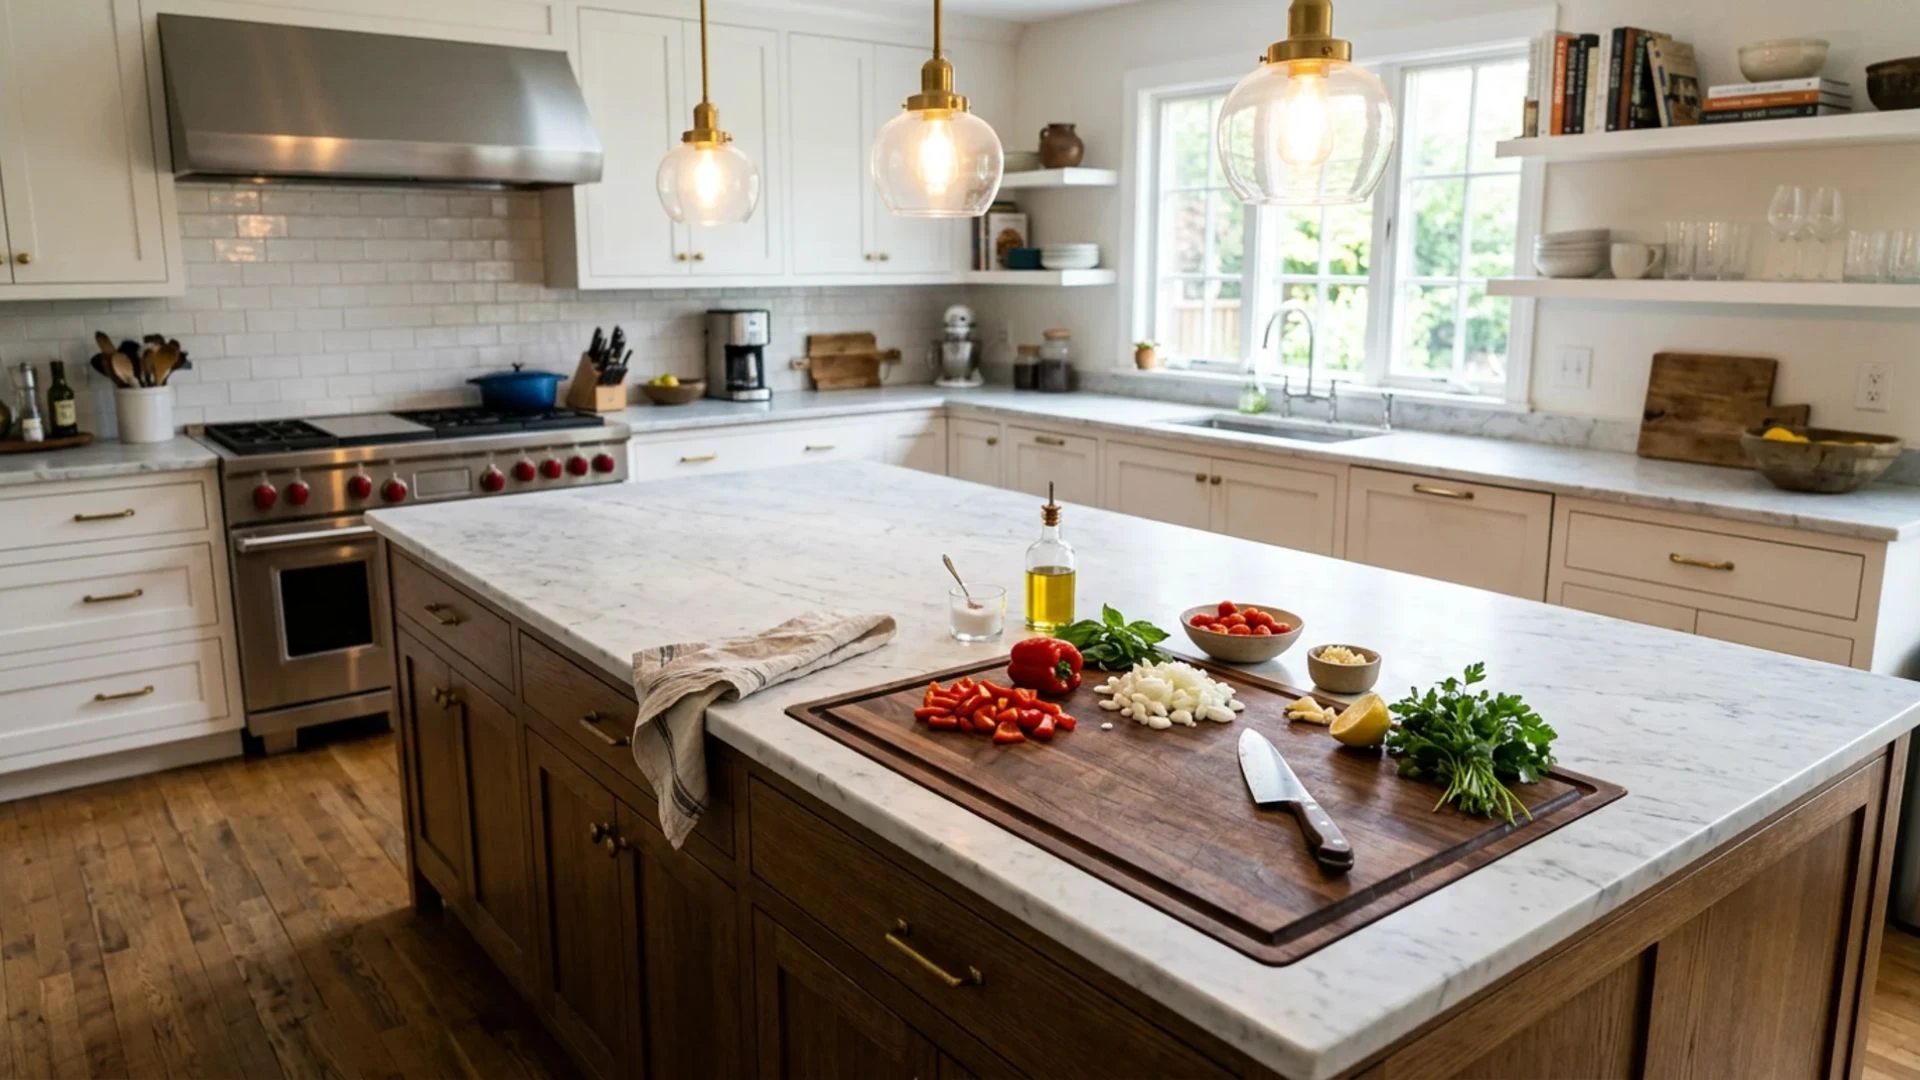
A custom cutting board is built flush into a recessed section of the island countertop, with a juice groove routed around its perimeter and a small drain hole that connects to the sink plumbing below.
The board sits level with the surrounding countertop and lifts out for cleaning or replacement.
Budget: $800 – $2,500
27. Secondary Prep Sink Installation
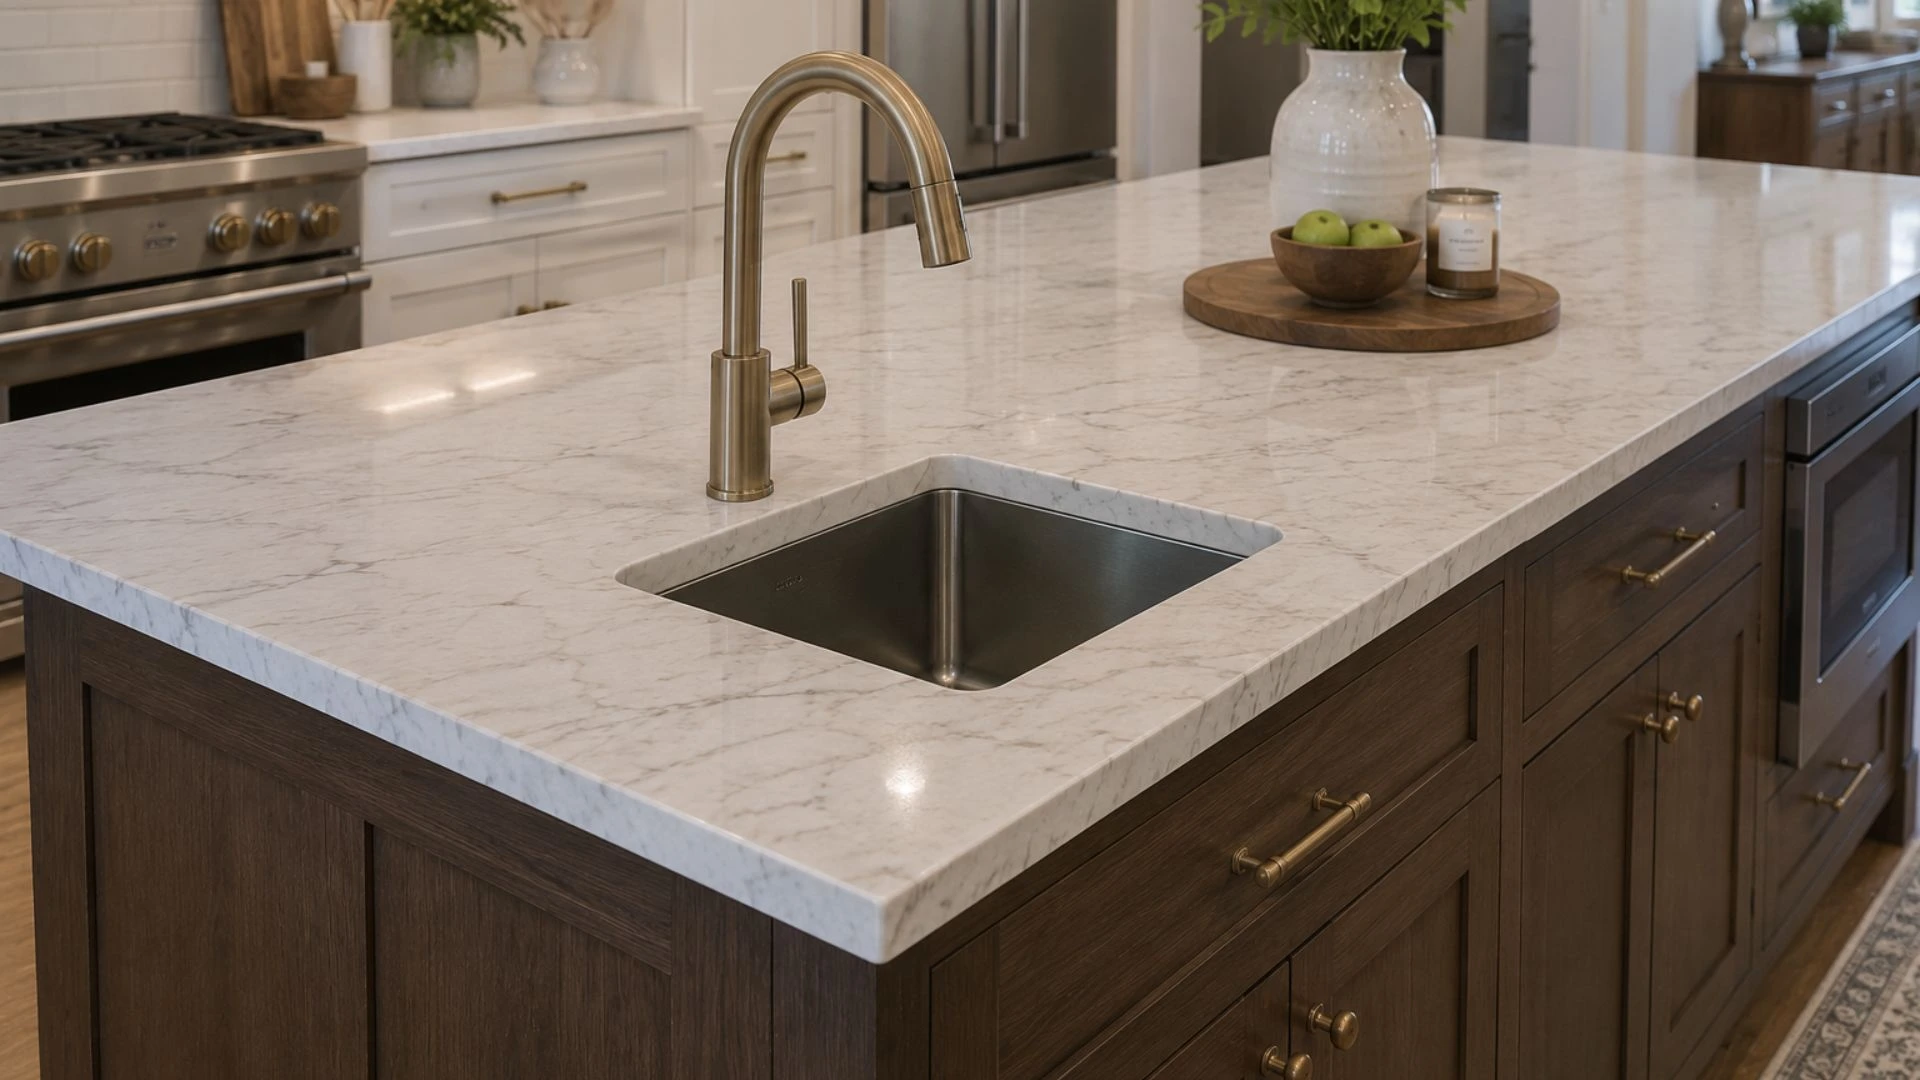
A smaller basin is cut into the island countertop with an undermount sink installed separately from the main sink.
New supply lines and drains connect to existing plumbing through the island cabinet, with a faucet above.
Two people rinse, prep, and clean simultaneously at separate water sources. The prep sink is particularly effective when the primary sink is occupied with dishwashing while cooking is still in progress.
Budget: $1,500 – $4,500
28. Built-In Glass Rinser Station
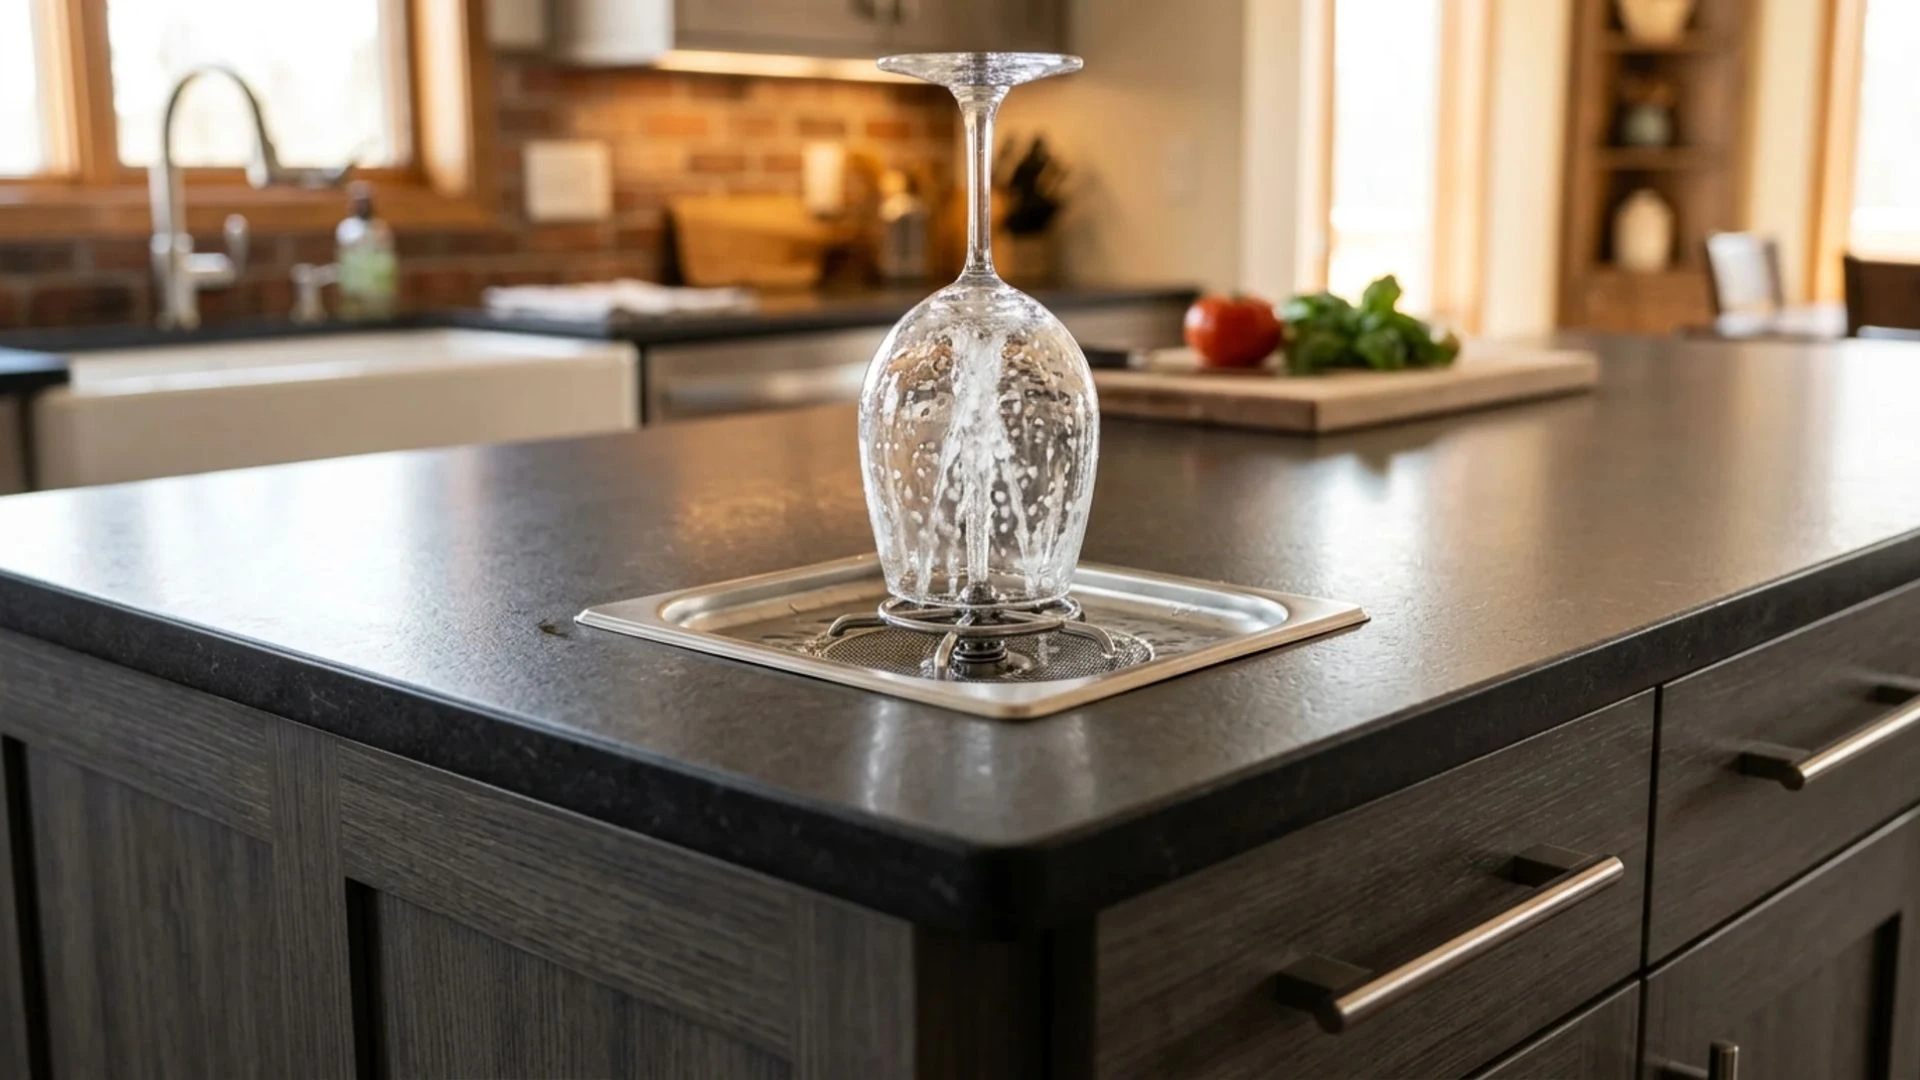
A glass rinser is built into the island countertop, embedded in a small stainless steel basin flush with the surface.
A central jet assembly at the base of the basin forces pressurized water upward into a glass pressed down onto it, rinsing the interior in seconds. Water flows back into the basin and drains through the island’s connected drain line.
The basin sits flush with the countertop, with no raised edges breaking the surface.
Budget: $800 – $2,500
29. Integrated Herb Garden Trough
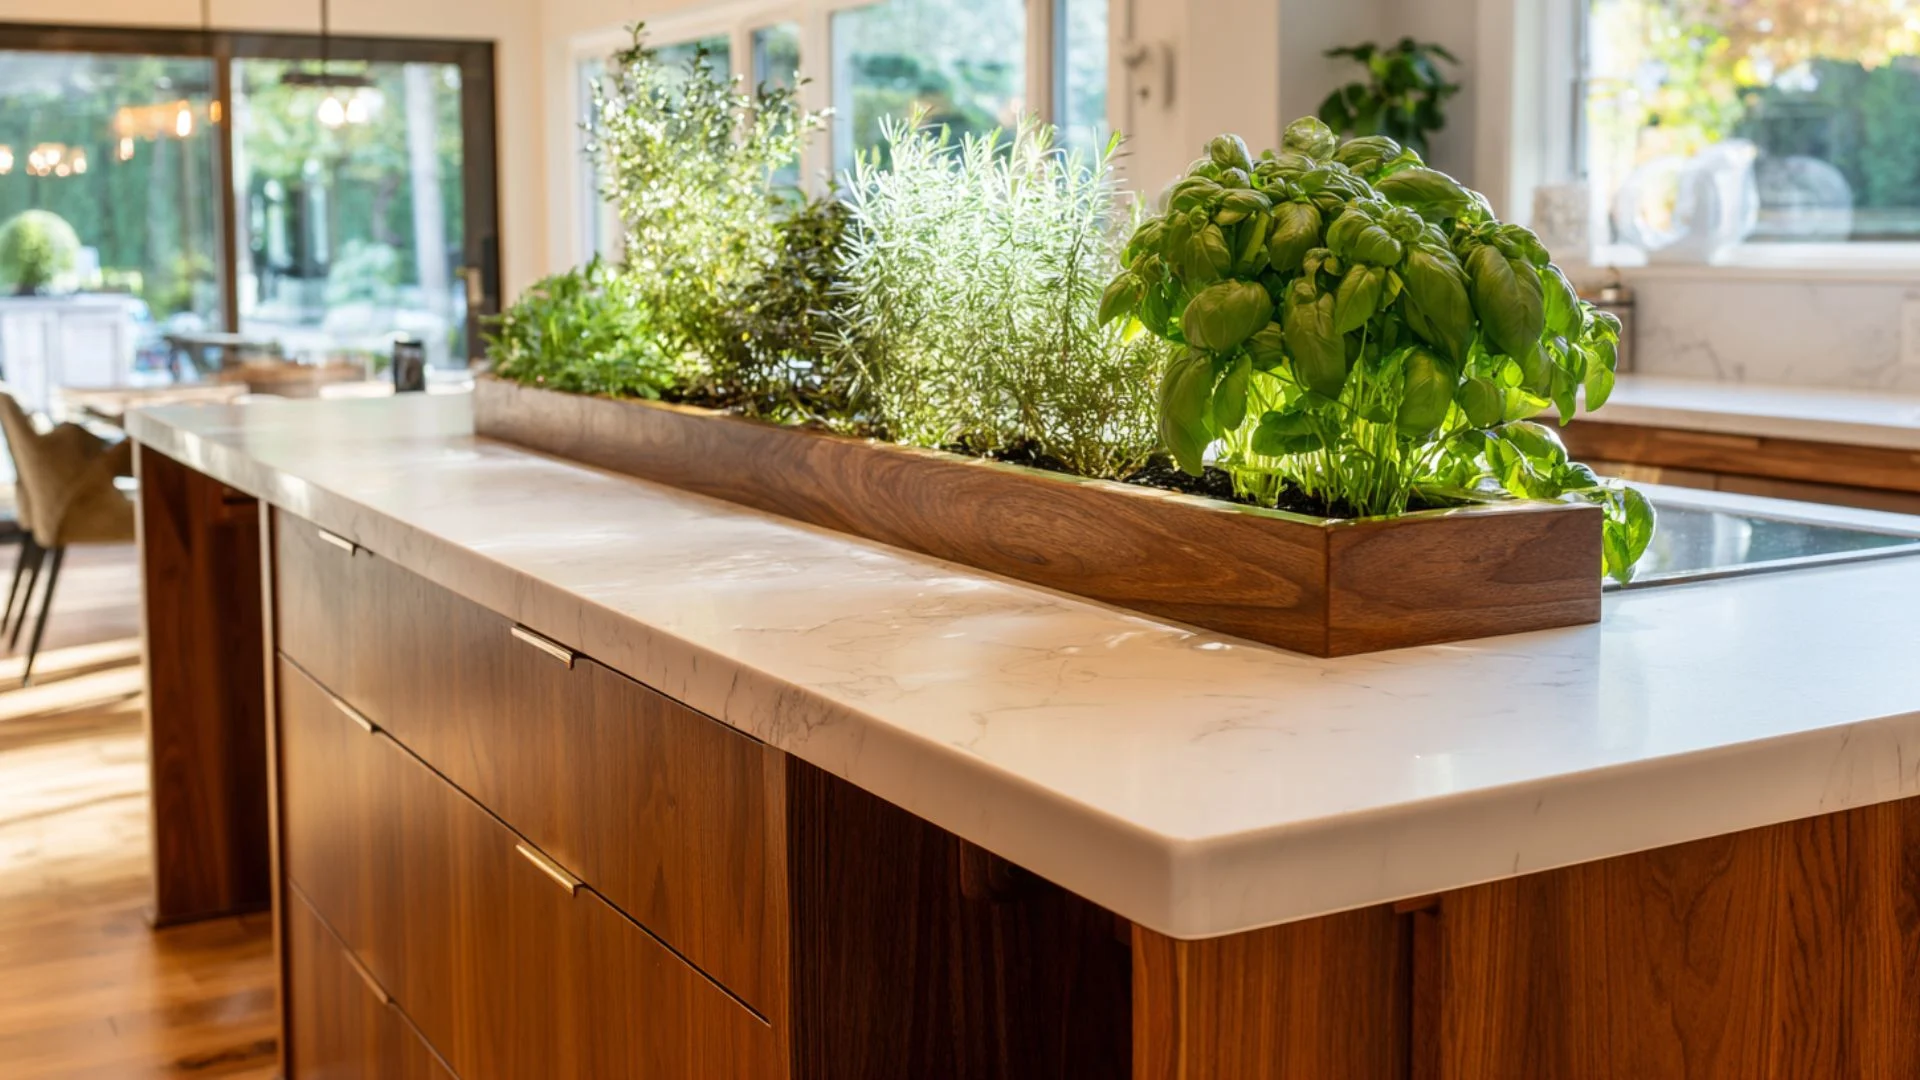
A narrow trough planter built into one end of the island countertop has a waterproof liner, drainage holes connected to a concealed drain, and grow lights fitted beneath a small upper shelf directly above it.
Fresh herbs grow inside the island, accessible during cooking without pots or planters.
The trough uses the same countertop material on the lip, making it a deliberate design feature.
Budget: $1,500 – $4,000
30. Fold-Down Island Work Shelf
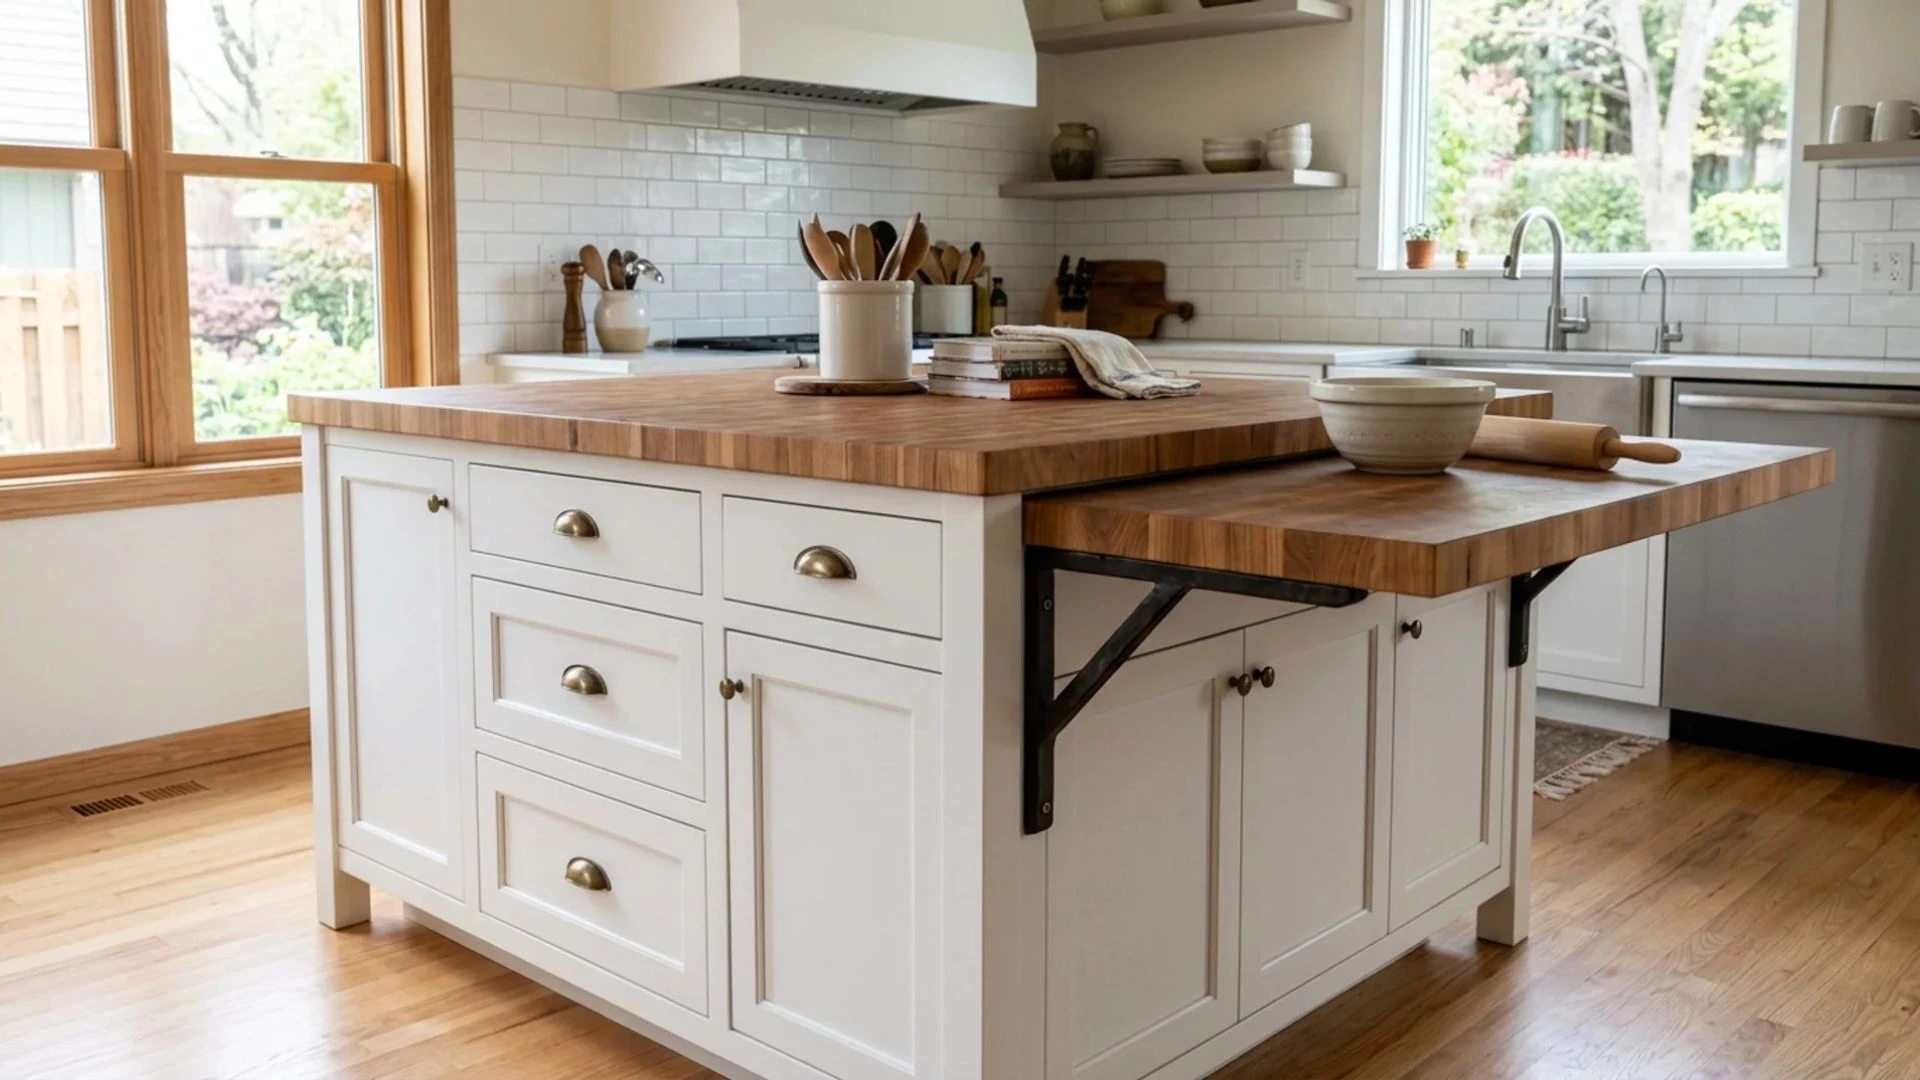
A fold-down shelf mounted on a piano hinge along one side of the island extends the usable countertop surface horizontally when lowered and folds flat against the island face when not needed.
A pull-out bracket locks the shelf level in the open position and retracts flush when folded back up.
Extra workspace was added for big cooking tasks without enlarging the island or reducing kitchen clearance.
Budget: $500 – $1,5003
31. Pull-Out Island Extension Leaf
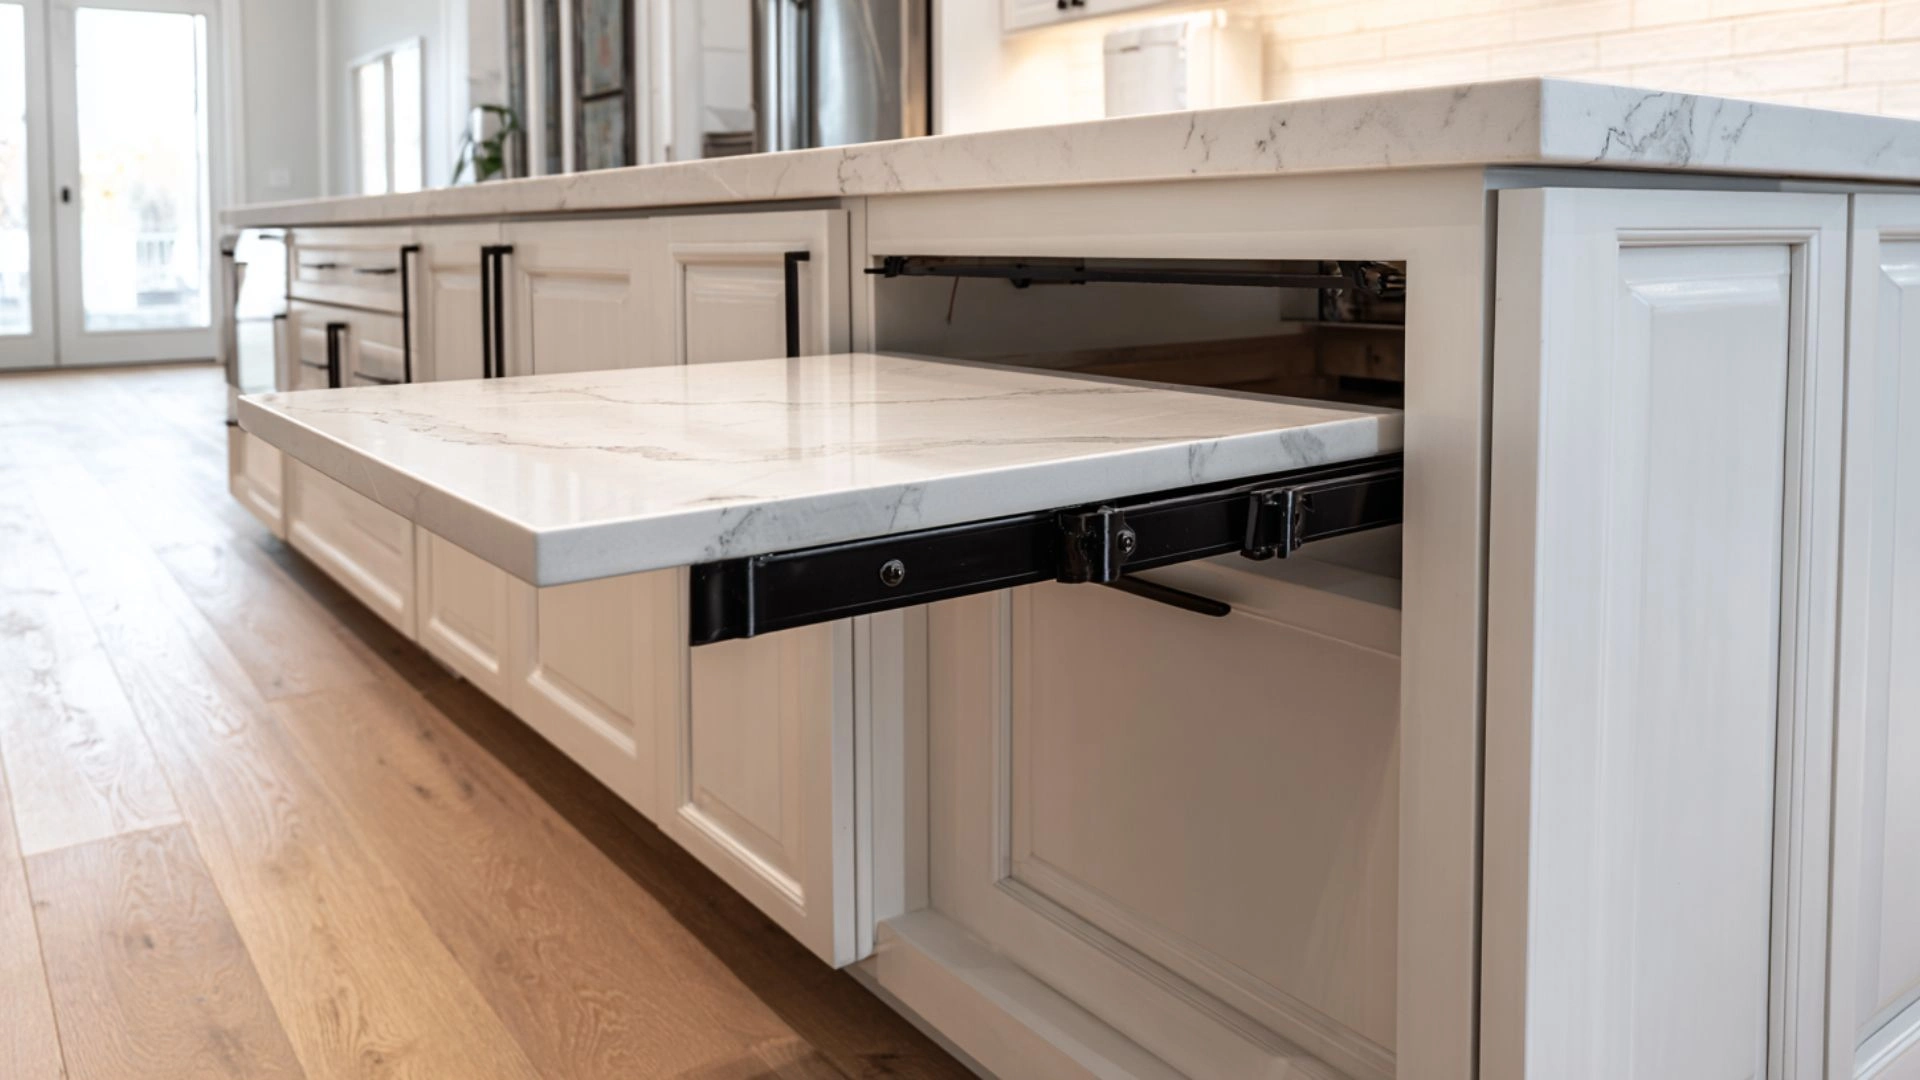
A hidden extension leaf built into one end of the island slides out on heavy-duty undermount runners and locks in position, adding up to eighteen inches of usable countertop surface when needed.
The leaf retracts flush with the island when not in use, with no visible seam or hardware indicating its presence.
It stays compact during daily use and expands when extra workspace or a temporary dining surface is needed.
Budget: $1,500 – $4,000
32. Under-Island Refrigerator Drawer
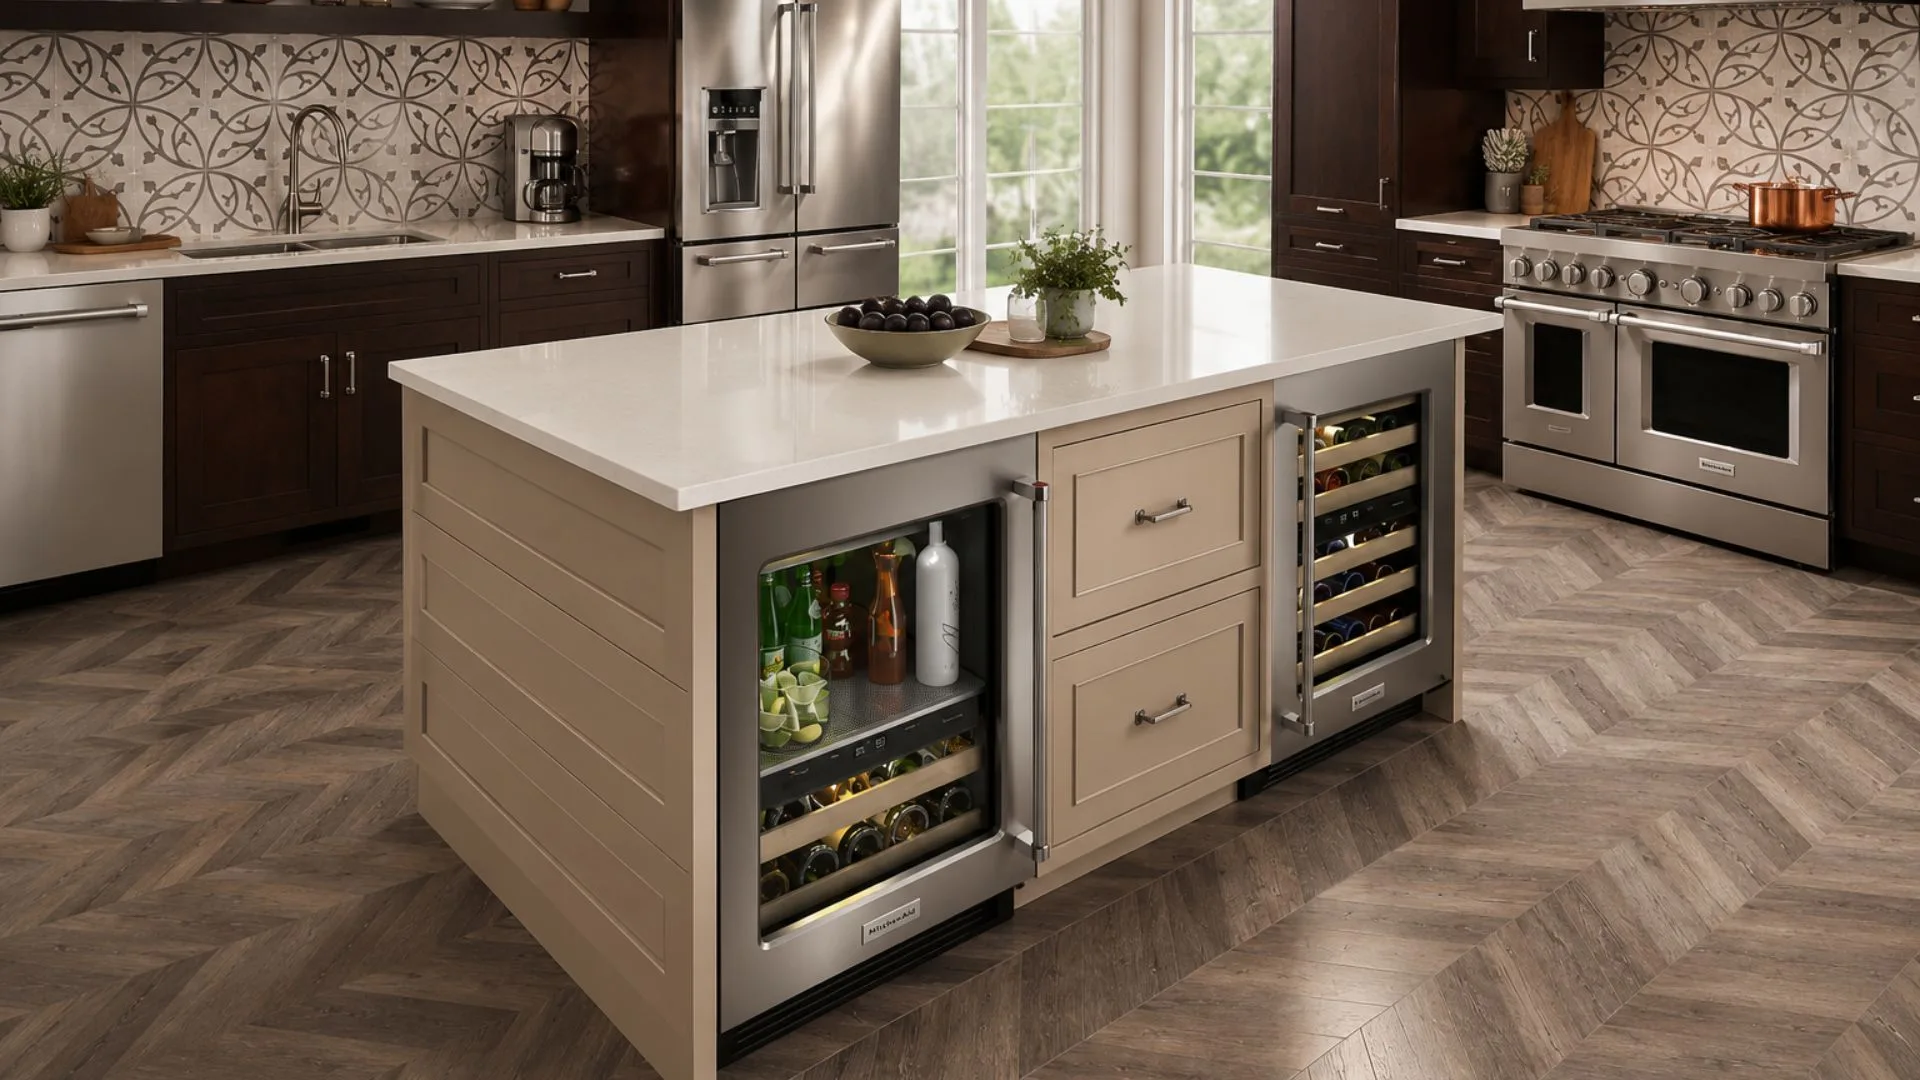
A refrigerator drawer unit replaces a standard base cabinet section within the island, fitting flush with surrounding cabinet fronts on a pull-out mechanism identical in appearance to a standard drawer.
The unit offers refrigerated storage for drinks, dairy, and frequently accessed items at the island workspace.
The exterior panel matches the island cabinetry perfectly, hiding the refrigerated unit when the drawer is closed.
Budget: $2,500 – $6,000
33. Integrated Soap and Paper Towel Station
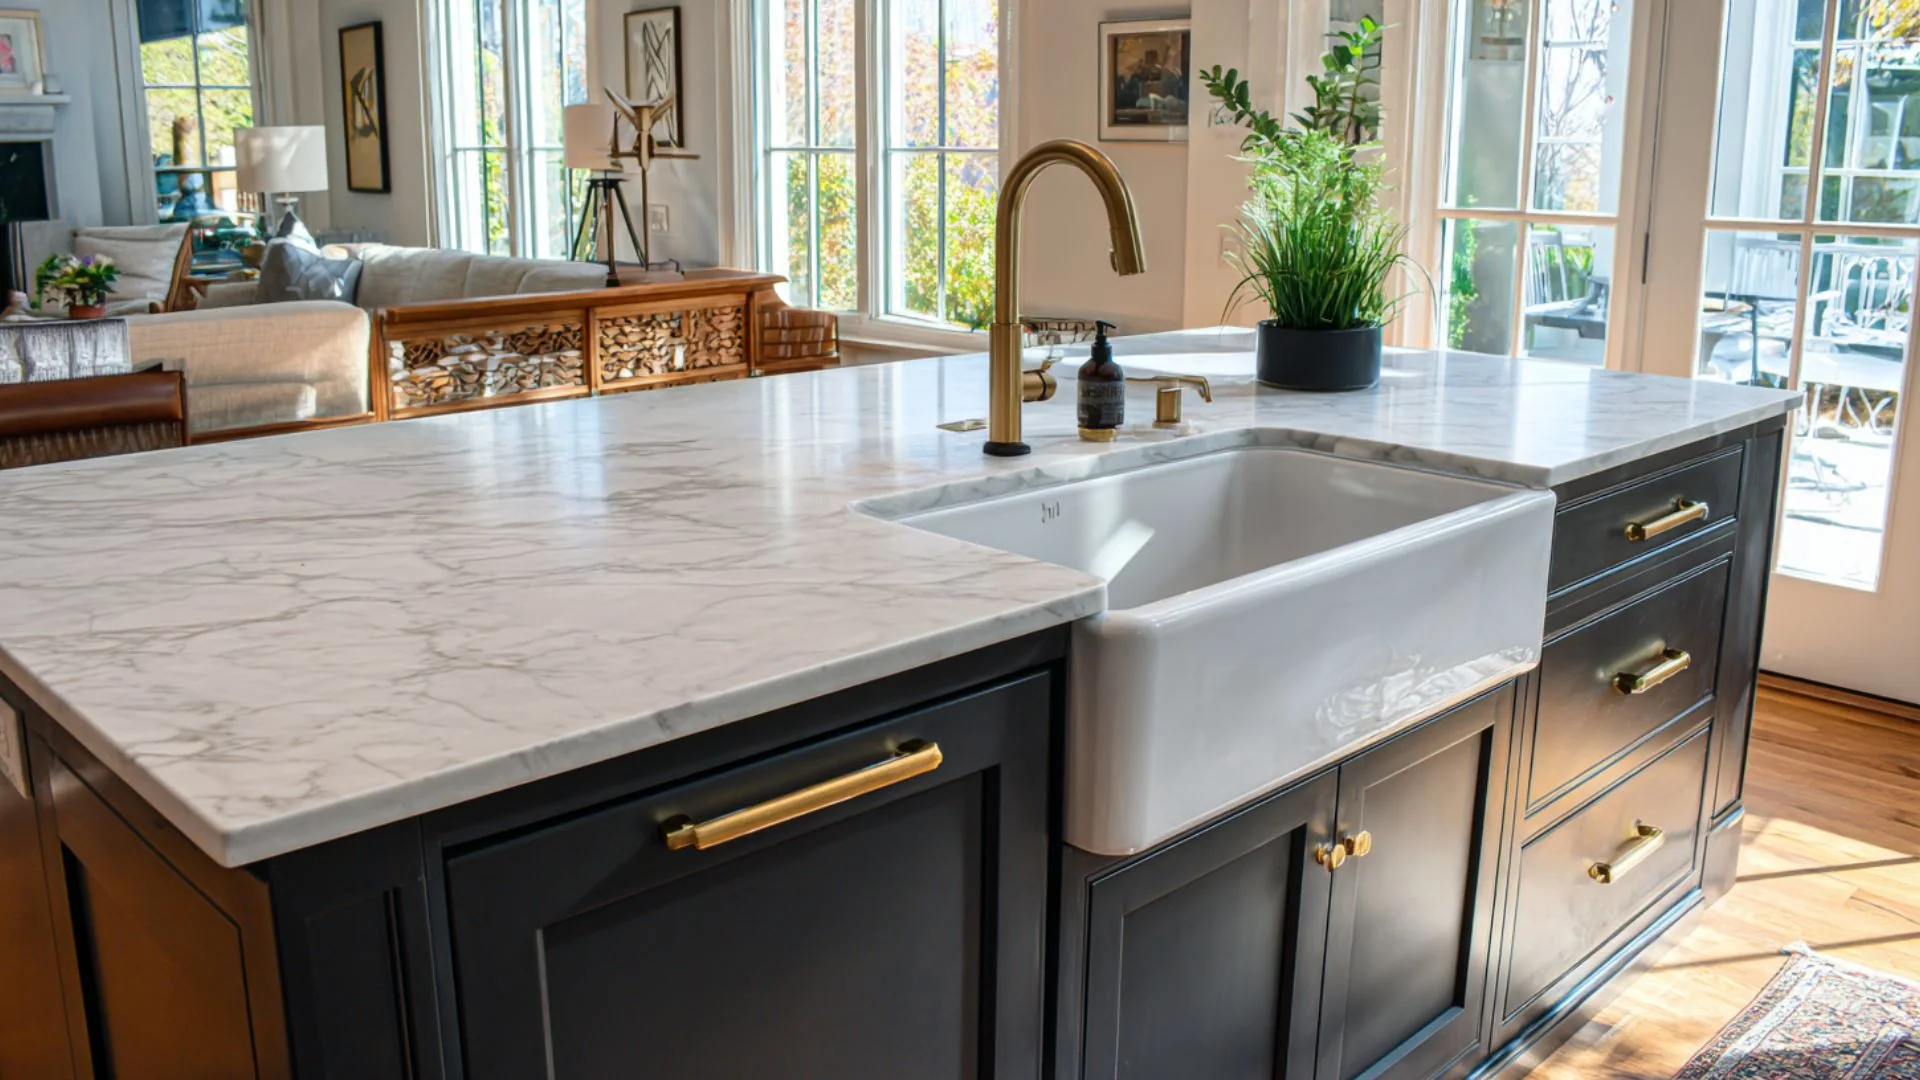
A recessed island panel station holds a combined soap dispenser and paper towel holder within a single frame.
The soap pump is flush with the panel and connects to an internal refillable reservoir.
The paper towel housing sits directly below within the same framed recess.
Both dispensers operate without countertop or freestanding accessories, leaving the prep surface and surrounding area free of standalone hygiene products.
Budget: $400 – $1,200
34. Integrated Chalkboard Panel on Island End
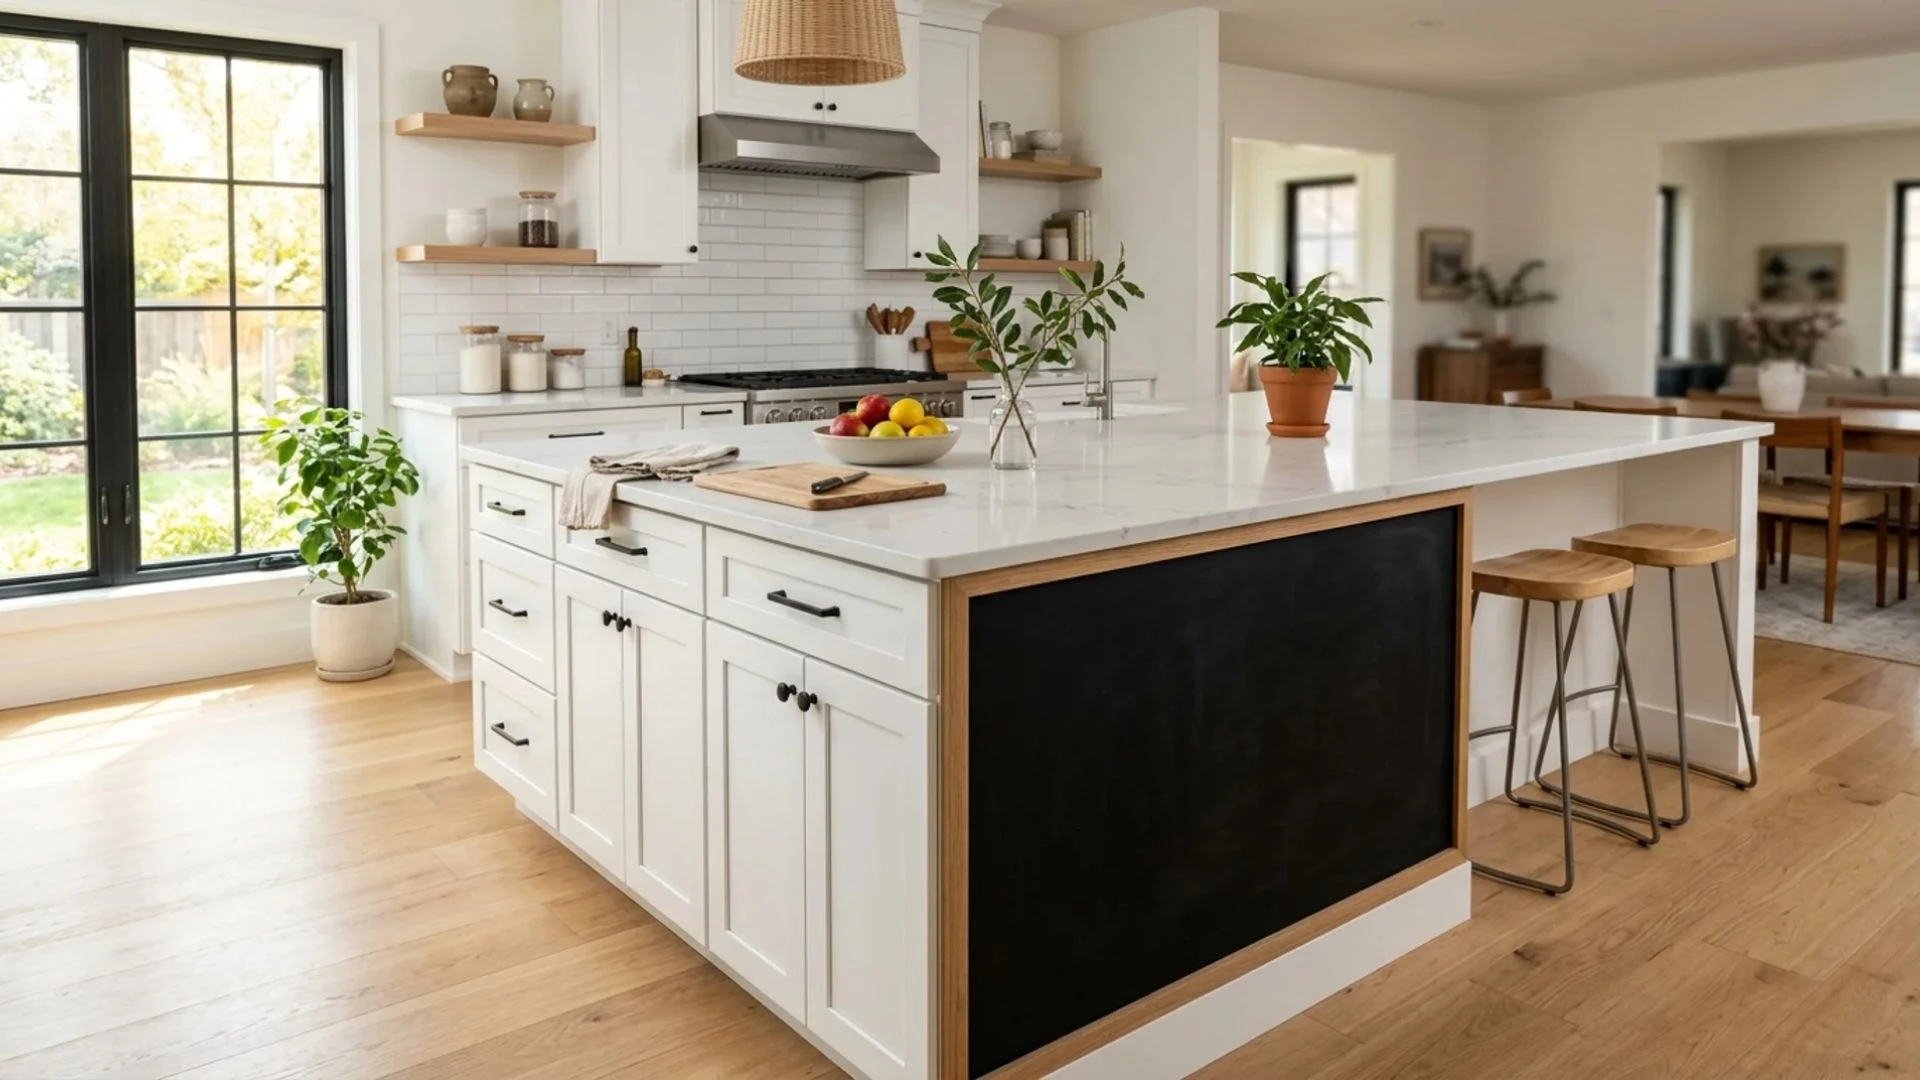
A full chalkboard panel is applied to one end face of the island, replacing the standard painted or clad surface with a matte chalkboard-finish material framed by a thin wood border that matches the island cabinetry.
The panel serves as a meal planner, grocery list surface, or recipe reference point directly at the kitchen workspace.
The chalkboard material is applied to the end panel and can be repainted if no longer desired.
Budget: $200 – $600
35. Freestanding Island on Casters
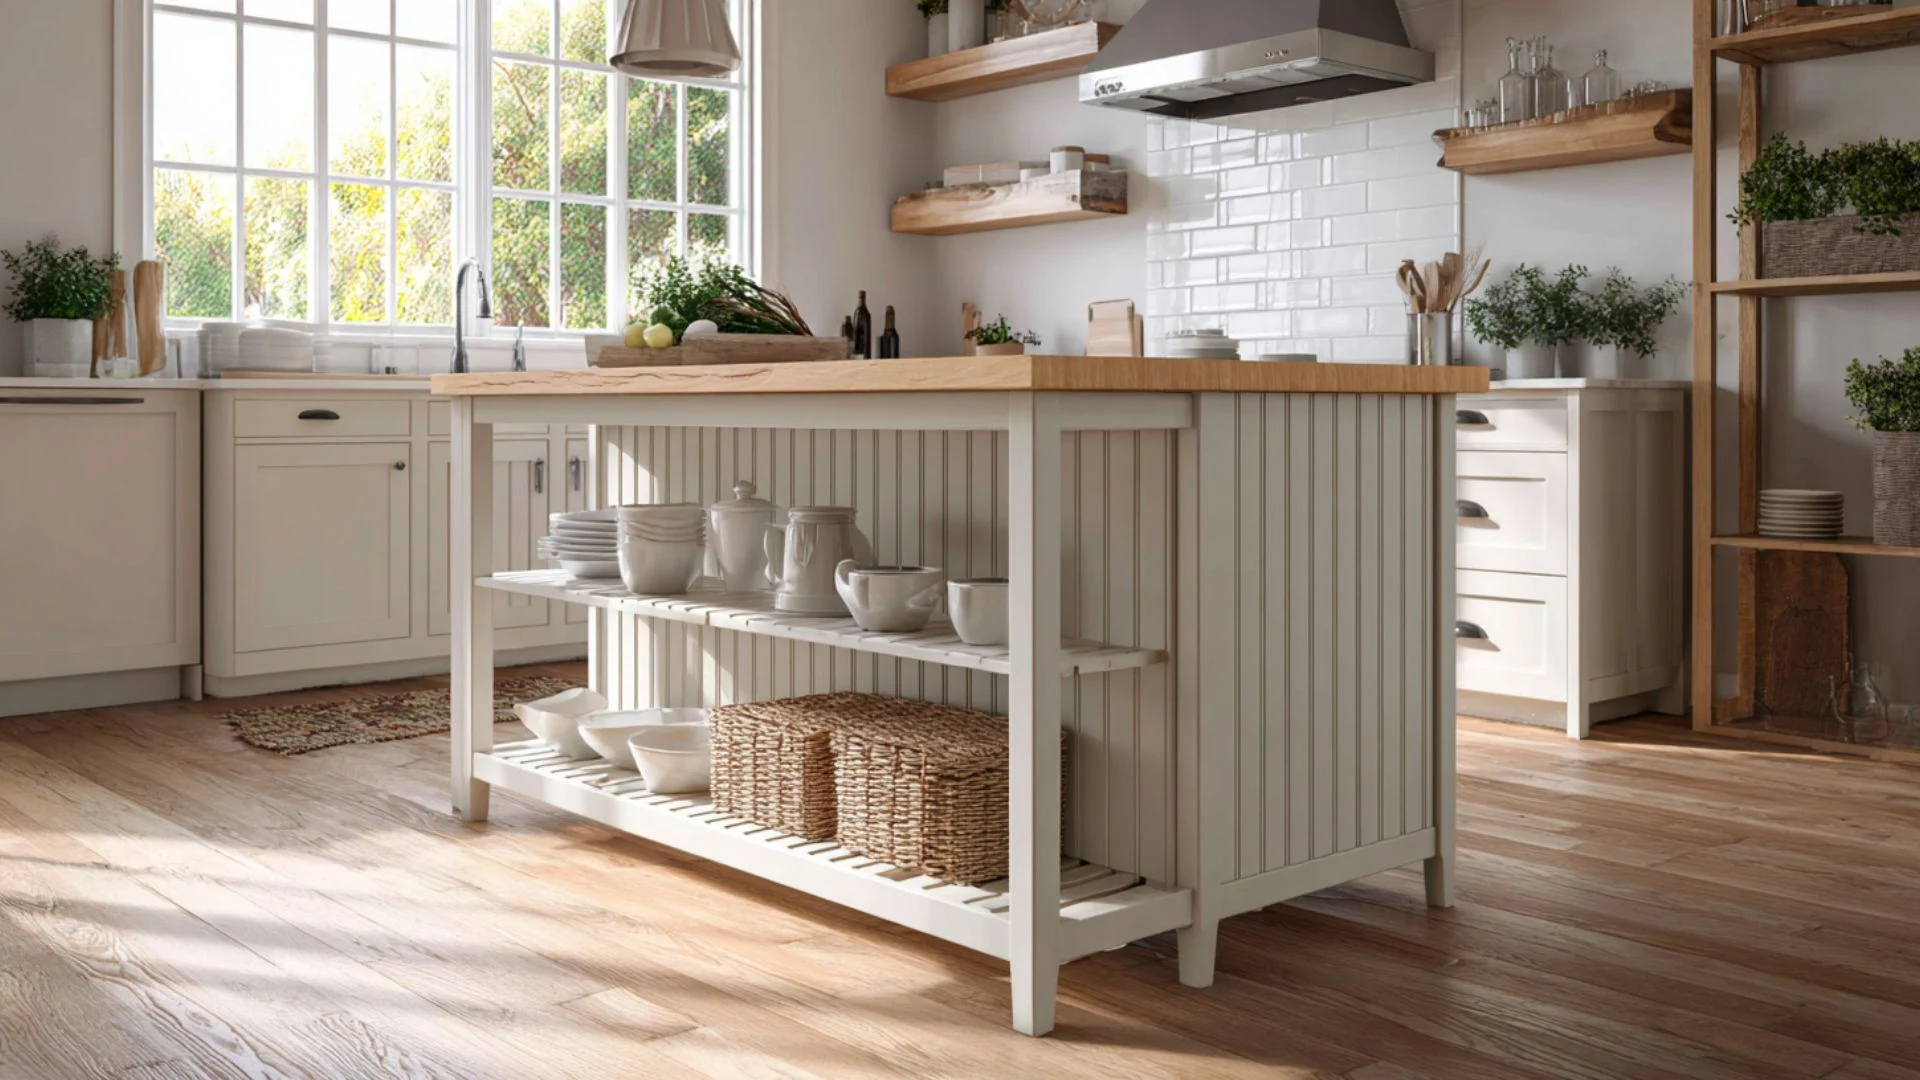
A self-contained island unit mounted on lockable heavy-duty wheels replaces a fixed built-in island.
The freestanding cabinet is finished with a countertop, cabinet fronts, and hardware consistent with the kitchen.
When casters are locked, the island is fixed; when unlocked, it rolls freely, enabling layout changes for entertaining, cleaning, or reconfiguring. The mobility suits’ kitchens serve various functions.
Budget: $1,500 – $5,000
36. Two-Height Island Configuration
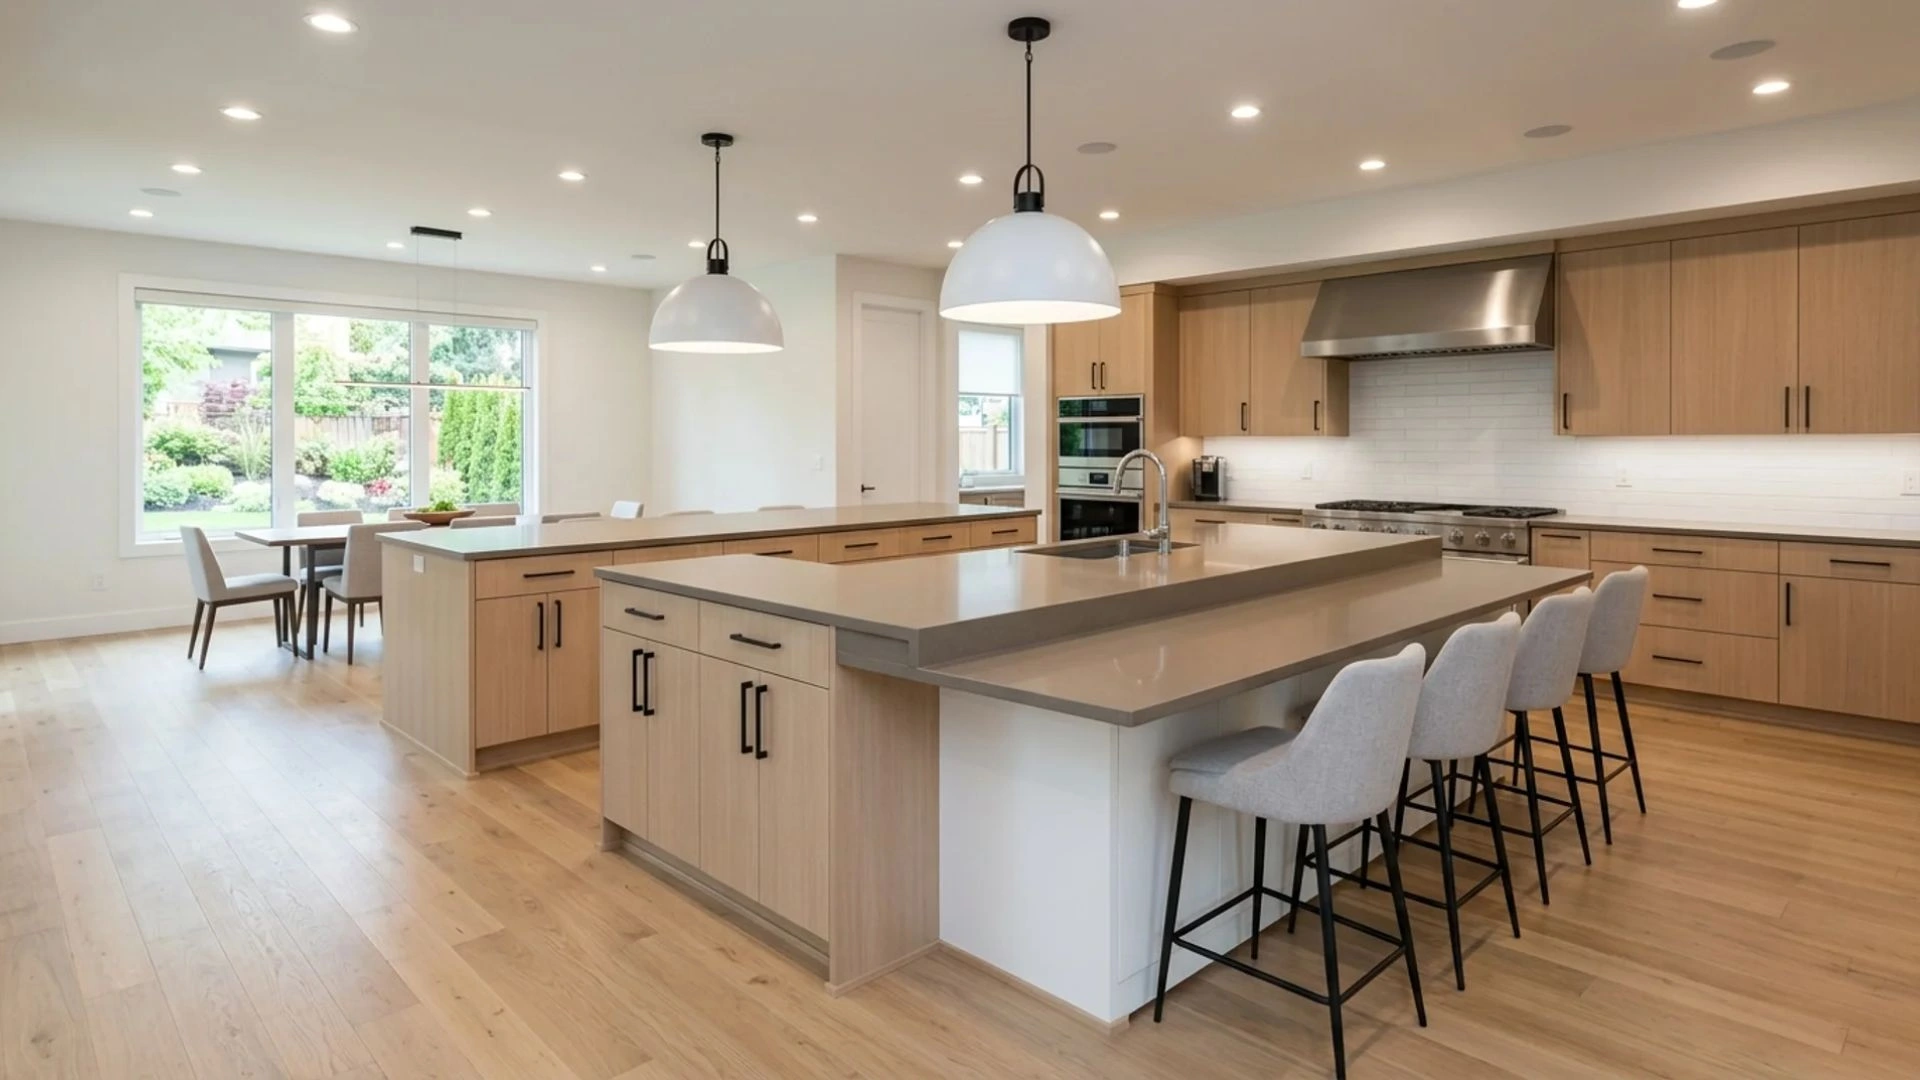
The island is divided into two counter levels within the same footprint, with a raised bar-height section on one side at forty-two inches and the primary work surface at the standard 36-inch counter height.
The raised section creates a barrier between prep and seating areas and hides prep clutter from diners.
Both sections share the same cabinet base and countertop material throughout.
Budget: $3,000 – $8,000
37. T-Shaped Kitchen Island
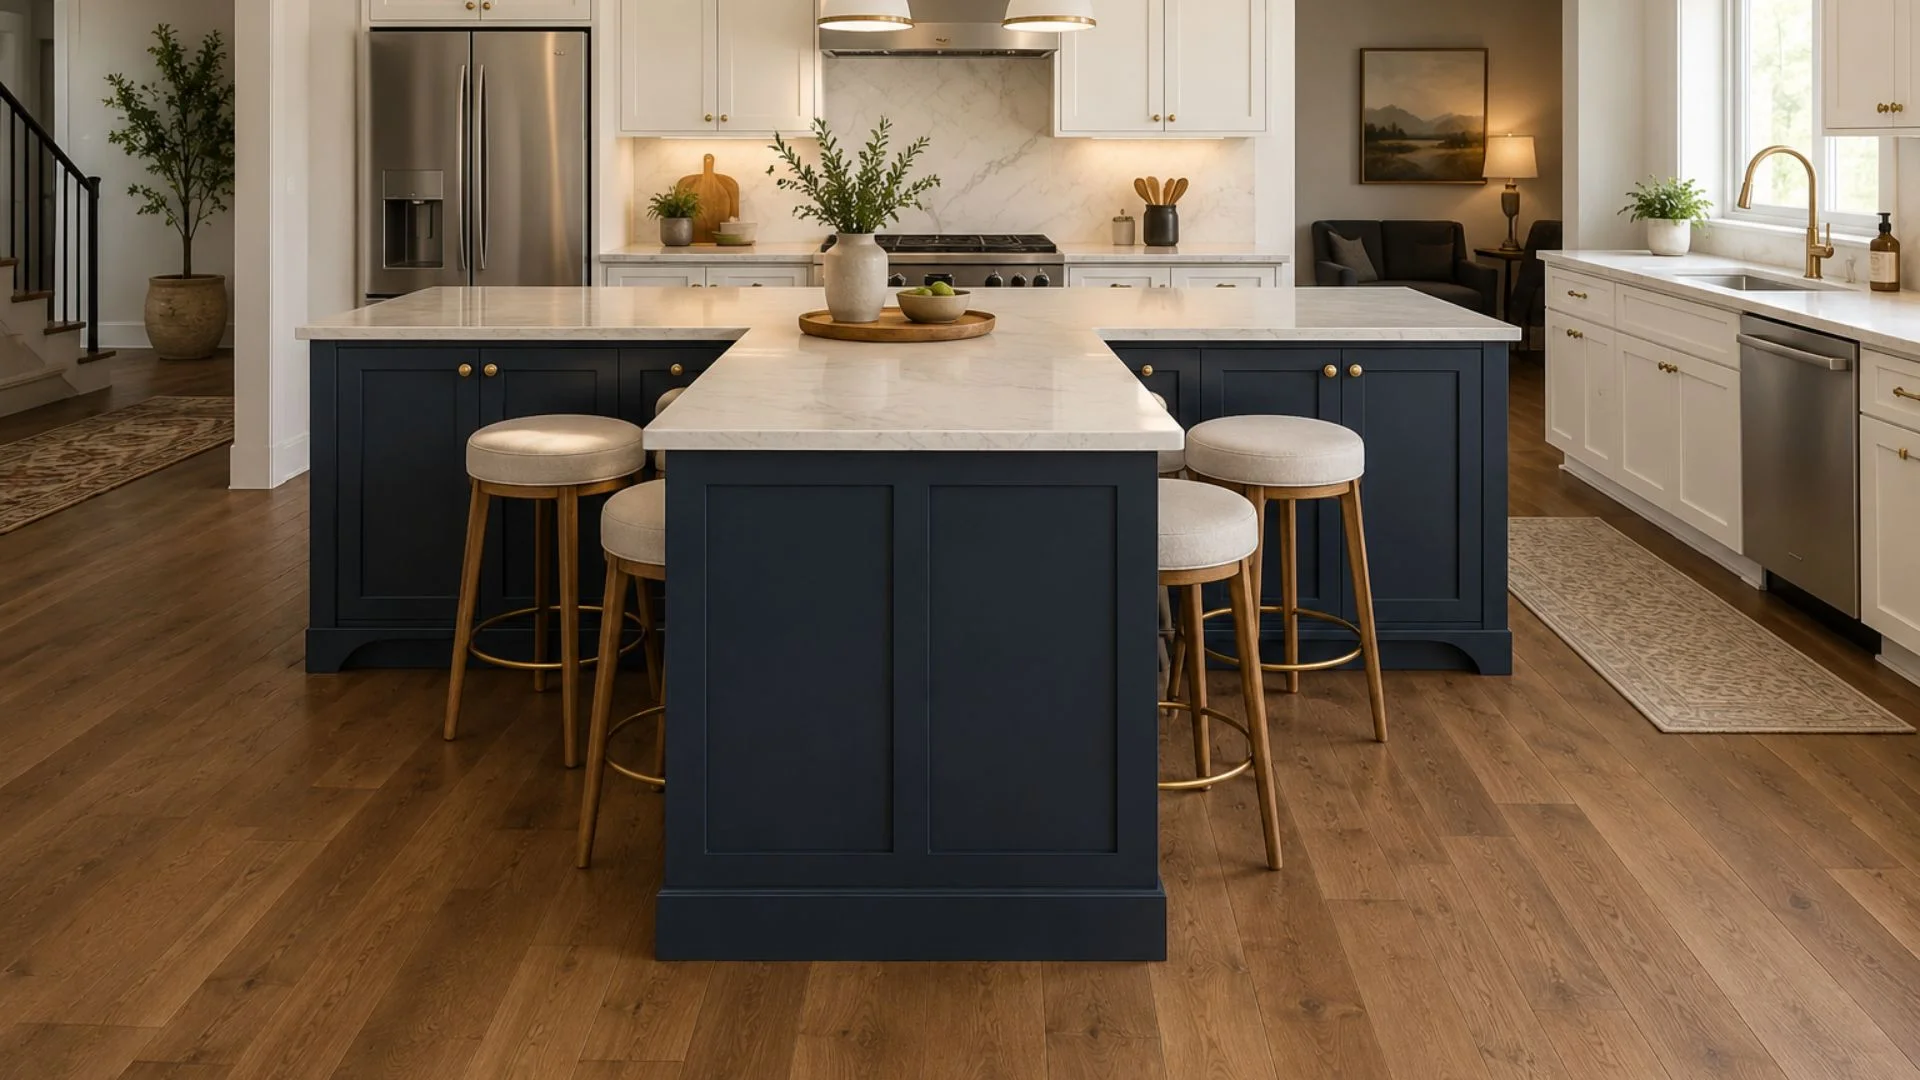
A T-shaped kitchen island features a main section and a wider extension forming a T shape.
The extended section creates a natural separation between different activities while keeping everything connected within one island. Many people use this layout to create distinct zones for food preparation, dining, or gathering.
The shape adds visual interest and makes a large kitchen seem more organized without extra furniture.
Budget: $4,000 – $15,000
38. Barrel-Shaped Kitchen Island
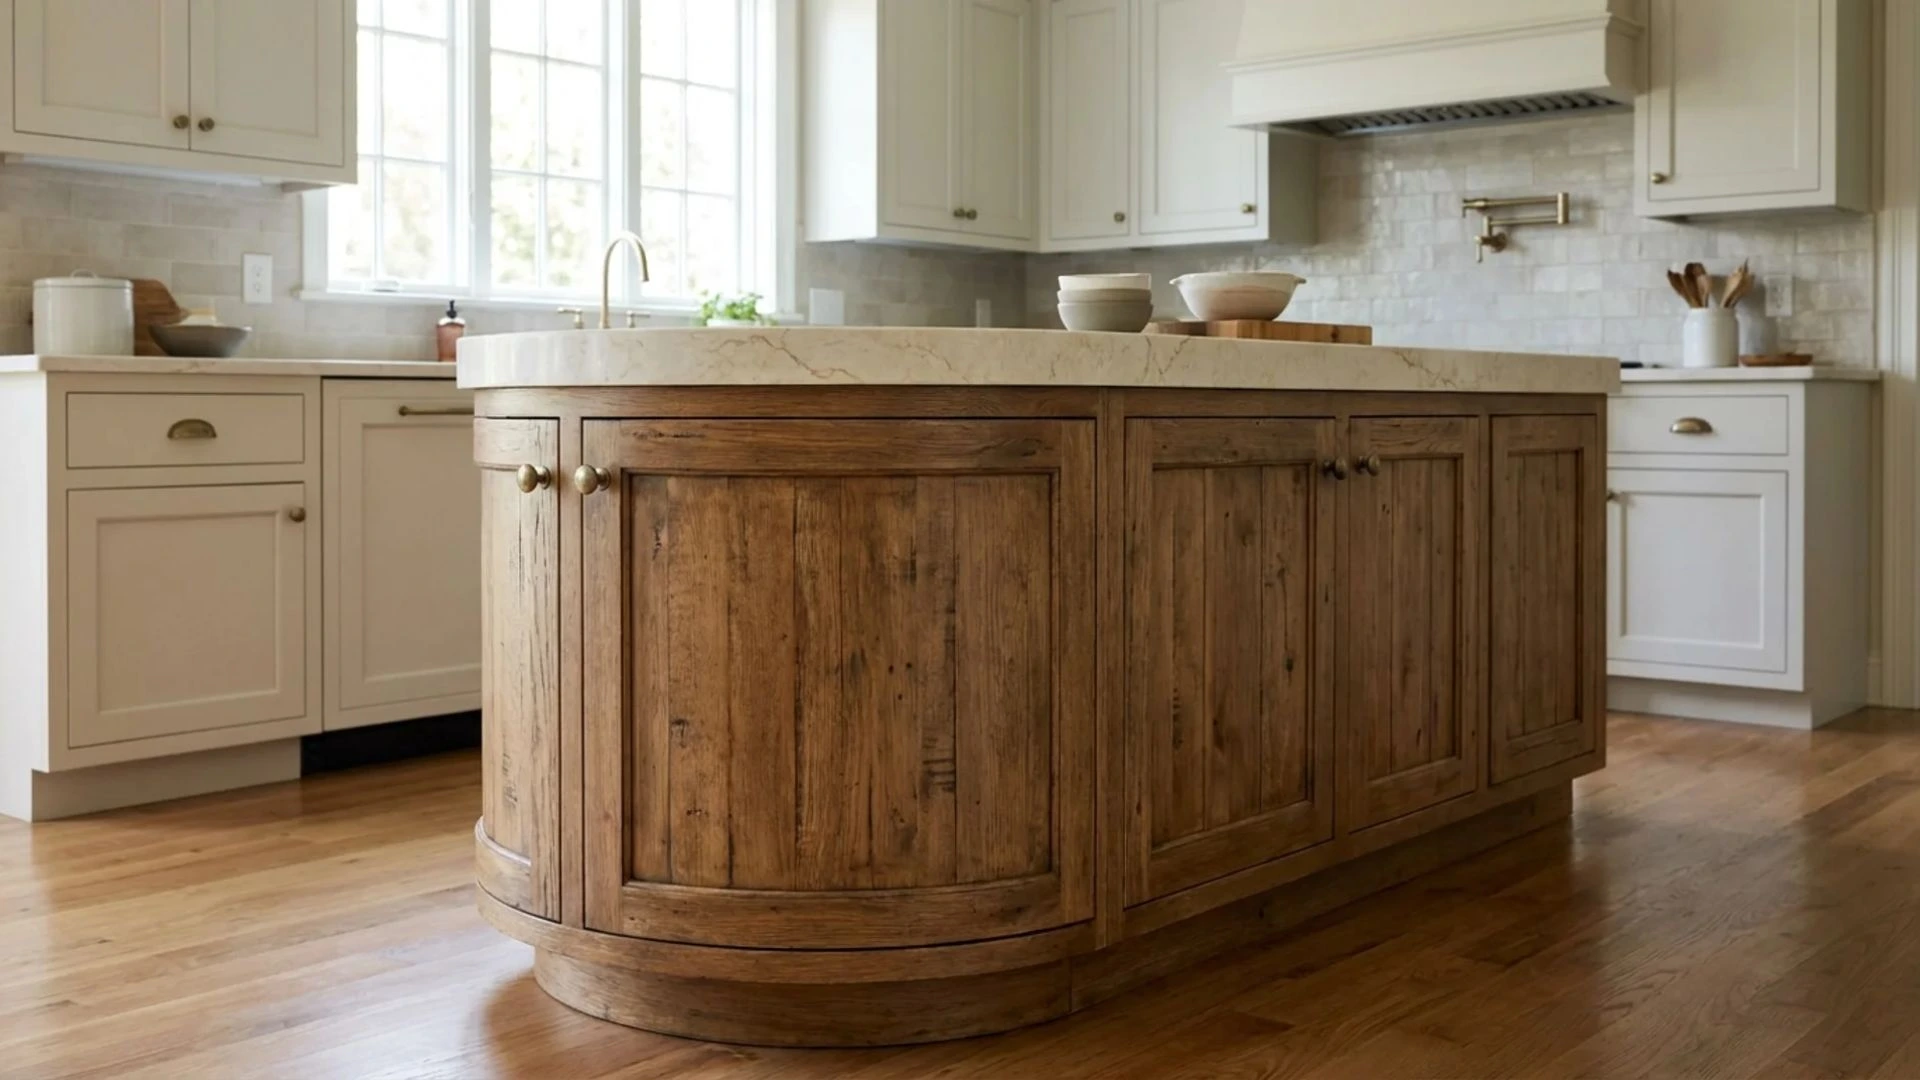
A barrel-shaped kitchen island features gently curved sides instead of straight cabinet lines.
The soft curves make the island look smoother and less boxy than a traditional rectangular design.
This shape adds character while maintaining plenty of countertop and storage space.
The rounded profile enhances kitchen flow and offers a custom look that stands out from standard island layouts.
Budget: $5,000 – $18,000
39. X-Frame Legs
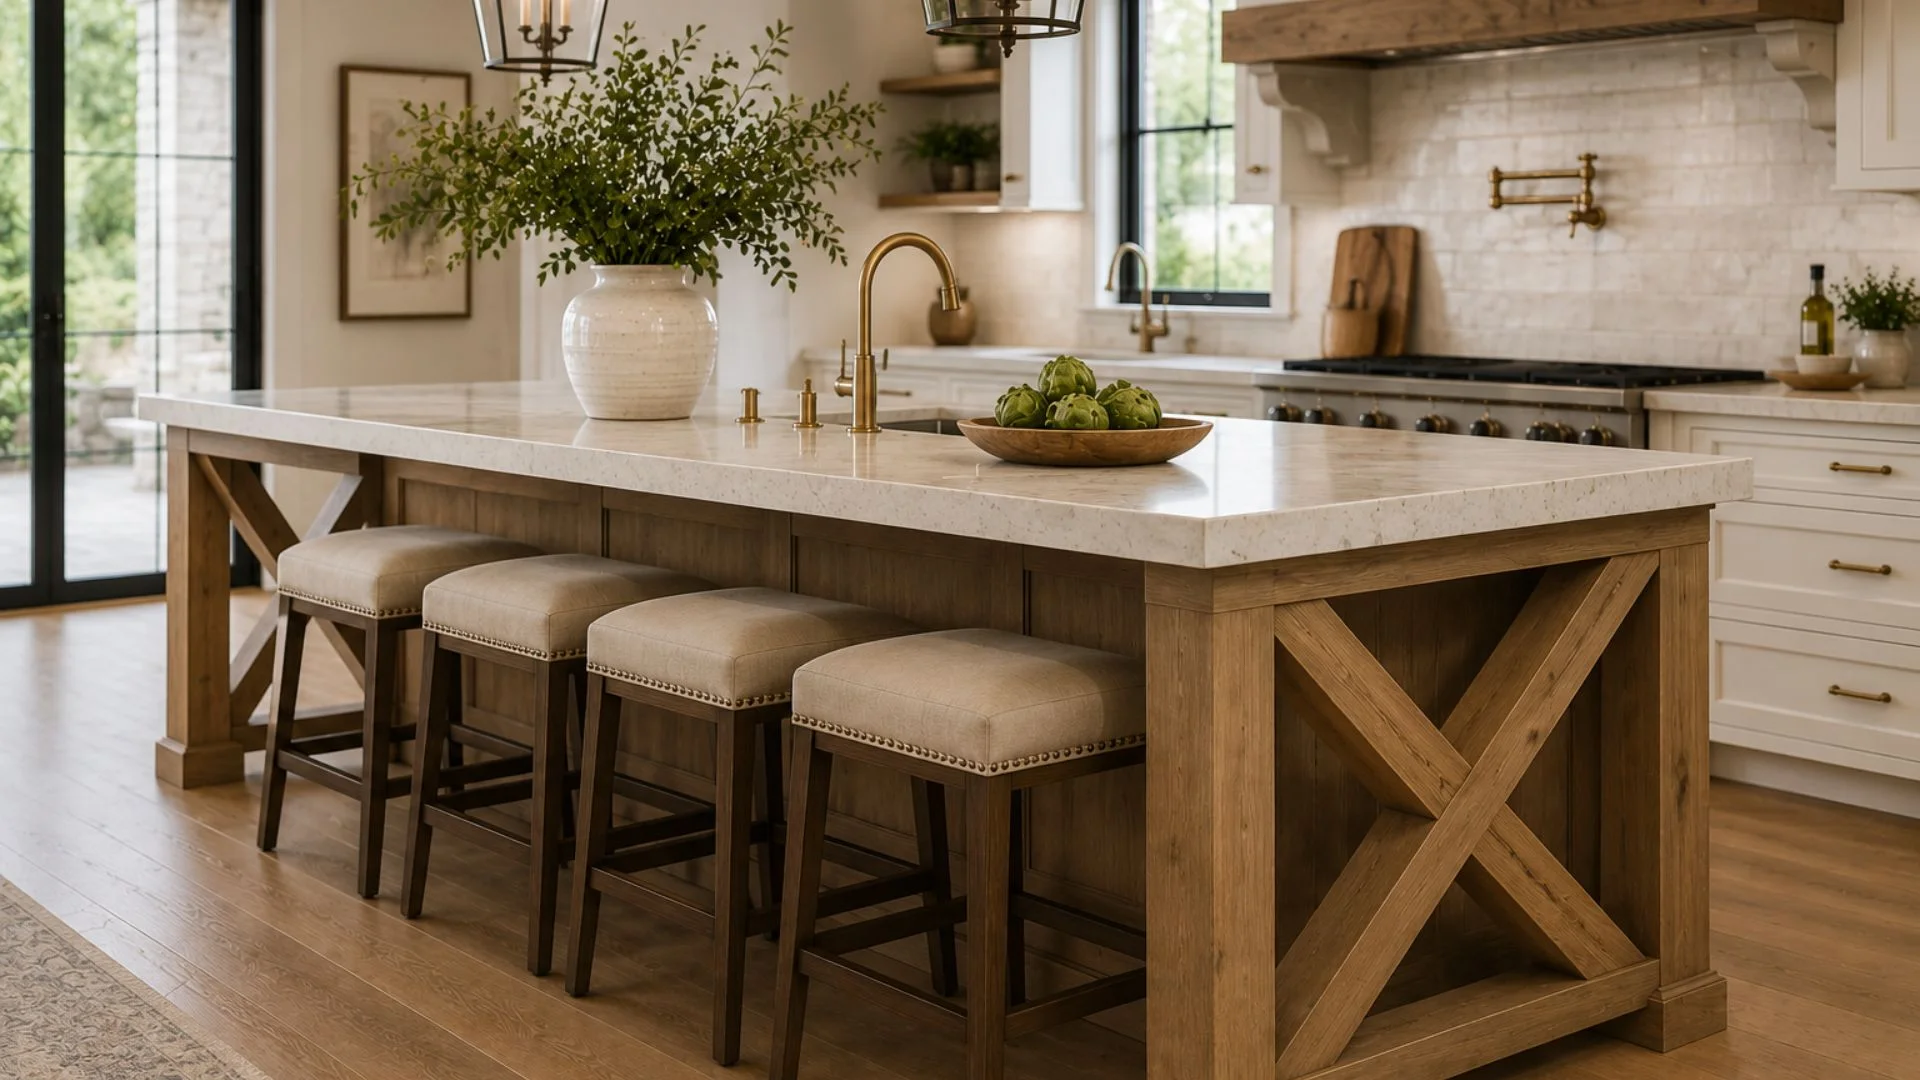
X-frame legs use diagonal wood supports arranged in a crisscross pattern at the ends of the island. The design adds structure while creating a strong visual feature that stands out from standard island panels.
The exposed framework adds texture and depth to the island, ideal for rustic, country, and transitional kitchens.
This upgrade makes the island feel more like custom furniture while maintaining a functional layout.
Budget: $800 – $3,000
40. Fluted Column Legs
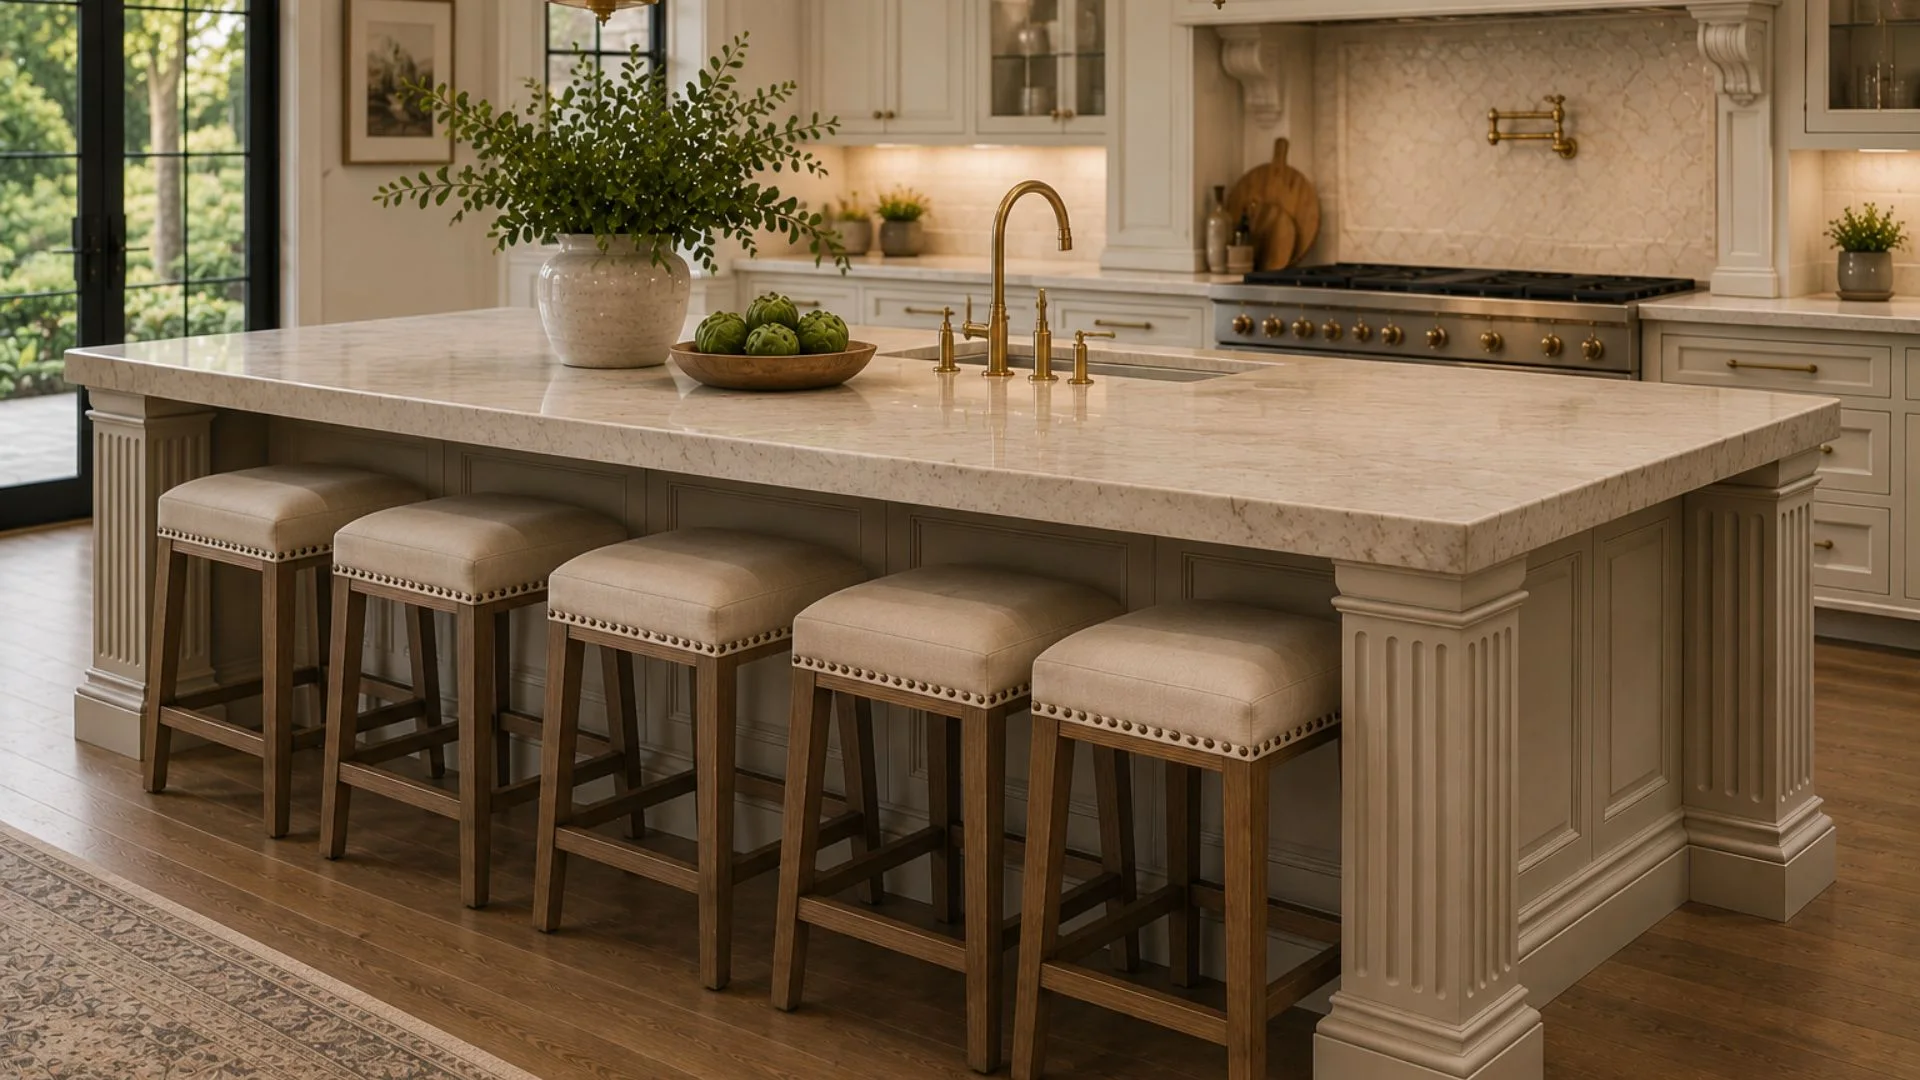
Fluted column legs have vertical grooves on support posts at island corners, inspired by classical columns.
The grooves add texture and depth, enhancing the island’s presence.
This design suits traditional, transitional, and luxury kitchens where decorative details are important. The column supports can turn a standard island into a more refined focal point without changing its overall layout or function.
Budget: $1,200 – $4,500
41. Upholstered Built-In Banquette
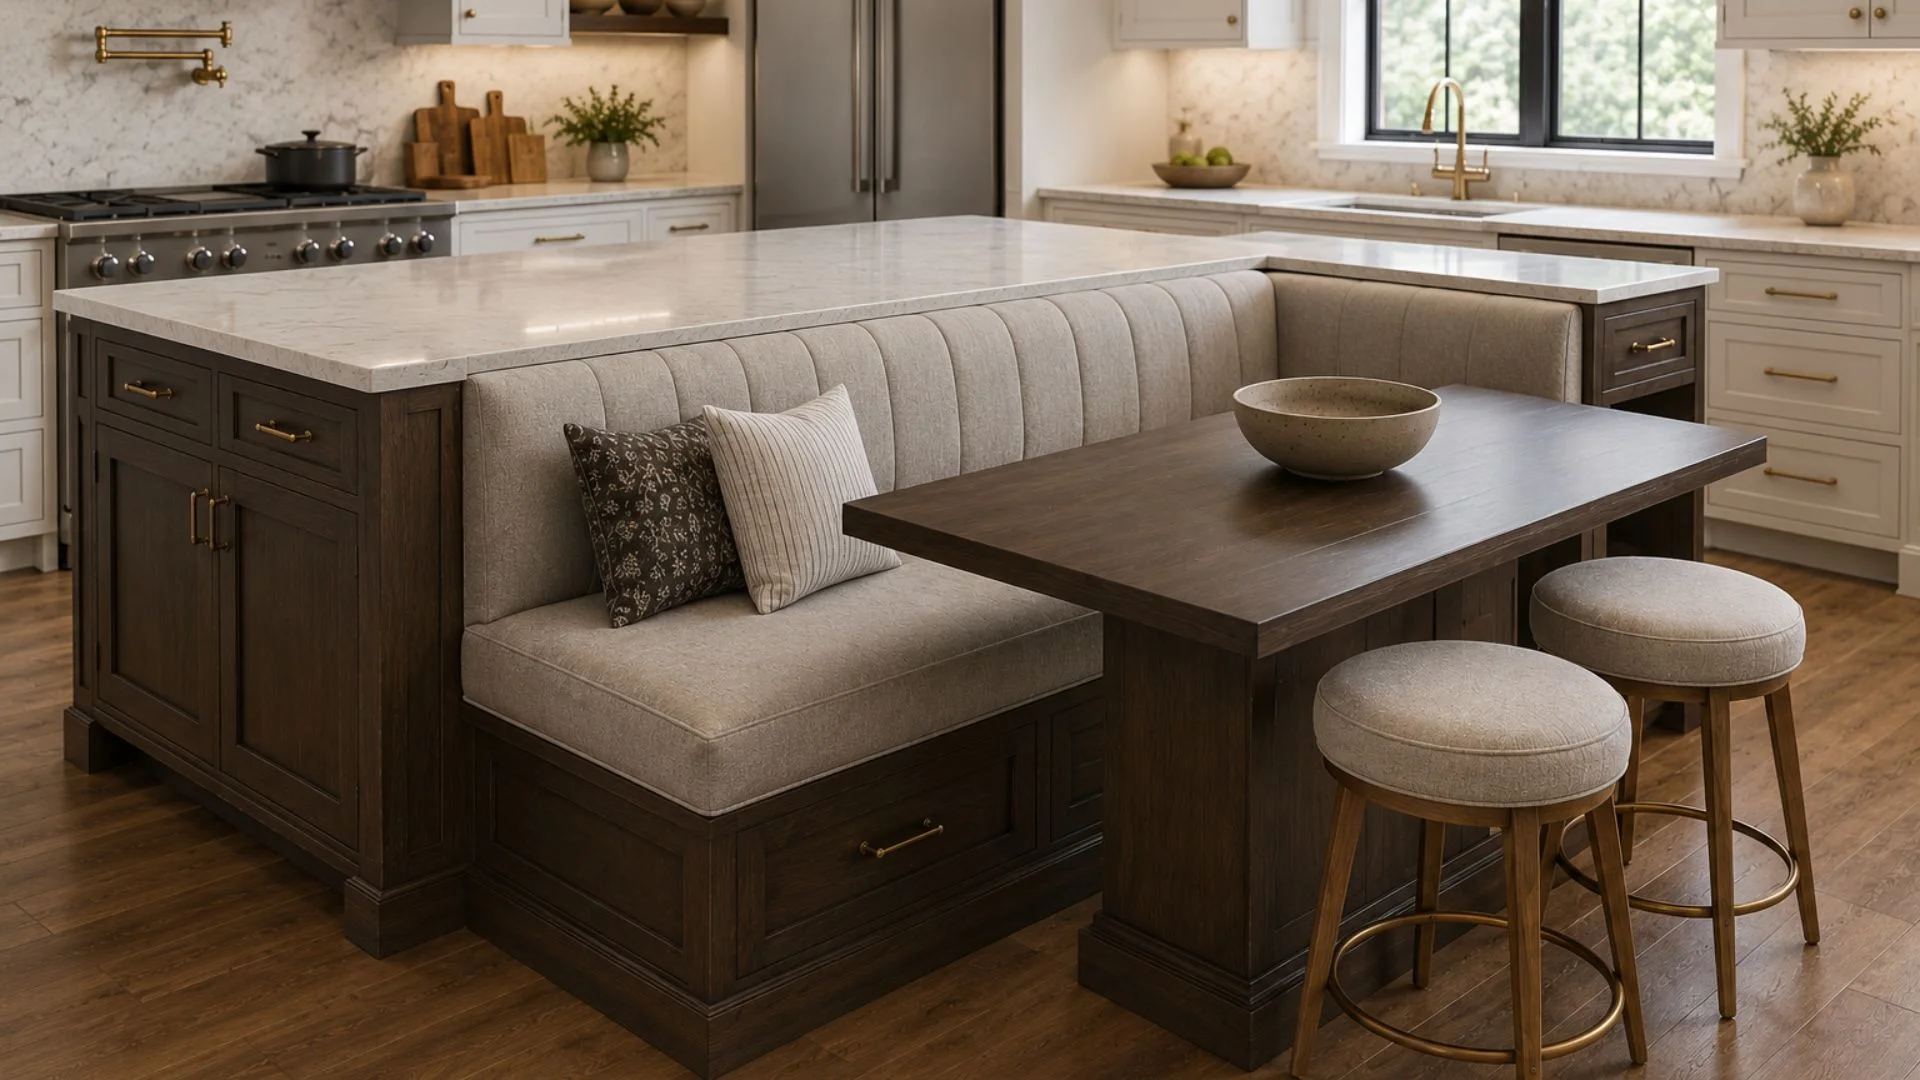
A fixed upholstered bench seat is built along one side of the island as a structural extension of the cabinet base.
The seat cushion is upholstered in a durable fabric, and the bench back is finished with a painted or paneled surface. Pull-out storage drawers are incorporated beneath the seat.
It offers a built-in, comfortable seat for informal kitchen dining without the need for stools or extra furniture.
Budget: $1,500 – $4,500
42. Curved Wraparound Seating End
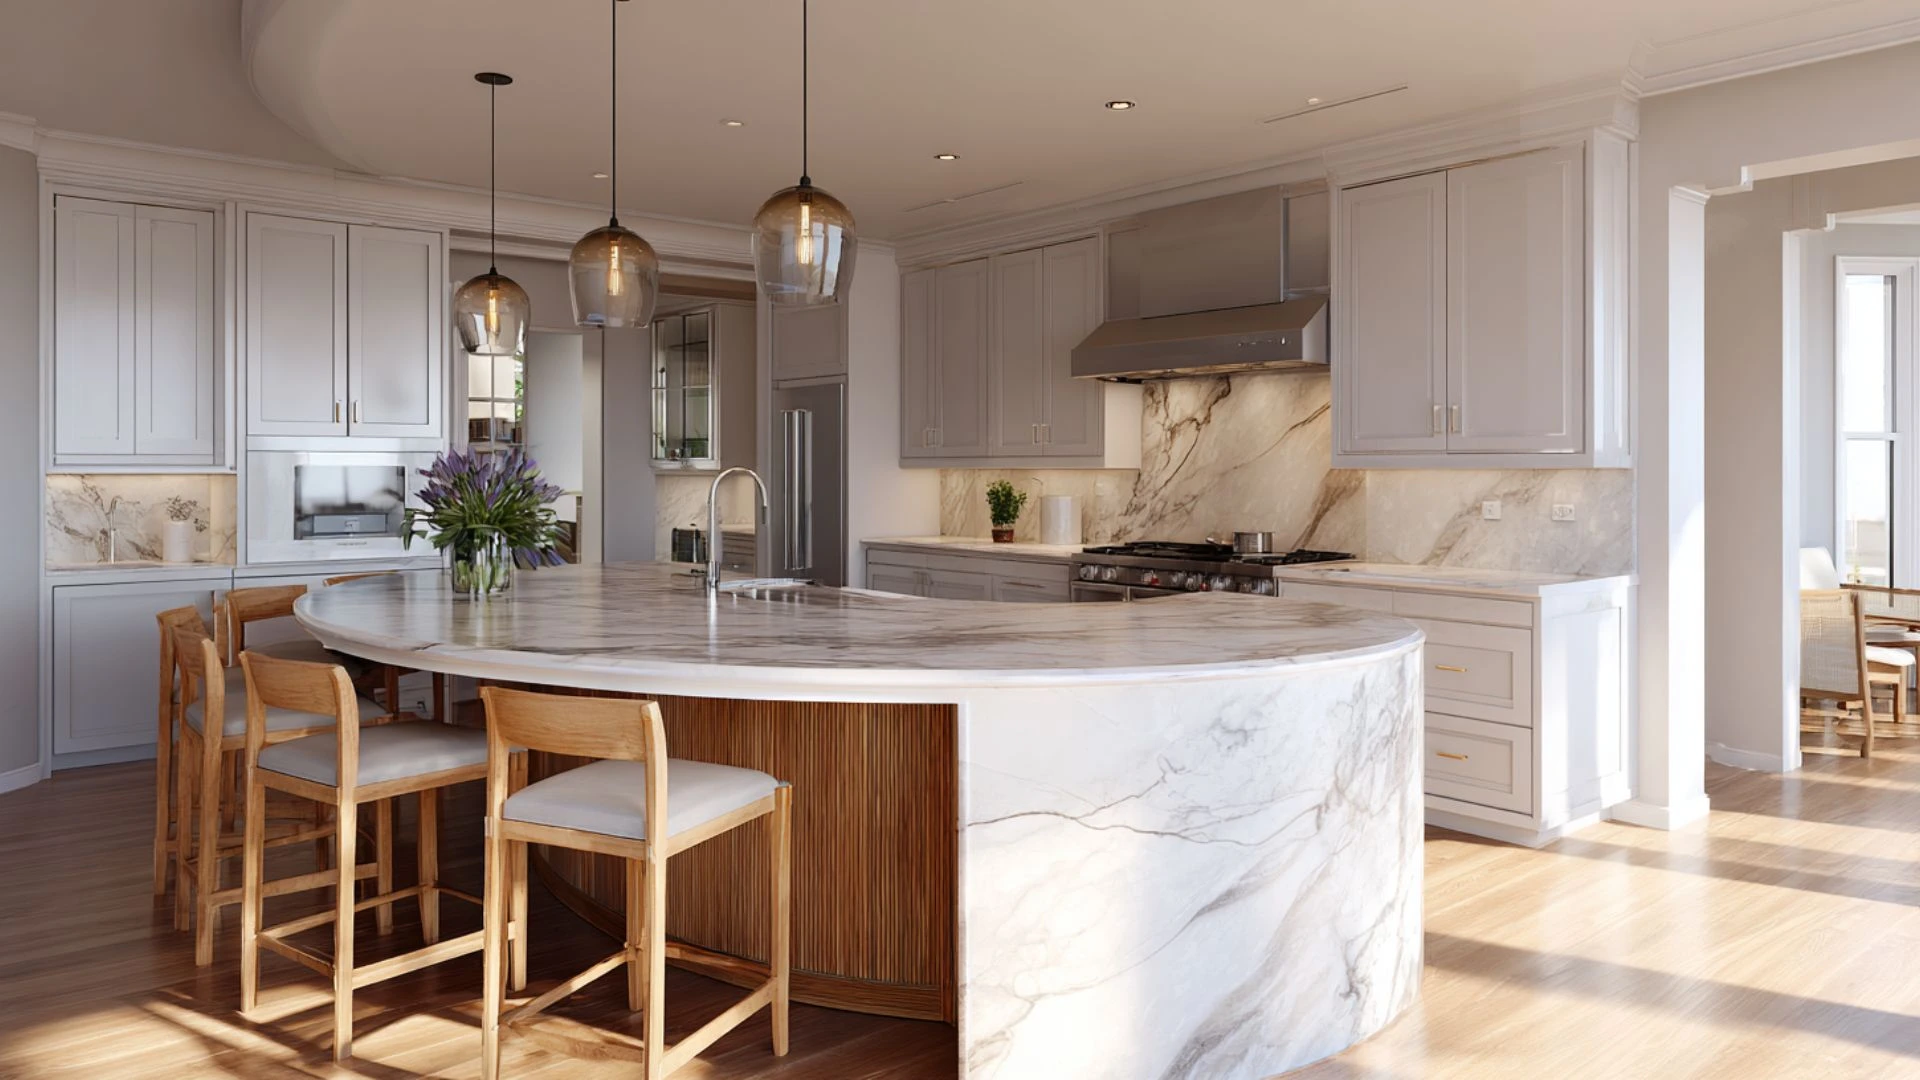
One end of the island is rounded, with the countertop overhang for seating on three sides.
The end cabinet is redesigned with a curved design, smooth exterior cladding, and a matching curved countertop.
The curved shape adds more seating and softens the island’s visual outline.
Budget: $3,000 – $9,000
43. Island-Integrated Breakfast Nook
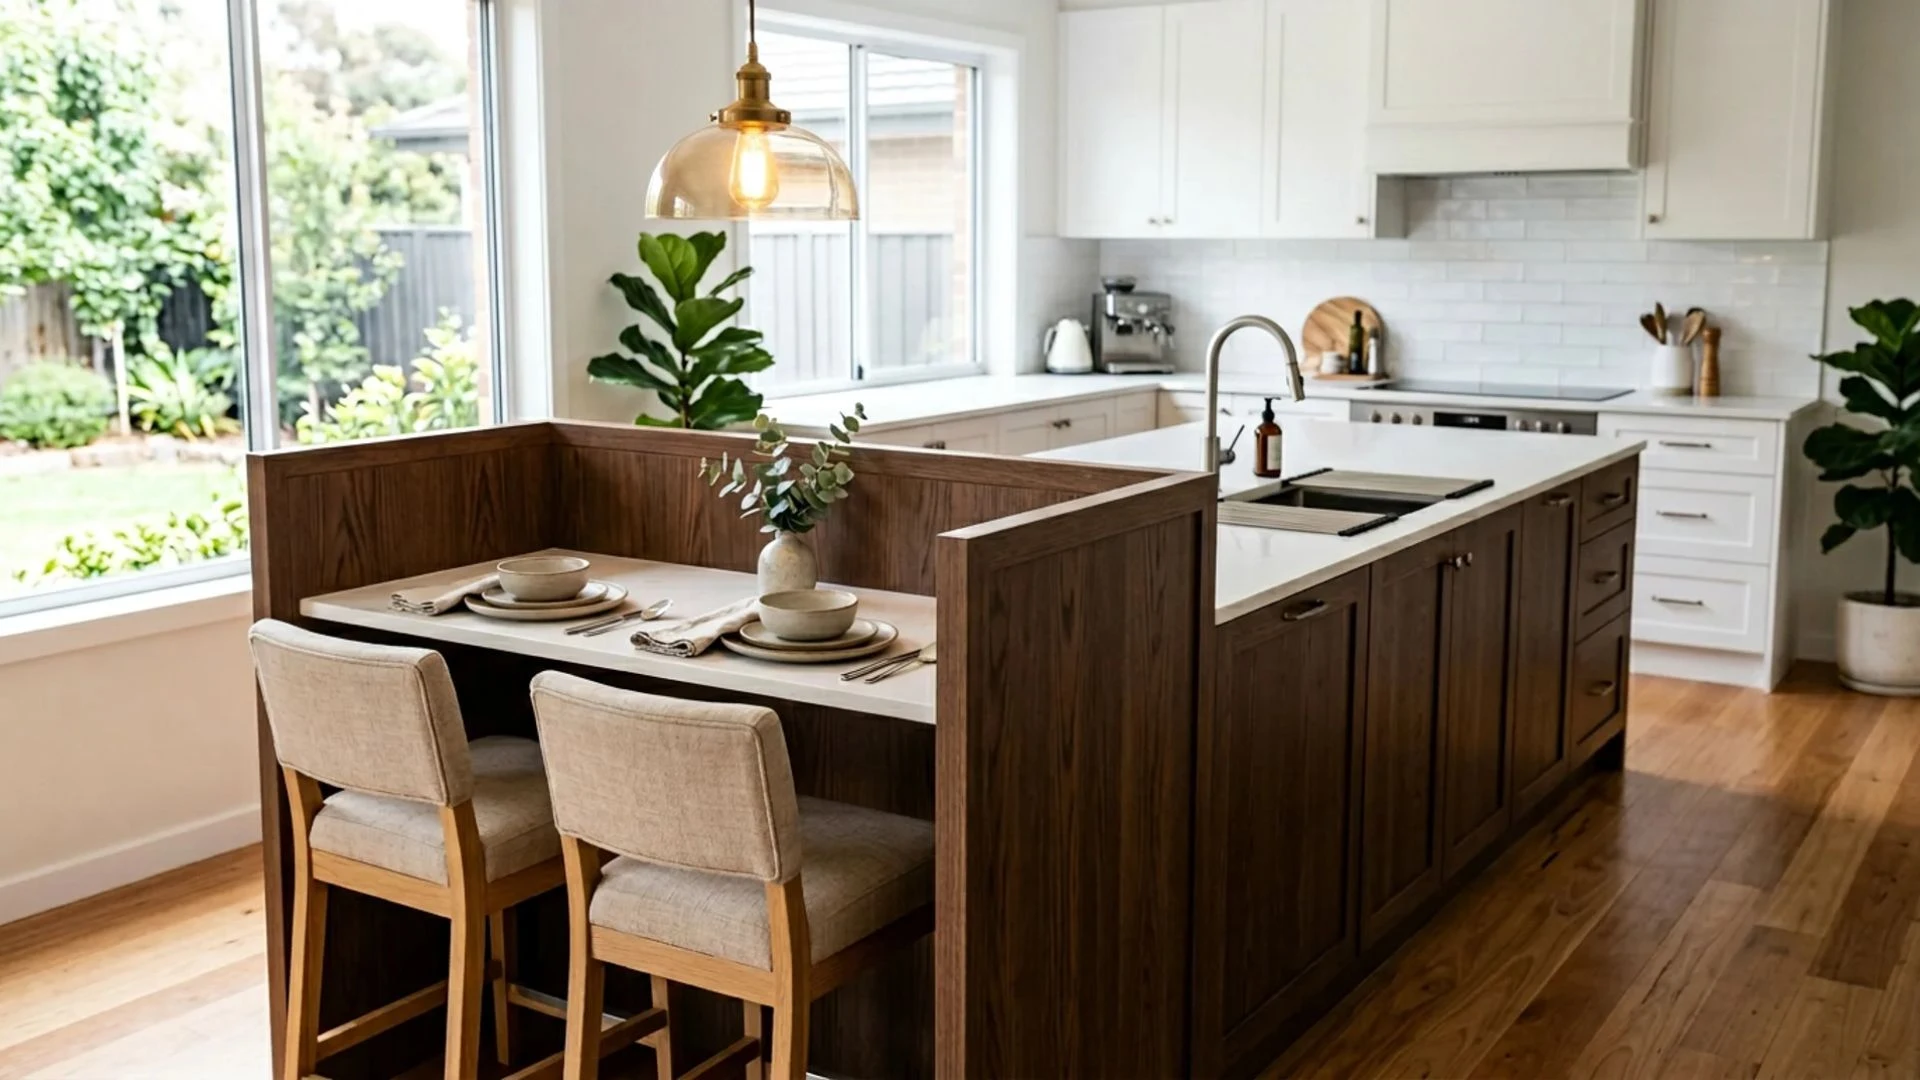
One end of the island is restructured to create a three-sided seating nook with a fixed lower counter surface and two short partition panels extending from the island end to define the space.
The nook seats two within the existing island; no extra table or furniture is needed.
The partition panels and lower counter match the island cabinetry and main countertop material.
Budget: $3,000 – $8,000
44. Lowered Children’s Work Section
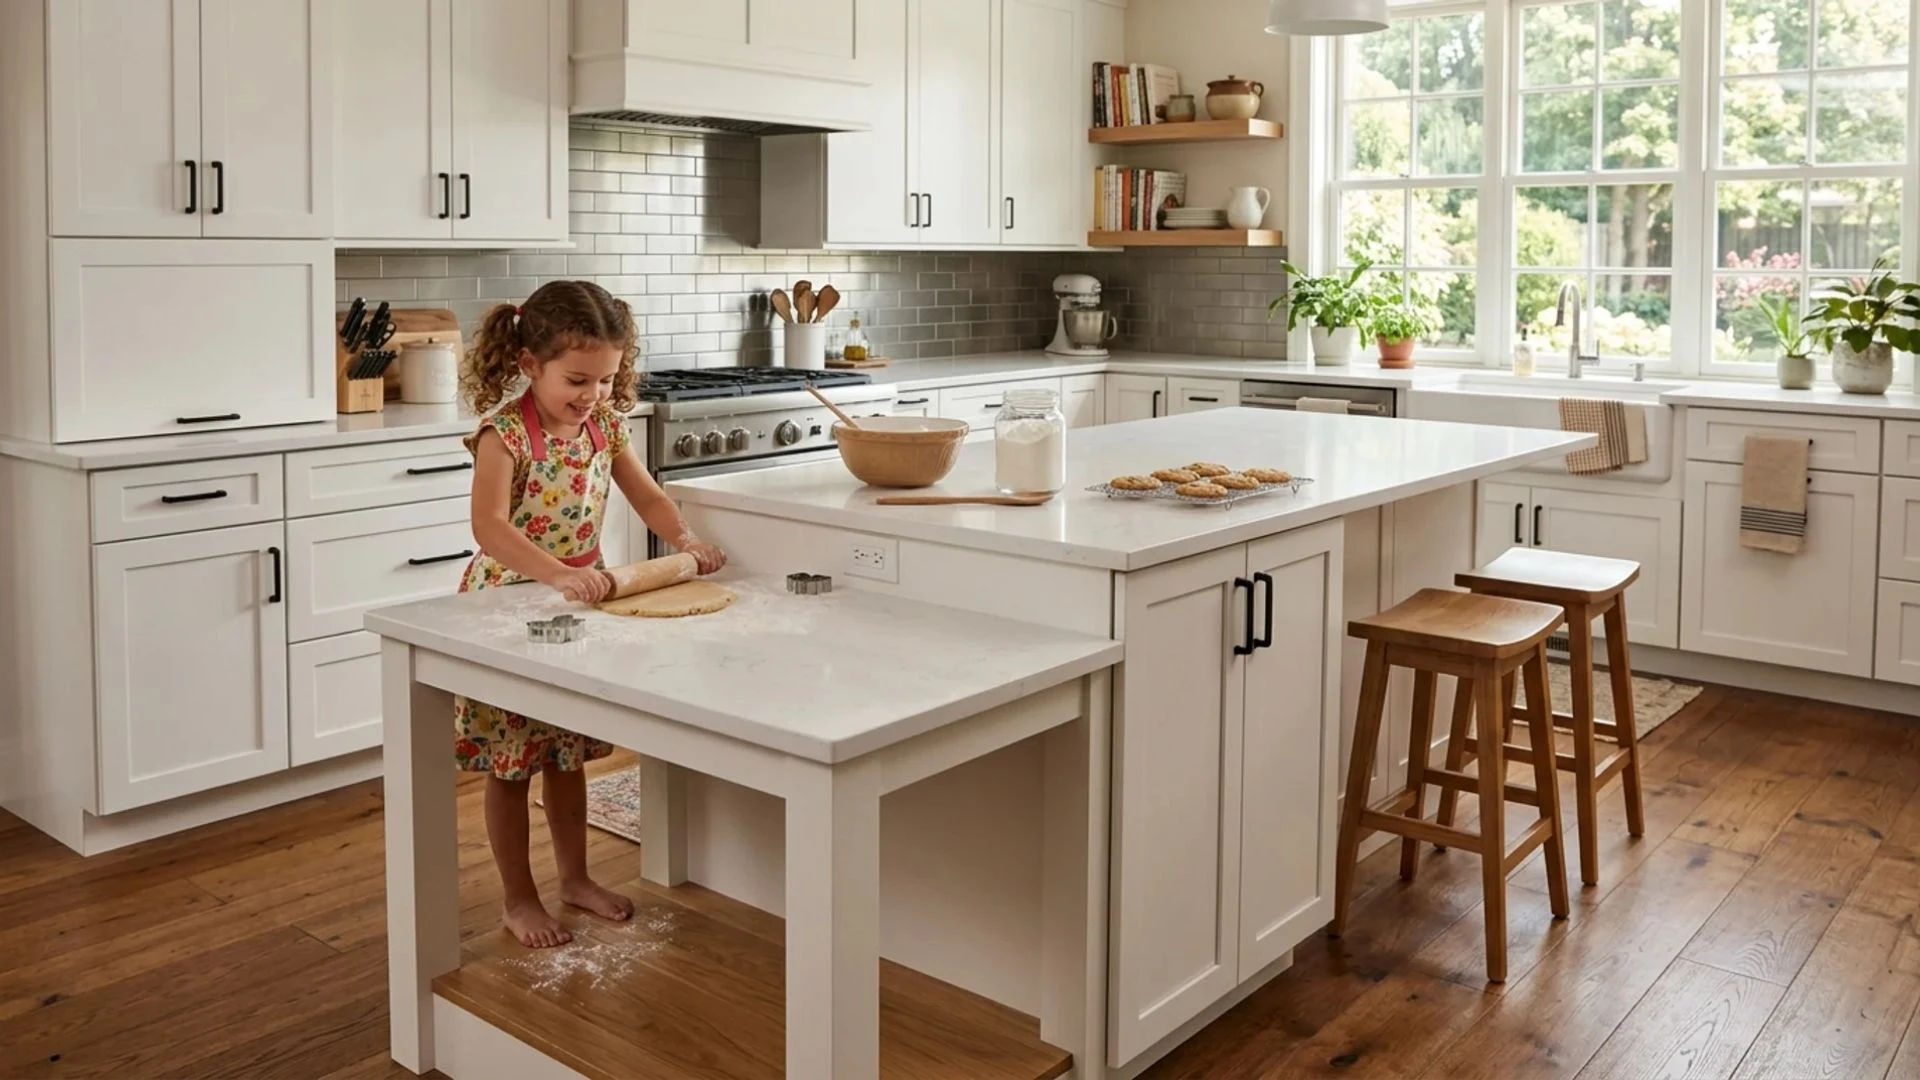
One end of the island drops to about 28-30 inches, allowing children to access the surface without step stools.
The lower section is a structural extension at reduced height, finished with matching surface material and cabinet fronts. Children participate in food prep and kitchen activities at a comfortable standing height.
The section integrates into the island footprint with no additional furniture required.
Budget: $1,500 – $4,000
45. Linear Suspension Pendant
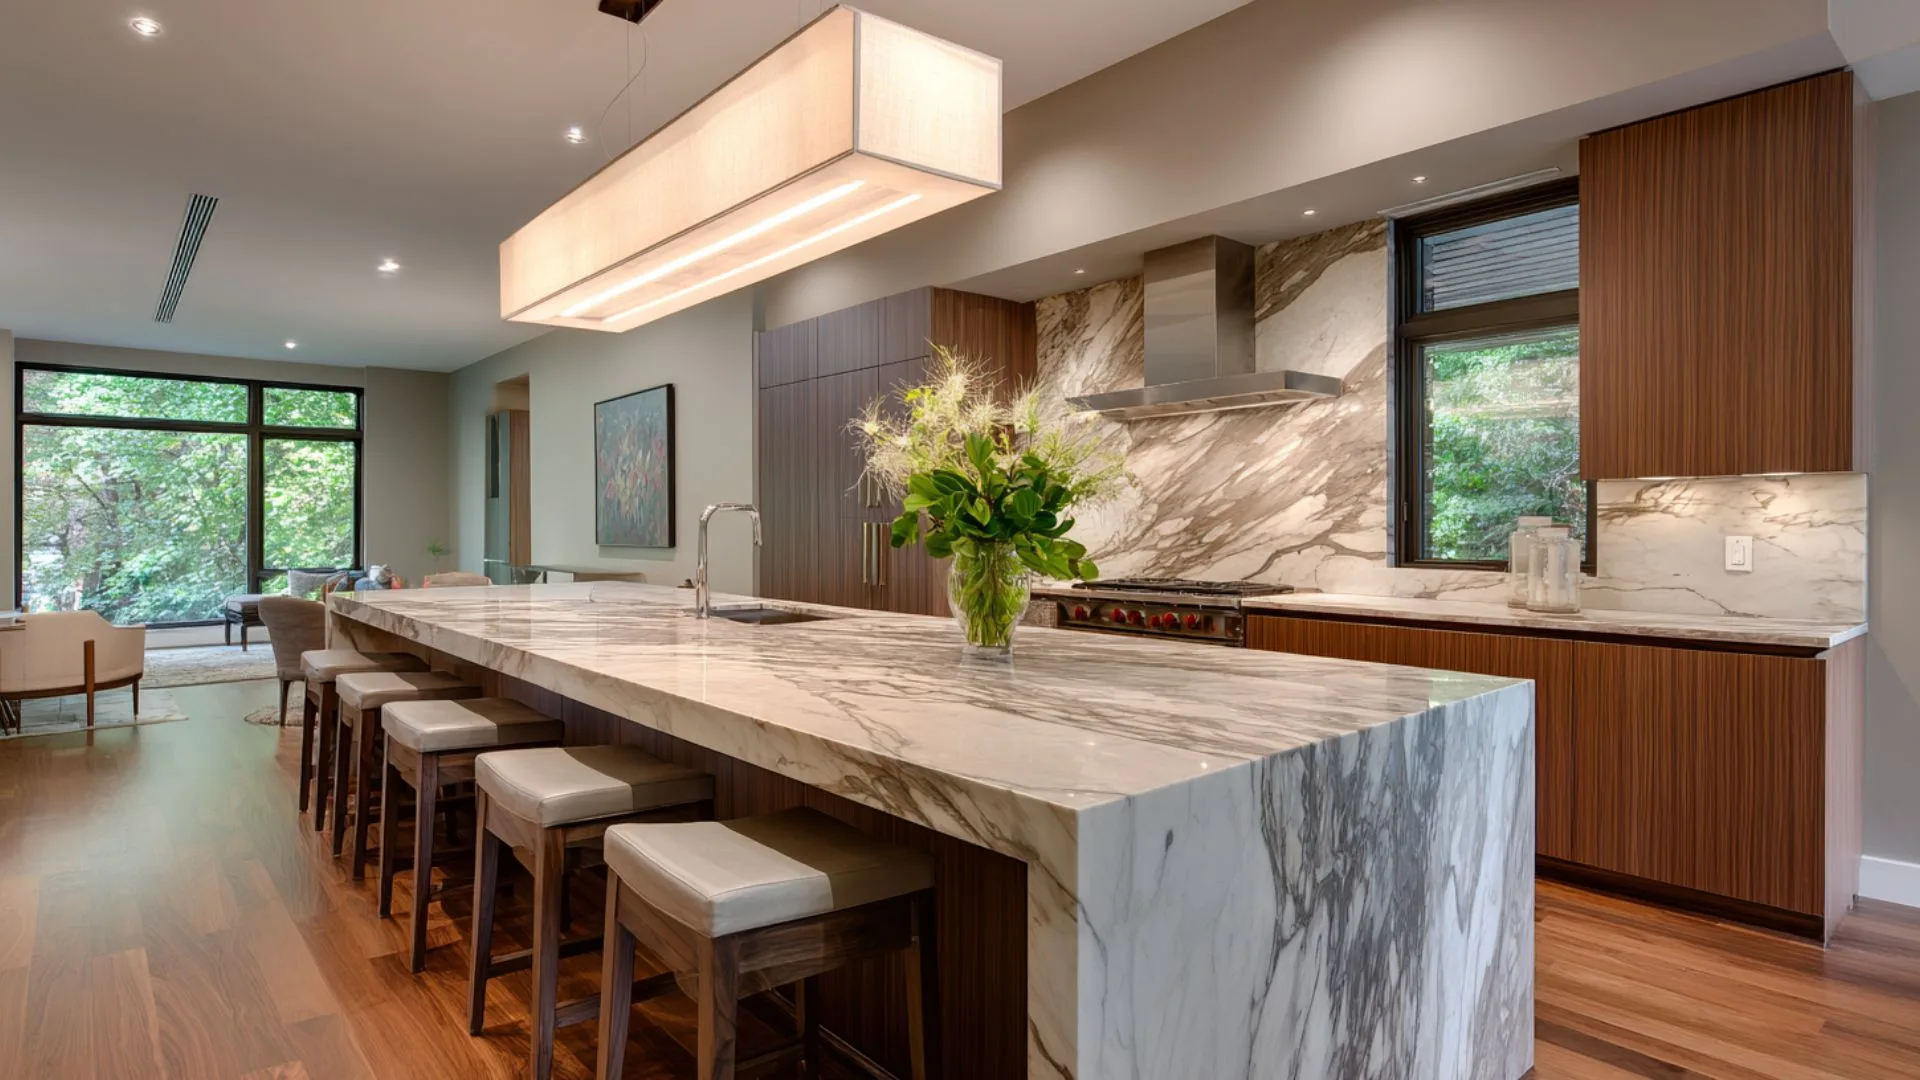
A single elongated pendant fixture hangs above the island, oriented lengthwise at thirty to thirty-six inches above the countertop. New wiring runs from the junction box to a ceiling canopy that supports the fixture.
The light illuminates the entire work surface, making the island the focal point of the kitchen.
This fixture suits islands that are longer than they are wide and defines the cooking zone from above.
Budget: $400 – $1,500
46. In-Cabinet Display Lighting Island
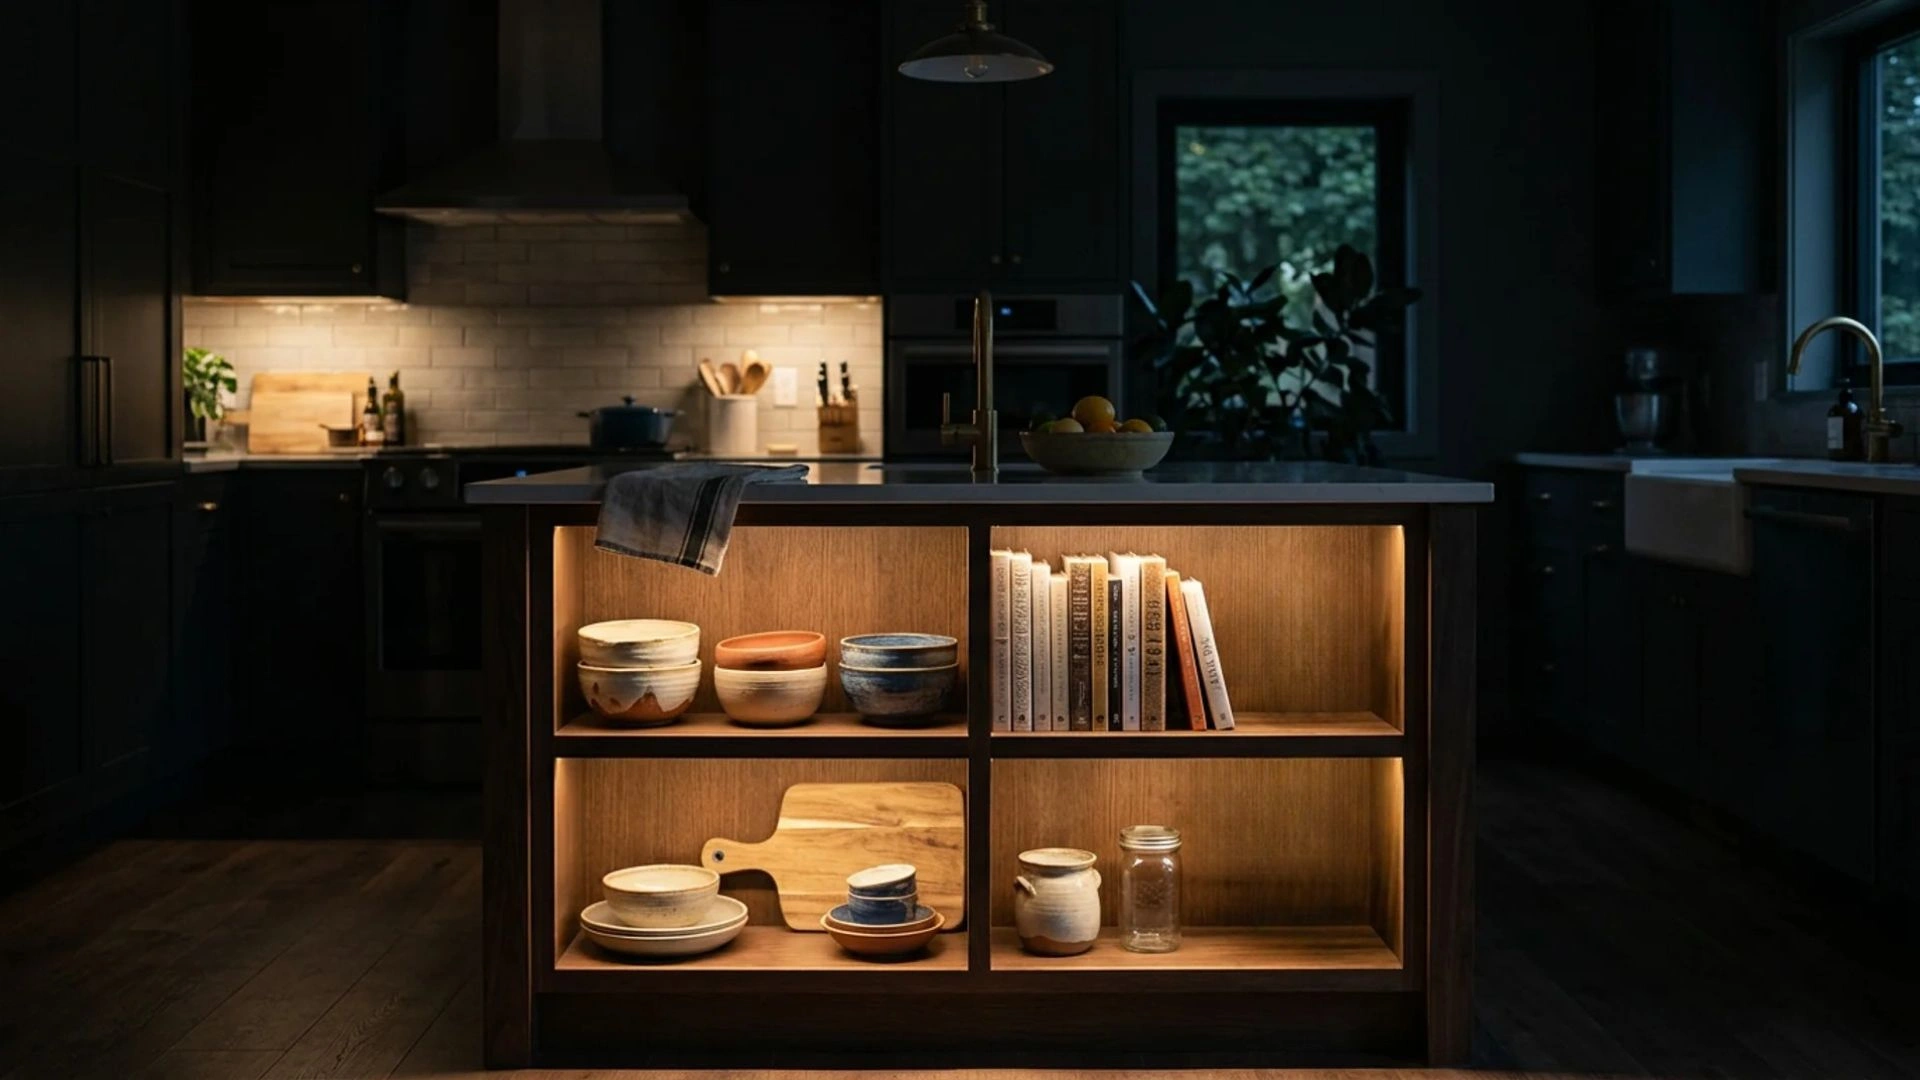
Small LED puck or strip lights installed inside the island’s open shelving, wired through the cabinet to a switch.
They illuminate objects on the shelves from within, casting warm light at counter level.
The effect is atmospheric and entirely separate from overhead task lighting.
It adds depth and layers to the kitchen lighting, especially after dark when overhead lights are dim.
Budget: $300 – $900
47. Freestanding Kitchen Island on Trestle Legs
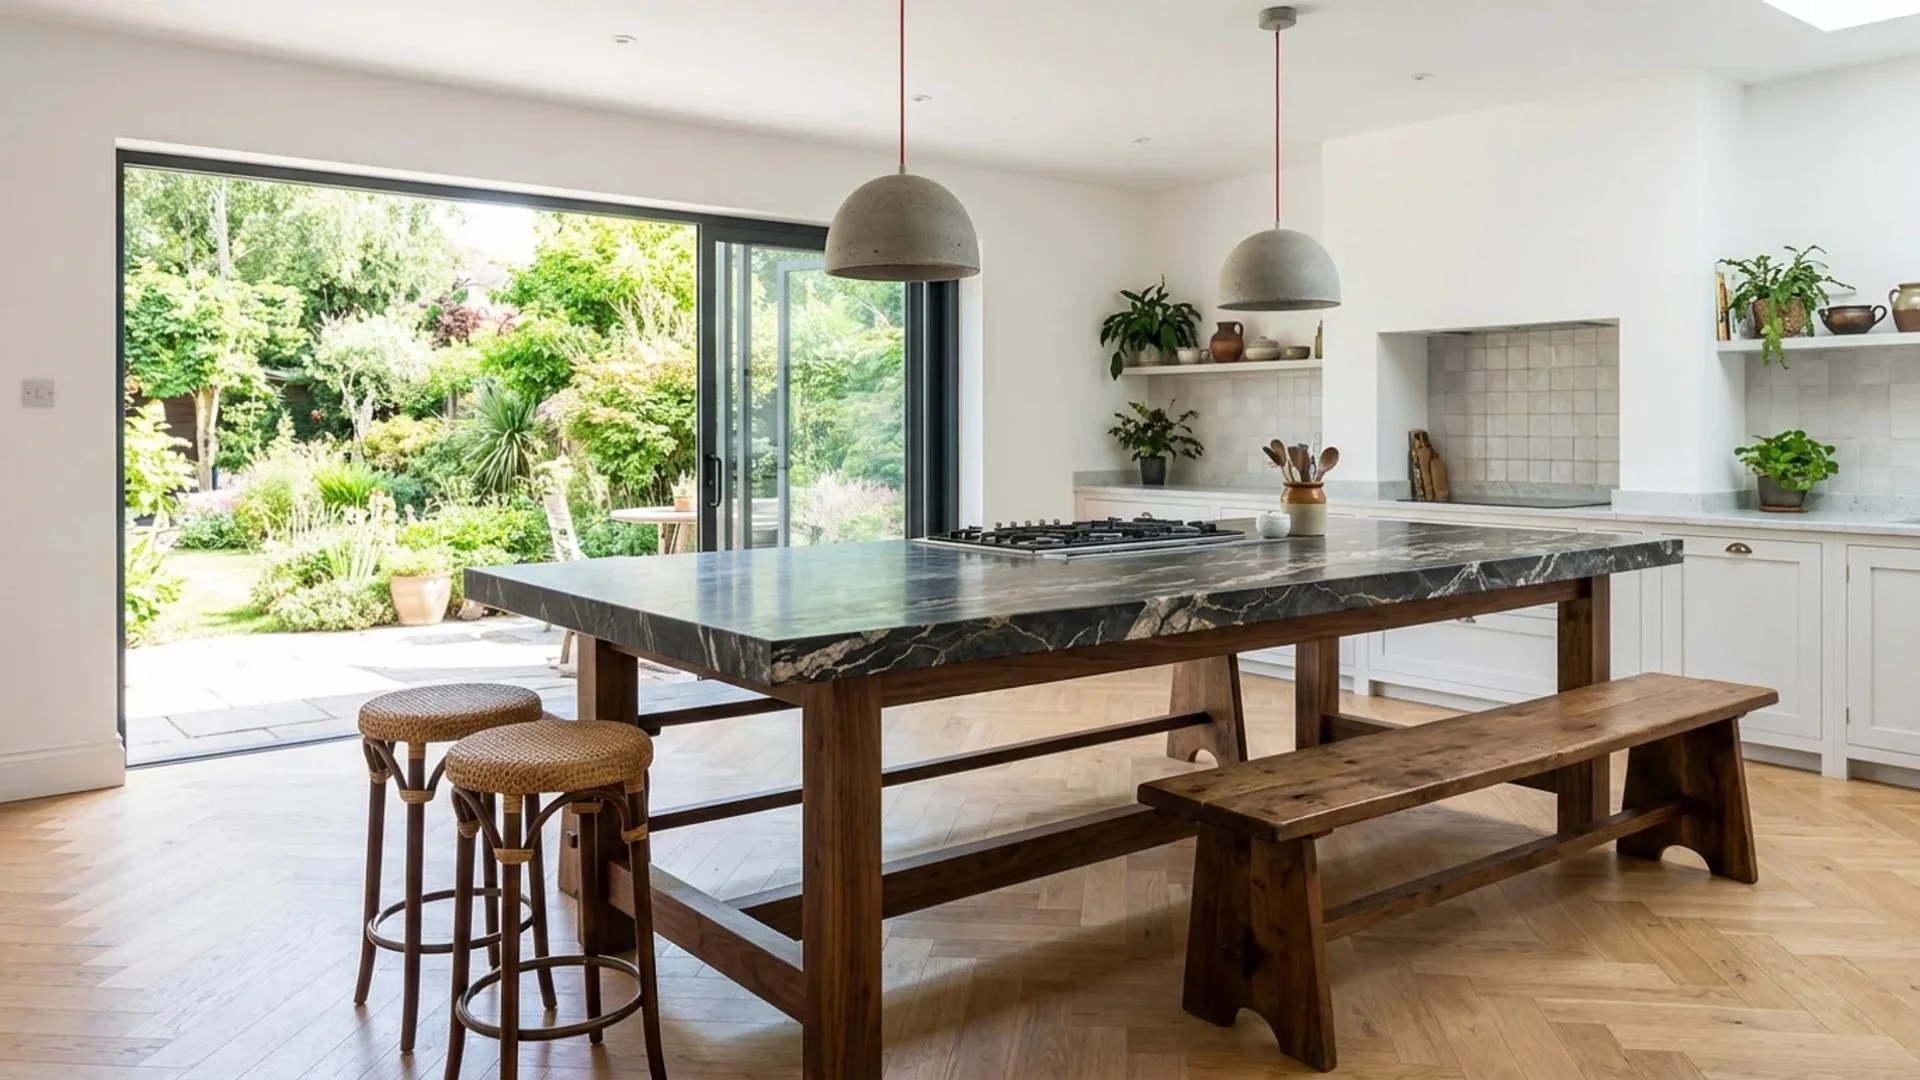
A freestanding trestle island replaces a fixed cabinet base with four solid wood legs in an A-frame or sawhorse configuration, supporting a thick stone or wood slab countertop above.
The open underside reduces storage but makes the kitchen feel lighter and more furniture-like, unlike built-in units.
The island rests on the floor without fixing, making it fully relocatable.
Budget: $4,000 – $12,000
48. Modern Farmhouse Island
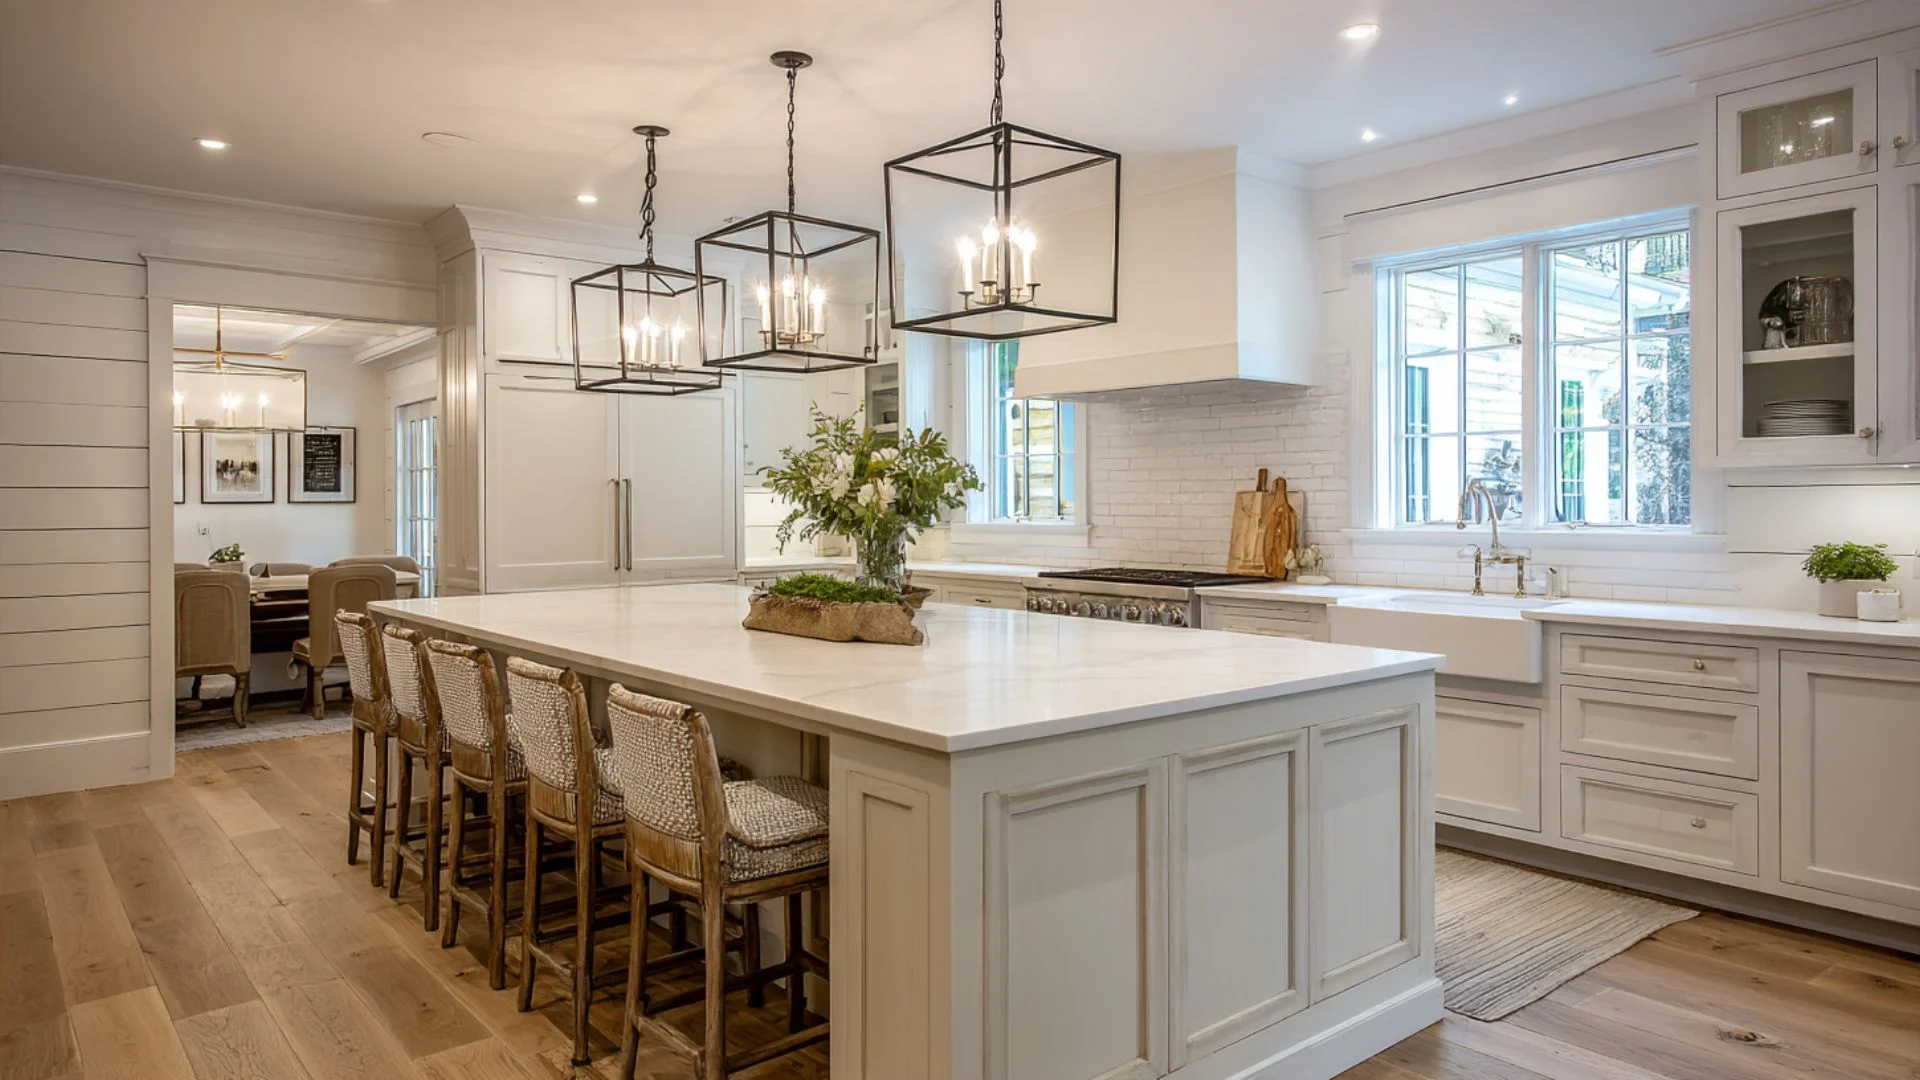
Existing cabinet fronts are replaced with shaker-style doors, the base is repainted in a warm, muted tone, and hardware shifts to simple bin pulls in brushed nickel or aged bronze.
The countertop moves to butcher block or white quartz to complete the material contrast.
Door replacement, paint application, and surface installation are all handled in sequence.
The island shifts from generic to characterful, blending warm raw wood with sleek lines for a crafted feel.
Budget: $2,000 – $6,000
49. Industrial Pipe and Steel Island
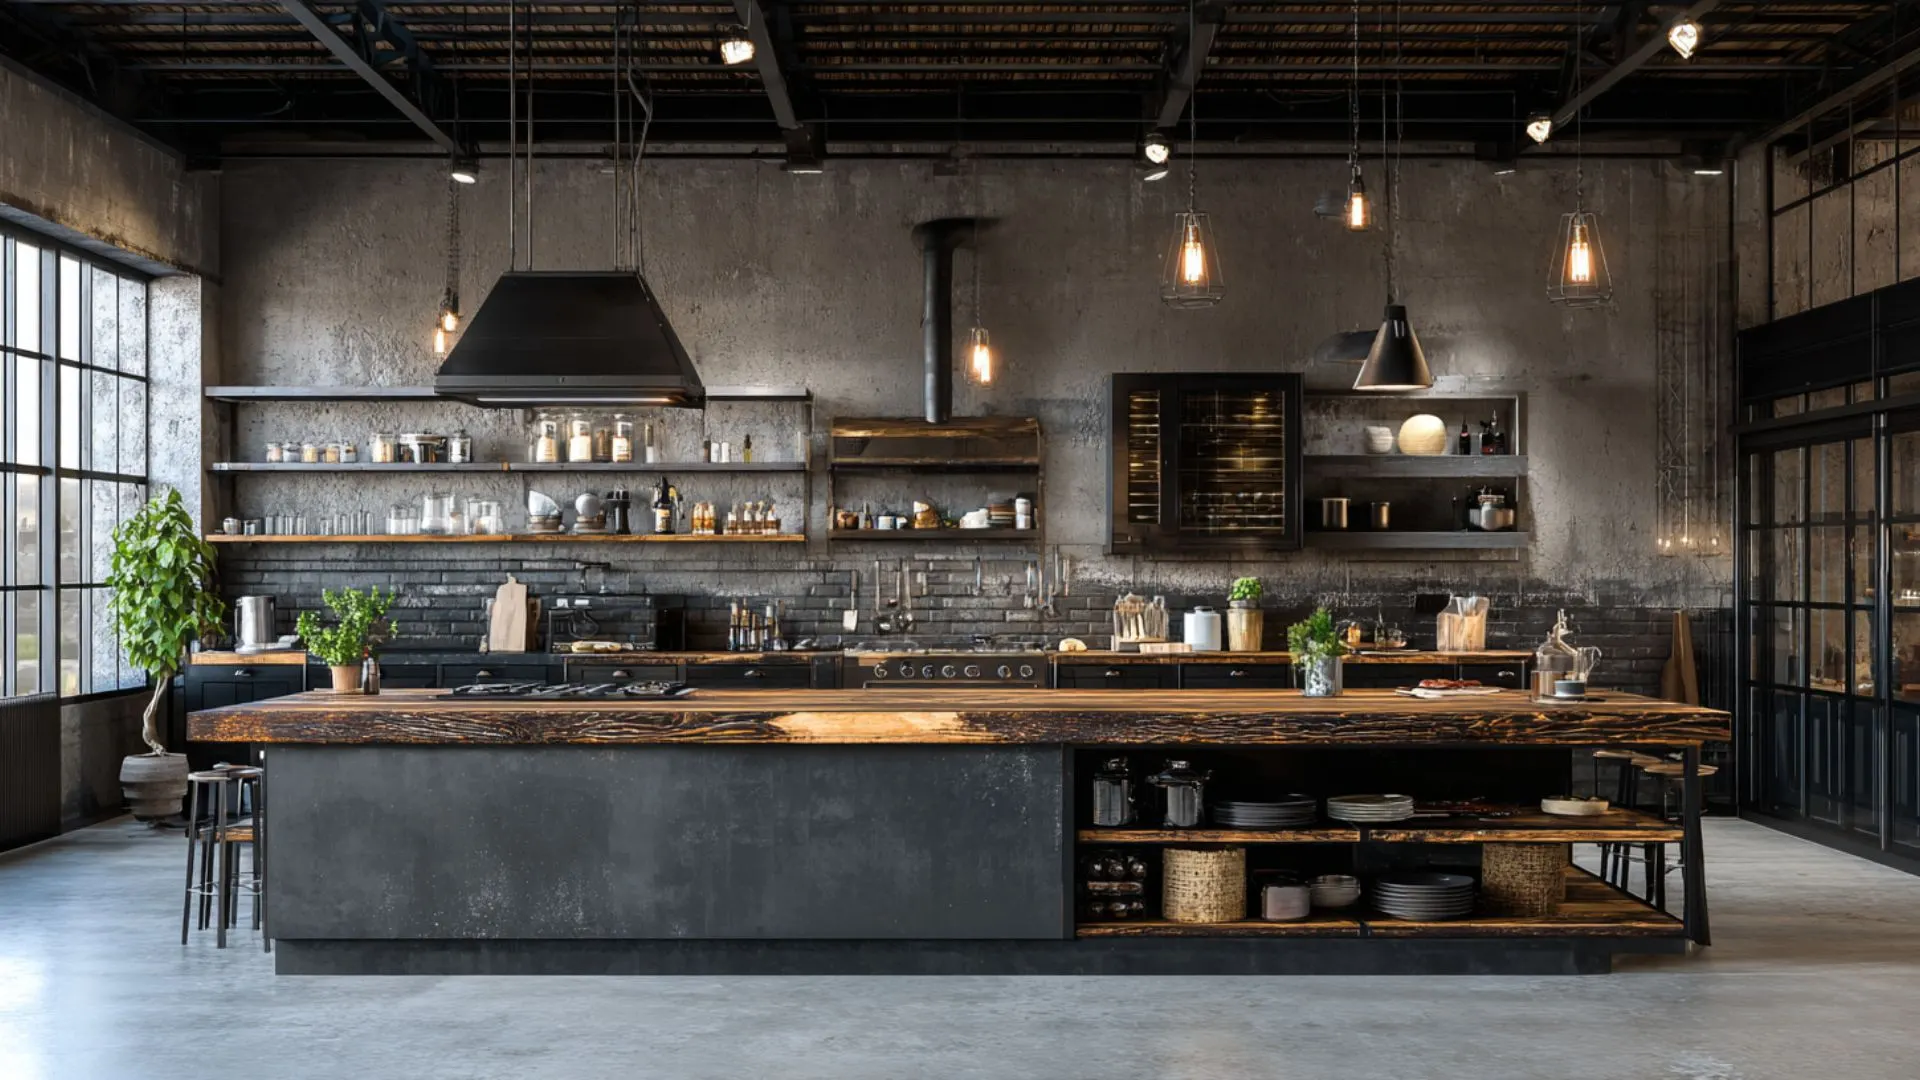
Exposed pipe-style steel legs are at the island corners; cabinet fronts are replaced with flat, dark panels; open lower shelving replaces closed cabinets; and the surface is replaced with concrete or raw steel.
The structural leg fitting, front swap, and surface installation are sequenced as a single project.
Dark matte hardware ties all metal elements together. The island transitions from traditional cabinetry to a raw, utilitarian form that appears deliberate rather than unfinished.
Budget: $3,500 – $9,000
50. Scandinavian Light Wood Island
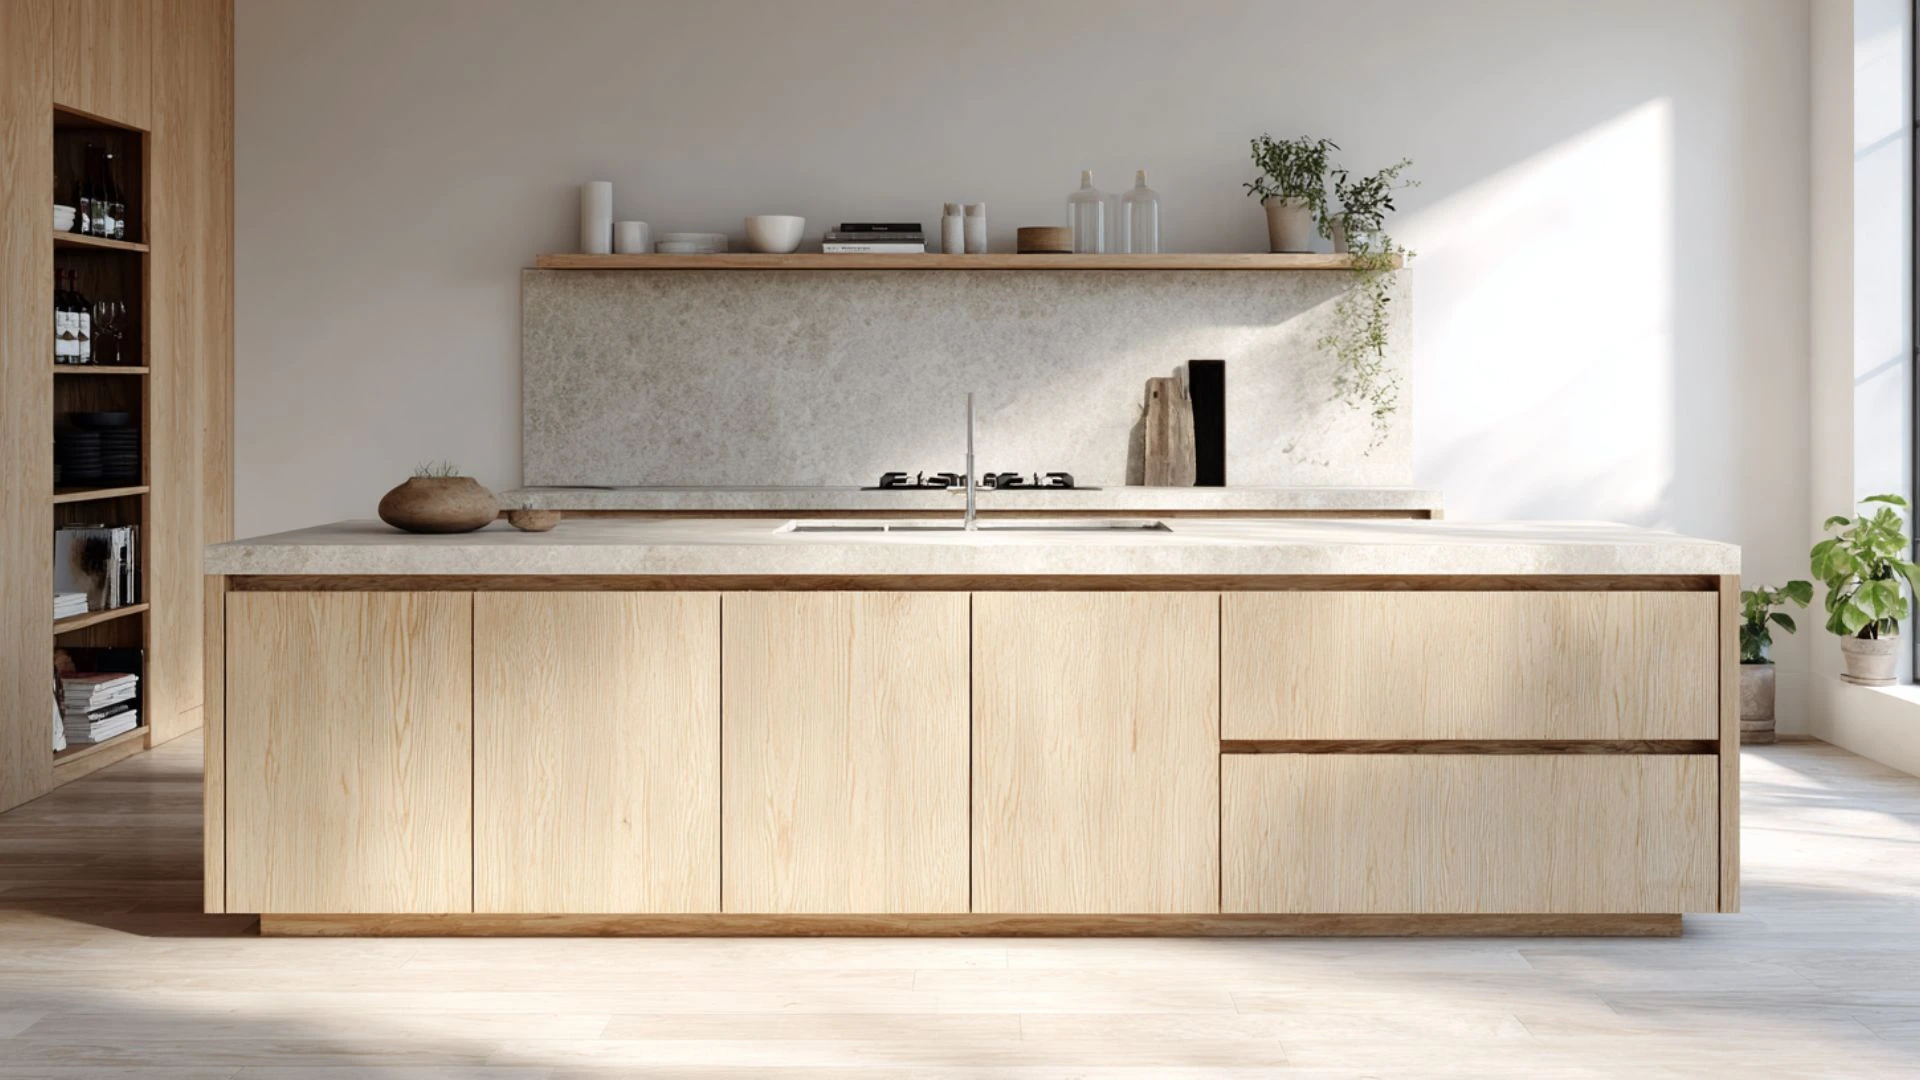
Painted or dark cabinet fronts are replaced with light ash or oak-veneer doors, all hardware is removed in favor of a push-to-open system, and a pale stone or white composite countertop is installed.
Push-latch mechanisms are fitted behind each front, and any decorative molding is stripped away.
Visual complexity is removed, leaving natural wood grain and clean proportions for a calm, uncluttered design.
Budget: $2,500 – $7,000
51. Traditional Raised-Panel Island
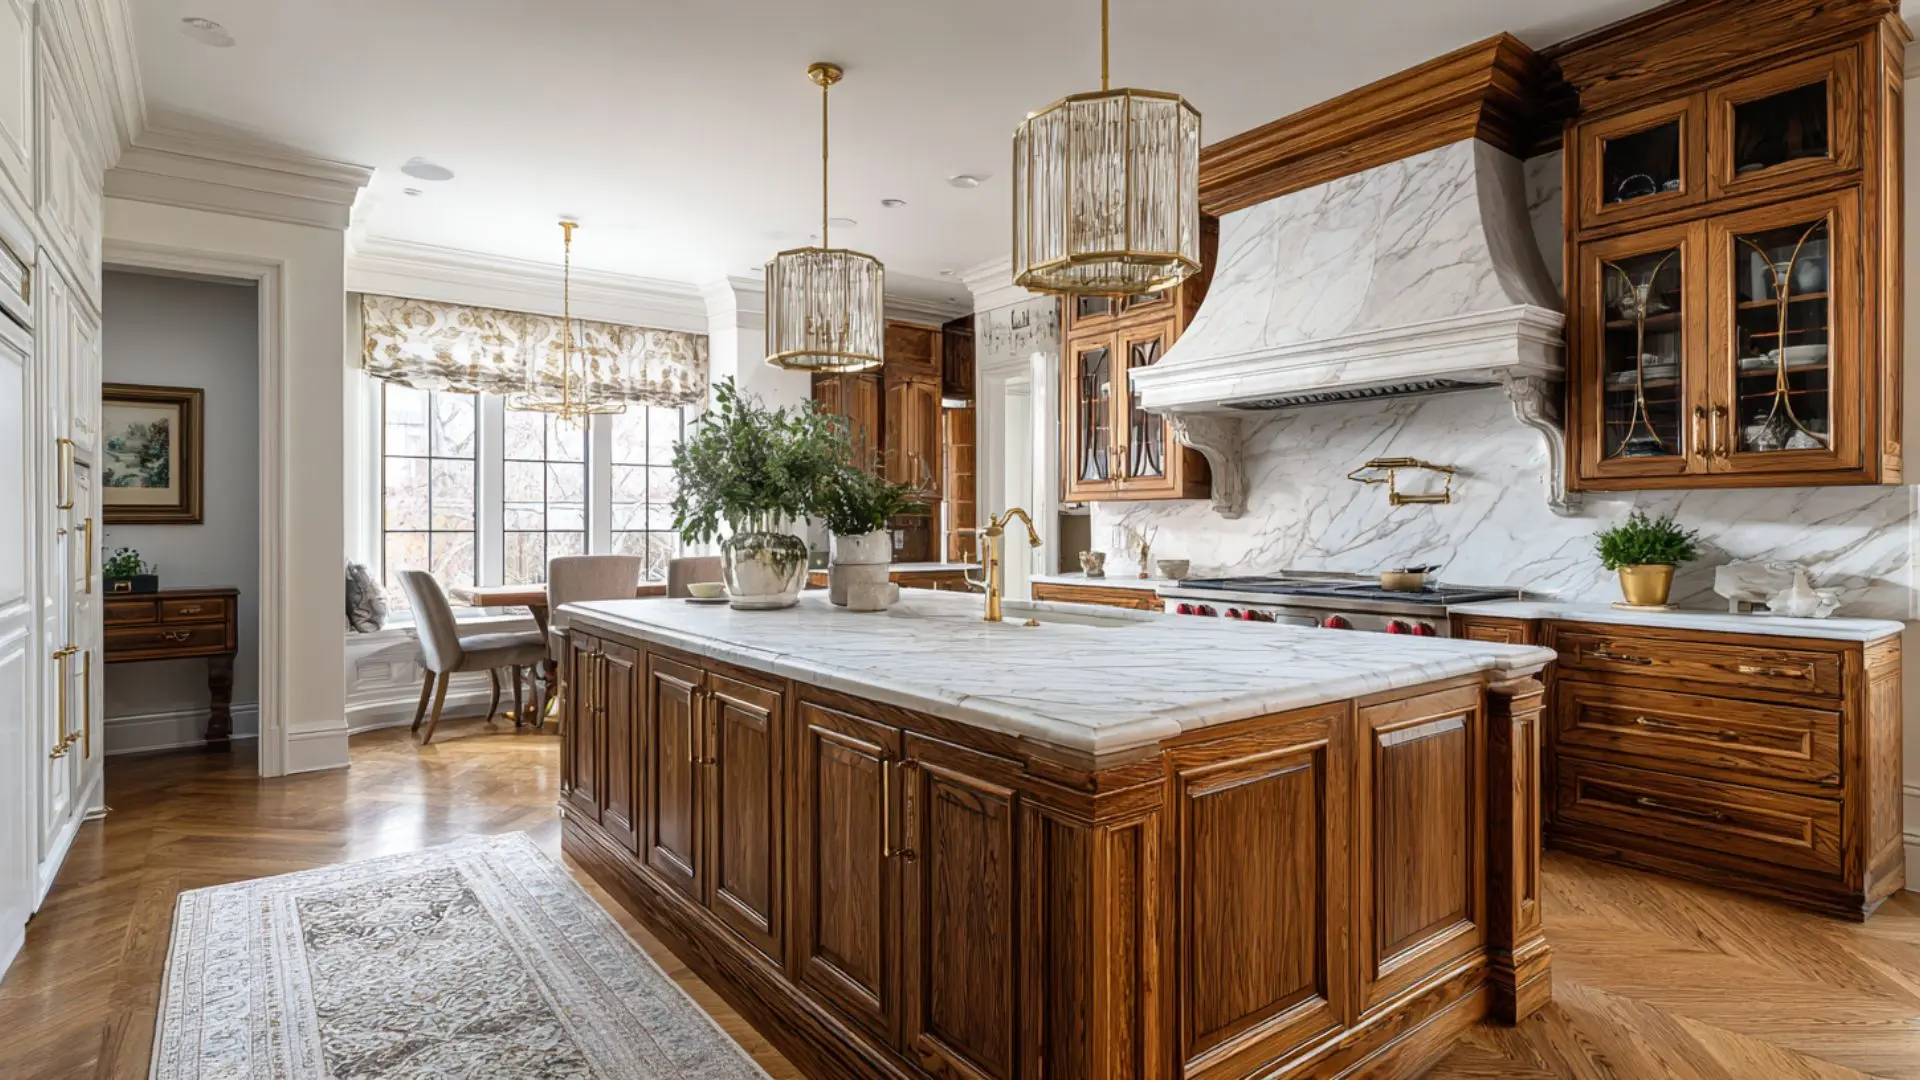
Flat or shaker fronts are replaced with raised-panel cabinet doors, turned corner legs are added at the base, crown molding is applied along the top perimeter, and surfaces are refinished in a rich stained or deep painted tone.
The door swap, leg installation, and molding work are completed as a coordinated finish package.
The island changes from a built-in cabinet to formal furniture, matching classic and English country kitchen styles.
Budget: $3,000 – $8,000
52. Parisian Bistro Island
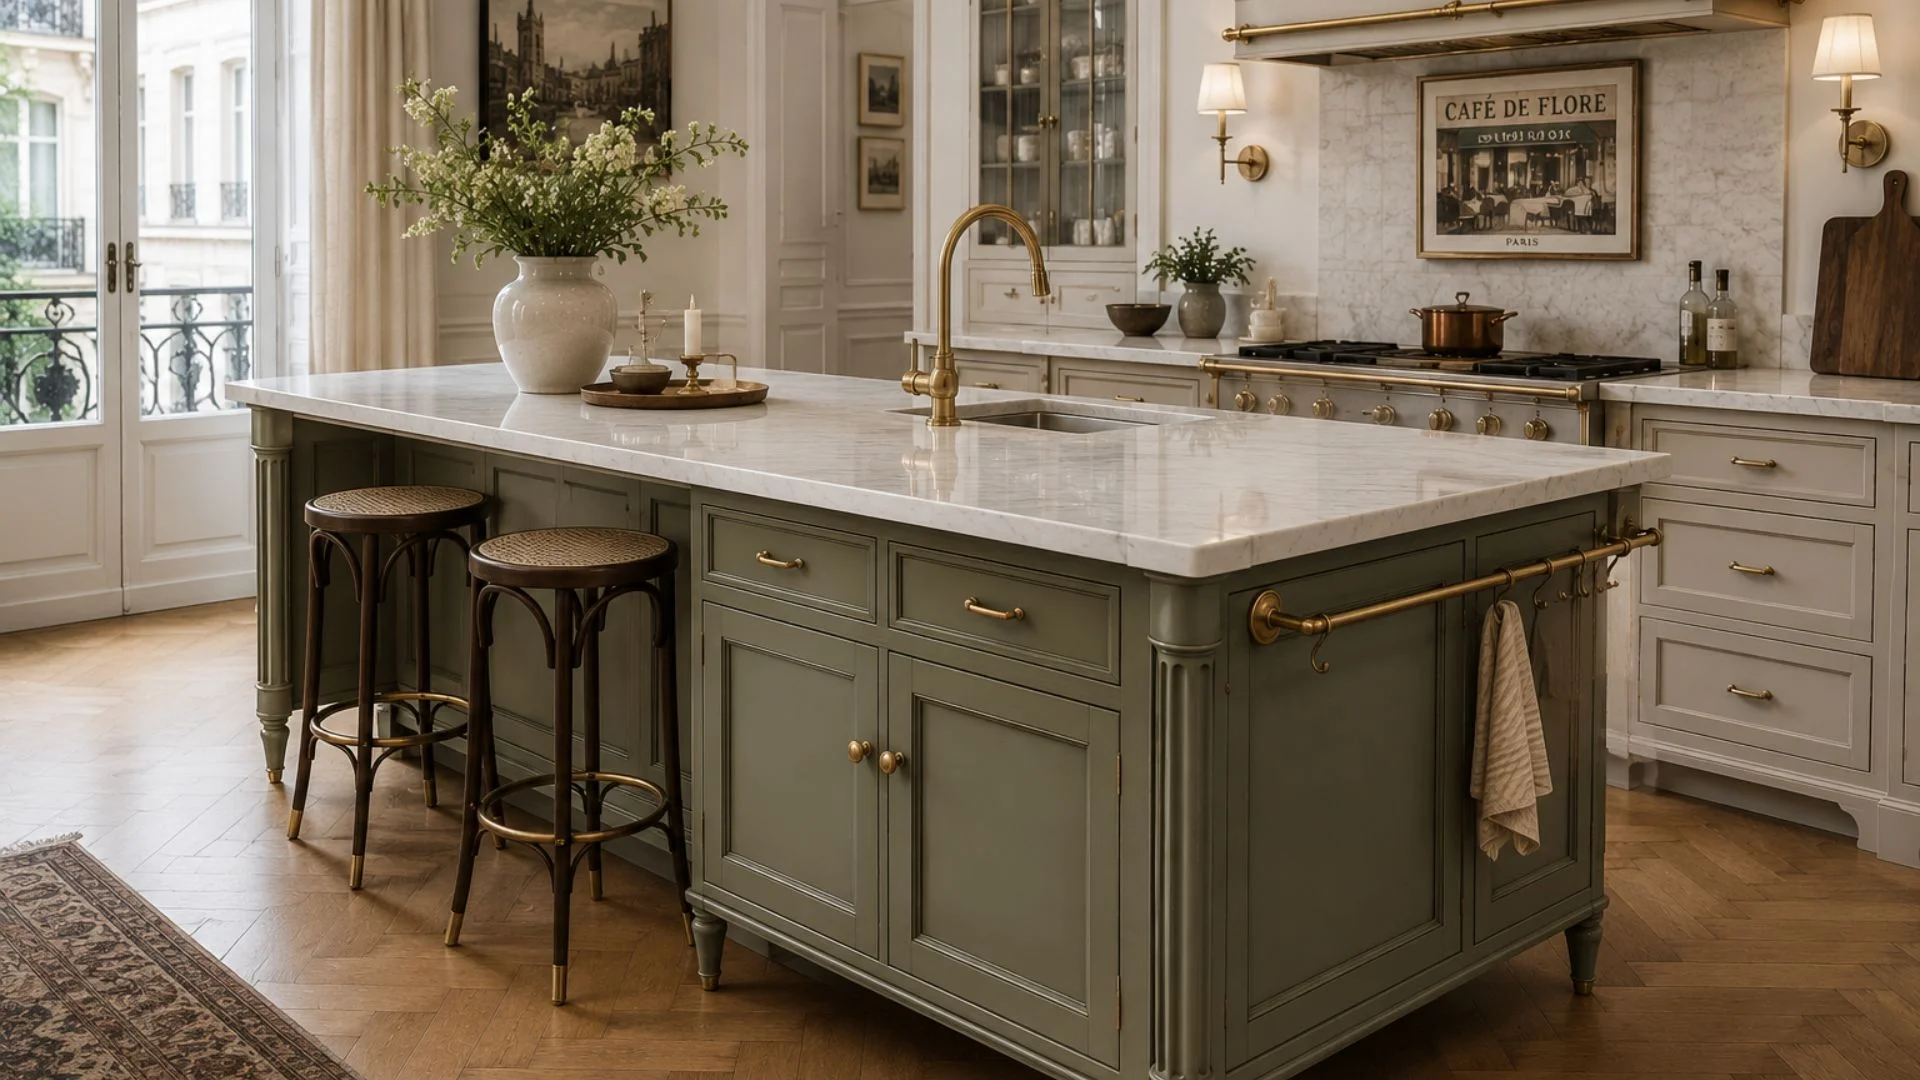
A Parisian bistro island takes inspiration from classic French café interiors and furniture.
Features often include furniture-style cabinetry, decorative legs, panel detailing, and warm brass hardware.
The design helps the island feel less like a standard cabinet unit and more like a statement piece within the kitchen.
This style suits people seeking a refined look with character, ample workspace, and storage.
Budget: $2,500 – $8,000
53. Japandi Minimalist Island
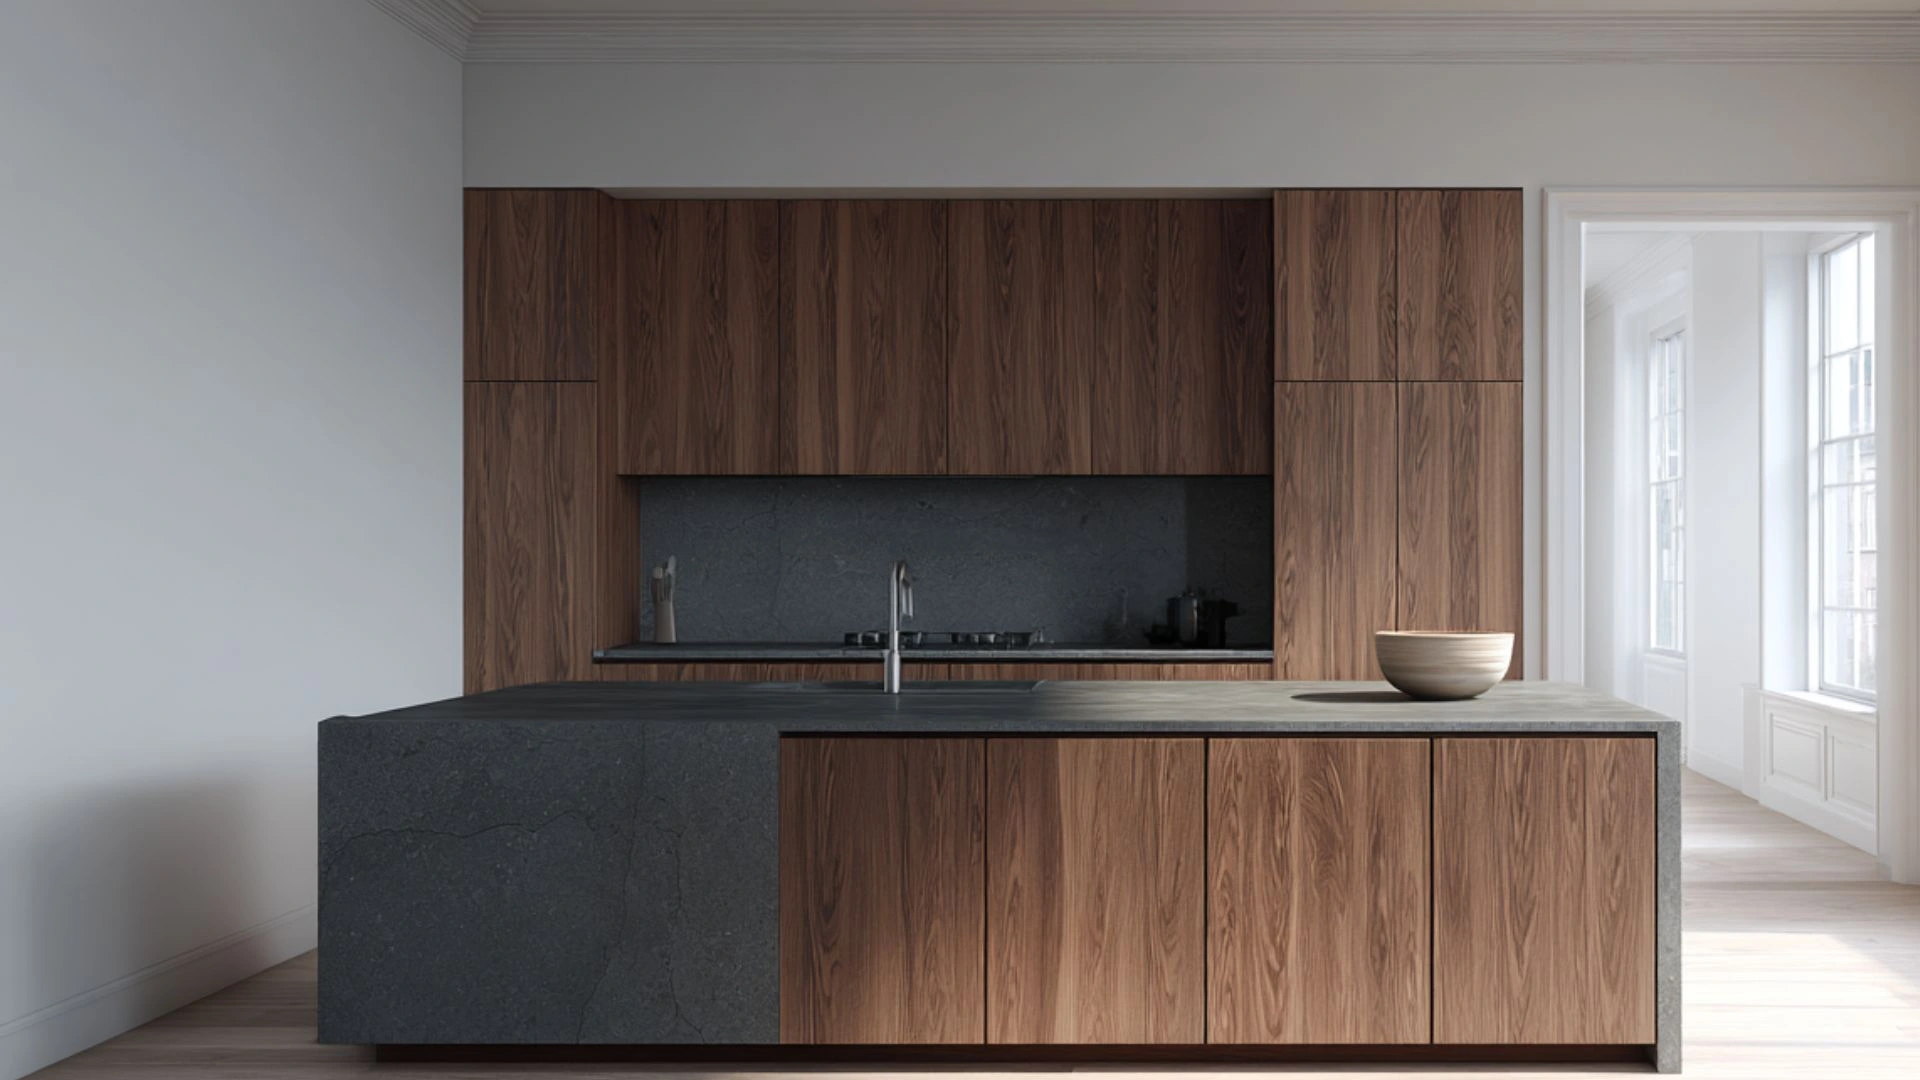
All hardware is removed, fronts are replaced with handleless flat panels in walnut or oak, with a honed matte stone surface. Push-to-open mechanisms are added, and decorative molding is removed.
The island is simplified to its basic form, with no ornamentation beyond the natural wood and stone textures.
The result is an island that feels grounded, deliberate, and visually quiet within the kitchen.
Budget: $3,000 – $8,500
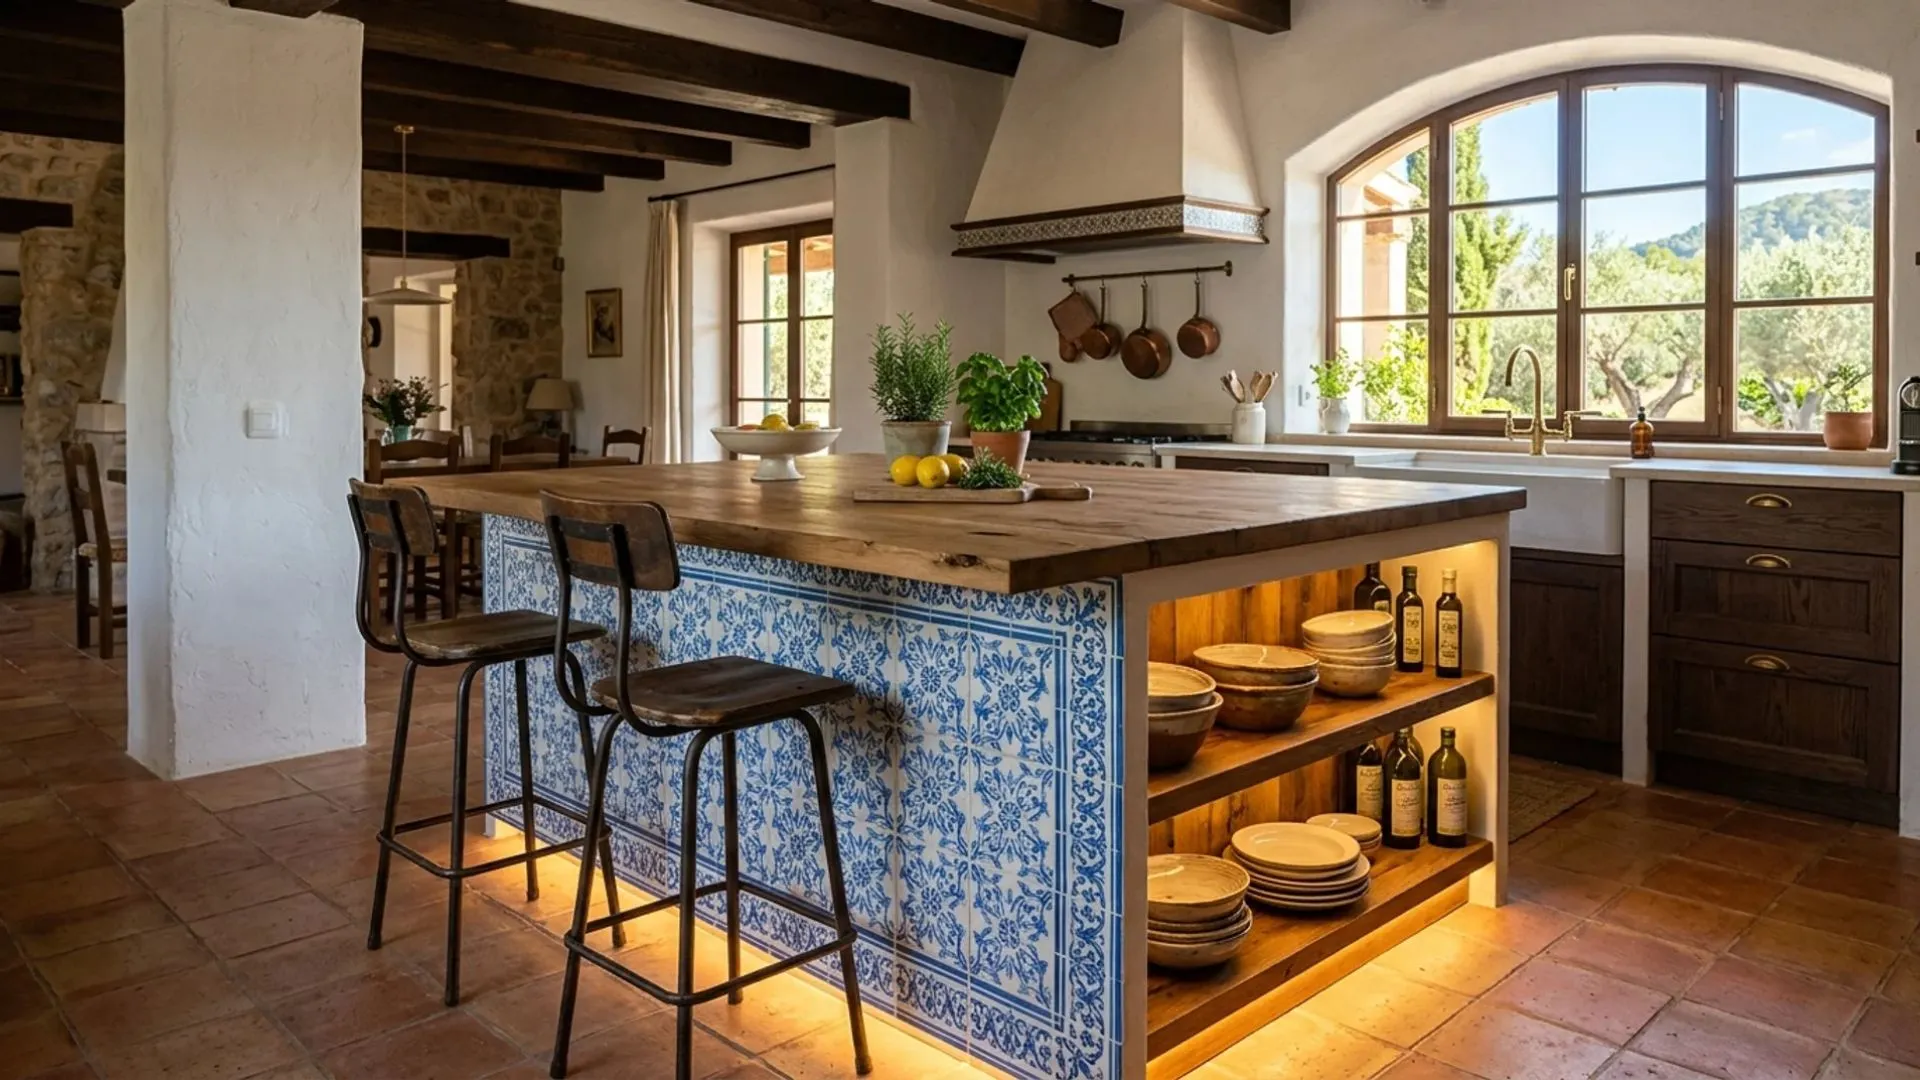
54. Mediterranean Tiled Island
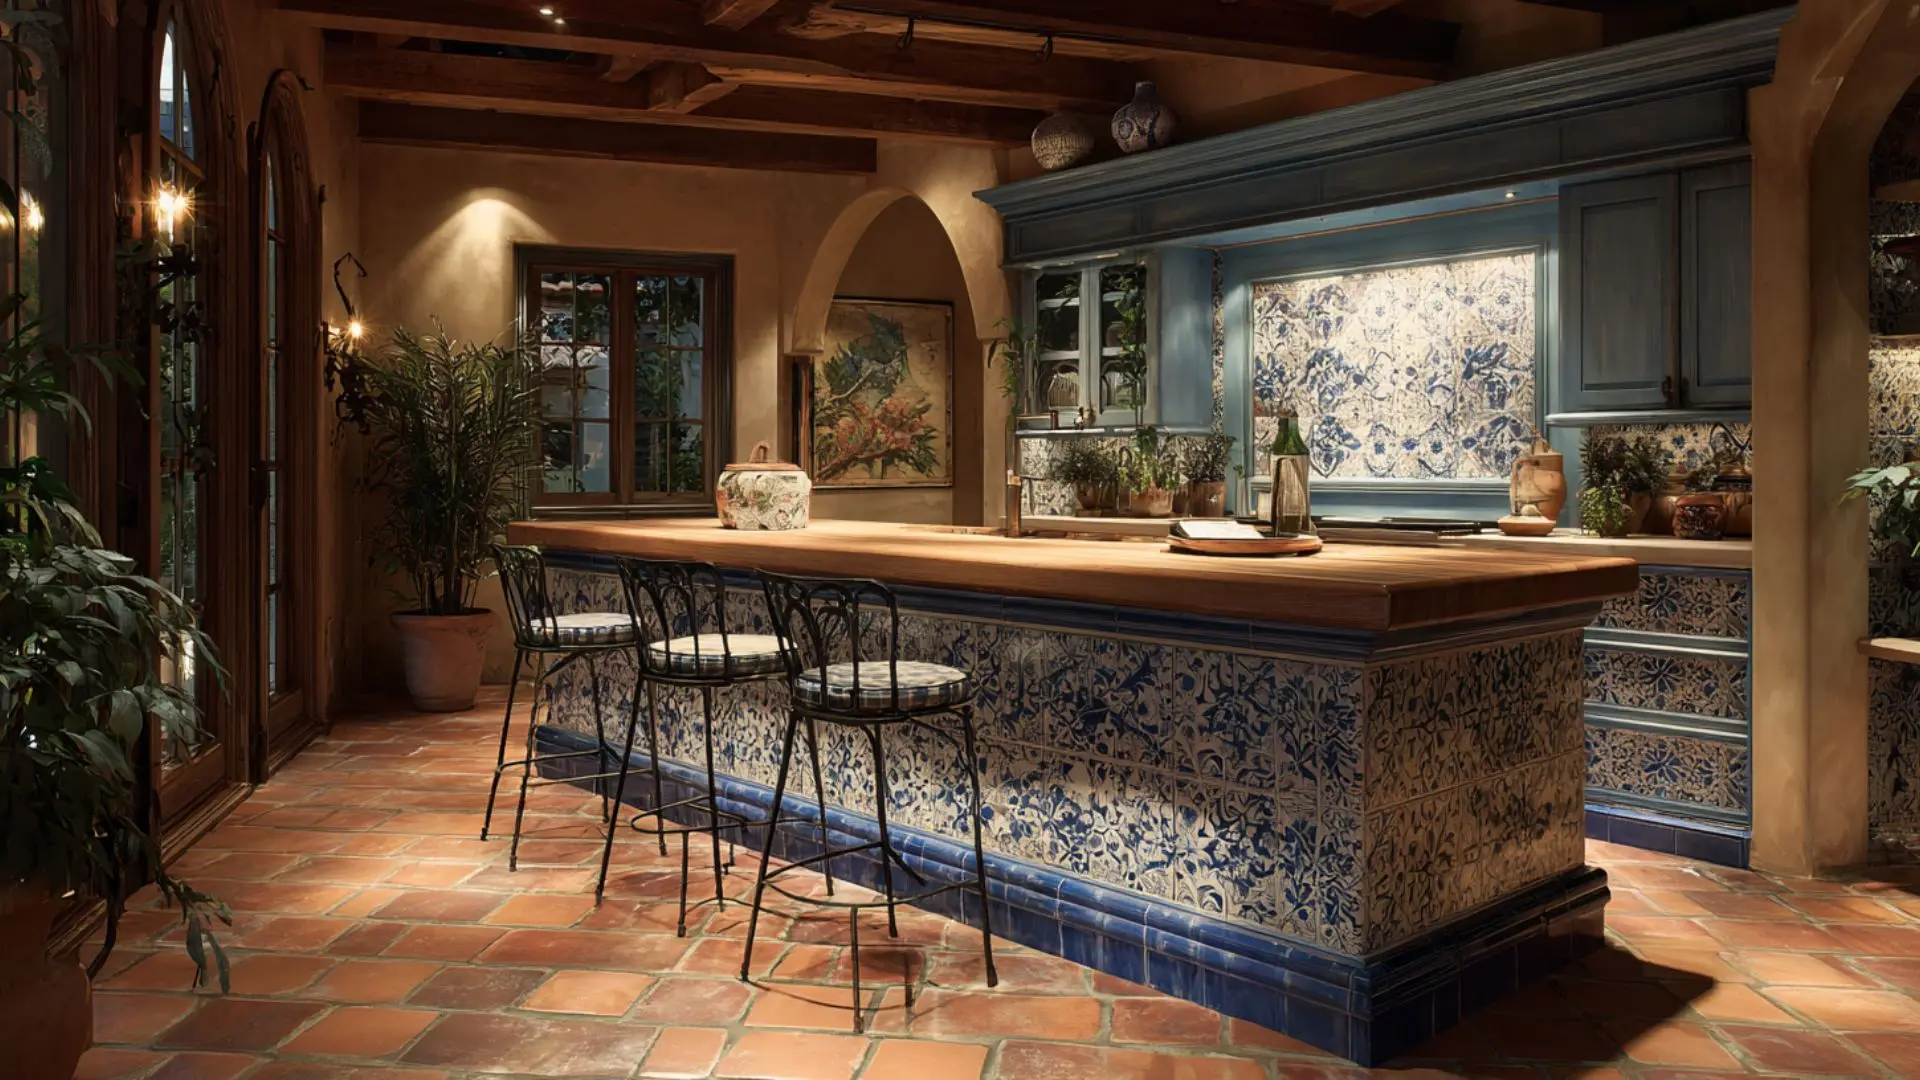
Hand-painted or encaustic tiles replace plain cladding on the lower panel.
Surface is removed, substrate is prepared, tiles are set in pattern, and joints are grouted. A stone or wood countertop rests above the tiled base, reinforced with wrought-iron or bronze hardware, adding regional character.
The tiled panel adds color, pattern, and texture, making it the kitchen’s most distinctive feature.
Budget: $1,500 – $4,500
55. Bold Single-Color Statement Island
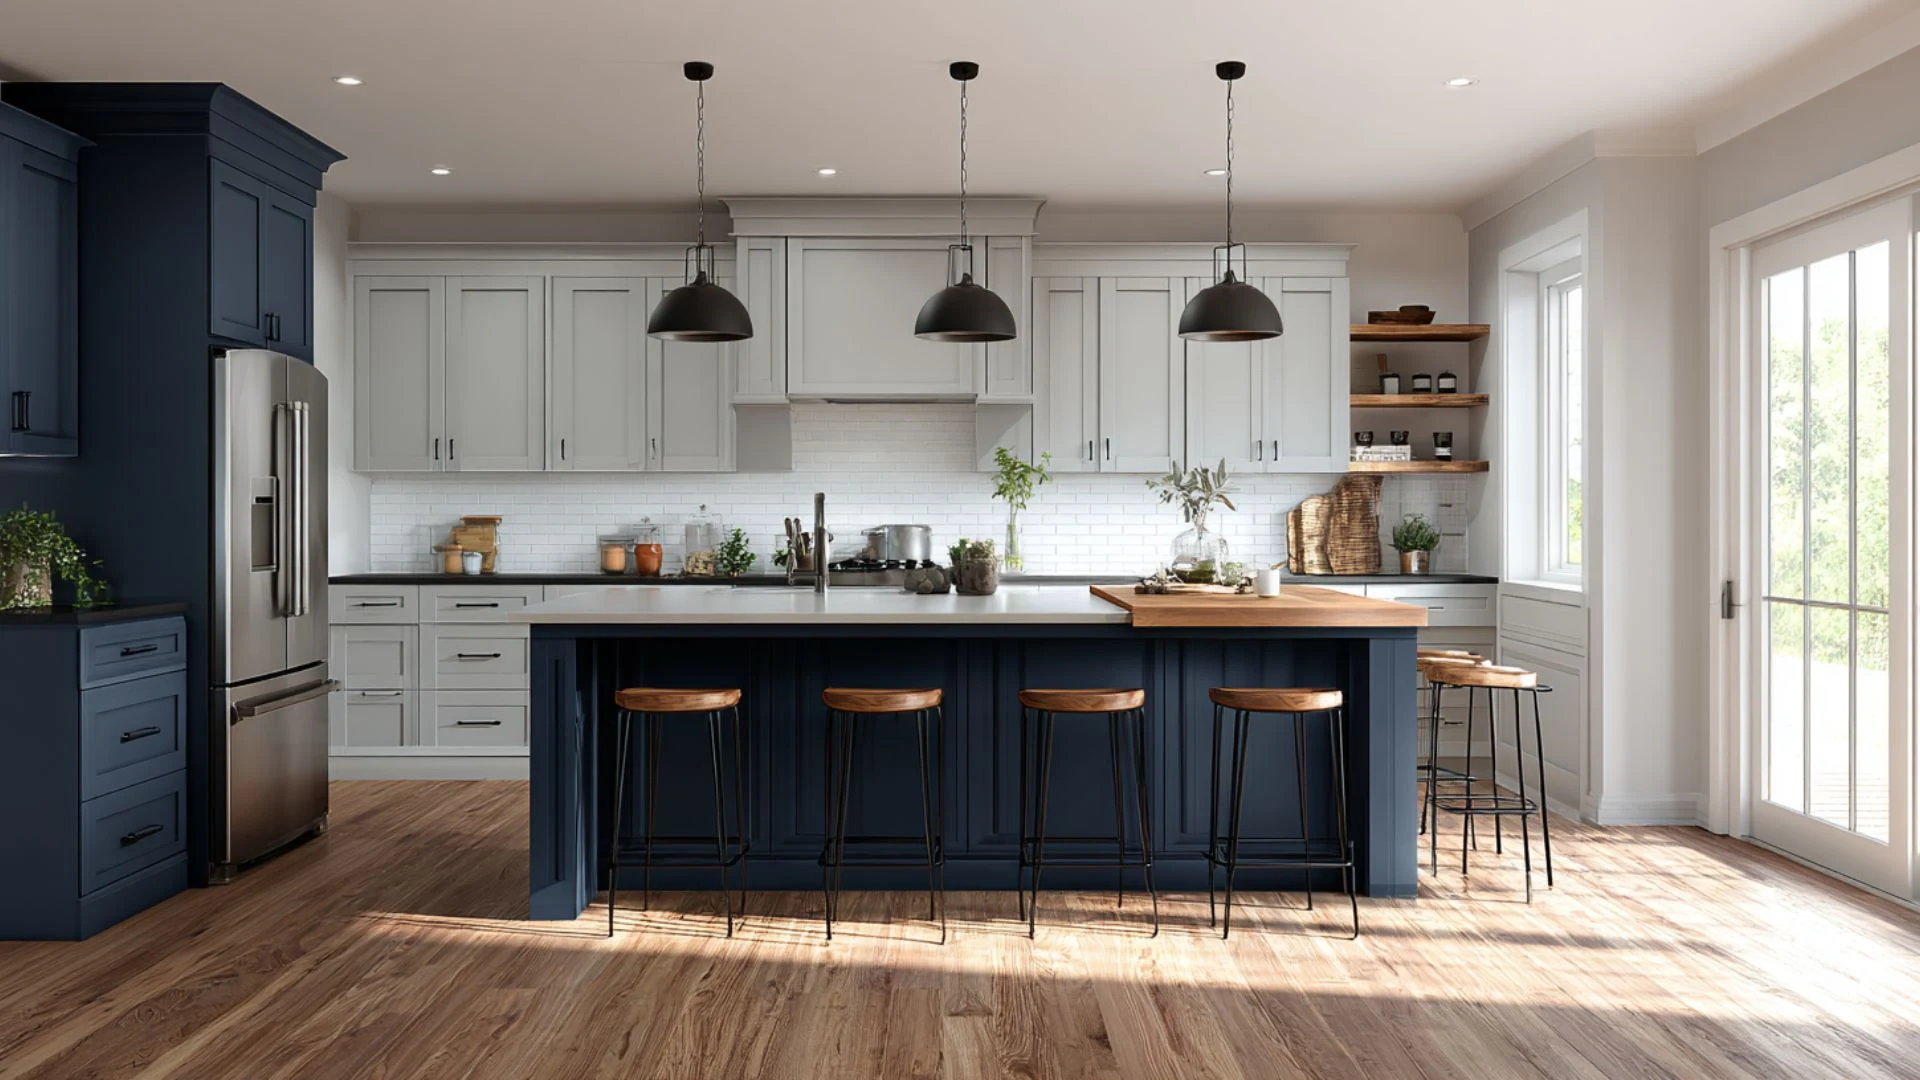
The island base and visible panels are painted in a saturated tone, with neutral perimeter cabinetry.
Surfaces are prepared, primed, and finished with durable cabinet paint in forest green, terracotta, or cobalt blue.
No structural changes are required. The contrast between the island color and the neutral perimeter establishes the island as the immediate focal point of the kitchen, delivering high visual impact at a relatively accessible cost.
Budget: $800 – $2,000
56. Mid-Century Modern Island
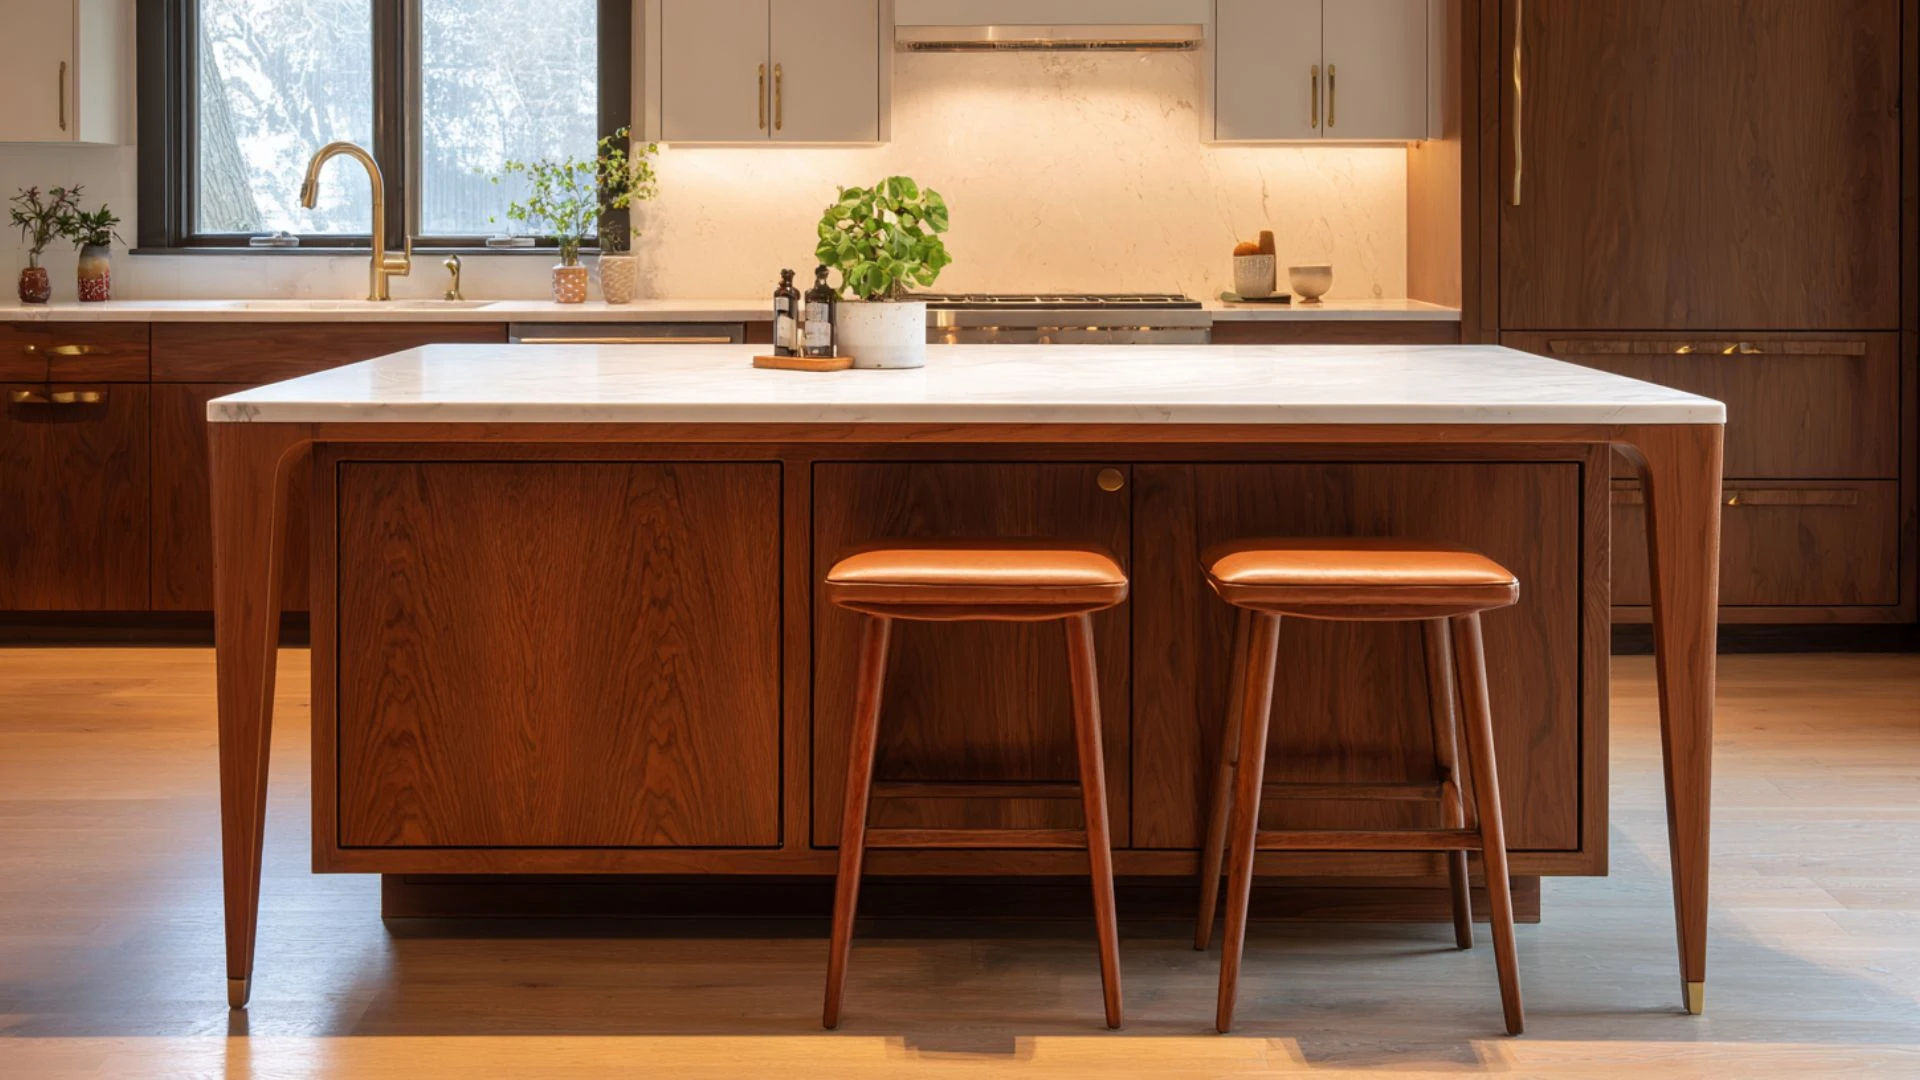
Tapered furniture-style legs are fitted at the four corners, existing fronts are replaced with flat-panel doors in warm teak or walnut veneer, and a solid-color stone or matte laminate surface is installed.
The legs are secured with internal blocking, and the new fronts are hung in sequence.
Lifting the island on tapered legs replaces the heavy cabinet look with a lighter, furniture-like style.
Budget: $2,500 – $6,500
57. Art Deco Island
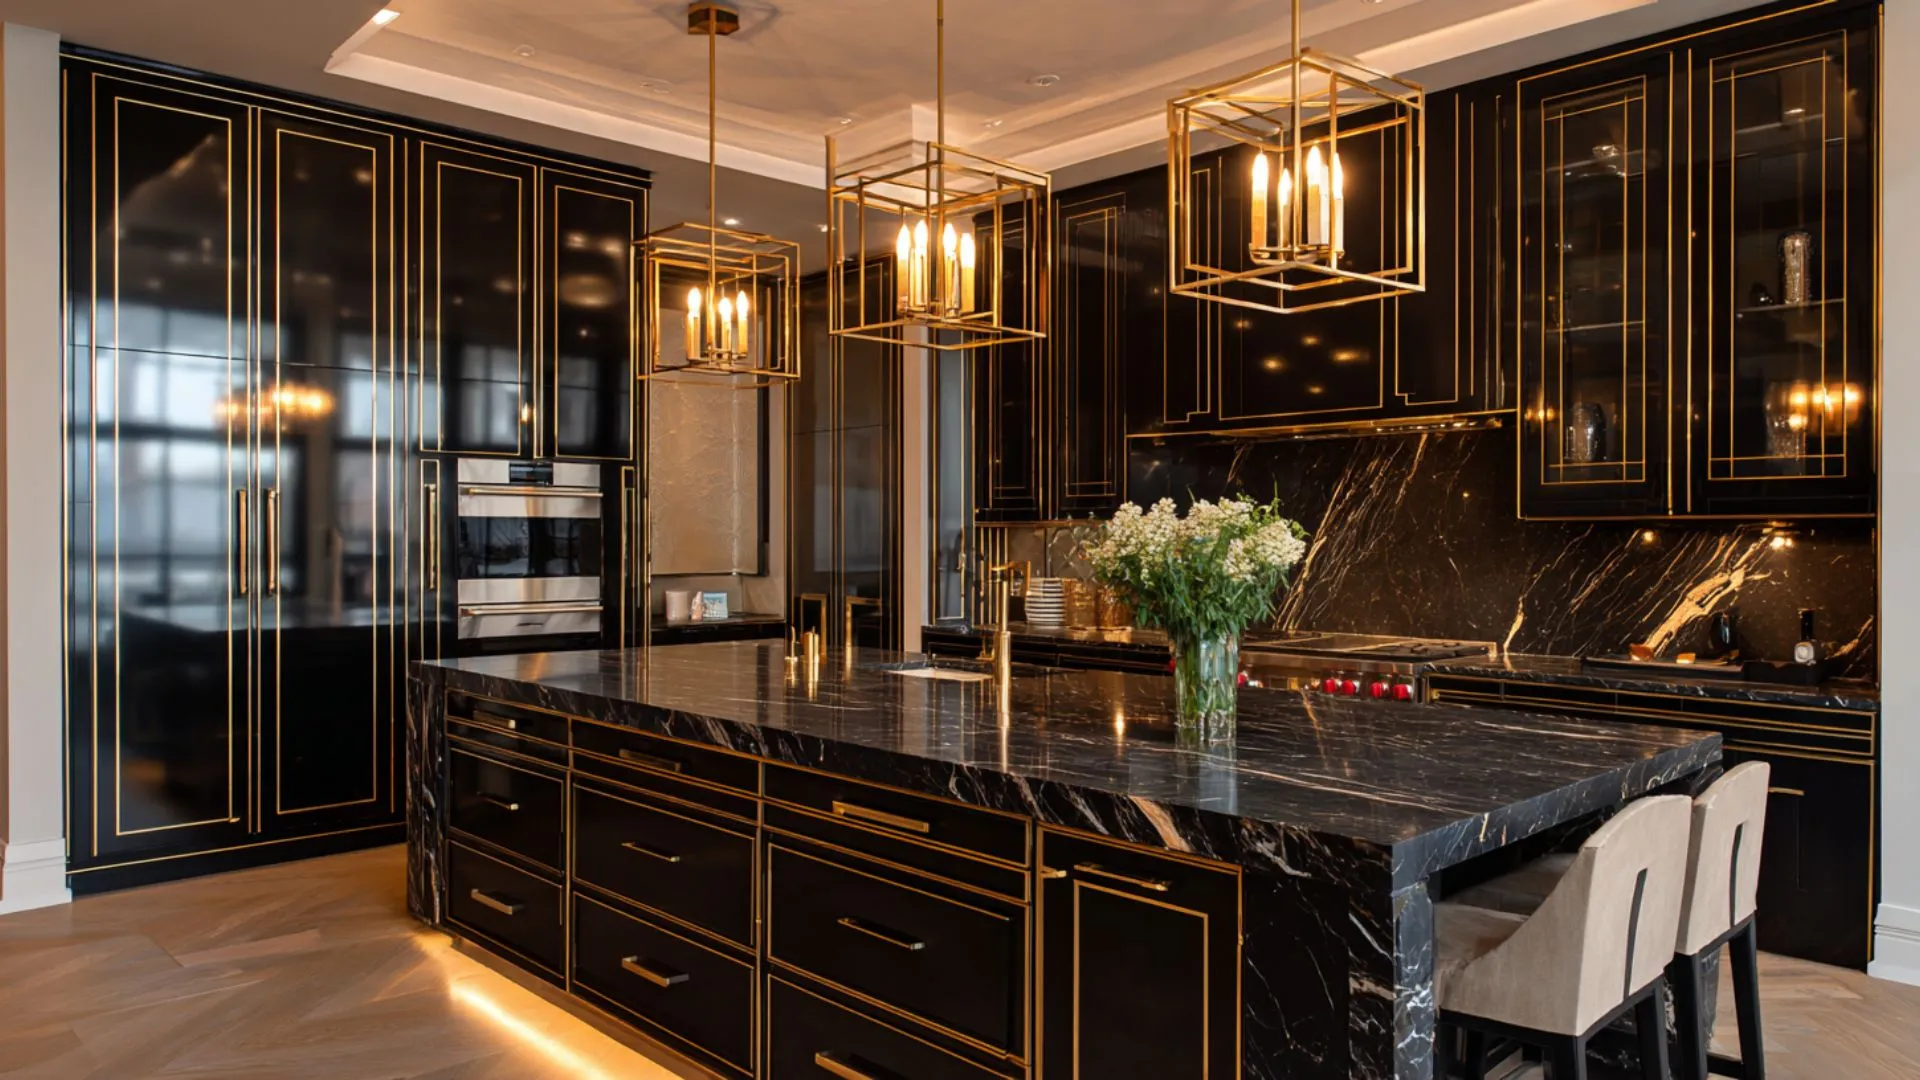
An Art Deco island remodel features bold geometric symmetry with high-gloss lacquered panels in black, cream, or jewel tones, fitted with polished chrome or gold hardware in stepped or fan shapes.
It adds decorative inlay strips of contrasting materials, such as brass or mirrored glass, along the cabinet edges.
The countertop shifts to a richly veined black marble or onyx slab, making the island the most formal element in the kitchen.
Budget: $5,000 – $14,000
58. Wabi-Sabi Imperfect Finish Island
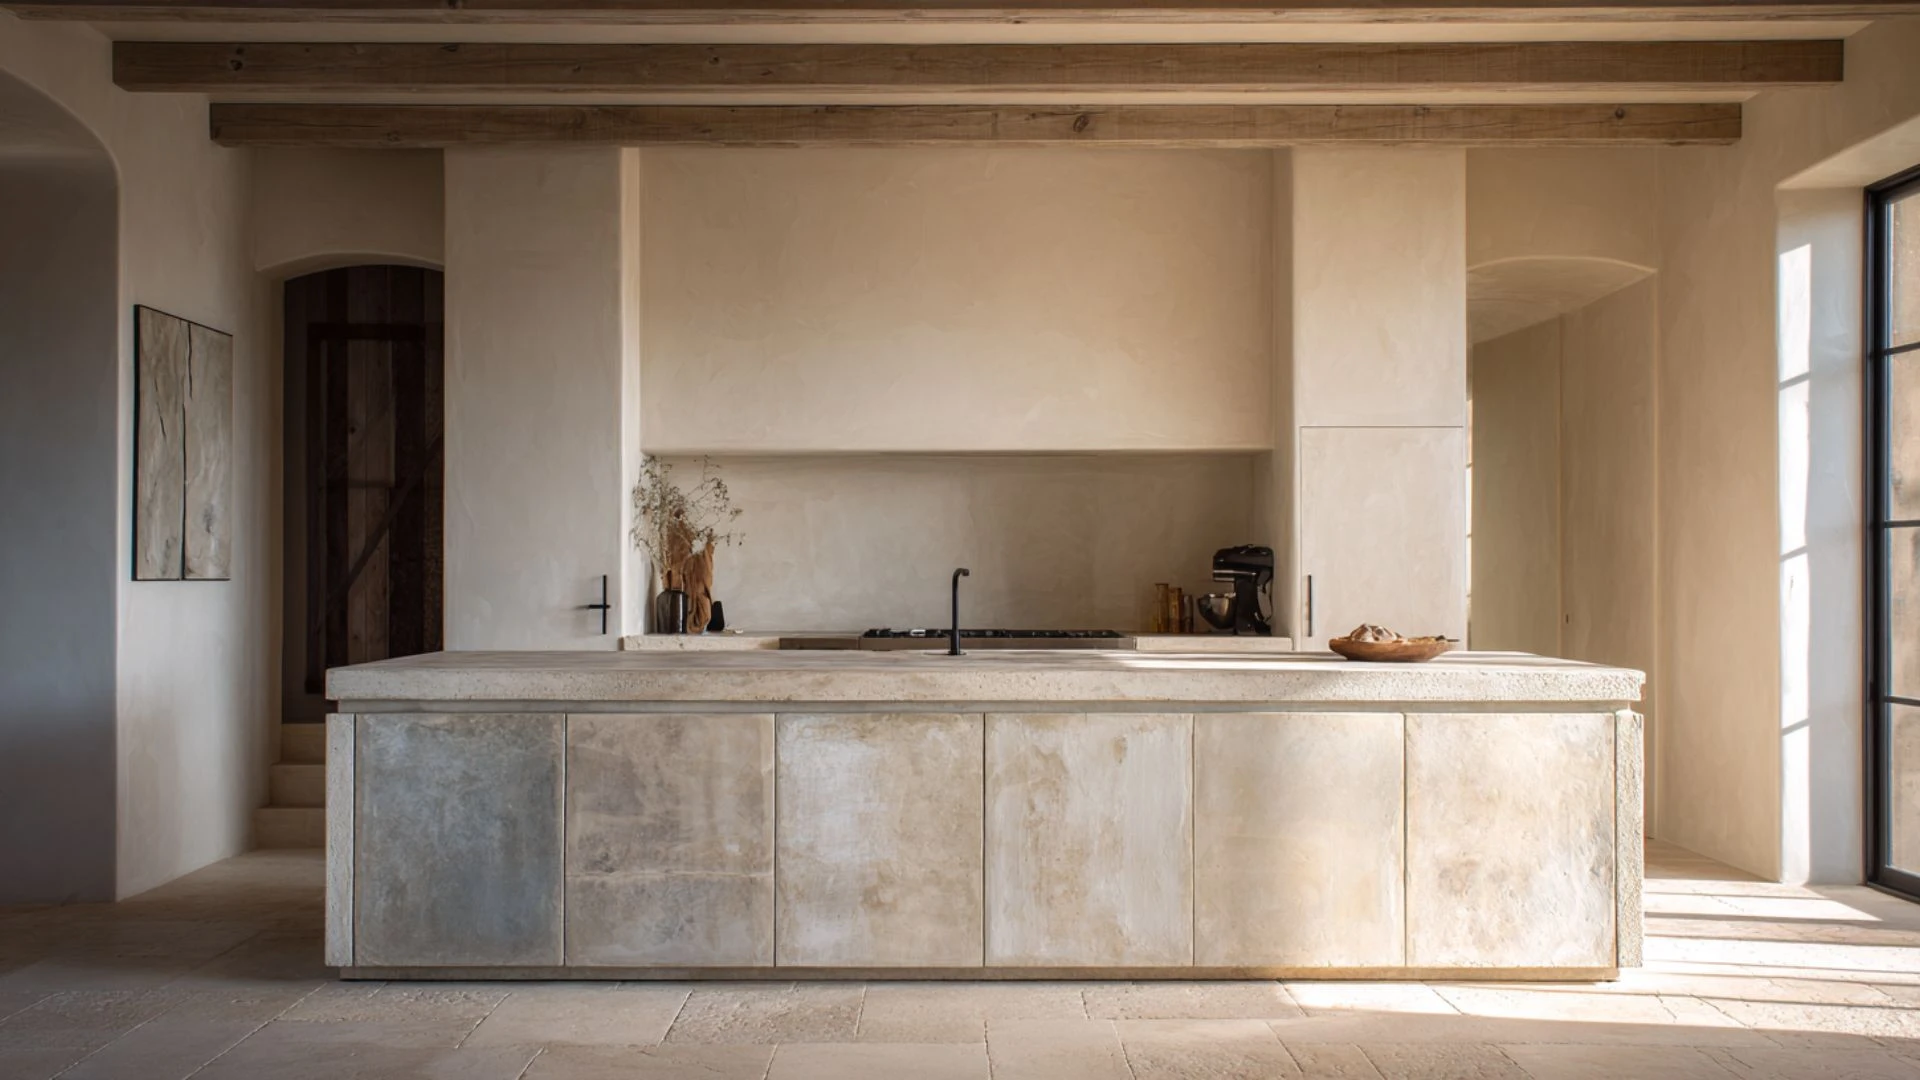
A wabi-sabi island remodel embraces intentional imperfection as the design direction.
Cabinet fronts are replaced with hand-plastered or lime-washed panels showing deliberate texture variation, uneven trowel marks, and natural tonal inconsistency. The countertop has a hand-finished concrete or rough-edged stone slab with visible imperfections, not polished away.
The result is an island that feels organic, aged, and unique, standing apart from finish-driven kitchen styles.
Budget: $2,500 – $7,000
59. Workflow and Clearance Assessment
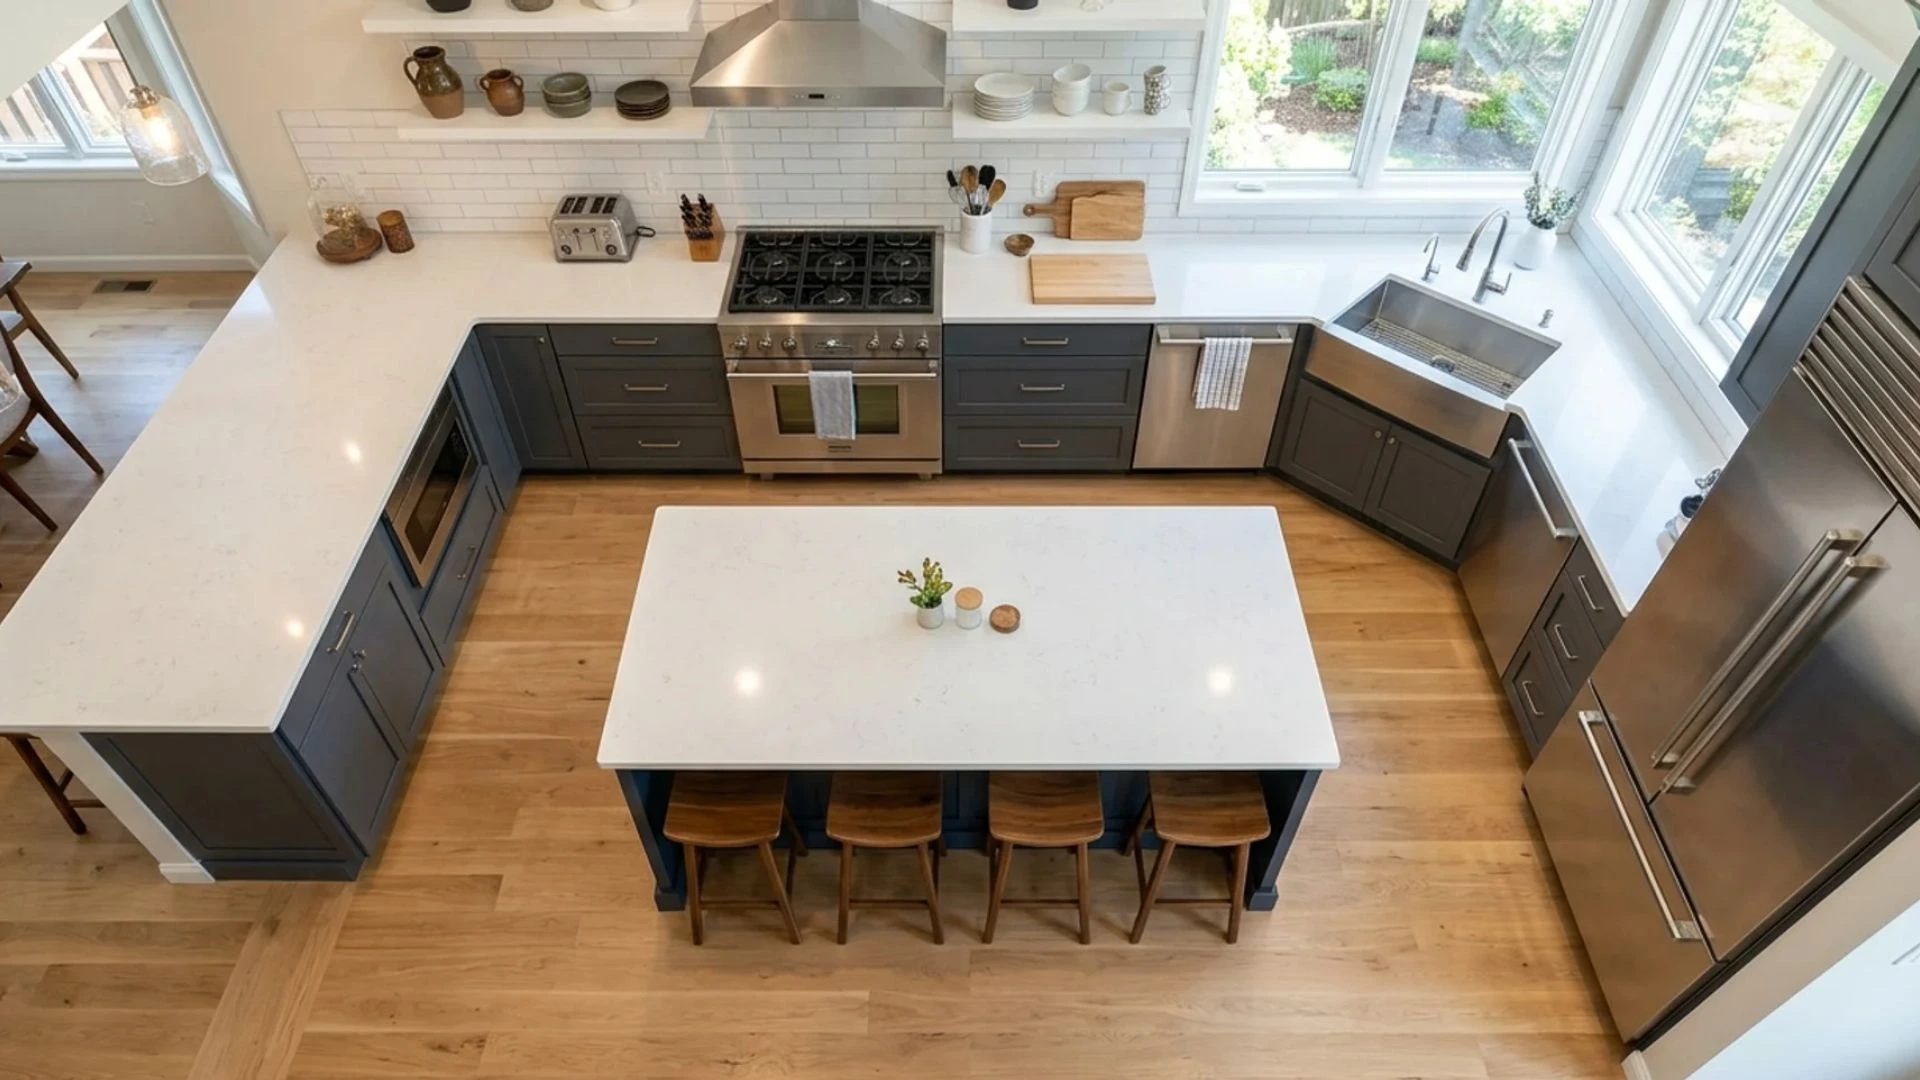
The island size and position are evaluated against the working triangle before remodeling.
A kitchen designer measures clearances on all sides and maps the primary movement paths through the kitchen.
A minimum of 42 inches of walkway is needed around the kitchen for single-cook use, increasing to 48 inches for two people working together. Any layout change must keep these clearances to maintain functionality.
Budget: $200 – $800
Note: All budget figures listed are approximate estimates only. Actual costs vary based on your location, the contractor you hire, material availability, and if any portion of the work is completed as a DIY project.
DIY vs. Contractor: An Honest Scope-by-Scope Breakdown
Not every kitchen island remodel requires professional help.
Some updates are simple weekend projects, while others involve specialized skills, tools, and construction work.
| Task | Who | Why |
|---|---|---|
| Cabinet painting | DIY | Low skill, high impact |
| Hardware swap | DIY | Basic tools, zero risk |
| Shiplap/panel skirt | DIY | Manageable with basic carpentry |
| Prefab countertop install | DIY | Heavy but no cutting required |
| Pendant light swap | DIY | Safe with existing wiring in place |
| Plug-in under-counter fridge | DIY | No electrical work needed |
| Custom stone countertop | Contractor | Requires templating, seaming, and lifting equipment |
| Electrical rough-in | Contractor | Permit-required in most regions |
| Plumbing addition | Contractor | Unpermitted work affects resale |
| Custom cabinet install | Contractor | Tolerance errors misalign doors and appliances |
| Hardwired appliances | Contractor | Licensed electrician required |
Choosing the right approach saves time, money, and frustration. For DIY, cosmetic upgrades are often suitable; for plumbing, countertops, and structural changes, it’s safer to hire professionals.
Frequently Asked Questions (FAQ’s)
1. How Much Does a Kitchen Island Remodel Typically Cost?
Costs range from $500 for cosmetic updates to $25,000 for full structural remodels.
2. Can I Remodel a Kitchen Island without Replacing the Entire Thing?
Yes, countertop swaps, paint, and hardware alone deliver significant visual transformation.
3. How Much Clearance Does a Kitchen Island Need on Each Side?
Minimum 42 inches for single-cook kitchens; 48 inches for households with multiple cooks.
4. What Adds the Most Value to a Kitchen Island Remodel?
Storage upgrades, seating overhang, and countertop material deliver the strongest return on investment.
5. Do I Need a Permit to Remodel a Kitchen Island?
Only if the remodel involves electrical rough-in changes, plumbing additions, or structural modifications.
Summing It Up!
A worn-out island can make a kitchen feel outdated, but a thoughtful update can change its look and function.
From storage to design styles, these kitchen island remodel ideas show the impact a remodel can have.
Some updates need a small budget, while others create a new room centerpiece.
Choose the kitchen island remodel ideas that fit your needs.
Set a realistic budget and create a kitchen island that works better for your home every day.

Holding a Master’s in Architecture from the University of Texas at Austin, Emily Rodriguez has dedicated more than two decades to the art and science of building renovation. Starting her journey in historic preservation, she developed a profound respect for blending old with new in building design. Emily became a vital part of our team in 2019, renowned for her insightful and innovative renovation tips. She has been leading our DIY home improvement series since ever since, where she shares her wealth of knowledge in turning outdated spaces into modern havens. When not engaged in writing or consulting, Emily is a passionate advocate for heritage conservation and enjoys exploring vintage architecture, a hobby that complements her professional expertise.