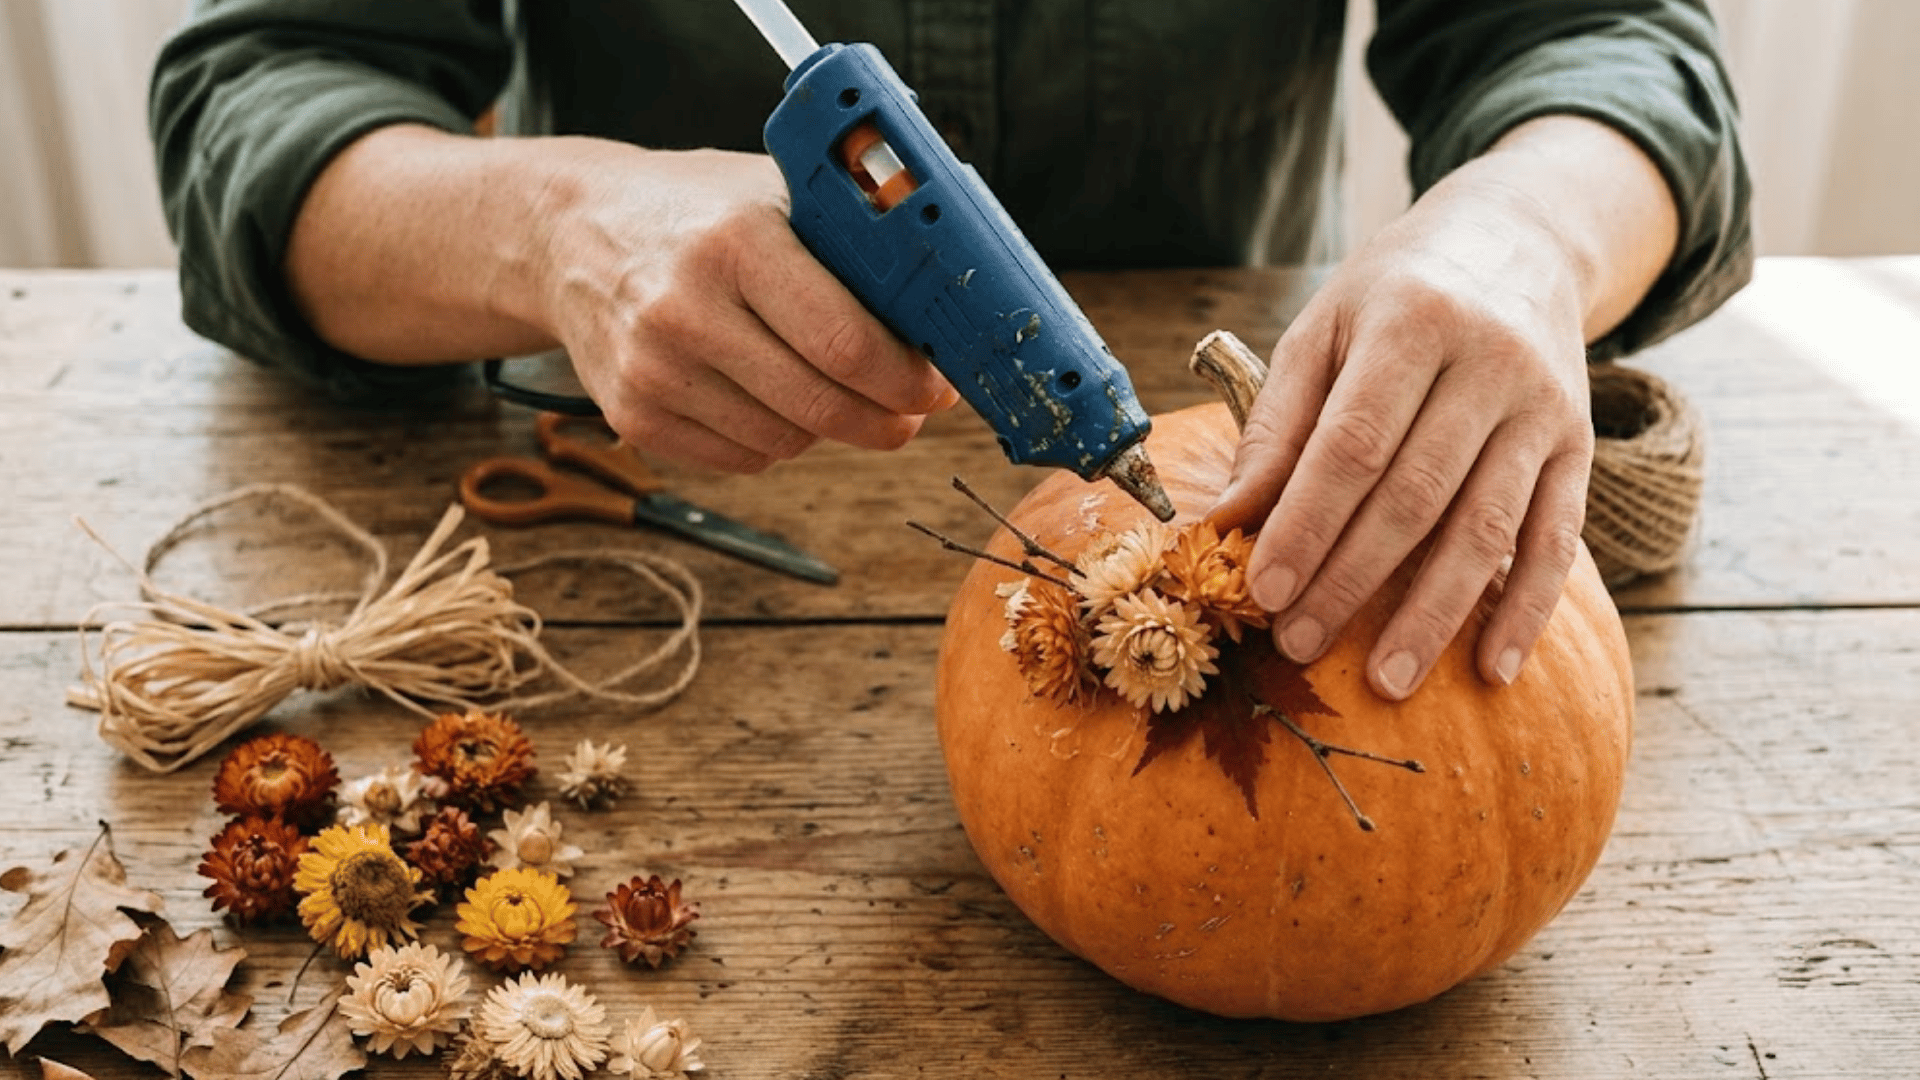

Why do so many decorated pumpkins end up looking busier than planned? Pumpkin decorating ideas can seem easy at first, but choosing a balanced design is often harder than expected.
It is easy to add too much color, too many details, or craft pieces that compete with the pumpkin itself. That can leave the finished piece looking messy instead of playful and seasonal.
A little planning can make the finished pumpkin feel more intentional without taking away its handmade charm.
How to Choose a Pumpkin for Decorating
A good decorating pumpkin should feel firm, dry, and heavy for its size. Look for one with an even shape if the design needs a clear front surface, or choose a more unusual shape for a playful look.
The skin should be free of soft spots, deep cuts, mold, and leaks, since damage can shorten how long the pumpkin lasts. A sturdy stem also makes it easier to move and display.
Smooth pumpkins work well for paint, stickers, and glued details, while deeply ribbed pumpkins can add extra texture. Choose a size that fits the planned display space and craft materials.
Easy No-Carve Pumpkin Decorating Ideas
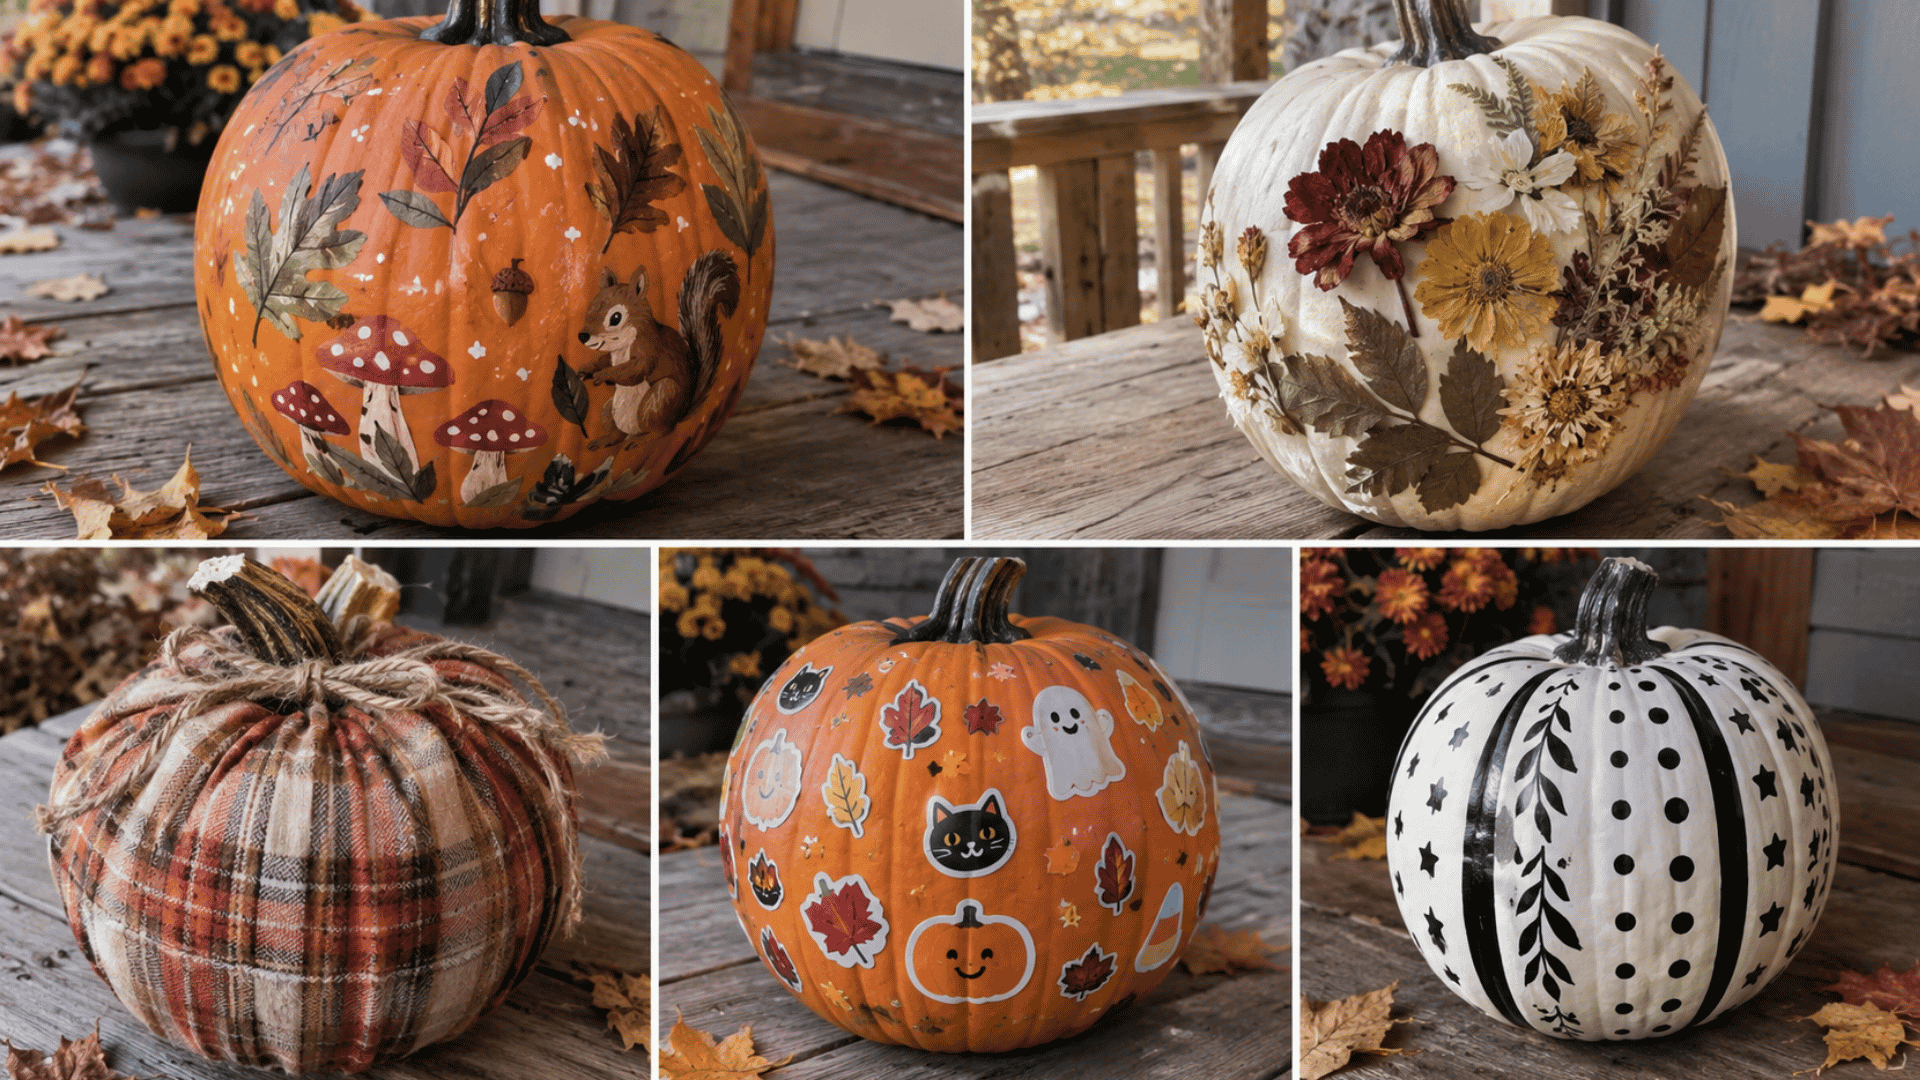
No-carve pumpkins are handy when you want a seasonal project without cutting into the pumpkin. They are also a good option for families with young children who want to take part in decorating.
1. Painted Woodland Pumpkin
A woodland pumpkin can turn into a little fall scene with leaves, mushrooms, acorns, and tiny forest animals. Keep the artwork simple so the natural shape of the pumpkin still stands out.
Materials Required
Pumpkin, acrylic paint, paintbrushes, pencil, a cup of water, and a paper towel.
Steps
- Wipe the pumpkin clean and let it dry.
- Lightly sketch leaves, branches, mushrooms, or small animals with a pencil.
- Paint the larger shapes first, then add smaller details.
- Let the paint dry before adding another layer or displaying the pumpkin.
Tip: Use earthy shades such as rust, cream, brown, and muted green for a woodland feel.
2. Pressed Flower Pumpkin
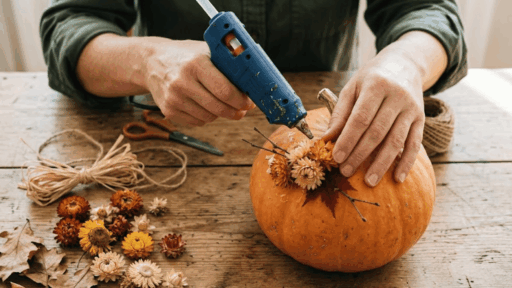
Dried flowers and leaves can give a plain pumpkin a soft, handmade appearance. You can decorate just one side and leave plenty of the pumpkin’s natural surface visible.
Materials Required
Pumpkin, dried flowers, pressed leaves, craft glue, small paintbrush, and twine.
Steps
- Clean and dry the pumpkin before decorating.
- Arrange the flowers and leaves on one side until you like the placement.
- Apply a small amount of glue beneath each piece and press it gently onto the pumpkin.
- Let everything dry completely, then tie twine around the stem if desired.
3. Fabric-Wrapped Pumpkin
A piece of plaid, velvet, cotton, or floral fabric can give a pumpkin an entirely different look. It is also a useful project for using up fabric scraps at home.
Materials Required
Pumpkin, fabric, scissors, ribbon or twine, and fabric glue.
Steps
- Cut a piece of fabric large enough to cover the pumpkin.
- Place the pumpkin in the center and pull the fabric upward around it.
- Gather the excess fabric around the stem.
- Secure the gathered fabric with ribbon or twine.
4. Sticker Pattern Pumpkin
Stickers make pumpkin decorating quick and easy, especially for kids. They can create faces, words, patterns, or little Halloween scenes without dealing with wet paint.
Materials Required
Pumpkin, seasonal stickers, letter stickers, and a clean cloth.
Steps
- Wipe the pumpkin clean and dry the surface.
- Plan a loose pattern before sticking anything down.
- Place the larger stickers first.
- Fill small empty areas with stars, leaves, dots, or other tiny stickers.
- Press each sticker firmly so it stays attached.
5. Black-and-White Pattern Pumpkin
Black and white paint gives a pumpkin a simple graphic look that can work beyond Halloween. Try one pattern across the whole pumpkin or combine several smaller designs.
Materials Required
Pumpkin, white acrylic paint, black acrylic paint, two paintbrushes, pencil, and painter’s tape.
Steps
- Paint the pumpkin white and let it dry.
- Lightly mark your chosen pattern with a pencil.
- Paint black dots, stripes, squares, or other shapes over the surface.
- Add tiny stars, bats, or leaves if you want extra detail.
- Remove any painter’s tape once the paint has dried.
DIY Pumpkin Crafts With Handmade Details
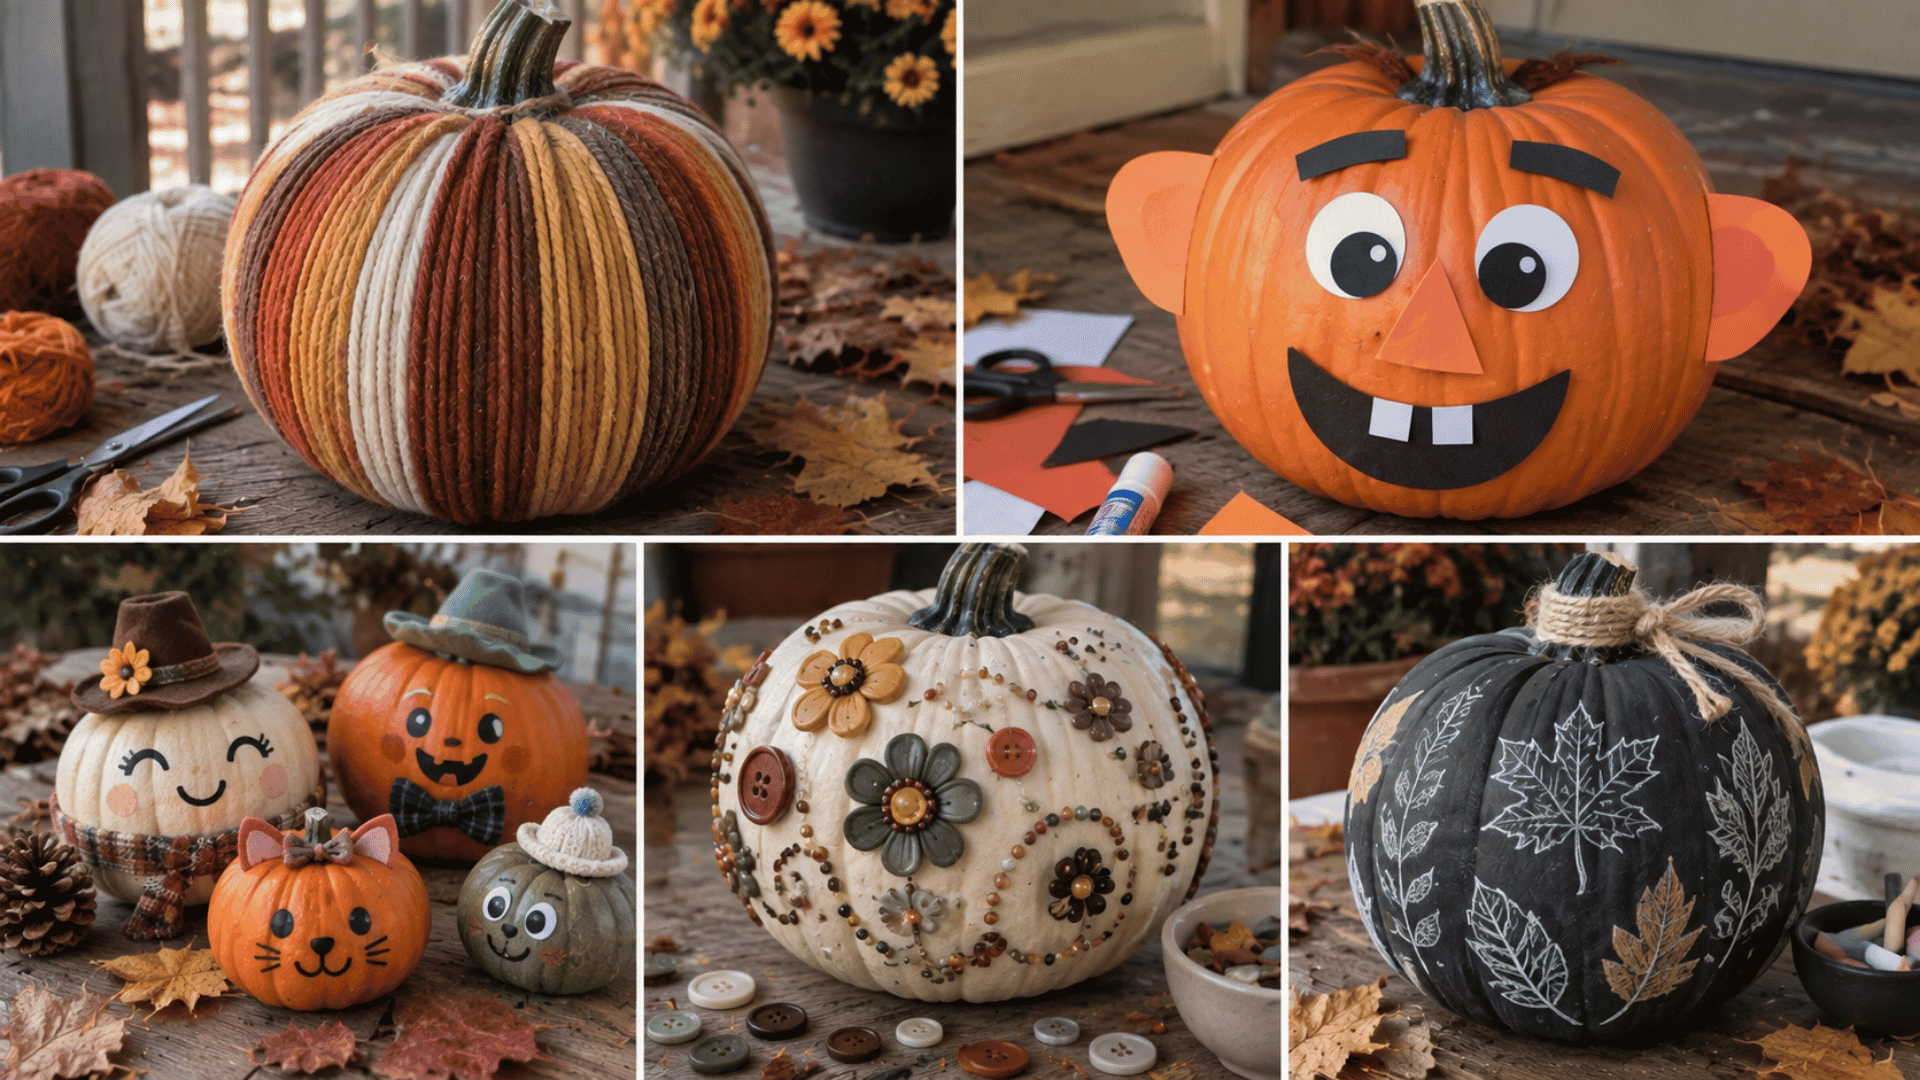
These DIY projects bring together simple craft materials, textures, and handmade details. They can work as family projects or as decorations made during a fall craft afternoon.
6. Yarn-Wrapped Pumpkin
Yarn adds texture while giving you plenty of room to play with different colors. A single shade looks simple, while several colors can create stripes or blocks across the pumpkin.
Materials Required
Pumpkin, yarn, scissors, craft glue, and ribbon.
Steps
- Add a small amount of glue near the top of the pumpkin.
- Attach the end of the yarn close to the stem.
- Wrap the yarn around the pumpkin, keeping each row close to the previous one.
- Change colors if you want stripes or sections.
- Cut the yarn and secure the final end with glue.
Tip: Leave the stem uncovered so the finished pumpkin is easier to pick up.
7. Paper Cutout Pumpkin Face
Paper shapes can turn a pumpkin into a funny character without cutting into the pumpkin itself. It is a simple family craft, and the facial features can be changed until everyone likes the expression.
Materials Required
Pumpkin, colored paper, scissors, craft glue or removable tape, pencil, and markers.
Steps
- Draw eyes, eyebrows, a mouth, ears, or other features on colored paper.
- Cut out each shape carefully.
- Arrange the pieces on the pumpkin to create an expression.
- Attach the pieces once you are happy with the face.
8. Mini Pumpkin Character Family
A few small pumpkins can become a little group of characters, each with its own expression and personality. This is a fun choice when several people are decorating pumpkins together.
Materials Required
Mini pumpkins, acrylic paint, colored paper, scissors, glue, ribbon, and small craft accessories.
Steps
- Decide what character each pumpkin will represent.
- Paint or draw a different face on each one.
- Cut out small hats, bows, collars, or other accessories.
- Attach the accessories once the paint has dried.
9. Button and Bead Pumpkin
Buttons and beads can create flowers, initials, borders, or scattered patterns across a pumpkin. It is a good project for using small craft pieces that you already have.
Materials Required
Pumpkin, buttons, beads, craft glue, tweezers, and pencil.
Steps:
- Lightly mark the design you want on the pumpkin.
- Sort your buttons and beads by color or size.
- Add a small amount of glue to each section.
- Place the buttons first, then fill smaller spaces with beads.
- Allow the pumpkin to dry completely before moving it.
Tip: Keep small beads and buttons away from very young children.
10. Chalk-Painted Pumpkin
A chalk-painted pumpkin has a soft matte finish that works nicely with short messages, leaves, and simple fall drawings. You can keep most of the pumpkin plain for a more understated look.
Materials Required
Pumpkin, chalk paint, paintbrush, chalk or paint pen, and ribbon.
Steps
- Apply a thin coat of chalk paint to the pumpkin.
- Let it dry before adding another coat if needed.
- Write a short fall message or draw a simple pattern.
- Finish with a ribbon around the stem.
Unique Pumpkin Decorating Ideas for a Look that Stands Out
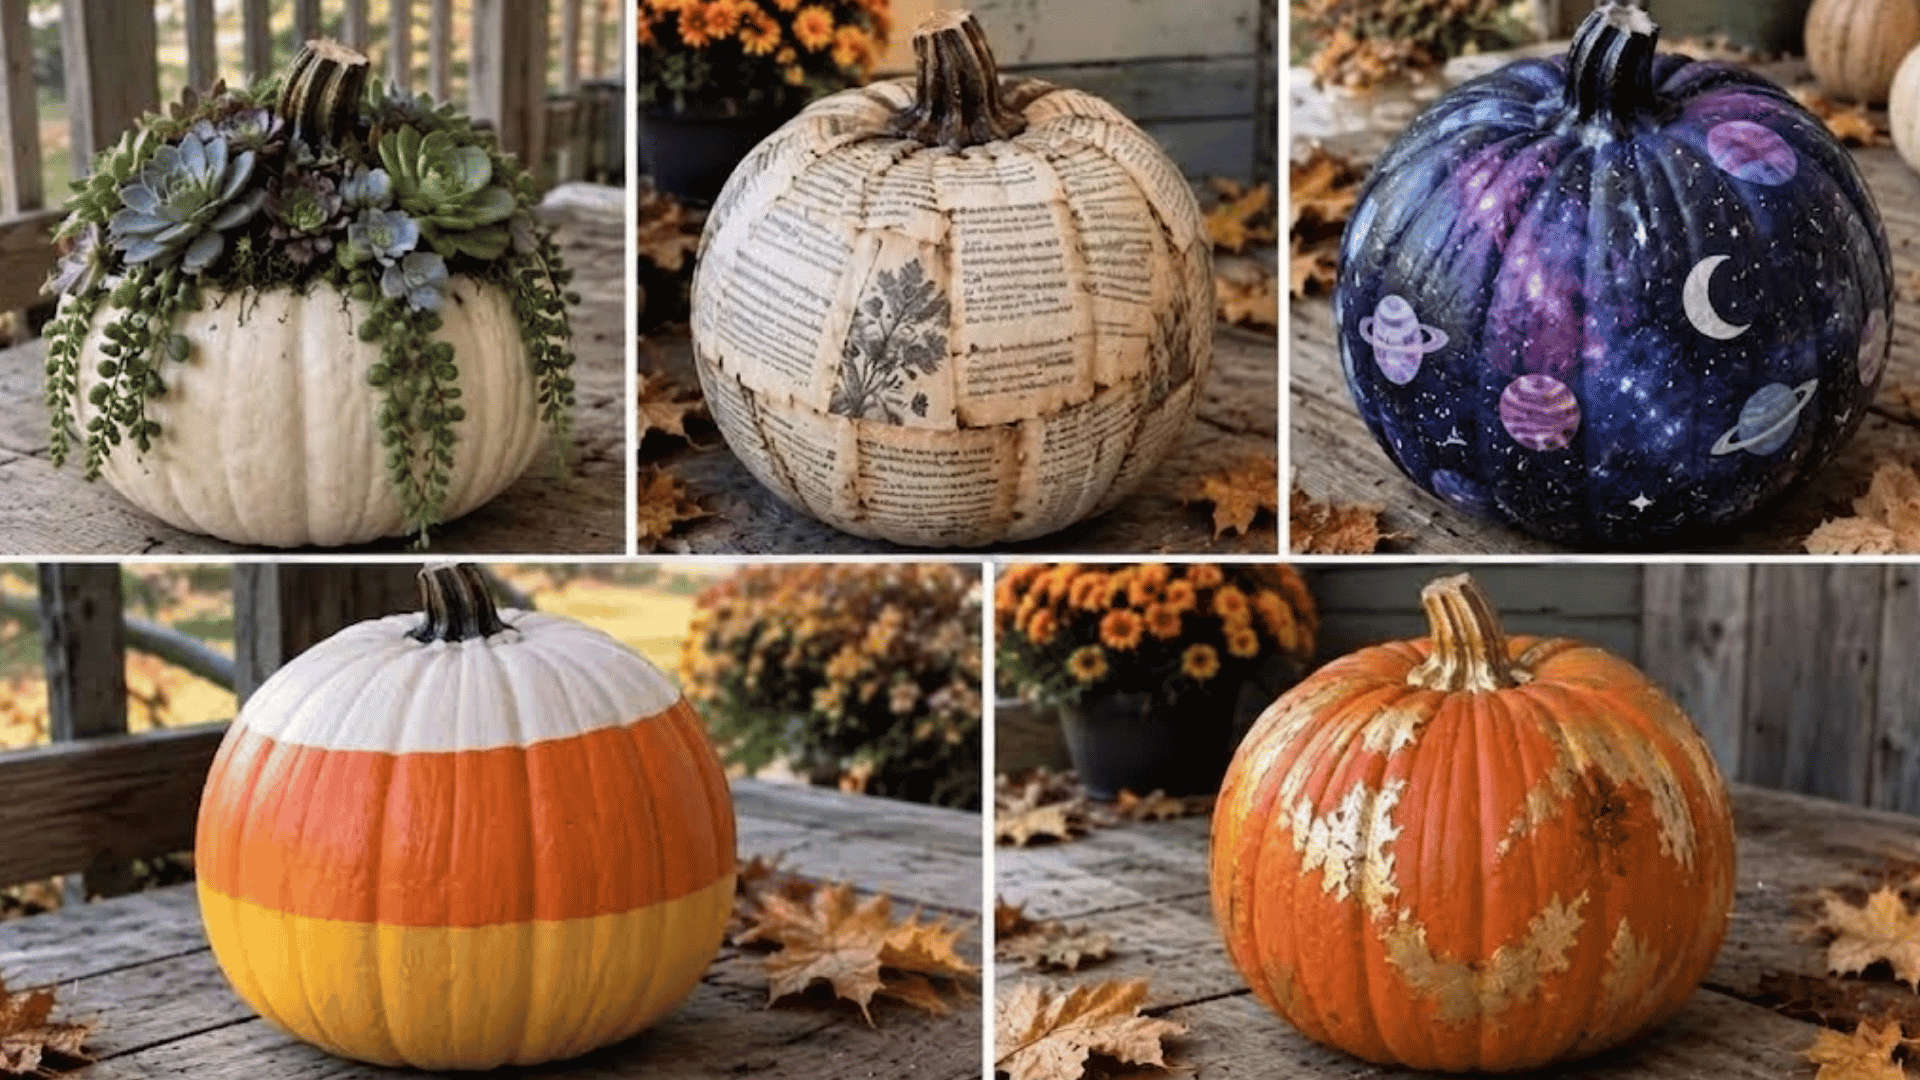
Some pumpkins can move beyond the usual orange-and-black Halloween palette. These projects use less expected materials that can work as fall decorations as well as Halloween pieces.
11. Succulent-Topped Pumpkin
Small faux succulents can give a pumpkin a plant-inspired look. Green leaves also pair nicely with white, cream, orange, and muted-colored pumpkins.
Materials Required
Pumpkin, faux succulents, floral wire or craft glue, scissors, and twine.
Steps
- Choose a pumpkin with a sturdy stem.
- Arrange the faux succulents around the stem.
- Secure them with floral wire or a small amount of glue.
- Add twine around the base of the arrangement if desired.
Tip: Use faux plants if you want to the decoration to last longer .
12. Book-Page Pumpkin
Old book pages or printed paper can give a pumpkin a vintage-style appearance. You can cover the entire pumpkin or use small pieces to create a partial design.
Materials Required
Pumpkin, old book pages, scissors, decoupage glue, paintbrush, and ribbon.
Steps
- Tear or cut the pages into small pieces.
- Brush a thin layer of glue onto one section of the pumpkin.
- Place the paper pieces over the glue, overlapping them slightly.
- Brush another thin layer over the paper.
- Continue around the pumpkin until you reach the desired coverage.
13. Galaxy Pumpkin
A galaxy-inspired pumpkin brings a space theme into a Halloween display with dark colors, tiny stars, planets, and a crescent moon. The scattered details make it easy to create without following a strict pattern.
Materials Required
Pumpkin, dark blue or black paint, purple paint, white paint, small paintbrushes, and a sponge.
Steps
- Paint the pumpkin with a dark blue, purple, or black base.
- Use a sponge to add small patches of purple or blue.
- Add white dots in different sizes for stars.
- Paint a few tiny planets or a crescent moon.
- Let the pumpkin dry before moving it.
14. Candy Corn Color-Block Pumpkin
Three painted sections in white, orange, and yellow turn a pumpkin into a candy corn-inspired decoration. It is simple enough for beginners and works nicely in a group of Halloween pumpkins.
Materials Required
Pumpkin, white paint, orange paint, yellow paint, a paintbrush, and painter’s tape.
Steps
- Paint the area around the stem white and let it dry.
- Mark the middle section with painter’s tape.
- Paint the middle band orange.
- Paint the lower section yellow once the orange has dried.
- Carefully remove the tape to reveal the color blocks.
15. Gold-Leaf Accent Pumpkin
A few gold accents can change the appearance of a plain pumpkin without covering its entire surface. Small metallic details also make this idea suitable for fall displays that last beyond Halloween.
Materials Required
Pumpkin, gold leaf, adhesive, small paintbrush, tweezers, and metallic gold paint.
Steps
- Decide where you want the gold accents before applying anything.
- Brush a small amount of adhesive onto selected areas.
- Press gold leaf onto the adhesive and gently remove the excess.
- Paint the stem gold to match if you want another metallic detail.
Simple Ways to Decorate and Display Pumpkins
A few practical choices can help decorated pumpkins look cleaner, stay in better condition, and fit naturally into indoor or outdoor fall displays.
Clean the surface first
Wipe away dirt and moisture before decorating, then let the pumpkin dry fully so paint, glue, stickers, and paper attach more evenly.
Plan the design
Lightly mark the main placement before starting, especially for faces, patterns, or layered decorations, so the finished design doesn’t feel crowded or uneven.
Let Each Layer Dry
Give paint and glued pieces enough drying time before adding more details, since rushing can cause smudging, slipping, or uneven finishes.
Keep Displays Away from Heat
Place finished pumpkins away from radiators, fireplaces, and strong indoor heat, which can make the skin soften and shorten their display life.
Protect Outdoor Pumpkins
Keep decorated pumpkins under a covered porch or sheltered area when possible so rain, direct sun, and damp ground do not damage the craft details.
Group Different Sizes Together
Mix larger and smaller pumpkins when building a display, but leave enough space between them so each design remains easy to see.
Check Pumpkins Regularly
Look for soft spots, leaking areas, or mold during the display period, and remove damaged pumpkins before they affect nearby decorations.
Conclusion
A decorated pumpkin does not need to look perfect to feel finished. Small handmade details often give it more character than a polished store-bought piece.
The right design is simply one that suits the space, season, and mood you want to create.
Trying different pumpkin decorating ideas can also make the activity feel more personal instead of following the same Halloween look every year.
Once the final piece is in place, it becomes part of the season itself. That is what makes pumpkin decorating such an easy tradition to return to each fall.
Frequently Asked Questions
Can Artificial Pumpkins Be Decorated the Same Way as Real Pumpkins?
Yes. Foam, plastic, and papier-mâché pumpkins can be painted or covered with many craft materials. They are useful when you need to store and reuse the decoration.
How Can a Pumpkin Decoration Match Existing Fall Decor?
Choose colors and materials already used nearby, such as wood, metal, fabric, or dried plants. Repeating one or two shades can help the display feel connected.
Can Decorated Pumpkins Be Used as Table Centerpieces?
Yes. Smaller pumpkins work especially well on dining tables, coffee tables, and entry consoles. Keep the arrangement low enough that it does not block conversation or nearby objects.

James McLaren, with a rich background in architecture from the University of Manchester, has been contributing his expertise to the world of creative construction and home innovation for over 20 years. His journey began as a project manager for a leading construction firm, where he honed his skills in bringing complex designs to life. James joined our platform as a freelancer in 2019, quickly becoming a favorite for his insightful and practical advice. He has been a pivotal force to our wing ever since, bringing our readers a blend of technical know-how and creative flair. Beyond his professional life, James is an avid woodworker and enjoys restoring vintage furniture, a hobby that complements his professional insights beautifully.