Thinking about installing a door? One of the most important things to consider is getting the right size hole in your wall where the door will go.
But what exactly is this hole called, and how big is this for a rough 32-inch door? Now, you might be wondering what a rough opening is for a 32-inch door. Well, we’ll tell you everything about it.
This door fits correctly and operates smoothly; you must create the right space size. But there’s more to it; you must also consider the height.
A standard door is usually around 80 inches tall, so the rough opening should be about 82 inches in height. Here, we’ll cover the dimensions required to create the right rough opening for a 32-inch door.
We’ll discuss the width, height, and important factors like how to measure and when to install the door.
So, let’s start learning how to ensure a perfect fit for your new door.
What is a Rough Opening?
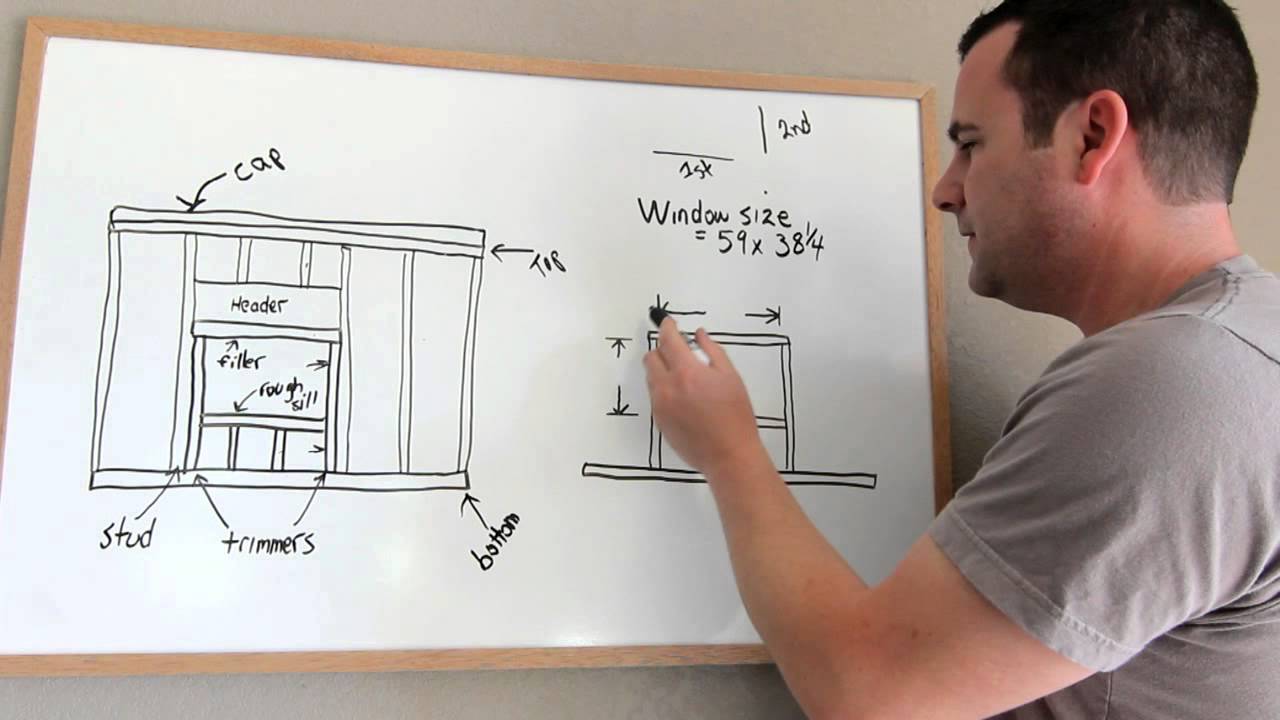
A rough opening in construction refers to the framed-in space where a door or window will eventually be installed. It’s the structural foundation for the door, providing the necessary space and support for the door unit. Builders create rough openings by framing out the dimensions required for the door, leaving enough space for the door to swing open and close smoothly.
The rough opening serves as the starting point for the door installation process. It must be precise and well-measured to ensure the door fits correctly and functions properly.
This includes ensuring the opening is plumb, level, and square, as any variation can lead to issues with the door operation down the line.
What is a Rough Opening for a 32-Door?

When figuring out the right size for the hole where a rough opening for a 32-inch door will go, you need to consider how big the door is and the extra space it needs to fit correctly. A regular 32-inch door is usually 32 inches wide and 80 inches tall. But it would be best to double-check the exact measurements of the door you’re using because different brands might have small differences. To make the hole for a 32-inch door, you usually make it a bit bigger to fit the door and its frame.
Manufacturer’s Instructions
These are similar to a guide manual from the folks who created the door. Following their directions ensures everything is done correctly and the door functions properly.
Getting the Correct Measurements
As said above, precision is crucial to any interior architecture – and when working with a 32-inch door, it has to be perfect! For that, the dimensions of the door must be accurate. The door’s average size corresponds to its actual width, which, in this case, is 32 inches.
People usually add 2 inches to the door’s width and 2-1/2 inches to its height. So, the hole should be around 34 inches wide and 82-1/2 inches tall. This extra space lets you adjust things, use shims, and ensure the door fits well and moves smoothly in the frame.
It also gives you room to put in door frame extensions, which help the door frame blend in with the wall.
Recognizing the Importance of Rough Openings
The door’s rough opening is much more a cause of concern than you think. It is a well-designed frame that contains the key to the door’s function, lifespan, and overall beauty. In short, it is an underlying structure with more to do with the door’s endurance, performance, and visual attractiveness.
A well-built, rough opening ensures the door runs smoothly, fits tightly inside the frame, and offers enough insulation. If you neglect this by any chance, it is likely that your door will be misaligned, you will have inefficient energy use, and you may also have structural difficulties over time.
Tools and Materials Required to Make Perfect Rough Opening
Making a proper rough opening for a door requires using crucial equipment and materials to ensure that everything is exact and long-lasting. But before you go ahead, you’ll need to gather the necessary items beforehand to save time and effort.
- Measuring Tape – A decent measuring tape can assist you in taking accurate measures. It will allow you to determine how large the rough opening should be for the door to fit precisely.
- Level – A level is used as a reference to ensure that the door frame is straight up and down and not inclined. It makes the door operate more smoothly and looks nice.
- Shims – Shims are little wedges that can be used to alter items. They are useful if the wall isn’t perfectly straight. Shims ensure that the door frame is the correct form and level.
- Screws and Screwdriver – Using the proper screws and a screwdriver keeps the door frame firmly in place. These items will make the structure dependable and sturdy.
- Insulation Materials – Materials such as foam or fiberglass keep heat inside and cold outside. It is like a warm blanket for your door, making the space more inviting.
- Sealants – Sealants are special glues that prevent air and water from entering. They improve the door’s performance and safeguard it from harm.
- Hammer – A hammer is useful for softly hammering objects into position. It helps make sure everything is secure and snug.
- Saw – If the door frame has to be in a particular form, a saw can help you cut it precisely.
How Do You Measure the Rough Opening for A 32-Inch Door?
Gather the tools and Materials Required to make a perfect rough opening:
Making a proper rough opening for a door requires using crucial equipment and materials to ensure that everything is exact and long-lasting. But before you go ahead, you’ll need to gather the necessary items to save time and effort.
| Tool/Material | Purpose/Use |
|---|---|
| Measuring Tape | Ensures precise measurements of the opening size for accurate door fitting. |
| Level | Helps confirm the door frame is vertically and horizontally aligned. |
| Shims | Adjusts and aligns the frame in uneven walls for level and plumb positioning. |
| Screws & Screwdriver | Securely fastens the door frame in place, ensuring structural stability. |
| Insulation Materials | Prevents drafts by filling gaps—commonly foam or fiberglass for energy efficiency. |
| Sealants | Seals air and water leaks to improve insulation and protect against damage. |
| Hammer | Taps parts or nails gently into position to secure or adjust framing elements. |
| Saw | Used to cut framing components or adjust the shape/size of the opening as needed. |
1. Prepare the Area
Before you start measuring with measuring tape for a rough opening for a 32-inch door, you must prepare the area. First, clear the space near the door frame.
Take away any furniture, decorations, or things blocking the way. Make sure the area is clean with no junk around. This is important because it helps you see the door frame clearly without obstructions, making measuring more accurate.
2. Gather the Necessary Tools
You’ll need a few important tools to get the right size for a rough opening for a 32-inch door. Make sure you have a measuring tape, a level, a pencil, and a notepad ready. These tools will help you measure and make sure the door fits perfectly.
3. Measure the Width
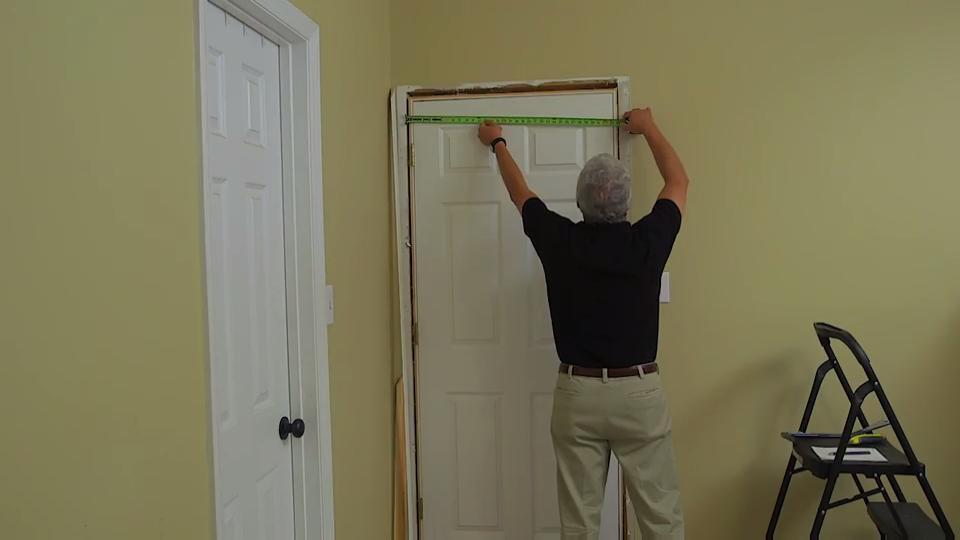
To determine how wide the space should be for a rough opening for a 32-inch door, begin by measuring the gap between the two vertical wooden beams on both sides of the door frame. Use your tape measure to get a measurement.
Remember that for a 32-inch door, the space between the studs should also be 32 inches wide. If the measurement doesn’t match, you might need to twist the frame or use a different door size.
4. Determine the Height
To check the right size for your door, start by measuring the height of the opening where it will go. To do this, measure from the top of the door frame that horizontal piece above the door down to the floor.
If you’re installing a rough opening for a 32-inch door, the height of this opening should be 80 inches. Ensure your measurement is exact to ensure the door fits nicely in that spot.
5. Account for Shimming
When you measure the space for your door, remember to consider using shims. Shims are tiny wedges you insert between the door frame and the space where the door goes. They help make sure the door is level and straight.
To do this, leave a small gap of about 1/8 to 1/4 inch on both sides of the door frame. This gap allows you to make small adjustments when installing the door so it fits perfectly in the space.
6. Consider the Door Frame Thickness
Remember to include the door frame’s thickness to find the right width for your door’s space. Usually, a regular rough opening for a 32-inch door comes with a frame that’s about 1 3/8 inches wide.
To determine the total width you’ll need for the opening, add the door’s width (32 inches) to the frame’s thickness of 1 3/8 inches. So, if you have a 32-inch door with a standard frame, your rough opening should be 33 3/8 inches wide.
Step-By-Step Instructions for Making the Perfect Rough Opening
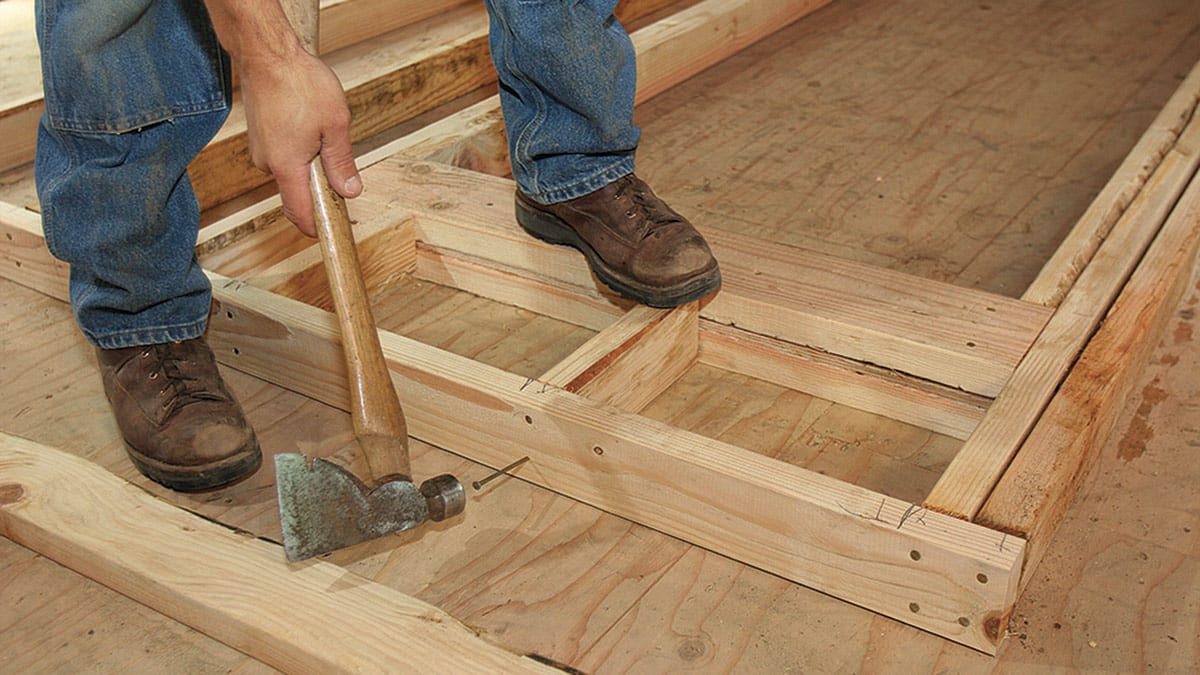
A sequence of exact processes is required to achieve a beautiful rough opening for your 32-inch door. Here’s a short guide to guarantee a smooth installation.
1. Measuring and Marking
Determine the width of the door slab to begin with. Just add 2 inches to whatever width measurement you achieve. Similarly, add two and a half inches to the measurement for the approximate opening height. Mark the precise placement of the rough opening on the wall using a level. Before you process, double-check these dimensions and markings.
2. Removal of Existing Frame
This step only applies if you have an existing door. Carefully remove the door first and then uninstall the frame. However, be careful and avoid damage to the surrounding wall. This stage may need patience and a careful touch.
3. Structural Assessment
Examine the surrounding structure for blockages, such as electrical cables, pipes, or load-bearing components, that might hamper the installation procedure. If you find any of these near the installation area, encase them so that it does not interfere. Safety and structural integrity are of utmost importance.
4. Frame Installation
Now comes the most crucial part, wherein you will install the door’s foundation. Follow the manufacturer’s directions for installing the door frame. Shims can secure the frame and ensure it is level and plumb. This is the foundation for a sturdy and well-fitting door.
5. Install the Header and Still Components
Attach the header and still components to the frame structure. Ensure these pieces are aligned correctly and leveled since they give structural support and stabilize the door.
6. Precision Adjustment
Please carefully look over the frame for any anomalies. If you need it, please make careful adjustments using shims to ensure a snug and accurate fit. Please ensure the frame is square and level to avoid any operating difficulties with the door.
7. Sealing and Insulating
Apply insulation around the frame to improve energy efficiency and soundproofing. For instance, you can use appropriate materials to fill the gap between the wall and the frame. This process eliminates moisture intrusion and drafts. Ultimately, it assures a long-term performance.
8. Installing the Door
Insert the 32-inch door slab into the frame. Take note of the door’s alignment, smooth functioning, and secure latch. Also, take time with this step, as it significantly impacts the door’s function.
Is it Necessary for the Opening to Be Larger Than the Door and its Frame?

When putting in a door, it’s crucial to have a rough opening bigger than the door and its frame. There are good reasons for this. First, having that extra space makes installing and adjusting the door easier. It gives you room to move the door and frame into place without worrying about damaging them.
Plus, it lets you add insulation, which helps the door fit easily and seal properly. This keeps out drafts and saves energy. A larger rough opening is also handy because doors and frames can vary in size due to manufacturing differences. So, even if they’re not exactly the size they’re supposed to be, a bigger rough opening ensures that your door will fit.
This flexibility simplifies the installation process, which is great for both do-it-yourselfers and professionals.
What are The Standard Door Sizes?

- Height – A regular indoor door is usually about 80 inches tall, equivalent to 6 feet and 8 inches. This height is common for doors inside houses, and it gives enough room for most people to walk through comfortably without having to bend down. Exterior doors, though, can come in different heights, depending on how they’re designed and what they’re needed for. However, many of them still stick to a similar standard height.
- Width – Door widths come in different sizes, depending on what the door is for. Inside your home, doors are usually 32 inches wide, and outside doors are typically 36 inches wide. These measurements are chosen to make it easy for people to get through and to let big things, like furniture, go in and out. But if you need a door to fit a special spot or match a certain style, you can have one made just for you.
How to Frame the Rough Opening of an Interior Door
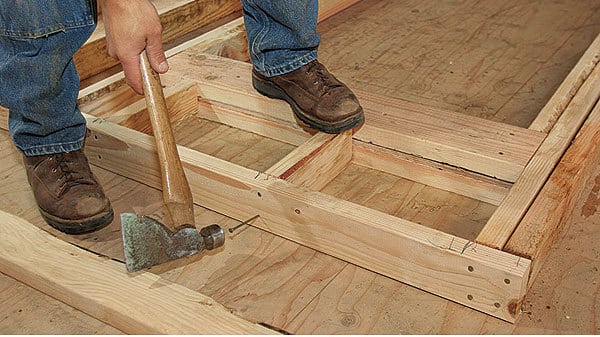
Creating the right-sized space for an indoor door is important when you’re putting it in. This makes sure the door fits well and works correctly. You’ll need basic tools like a saw, level, and tape measure to do this. You can follow these simple steps to make the space for your door.
- Measure and Mark: To start, measure the height and width of the door you want to put in. If it’s a regular rough opening for a 32-inch door, your opening should be roughly 2 inches wider and about 2 1/2 to 3 inches taller than the door itself. This extra room is important for making sure everything fits and for the door frame.
- Secure the Header: Place the header at the upper part of the rough opening and attach it firmly using nails or screws. Ensure that it is level and well-supported.
- Attach the Jambs: Place them on each side of the rough opening, ensuring they are plumb and flush with the wall. Secure them in place with nails or screws, ensuring they are level and properly spaced.
- Add Support: To keep the door frame from bending as it ages, add extra supports, like cripple studs, between the top part of the wall and the header. Use shims to fix it and ensure the door frame is straight and upright if needed.
- Finishing Touches: Apply casing or trim around the door frame to cover gaps and create a polished appearance.
How Much Smaller a Door Should Be Than The Jamb?

It’s important to have a small space between the door and frame when putting in an interior door. This gap is necessary to ensure the door can open and close easily without rubbing against the frame.
Usually, the door is smaller than the frame. For a standard rough opening for a 32-inch door, the door should be about 1/8 to 1/4 inch narrower and 1/8 inch shorter than the frame. This small gap lets the door swing without friction while still fitting comfortably. Remember that the exact size of the gap might depend on the type of door and hardware you’re using.
Following the manufacturer’s instructions for your specific door and frame is important to ensure everything fits and works correctly. Additionally, you can use shims while installing to fine-tune the gap and ensure the door moves smoothly within the frame.
Conclusion
As we’ve seen, figuring out the right size for the rough opening for a 32-inch door is a simple task involving basic measurements. To create a suitable opening for such a door, ensure the width is 34 inches and the height is 82 inches.
This extra space accounts for the door frame and a bit of room for the door to swing smoothly. Accuracy is important when you are dealing with these measurements.
Before building or installing the door frame, double-check your measurements. Additionally, consider the specific requirements of the door you’re using, as different doors may have unique needs.
Knowing the correct rough opening dimensions for your 32-inch door is needed for a successful installation. You can guarantee a perfect fit and proper performance by taking accurate measurements and paying attention to details.
So, go for these rough-opening 32-inch doors that offer security and convenience to your home.
Frequently Asked Questions
What About the Rough Opening Height for a 32-inch Door?
For the rough opening height, you should typically add 2 1/2 inches to the door’s nominal height. This accounts for the door frame, shimming space, and flooring material. Therefore, the rough opening height for rough opening for a 32-inch door is usually around 82 1/2 inches.
Can I Customize the Rough Opening Size for a 32-inch Door?
Sometimes, you may need to adjust the rough opening size based on your needs or the door’s design. However, following industry standards and guidelines is essential to ensure proper installation.
Is it Necessary to Consult a Professional for Rough Opening Measurements and Installation?
While it’s possible to measure and create a rough opening yourself if you have the necessary skills and tools, consulting a professional carpenter or contractor is advisable for accurate and easy installations, especially for exterior doors.
Is It Fine to Utilize the Same Rough Opening Measurements for a 34-Inch Door?
While the width and height ratios do not remain the same, each door model’s manufacturer’s criteria must be followed. Because of its design elements or materials, some doors may necessitate differences in rough opening proportions.


