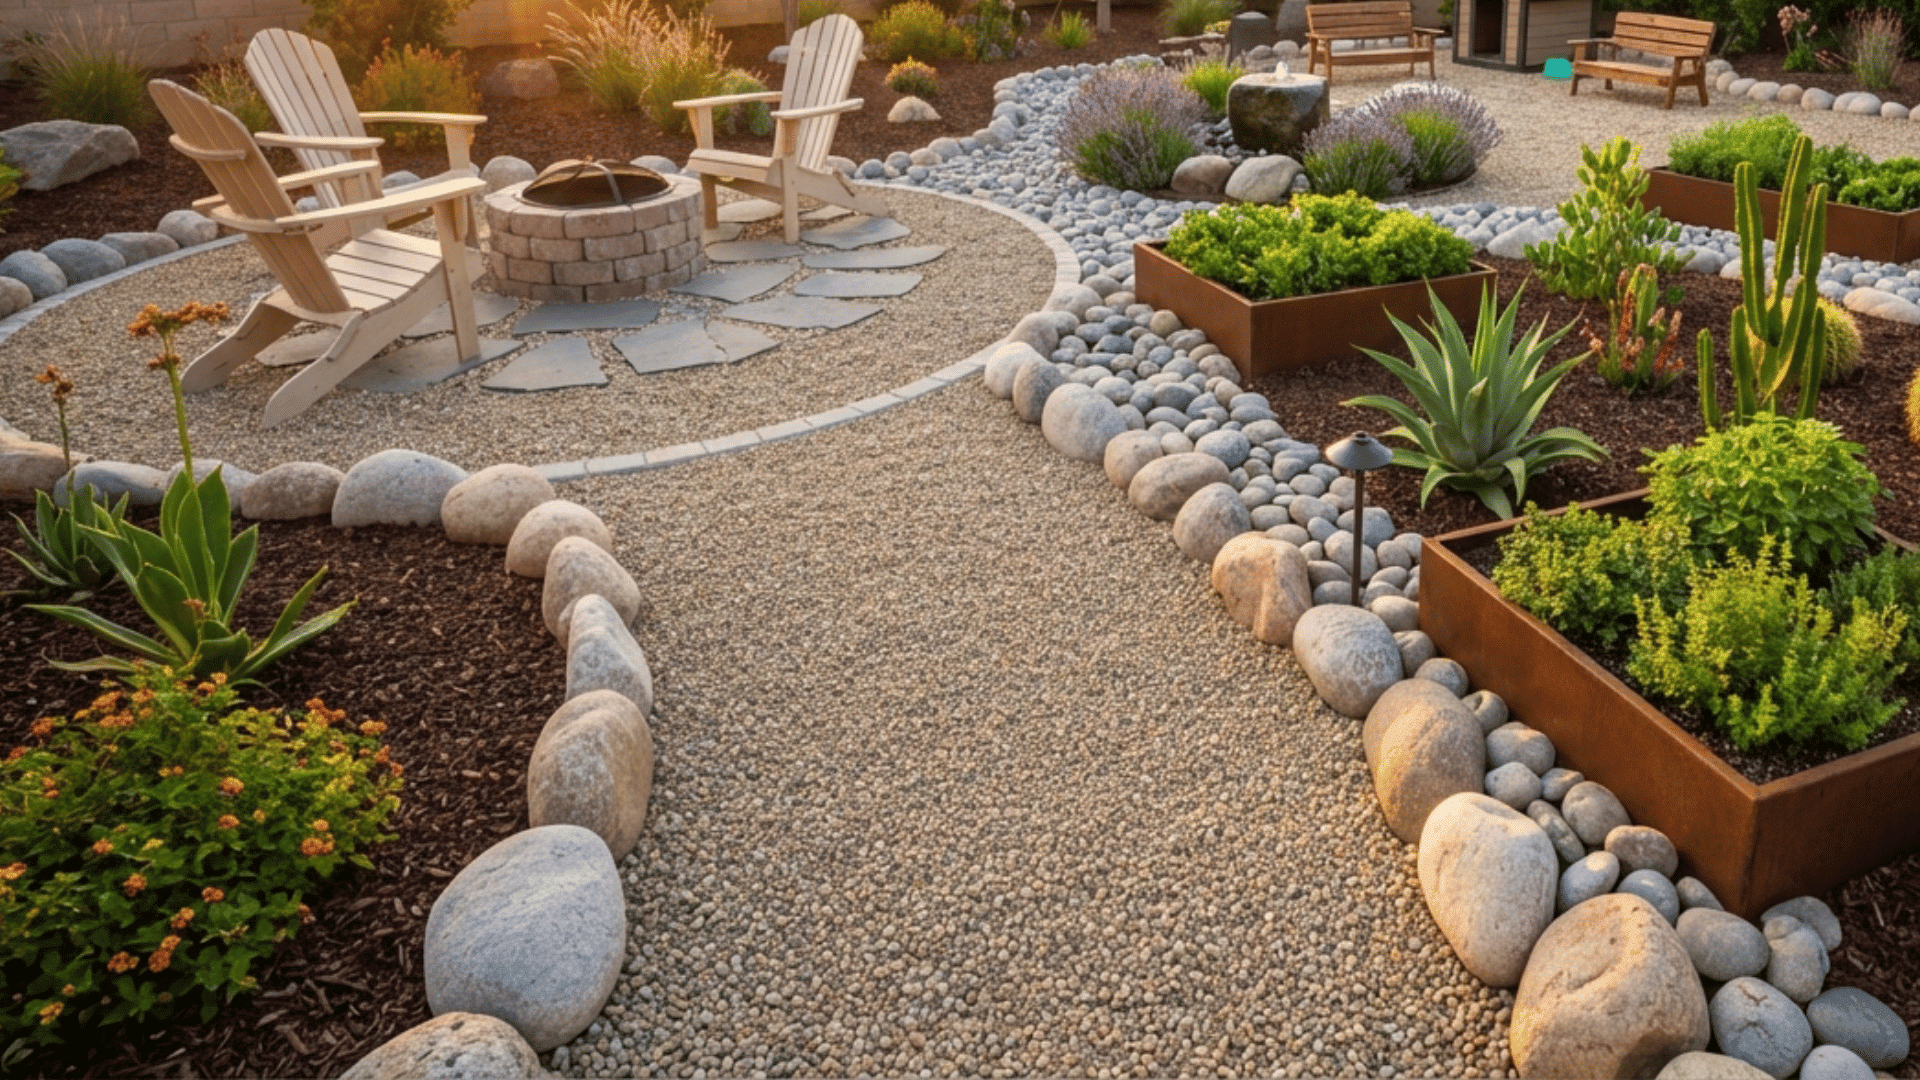
Ever feel like your backyard is missing that “crunch” underfoot? You know, that satisfying sound of a well-traveled path? If you’re tired of trekking through muddy grass, a pea gravel walkway might be your new best friend.
Whether you’re a seasoned DIYer or just someone who wants a prettier path to the shed, you’re in the right place.
This post tells you how to install a pea gravel walkway, including step-by-step instructions and budget-friendly options to transform your landscape without breaking the bank.
Let’s roll up our sleeves and get digging.
Why Choose a Pea Gravel Walkway?
A pea gravel walkway offers more than just aesthetic appeal; it’s a functional, eco-friendly option that works well in various landscapes. Here’s why you should consider it:
- Affordable: Compared to other types of walkways, pea gravel is a budget-friendly option, making it ideal for those looking to improve their outdoor space without spending a fortune.
- Easy to Install: With a little bit of effort, you can create a professional-looking walkway yourself, saving on labor costs.
- Permeable: The gravel allows water to pass through, reducing runoff and promoting better drainage in your yard.
- Low Maintenance: Unlike paved paths that require sealing or repair, a pea gravel walkway is easy to maintain, just rake the surface occasionally and refill the gravel when necessary.
- Versatile Design: Pea gravel fits well with various styles, from rustic to modern, and can be tailored to suit any garden or yard theme.
How to Install a Pea Gravel Walkway: Step-by-Step Guide
A pea gravel walkway is a great way to add charm and functionality to your outdoor space. It’s budget-friendly, easy to install, and looks fantastic in any yard.
Tools and Materials Required
Before you begin, make sure you have all the tools and materials needed for the job. Here’s what you’ll need:
| Tool | Material |
|---|---|
| Shovel | Pea gravel |
| Measuring tape | Landscape fabric |
| Rake | Base stone (gravel mix) |
| Motorized compactor (plate compactor) | Cobblestones |
| Landscape staples | Concrete (for leveling cobblestones) |
| Spray paint or string |
Step 1: Dig the Pathway
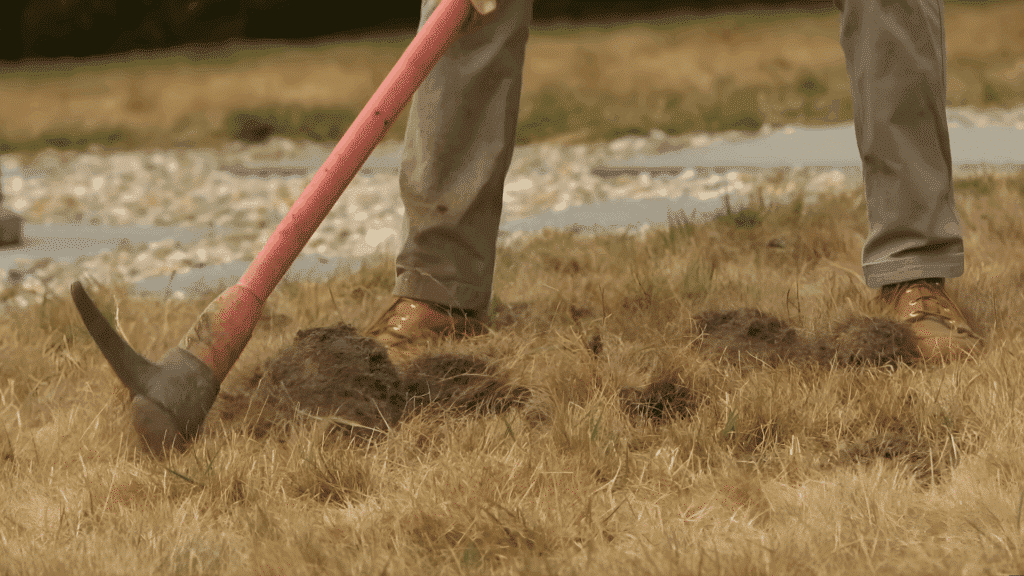
Start by using a shovel or digging tool (like a mattock or hoe) to clear the topsoil along the marked path. Aim for a depth of 4–6 inches, depending on the thickness of the gravel layer.
Ensure the trench is wide enough to accommodate both the cobblestones and pea gravel. This will create a firm foundation for the walkway.
Step 2: Compact the Soil
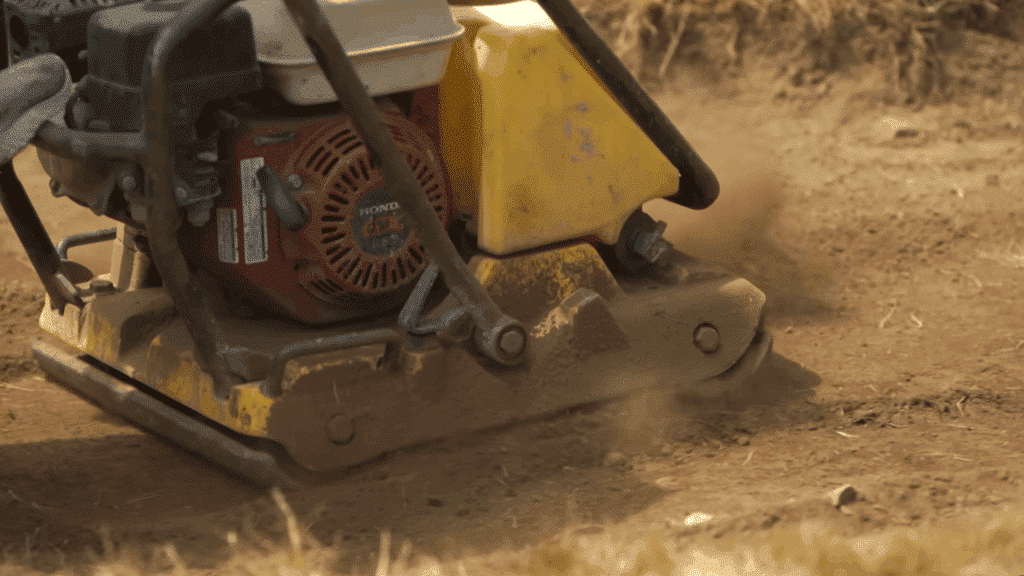
Once the pathway is dug out, use a plate compactor to compress the soil and remove any air pockets. This ensures the soil stays in place and forms a stable base for the gravel.
Properly compacting the soil will help prevent it from shifting over time and keep the walkway level.
Step 3: Add Cobblestones for Edging
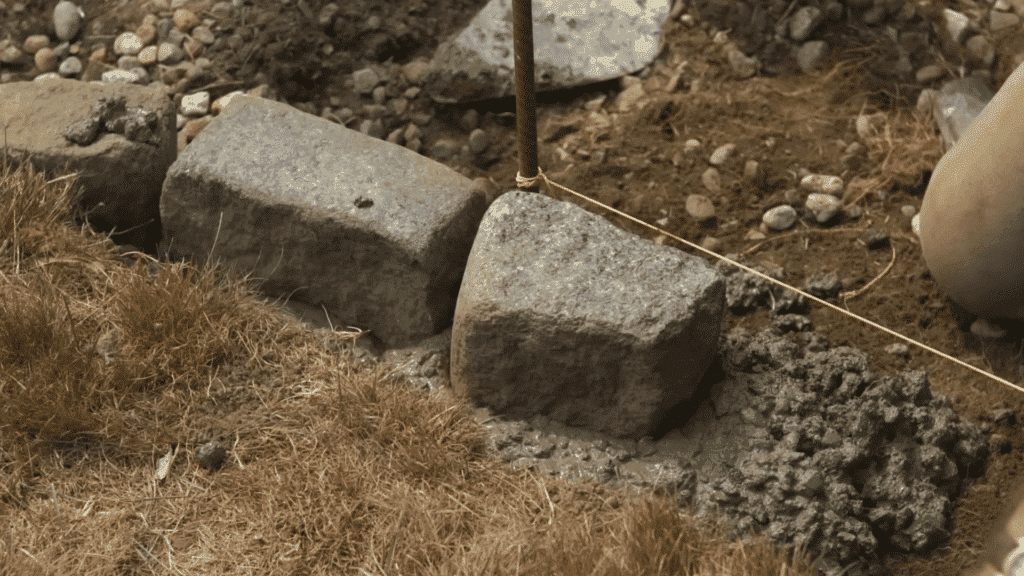
Place cobblestones along the edges of the path. If needed, add a small amount of concrete under the stones to level them. Adjust each stone to ensure a neat, stable border.
The stones should align with the path markings to maintain symmetry and keep the walkway defined.
Step 4: Lay Landscape Fabric
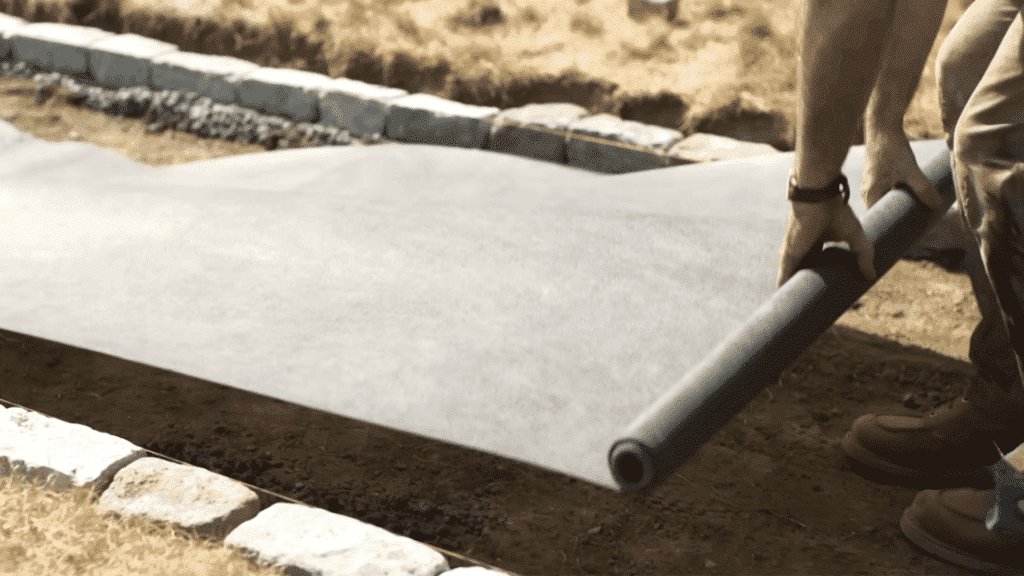
Roll out landscape fabric along the entire trench. This will prevent weeds from growing through the gravel while still allowing water to drain through.
Secure the fabric with landscape staples to ensure it stays in place and doesn’t shift over time. This step is crucial for maintaining a clean, low-maintenance walkway.
Step 5: Add Base Stone
Pour a layer of base stone (gravel or crushed rock) into the trench, spreading it evenly with a rake. Compact the base stone with the plate compactor to create a solid foundation that will help stabilize the pea gravel.
This layer ensures proper drainage and prevents settling over time, making the walkway more durable.
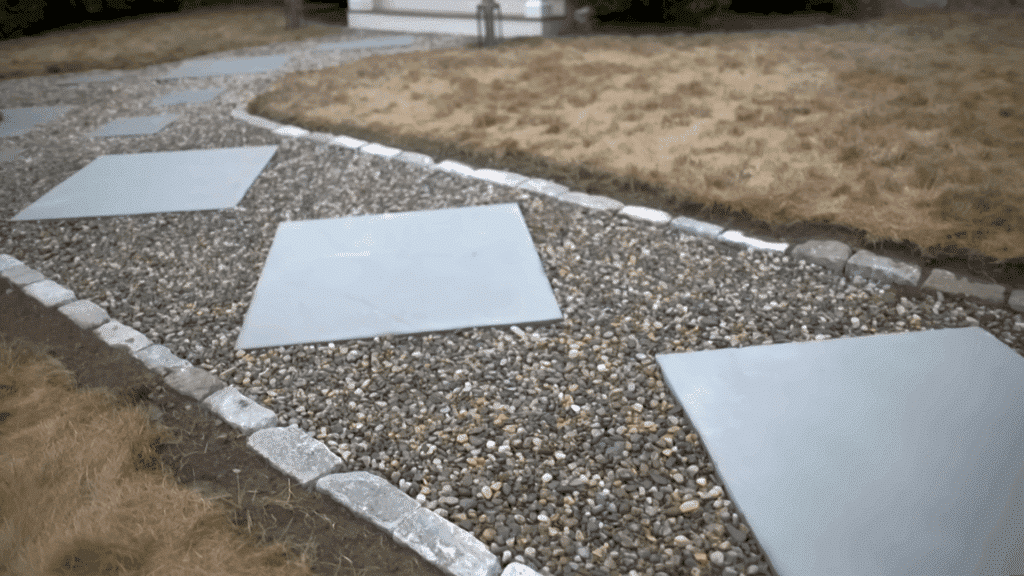
Step 6: Lay the Concrete Pavers
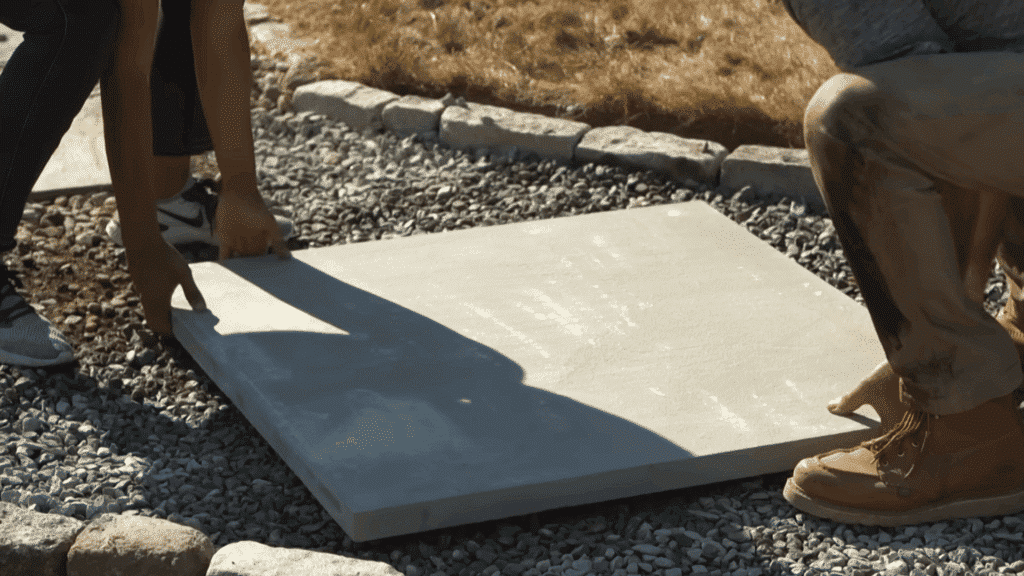
After the base layer is compacted, lay large concrete pavers on top of the gravel. The pavers should be placed at regular intervals, depending on the style you want for your walkway. Ensure they are aligned and spaced evenly for a clean, uniform look.
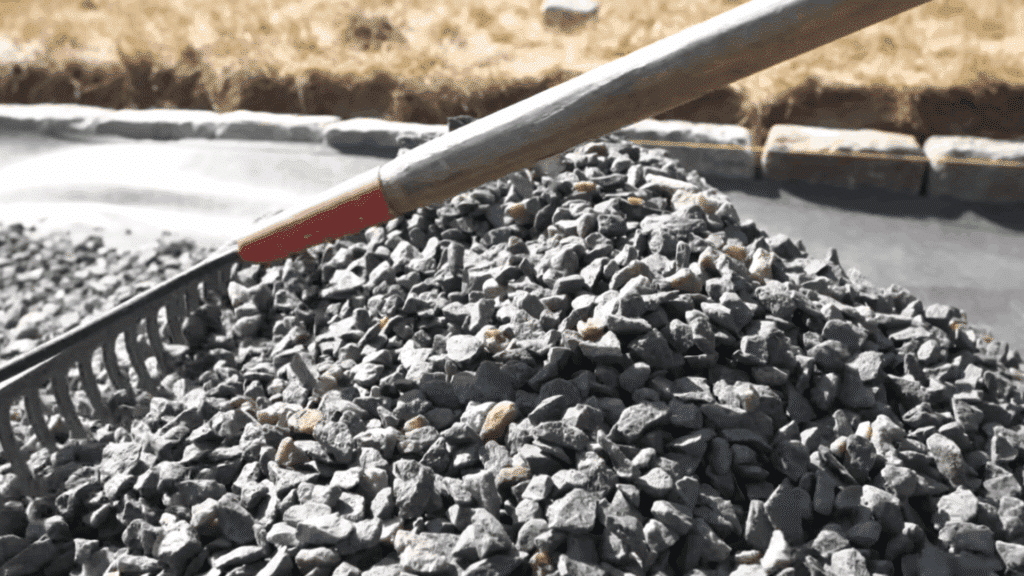
Step 7: Spread the Pea Gravel
Spread a layer of pea gravel evenly over the base stone, using a rake to ensure it is level. It’s okay if the gravel is not perfectly flat, as the unevenness adds to the natural, rustic look of the walkway.
Take your time to evenly distribute the gravel, ensuring the walkway looks inviting and functional.
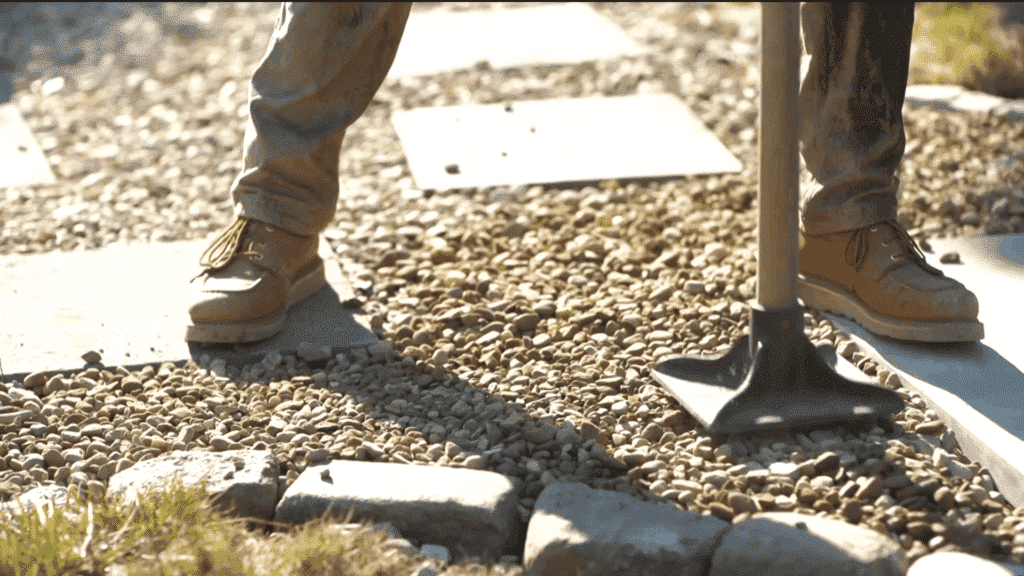
Step 8: Final Compacting
Use the plate compactor to gently compact the pea gravel. This will help settle the gravel and make the surface firm and stable. Run the compactor over the entire surface to ensure a solid, walkable path.
Compacting will help the gravel stay in place and reduce shifting when used frequently. Refer the video given below for more clarity
Budget Breakdown for a Pea Gravel Walkway
When planning your pea gravel walkway, understanding the costs involved will help keep your project on budget.
| Material/Service | Cost Estimate | Details |
|---|---|---|
| Pea Gravel | $30–$50 per ton | Coverage: 1 ton typically covers 100-150 sq ft at 2-3 inches deep. |
| Edging Materials | $1–$5 per linear foot | Wood, stone, or metal edging options. |
| Labor Costs (DIY) | Free | Save by installing it yourself. |
| Labor Costs (Professional) | $50–$75 per hour | Professional installation if needed. |
| Tools (rental or purchase) | $50–$150 | Includes compactor, shovel, rake, etc. |
Gravel Quantity Estimate
To ensure you purchase the correct amount of gravel, it’s always a good idea to slightly overestimate, as some settling will occur after compaction.
- For a walkway of 100 sq ft (10×10 feet) with 2–3 inches of gravel, you’ll need approximately 1–1.5 tons of pea gravel.
- For larger areas, increase the amount of gravel accordingly. For example, a 200 sq ft area would require 2–3 tons.
Budget-Friendly Options for Your Pea Gravel Walkway
Creating a beautiful pea gravel walkway doesn’t have to be expensive. Here are some cost-effective ways to keep your project within budget while still achieving a professional look.
- Buy Gravel in Bulk: Purchasing pea gravel in bulk rather than bags can save you a significant amount of money. Local suppliers often offer discounts for large quantities.
- Use Affordable Edging Materials: Instead of pricey stone or metal, consider using wood, recycled bricks, or natural stones from your yard as edging. These materials are both economical and eco-friendly.
- DIY Installation: Skip the cost of hiring a professional and take on the project yourself. With the right tools and a little effort, you can easily install your own pea gravel walkway.
- Repurpose Materials: If you have leftover materials from other projects, such as old bricks or timber, use them to enhance the walkway design, cutting down on additional costs.
- Simple Pathway Design: Keep the design straightforward by avoiding complex patterns or extra decorative elements. A simple, clean design will still look great and save money on materials.
Conclusion
At the end of the day, a beautiful pea gravel walkway is an affordable and practical addition to any garden or yard. It doesn’t require expensive materials or professional help, just some simple tools and a bit of elbow grease.
With a well-planned design, you can create a stylish, durable path that enhances the beauty of your outdoor space without breaking the bank.
The gravel’s natural look complements various garden styles, and the easy maintenance makes it a long-lasting choice.
So, whether you’re DIYing the project or seeking budget-friendly materials, a pea gravel walkway is a fantastic, cost-effective solution for any yard.

Veronica Lee holds a Master’s degree in Landscape Architecture from Cornell University and has dedicated more than 15 years to transforming outdoor areas into artistic and sustainable spaces. Her career took off in a renowned landscape design firm, where she excelled in creating visually stunning and environmentally responsible designs. In 2019, Veronica brought her expertise to our platform, quickly becoming a key contributor to our outdoor design and sustainability sections. As the lead of our landscape innovation series ever since joining, she has inspired readers with her forward-thinking and practical approach. When not drafting designs, Veronica enjoys pottery and participates in local conservation efforts, activities that complement her professional ethos of blending art with nature.