Ice dams form when melting snow refreezes at the edge of your roof, blocking proper drainage. This trapped water can seep beneath shingles, leading to leaks, mold, and even structural damage.
It also puts extra weight and stress on gutters. Gutter heat tape offers a simple solution by keeping key areas warm enough to prevent water from freezing.
It helps protect your roof, gutters, and home during harsh winters.
This blog walks you through everything you need to know, from choosing the right materials to installing heat tape safely and correctly for long-lasting results.
What is Heat Tape or Heating Cable?
Heat tape, also called a heating cable, is an electric wire designed to melt snow and ice from roof edges, gutters, and downspouts.
It works by generating low, consistent heat that prevents water from freezing and forming ice blockages.
These cables are designed for outdoor use and can withstand cold temperatures and moisture when installed correctly. They are placed along areas where ice buildup is common, helping water flow safely off the roof.
Gutter heat tape installation involves placing heating cables along roof edges and gutters to prevent ice buildup. It helps keep water flowing, reducing the risk of ice dams, leaks, and winter damage.
How Installation Prevents Ice Dams
- Prevents ice dams by keeping water flowing instead of freezing
- Gently warms roof edges to allow proper drainage
- Stops ice buildup in common problem areas
- Reduces the risk of water backing up under shingles
- Helps prevent leaks and water damage
- Protects gutters from excess strain in cold weather
Tools Needed for Heat Tape Installation
Before starting heat tape installation, gather all the necessary tools and materials. Having everything ready will make the process quicker, safer, and help avoid interruptions during setup.
| Tool/Material | Purpose |
|---|---|
| Heat tape / De-icing cable | Melts snow and prevents ice buildup |
| Roof clips & gutter clips | Secure the cable in place |
| Outdoor-rated extension cord | Provides a safe power connection |
| Measuring tape | Helps measure roof and gutter lengths accurately |
| Ladder with stabilizer | Ensures safe access to the roof and gutters |
| Gloves & safety gear | Protects hands and prevents injuries |
Step-By-Step Gutter Heat Tape Installation
Follow these simple steps to install heat tape correctly. Each step helps ensure proper setup, safety, and long-term performance during winter conditions.
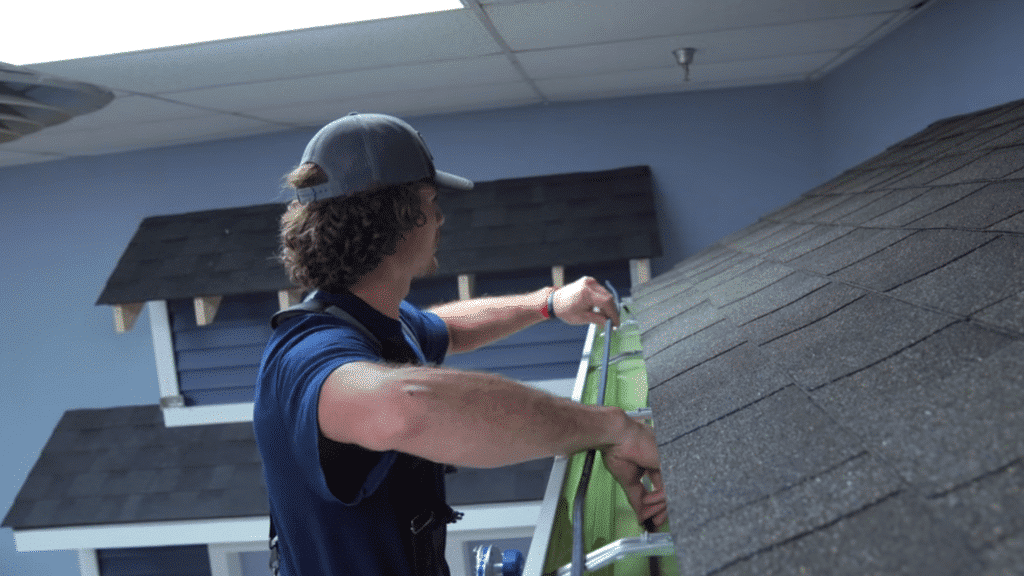
Step 1: Measure Gutters and Power Distance
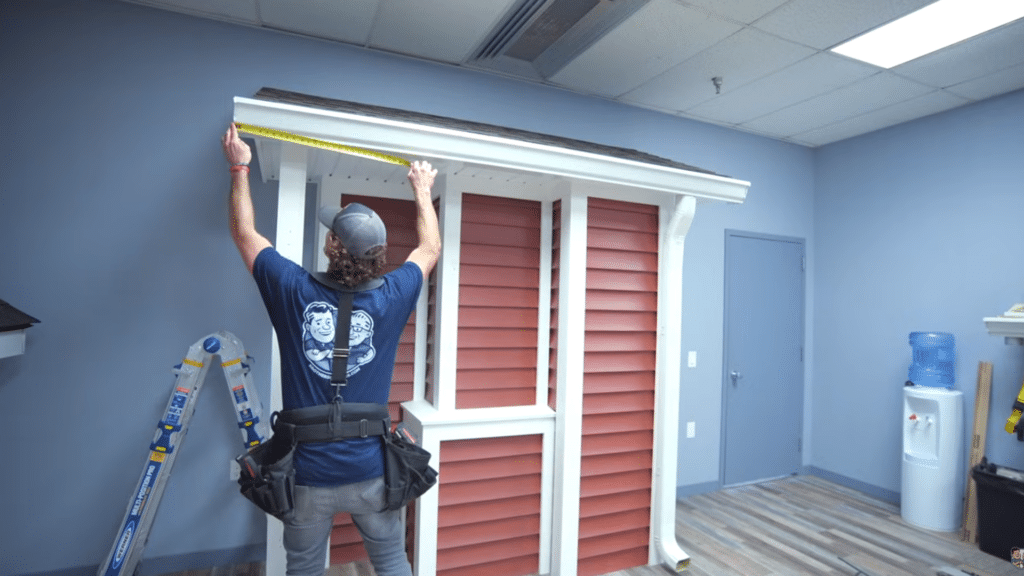
Start by measuring the full length of your gutter and multiplying it by two, since the cable will run in a double loop.
Then measure from the top of the gutter to the bottom of the downspout; it only needs a single cable run.
Finally, measure the distance to the nearest power source. Lay the cable on the ground to confirm you have enough length for the full setup, including the gutter, downspout, and connection point.
Step 2: Prepare and Terminate the Cable
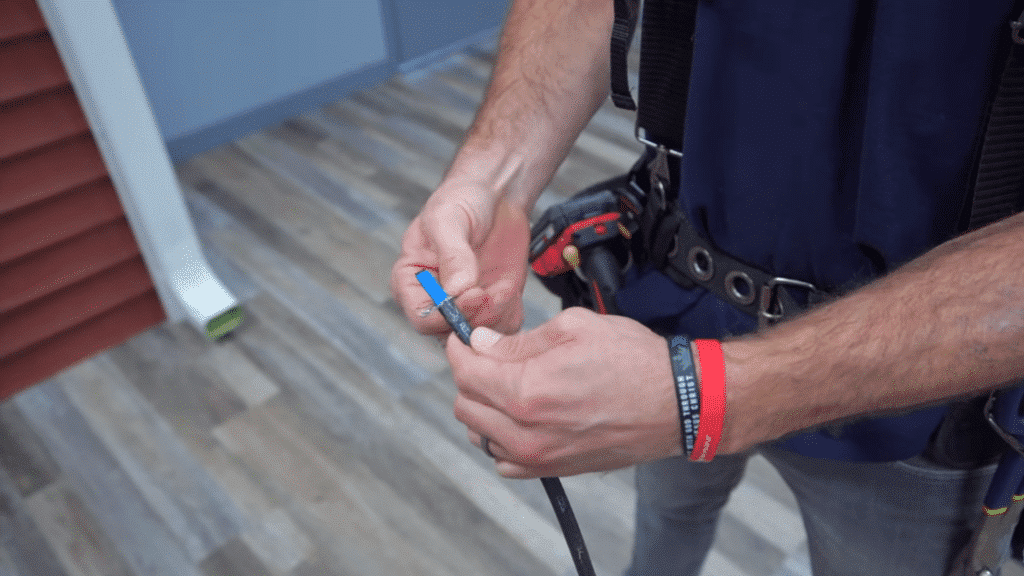
Before installation, one end of the cable needs to be sealed properly. Begin by scoring and removing the outer layer of the cable, then carefully trim the metal insulation with snips.
Insert the prepared end into a silicone-filled termination plug to keep it watertight. This step ensures safety and protects the cable from moisture damage, which is important for long-term outdoor use.
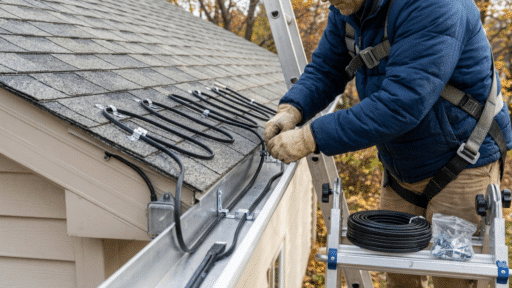
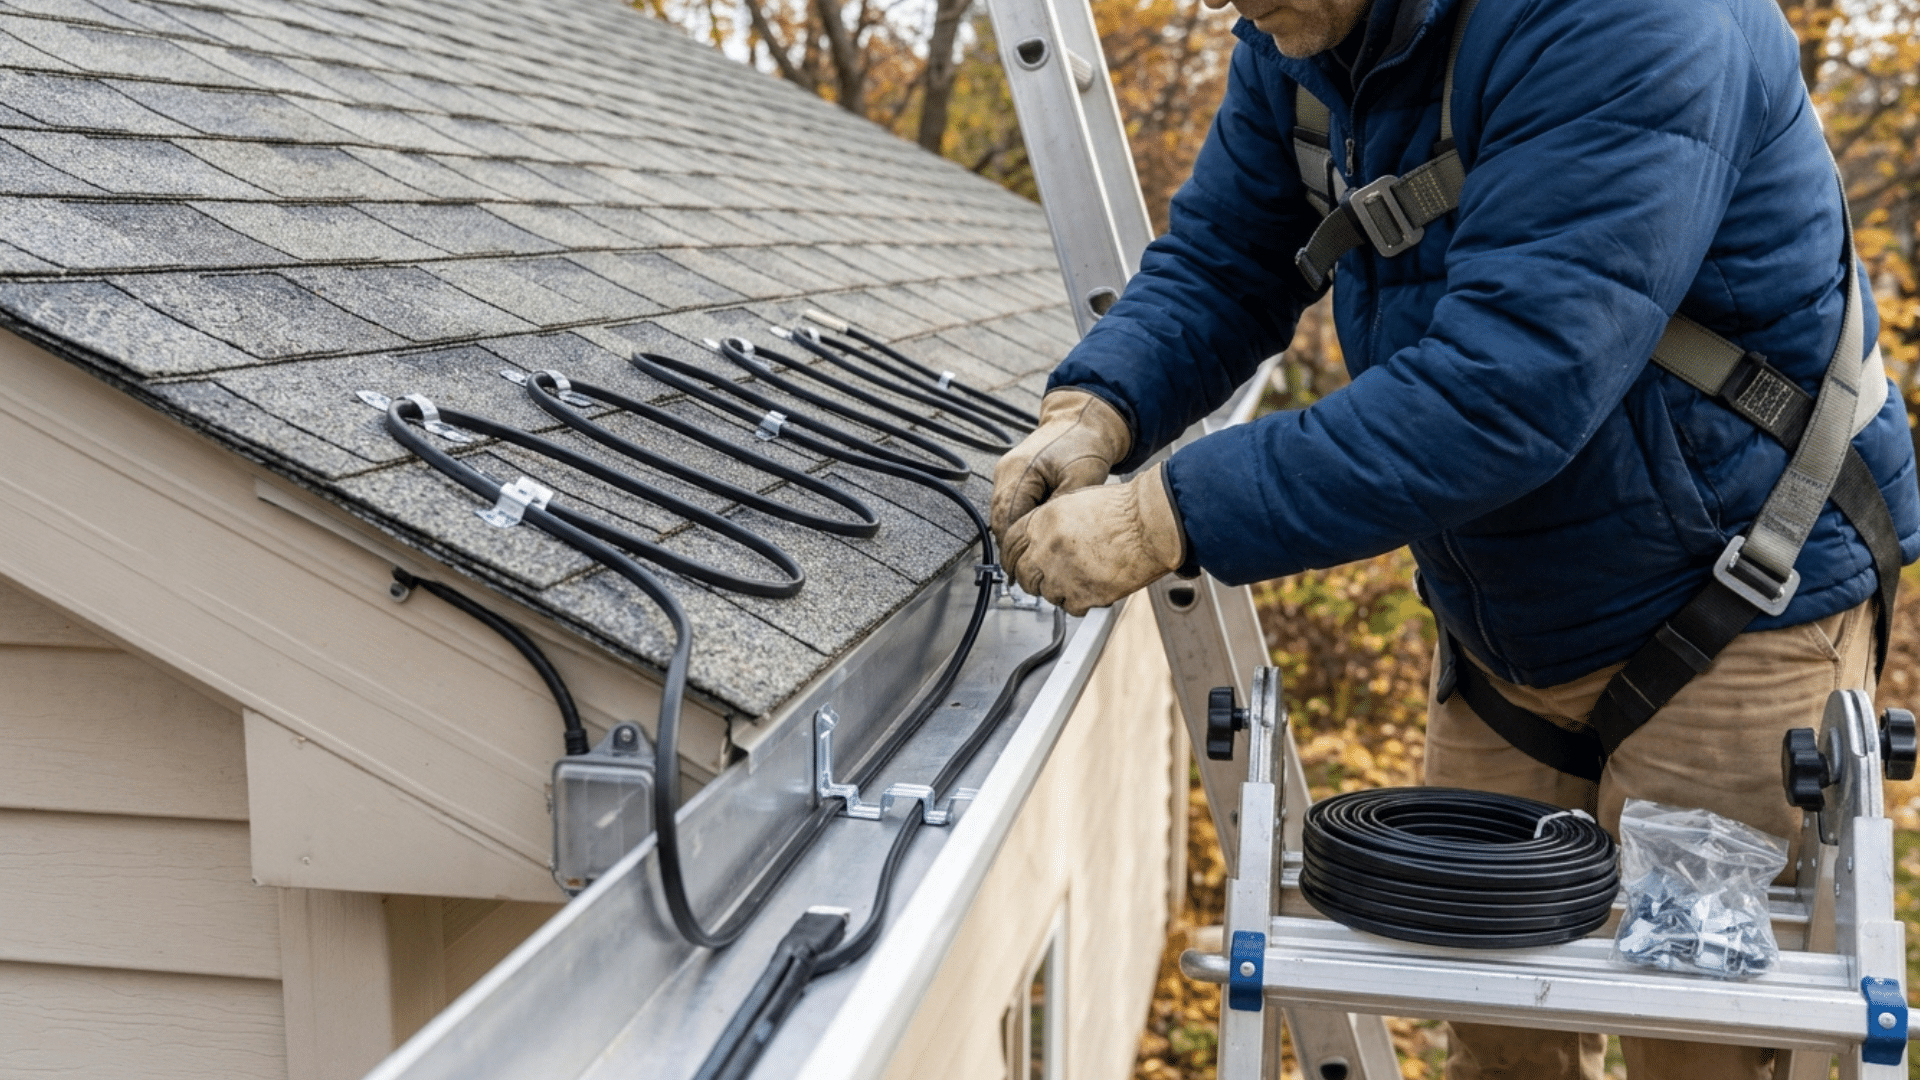
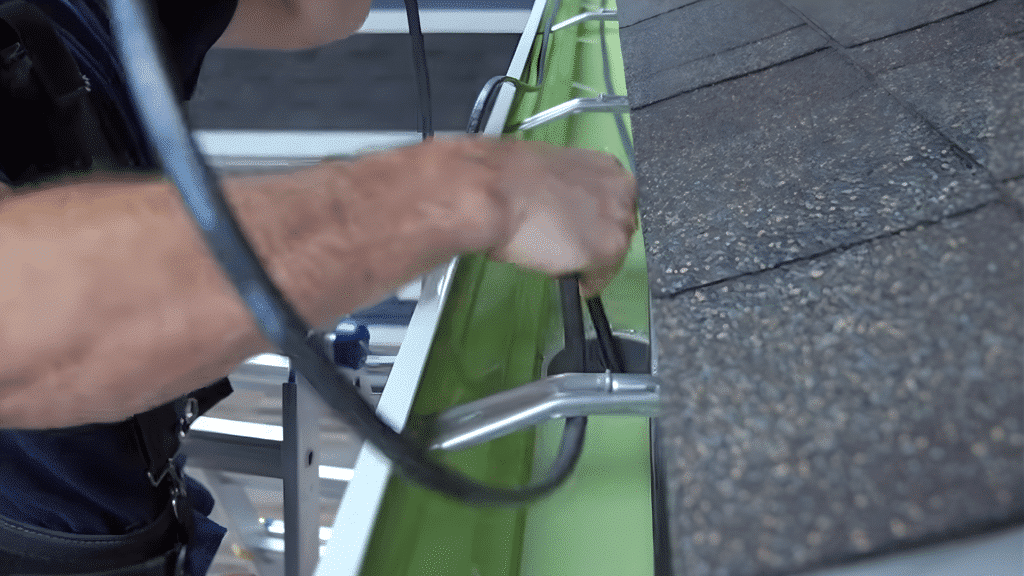
Step 3: Run Cable Through the Gutter
Place the terminated end under the gutter hangers and run it along the bottom toward the end cap. Then loop the longer side of the cable over the hangers and back along the gutter to create a double loop.
Make sure the cable lies flat without any twists or tangles. Proper placement helps distribute heat evenly and prevents weak spots where ice can form.
Step 4: Feed Cable Into the Downspout
Once the gutter section is complete, loop the cable around the last hanger and guide it down into the downspout.
Carefully feed it through to the bottom, watching for sharp edges that could damage the cable. It may help to have someone assist from below.
Leave a little slack in the cable so adjustments can be made during the next steps without pulling it too tight.
Step 5: Install Gutter Guard System (optional)

If using a gutter guard, start by installing the end cap and sealing it with silicone. Remove the mesh from the guard and install the base frame first.
Then, place the cable along the back side of the frame and reinstall the mesh to hold it in place. Continue this process along the gutter, ensuring everything is properly aligned. This helps protect both the cable and the gutter from debris buildup.
Step 6: Secure and Finish the Gutter Guard
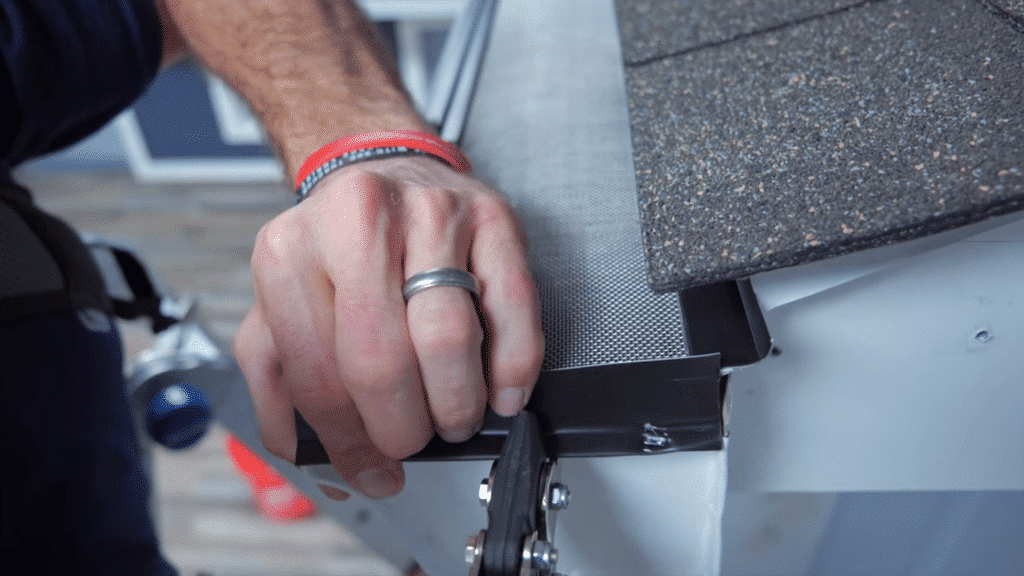
Secure the gutter guard using screws along the gutter and fascia board. Measure and cut the final section carefully for a proper fit.
Create a small channel at the end so the cable sits safely without touching sharp edges. Reinstall the mesh and attach the end cap.
For a better understanding of the process, watch this video.
Safety Tips for Installing Heat Tape
Working on a roof needs extra care. These simple tips help keep the process safe and smooth.
- Install Only in Dry Weather: Always choose a clear, dry day for installation. Wet or icy surfaces can make the roof slippery, increasing the risk of falls.
- Use a Stable Ladder on Flat Ground: Place your ladder on a firm, level surface. A stabilizer adds extra support and helps prevent sudden shifts while climbing.
- Never Overlap Heat Cables: Overlapping cables can cause overheating and damage. Keep the cable evenly spaced as per the instructions.
- Follow Manufacturer Instructions Closely: Each product may have specific guidelines. Reading and following them ensures safe and proper installation.
- Keep Power Off During Setup: Always install the cable with the power turned off. This reduces the risk of electric shock while handling the system.
Cost of Gutter Heat Tape Installation
The cost of gutter heat tape installation depends on materials, roof size, and setup complexity. Knowing these factors helps you plan your budget more accurately.
| Item / Factor | Estimated Cost / Impact |
|---|---|
| Heat Tape | $1 to $5 per foot |
| DIY Installation | Low cost (no labor charges) |
| Professional Installation | Higher cost but safer and more reliable |
| Roof Size | Larger roofs need more material, increasing cost |
| Cable Type | Higher-quality cables cost more but last longer |
| Installation Difficulty | Complex layouts increase time and labor costs |
Maintenance Tips for Heat Tape Systems
A little regular care can help your heat tape last longer and work efficiently throughout winter.
- Check Cables Before Winter Starts: Inspect the entire cable for any visible damage before the cold season begins. Catching issues early helps avoid failures when you need it most.
- Clean Gutters Regularly: Remove leaves and debris from gutters to ensure proper water flow. Blocked gutters can reduce the effectiveness of the heat tape.
- Look for Cracks or Wear: Check for cracks, fraying, or exposed wiring. Damaged cables should be replaced to prevent safety risks.
- Test Power Connections Each Season: Plug in the system and confirm it’s working properly. Make sure all connections are secure and protected from moisture.
Conclusion
Gutter heat tape installation is a simple and practical way to prevent ice dams and protect your home during winter. With the right tools and a careful approach, most people can handle the process without much difficulty.
Paying attention to layout, safety precautions, and proper setup makes a noticeable difference in performance. It’s also important to check the system periodically to ensure everything is working as expected.
Taking action before winter arrives can save you from costly repairs and help keep your roof and gutters in good condition throughout the season.

James McLaren, with a rich background in architecture from the University of Manchester, has been contributing his expertise to the world of creative construction and home innovation for over 20 years. His journey began as a project manager for a leading construction firm, where he honed his skills in bringing complex designs to life. James joined our platform as a freelancer in 2019, quickly becoming a favorite for his insightful and practical advice. He has been a pivotal force to our wing ever since, bringing our readers a blend of technical know-how and creative flair. Beyond his professional life, James is an avid woodworker and enjoys restoring vintage furniture, a hobby that complements his professional insights beautifully.