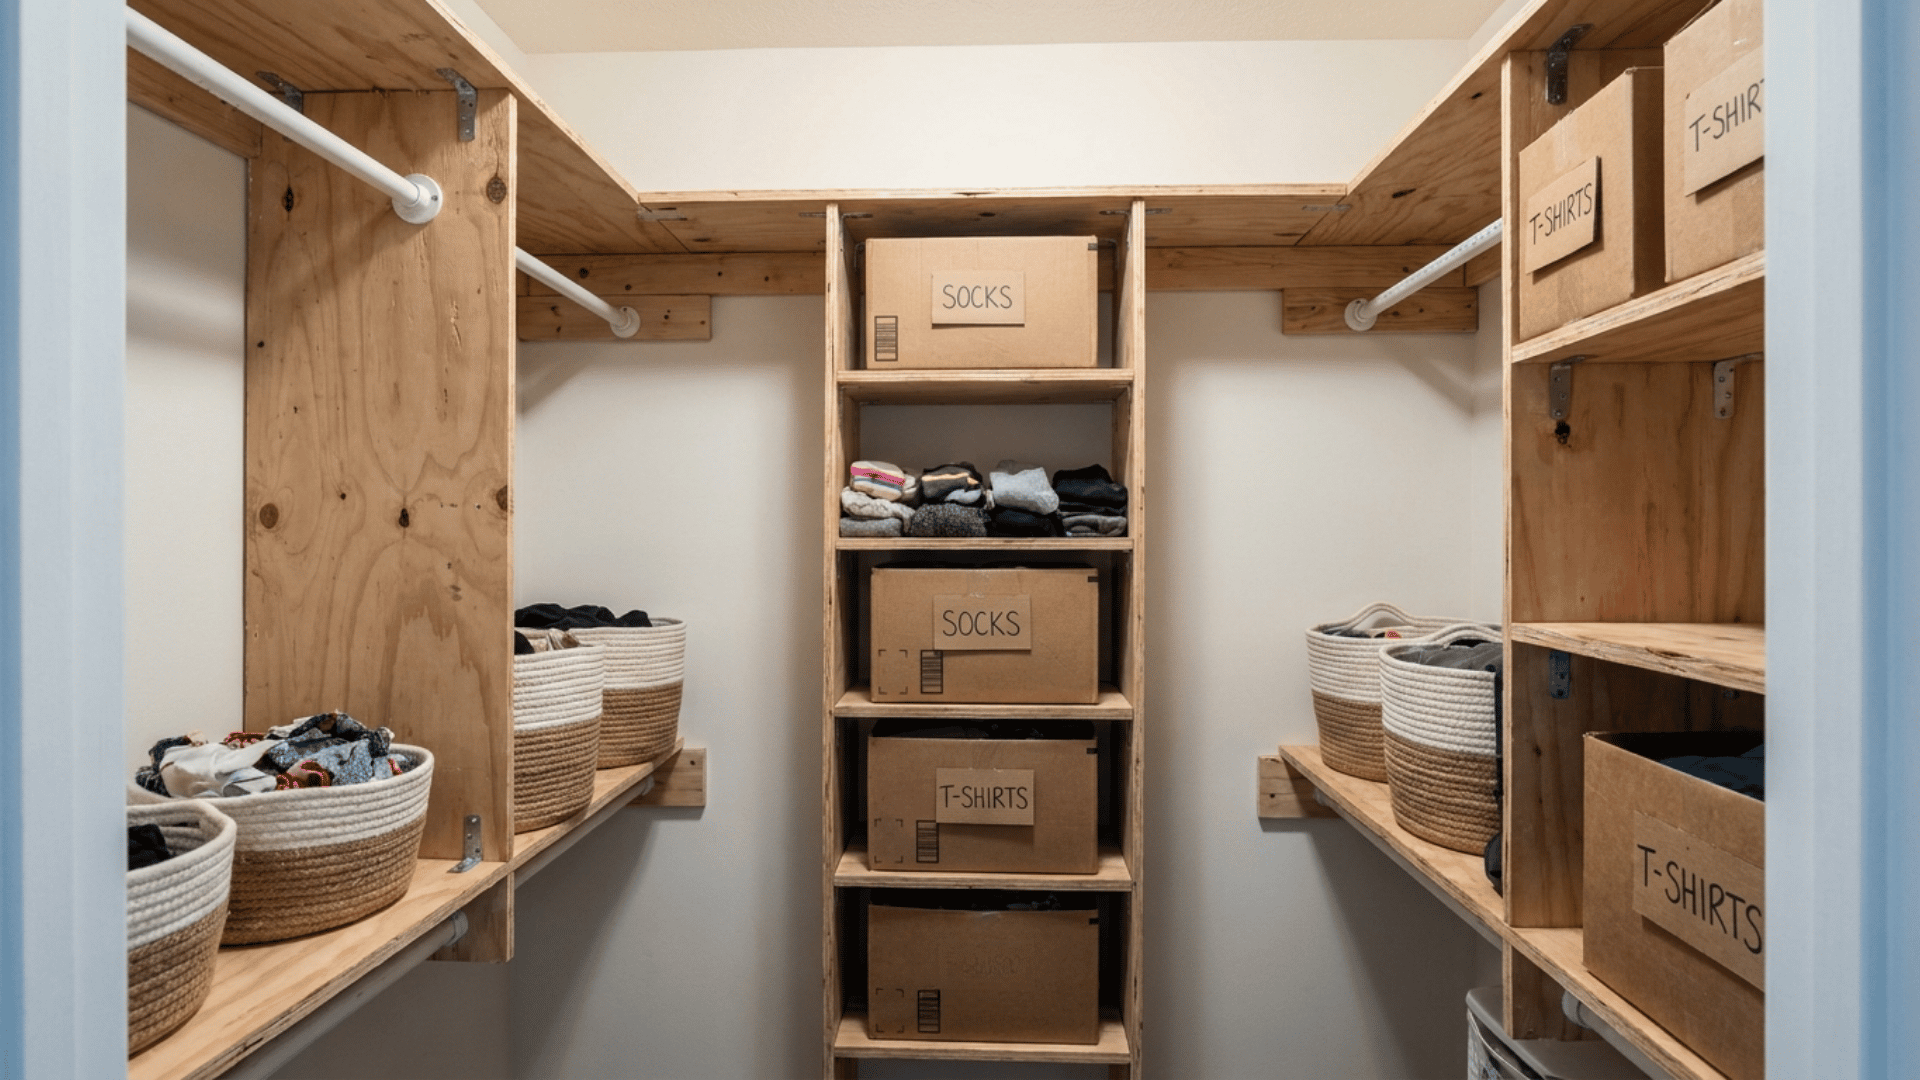
A well-organized closet can make daily routines simpler and less stressful. Instead of searching through piles of clothes or struggling to locate accessories, a practical storage system keeps essential items within easy reach.
This is one reason closet organization remains a popular home improvement project among homeowners.
Building a DIY closet organizer offers additional benefits by allowing you to create a storage setup that meets your specific requirements without the expense of professional installation.
From adding extra hanging space and shelving to creating dedicated areas for shoes and accessories, a custom layout helps make better use of available space.
In this article, you’ll learn how to plan, build, budget, and maintain a DIY closet organizer that improves storage efficiency and keeps clutter under control.
When I started organizing my own closet, I realized that even a few simple storage upgrades made it easier to keep everything in its place and save time each day.
Why a DIY Closet Organizer is Worth the Effort
Before starting your project, it’s helpful to understand the key advantages of a DIY closet organizer as a worthwhile investment.
- Save Hundreds Compared to Custom Installations: Building your own closet organizer can significantly reduce costs by eliminating labor fees and letting you choose materials that fit your budget and storage needs.
- Design Storage Around Your Needs: A DIY closet organizer gives you the freedom to create a layout that matches your wardrobe, making it easier to store clothing, shoes, and accessories efficiently.
- Increase Functionality and Home Value: An organized closet improves everyday convenience, reduces clutter, and adds practical storage features that can make your home more appealing to potential buyers.
Planning your DIY Closet Organizer
Proper planning is one of the most important steps in building a DIY closet organizer. A well-planned organizer not only improves storage capacity but also makes everyday use more convenient.
1. Measure your Closet Accurately
Accurate measurements are essential for creating a closet organizer that fits properly. Measure the width, depth, and height of the closet, and record each dimension carefully.
Don’t forget to note obstacles such as doors, vents, light switches, electrical outlets, and baseboards. These details can affect shelf placement, hanging rod locations, and overall design choices during installation.
2. Inventory: What You Need to Store
Before finalizing your design, take inventory of everything that will be stored in the closet. Separate items into categories such as hanging clothes, folded garments, shoes, handbags, accessories, and seasonal belongings.
Understanding your storage requirements helps determine how much space to allocate to shelves, drawers, cubbies, and hanging rods to improve organization.
3. Create a Closet Layout Sketch
Creating a simple layout sketch can help you visualize the finished organizer before construction begins. Mark where shelves, hanging rods, drawers, and storage compartments will be placed.
A rough design allows you to identify potential space issues early and ensures that every section of the closet serves a practical purpose once installation is complete.
4. Establish a Realistic Budget
Setting a realistic budget helps keep your project financially manageable from start to finish. Consider expenses such as lumber, shelving materials, hardware, paint, and finishing supplies.
If you plan to include premium features like drawers, lighting, or decorative trim, factor those costs into your budget as well to avoid unexpected spending.
Tools and Materials you’ll Need
Selecting the right combination of materials can help ensure your storage system remains durable, functional, and suitable for your budget while meeting your long-term organizational needs.
| Material/Component | Best For | Key Benefit |
|---|---|---|
| Plywood | Durable organizers | Strong and long-lasting |
| MDF | Budget projects | Affordable and easy to paint |
| Melamine Boards | Modern closet systems | Smooth and easy to clean |
| Closet Rods | Hanging clothing | Maximizes vertical storage space |
| Mounting Brackets | Shelf support | Provides stability and strength |
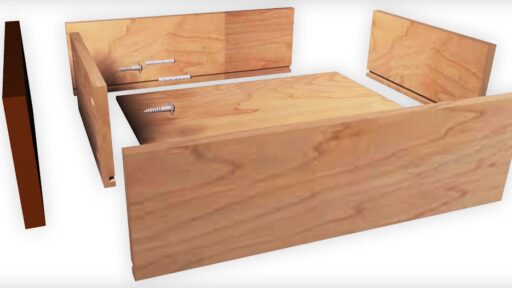
| Screws and Fasteners | Assembly and installation | Keeps components securely attached |
| Drawer Slides | Custom drawer systems | Allows smooth drawer operation |
| Edge Banding | Finished shelving | Covers exposed edges for a cleaner look |
| Wood Filler | Surface repairs | Helps create a smooth finish before painting |
| Paint or Laminate Finish | Customized appearance | Protects surfaces and improves appearance |
Step-by-Step DIY Closet Organizer Installation Guide
Building a DIY closet organizer may seem like a large project, but breaking it into manageable steps can make the process much easier.
By following a structured approach, you can create a storage system that is sturdy, functional, and designed to meet your organization’s needs.
Taking the time to complete each step carefully will help ensure accurate installation and long-lasting results.
Step 1. Empty and Prepare the Closet
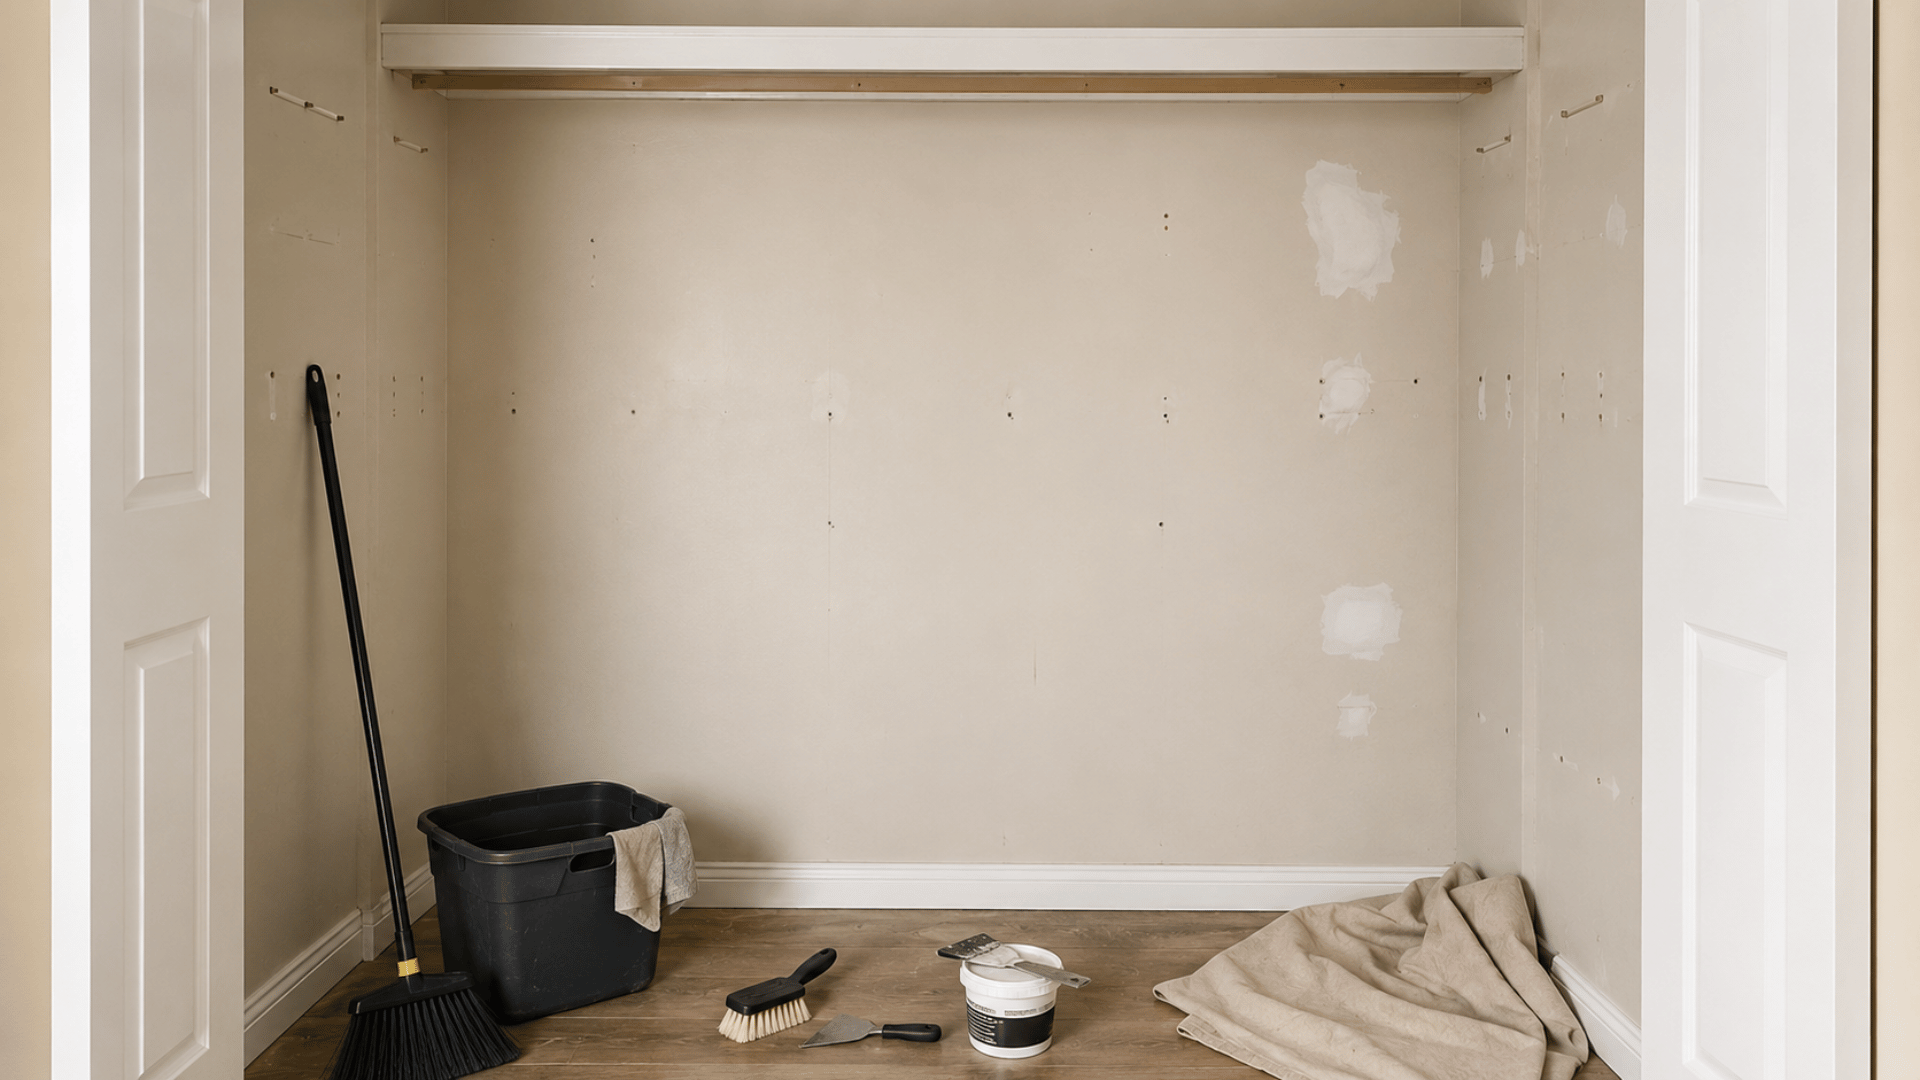
Before installing any new storage components, completely empty the closet and remove all existing shelves, rods, hooks, and hardware.
This gives you a clear view of the available space and helps identify any repairs that need attention. Check the walls for holes, cracks, or damaged areas and patch them before beginning installation.
Thoroughly cleaning the closet at this stage can also help create a better work environment and ensure your new organizer is installed on a solid foundation.
Step 2. Mark Wall Stud Locations
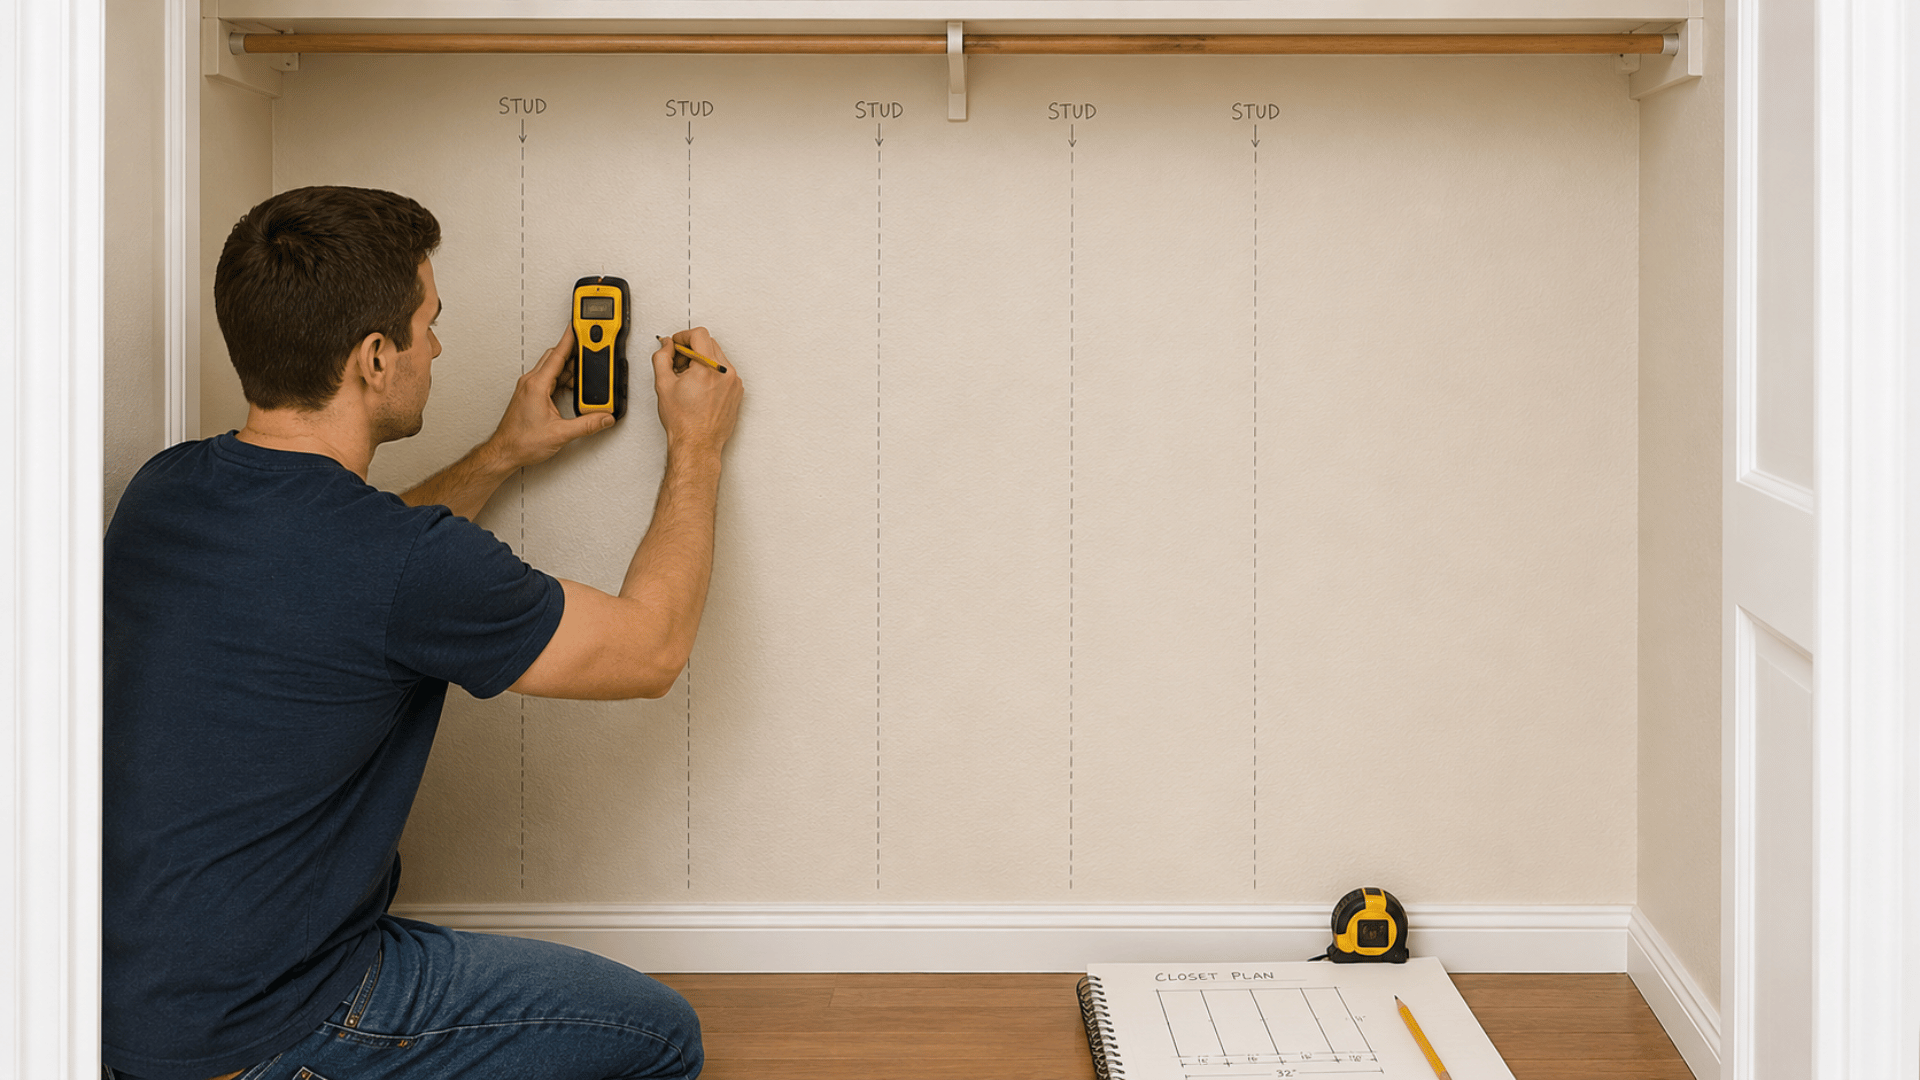
Wall studs provide the structural support needed to hold shelves, rods, and other storage components securely. Use a stud finder to locate each stud and mark its position with a pencil.
Take time to verify measurements and confirm stud placement before drilling.
Carefully planning mounting locations helps distribute weight evenly throughout the organizer and reduces the risk of shelves or rods becoming loose over time.
Step 3. Install Vertical Supports
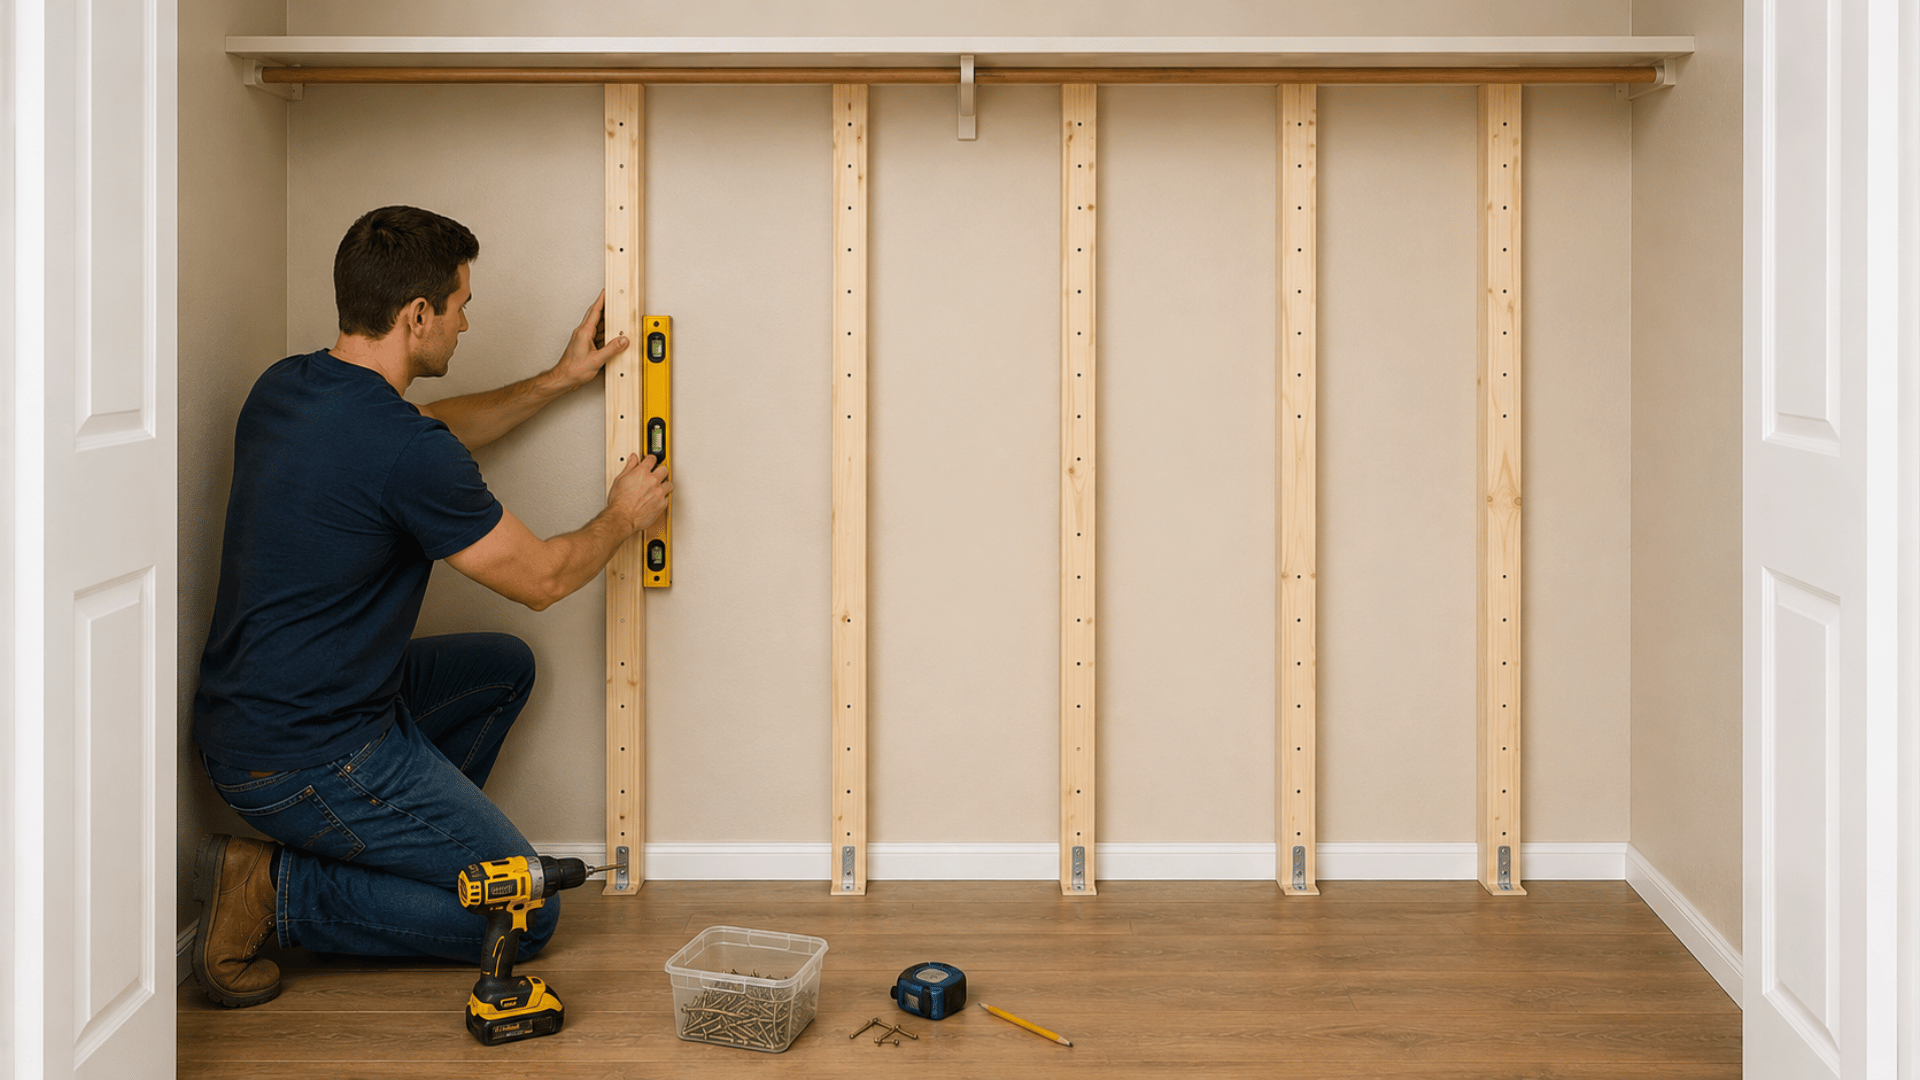
Vertical supports form the backbone of your closet organizer and provide the framework for shelves, drawers, and hanging rods.
Position each support according to your layout plan and ensure they are level before securing them to the wall. Consistent spacing between supports improves weight distribution and helps create a balanced appearance.
Properly installed supports contribute significantly to the overall durability and stability of the finished organizer.
Step 4. Add Shelving Components
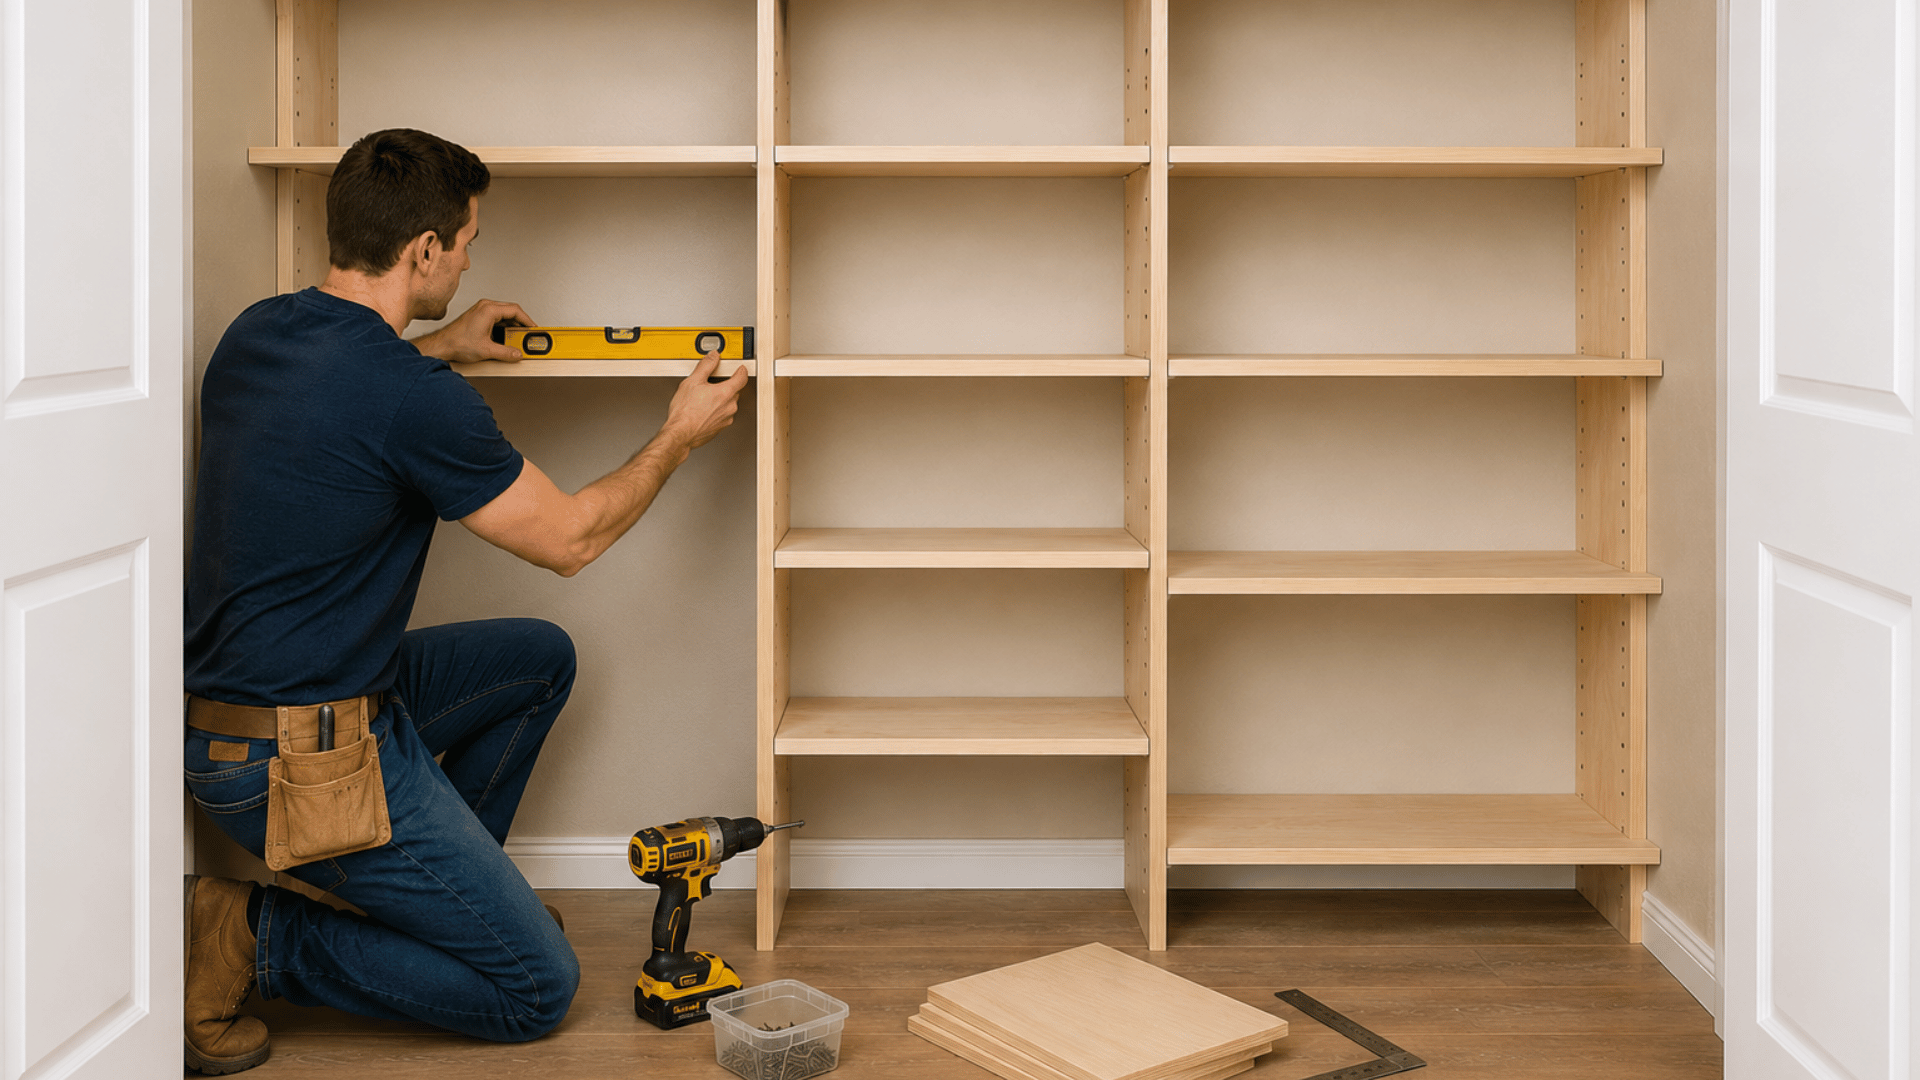
Shelves provide valuable storage space for folded clothing, storage bins, handbags, and accessories. Begin by installing the highest shelves first, then work downward while checking alignment with a level.
Secure each shelf properly using brackets, supports, or fasteners recommended for the material being used.
Taking extra care during this step helps prevent sagging and ensures the shelves can handle everyday storage demands without losing stability.
Step 5. Mount Closet Rods
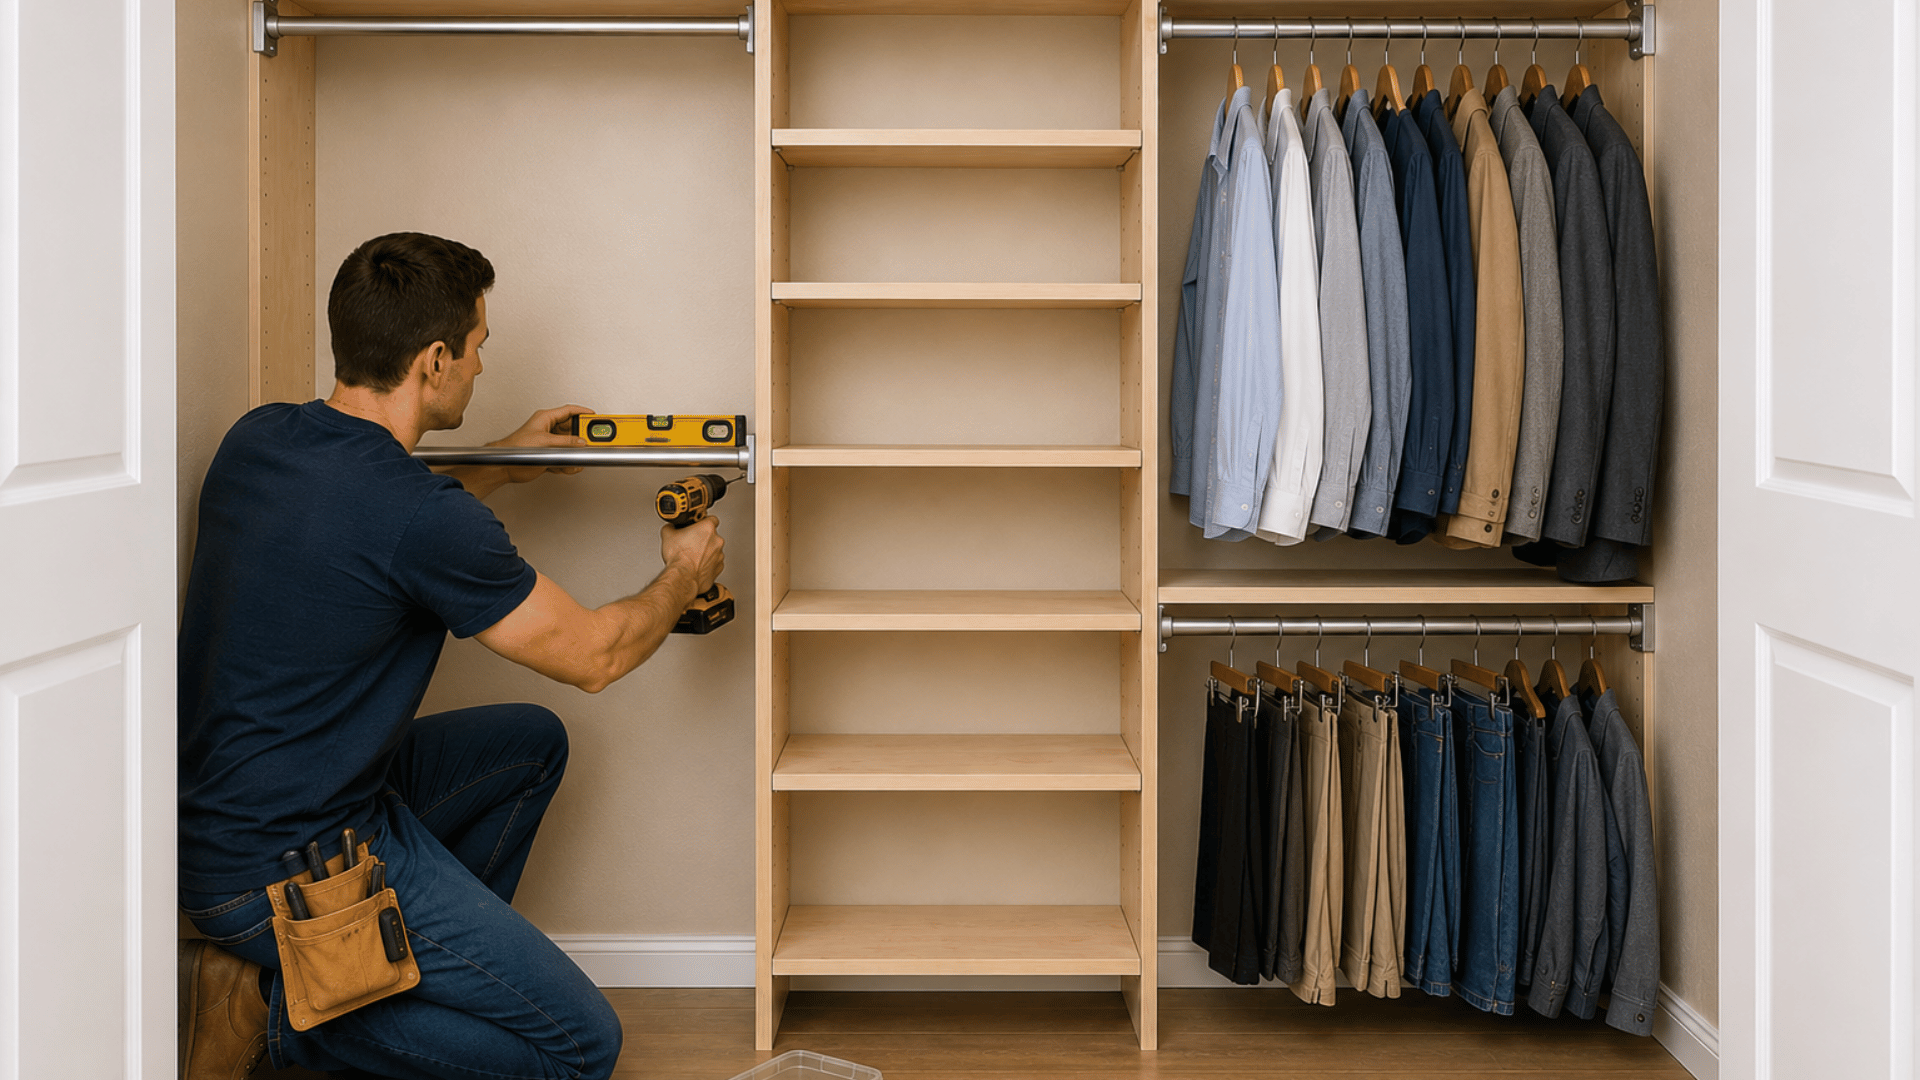
Closet rods are essential for storing hanging garments efficiently. Determine the appropriate height based on the types of clothing you plan to hang, such as shirts, jackets, dresses, or long coats.
Securely install brackets into wall studs or designated supports, and confirm that the rods are level before tightening all hardware.
Proper rod placement can maximize hanging capacity while keeping clothing accessible and wrinkle-free.
Step 6. Build Drawers and Storage Cubbies
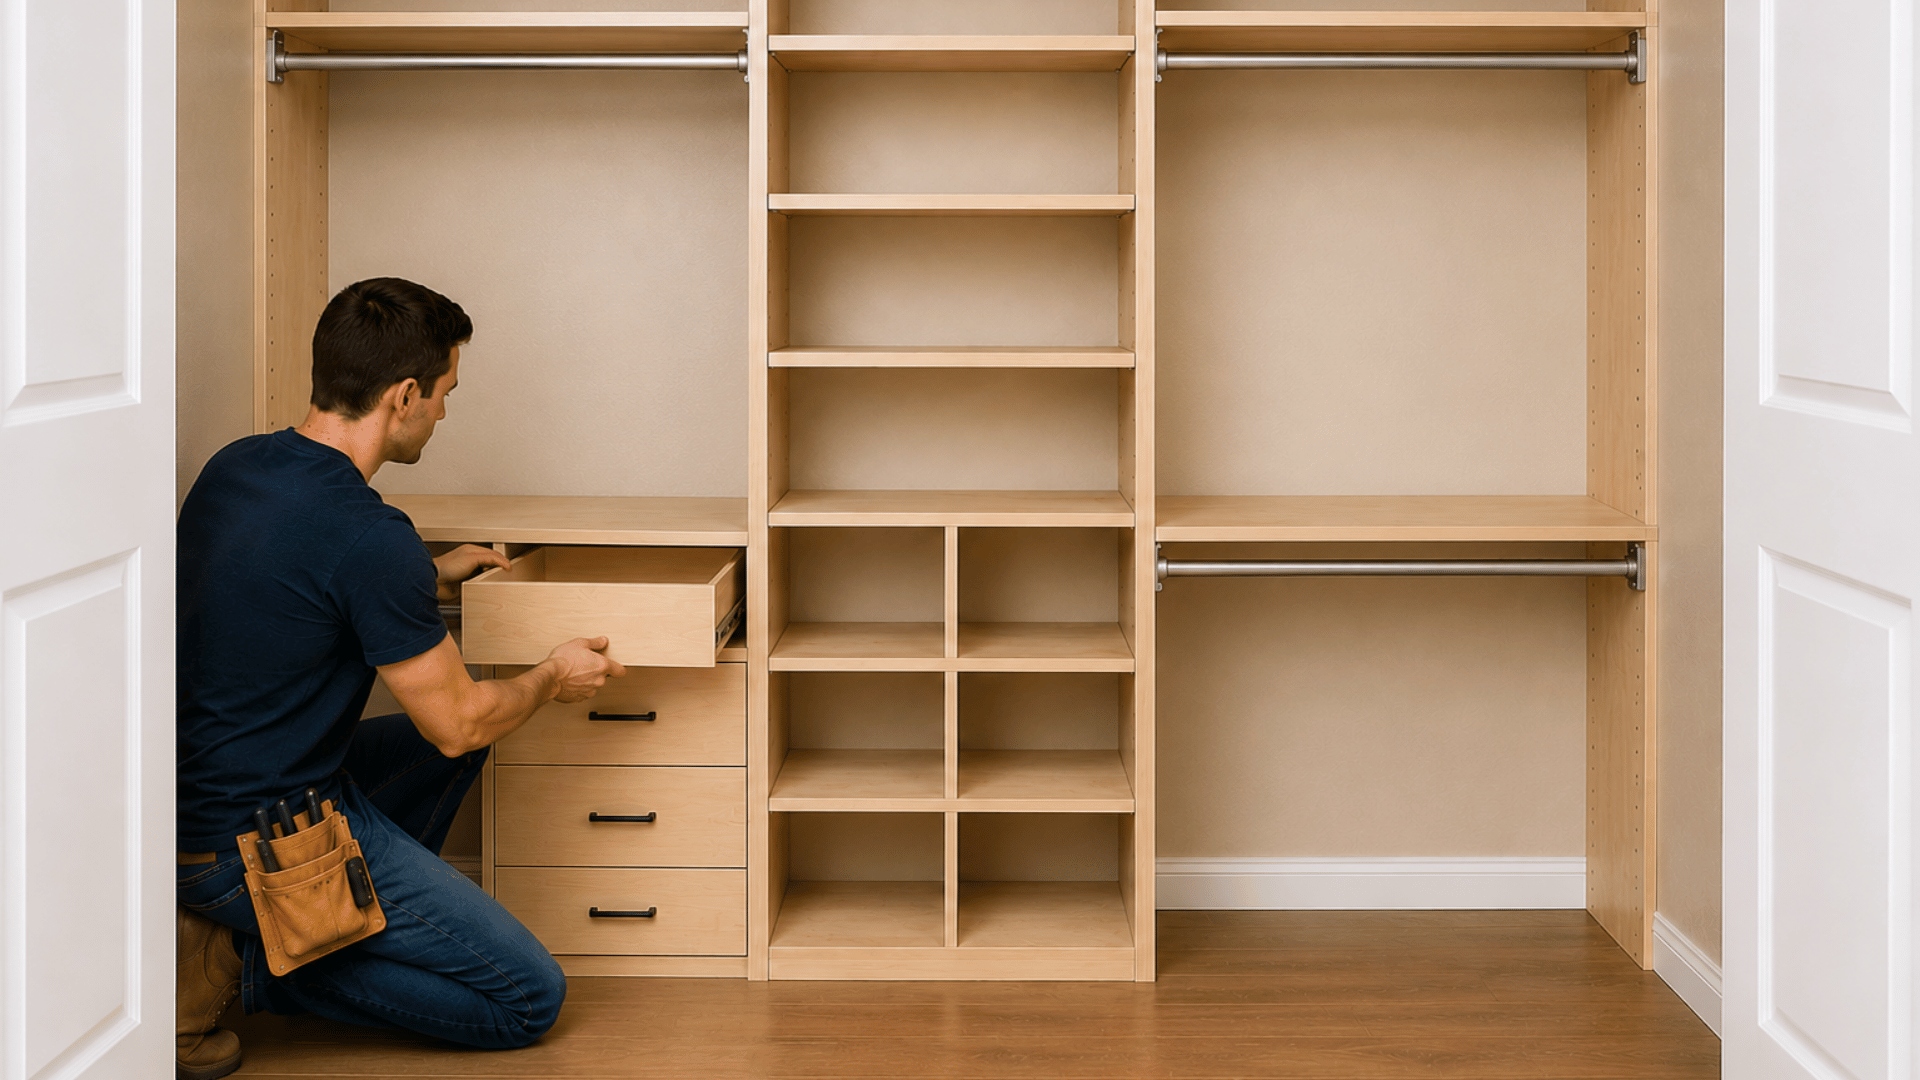
Drawers and cubbies help create dedicated storage areas for items that do not belong on shelves or hanging rods.
Use drawers for accessories, folded clothing, and smaller belongings, while cubbies work well for shoes, handbags, and storage baskets.
Dividing the closet into specific storage sections makes it easier to maintain organization and reduces clutter. Custom-sized cubbies can also help maximize unused areas within the closet.
Step 7. Paint, Finish, and Secure Everything
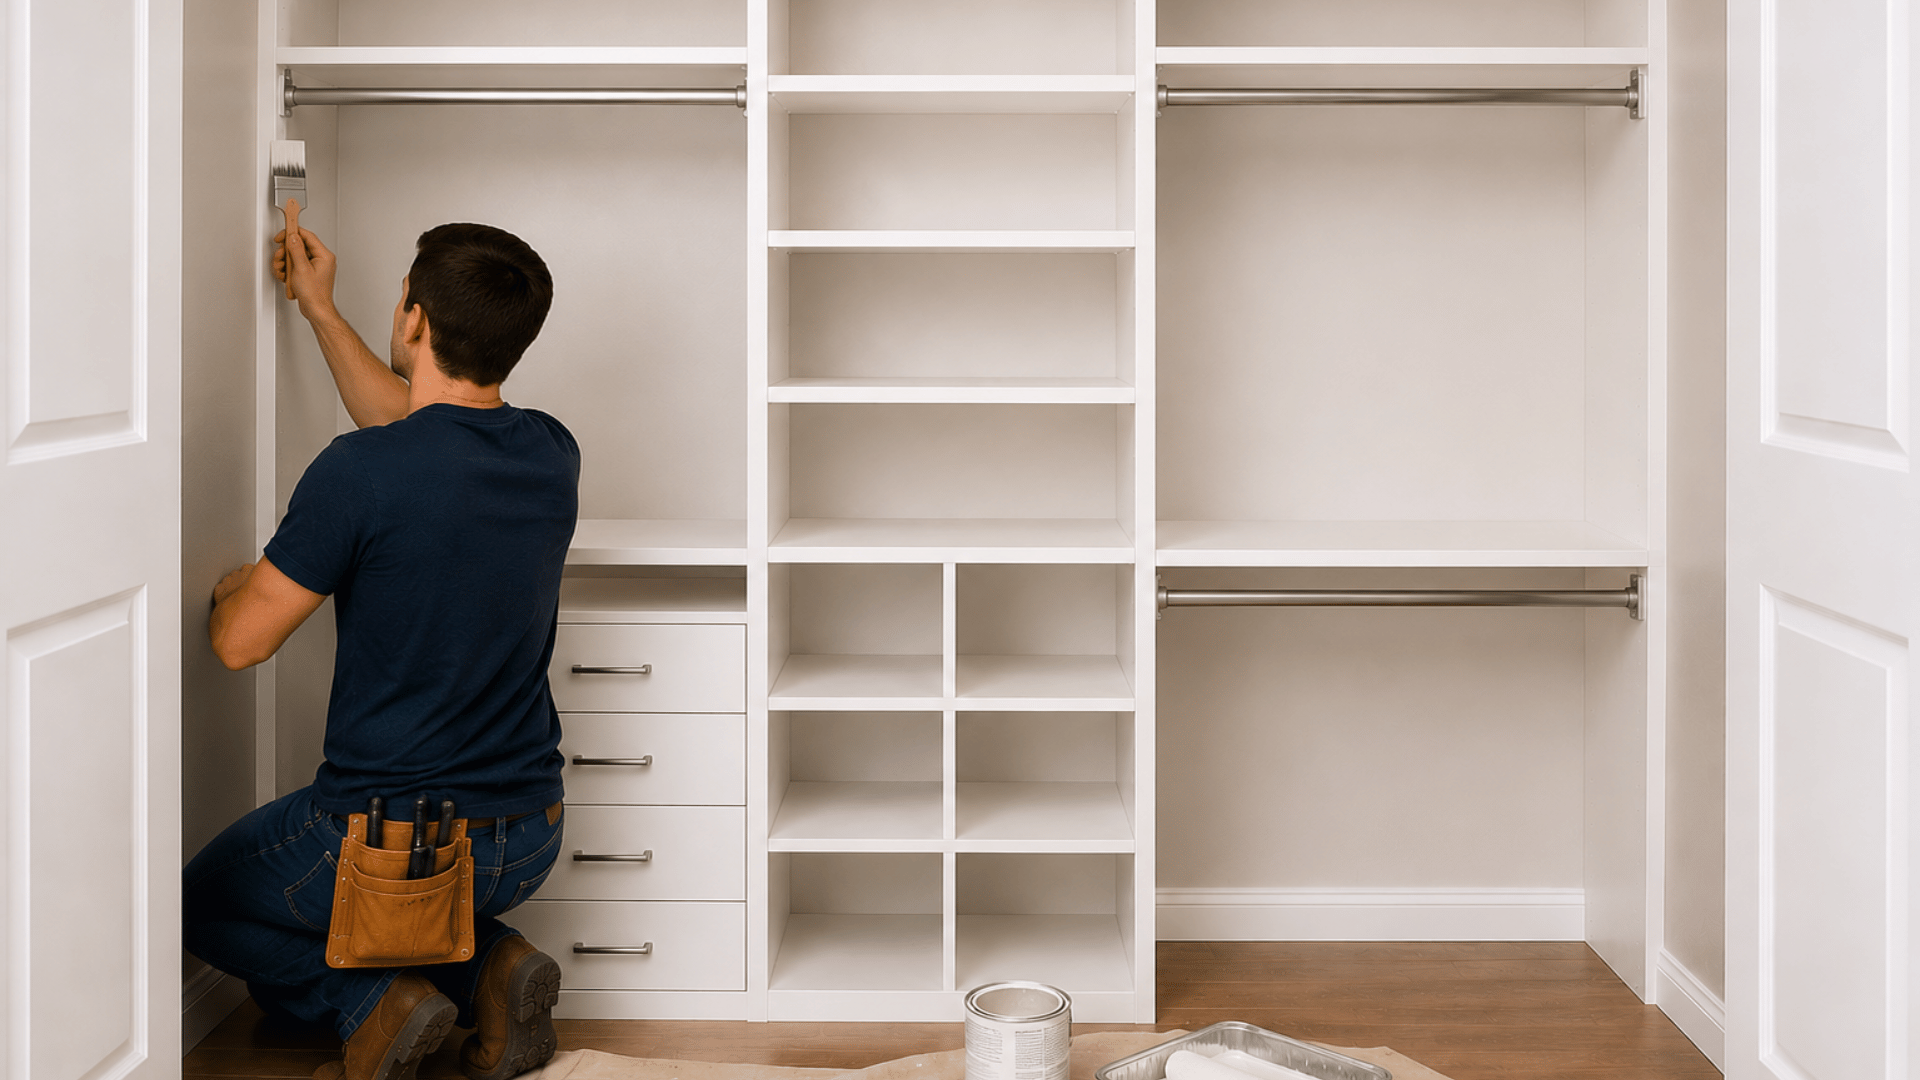
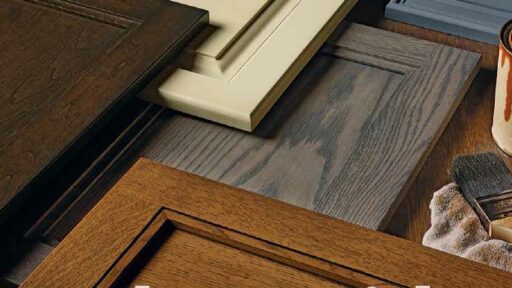
Once all structural components have been installed, apply paint, stain, or another finish to protect the surfaces and improve the organizer’s overall appearance.
Allow finishes to dry completely before loading shelves or drawers. Inspect all brackets, screws, and mounting hardware to ensure everything is tightened securely.
Testing the stability of shelves, rods, and storage compartments before use helps confirm that the organizer is ready to support your belongings safely.
DIY Closet Organizer Average Cost
Understanding material costs in advance can help you build a closet system without overspending.
Creating a budget before purchasing supplies allows you to prioritize essential components, compare material options, and avoid unexpected expenses during the project.
While actual costs may vary based on closet size, material quality, and optional features, the estimates below can help you determine which budget range best fits your goals.
Budget-Friendly Closet Organizer
Estimated Total: $100–$250
A budget-friendly closet organizer is ideal for homeowners looking to improve storage without making a large investment. This option typically focuses on basic shelving, hanging rods, and essential hardware while using cost-effective materials.
- Shelving: $30–$70
- Closet Rods: $10–$25
- Hardware and Brackets: $15–$30
- Paint or Finish: $20–$40
Mid-Range Closet Organizer
Estimated Total: $250–$500
A mid-range closet organizer offers additional storage features and upgraded materials. This budget range often includes drawer units, premium shelving, and higher-quality finishes that improve both functionality and appearance.
- Premium Shelving: $80–$150
- Drawer Units: $75–$150
- Hardware and Brackets: $30–$60
- Finishing Materials: $40–$100
Premium Closet Build
Estimated Total: $500+
A premium closet build is designed for homeowners seeking a highly customized storage solution. These projects often include advanced storage features, upgraded finishes, and built-in elements that maximize organization and convenience.
- Custom Drawers: Dedicated storage for clothing and accessories
- Built-In Shelving: Maximizes available storage space
- Decorative Finishes: Create a polished appearance
- Integrated Lighting: Improves visibility and accessibility
DIY Closet Organizer Ideas for Every Closet Type
Different closet sizes and layouts require different organization strategies. A storage solution that works well in a large walk-in closet may not be suitable for a compact reach-in space.
Understanding the strengths of each closet type can help you choose features that maximize storage, improve accessibility, and keep belongings organized.
The following ideas can help you create a closet organizer that matches your available space and daily storage needs.
1. Small Reach-In Closet Organizer Ideas
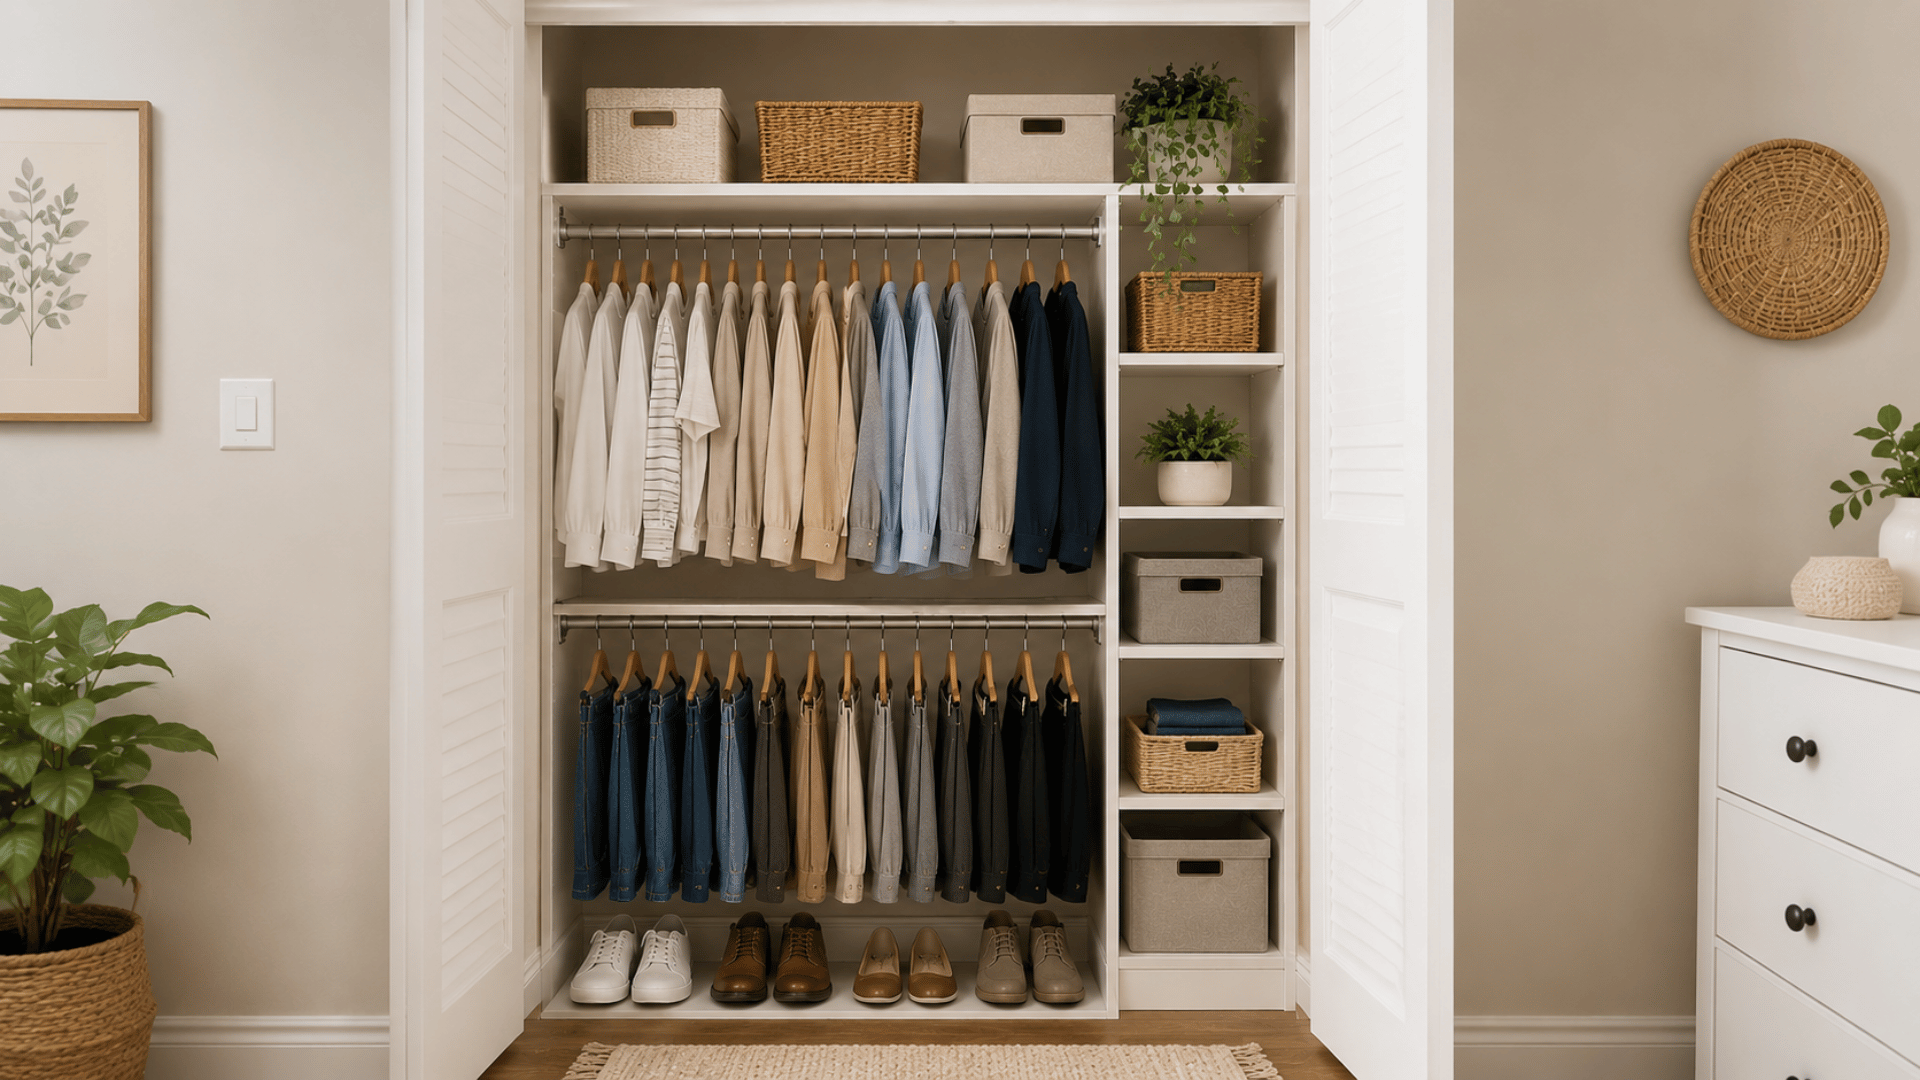
Small reach-in closets benefit from storage solutions that maximize vertical space and reduce clutter. A combination of shelving, hanging rods, and compact storage accessories can help make the most of limited space.
- Use vertical storage solutions.
- Add double hanging rods.
- Install shelves above clothing rods.
- Use slim-profile hangers.
- Incorporate storage bins and baskets.
2. Shared Closet Organizer Solutions
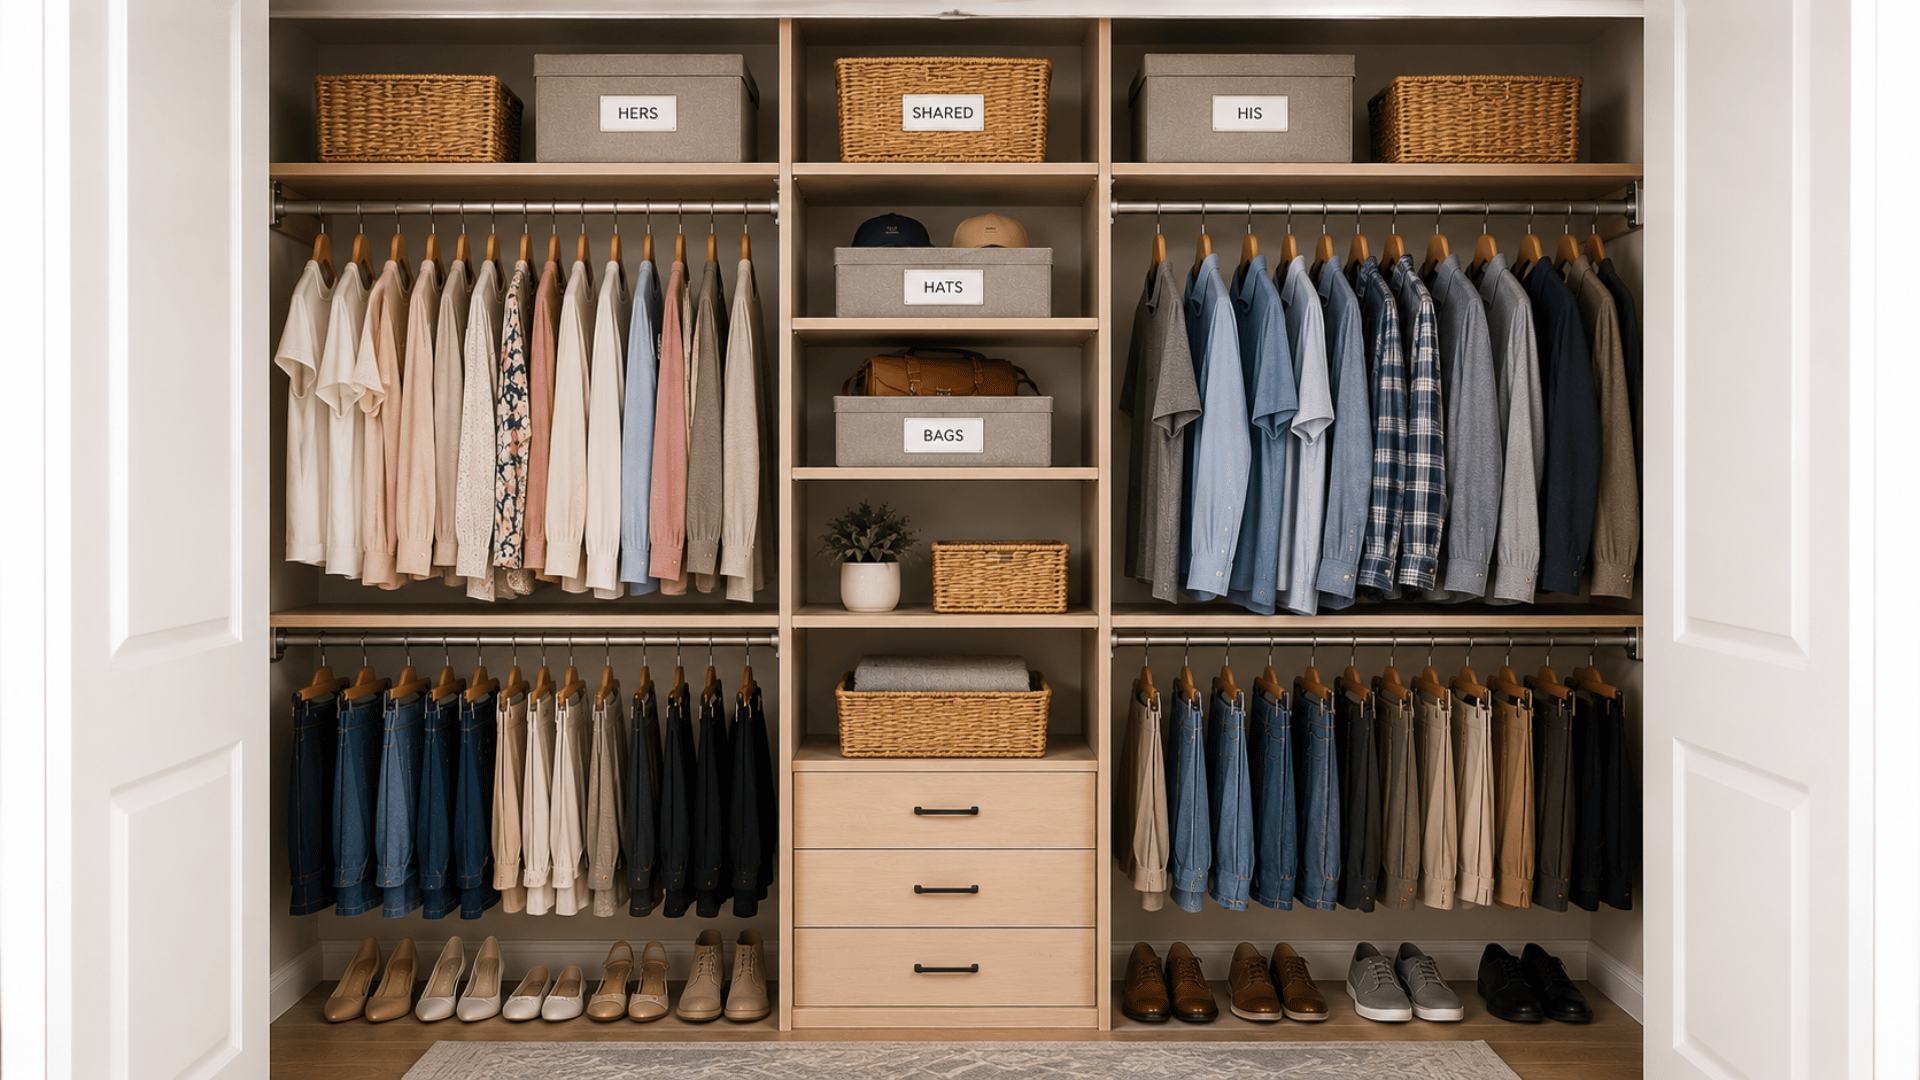
A shared closet works best when storage is divided into clearly defined sections. Giving each person designated areas can help maintain organization and prevent overcrowding.
- Create separate storage sections.
- Use labeled bins and baskets.
- Assign individual hanging areas.
- Dedicate shelves to each user.
- Store shared items in a central location.
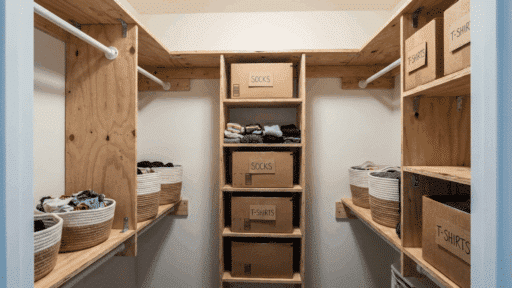
3. Walk-In Closet Storage Ideas
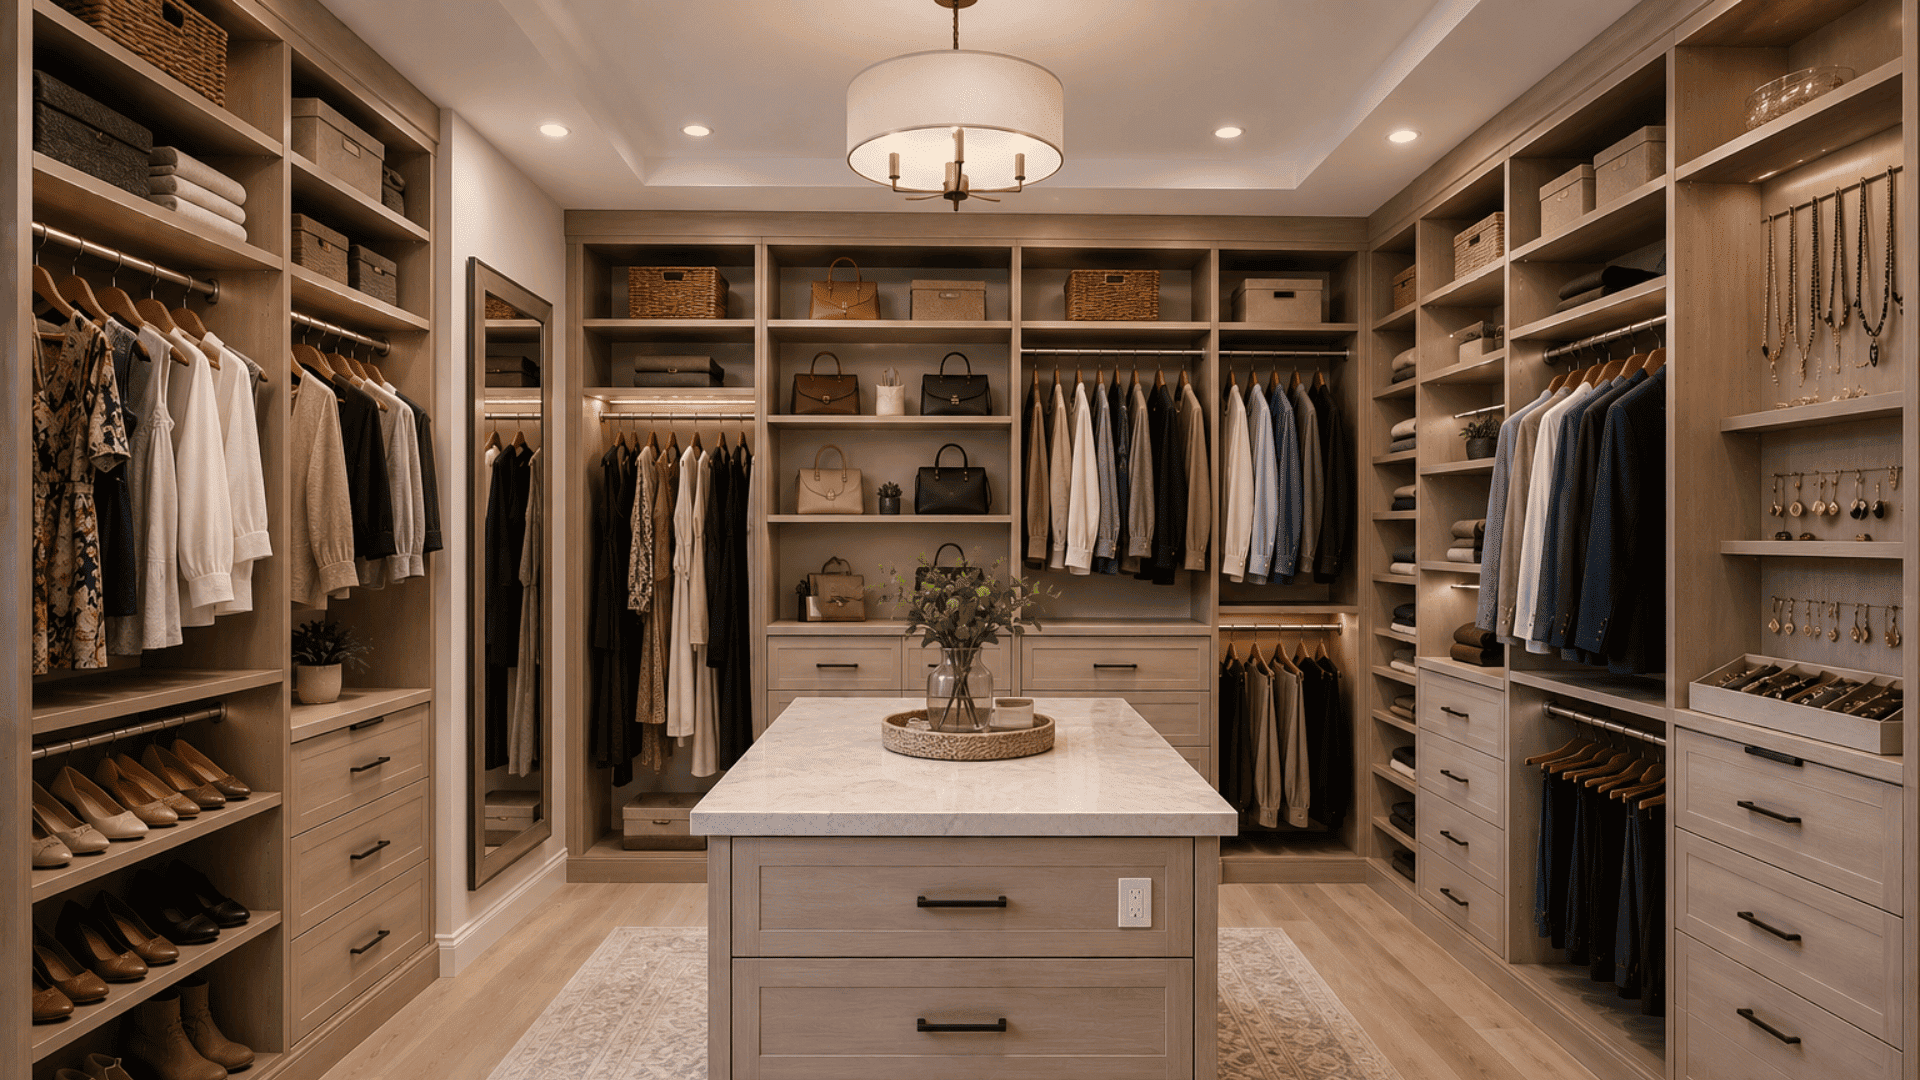
Walk-in closets offer more flexibility and room for additional storage features. Strategic planning can help keep larger spaces organized and easy to maintain.
- Incorporate islands and drawers.
- Add custom shelving.
- Create dedicated storage zones.
- Use floor-to-ceiling storage.
- Include specialty storage for accessories.
4. Kids’ Closet Organizer Designs
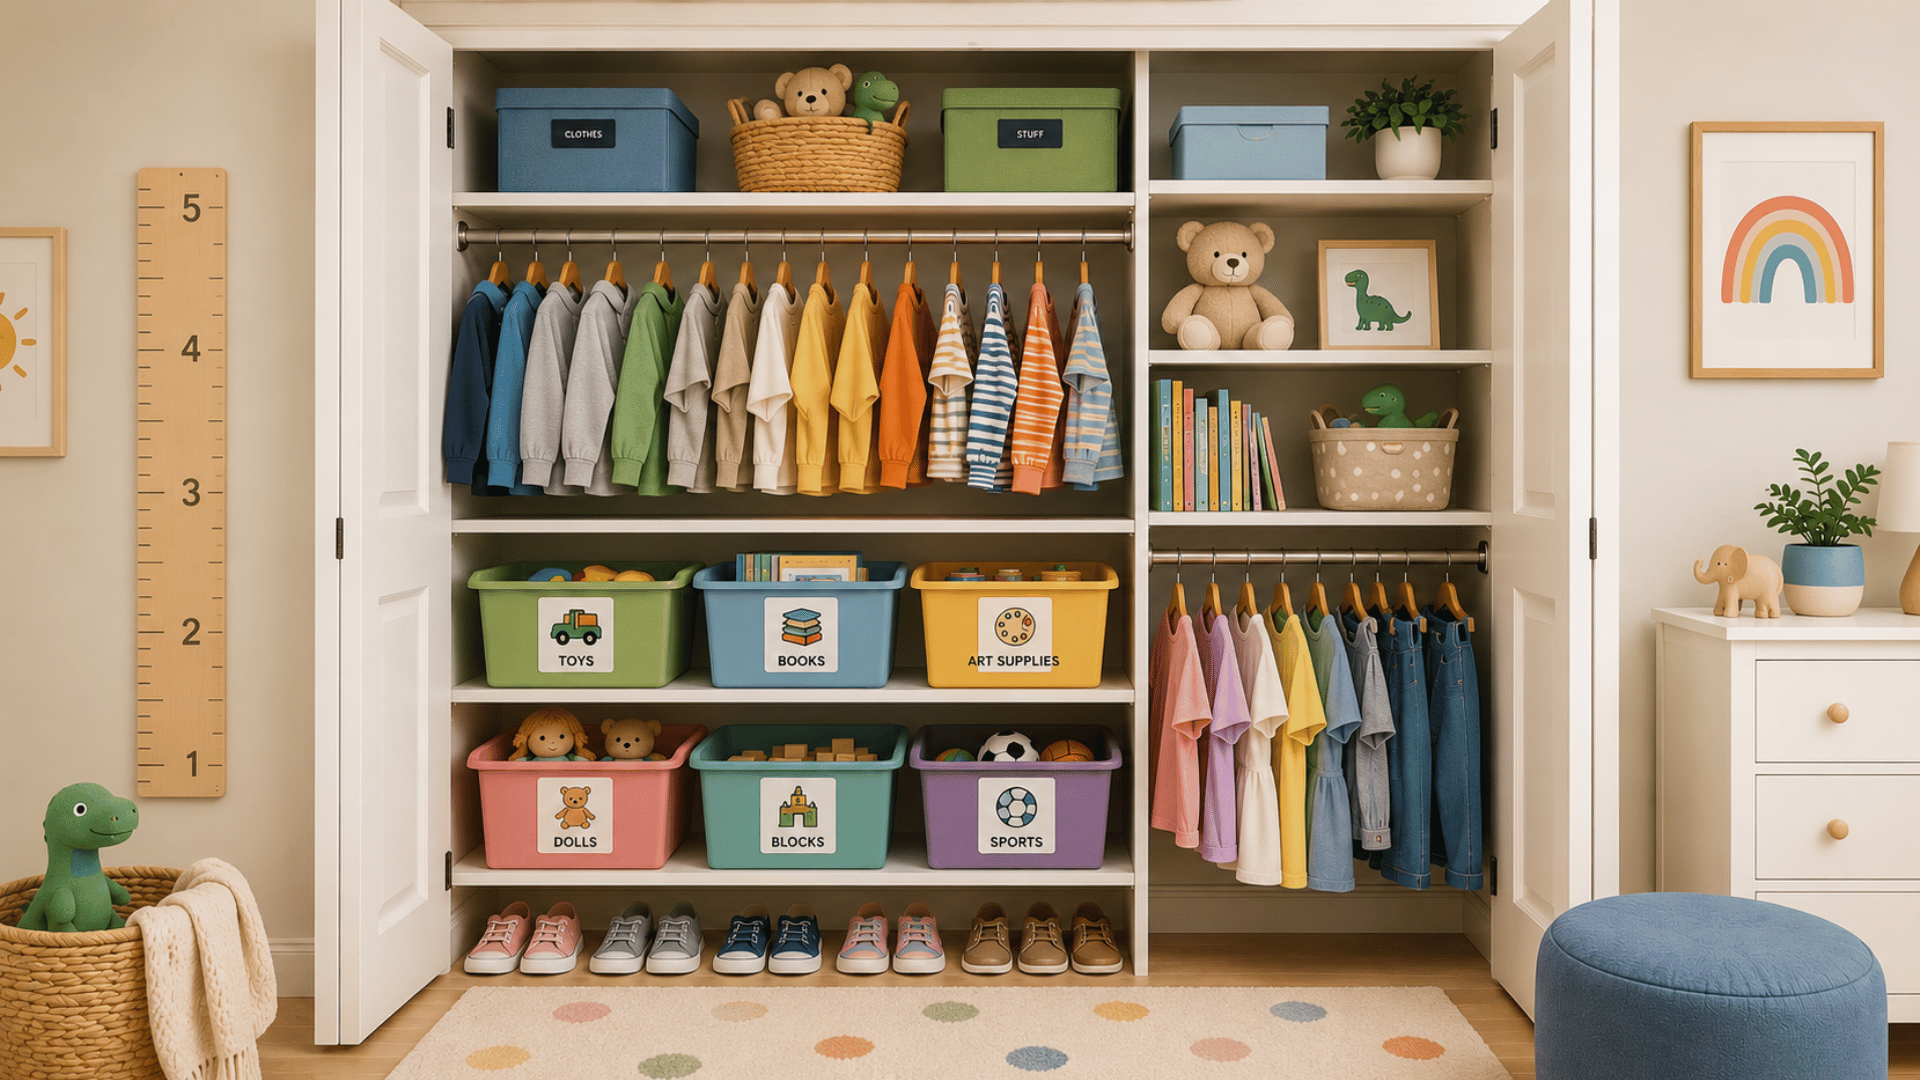
Kids’ closets should focus on accessibility and flexibility. Storage solutions that are easy to reach can encourage better organizational habits.
- Install adjustable shelving.
- Add easy-to-access storage.
- Use labeled bins for toys and accessories.
- Position rods at child-friendly heights.
- Choose storage solutions that can grow with changing needs.
Closet Makeover Checklist
A well-organized closet starts with proper preparation and continues with regular maintenance after installation.
The list below outlines key tasks to complete before beginning your project and the habits that can help keep your closet organized once the organizer is in place.
- Measure your closet accurately and create a storage plan based on your space and organization needs.
- Declutter and sort clothing, shoes, and accessories, keeping only items you use regularly.
- Determine the right mix of shelving, hanging rods, drawers, and storage accessories before installation.
- Organize items by category and frequency of use, placing everyday essentials within easy reach.
- Maintain your closet by labeling storage areas, returning items to their designated spots, and regularly reviewing organizational needs.
Common DIY Closet Organizer Mistakes to Avoid
Avoiding common mistakes during planning and installation can save time, reduce unnecessary expenses, and improve the overall performance of your closet organizer. The table below highlights frequent issues homeowners encounter and practical ways to prevent them.
| Mistake | Why It’s a Problem | Solution |
|---|---|---|
| Skipping Accurate Measurements | Can lead to installation errors, poor fit, and wasted materials. | Measure the closet multiple times and record width, depth, and height before purchasing materials. |
| Overloading Shelves | Excess weight can cause shelves to sag or become damaged over time. | Use sturdy materials, install proper supports, and follow recommended weight limits. |
| Ignoring Future Storage Needs | Storage requirements may change, leading to overcrowding later. | Include adjustable shelves and allow room for future storage additions. |
| Not Securing Components to Studs | Can create safety risks and reduce structural stability. | Locate wall studs and secure heavy components to them for proper support. |
Conclusion
Building a DIY closet organizer is a practical way to improve storage, reduce clutter, and make better use of available space.
With proper planning, accurate measurements, and the right materials, you can create a storage system that fits your needs and budget.
Selecting the appropriate organizer design, following a structured installation process, and maintaining organizational habits can help ensure long-term success.
Even simple upgrades can make a noticeable difference in how efficiently your closet functions. Starting with a basic design and making improvements over time can help you create a system that continues to support your storage needs.
When I organized my own closet, I found that having dedicated storage areas made it much easier to keep everything tidy and accessible each day.
Frequently Asked Questions
How Much does it Cost to Build a DIY Closet Organizer?
Most DIY closet organizers cost between $100 and $500, depending on closet size, materials, and optional features such as drawers, lighting, and decorative finishes.
What is the Best Material for a DIY Closet Organizer?
Plywood is a popular choice because it offers durability, strength, and a smooth finish while effectively supporting shelves, drawers, and hanging storage.
Can Beginners Build a DIY Closet Organizer?
Yes. Many DIY closet organizer projects use basic tools and straightforward construction methods, making them suitable for beginners with limited woodworking experience.
How Long does it Take to Build a Closet Organizer?
Most DIY closet organizer projects can be completed within a weekend, although larger or more customized designs may require additional time.
What is the Most Efficient Closet Organizer Layout?
A combination of hanging rods, adjustable shelves, drawers, cubbies, and shoe storage provides a flexible layout that works for most storage needs.

James McLaren, with a rich background in architecture from the University of Manchester, has been contributing his expertise to the world of creative construction and home innovation for over 20 years. His journey began as a project manager for a leading construction firm, where he honed his skills in bringing complex designs to life. James joined our platform as a freelancer in 2019, quickly becoming a favorite for his insightful and practical advice. He has been a pivotal force to our wing ever since, bringing our readers a blend of technical know-how and creative flair. Beyond his professional life, James is an avid woodworker and enjoys restoring vintage furniture, a hobby that complements his professional insights beautifully.