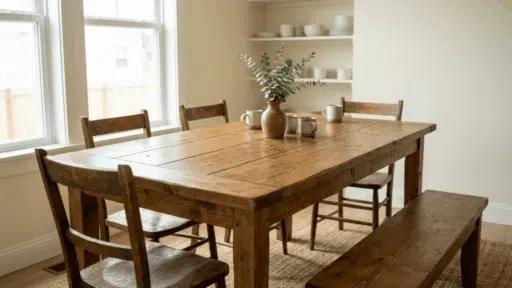
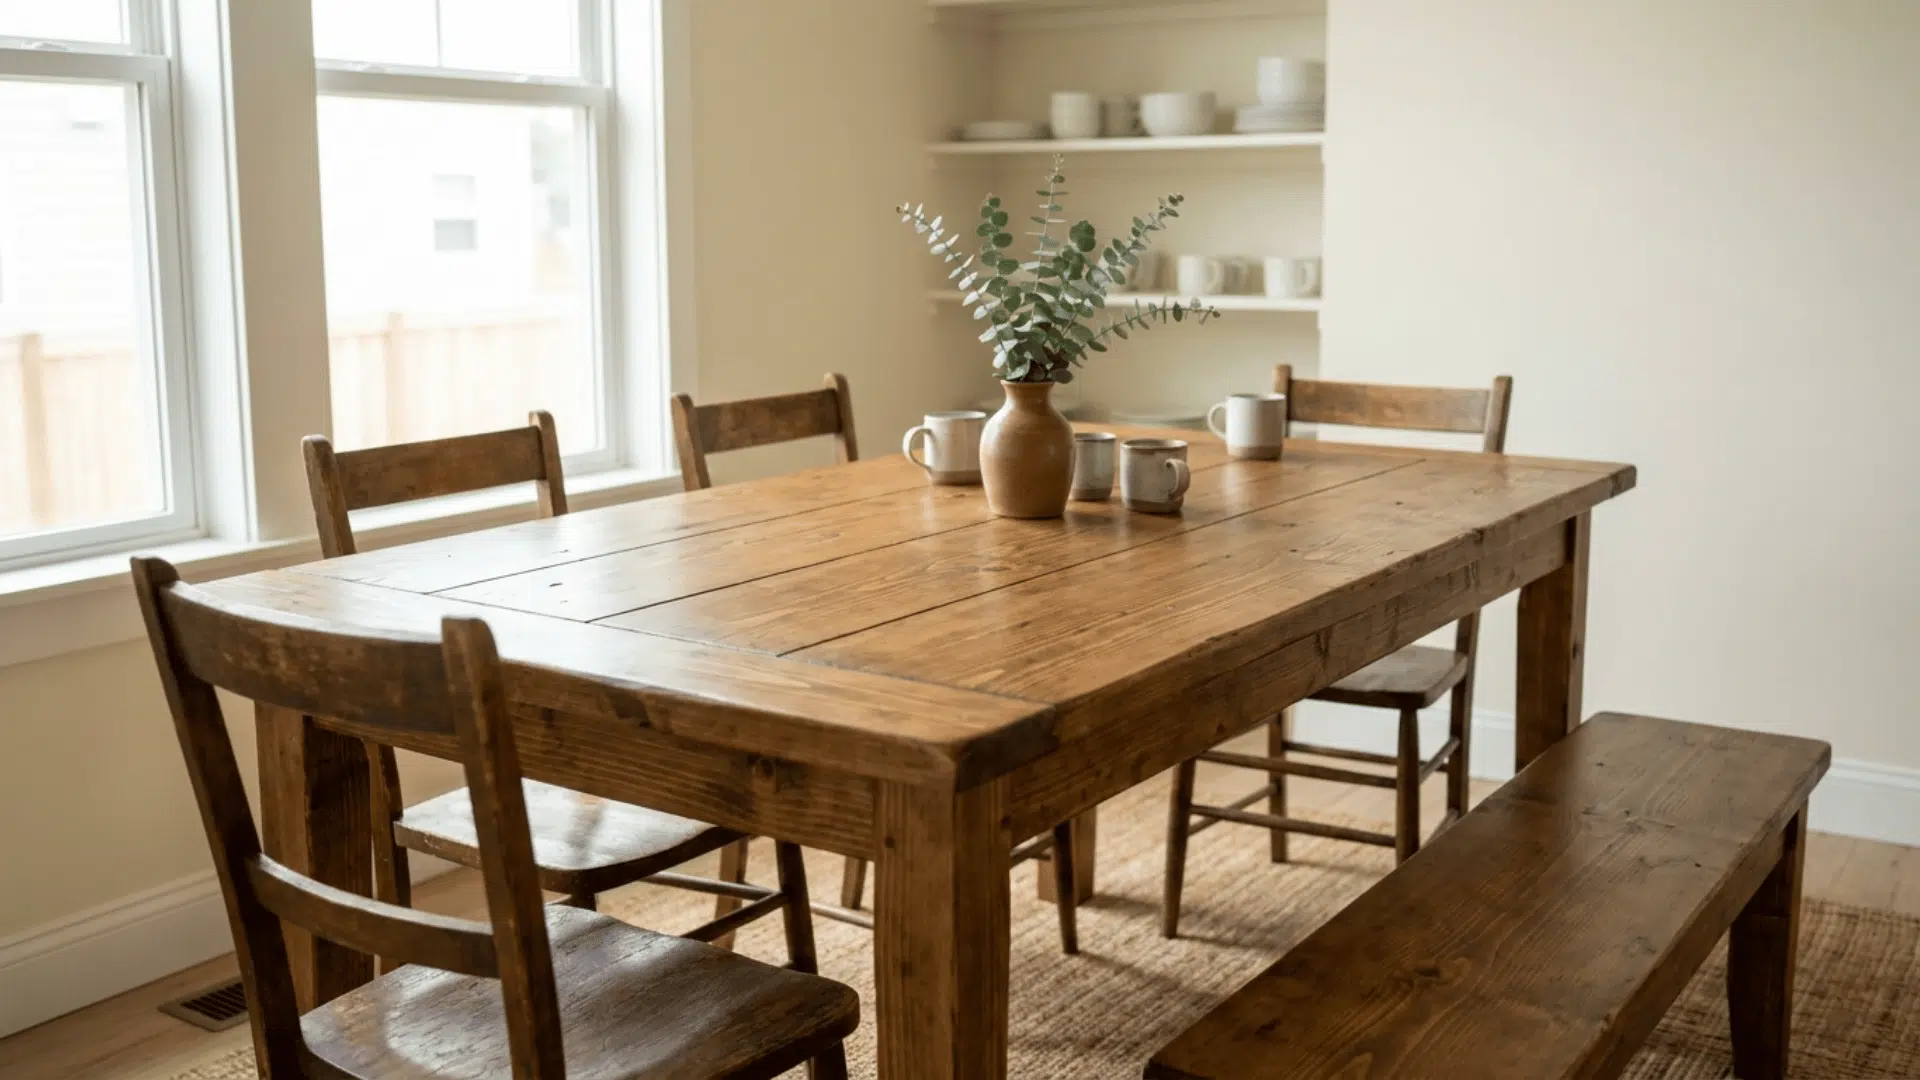
A farmhouse table was the first big build I ever finished, and it still sits in my dining room today. It cost me less than $150 in lumber, and it has survived years of family dinners, homework sessions, and craft projects.
If I can build one with basic tools, you can too. This guide walks through every step of a DIY farmhouse table. It covers the required tools and wood, as well as cutting and assembly.
There are tips for common mistakes as well, like wobbly legs and uneven tabletops, because I made most of them myself.
You do not need a workshop full of fancy equipment. A few power tools, a free weekend, and a little patience will get the job done. Let’s get started.
Tools and Materials Needed
Everything you need for a DIY farmhouse table fits on one quick list. Each item plays a clear role in the build.
- 2×4 pine boards
- 2×8 or 2×10 pine boards
- Pocket hole screws
- Wood glue
- Sandpaper (80, 120, 220 grit)
- Wood stain
- Polyurethane sealer
How to Build a DIY Farmhouse Table: Step by Step
The full build takes one weekend from first cut to final coat. Each step below builds on the one before it, so follow the order.
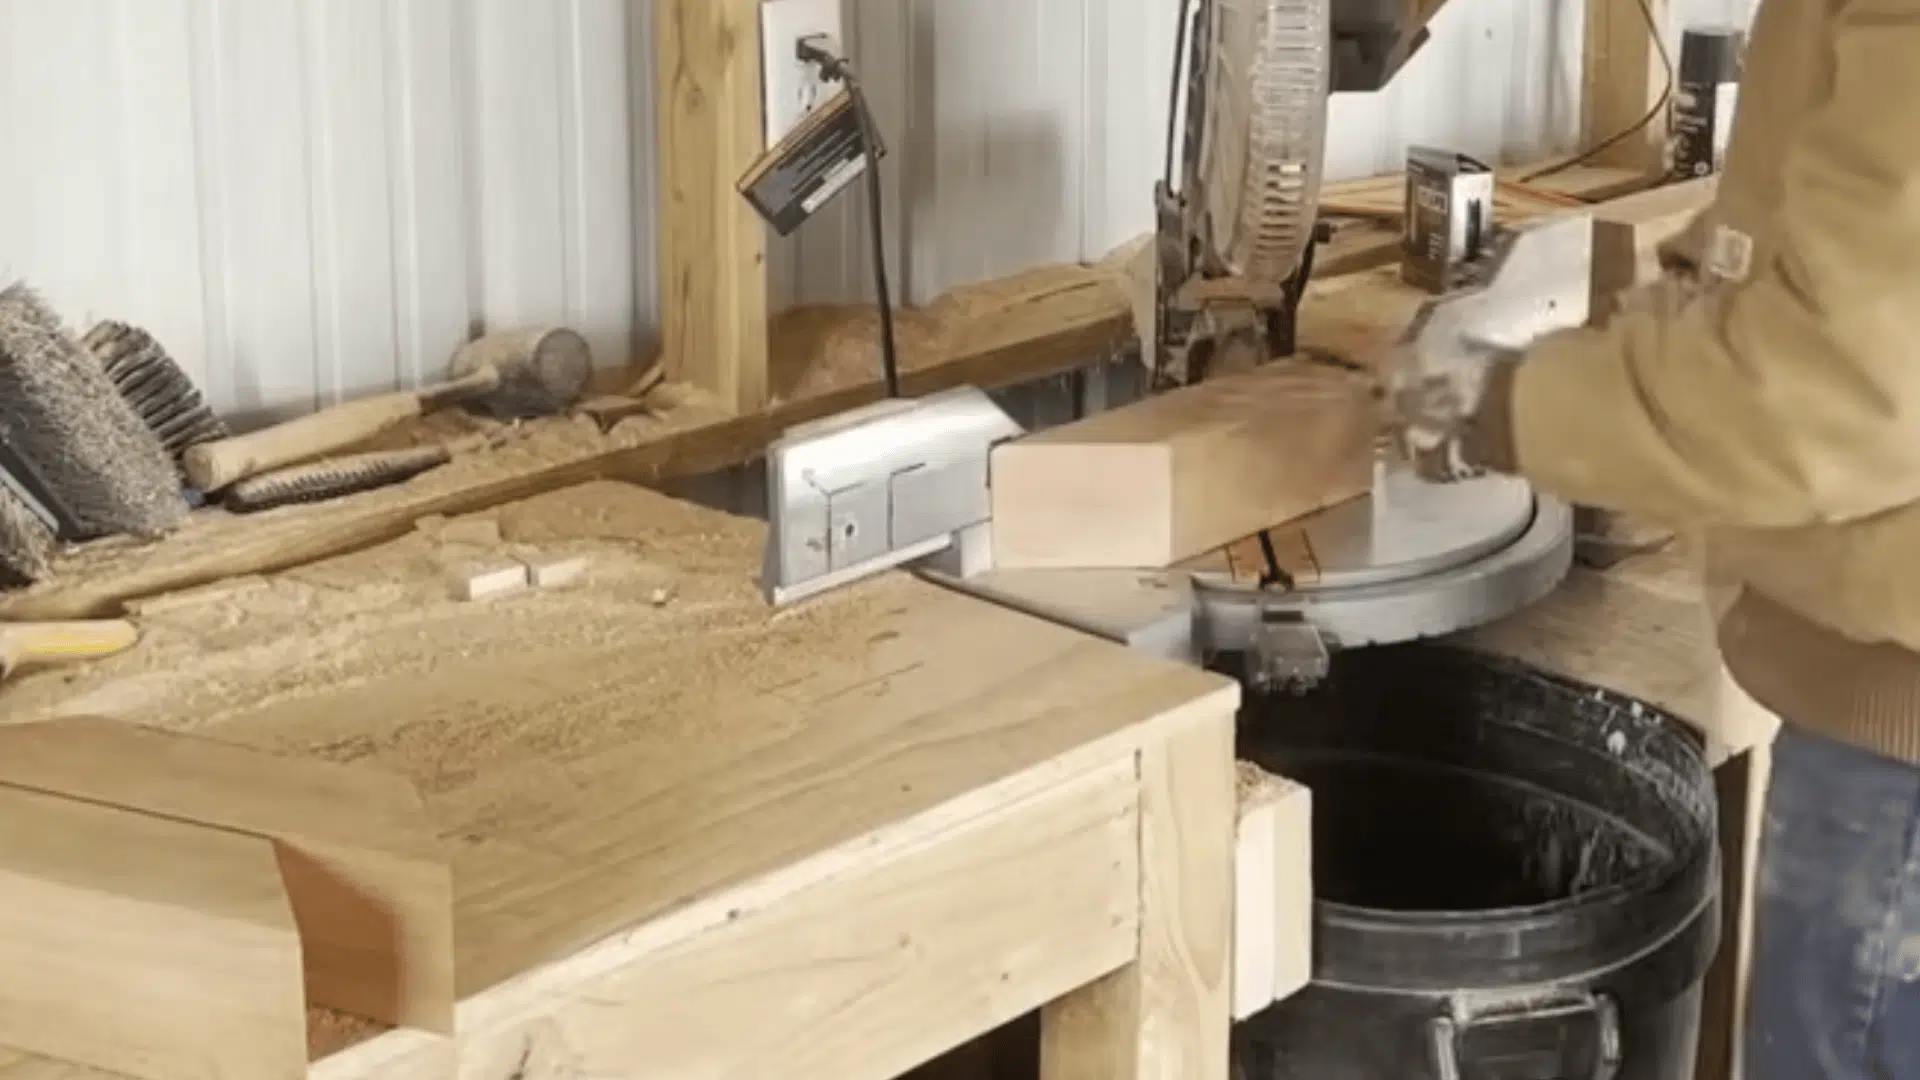
Step 1: Cut the Base Pieces to Size
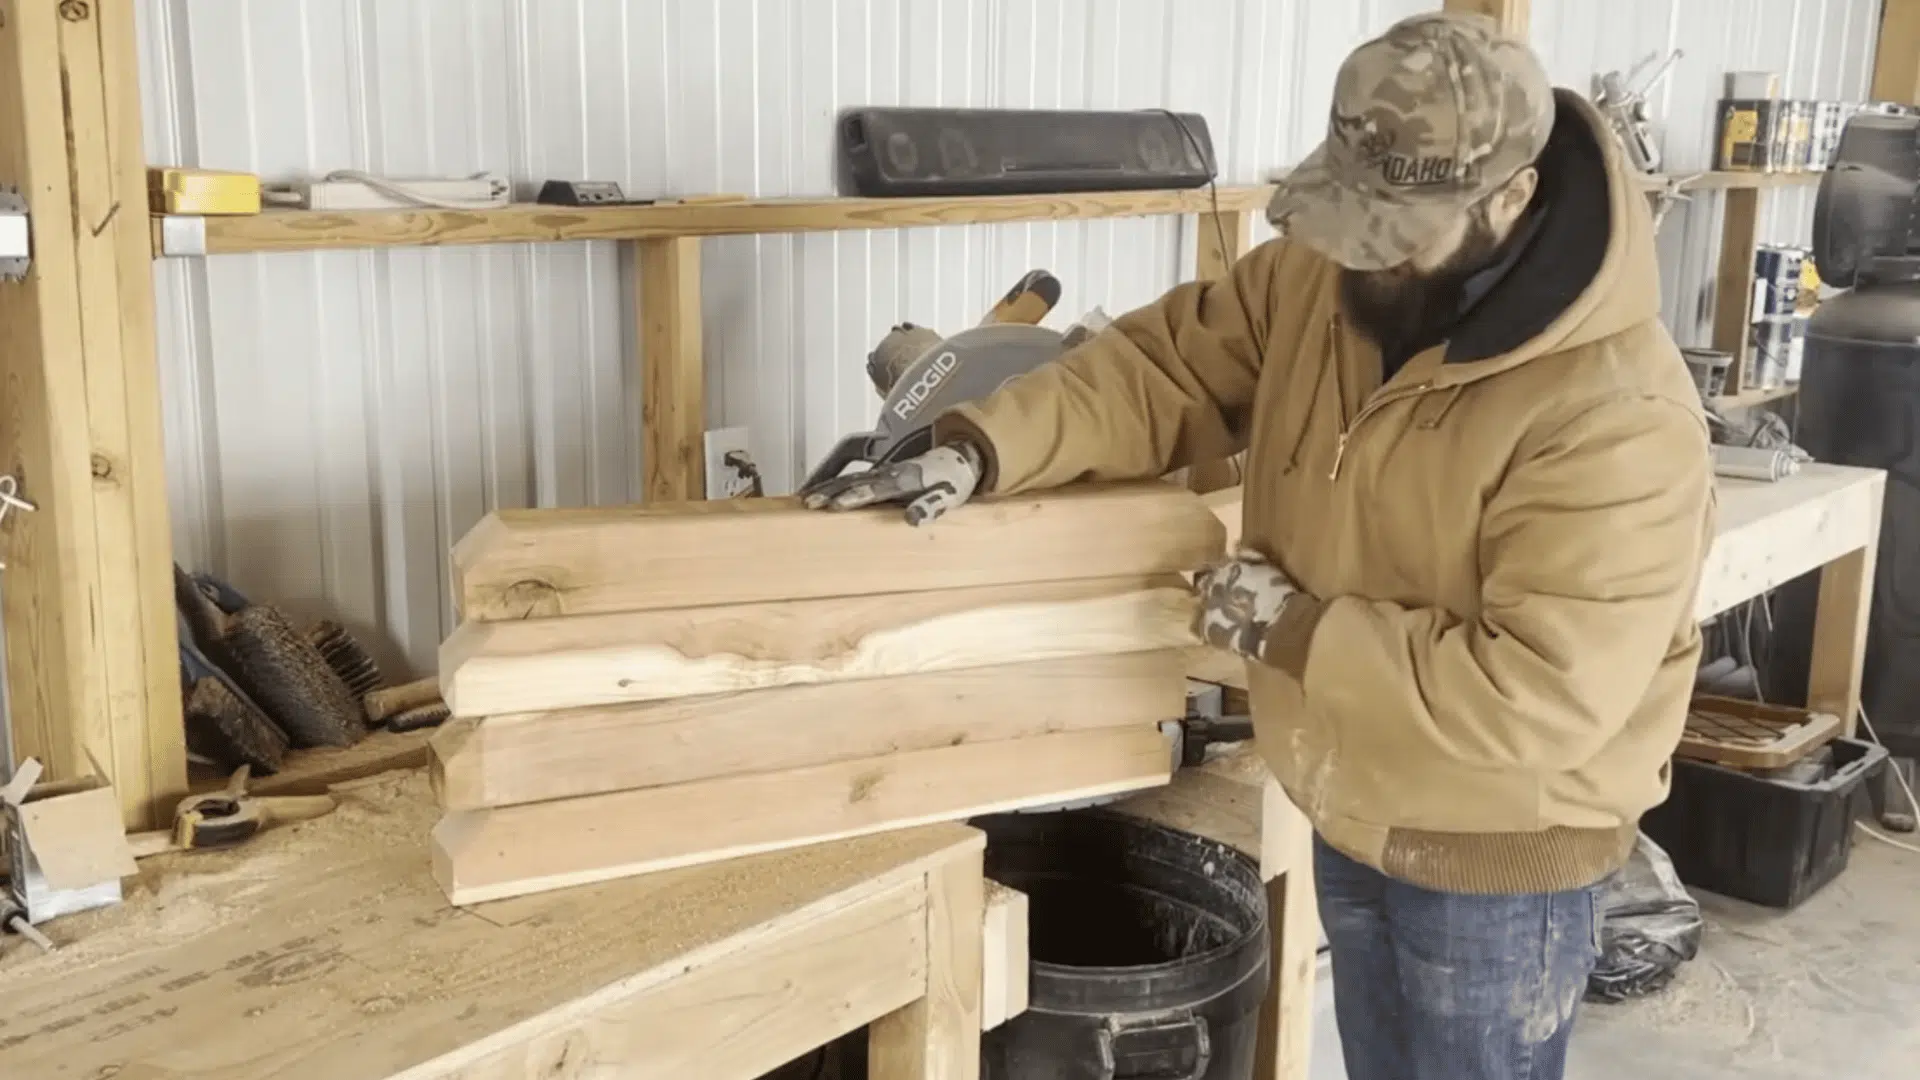
Cut the 4x4s for the trestle base first. Each side needs a top and bottom piece at 32 inches with 45-degree angled cuts on the ends, plus a center king post at 21 inches.
Cut eight smaller 45-degree-angle braces, four per side, that run from the top and bottom pieces to the center post. A jig or marked stops on the saw table keep repeated cuts identical, but measuring and marking each piece works fine too.
Step 2: Cut the Cross Member
Cut one more 4×4 as the cross member that connects the two trestle sides. For a 6-foot table, this piece runs 49 inches. Also cut two small kicker pieces that brace the cross rail up into each trestle side.
Step 3: Assemble Each Trestle Side
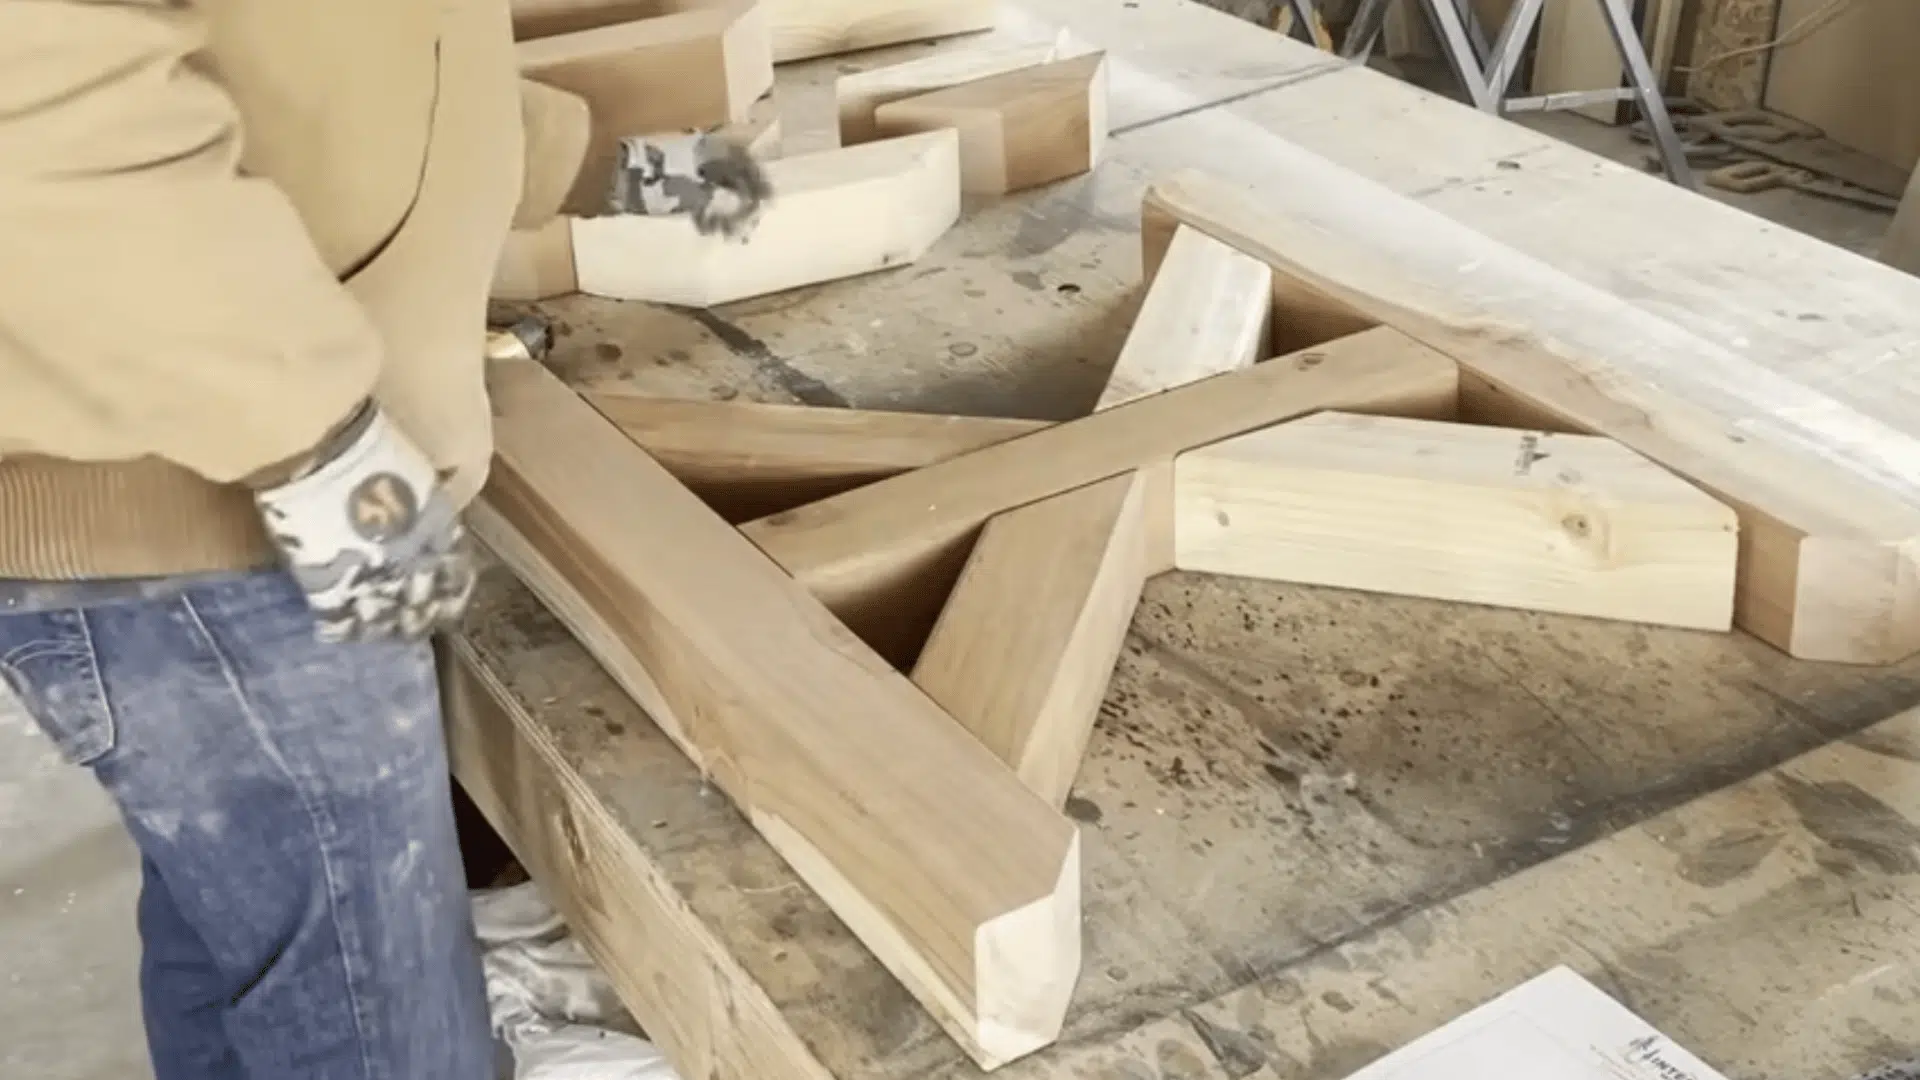
Stack the two 32-inch pieces, mark the center at 16 inches, and place the 21-inch king post on that mark. Brad nail at an angle, three nails top and three at the bottom.
Add the 45-degree braces from the top and bottom pieces to the center post, checking each piece with a square before nailing.
Square corners now prevent a wobbly table later. Repeat to build the second side of the trestle.
Step 4: Connect the Base and Reinforce It
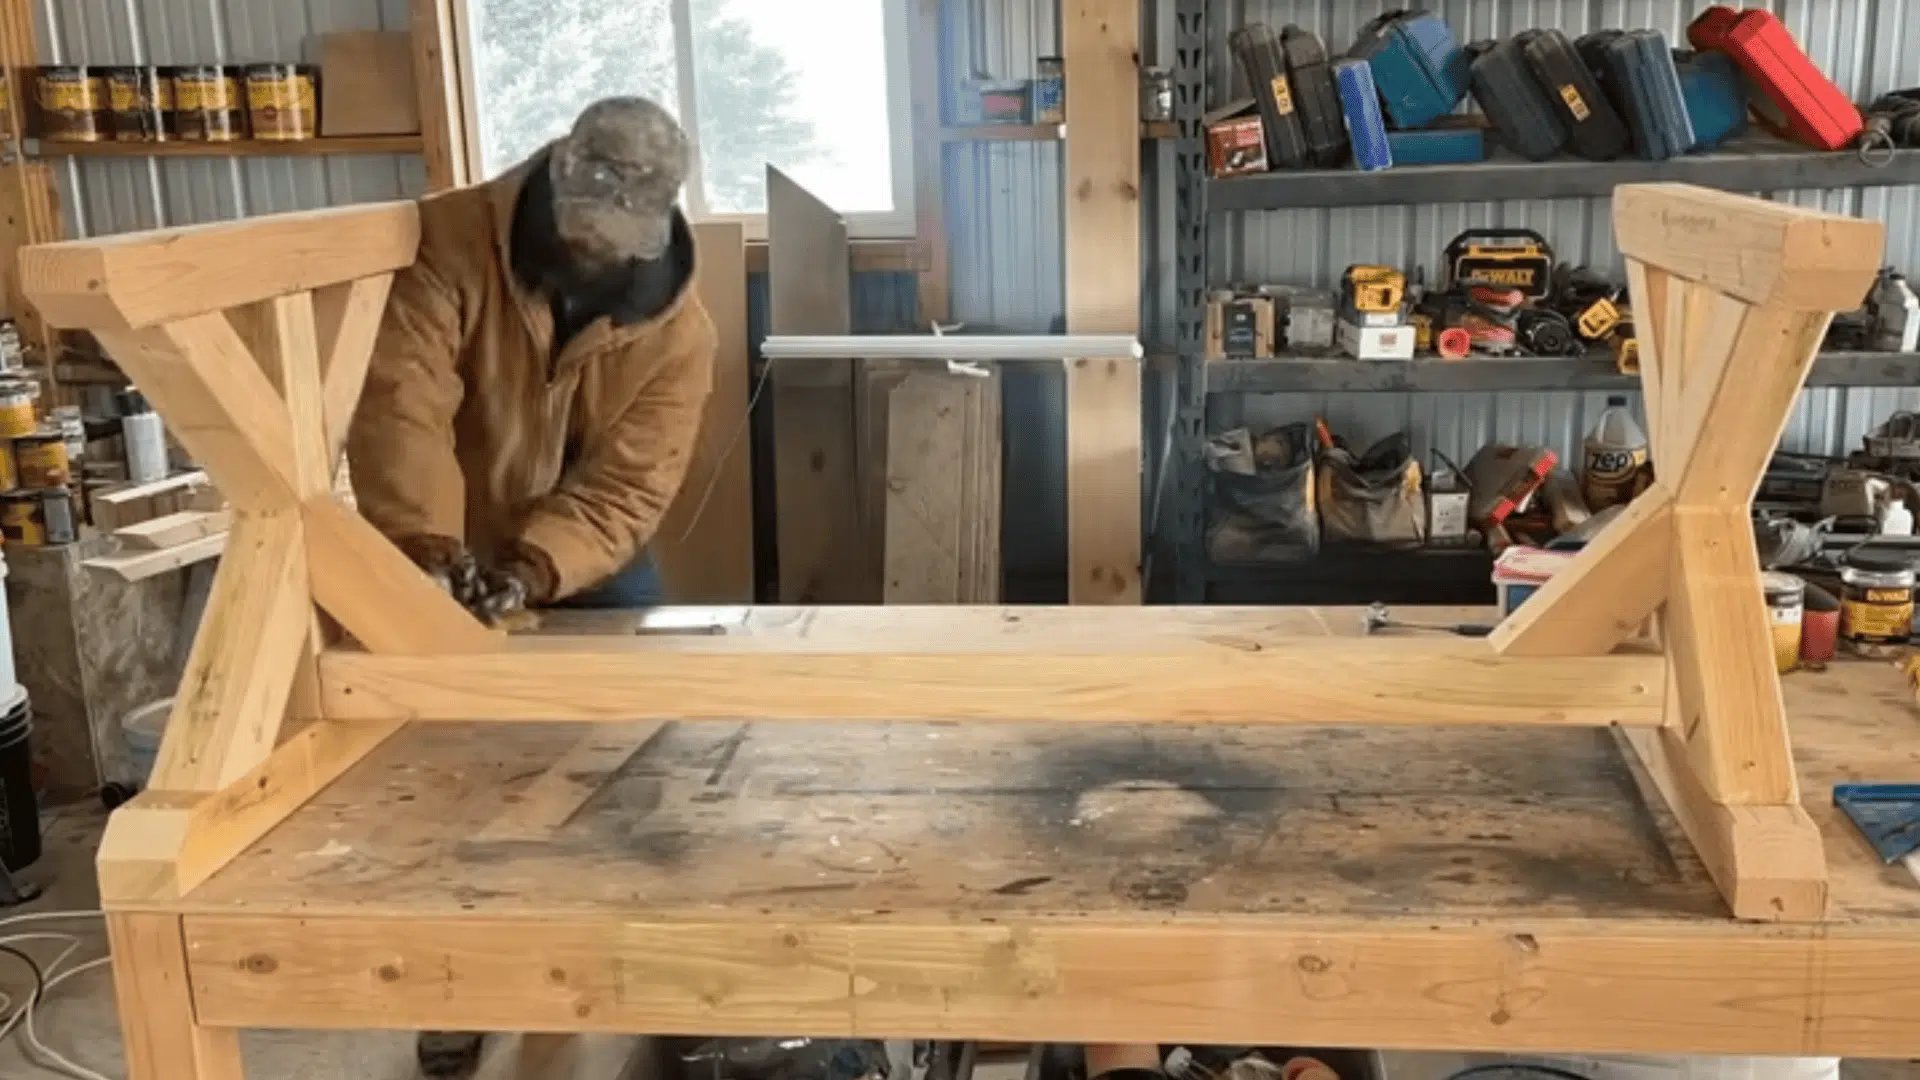
Stand both trestle sides up and install the cross member into the center of each king post. Add the small kicker braces to stop the base from racking back and forth.
Brad nails hold everything in place, but the video recommends driving 3-inch screws into every connection for real strength. Putty over the screw holes so the base is ready for finishing.
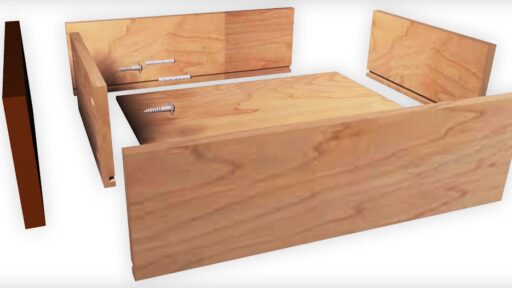
Step 5: Build the Tabletop
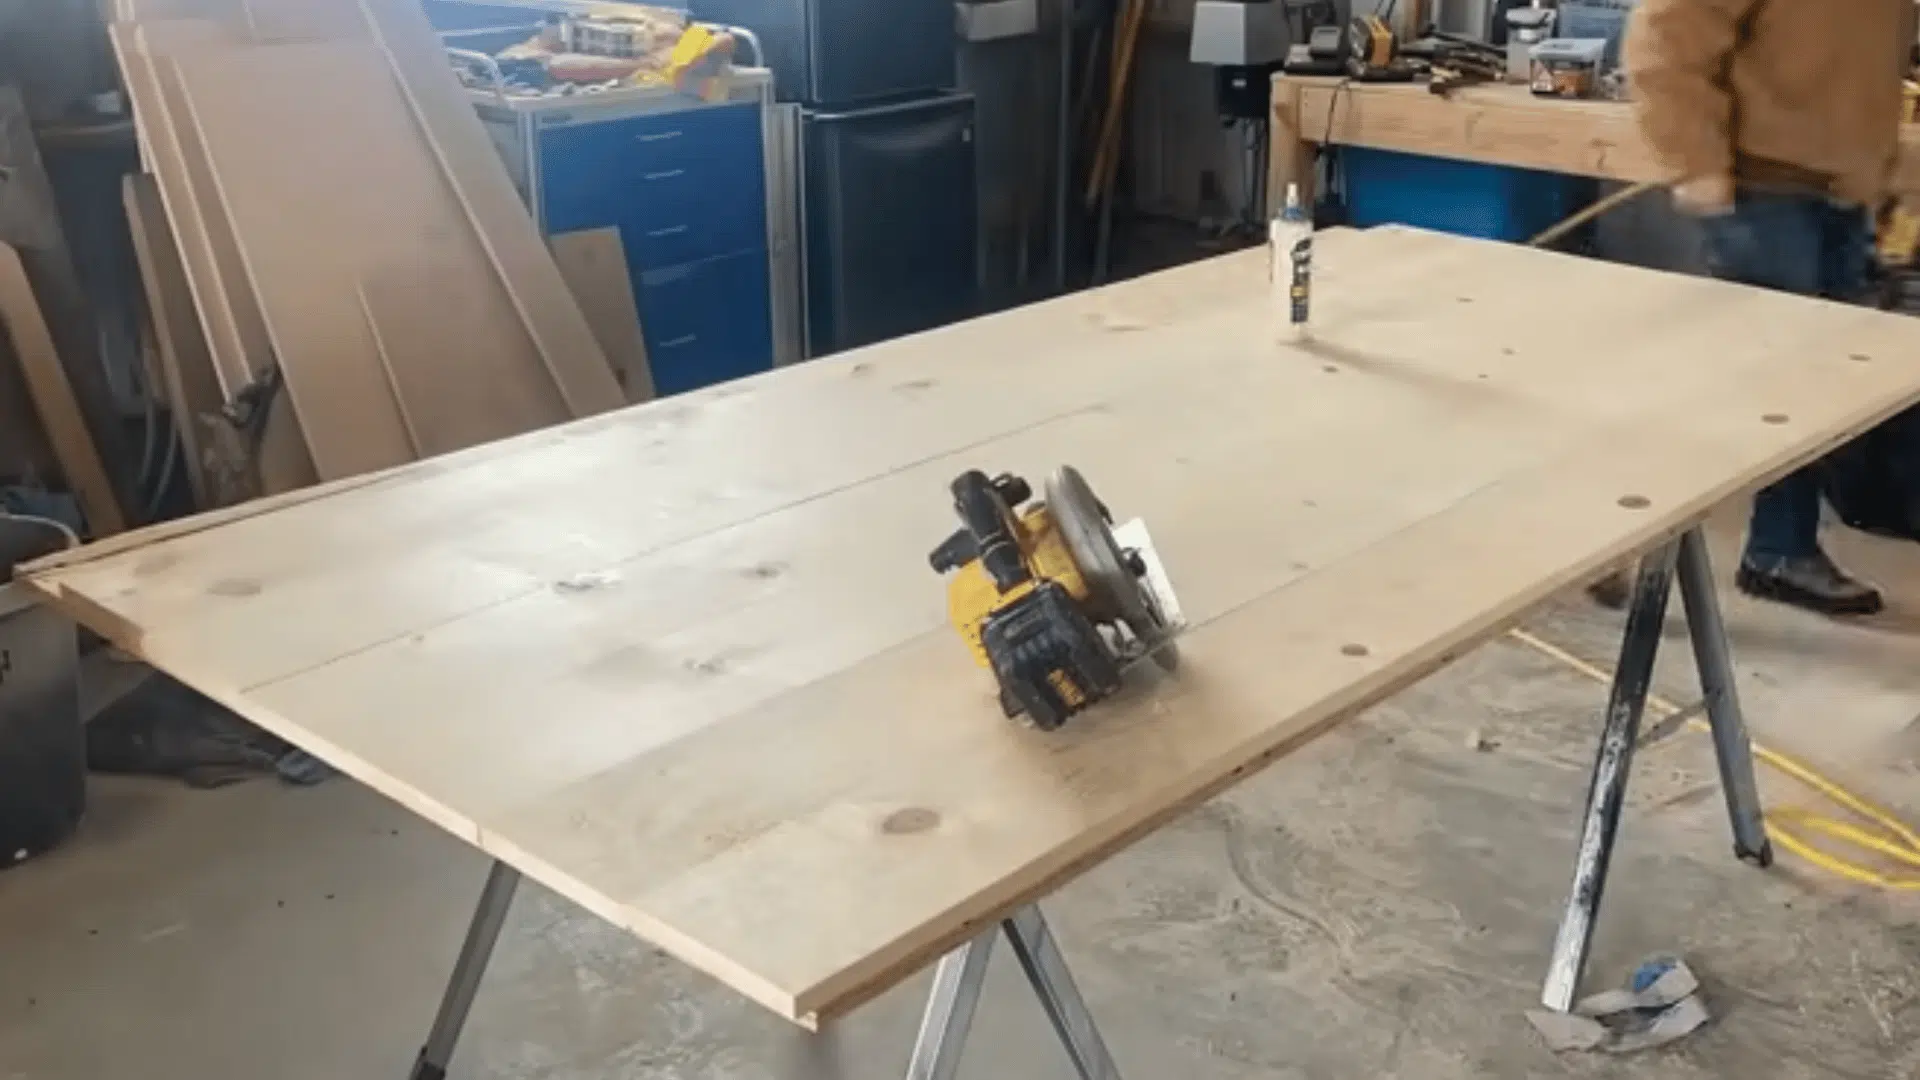
Lay the 1×8 boards across the 3/4-inch plywood sheet and arrange them until the seams sit tight. Spread wood glue across the plywood, set each board down, and secure it with 1.25 to 1.5-inch brad nails.
Clamp anything that lifts. Fill every seam with wood filler so the surface sands flat later.
Step 6: Trim and Skirt the Edges
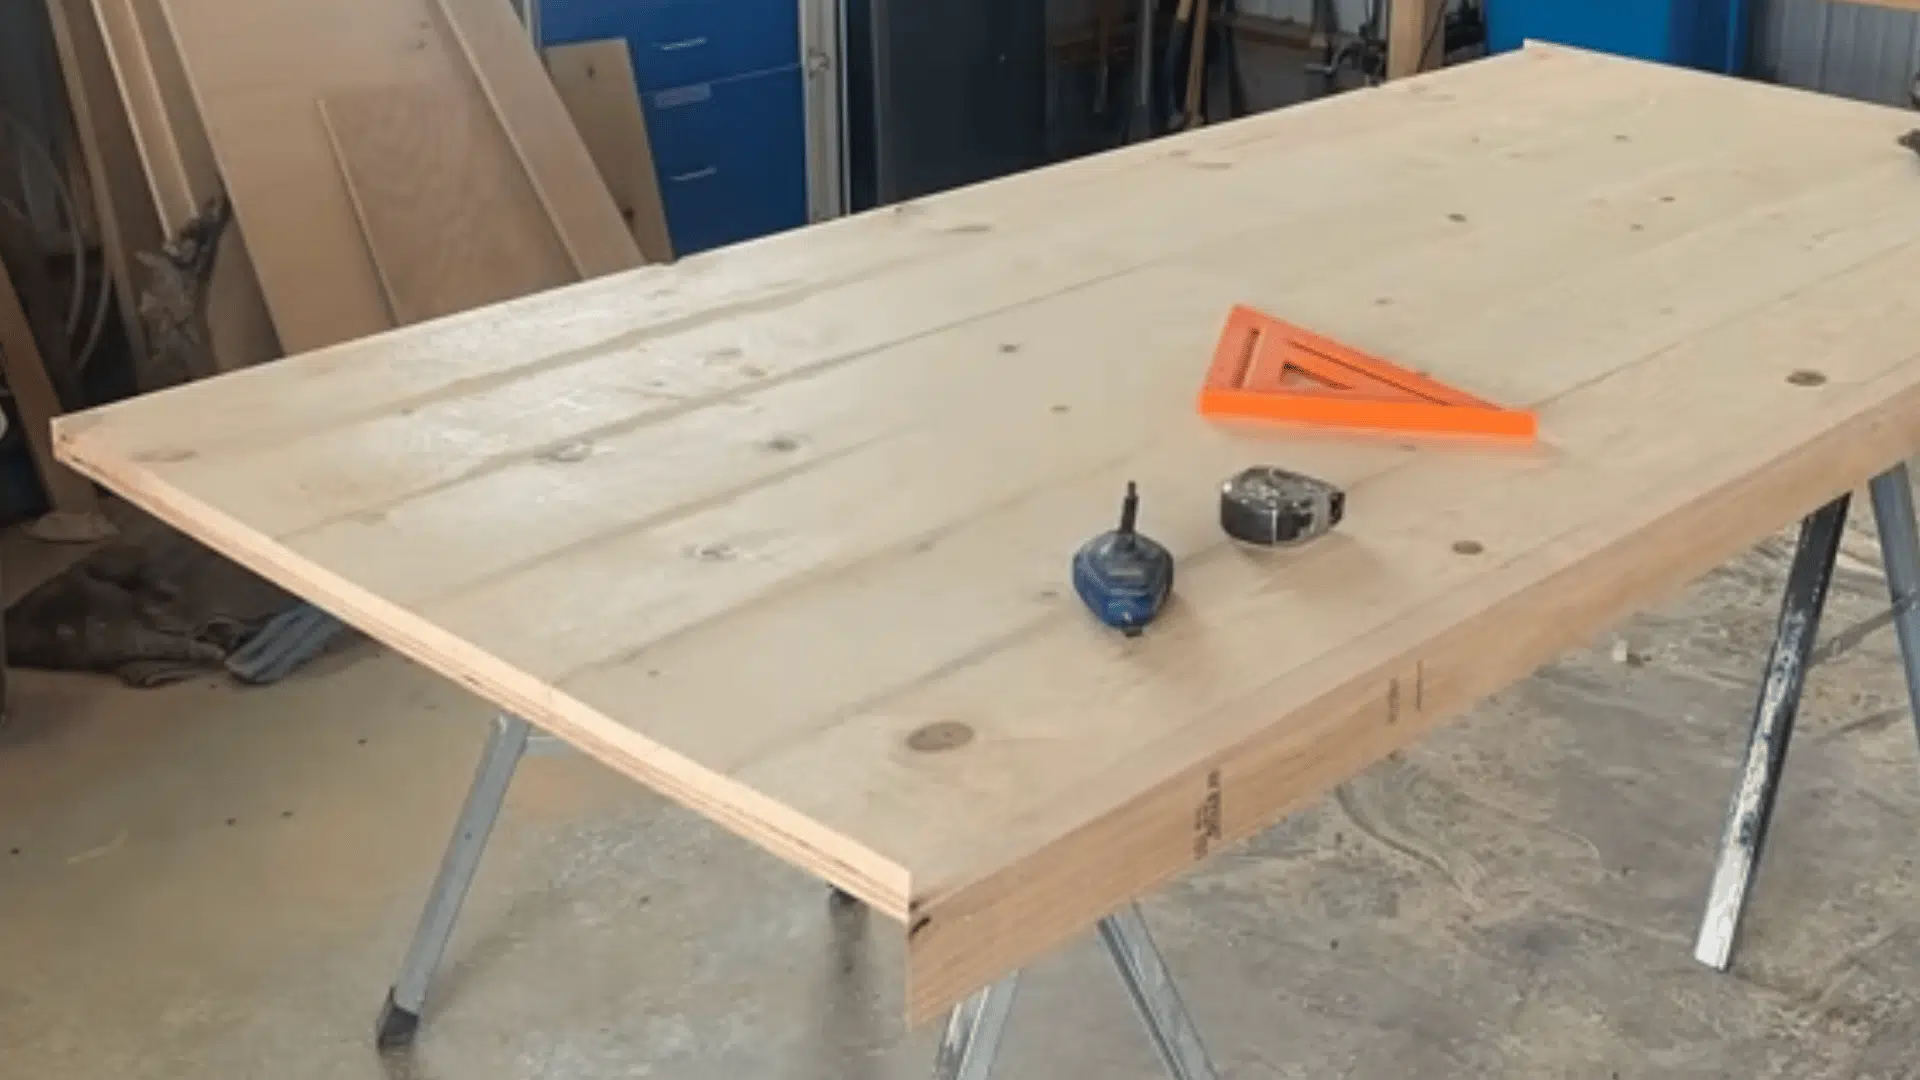
Snap a string line across each end and cut the boards and plywood flush in one straight pass. Rip 2x4s so one edge is clean and straight, then attach them as skirting around the sides for a thick, finished look.
Putty the nail holes.
Step 7: Sand Everything Smooth
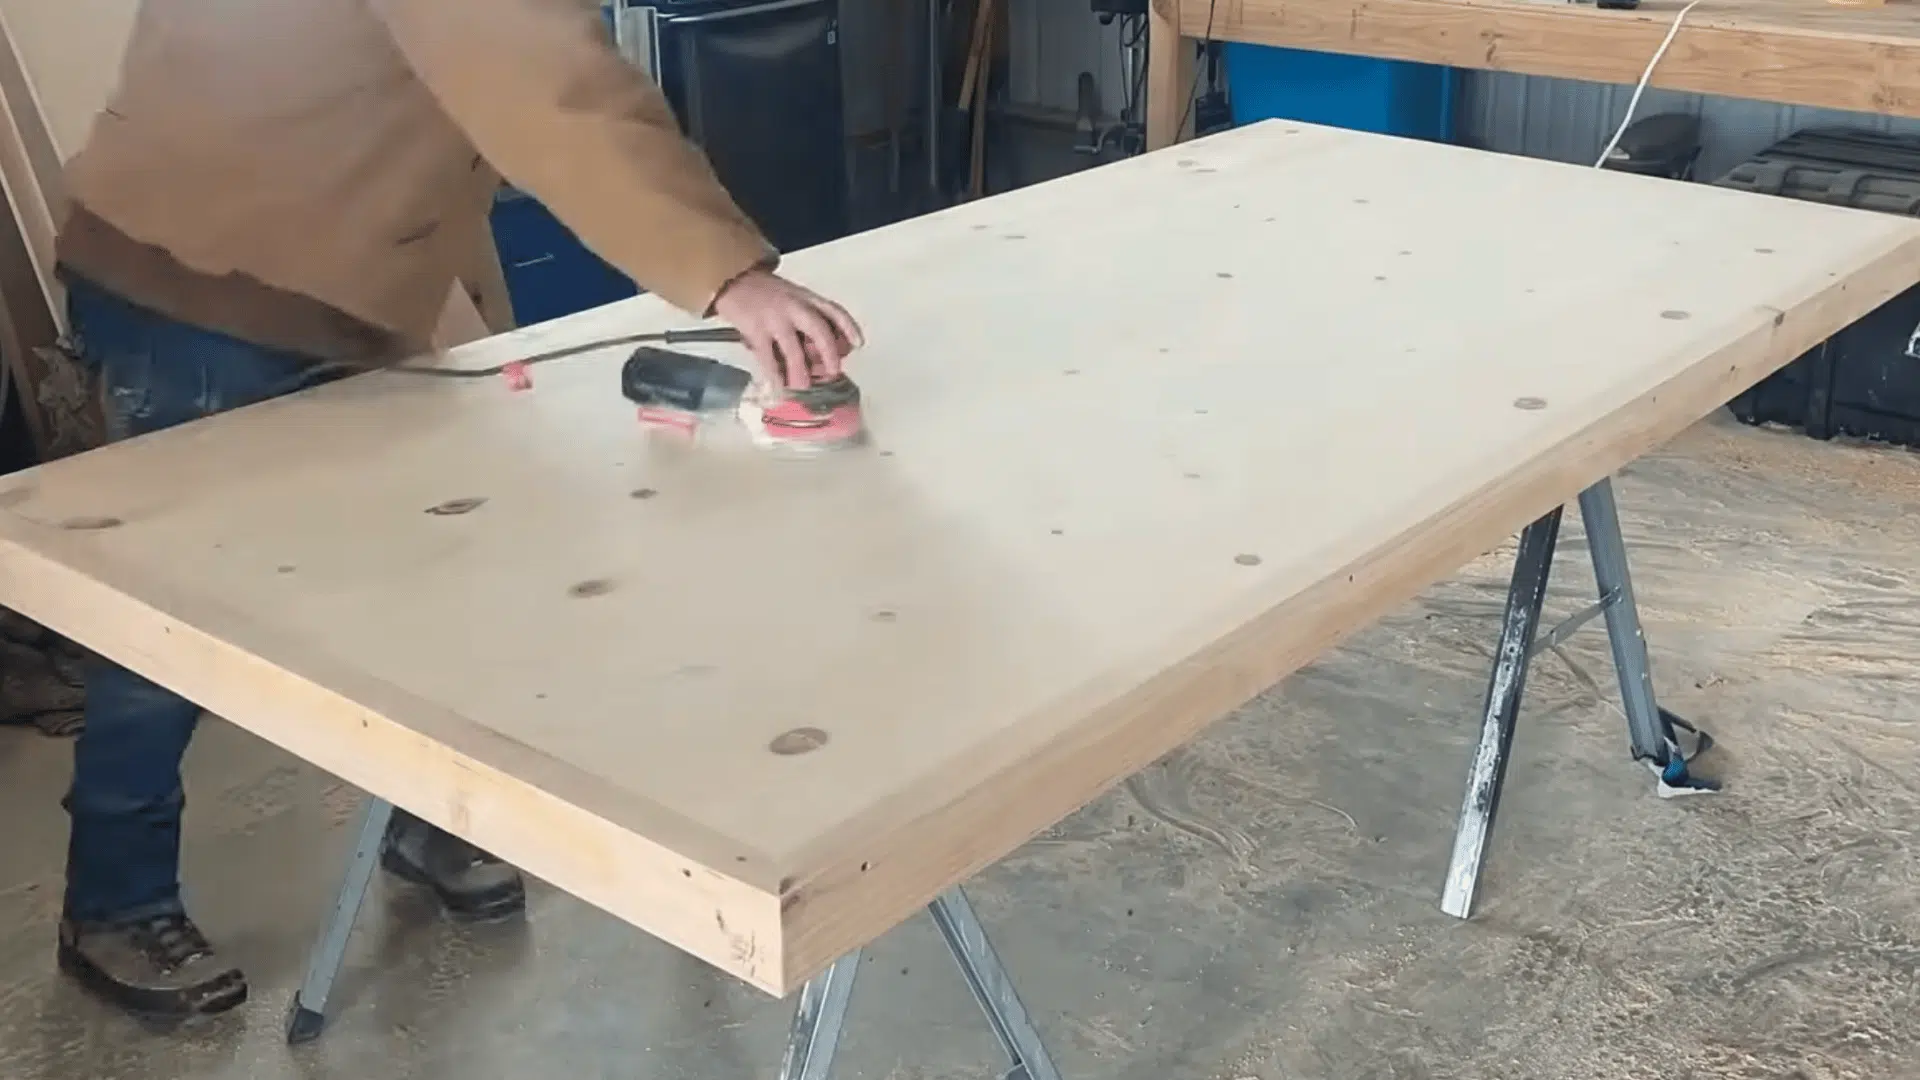
Sand the entire tabletop until all filler is completely removed and the surface feels smooth and level from edge to edge.
Take extra care around joints and repaired areas to ensure a consistent finish.
This step is essential because careful sanding helps transform ordinary construction lumber into a polished piece that looks and feels like quality furniture.
Step 8: Stain and Finish
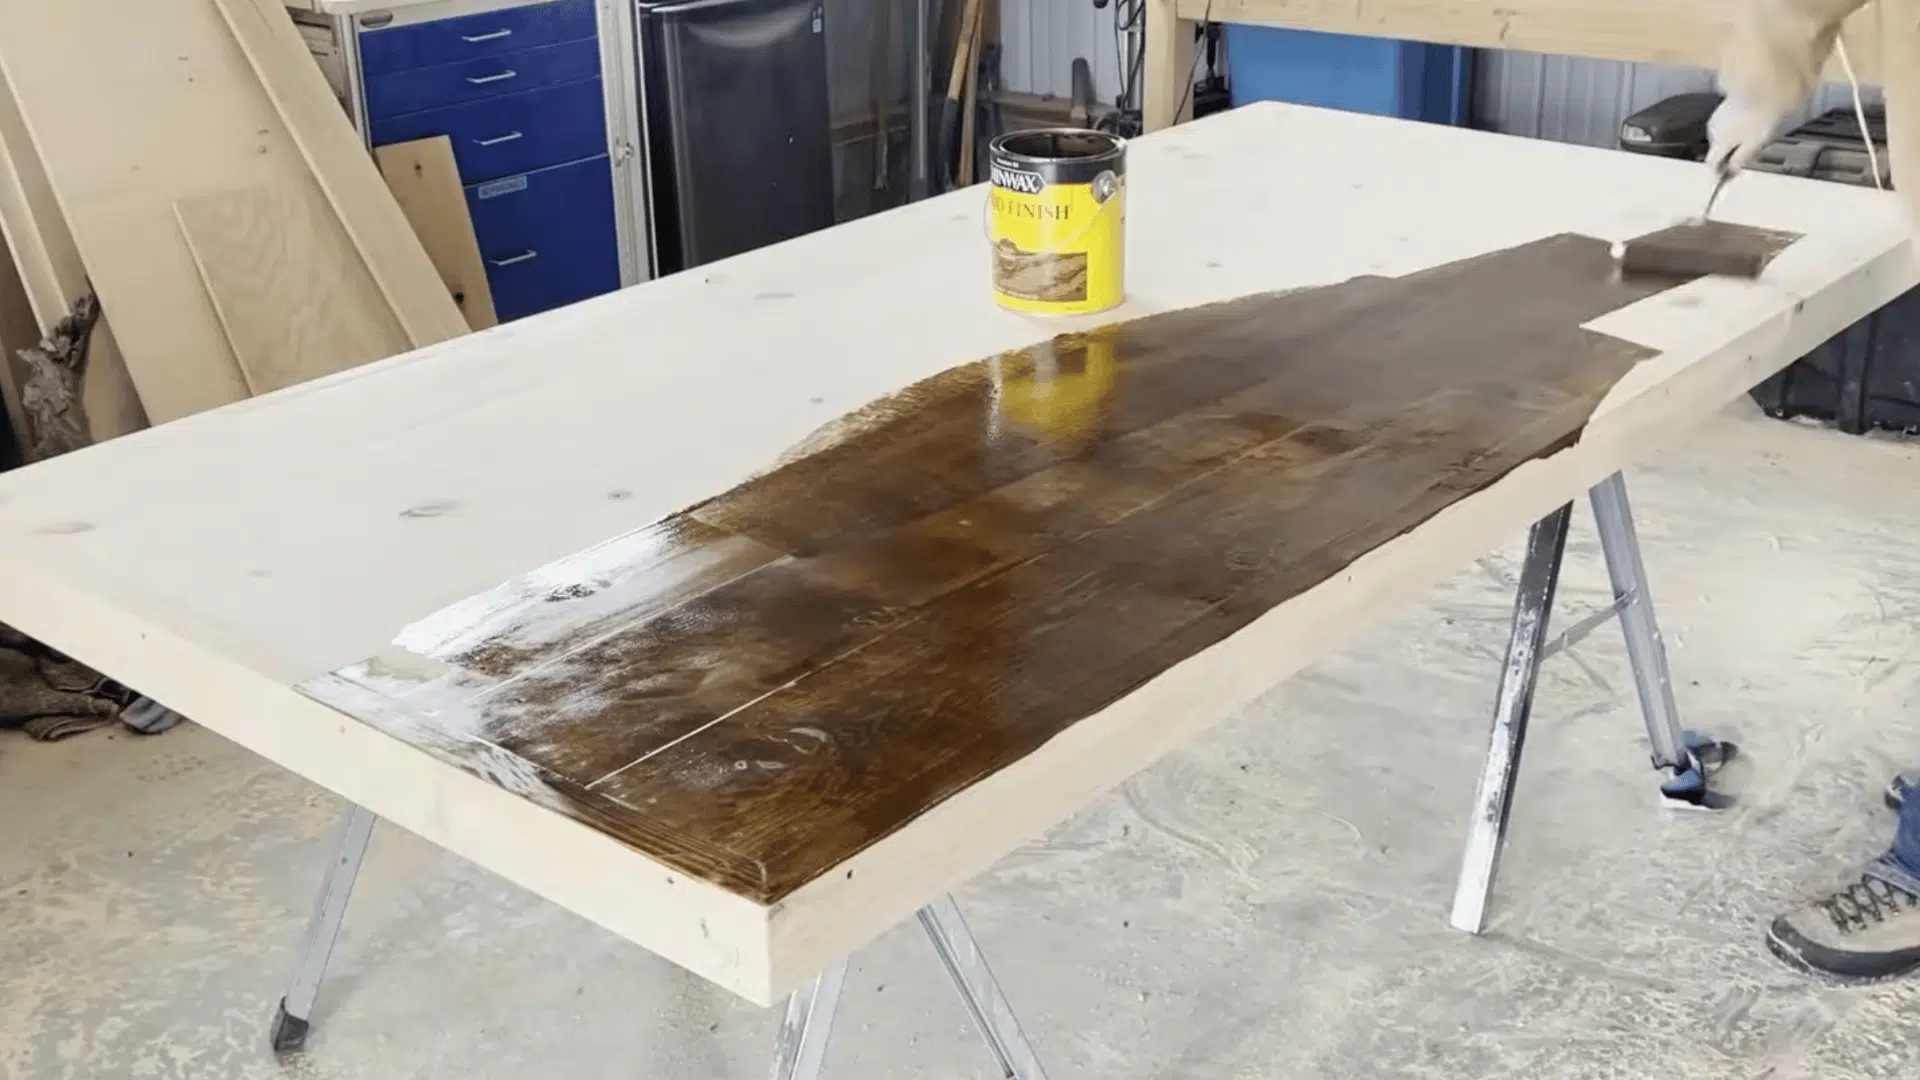
Roll Minwax Special Walnut across the entire surface, let it sit for 4 to 5 minutes, then wipe off the excess with rags while it is still wet.
Wiping on time exposes the grain; waiting too long leaves dark, uneven patches. One coat gave the table its full color in this build.
Watch this video below by Nate Halverson for more information:
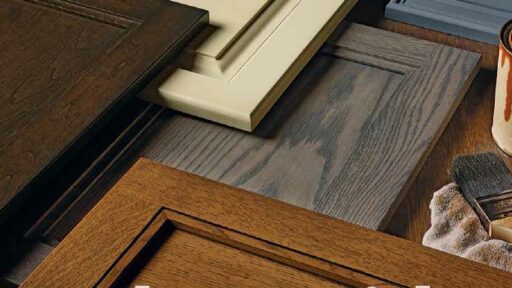
Choosing the Best Wood for a Farmhouse Table
Several wood types can be used for a farmhouse table, but each offers a different balance of cost, durability, and appearance.
| Wood Type | Cost | Durability | Appearance | Recommended Use |
| Pine | Low | Moderate | Traditional farmhouse look with visible knots | Best overall choice for DIY farmhouse tables |
| Douglas Fir | Medium | Good | Straight grain with a rustic feel | Great balance of strength and affordability |
| Oak | High | High | Rich grain and premium appearance | Ideal for long-lasting, high-use tables |
| Maple | High | Very High | Smooth, clean, modern look | Best for maximum durability and wear resistance |
| Pressure-Treated Lumber | Medium | High Outdoors | Rough construction appearance | Not recommended for indoor dining tables |
Common DIY Farmhouse Table Mistakes to Avoid
Small mistakes during a DIY farmhouse table build can lead to uneven surfaces, weak joints, or a finish that does not last.
Knowing the most common problems ahead of time helps create a stronger, better-looking table with fewer repairs later.
- Skipping Lumber Inspection: Wood that is warped, twisted, or cracked can make assembly difficult. Checking each board before purchase helps keep the tabletop flat and the base stable.
- Incorrect Measurements: Even a small measuring error can affect the entire build. Measuring twice before cutting helps ensure all parts fit together properly.
- Not Sanding Enough: Rough spots and uneven edges can show through stain and finish. Proper sanding creates a smoother surface and a more professional result.
- Weak Tabletop Connections: Poorly secured boards may separate over time. Strong joints and quality wood glue help keep a DIY farmhouse table sturdy for years.
- Rushing the Finish: Applying stain or sealer before the wood is fully prepared can cause blotches. Allowing enough drying time improves both appearance and durability.
Final Thoughts
Building a DIY farmhouse table is more than a way to save money. It creates a dining spot with personal value, real character, and a story behind it.
With the right lumber, careful measuring, solid joints, and a good finish, a simple stack of boards can turn into a table made for meals, homework, holidays, and everyday life.
The best part is that the project can fit a range of homes, budgets, and skill levels. A basic pine table works well for beginners, while custom legs, benches, stains, or reclaimed wood can make the design feel more personal.
A homemade table does not need to be perfect to be worth keeping. It only needs to be strong, useful, and made with care.
Share your DIY farmhouse table experience in the comments below.
Frequently Asked Questions
Are Farmhouse Tables Still in Style In 2026?
Yes, farmhouse tables remain popular for their warm, natural look, which suits rustic, modern, minimalist, and transitional dining spaces.
What Height is Best for a Farmhouse Dining Table?
Standard dining height is around 29 to 30 inches, which pairs well with chairs or benches having a 17–18-inch seat height.
How Easy is it to Maintain a Farmhouse Table?
Maintenance is simple: wipe with a damp cloth, avoid harsh chemicals, use coasters and trivets, and reapply finish every few years as needed.

James McLaren, with a rich background in architecture from the University of Manchester, has been contributing his expertise to the world of creative construction and home innovation for over 20 years. His journey began as a project manager for a leading construction firm, where he honed his skills in bringing complex designs to life. James joined our platform as a freelancer in 2019, quickly becoming a favorite for his insightful and practical advice. He has been a pivotal force to our wing ever since, bringing our readers a blend of technical know-how and creative flair. Beyond his professional life, James is an avid woodworker and enjoys restoring vintage furniture, a hobby that complements his professional insights beautifully.