
Painted stairs can change the whole feel of an entryway, hallway, basement, or older staircase without replacing the structure.
A fresh coat of paint can make tired steps look cleaner, brighter, and more connected to the rest of the home. But stairs are not like walls or trim. They deal with shoes, dust, cleaning, grip, and daily wear.
That is why the best painted stair projects start before the paint can even open. Prep, paint type, drying time, and finish all affect how long the stairs look good.
In this blog, I’ll explain how to paint stairs without regret, when painting over existing stairs makes sense, and which painted stairs ideas feel practical for everyday homes.
Can You Paint Over All Types of Stairs?
You can paint over many types of stairs, but not every staircase is a good candidate. Wood stairs, basement stairs, painted risers, and older staircases in solid condition are usually the best options.
The surface needs to be clean, dry, stable, and properly prepared before paint goes on. Stair treads take more wear than walls or trim, so regular wall paint is not the best choice.
Use porch, floor, or stair paint made for foot traffic, then add a protective finish if needed. You also need to plan drying time carefully, since the stairs may be hard to use while the paint cures.
- Best for: wood stairs, basement stairs, painted risers, and older staircases in good condition.
- Not ideal for: loose, unsafe, rotten, cracked, or badly damaged stairs.
- Use: porch, floor, or stair paint made for daily foot traffic.
- Add grip: use an anti-slip finish if the stairs feel slick.
What to Know Before Painting Stairs
Before painting stairs, think about wear, safety, finish, and drying time. These details determine how long the paint lasts and how safe the stairs feel.
| Factor | Why it Matters | Best Choice |
|---|---|---|
| Stair Material | Paint sticks differently to wood, laminate, concrete, or already-painted stairs. | Check the surface first. |
| Foot Traffic | Stairs wear faster because shoes hit the same spots every day. | Use durable floor paint. |
| Safety | Smooth painted treads can feel slick, especially when wearing socks or when pets are present. | Add an anti-slip finish. |
| Dry Time | Stairs may be hard to use while primer, paint, or sealer dries. | Paint in sections. |
| Prep Quality | Poor prep can cause peeling, chipping, or uneven coverage. | Clean, sand, and prime. |
How Much Does It Cost to Paint Stairs?
Painting stairs is usually one of the cheaper staircase updates. For a standard indoor staircase, a DIY project often needs porch or floor paint, primer, sandpaper, painter’s tape, wood filler, a small brush, a roller, and an anti-slip additive if the treads feel slick.
A realistic materials range is about $60 to $130, depending on paint quality, stair size, and what tools you already have. Paint often costs less than a carpet runner, tread replacement, or full refinishing.
The tradeoff is upkeep. Painted stairs may need touch-ups on tread centers, stair noses, and edges where shoes most often hit.
Prices change by store and location, so check local costs before buying supplies or choosing the final stair finish for your home.
Best Paint for Stairs
The best paint depends on the stair material, daily use, and finish. Treads need strength, while risers allow more freedom in style.
1. Paint for Stair Treads
Stair treads get the most direct wear because shoes hit them every day. Use porch and floor paint, floor enamel, or another paint made for foot traffic instead of regular wall paint.
These are some reliable options for high-traffic stairs. If painted treads feel slick, add an anti-slip topcoat or grit additive before regular indoor use.
- BEHR Premium Porch & Patio Floor Paint
- KILZ Porch & Patio Floor Paint
- Sherwin-Williams Porch & Floor Enamel
Choose a tougher finish for the center of each tread. Avoid high-gloss paint if the stairs already feel slippery.
2. Paint for Stair Risers
Stair risers do not take the same direct foot traffic as treads, so they allow more freedom with color and pattern. Use them for lighter shades, soft contrast, stencils, or accent colors.
These products provide smooth, washable finishes that are easy to maintain and ideal for decorative risers.
- Benjamin Moore ADVANCE Interior Paint
- Sherwin-Williams Emerald Urethane Trim Enamel
- BEHR Premium Plus Interior Paint
Use risers for decorative ideas rather than on the tread surface. Pick washable paint if kids, pets, or shoes often mark them.
3. Paint Finish for Stairs
The paint finish affects how stairs look, feel, and clean underfoot. Satin or semi-gloss floor paint usually works well because it is easier to wipe than flat paint and less slippery than high-gloss paint.
For extra durability, protection, and grip, I recommend these products:
- Varathane Water-Based Floor Polyurethane
- Minwax Polycrylic Protective Finish
- Rust-Oleum Anti-Slip Additive
Use satin or semi-gloss floor paint for most painted stairs. Avoid very glossy finishes on treads unless you add grip.
Tools and Materials Needed to Paint Stairs
Before you start, gather everything for prep, painting, safety, and cleanup. This keeps the project moving and helps you avoid stopping halfway with wet paint on the stairs.
- Degreaser or mild cleaner
- Sandpaper or a sanding block
- Painter’s tape
- Drop cloth
- Wood filler
- Putty knife
- Primer
- Angled brush
- Small roller
- Anti-slip additive or topcoat
- Vacuum or tack cloth
How to Paint Stairs Step by Step
Painting stairs works best when you follow the right order. Clean first, fix damage, sand the surface, then apply paint in thin coats so the finish lasts longer and looks cleaner.
Good prep also helps prevent peeling, patchy color, and early scuff marks.
Step 1: Clean and Vacuum the Stairs
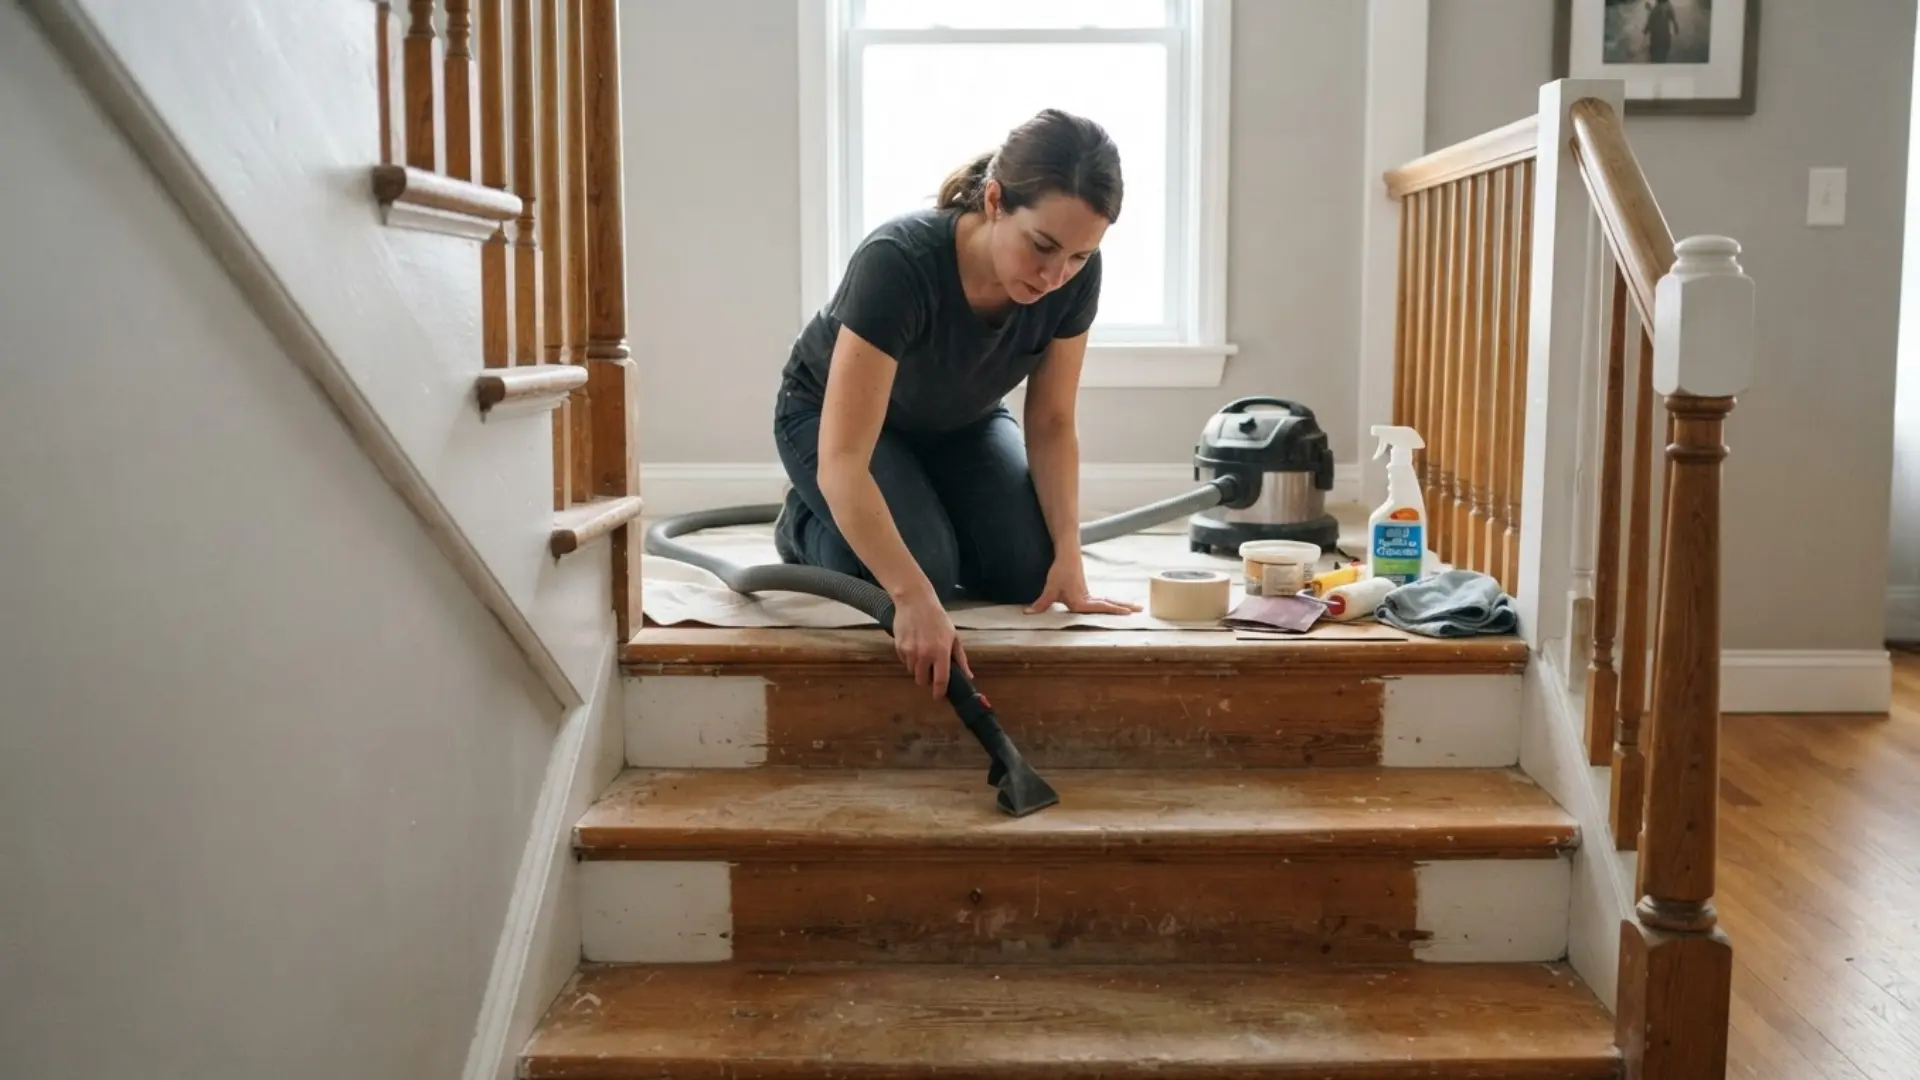
Start by removing dust, dirt, pet hair, and old grime from the stairs. Vacuum the treads, risers, corners, edges, and gaps near the trim, as small debris can get trapped under the paint.
Then wipe the surface with a mild cleaner or degreaser to remove oils and sticky buildup. Avoid soaking the stairs, especially if they are wood. Let the surface dry fully before you repair, sand, or prime.
Step 2: Repair Cracks, Gaps, and Nail Holes
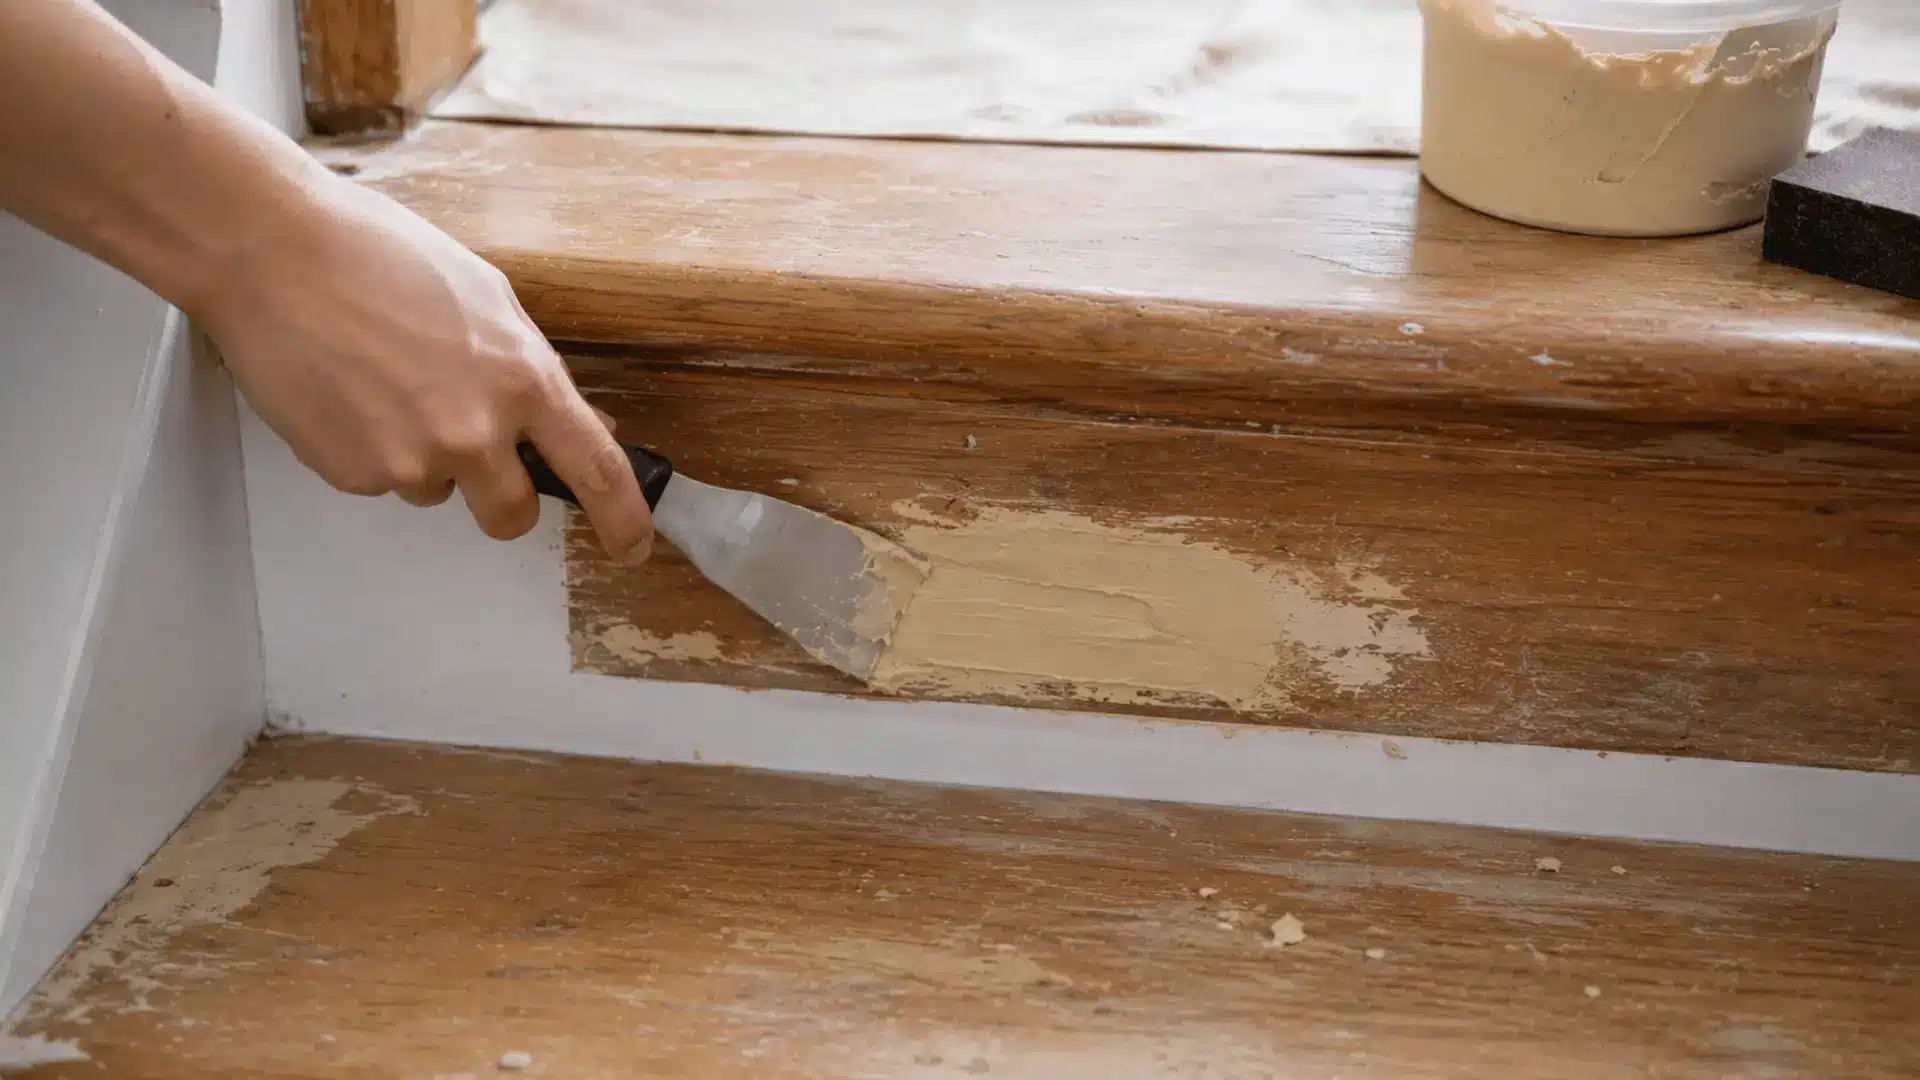
Check each tread, riser, edge, and corner for dents, nail holes, cracks, or small gaps. Fill damaged spots with wood filler if you are painting wooden stairs.
Use a putty knife to press the filler into the damaged area and smooth off the extra. Do not paint over raised filler or wet patches.
Let everything dry fully, then sand the repaired areas until they feel level with the surrounding stair surface.
Step 3: Sand and Tape the Area
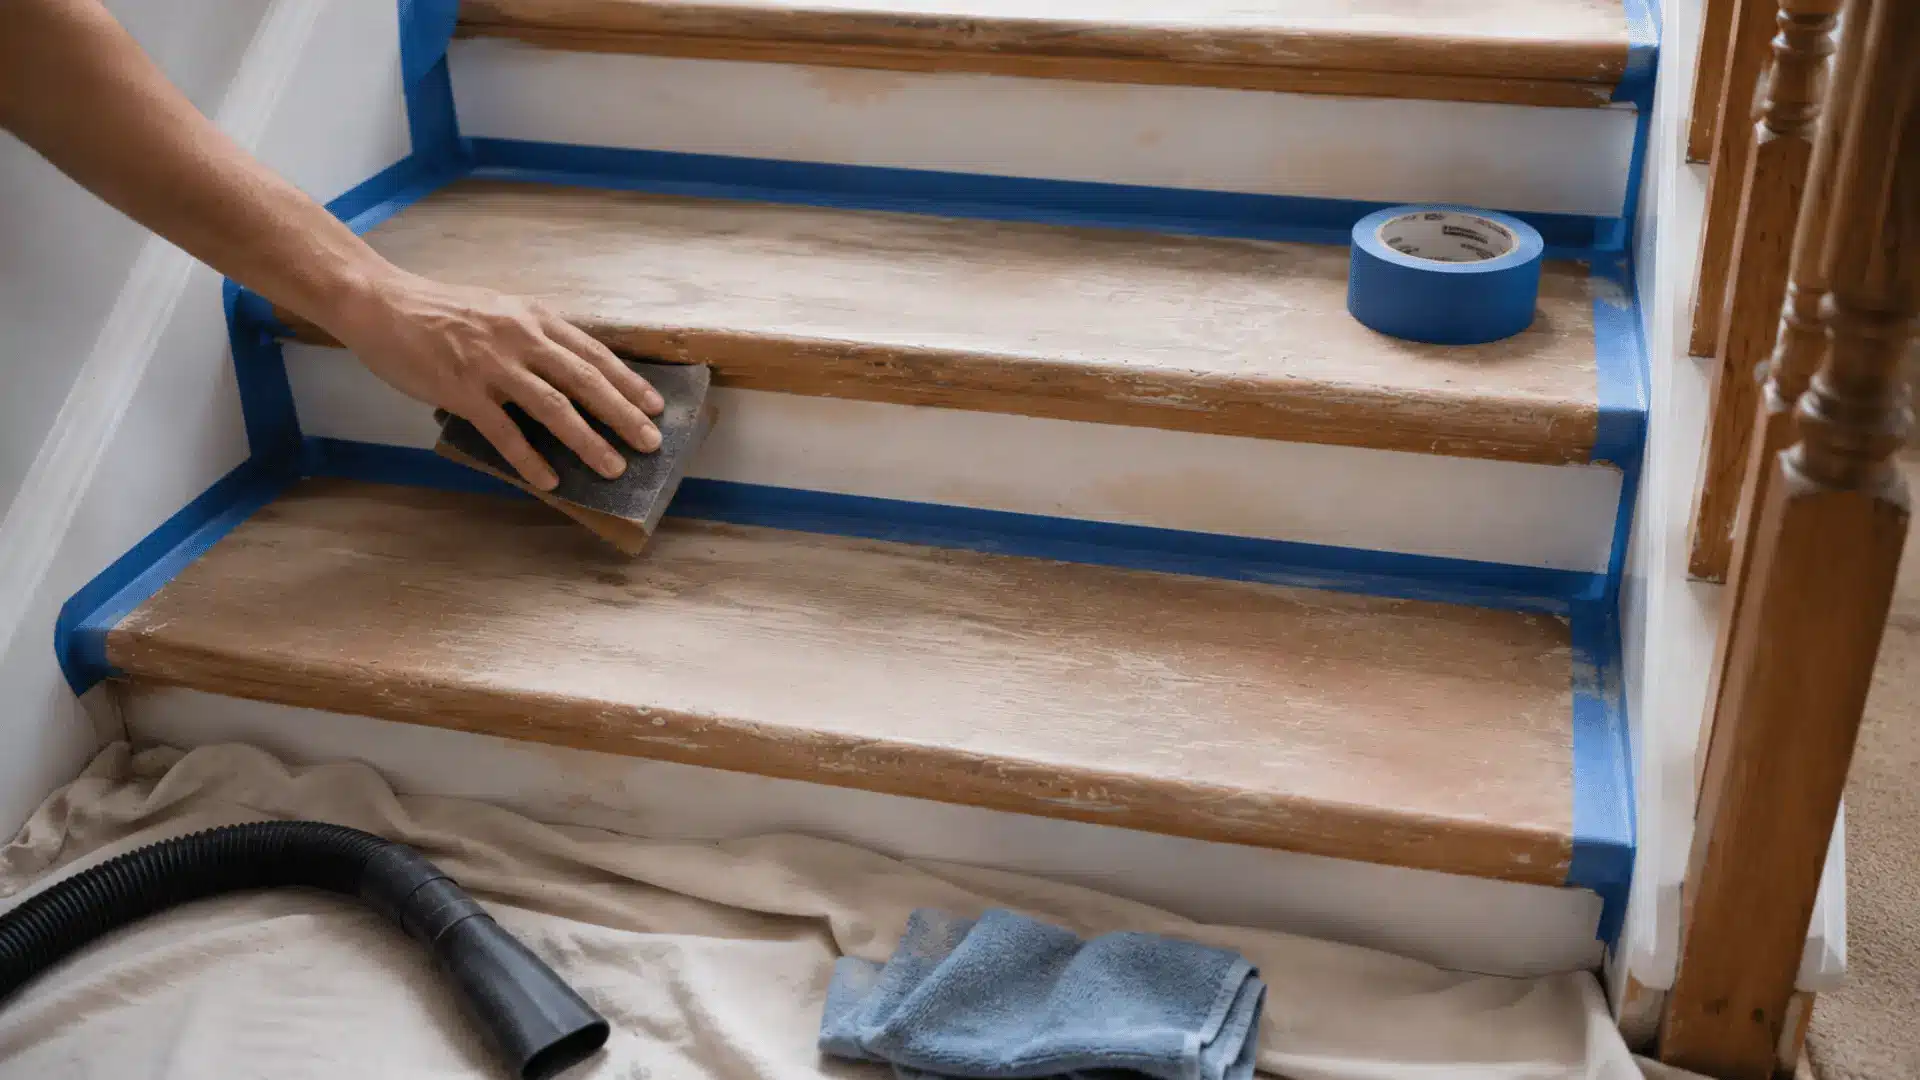
Lightly sand the stairs so the primer and paint have a better surface to adhere to. You do not need to remove every layer of old paint unless it is peeling, but glossy areas should be dulled.
After sanding, vacuum carefully and wipe with a tack cloth so dust does not mix into the paint. Then tape off walls, trim, railings, and the edges where treads meet risers for cleaner paint lines.
Step 4: Prime the Stairs
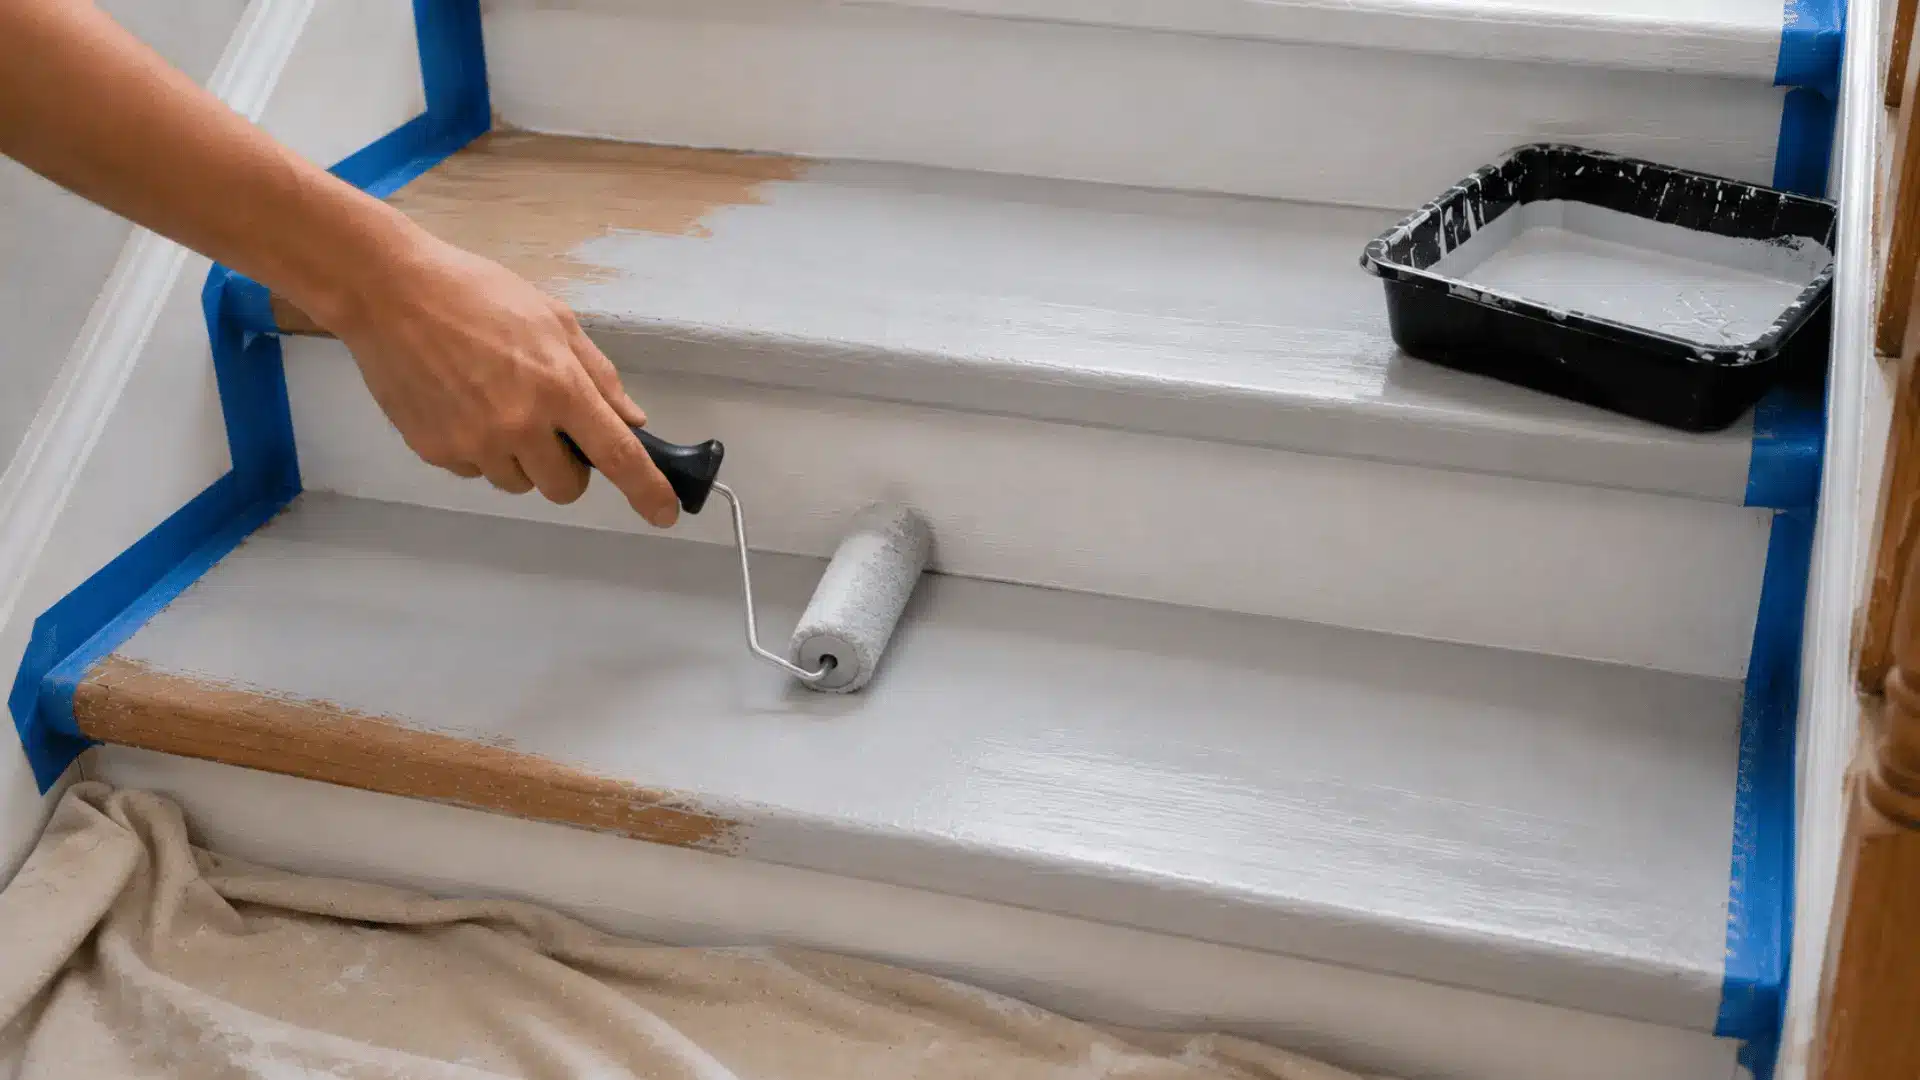
Apply primer before painting, especially if the stairs are bare wood, stained, patched, glossy, or changing from a dark color to a lighter one.
Primer helps seal the surface, cover old marks, and improve paint grip. Use an angled brush for corners, edges, and tight spots.
Use a small roller for flat tread and riser areas. Let the primer dry fully according to the product label before adding paint.
Step 5: Paint the Risers First
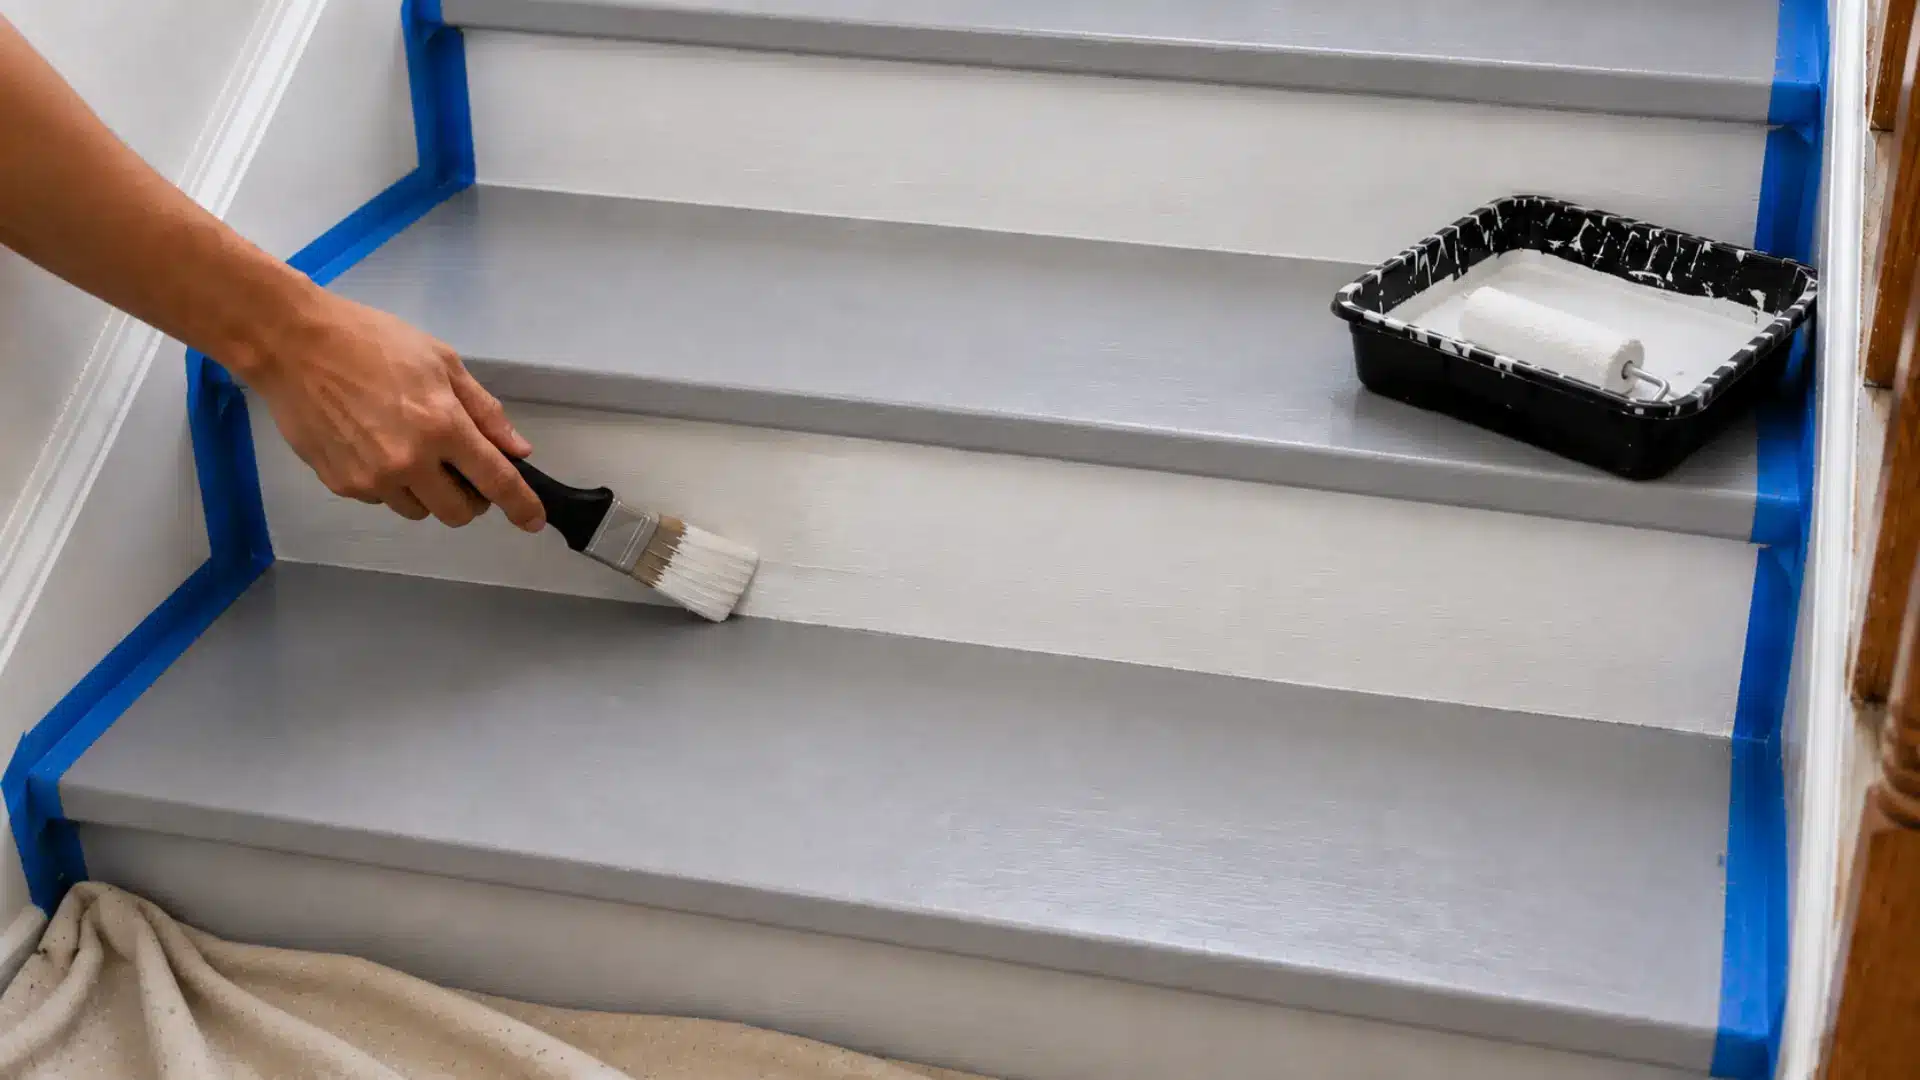
Paint the risers before the treads, since they do not bear direct foot traffic. This also makes the job easier because you are less likely to step into wet paint while working.
Use an angled brush near the edges and a small roller for the center. Apply thin, even coats instead of loading on too much paint at once. Check for drips along the lower edge before the paint starts drying.
Step 6: Paint the Treads in Thin Coats
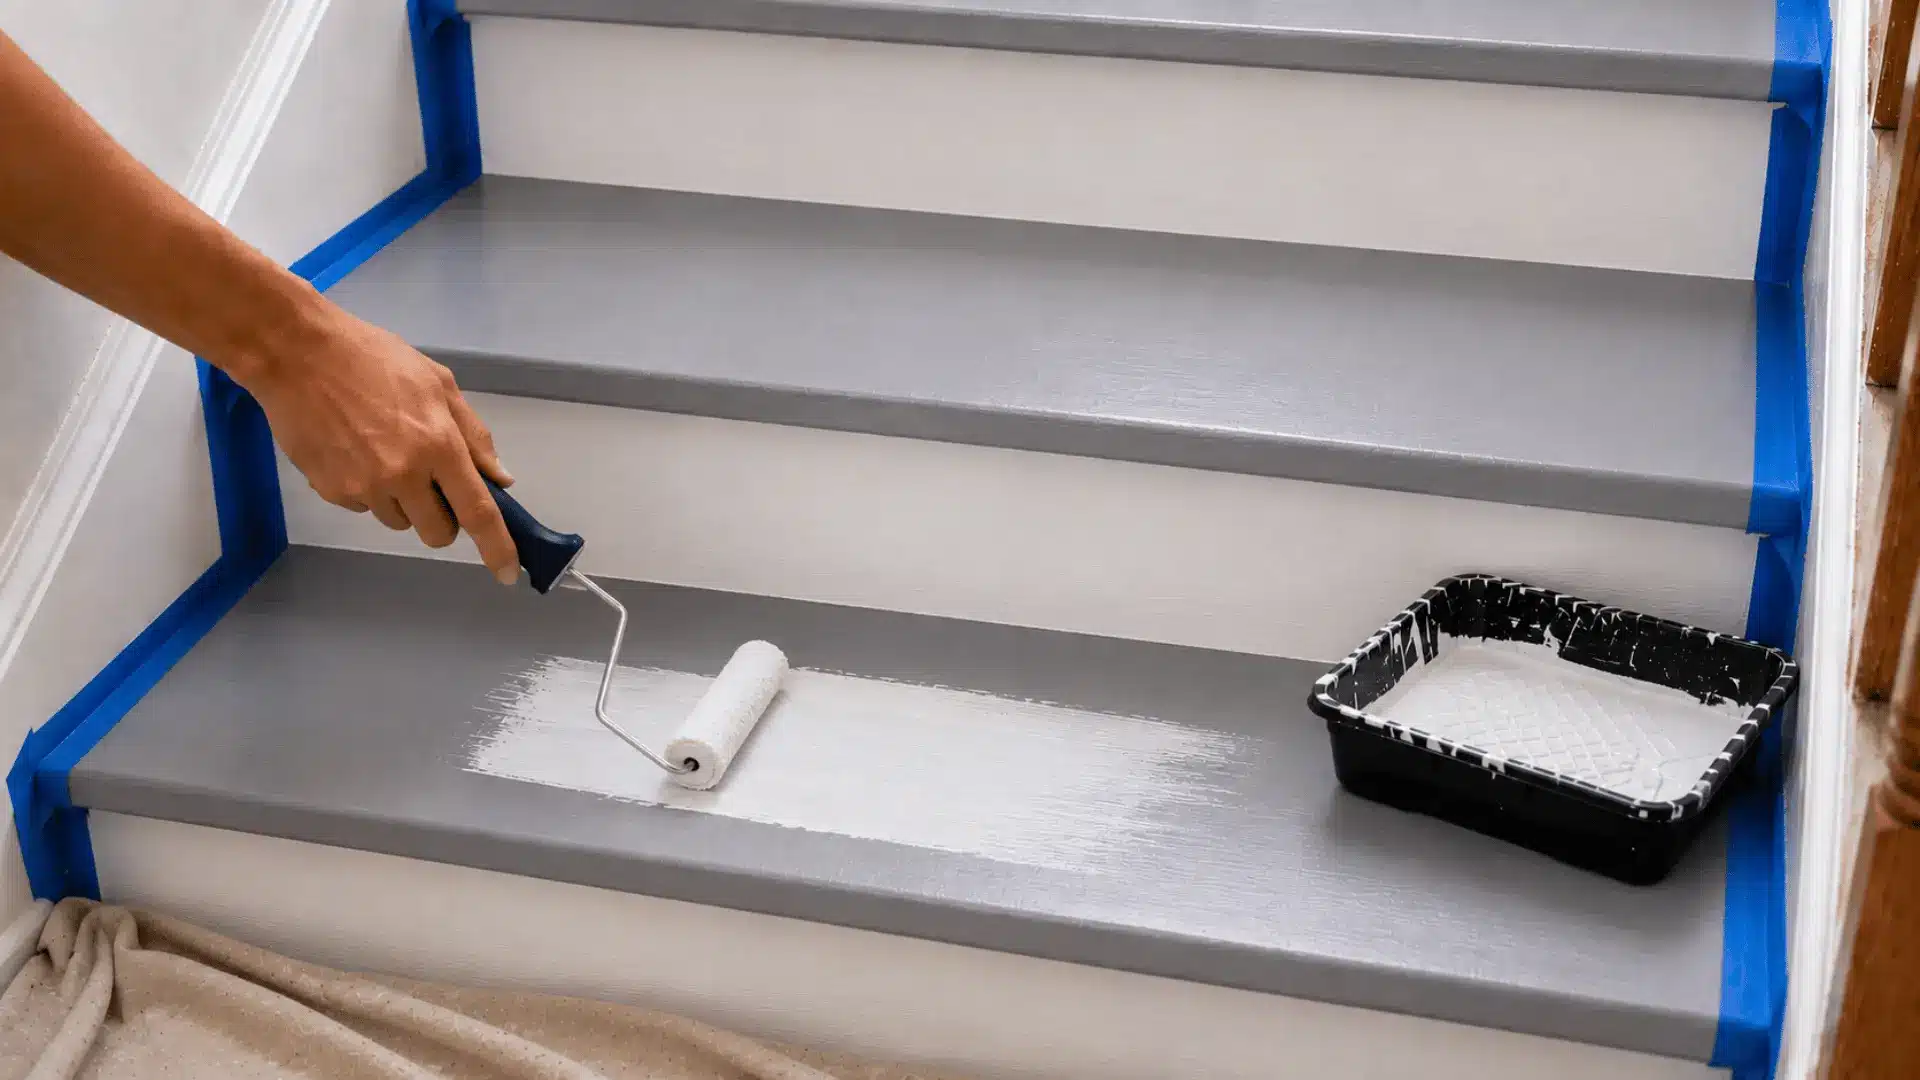
Paint the treads with porch, floor, or stair paint made for foot traffic. Thin coats dry more evenly and usually last longer than a single heavy coat.
Start at the top and work down, or paint every other step if the stairs must stay usable during the project. Let each coat dry properly before adding another coat.
Avoid walking on the surface too soon, even if it feels dry to the touch.
Step 7: Add Protection and Let the Paint Cure
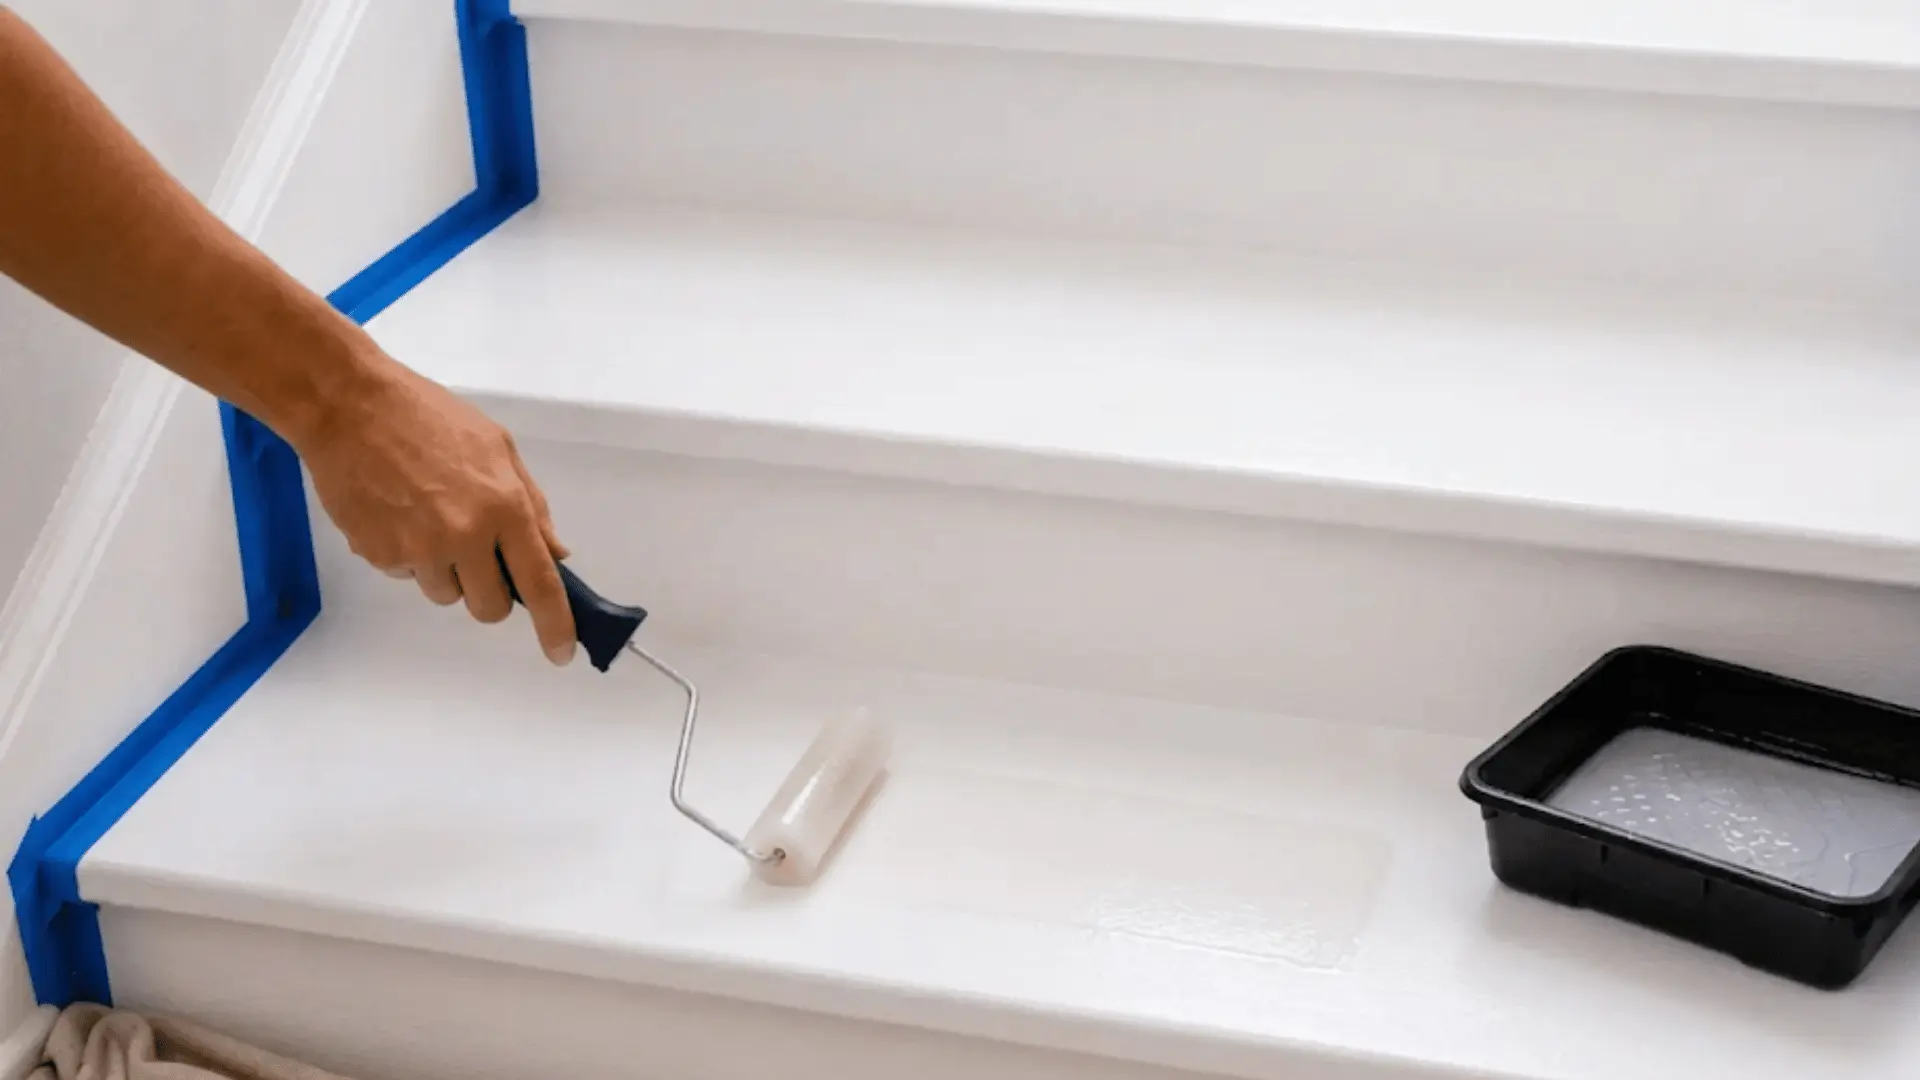
Once the paint dries, add protection if your paint type allows it. This may be a water-based polyurethane, floor sealer, or anti-slip finish.
A protective coat helps painted stairs better handle shoes, cleaning, pets, and daily use. If the stairs feel too smooth, use an anti-slip additive or textured topcoat.
Remember that dry-to-touch does not mean fully cured. Wait for the full curing time before heavy foot traffic. Most floor paints are walkable in a day but continue curing for up to two weeks.
Safety, Durability, and Maintenance Tips for Painted Stairs
The right paint, sheen, grip, and upkeep can help painted stairs stay safer and look better for longer. Consider these points before painting and during regular care.
- Choose Floor-Rated Paint: Use porch, floor, or stair paint because regular wall paint may peel, scuff, or chip under daily foot traffic.
- Use a Safer Sheen: Satin or low-sheen finishes are easier to clean and usually feel less slippery than high-gloss paint.
- Add Grip Where Needed: Use an anti-slip additive, textured topcoat, or painted runner on stairs used by children, pets, or people wearing socks.
- Protect High-Wear Areas: Prepare the tread centers and front edges carefully because these spots usually wear down first.
- Allow the Paint to Cure Fully: Paint may feel dry before it has hardened, so avoid heavy use until the recommended curing time has passed.
- Expect Wear Based on Traffic: Properly prepared and painted stairs can last several years, but busy staircases may need touch-ups sooner.
- Sweep or Vacuum Regularly: Remove dirt and grit before they scratch or dull the painted surface.
- Avoid Harsh Cleaners: Strong cleaning products can damage the paint or protective topcoat.
- Keep Leftover Paint: Save a small amount for repairing worn tread centers, corners, and stair edges.
- Touch Up Chips Quickly: Repair small chips before they begin peeling or spreading.
Painted Stairs Ideas Every Home Style
Painted stairs can be simple, colorful, classic, or playful. The right idea depends on your wall color, flooring, light, railing, and how much attention you want the staircase to get.
1. White Risers With Dark Treads
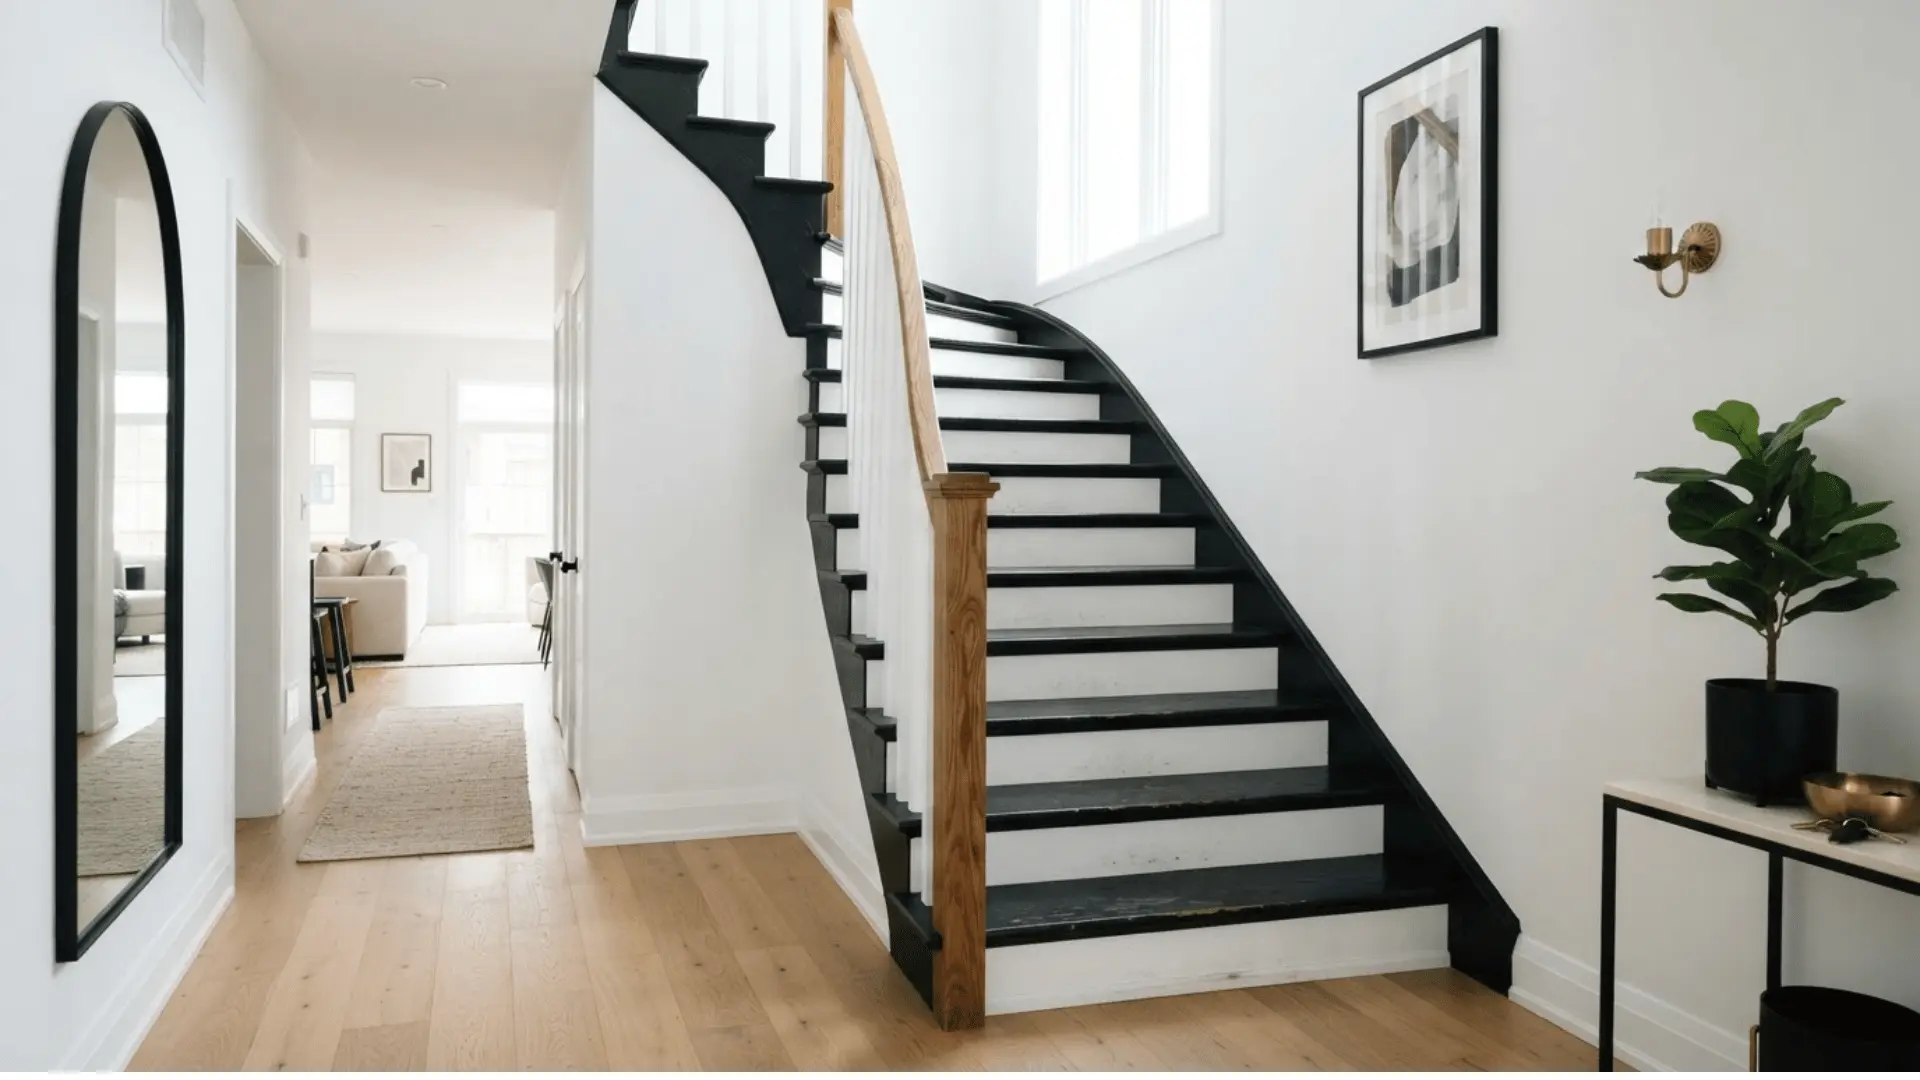
White risers with dark treads are one of the most reliable painted stair ideas because the contrast feels clean without looking too busy.
The white risers make the staircase look brighter, while the darker treads handle daily marks better. This works especially well in older homes, entryways, and hallways, where the stairs are among the first things people see.
- Best for: Classic homes, hallways, and painted wood stairs.
- Pair with: Black railings, warm wood floors, or white trim.
- Keep in mind: White risers may need regular wiping.
2. Black Painted Stairs
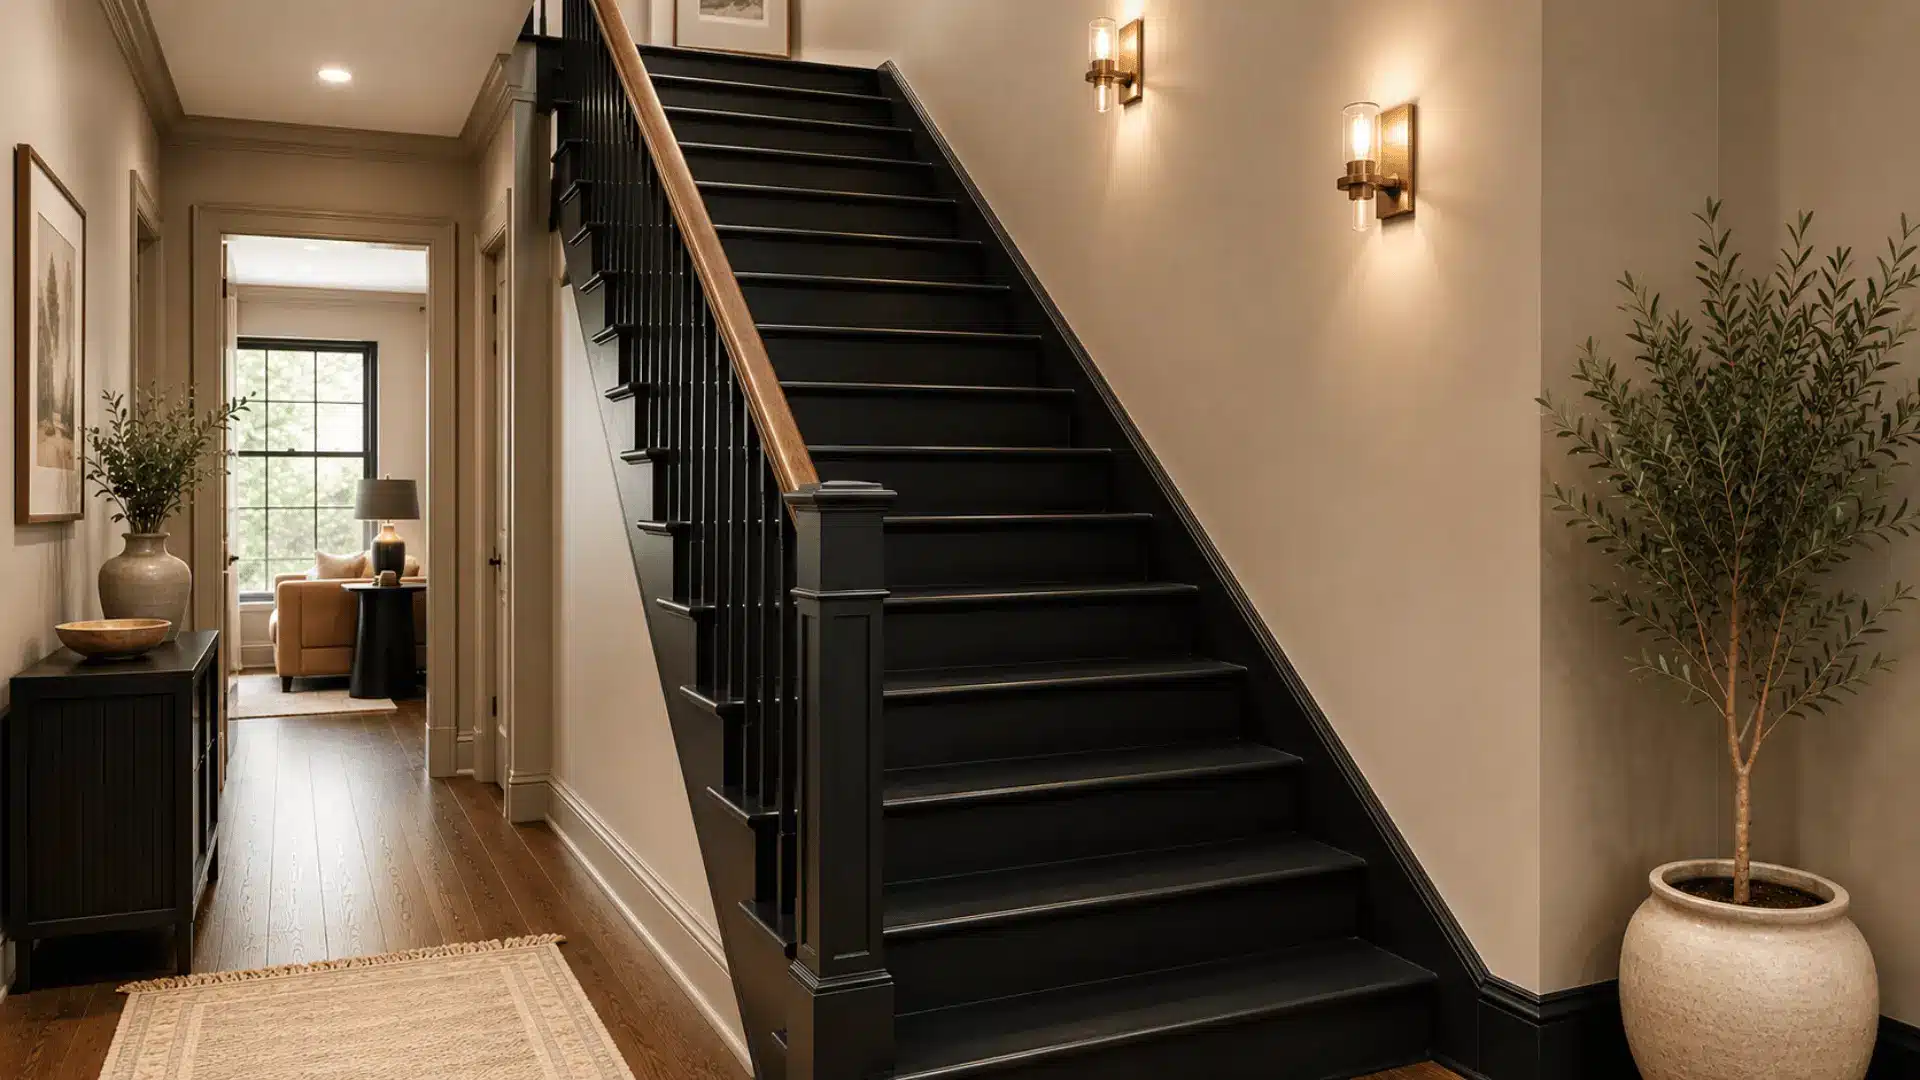
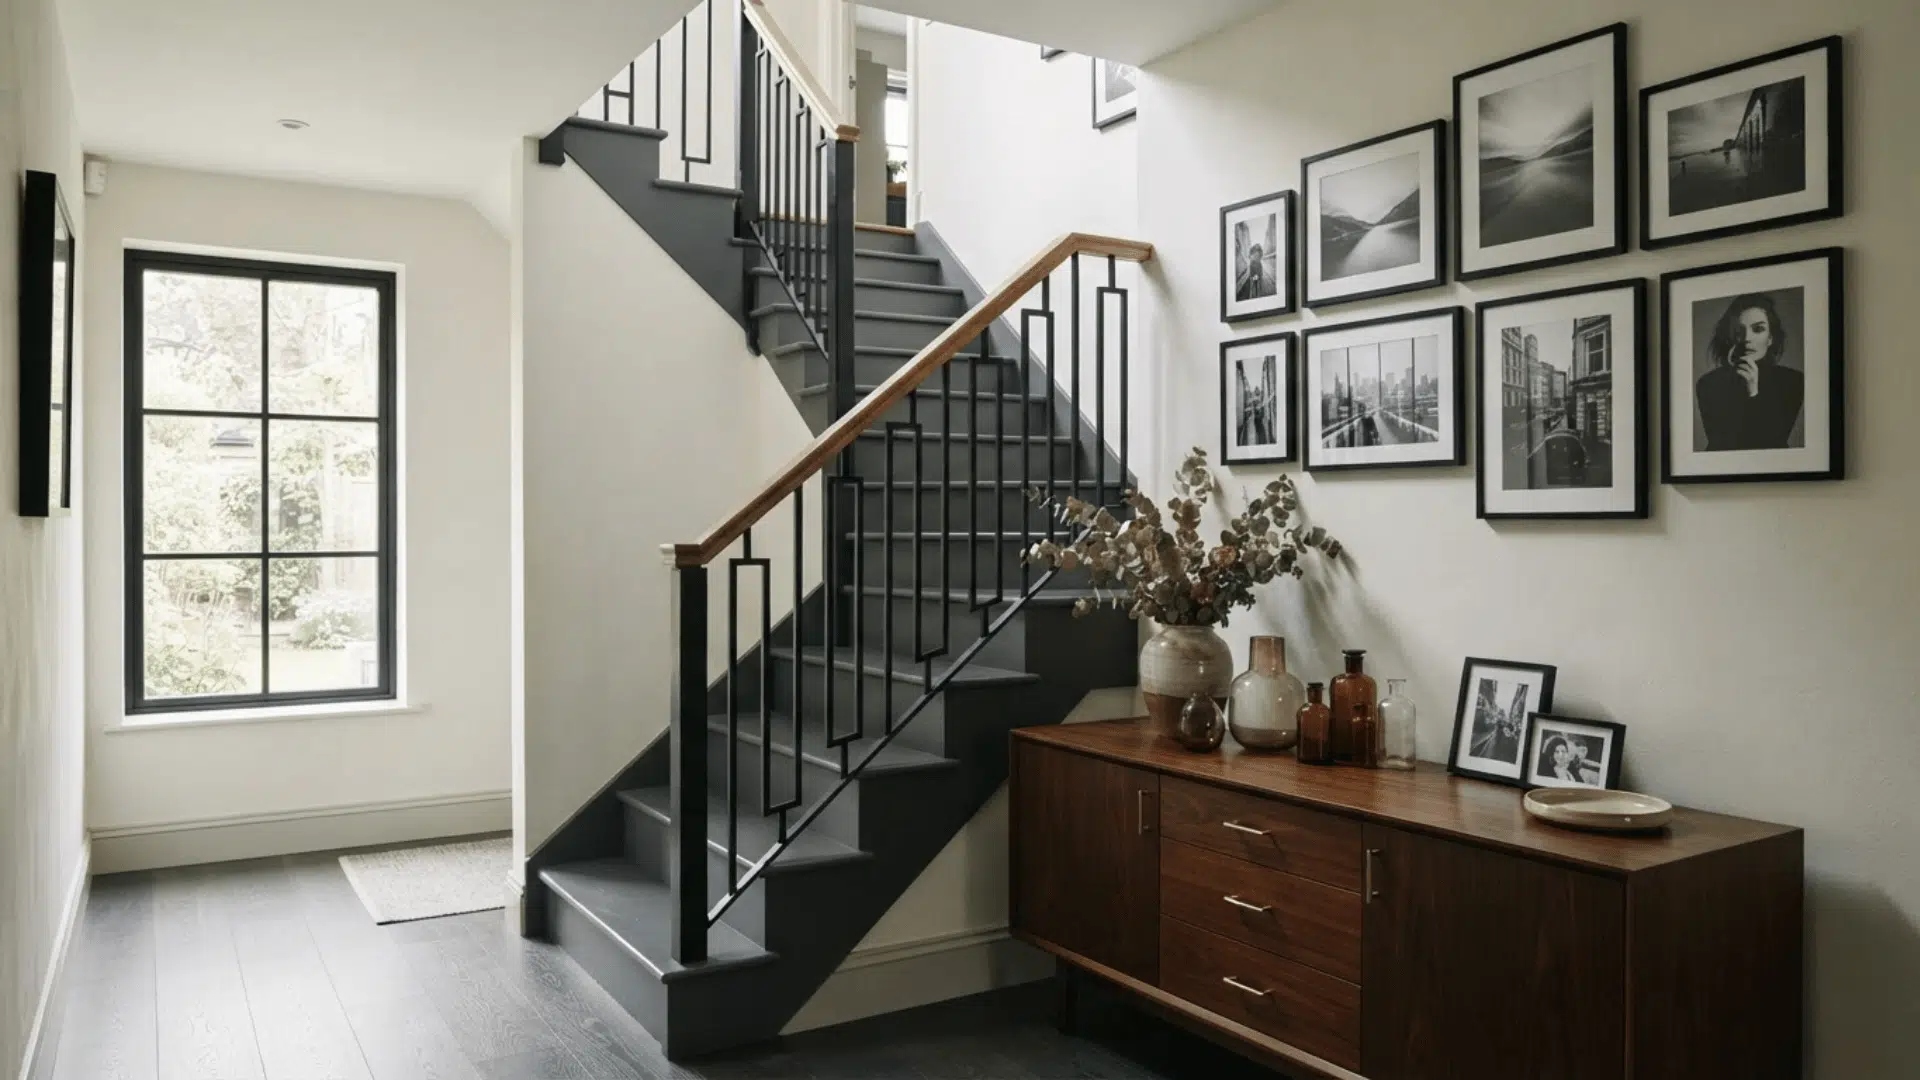
Black painted stairs can make a staircase feel sharper and more grounded. This idea works best when the walls, trim, or railing around the stairs are lighter, so the space does not feel closed in.
Black is strong on treads, side trim, or full staircases, but it can show dust, pet hair, and small scuffs faster than mid-tone colors.
- Best for: Modern homes, narrow halls, and high-contrast spaces.
- Pair with: White walls, wood railings, or brass accents.
- Keep in mind: Black paint can show dust, pet hair, and scuffs.
3. Two-Tone Painted Stairs
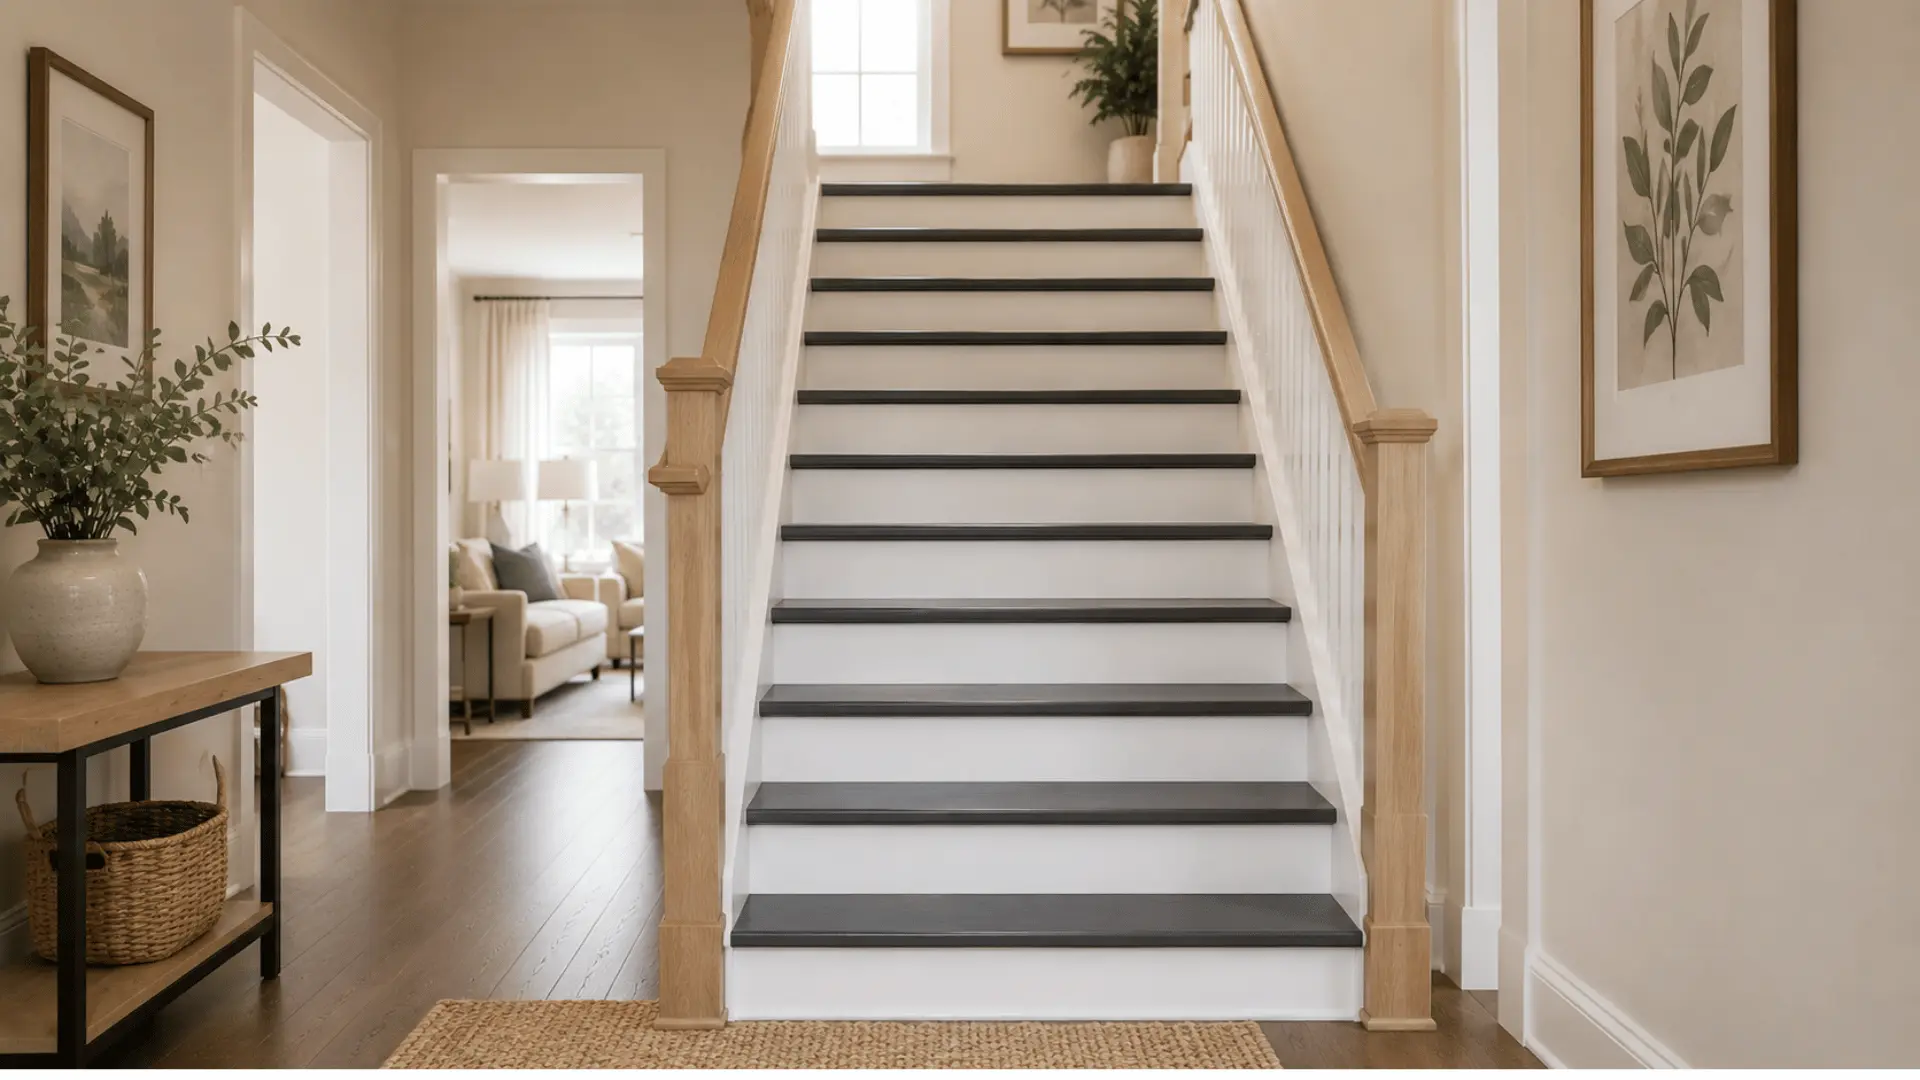
Two-tone painted stairs use one color on the treads and another on the risers. This is a good choice when you want the stairs to feel more finished without using a pattern. It can also help each step look more defined.
Dark treads with light risers are popular because the walking surface stays practical while the risers keep the staircase bright.
- Best for: Homes that need a clean but noticeable update.
- Try: Dark gray treads with white risers.
- Keep in mind: Choose colors that match nearby floors and walls.
4. Painted Stair Runner
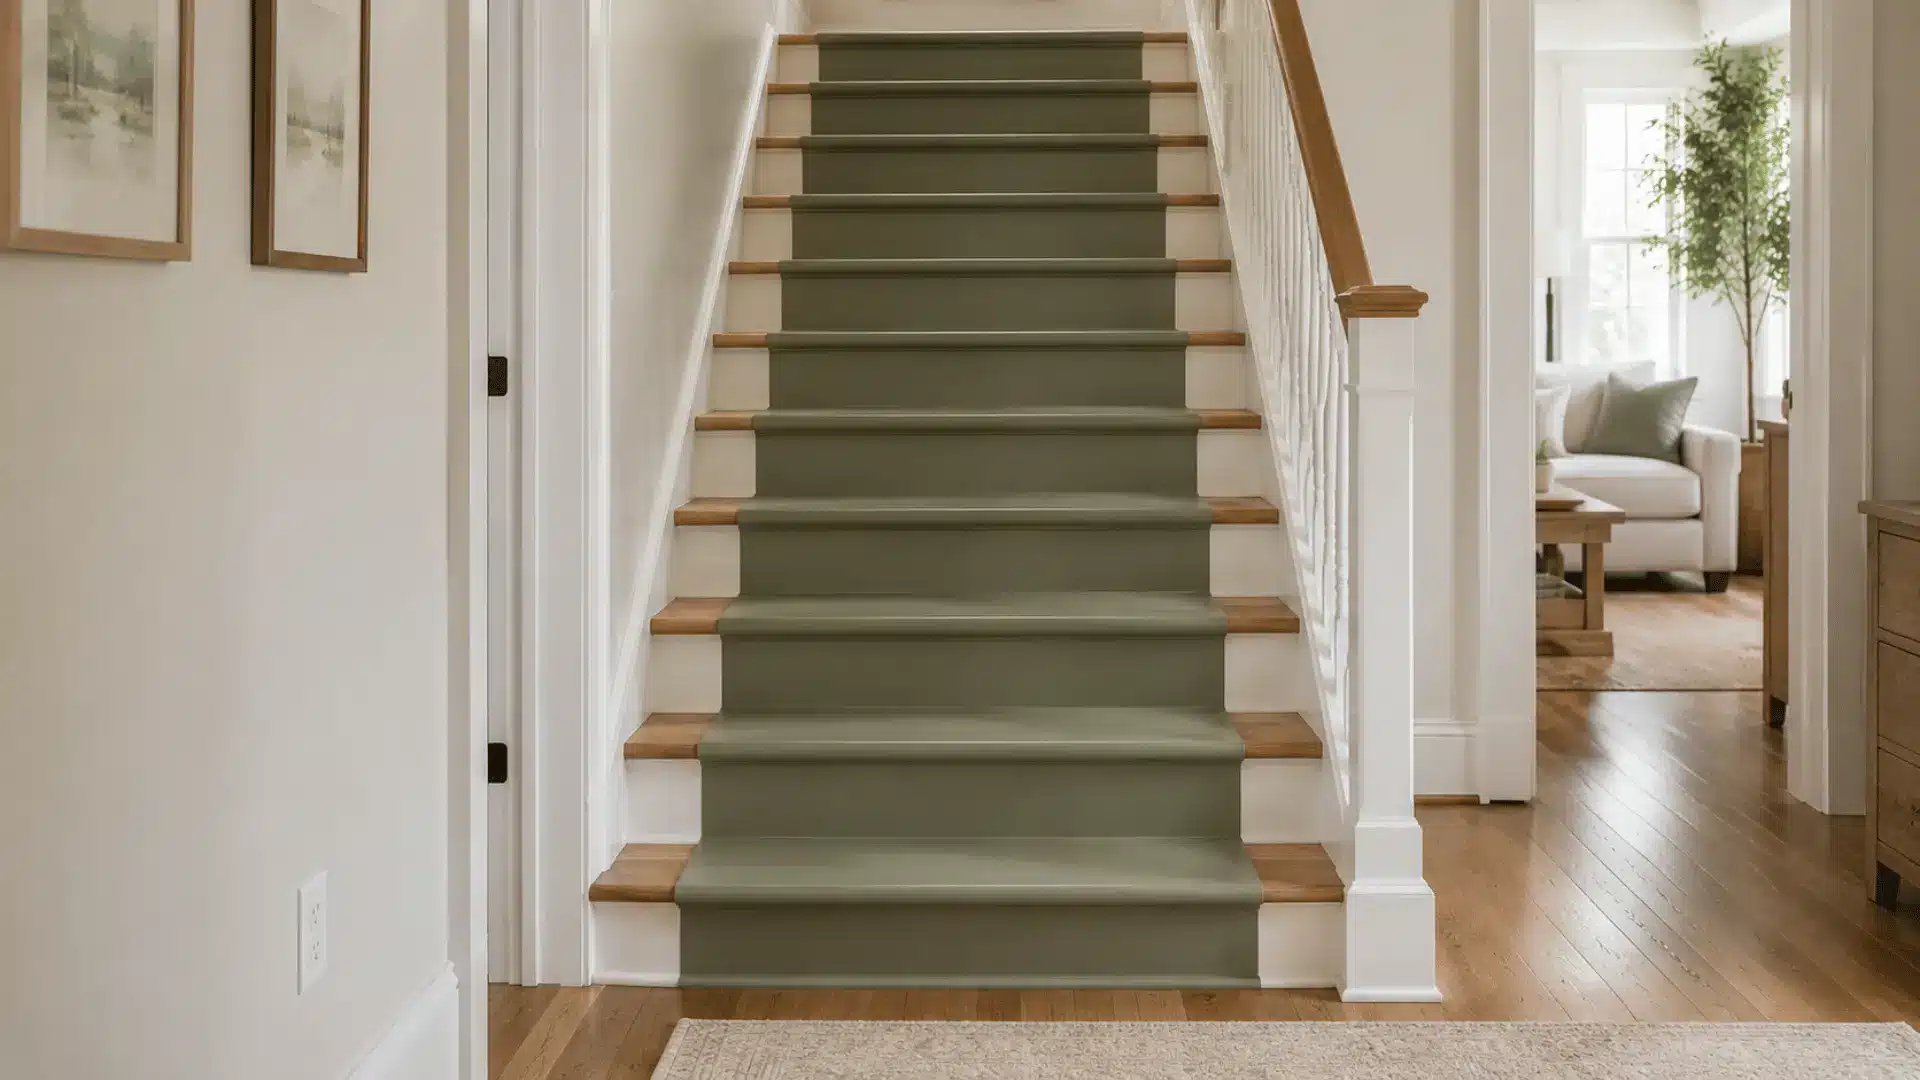
A painted stair runner gives the look of a runner rug without fabric, staples, or carpet cleaning. The center strip is painted in one color, while the side edges stay wood, white, or another painted shade.
It works well on narrow stairs because the painted strip naturally guides the eye upward. Careful measuring matters because uneven lines are easy to notice.
- Best for: Narrow staircases and hallway stairs.
- Pair with: Neutral walls and simple trim.
- Keep in mind: Measuring and taping must be accurate for clean lines.
5. Patterned Stair Risers
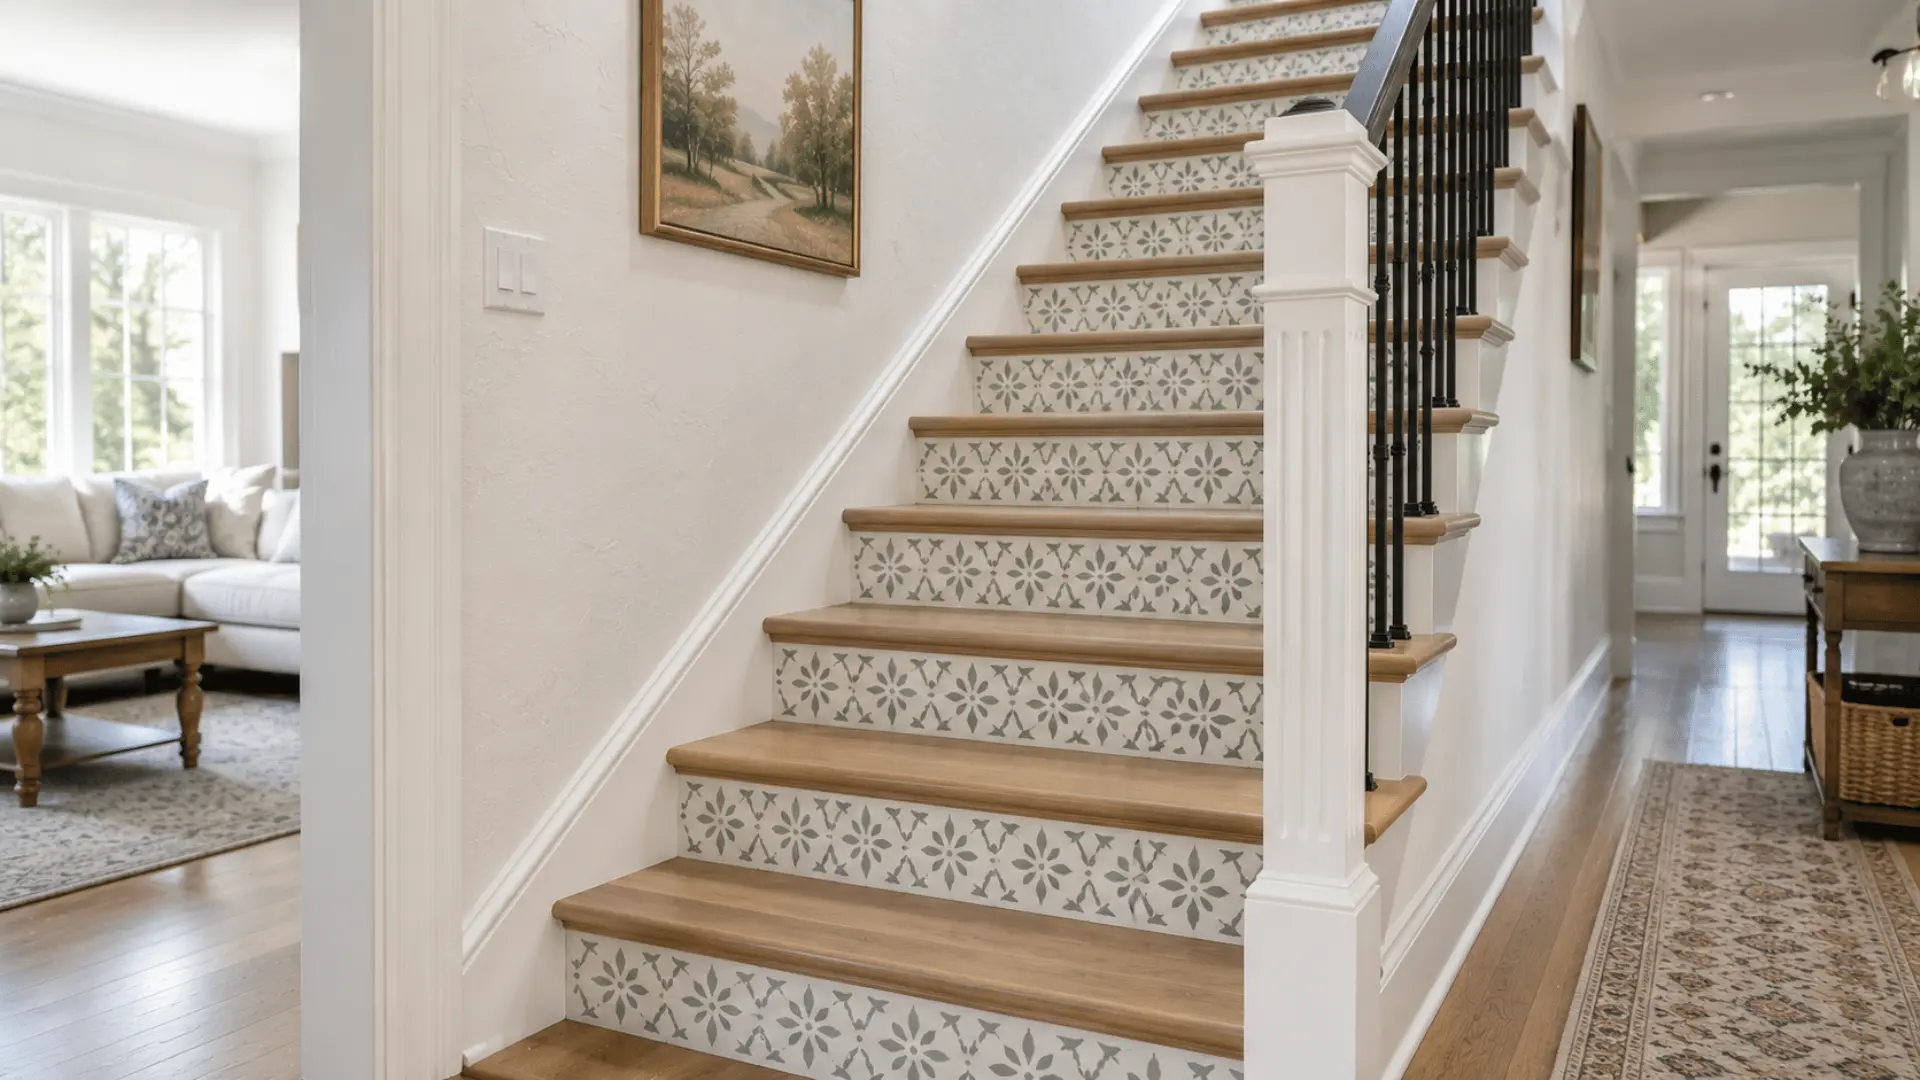
Patterned stair risers add detail without putting busy designs on the part you walk on. Since risers face outward, they are easier to see and usually get less direct wear than treads.
You can use small stencils, soft stripes, checkerboard designs, or tile-style shapes. This idea works best when the nearby walls and flooring are simple enough to balance the pattern.
- Best for: Entry stairs, basement stairs, and visible staircases.
- Try: Stripes, stencils, checkerboard, or tile-style patterns.
- Keep in mind: Keep treads simple so the staircase does not feel crowded.
6. Ombre Painted Risers
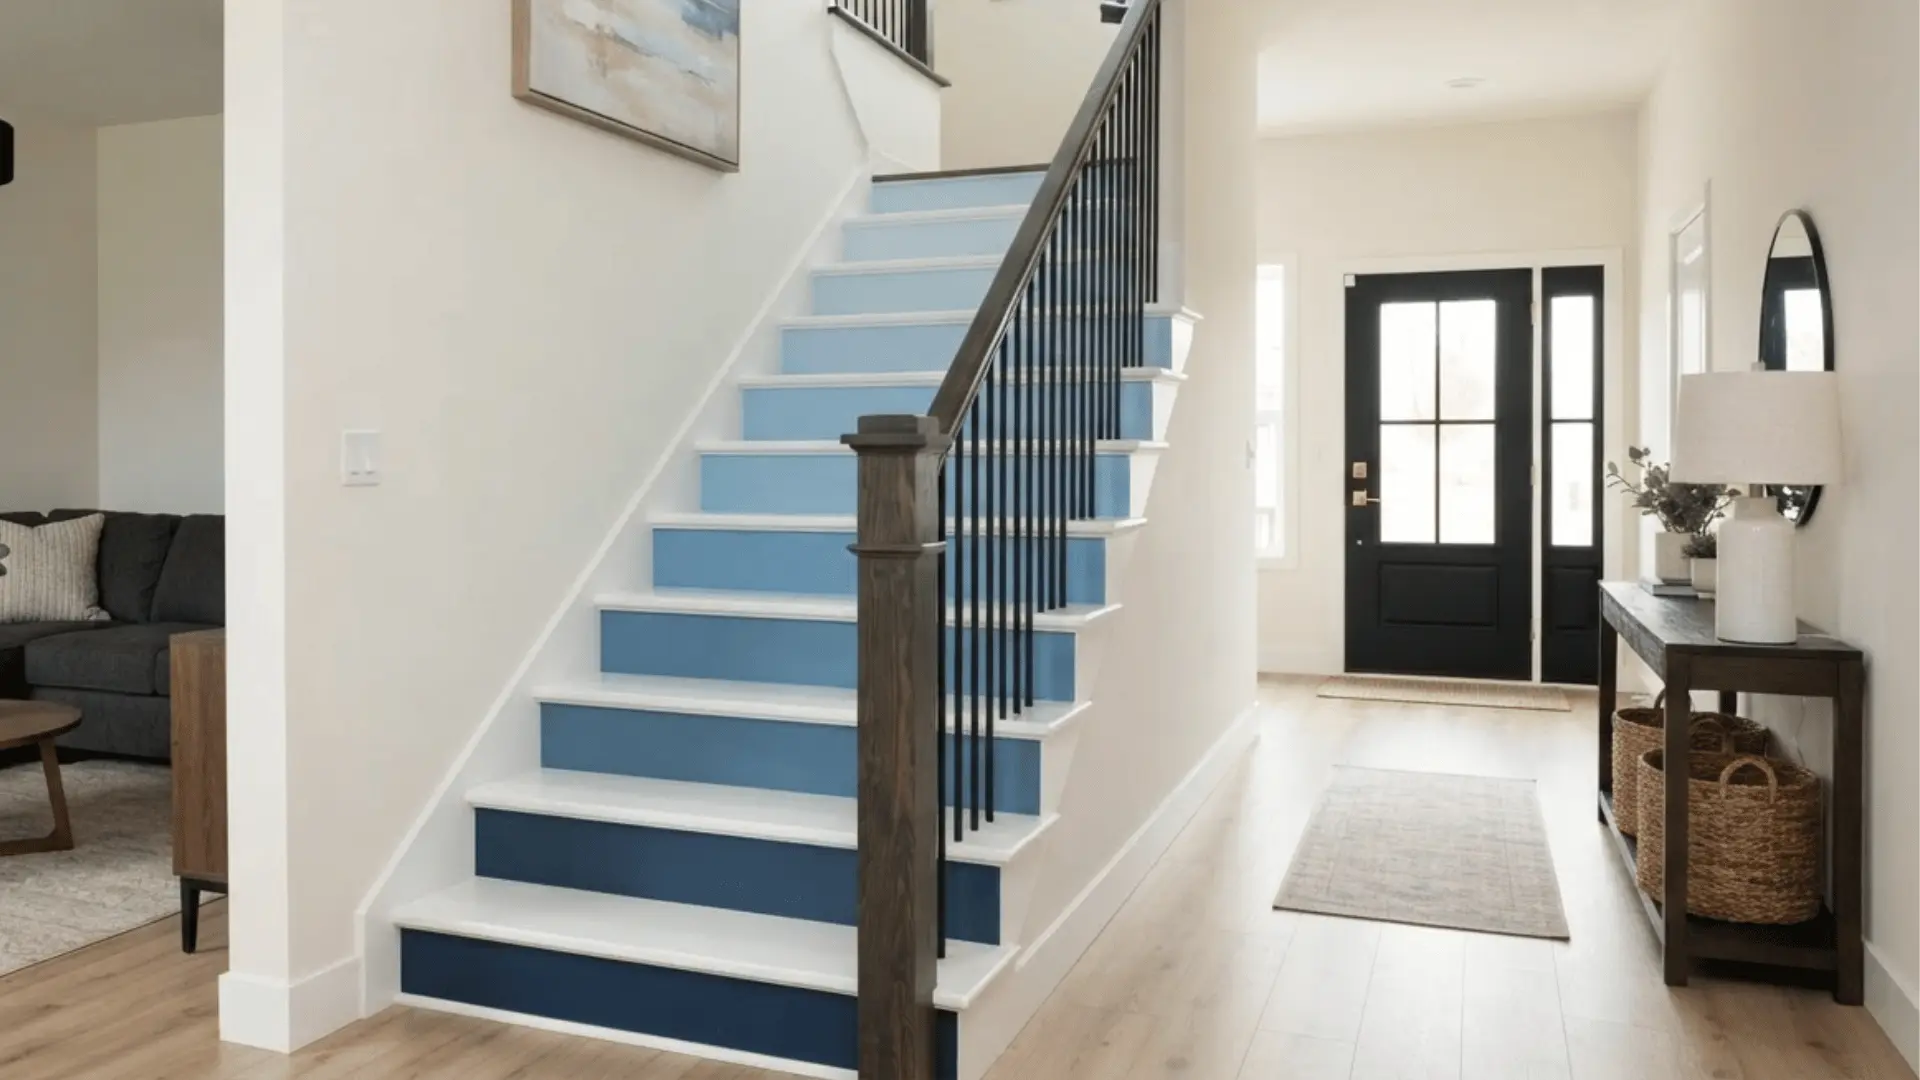
Ombre-painted risers move from dark to light within the same color family. The look feels more planned when the color change is gradual rather than random.
It works best on staircases where the risers are easy to see from the entry, hallway, or living area. Keep the treads plain so the color shift remains the main detail rather than competing with other finishes.
- Best for: Visible stairs and creative home updates.
- Try: Blue, green, gray, beige, or terracotta shades.
- Keep in mind: Keep treads plain to balance the color shift.
7. Soft Neutral Painted Stairs
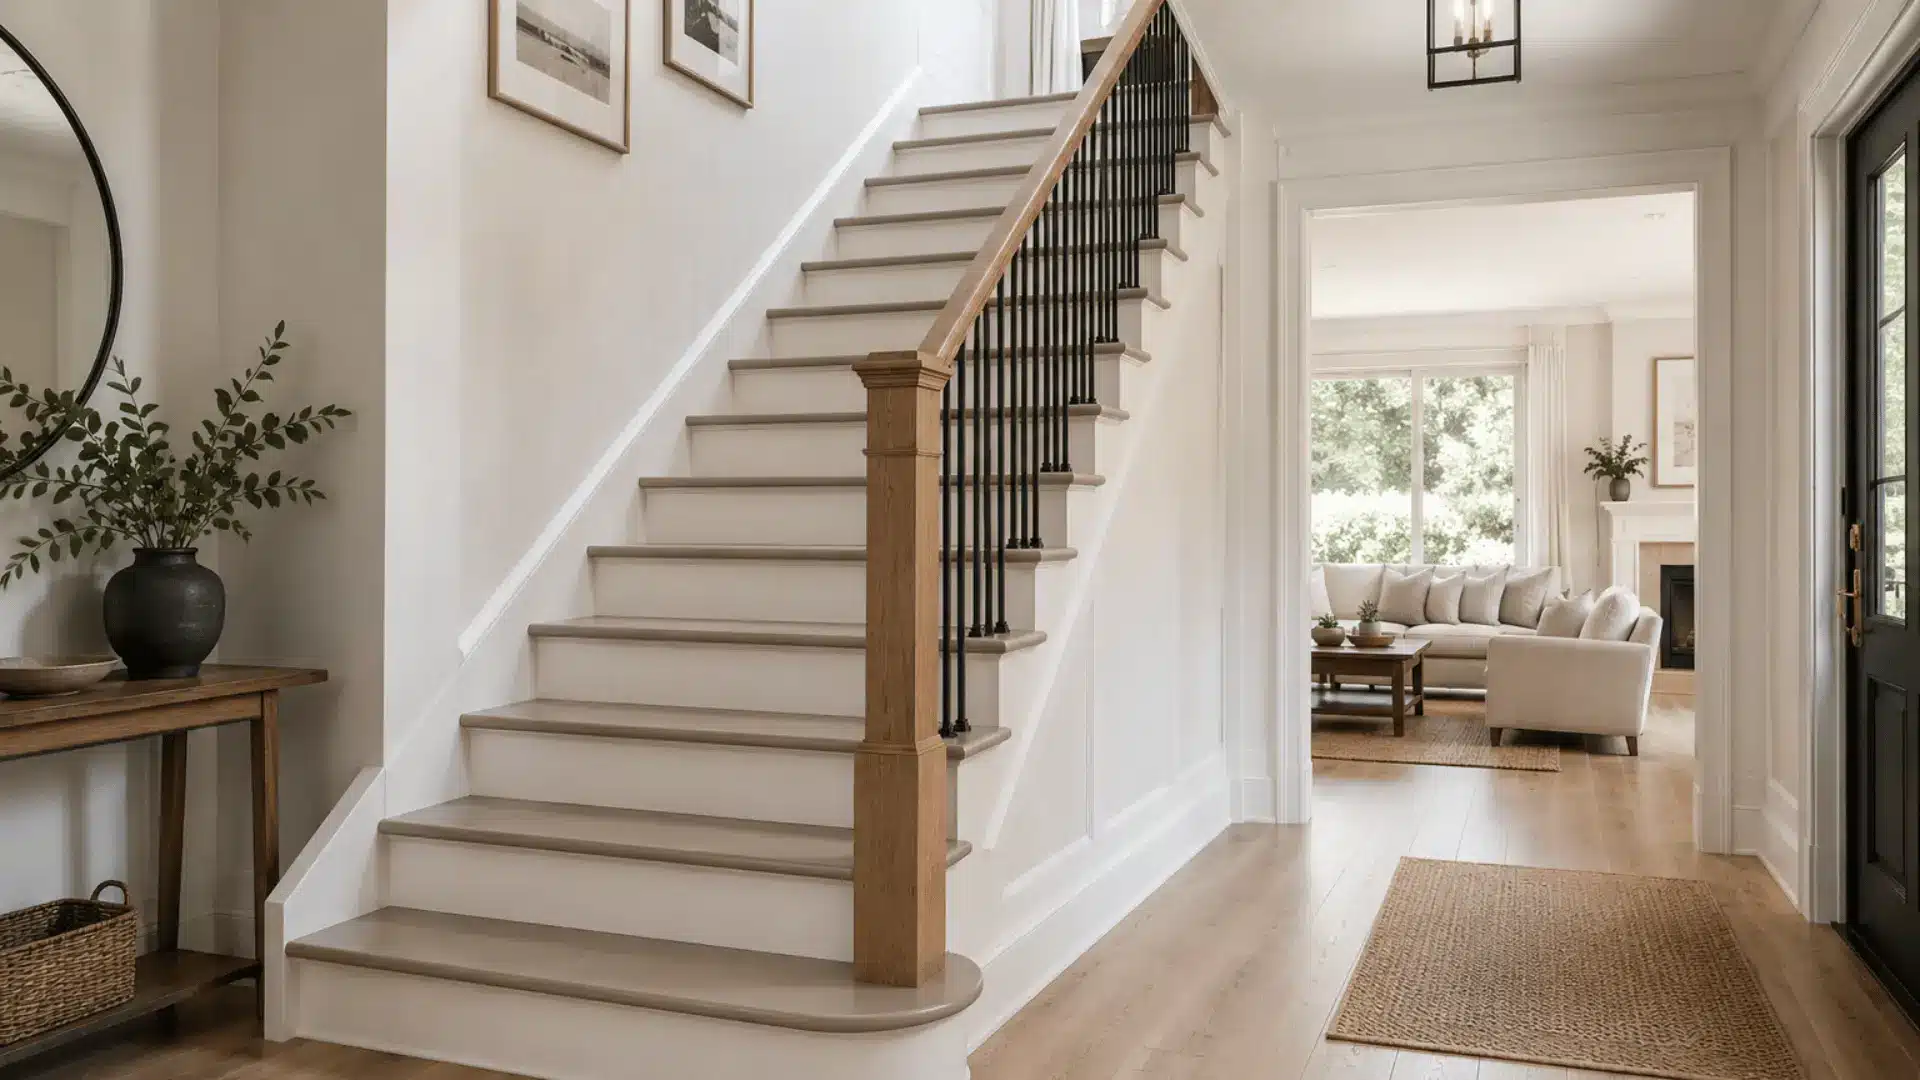
Soft, neutral-painted stairs are a good option when you want the staircase to look fresh without making it the loudest feature in the room.
Cream, greige, taupe, warm gray, and soft beige work with many wall colors and flooring types. These shades are also easier to live with over the long term because they blend well with wood, white trim, and simple railings.
- Best for: Family homes, rentals, and mixed decor.
- Pair with: Wood railings, white walls, and natural fiber rugs.
- Keep in mind: Mid-tone neutrals hide marks better than pale shades.
8. Navy Painted Stair Risers
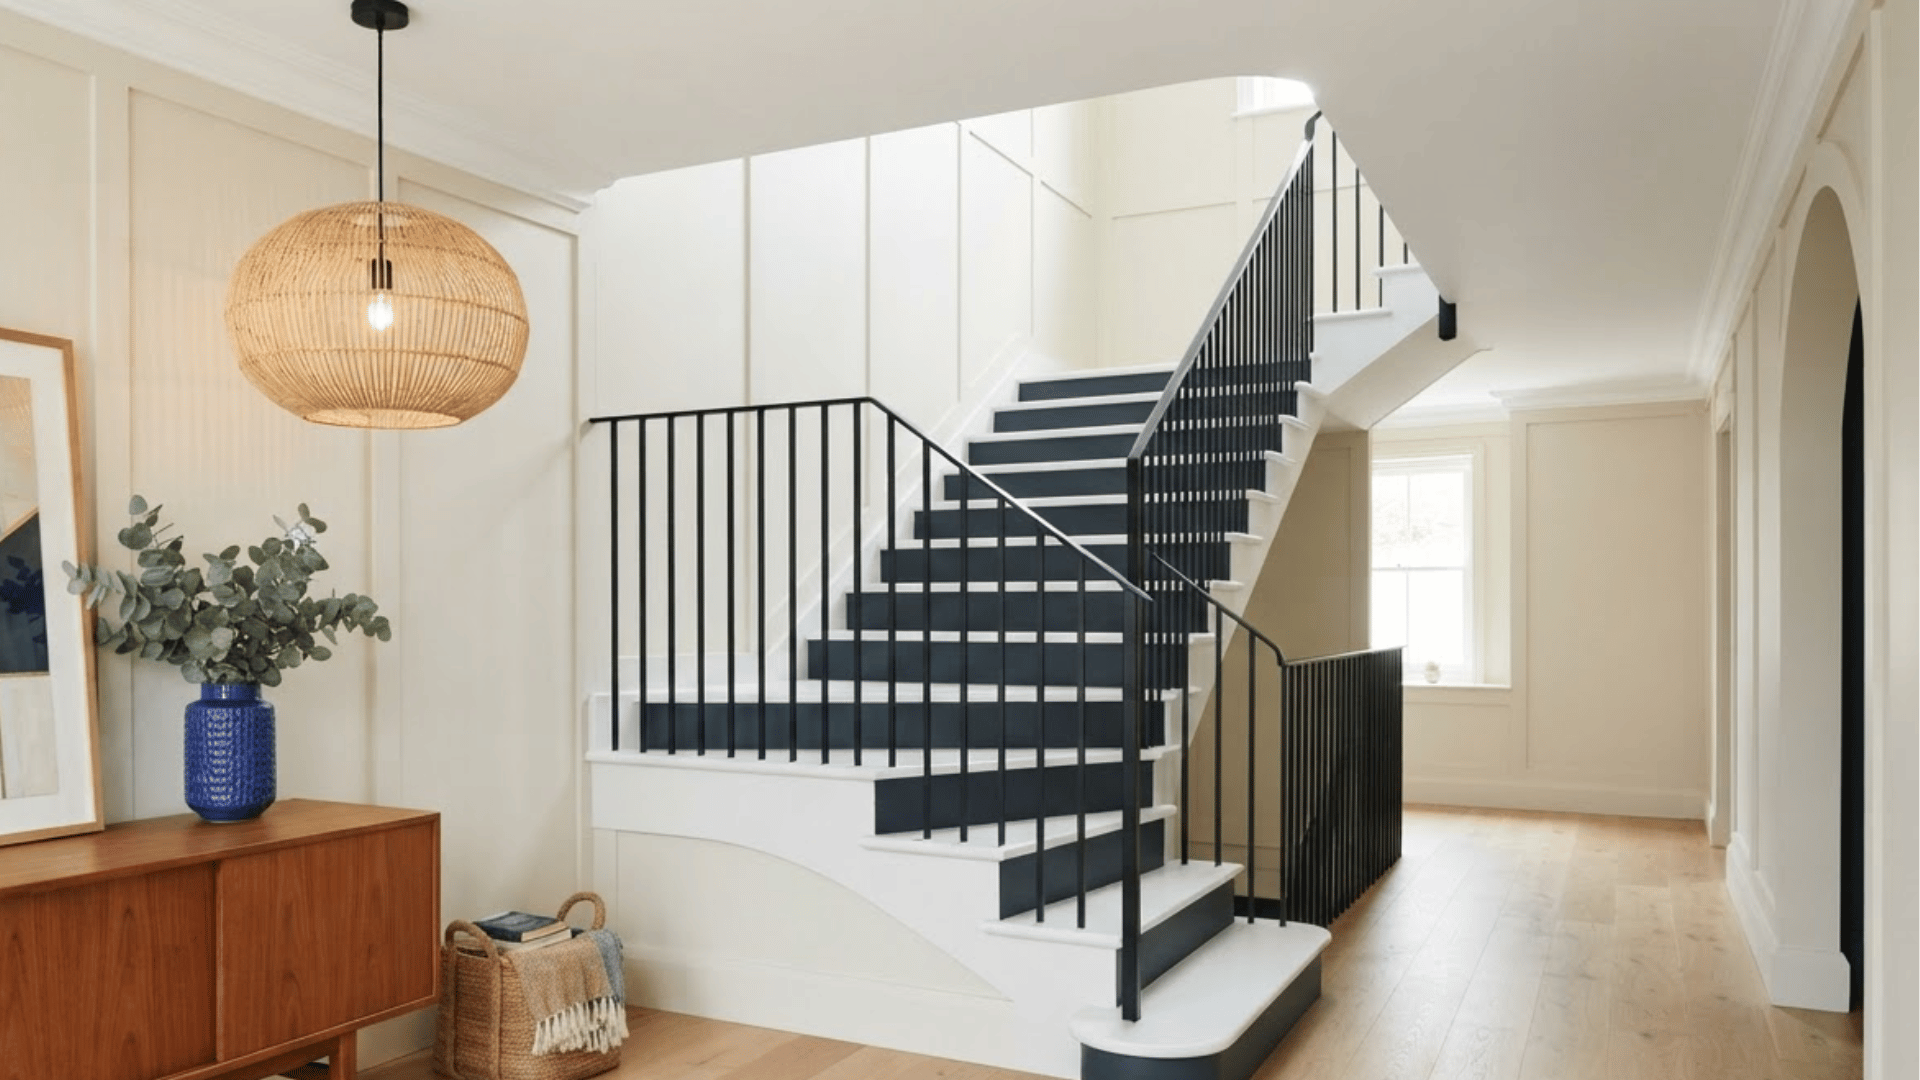
Navy-painted risers add color while still feeling calm and practical. They work especially well when the treads stay white, wood, gray, or another simple shade.
Navy can hide marks better than pale colors, which makes it useful for busy homes. Keep nearby walls light if the staircase is narrow, since dark risers can make a small stairwell feel heavier.
- Best for: Entryways, coastal homes, and classic interiors.
- Pair with: Oak floors, white trim, or brass details.
- Keep in mind: Keep nearby walls light so the staircase still feels open.
9. Sage Green Stairs
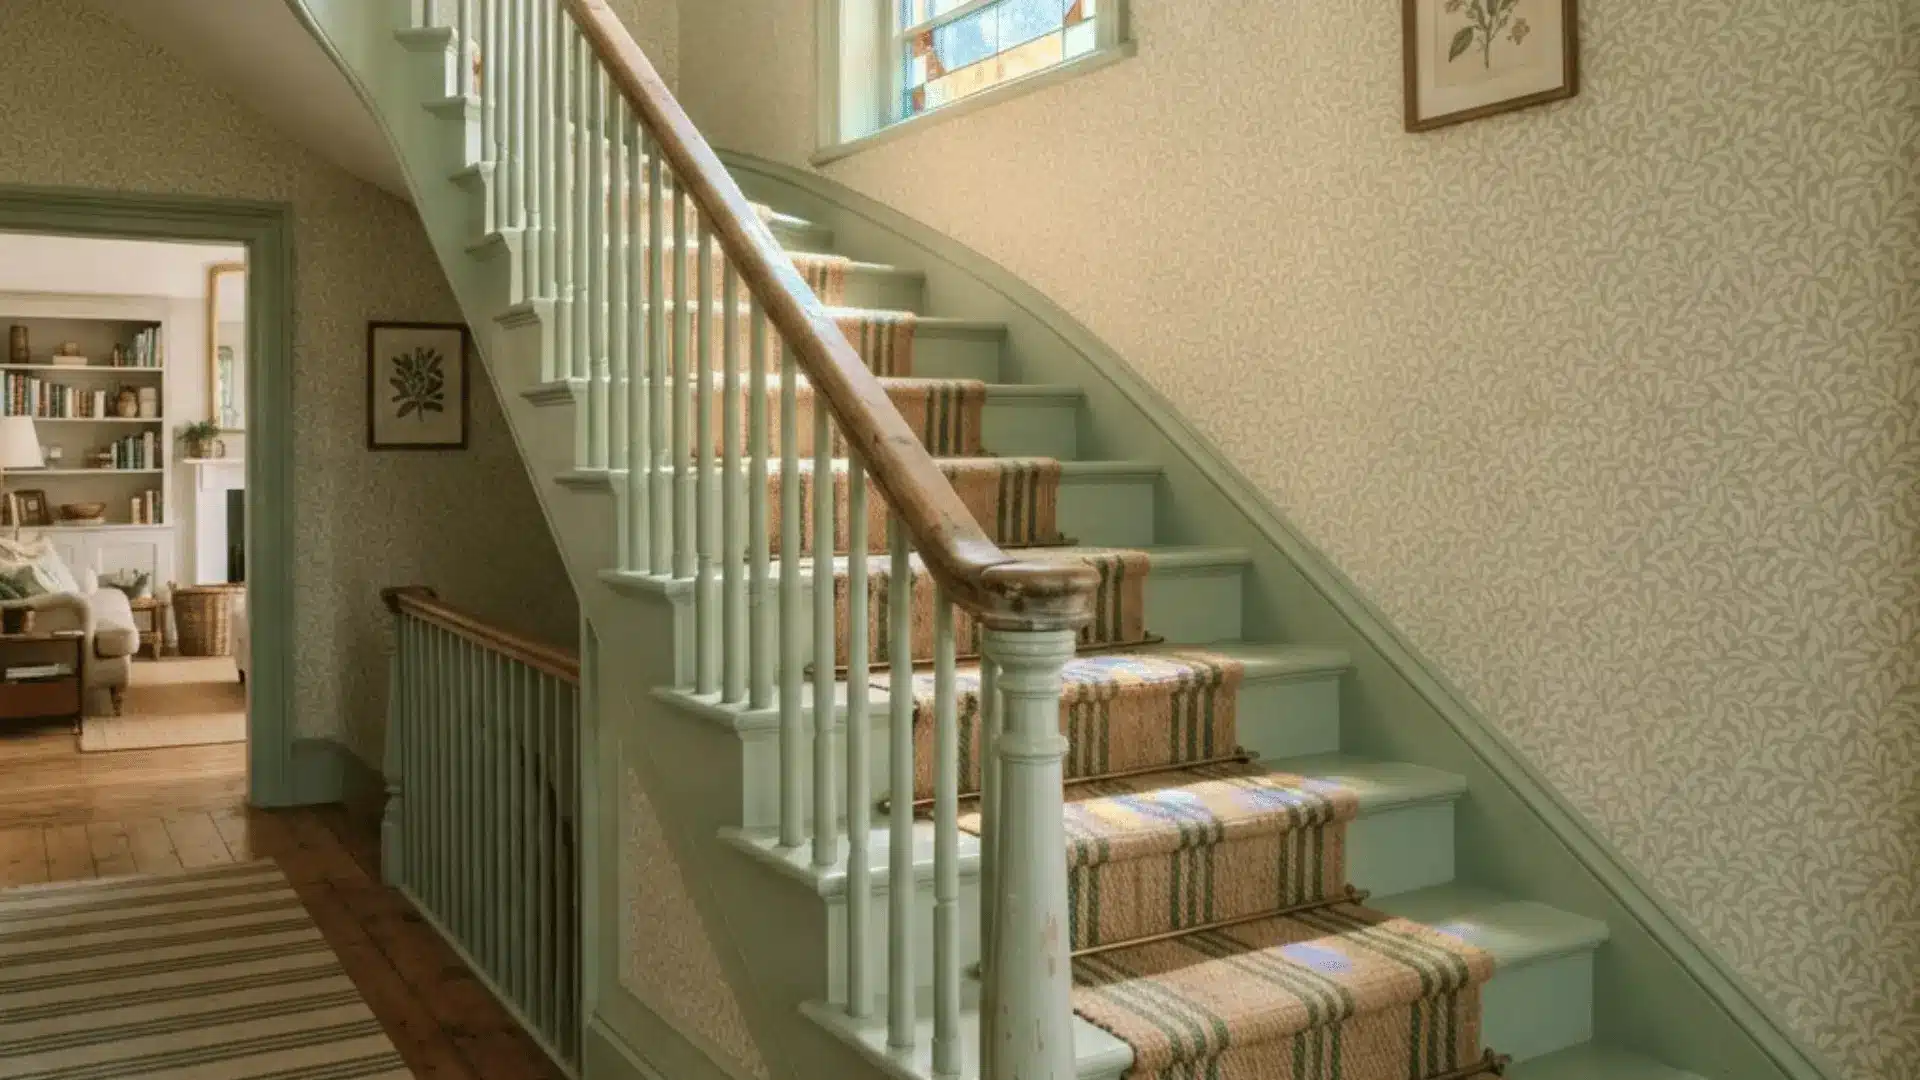
Sage green stairs bring a soft color to the staircase without feeling too bright. This shade works well in homes with plants, wood tones, cream walls, or black railings.
You can paint only the risers for a lighter touch or use sage on both treads and risers for a fuller look. Always test it in different light before painting the full staircase.
- Best for: Cottage, farmhouse, and nature-inspired spaces.
- Pair with: Cream walls, black railings, and natural wood.
- Keep in mind: Test the color in daylight and evening light first.
10. Warm Gray Painted Stairs
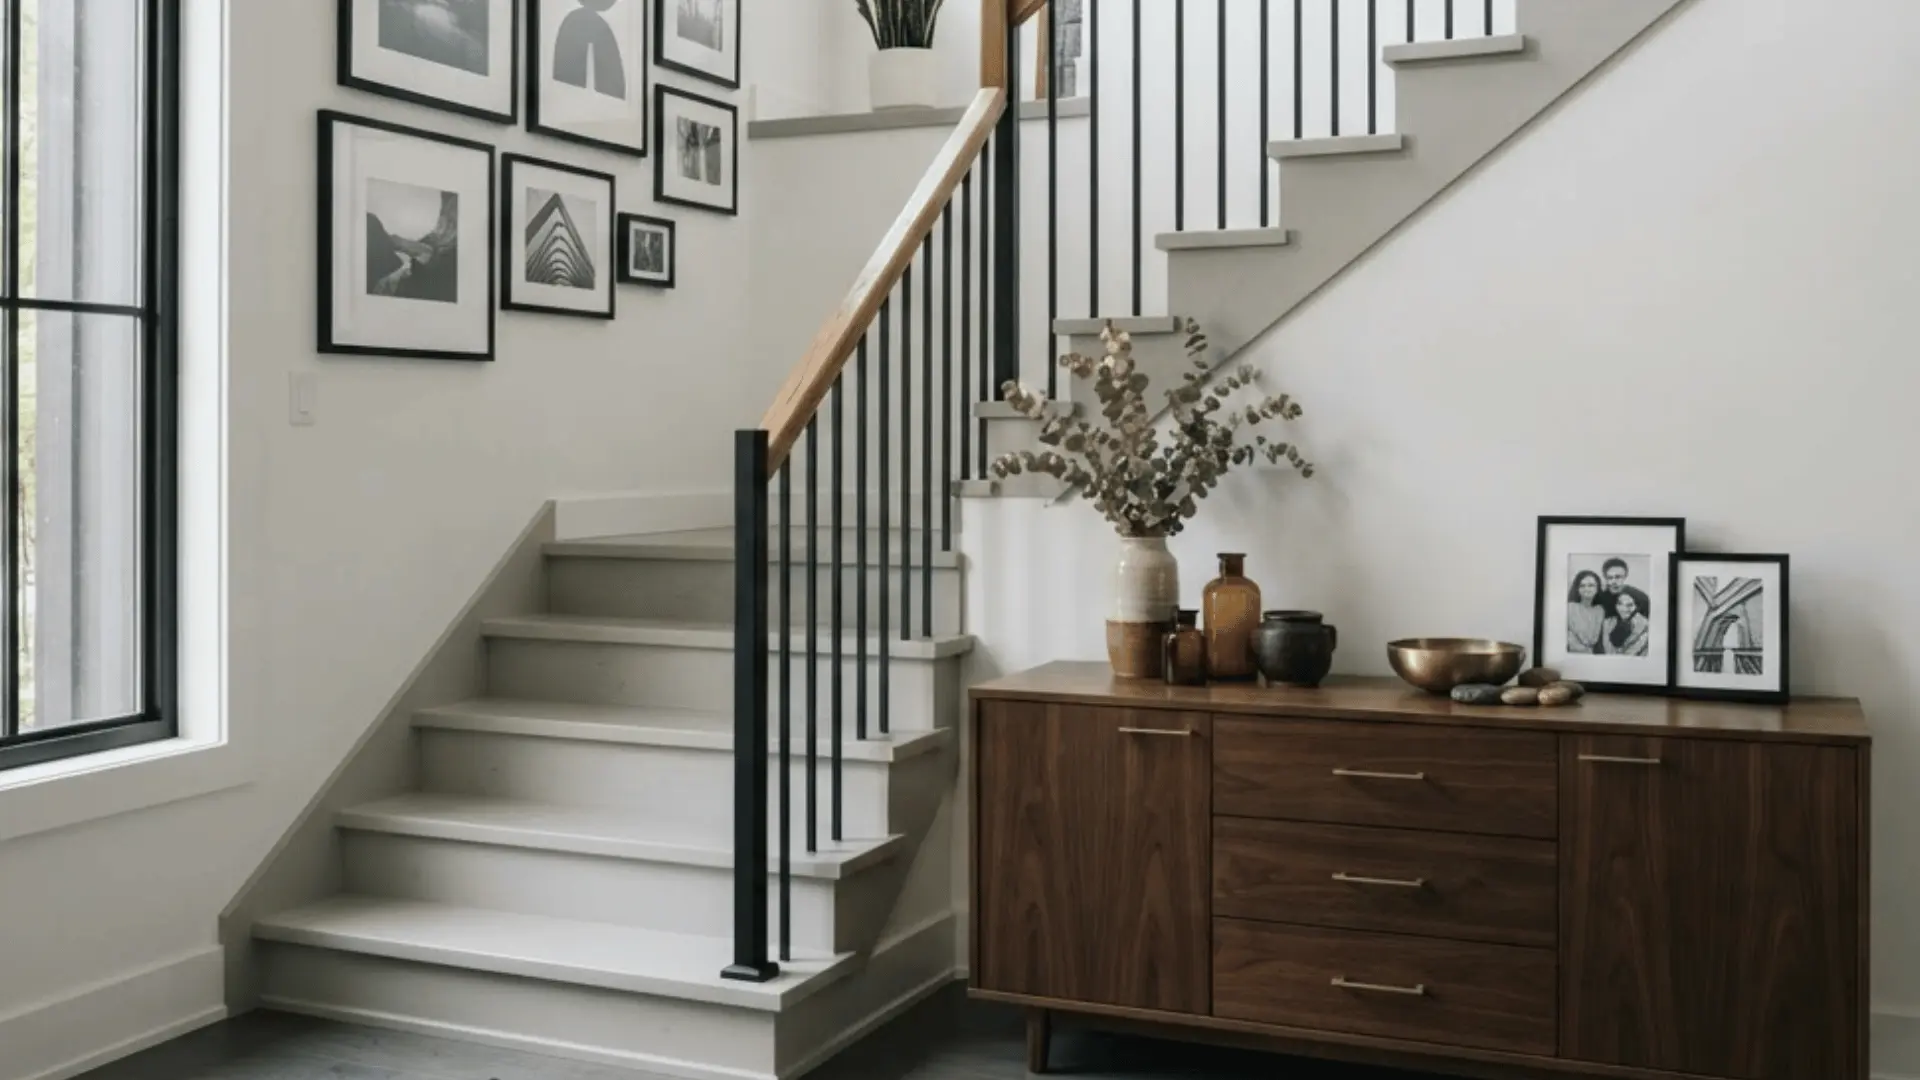
Warm gray painted stairs are practical for homes where the staircase gets daily use. The color hides dust, shoe marks, and small scuffs better than white or black.
It also works with many wall colors, including cream, beige, blue, and green. Choose warm gray if your floors or railings have brown, tan, or honey wood tones nearby.
- Best for: Busy homes, basement stairs, and hallways.
- Pair with: Cream, beige, blue, green, or black accents.
- Keep in mind: Choose warm gray if your floors have brown or beige tones.
11. Checkerboard Stair Risers
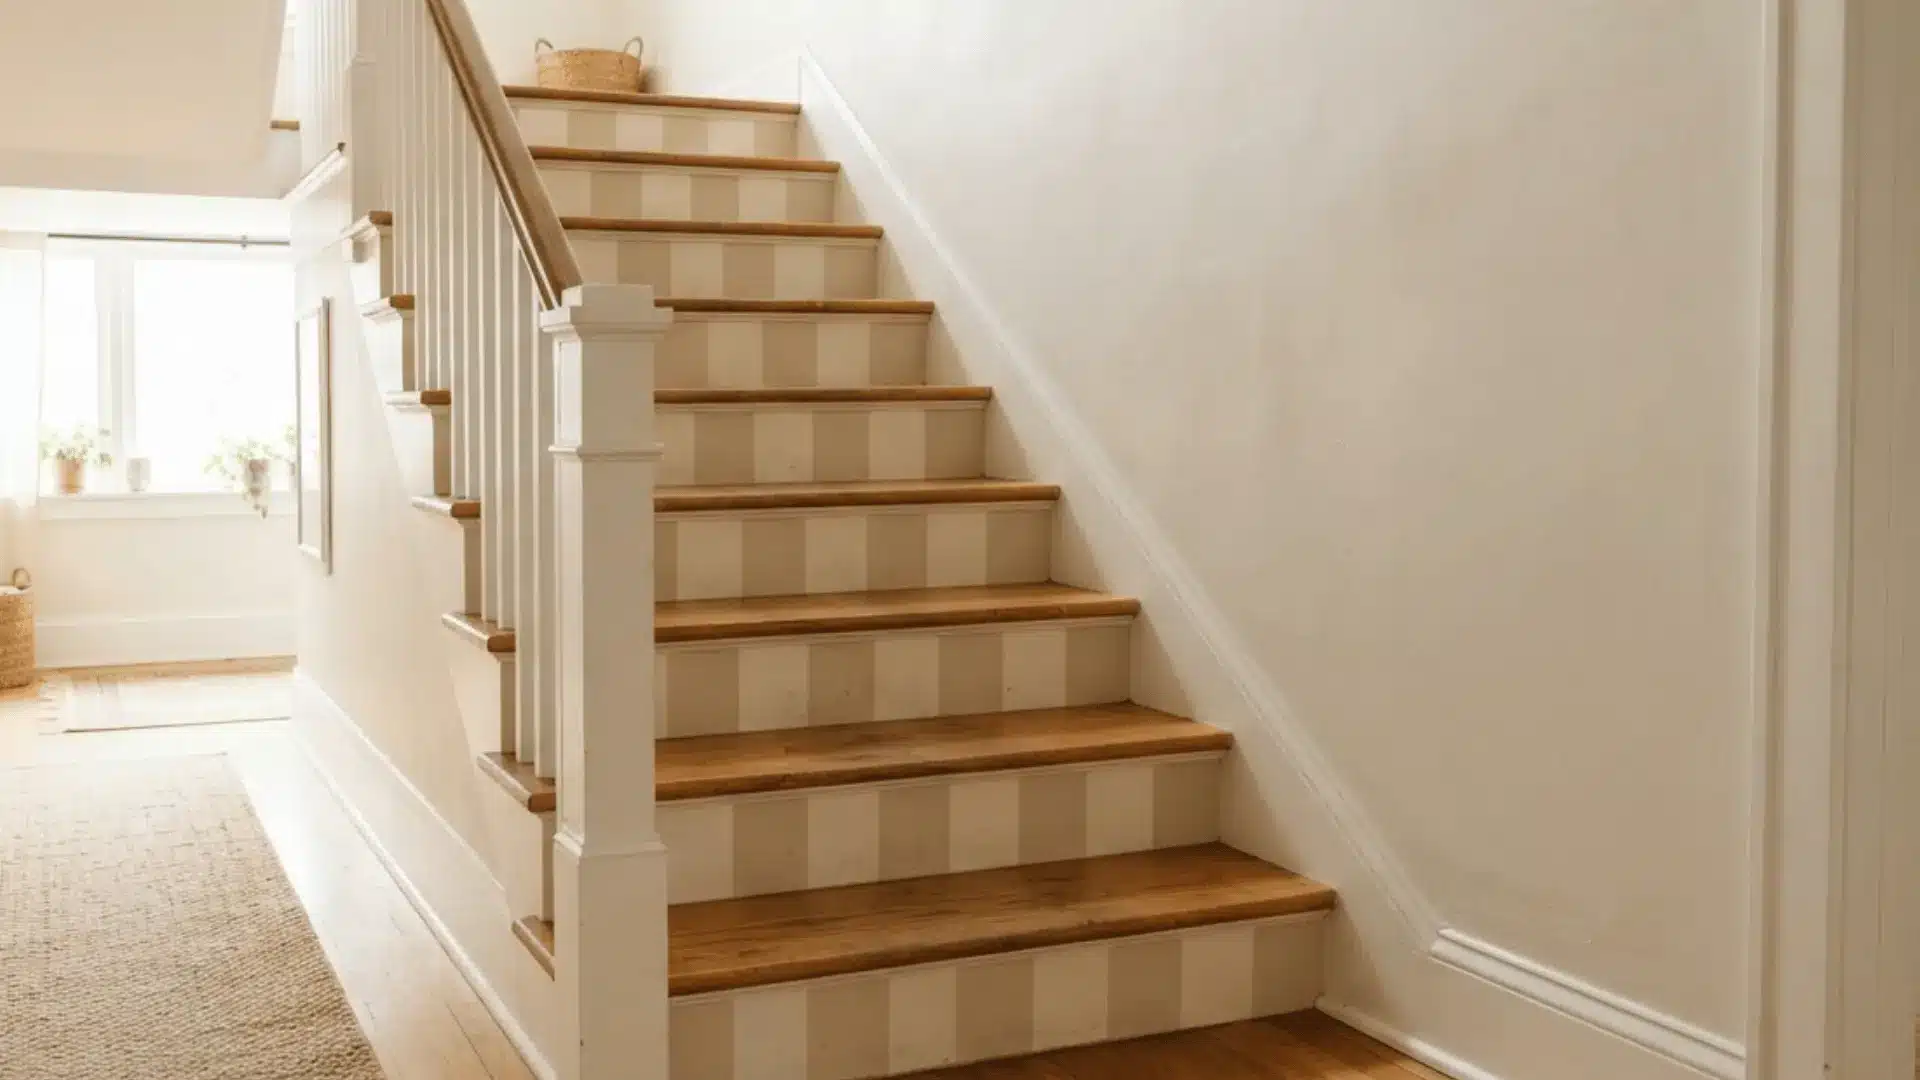
Checkerboard stair risers give the staircase a clear pattern without covering the treads. This can work well in casual homes, playrooms, basement stairs, or entryways that need more personality.
Smaller checks usually feel easier to live with than large blocks. Keep the rest of the staircase simple so the pattern looks planned instead of too busy.
- Best for: Casual homes, playrooms, and visible staircases.
- Try: Black and white, beige and cream, or green and white.
- Keep in mind: Smaller checks usually feel softer than large checks.
12. Painted Numbered Stairs
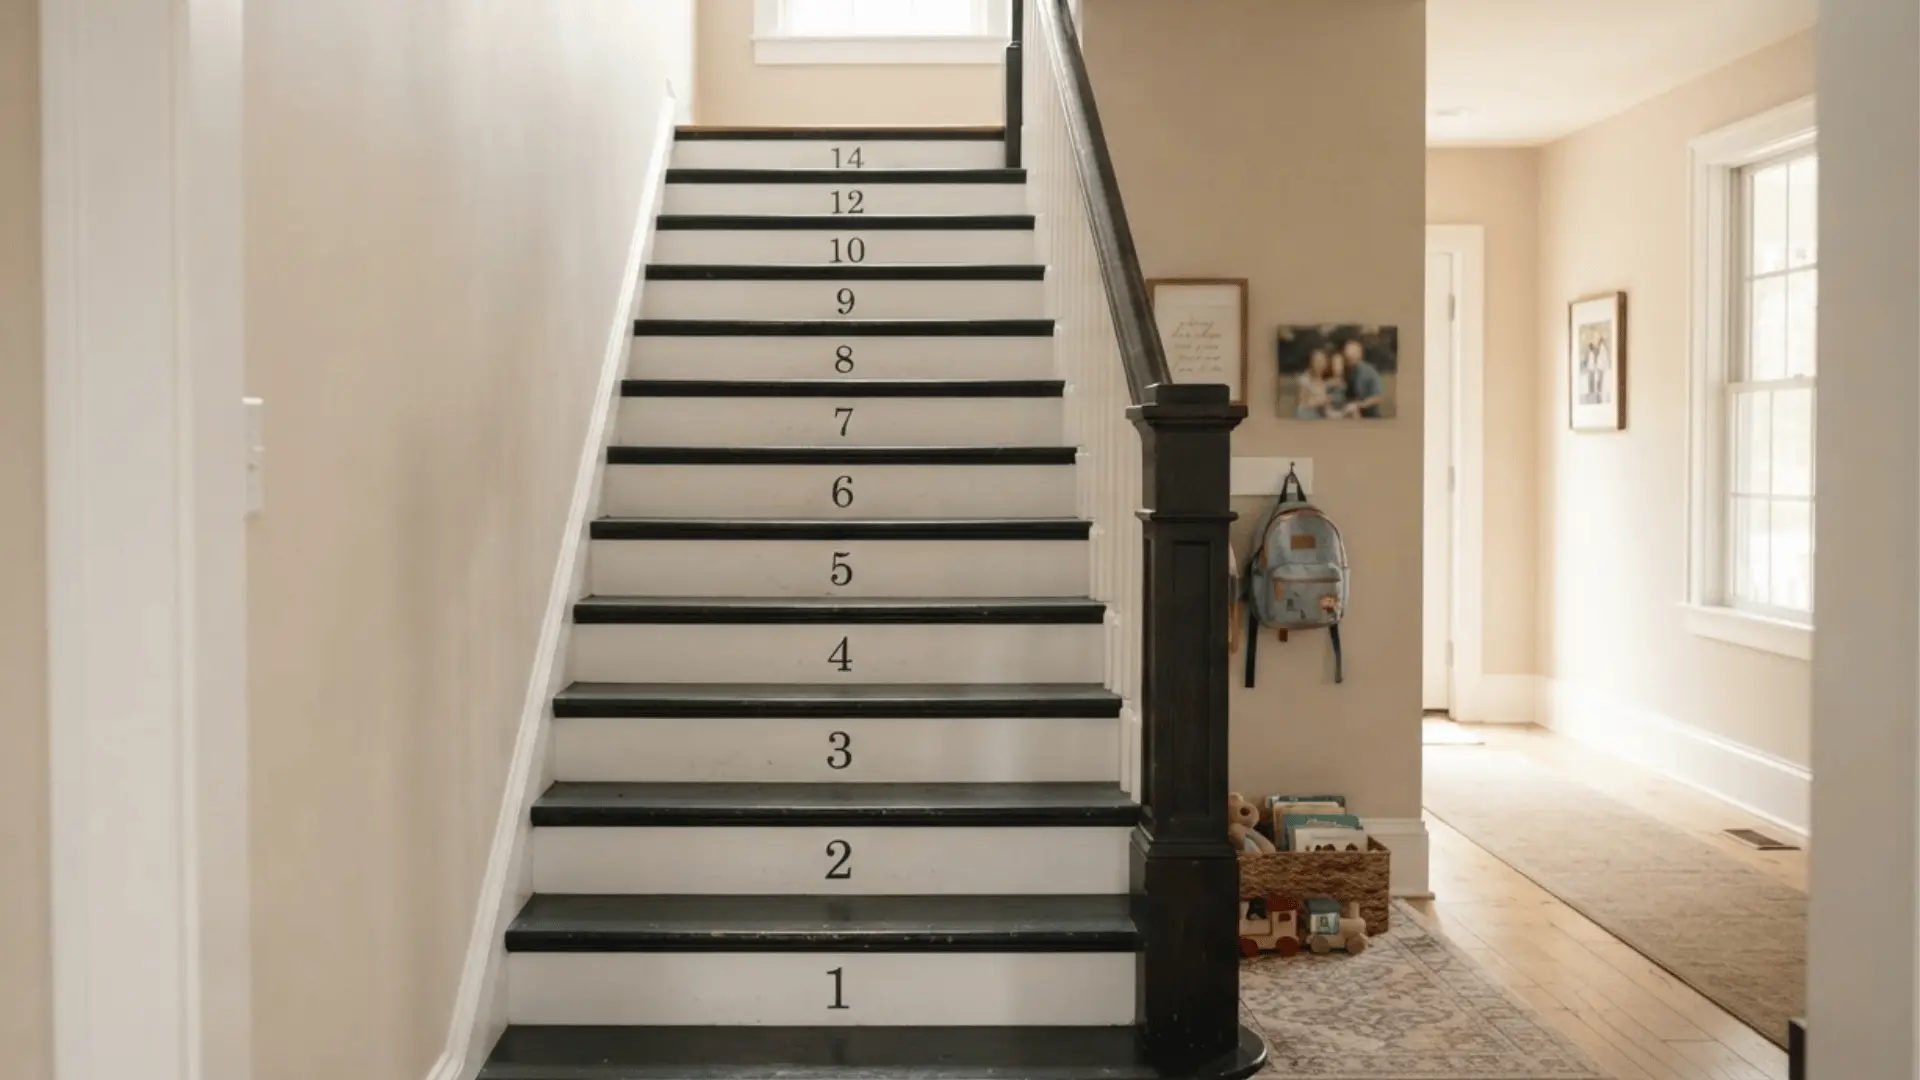
Painted numbered stairs can make a staircase feel fun and personal, especially in family spaces. This idea works well on basement stairs, playroom stairs, or casual back entries.
Each riser can show one number in a clean stencil or painted style. Keep the numbers simple, spaced well, and easy to read so the staircase still feels neat.
- Best for: Kids’ spaces, learning corners, and relaxed homes.
- Pair with: White risers, dark treads, or soft wall colors.
- Keep in mind: Use clean numbers that fit the rest of the room.
13. Terracotta Painted Risers
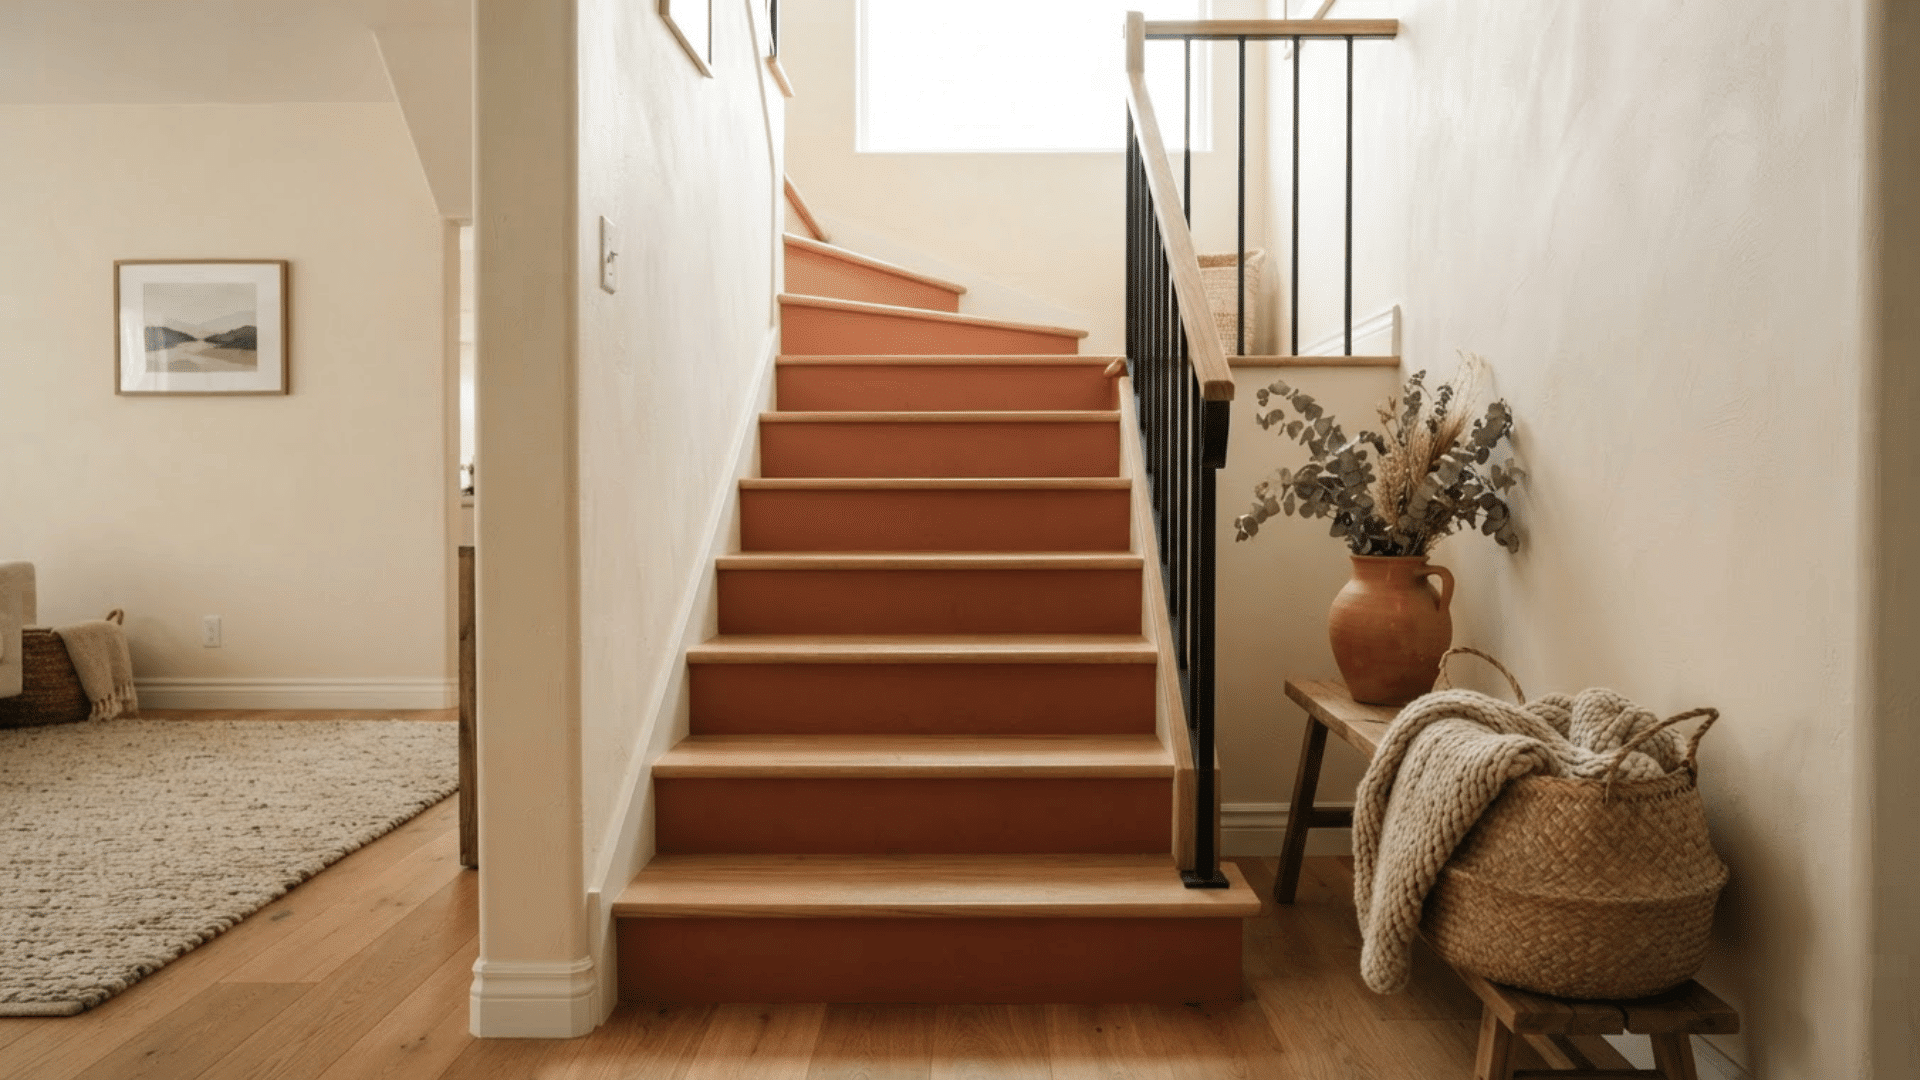
Terracotta-painted risers bring warmth to a staircase without using bright red or orange. This color works well with cream walls, wood floors, clay decor, black accents, and natural textures.
It is a good choice when the rest of the home already uses warm tones. Use it on risers if you want color but want the treads to stay practical.
- Best for: Warm interiors, entryways, and rustic homes.
- Pair with: Cream walls, clay decor, black accents, and wood floors.
- Keep in mind: Use it on risers if you want color without heavy upkeep.
14. White Painted Stairs
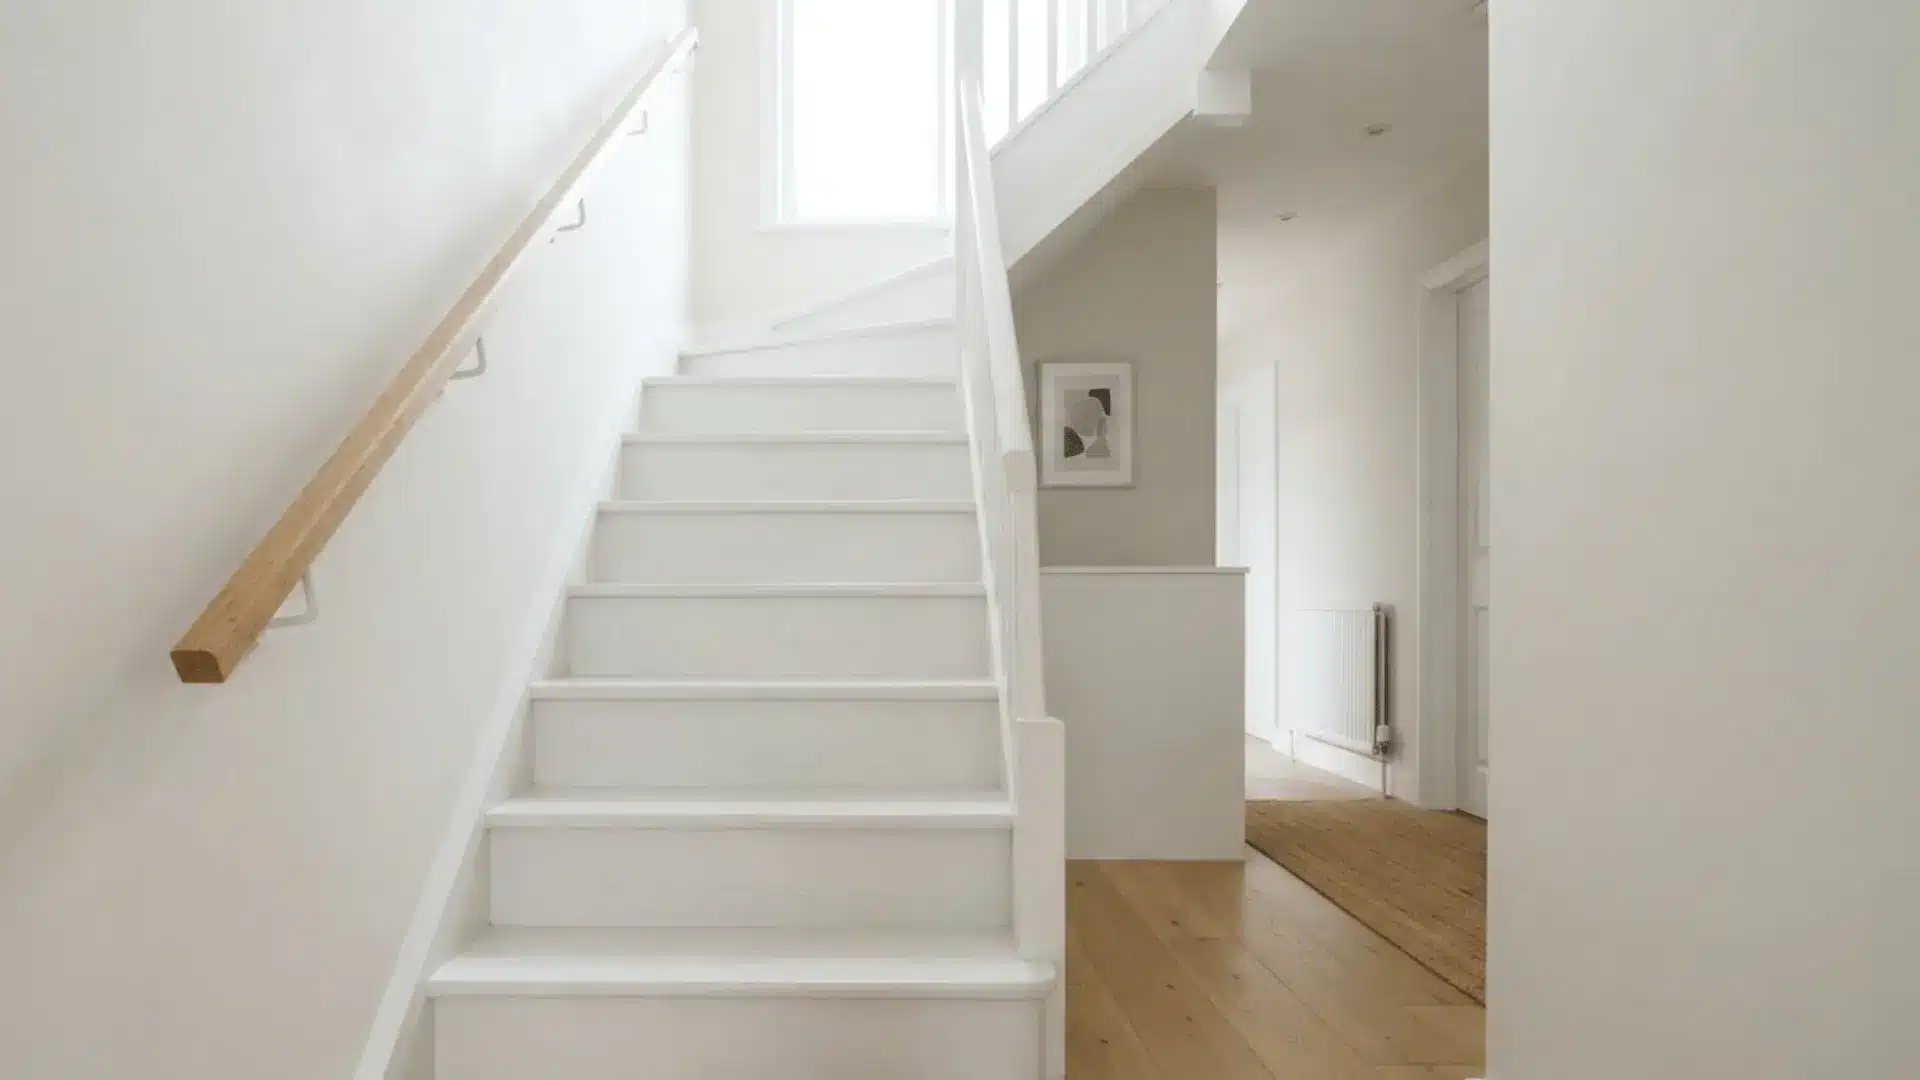
White painted stairs can make a dark stairwell feel brighter and cleaner, especially when the walls are also light.
This idea works best in homes where shoes are removed indoors or where the staircase does not get heavy daily traffic. Since white shows scuffs quickly, use durable floor paint and save leftover paint for small touch-ups later.
- Best for: Small homes, dark stairwells, and light interiors.
- Pair with: Simple railings, pale walls, and wood accents.
- Keep in mind: White shows marks quickly, so keep leftover paint for touch-ups.
15. Color Block Painted Stairs
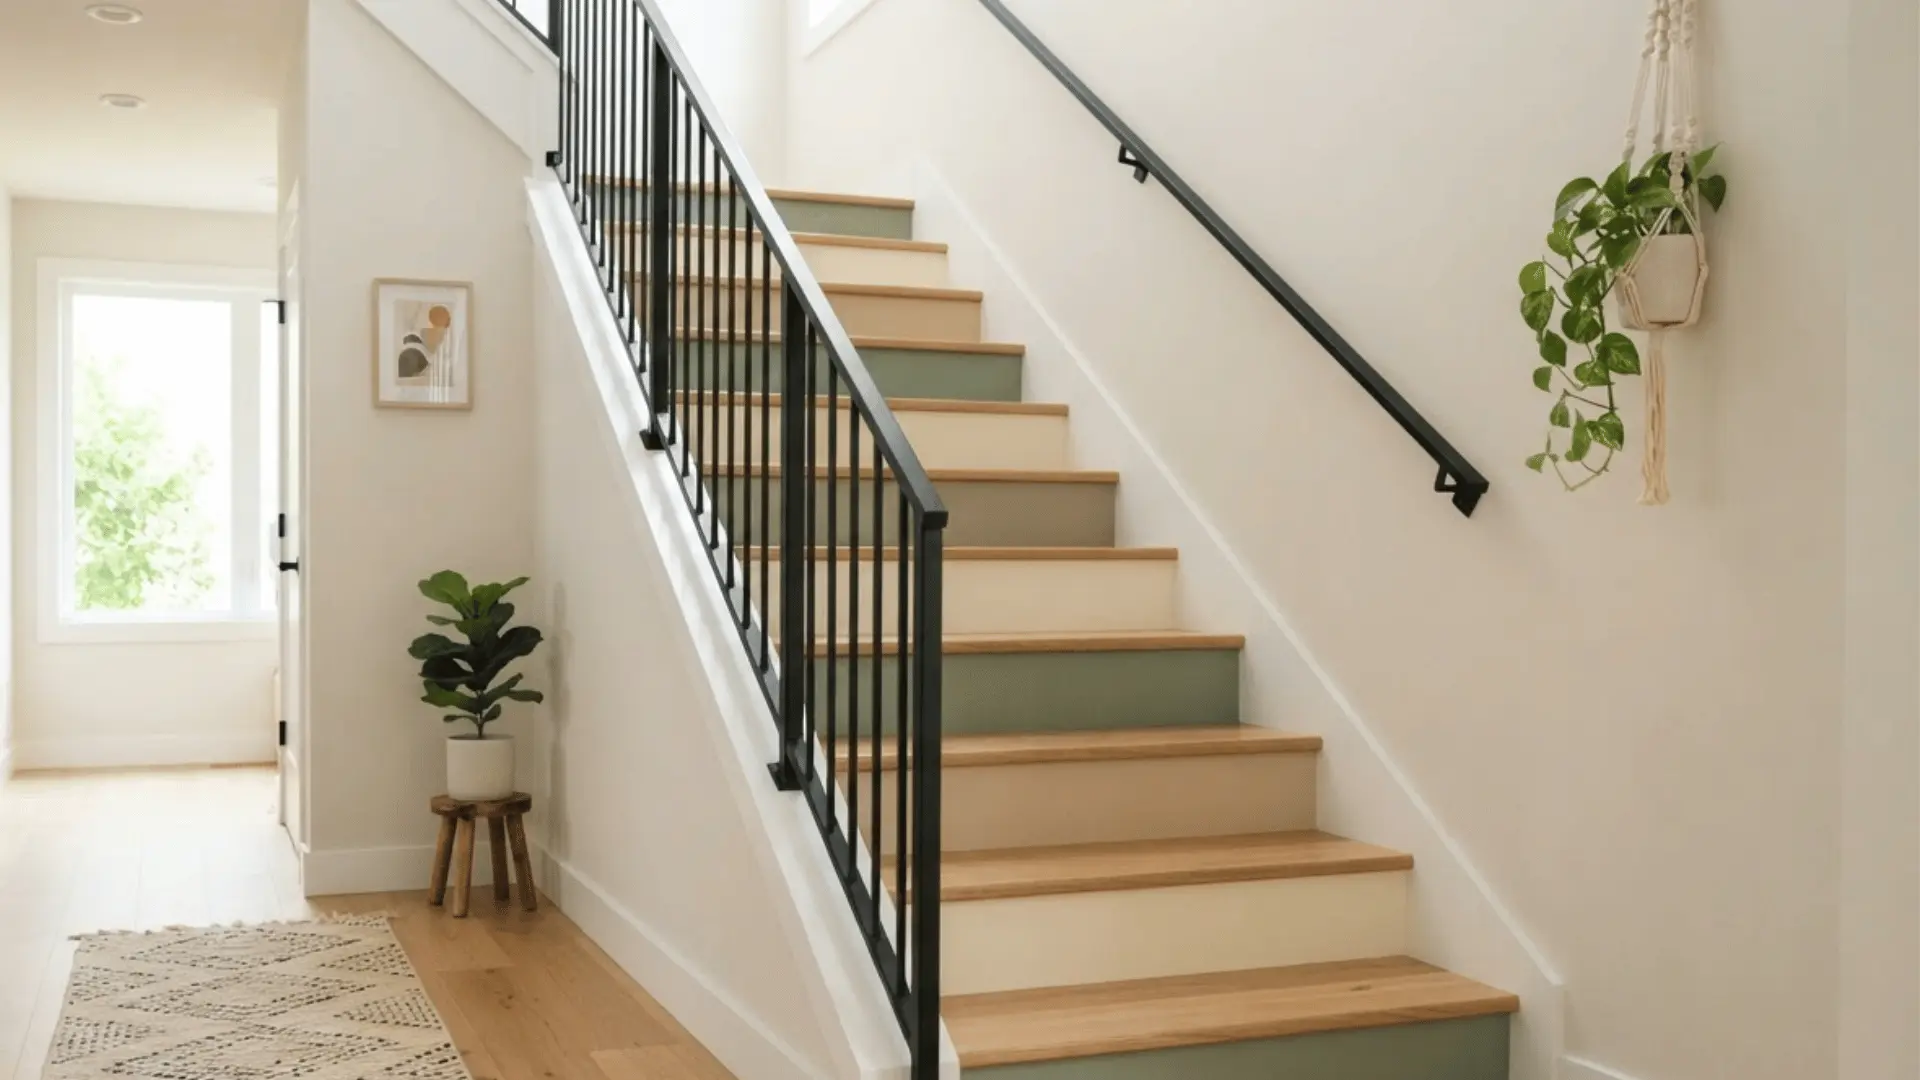
Color-block painted stairs use clear sections of color on risers, treads, or side trim. You can use two colors for a simple look or three related shades for more contrast.
This works well in kids’ spaces, creative homes, and modern hallways. Keep the railing and nearby walls simple so the staircase does not feel too heavy.
- Best for: Kids’ spaces, creative homes, and modern hallways.
- Try: Green with cream, navy with white, or gray with beige.
- Keep in mind: Keep the railing simple so the stairs stay balanced.
Painted Stairs With or Without a Runner
Painted stairs look clean and fresh, but some homes need more grip, softness, or noise control. Before you decide, compare plain painted stairs with a carpet runner or a painted runner.
| Option | Best For | Pros | Cons |
|---|---|---|---|
| Painted Stairs | Budget updates | Affordable, easy to style, and available in many colors | Can chip and may need touch-ups |
| Carpet Runner | Grip and comfort | Adds traction, softness, and noise control | Costs more and traps dust |
| Painted Runner | Runner looks without fabric | Gives a framed look and avoids carpet upkeep | Needs careful taping and measuring |
Renter-Friendly and Reversible Painted Stair Ideas
If you rent or do not want permanent paint, you can still achieve a painted-stair look without altering the original staircase.
The safest option is to choose updates that can be removed later without sanding or repainting the stairs. Try these renter-friendly ideas:
- Peel-and-stick riser decals: These add color or pattern to risers without painting the stair surface.
- Removable stair runner: This adds softness and grip without painting the treads.
- Temporary tread mats: These can add traction and cover worn steps without a full stair update.
- Painted hardboard riser panels: Paint thin panels separately, then place them over risers instead of painting the stairs directly.
- Low-tack stair-safe tape designs: Use only if the product is safe for your stair finish and can be removed cleanly.
Always check your lease before changing stairs, railings, or trim. Take clear photos before starting so you have a record of the original condition.
Common Mistakes to Avoid When Painting Stairs
Most painted-stair problems stem from rushed prep, the wrong paint, or not giving each coat enough time to dry. These mistakes can make the finish peel, scuff, or feel unsafe underfoot.
| Mistake | Why is it a Problem | Better Choice |
|---|---|---|
| Skipping sanding | Paint may peel or sit unevenly on glossy stairs | Lightly sand the surface before priming |
| Using wall paint | It is not made for foot traffic | Use porch, floor, or stair paint |
| Painting thick coats | Thick paint dries slowly and can look uneven | Apply thin, even coats |
| Ignoring grip | Smooth painted stairs may feel slippery | Add an anti-slip finish or texture |
| Rushing dry time | The paint can scuff, dent, or peel early | Let each coat dry as directed |
| Painting all steps at once | It can block access to the stairs | Paint every other step if needed |
| Skipping primer | Stains may show, and paint may not stick well | Prime bare, patched, or glossy areas |
| Not cleaning first | Dirt and oils can stop paint from bonding | Vacuum and wipe the stairs before sanding |
Final Thoughts
Painted stairs are a practical way to refresh a staircase without replacing the whole thing. The final look can be simple, bold, classic, or colorful, but the finish only lasts when the prep is done right.
Start with clean stairs, repair small damage, sand glossy areas, and use primer where needed. Choose durable floor-rated paint for the treads, apply thin coats, and allow enough drying time before regular use.
If the stairs feel too smooth, add grip with an anti-slip finish, painted runner, or carpet runner. The design side matters too.
The right color, contrast, riser detail, or painted runner can help the staircase feel connected to the rest of your home.
A good painted stair project starts with prep, not the paint can. Pick one idea from the list, test a small area, and see how it looks in your home’s light before painting the full staircase.
Frequently Asked Questions
Can I Paint Stairs without Removing the Railing?
Yes, you can paint stairs without removing the railing. Tape around posts and trim carefully, then use a small angled brush for tight edges.
Should I Remove Old Carpet Before Painting Stairs?
Yes, remove old carpet, staples, tack strips, and glue first. The stair surface must be smooth and solid before paint can look clean.
What if My Stairs Already Have Peeling Paint?
Scrape loose paint first, then sand the edges smooth before priming. Painting over peeling areas will usually make the new finish fail faster.
Can I Use Stencils on Stair Risers?
Yes, stencils work well on risers because they do not get direct foot traffic. Use thin paint layers so the design stays crisp.
Do Painted Stairs Work with Wood Floors?
Yes, painted stairs can work well with wood floors. Keep the treads wood-toned or choose stair colors that match nearby floor undertones.

James McLaren, with a rich background in architecture from the University of Manchester, has been contributing his expertise to the world of creative construction and home innovation for over 20 years. His journey began as a project manager for a leading construction firm, where he honed his skills in bringing complex designs to life. James joined our platform as a freelancer in 2019, quickly becoming a favorite for his insightful and practical advice. He has been a pivotal force to our wing ever since, bringing our readers a blend of technical know-how and creative flair. Beyond his professional life, James is an avid woodworker and enjoys restoring vintage furniture, a hobby that complements his professional insights beautifully.