Bathroom plumbing might look complicated at first glance, but it follows a clear and logical system once broken into stages.
Knowing how to plumb a bathroom correctly, from supply lines to drain connections, saves time and money on future repairs.
Every stage, from planning to installation and final testing, is covered below using US plumbing standards to keep the work code-compliant, safe, and built to last.
Basics of Bathroom Plumbing
Before picking up a single tool, it helps to understand the two systems behind how to plumb a bathroom.
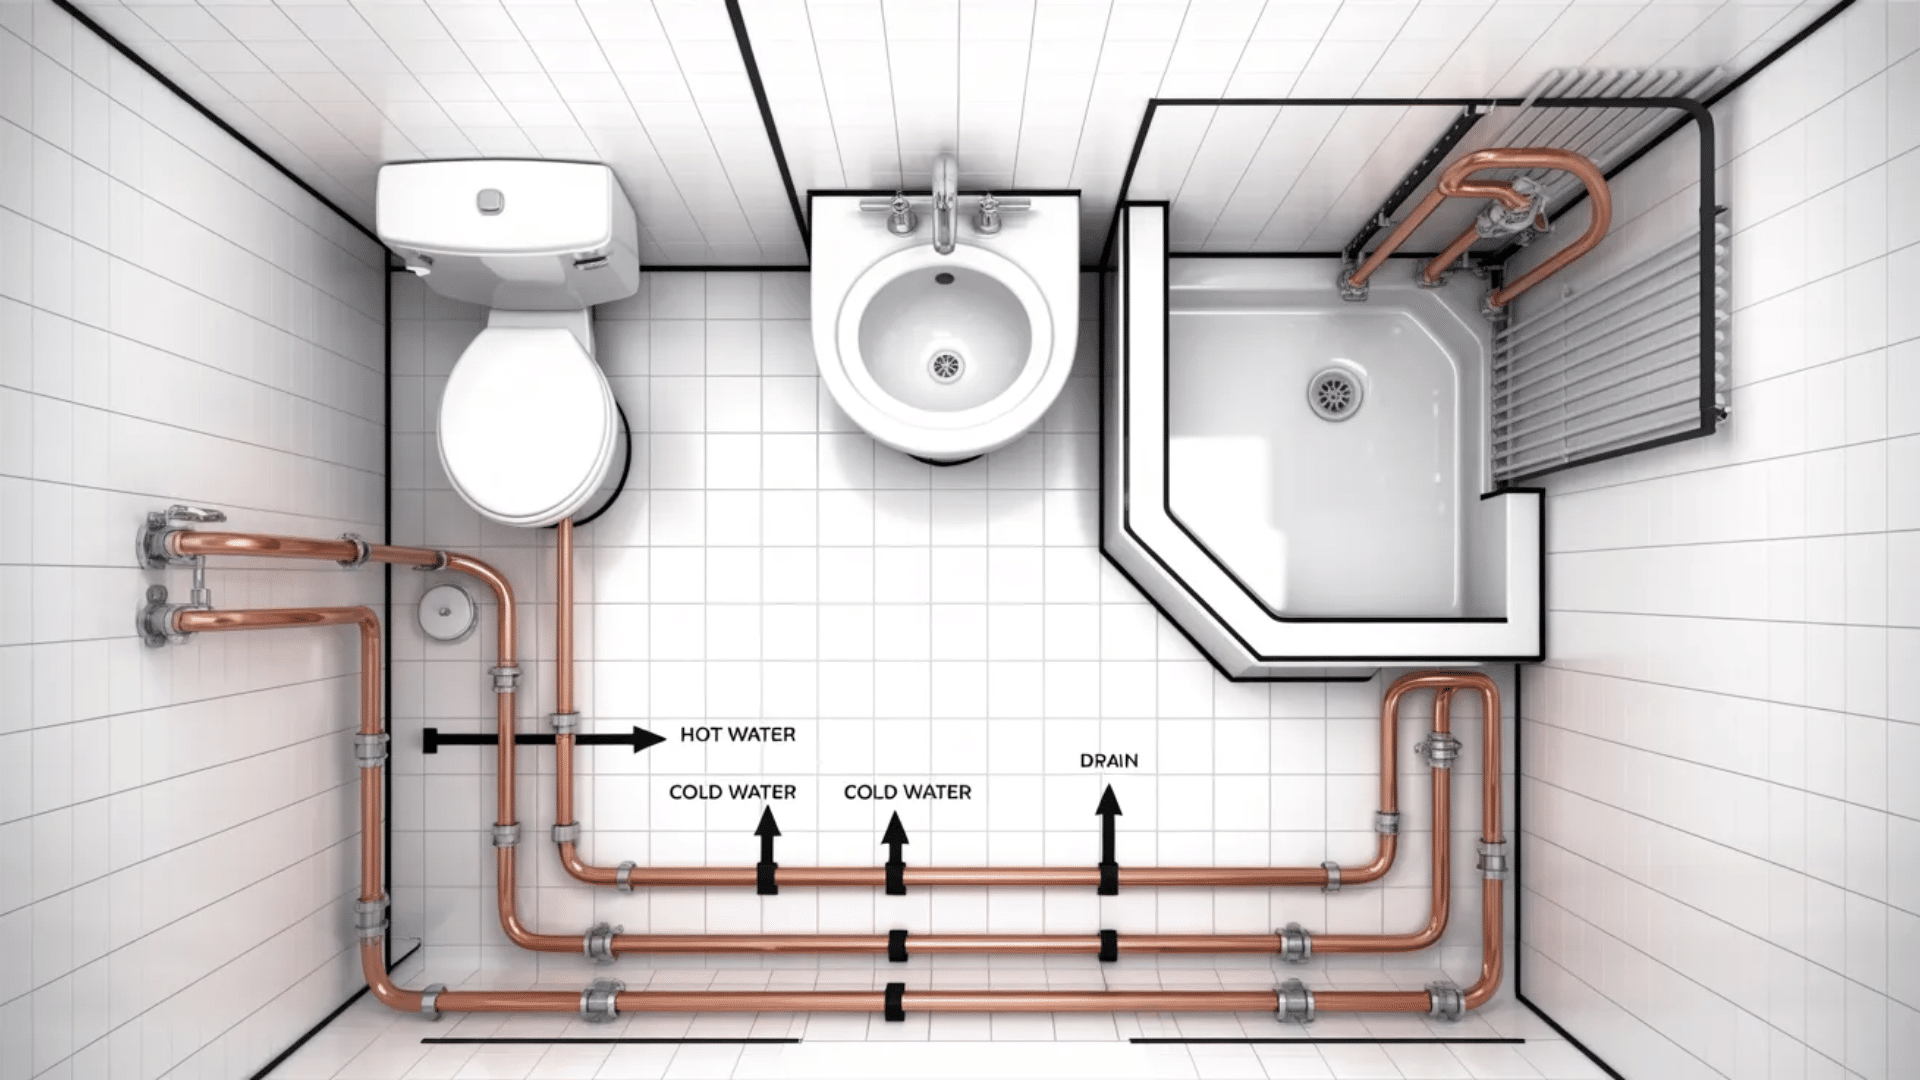
The water supply system (hot and cold) brings pressurized water into the space through dedicated lines, usually made of PEX or copper, connecting directly to fixtures like the sink, toilet, and shower.
The drain-waste-vent (DWV) system, on the other hand, removes used water through gravity while vent pipes regulate air pressure, preventing sewer gases from entering the home.
US Plumbing Codes
| Category | Requirement | Why It Matters |
|---|---|---|
| Permits | Required for new rough-in or full remodel | Avoids legal issues, failed inspections, and insurance problems |
| Toilet Drain Size | 3–4 inch pipe | Handles solid waste efficiently without clogs |
| Sink/Shower Drain Size | 1.5–2 inch pipe | Ensures proper water flow and drainage |
| Supply Line Size | ½ inch pipe | Provides steady water pressure to fixtures |
| Venting Rules | Vent within trap arm distance (≈5 ft for 1.5-inch lines) | Prevents sewer gases and maintains proper airflow |
How to Map Supply and Drain Lines
Getting the layout right early makes the entire plumbing process smoother and more reliable. A few key rules help prevent costly mistakes and ensure everything works as expected.
- Run Supply Lines Correctly: Keep hot on the left and cold on the right, and run lines as directly as possible from the main supply.
- Set Valve Heights in Advance: Mark rough-in heights early (28 inches for tub, 48 inches for shower) for accurate fixture placement.
- Maintain Proper Drain Slope: Ensure a ¼ inch per foot slope toward the main stack for smooth drainage.
- Avoid Incorrect Angles: Too flat causes backups, too steep lets water outrun solids.
- Install Vent Lines Properly: Each fixture needs a vent within trap arm distance to regulate air pressure and prevent sewer gas issues.
How to Plumb a Bathroom: Step-by-Step Guide
Before starting, take a little time to study your bathroom layout.
In the example shown, the bathroom is a standard5-by-8-foot layout, which is a common size in many US homes. The setup includes a toilet, a 24-inch vanity sink, and a 34-inch shower.
Step 1: Plan and Mark the Layout
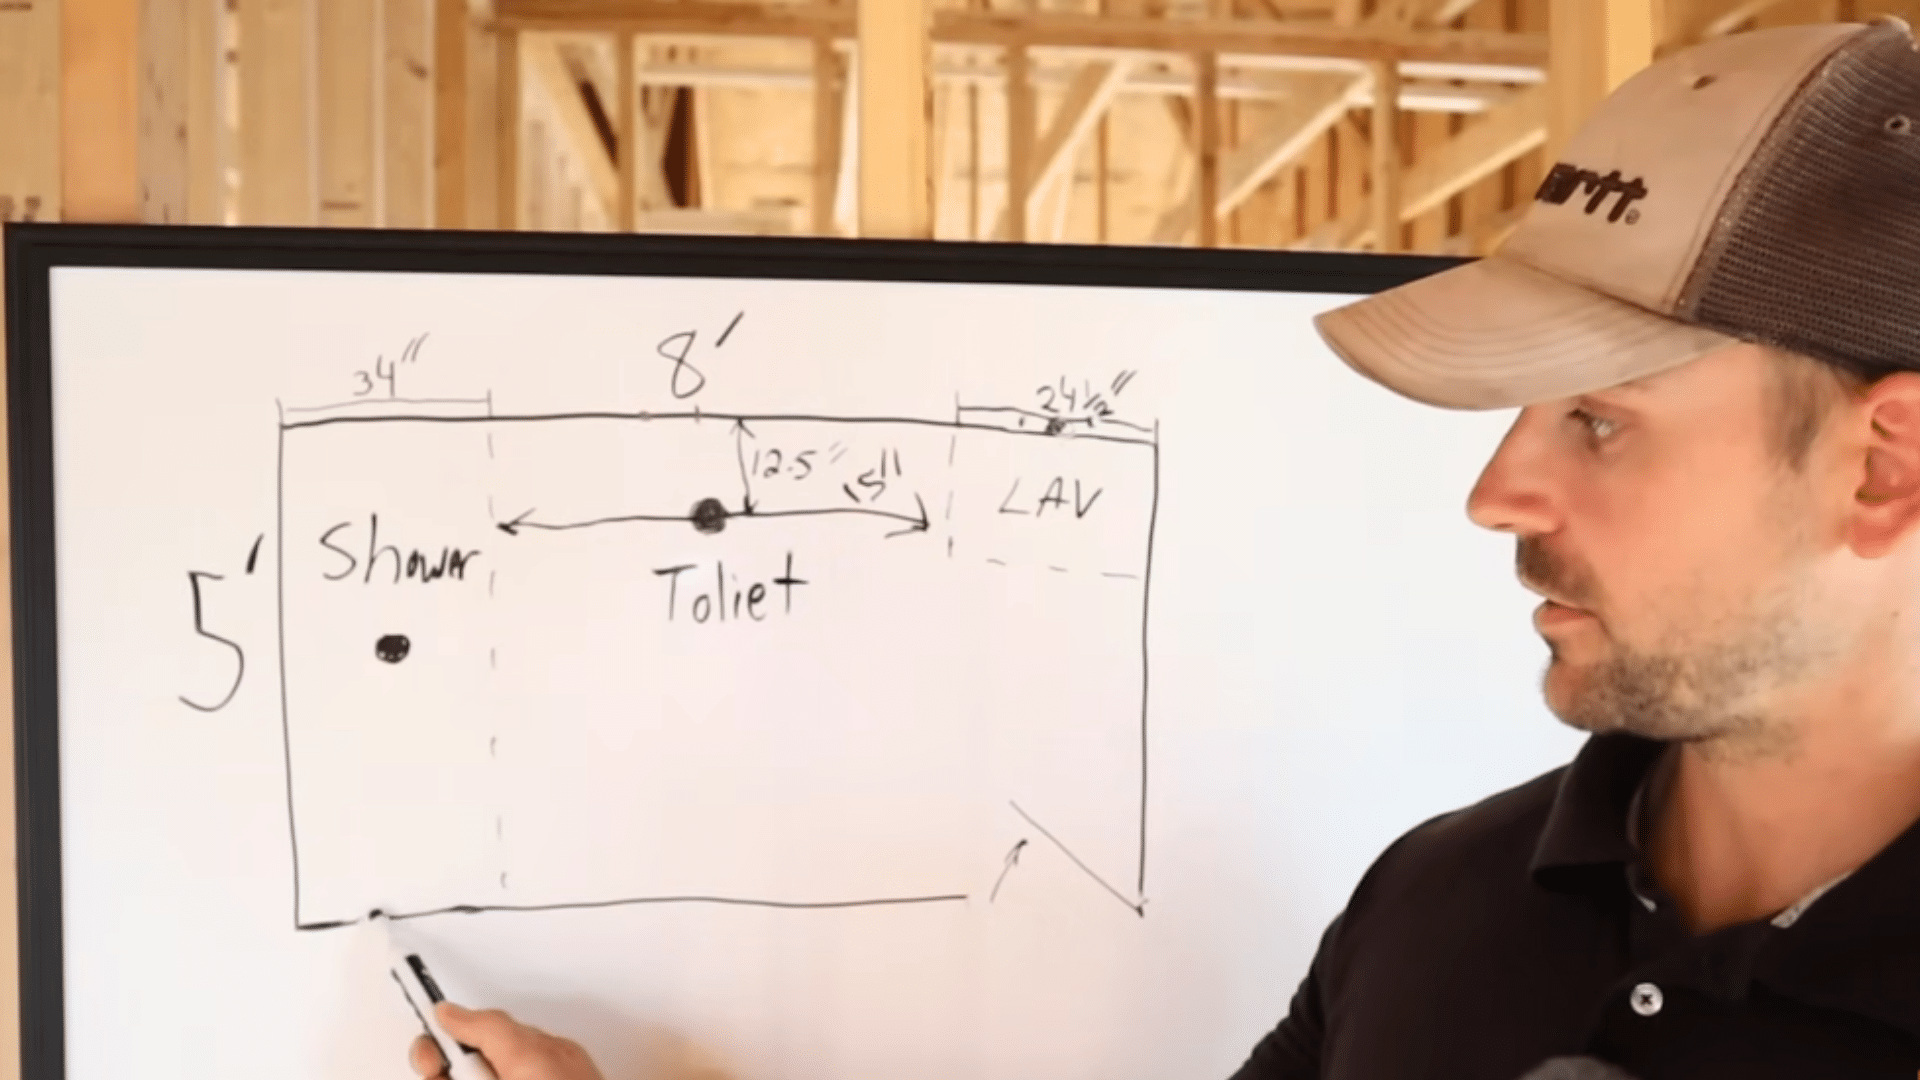
Start by marking the positions of the toilet, sink, and shower on both the floor and walls. This gives you a clear guide before any drilling begins. Dry-fit the shower base to locate the drain accurately and mark the toilet and sink centers clearly.
Check spacing between fixtures and nearby walls to avoid crowding. Taking time at this stage helps prevent alignment issues later and keeps the entire setup organized from the beginning.
Step 2: Measure and Mark the Toilet Rough-In
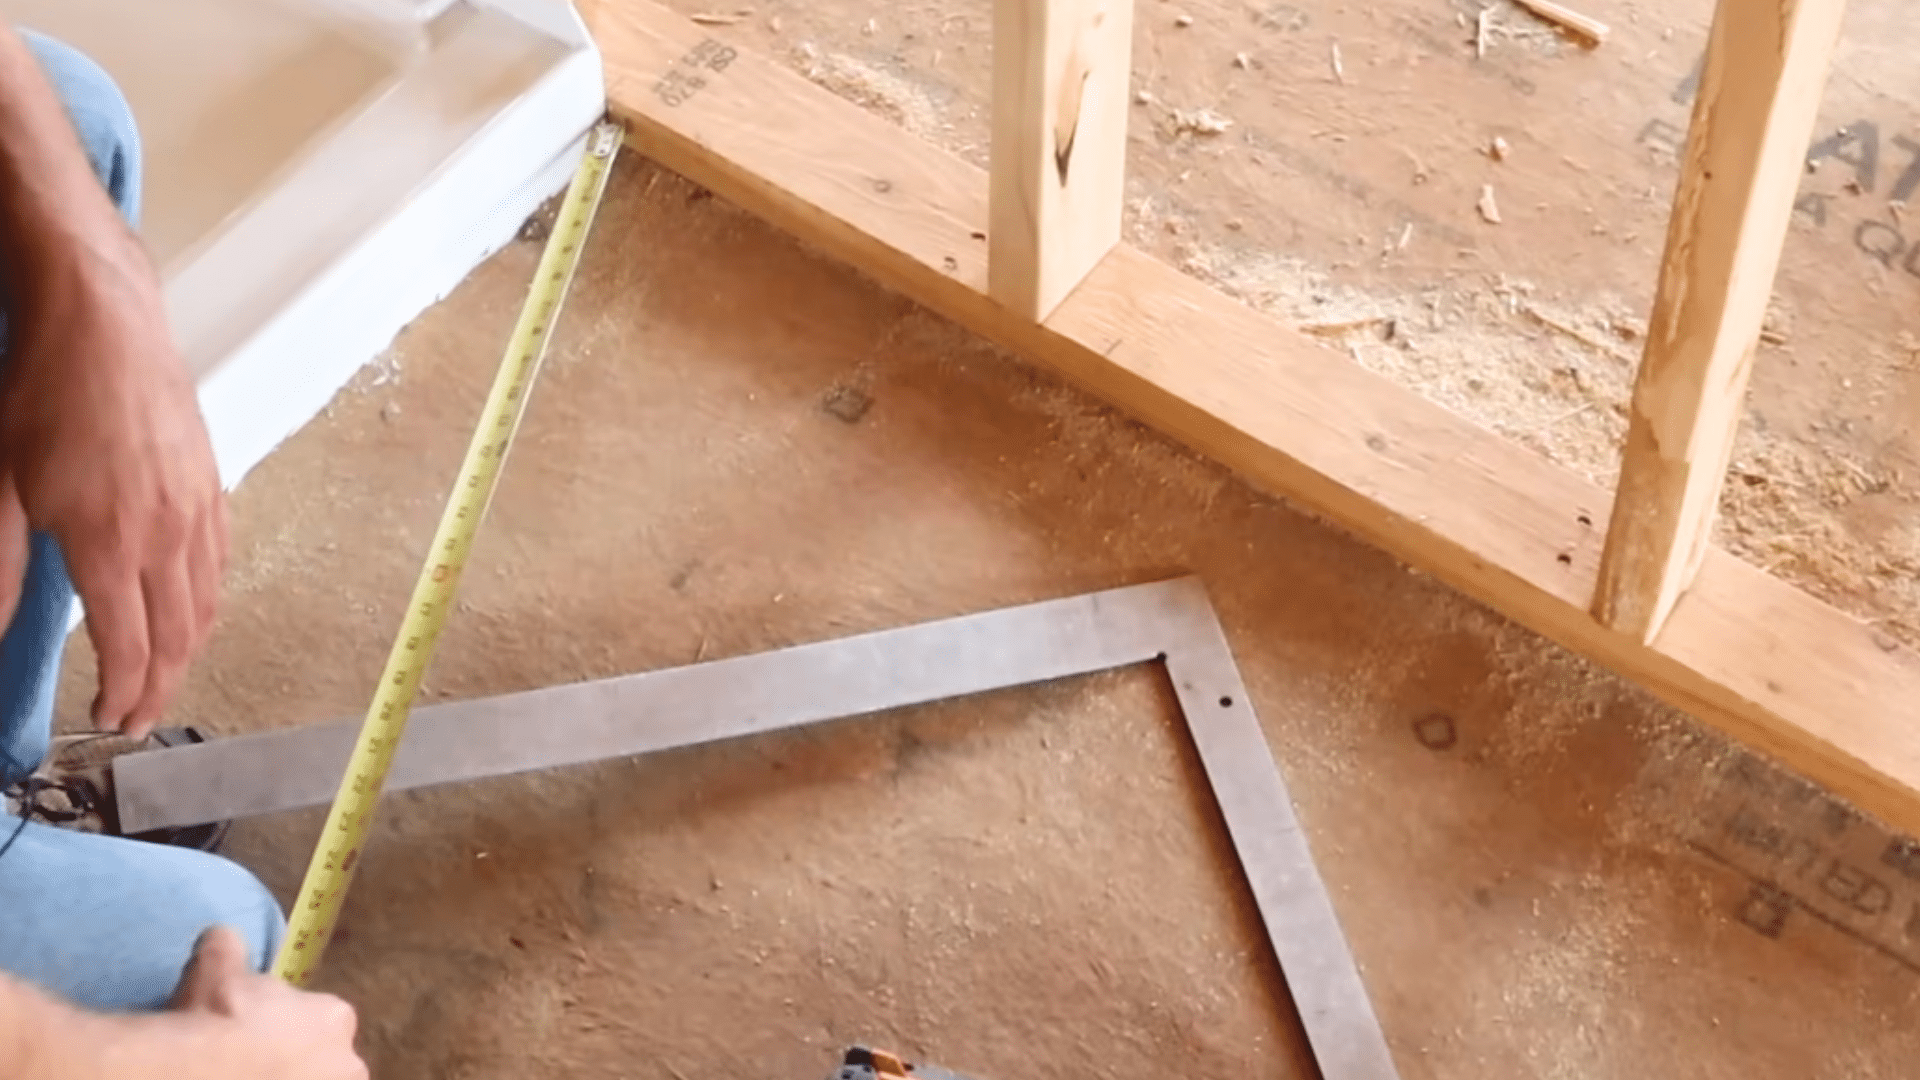
Measure and mark each drain location before cutting.
The toilet center should be 12–12½ inches from the wall, while the sink and shower drains are marked based on fixture placement.
Step 3: Drill All Drain Openings
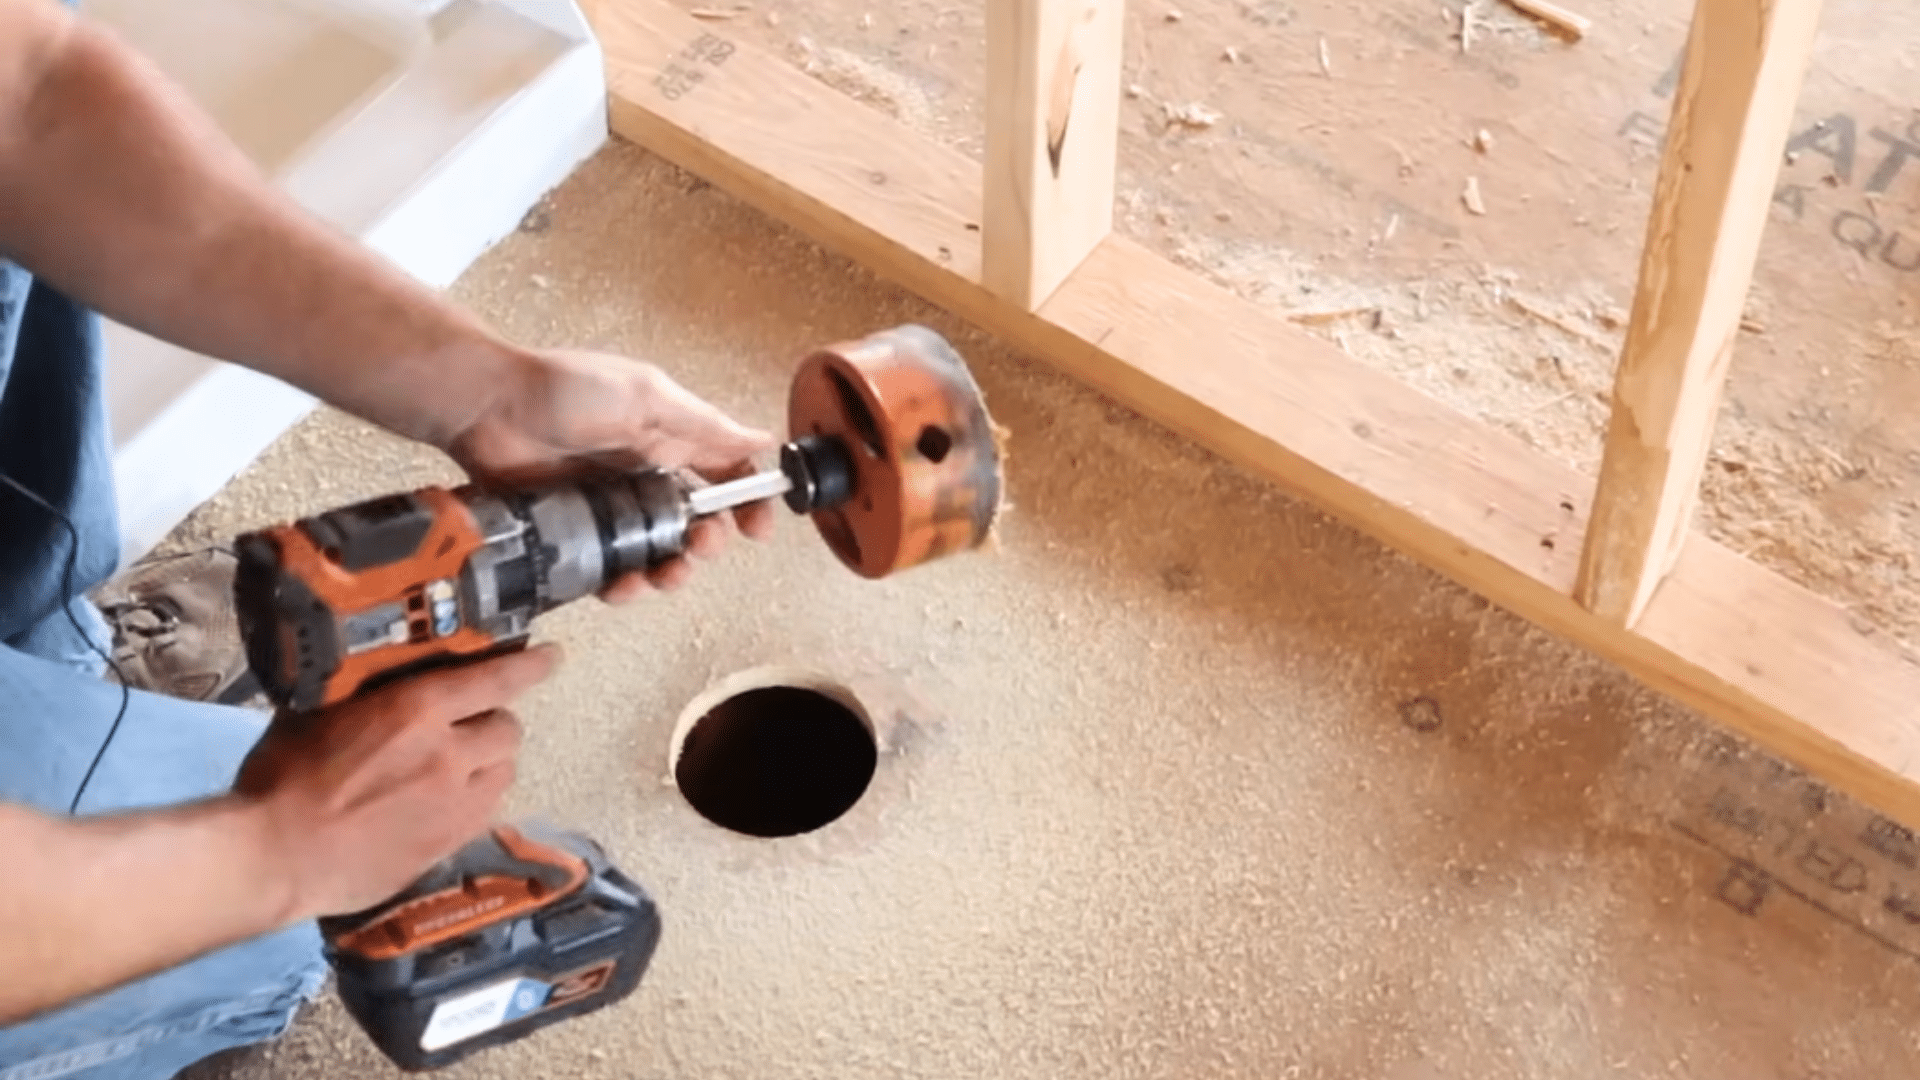
Use a 4½-inch hole saw when cutting the openings for the toilet flange and shower drain, as both require a larger opening to allow the drain fittings to sit properly in place.
For the sink drain, use a 2⅛-inch hole saw, which is the standard size for fitting a 1½-inch drain pipe through the framing and subfloor.
Step 4: Drill Water Supply Line Openings
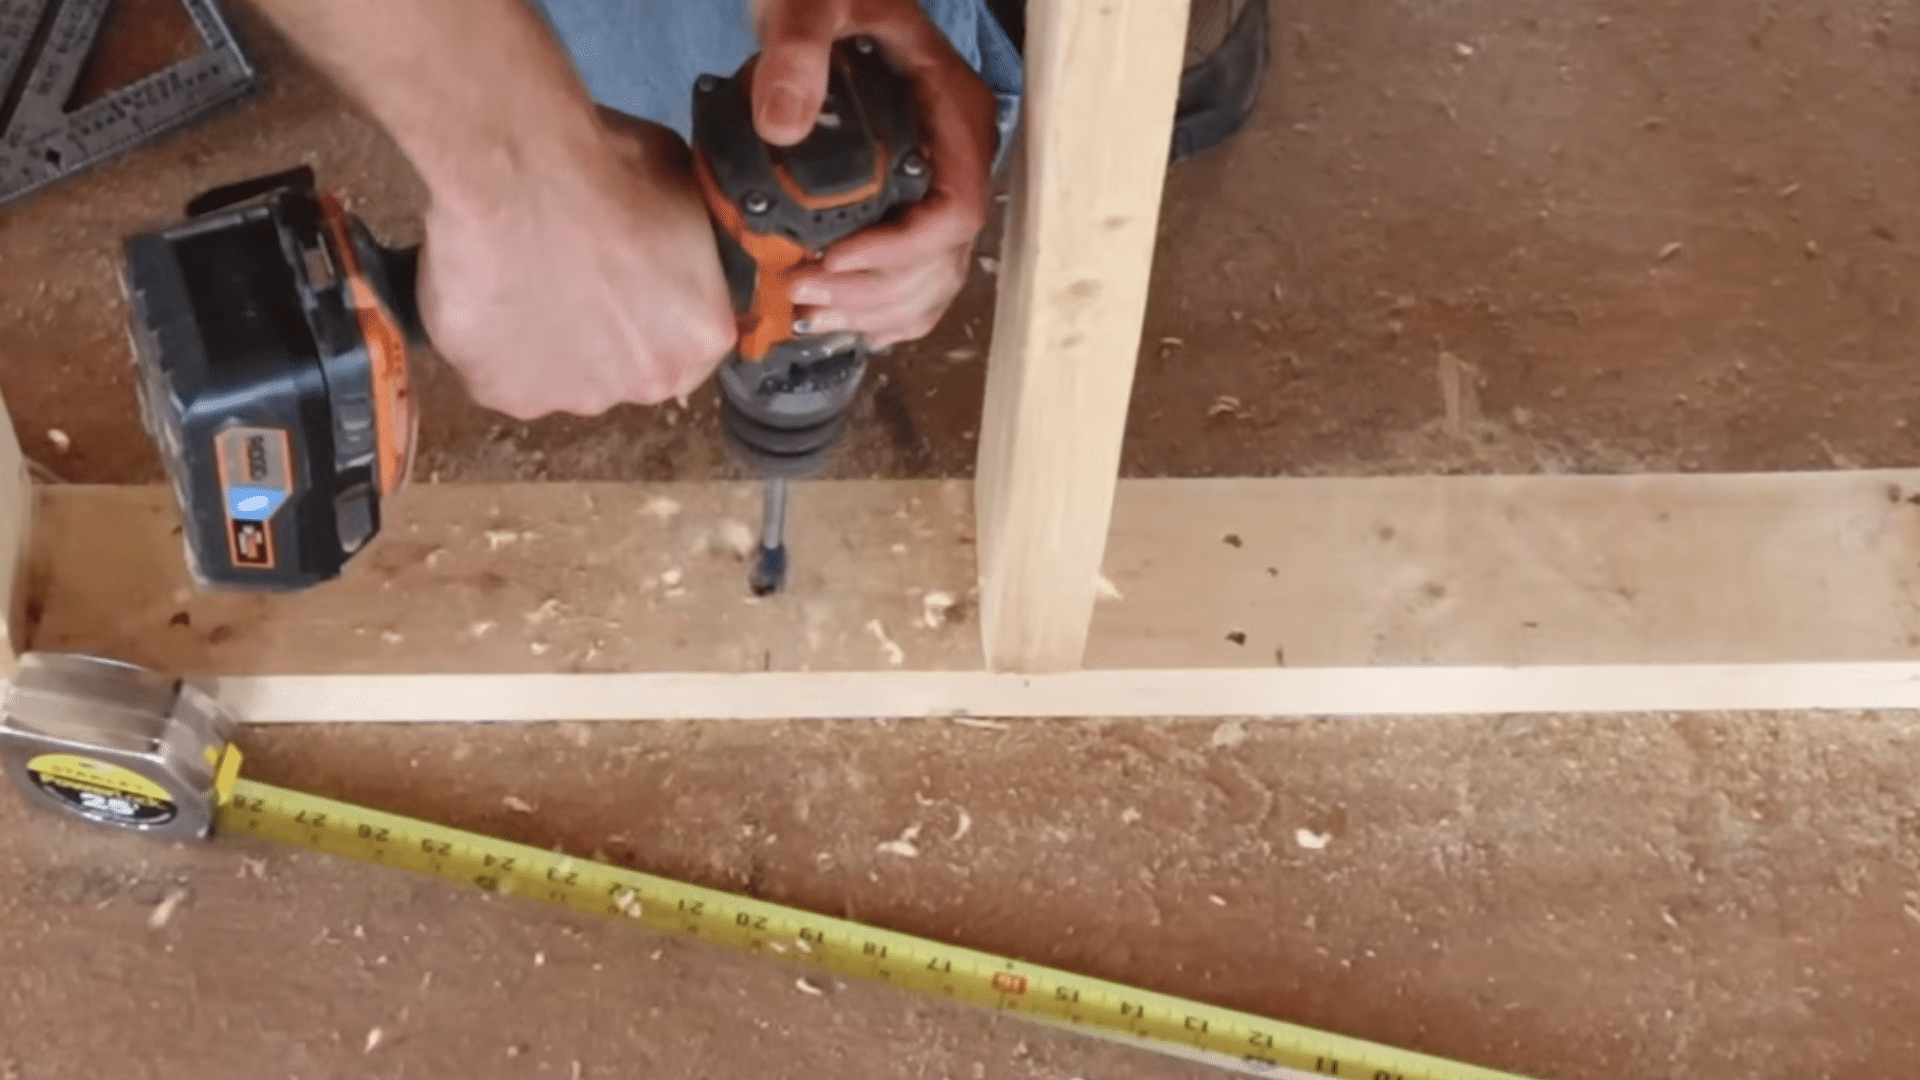
Mark and drill holes for water supply lines after the drains are done. Keep the standard rule in mind: hot water on the left, cold on the right.
For the sink and shower, place supply lines about 4 inches from the center. Use a 5/8-inch drill bit for ½-inch pipes, and adjust placement slightly if a floor joist blocks the path.
Step 5: Build the Sink Drain and Vent System
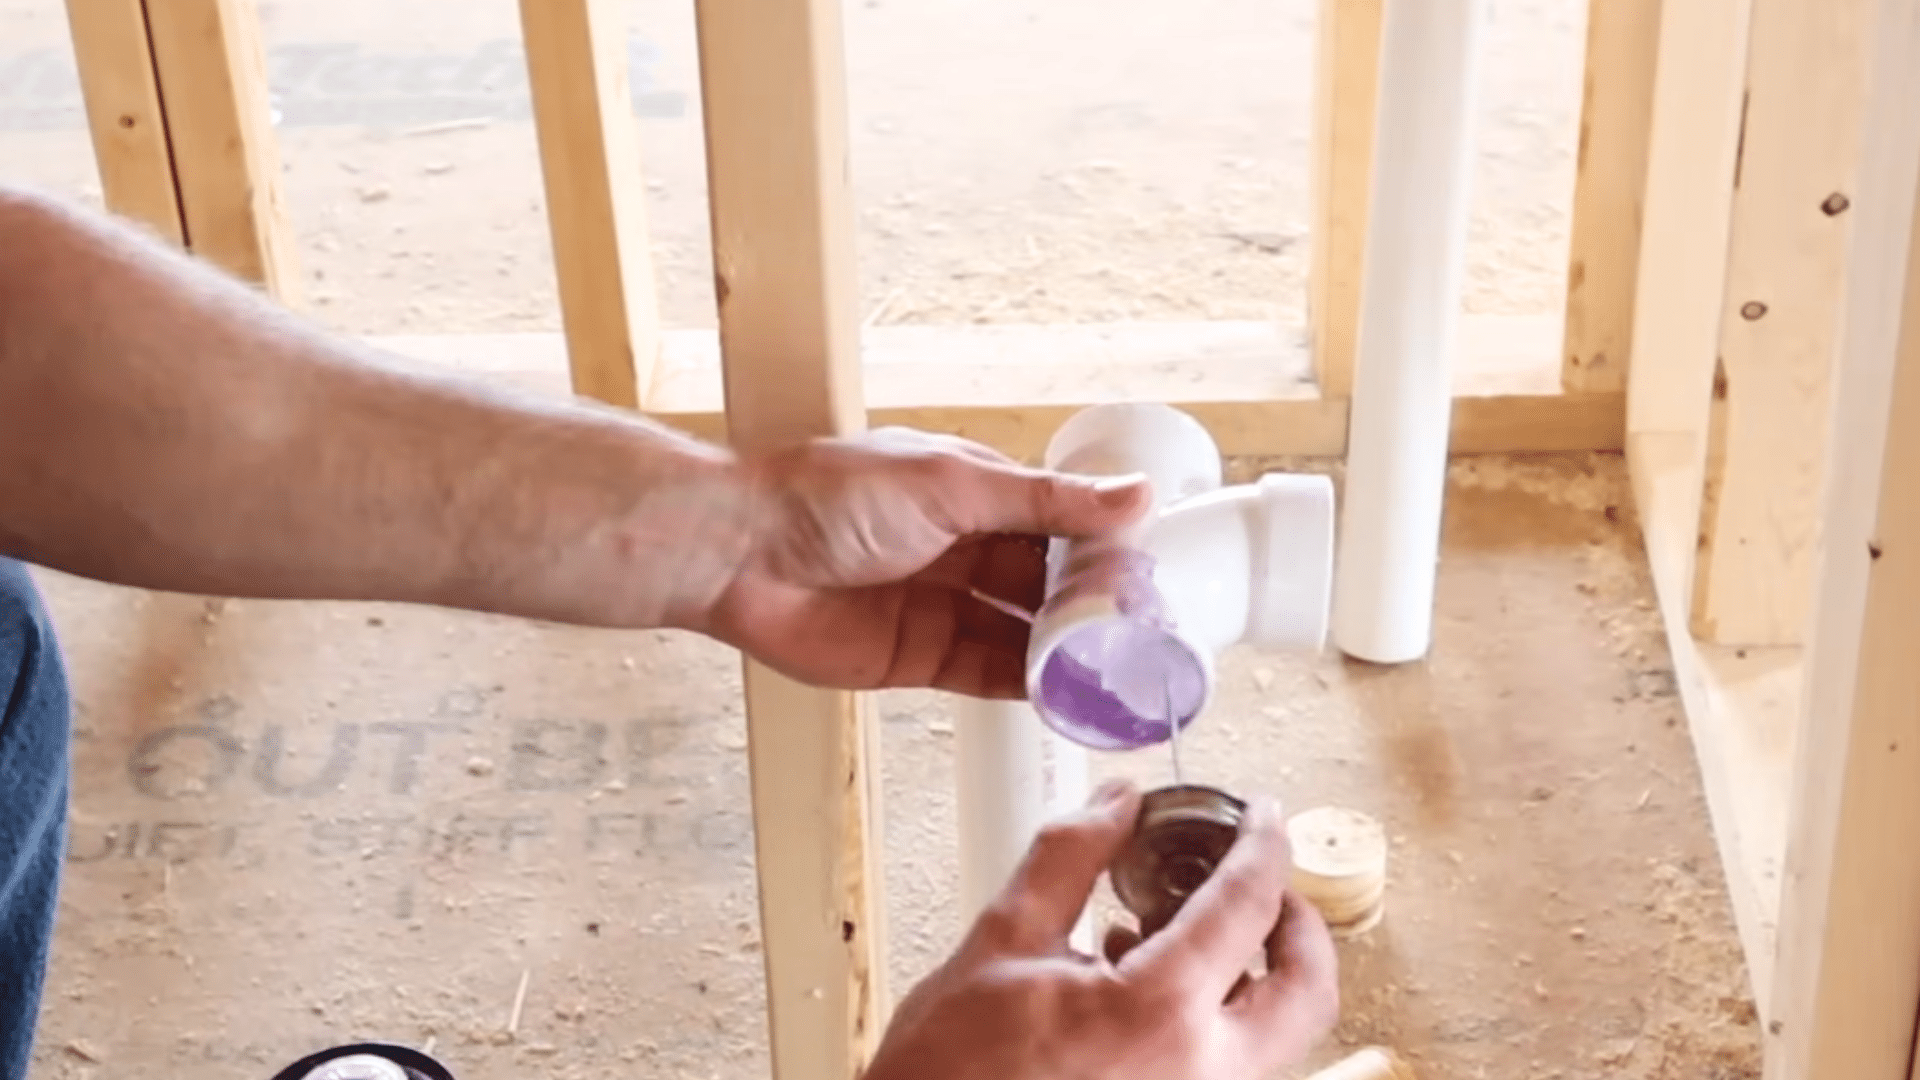
Install a 1½-inch sanitary tee at the correct height for the sink drain. Cut the pipe cleanly, remove burrs, and use primer and PVC cement to secure all joints.
Attach the vent pipe and run it upward through the wall. Proper venting helps maintain airflow and prevents drainage issues.
Step 6: Connect Vents and Prepare Final Hookups
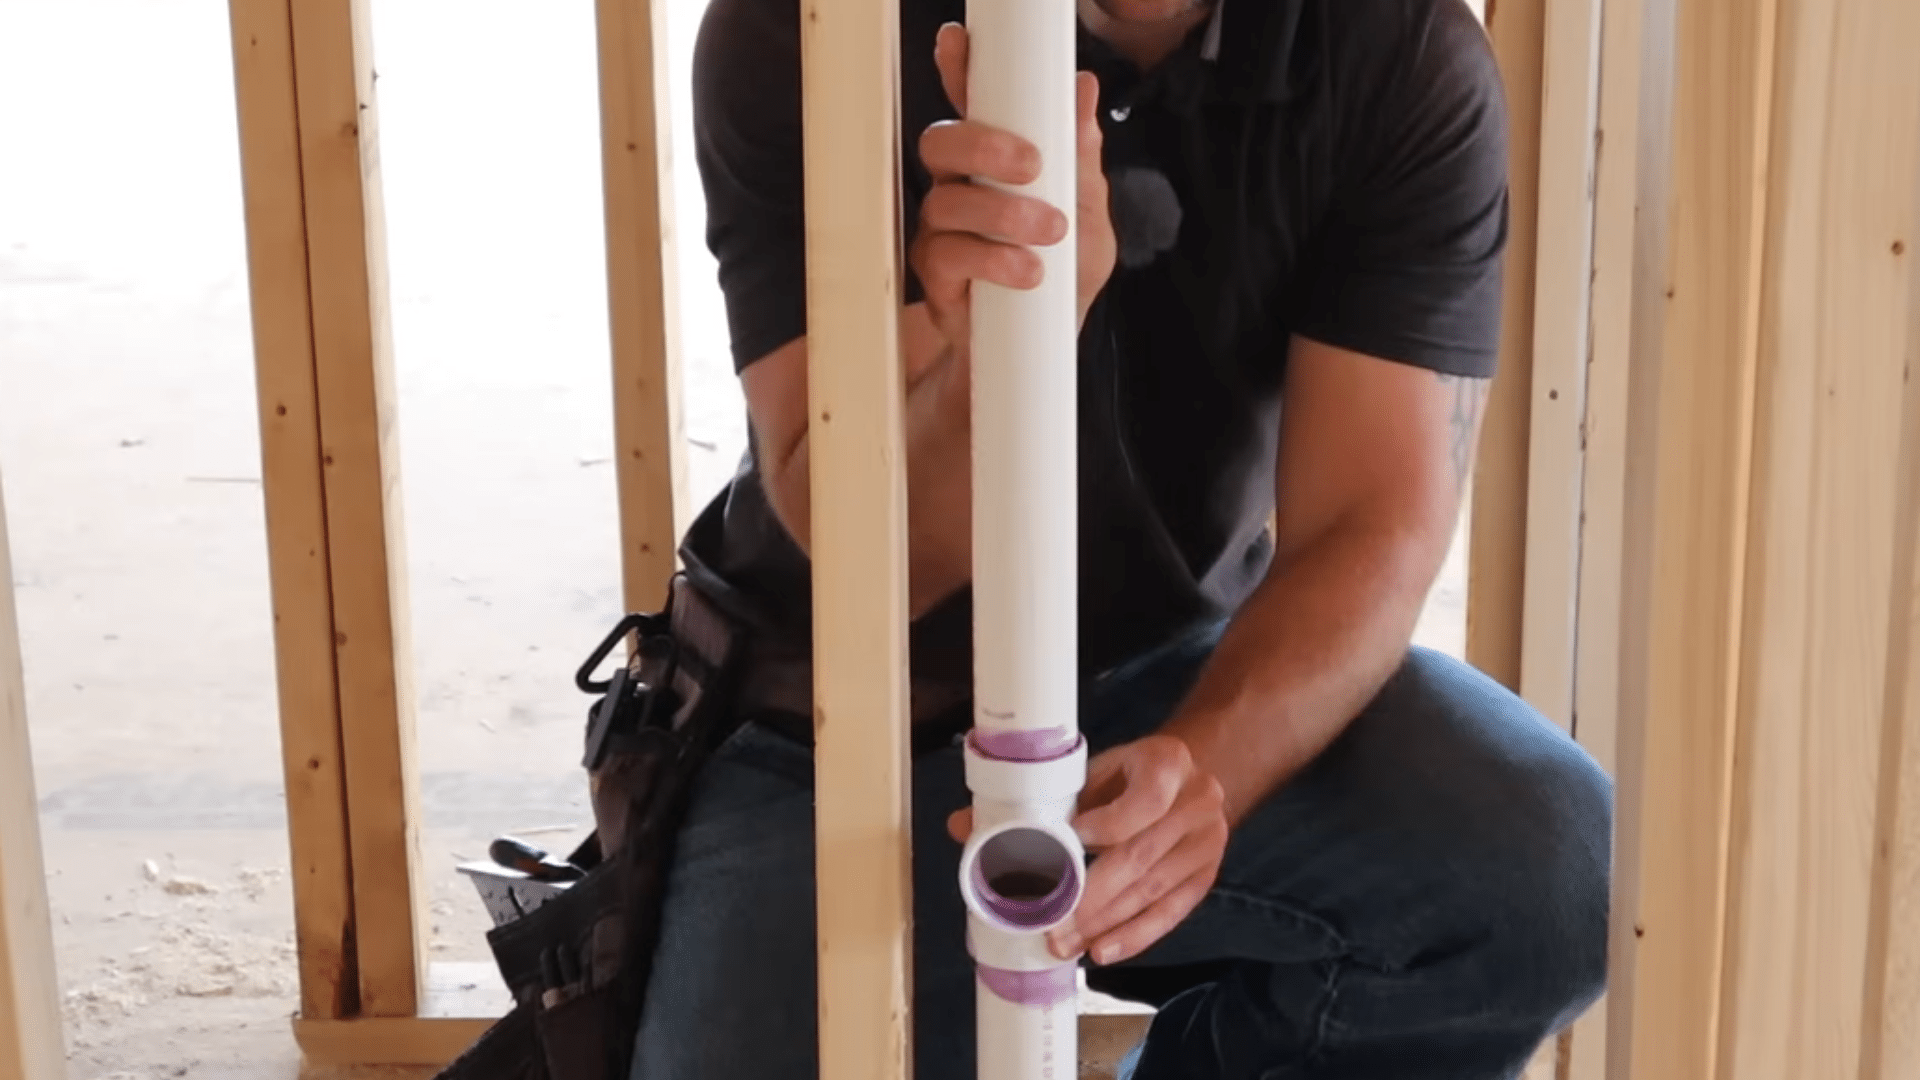
Join the sink and toilet vents together and connect them to the main vent stack that runs through the roof. This ensures proper air pressure across the system.
For the final setup, connect supply lines, install shut-off valves, and attach fixtures like the sink, toilet, and shower. Test the system to check for leaks and proper flow before closing walls.
Check out the full video below:
Bathroom Plumbing Cost Breakdown in the US
Costs can vary based on project size, materials, and labor involved. Understanding typical price ranges helps you plan your budget and avoid unexpected expenses.
| Project Type | Cost Range | What It Includes |
|---|---|---|
| Fixture Replacement (DIY) | $75–$400 | Basic swaps like faucets, showerheads, or toilets (materials only) |
| Full Bathroom Rough-In (DIY Materials) | $500–$1,200 | Pipes, fittings, and basic materials without labor |
| Professional Full Bathroom Plumbing | $4,000–$8,000+ | Complete installation including labor, materials, and setup |
| Licensed Plumber Hourly Rate | $100–$200/hour | Standard labor for repairs, installs, or inspections |
| Emergency Plumbing Services | $250–$500/hour | Urgent repairs outside regular working hours |
Common Mistakes to Avoid
Small plumbing errors can lead to bigger issues later, from leaks to drainage problems.
- Wrong Pipe Slope – The slope must be set during layout. Fixing it later often means cutting out and redoing entire pipe sections.
- Missing Vent Connections – Skipping vents leads to slow drainage, gurgling sounds, and sewer gas entering the home.
- Skipping PVC Primer – Using cement alone is not code-compliant in most US areas and can weaken joints over time.
- Ignoring Permits – Unpermitted work can void insurance coverage, delay home sales, and require costly re-inspections.
Conclusion
Getting bathroom plumbing right comes down to following each step in the correct order.
Planning the layout first, setting proper drain slope early, and testing every connection before closing walls make the entire system more reliable.
Each stage connects to the next. Mistakes in rough-in work can affect venting, fixture placement, and final inspection results.
Taking time to measure carefully and work methodically helps avoid rework and ensures a system that performs well in the long term.

Holding a Master’s in Construction Management from Purdue University, William Ray has dedicated more than two decades to studying and applying construction principles. His professional journey includes a tenure with a prominent construction firm, where he specialized in project management and building technologies. William brought his knowledge to our team, providing in-depth insights into practical construction techniques. As the leader of our beginner’s guide to building since 2019, he has a knack for breaking down intricate processes into easily digestible content. When not involved in writing or onsite consultations, William enjoys woodworking and volunteering in community building projects, which aligns with his passion for hands-on construction and community service.