
A patio slab looks like a ready-made footing: drill a few holes, set wood-to-concrete brackets, and you’re sipping lemonade by Saturday. But if the concrete can’t resist wind uplift or edge breakout, anchors loosen and cracks spider across the slab.
This guide walks you through slab tests, bracket-and-anchor selection, and pro-level installation.
Quick answer: Bolt pergola post bases to a patio only when slab thickness, anchor embedment, edge distance, and full bracing meet load requirements. The familiar 4-inch-concrete rule isn’t proof.
First Decide Whether the Slab can Act as a Footing
Before you pick up a hammer drill, confirm the patio behaves like a footing, not just a floor: measure thickness, test soundness, and check the space around every post location.
Check the Slab Itself
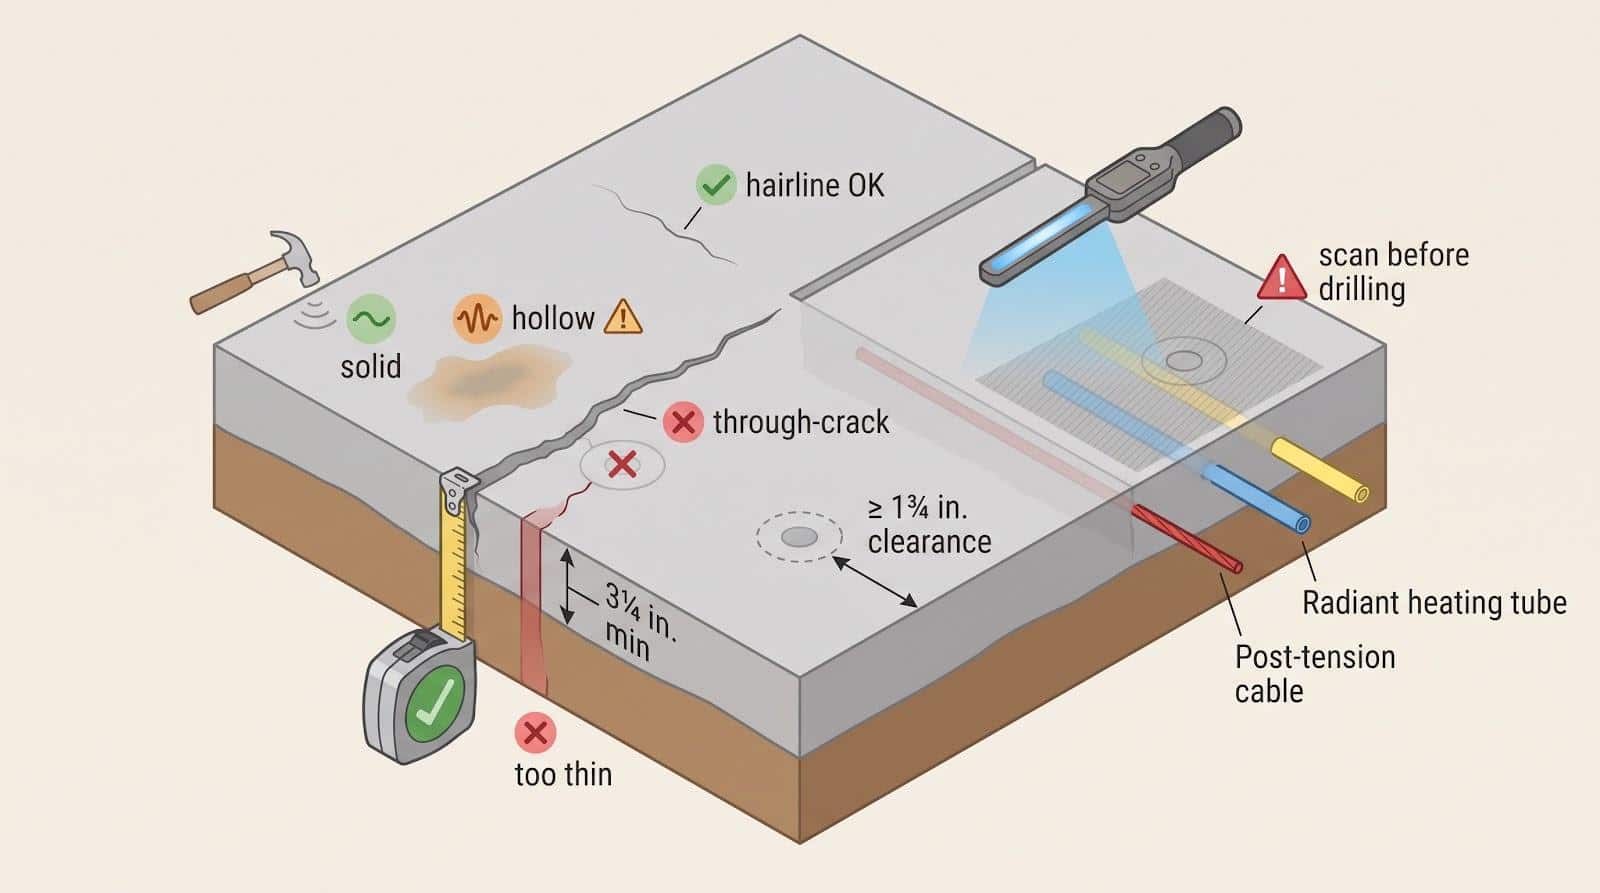
- Measure real thickness. Drop a ruler into a control-joint groove or exposed edge. Screw-anchor reports such as IAPMO UES ER-712 list 3¼ in. (83 mm) minimum concrete thickness for ¼-in. Titen Turbo anchors (forms.iapmo.org). Anything thinner needs a new footing.
- Listen for hollow spots. Tap near each proposed post; a dull thud signals poorly consolidated concrete that will not grip an anchor.
- Read the cracks. Hairline shrinkage cracks that stop at joints are usually harmless. Keep any anchor at least 1¾ in. from a crack or slab edge, the minimum edge distance stated in ER-712. Wider or stair-stepped cracks call for separate piers.
- Scan before you drill. Post-tension cables, radiant tubes, or buried conduit can sit close to the surface. A professional scan costs far less than cutting a tendon or replacing the slab.
Pass all four checks and you can move on to load calculations. Fail any one and plan for new footings instead.
Choose the Bracket and Concrete Anchor as One Connection System
Simpson Strong-Tie’s Outdoor Accents Sage System packages its wood to concrete pergola brackets with the screws and concrete anchors they need, so you’re buying a matched kit instead of a grab-bag of parts. The Sage-B post bases come in two-packs, and each two-pack includes 16 black Titen Turbo concrete screw anchors. The concrete drill bit is not included.
Why the Bracket and Anchor are Inseparable
A post base is only half of a structural connection. The ER-280 load table for the SAGE-B44 and SAGE-B66 bases lists uplift, download and lateral values, then adds a footnote: “Specifier is to design the concrete anchorage, which is outside the scope of this report.” In other words, the steel can hold the wood, but only a verified slab and anchor design can hold the steel.
That’s why you shop for a system, not a grab-bag of parts. For each Simpson Strong-Tie Sage-B post base, the fastener schedule calls for:
- the base,
- twelve SD #10 × 1½-in. screws for the post, and
- eight ¼-in. Titen Turbo concrete screws for the slab,
as listed in the Sage post base table of IAPMO UES ER-280. When you follow that recipe, and confirm the slab meets the anchor report’s 3¼-in. minimum thickness and 1¾-in. edge-distance requirements, you inherit the engineering instead of guessing.
Decorative Multi-Anchor Post Bases
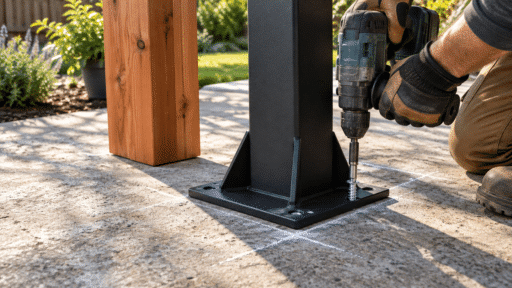
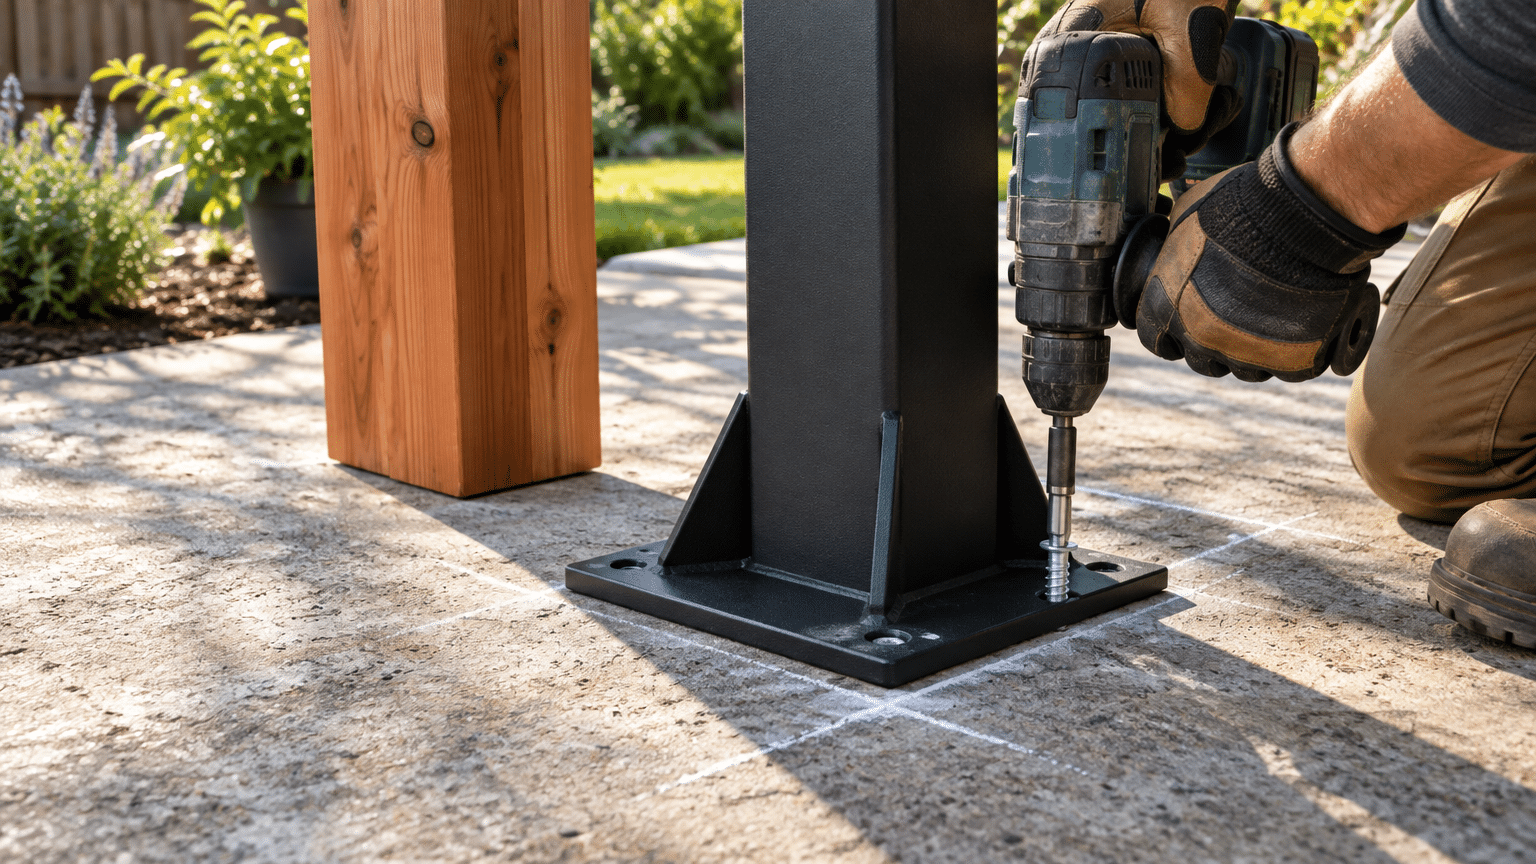
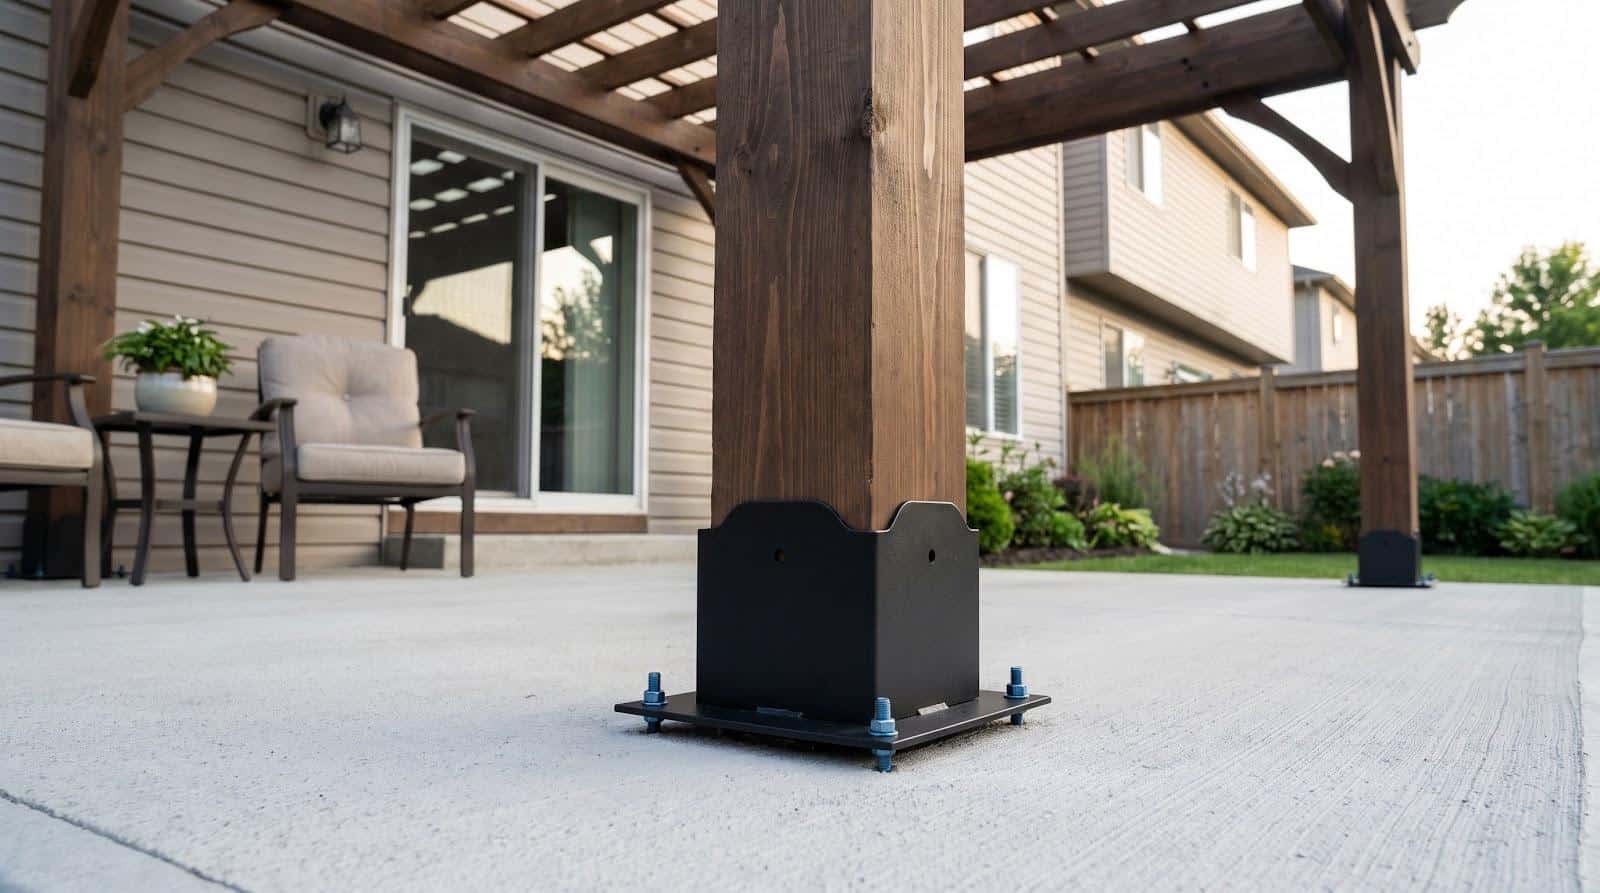
Picture a steel sandal that grips a 4 × 4 or 6 × 6, holds it off the concrete with a built-in standoff, and locks down with eight ¼-in. Titen Turbo screws. With the flanges outside the post, you can set the bracket on the layout marks, drill through the pre-punched holes, and swing the post in later, no acrobatics required. Each screw shares uplift and shear, so no single anchor has to play hero, and the built-in standoff keeps end grain out of standing water.
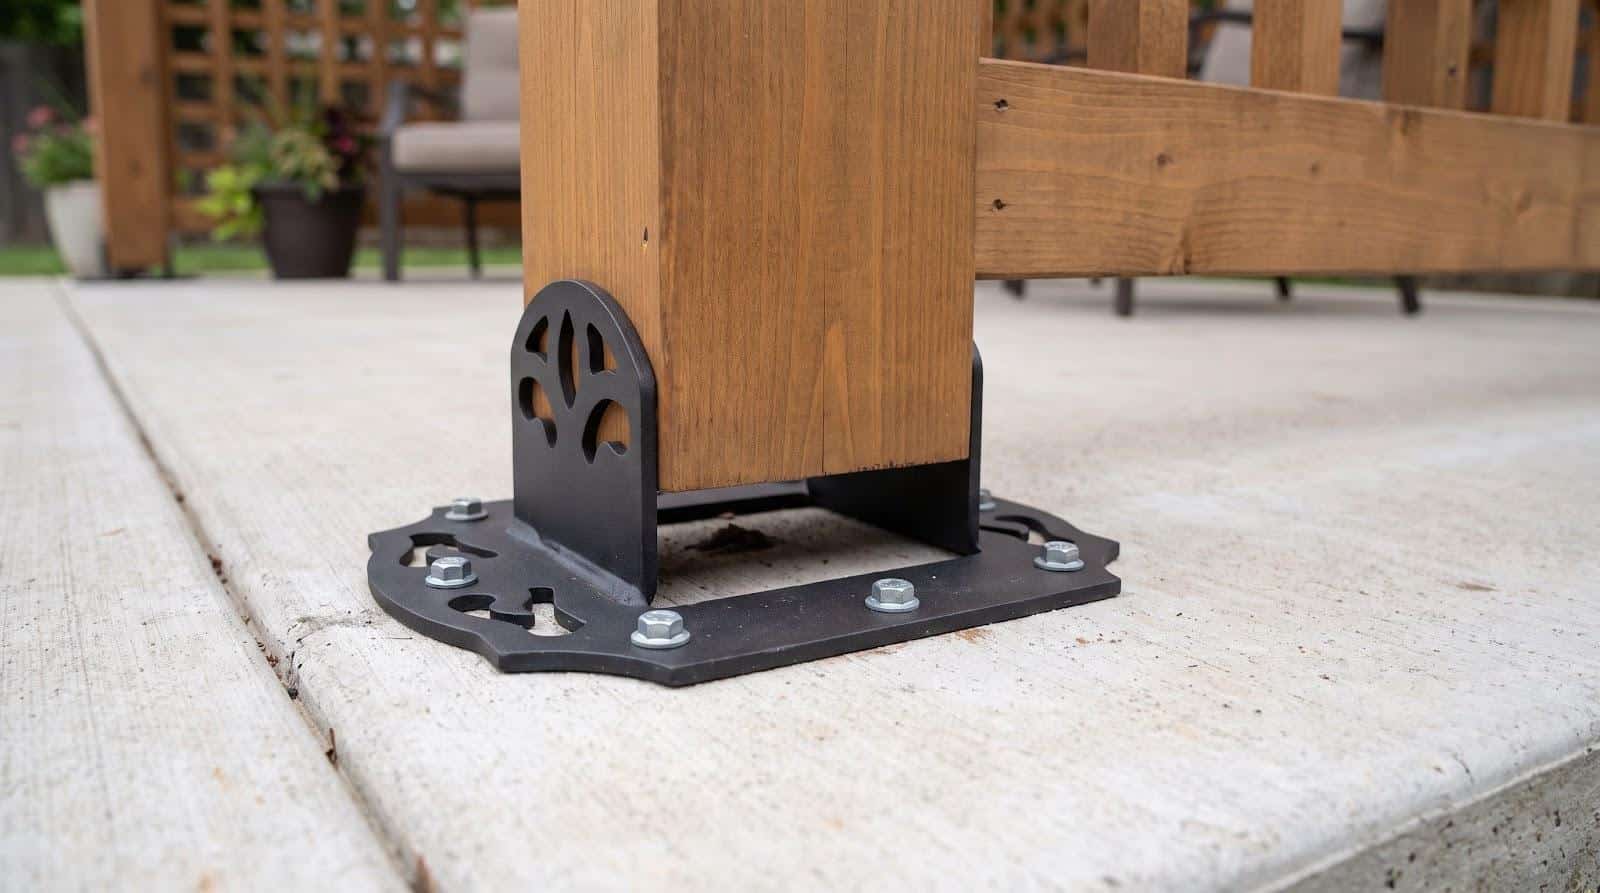
Because the anchor pattern is wide, clearance controls the design. ER-712 lists a 1¾-in. minimum edge distance and 2-in. minimum screw-to-screw spacing for these anchors. Check every hole against slab edges, control joints, or visible cracks before you fall in love with the look.
When the patio passes that test, a decorative multi-anchor base gives you a clean install and a tidy, photo-ready profile.
Adjustable or Single-Anchor Post Bases
Sometimes a control joint cuts through your anchor pattern or a stone border crowds the slab edge; an adjustable base solves the alignment problem.
It works like a heavy steel stirrup on one central anchor bolt. A slotted plate lets you nudge the post before you tighten the nut.
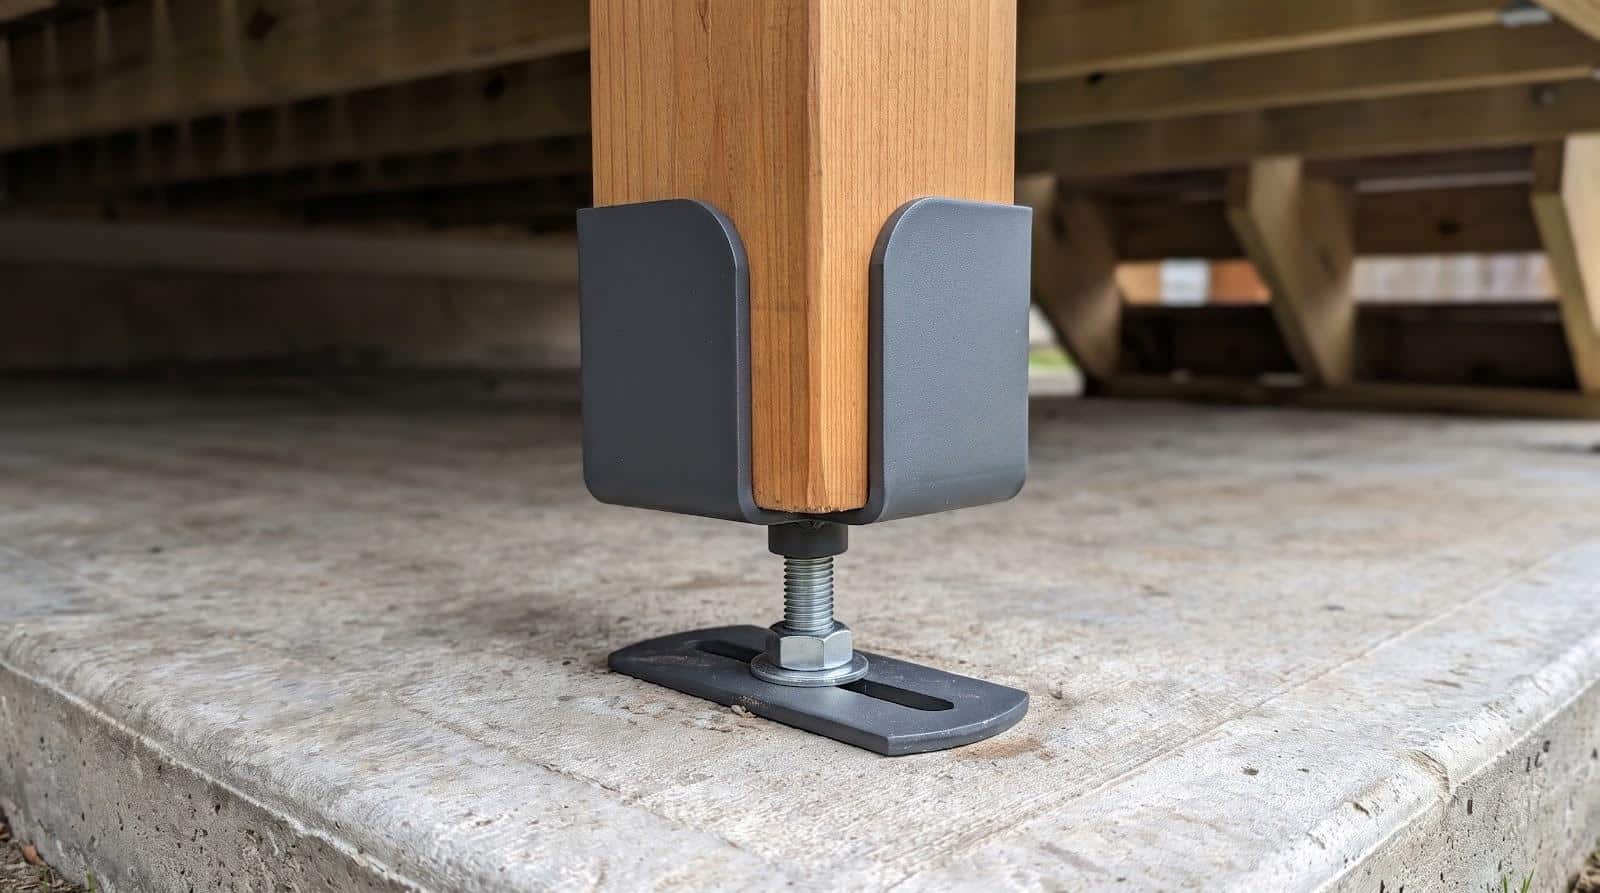
Physics sets the trade-off. One big anchor must sit farther from edges and penetrate deeper than the eight-screw pattern we just covered, and the narrow neck still behaves like a hinge. ER-280 warns that “post bases do not provide adequate resistance to prevent members from rotating about the base” and are not recommended for non-top-supported installations.
Adjustable bases excel under decks or short garden arches where the framing already braces the column. For a freestanding, roof-tall pergola, use them only when an engineer or the bracket manufacturer approves both the anchorage and the bracing plan.
Moment-Resisting or Cast-in Bases
When posts climb past 10 ft, or a solid roof turns every beam into a sail, a surface bracket that only holds the column down isn’t enough; the base must also resist rotation.
A moment-rated base works like a steel sleeve cast into a reinforced concrete footing. Simpson Strong-Tie describes its MPBZ as the first post base designed specifically to provide moment resistance, with an overlapping sleeve that resists rotation, and the MPBZ is covered by ICC-ES ESR-3050. Set in a footing sized to the manufacturer’s tables, it can reduce the need for bracing.
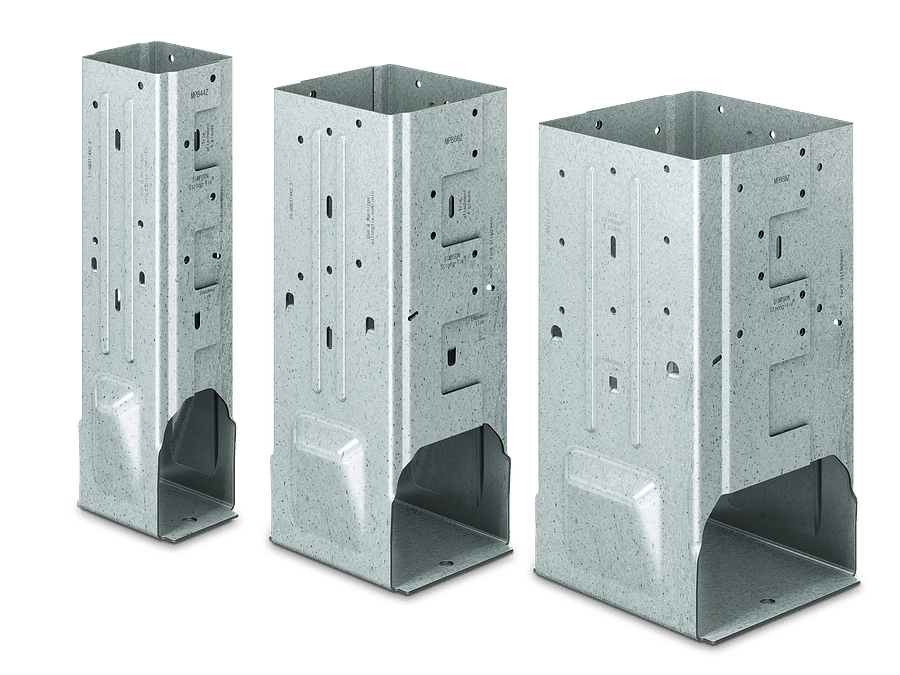
Simpson Strong-Tie MPBZ moment post bases
Installation happens when the footing is poured: set the reinforcement, plumb the bracket, then place the concrete. Once the concrete has cured, the post fastens on like a commercial column, with no guessing whether a patio slab can handle the leverage.
Moment hardware brings paperwork: engineering calculations, inspections, and precise rebar placement. If you’re adding a privacy wall or a solid roof, or you build in a high-wind area, ask a structural engineer first and choose a moment base with a current ICC-ES or IAPMO UES report.
Pick the Concrete Anchor Type
If you are not using a kit with matched anchors, choose the anchor type to suit the slab.
Concrete Screw Anchors
A concrete screw is an oversize deck screw whose threads cut into the hole wall. Drive it until the head seats and you have full strength, no epoxy and no expansion sleeve. ER-712 lists a 1¾-in. minimum edge distance, 2-in. minimum spacing, and 3¼-in. minimum concrete thickness for the ¼-in. Titen Turbo, and it covers uncracked concrete only. Miss the exact bit diameter or drill at an angle and the screw will spin loose. Use screws when the slab meets those limits and you need same-day strength.
Wedge Anchors
A wedge anchor is a threaded stud with a tapered cone that expands a split sleeve. Tightening the nut locks the sleeve against the hole wall, which tolerates a little dust and cold weather. Because the sleeve pushes outward, follow the wedge anchor’s own code report for edge distance, spacing and concrete thickness, and use wedges only in sound concrete to avoid popping a corner. Removal means cutting the rod flush; the buried sleeve stays.
Adhesive Anchors
Adhesive anchors fill the hole with two-part epoxy, then bond a threaded rod. No sleeve means lower edge stress and variable embedment depth, but the bond depends on careful hole cleaning, correct temperature, and full cure as the adhesive maker’s printed instructions specify. Cold or damp conditions can make the cure time much longer. Plan on precise brushing, blowing, and inspection, and remember that rod removal later will require grinding it off.
Quick Chooser
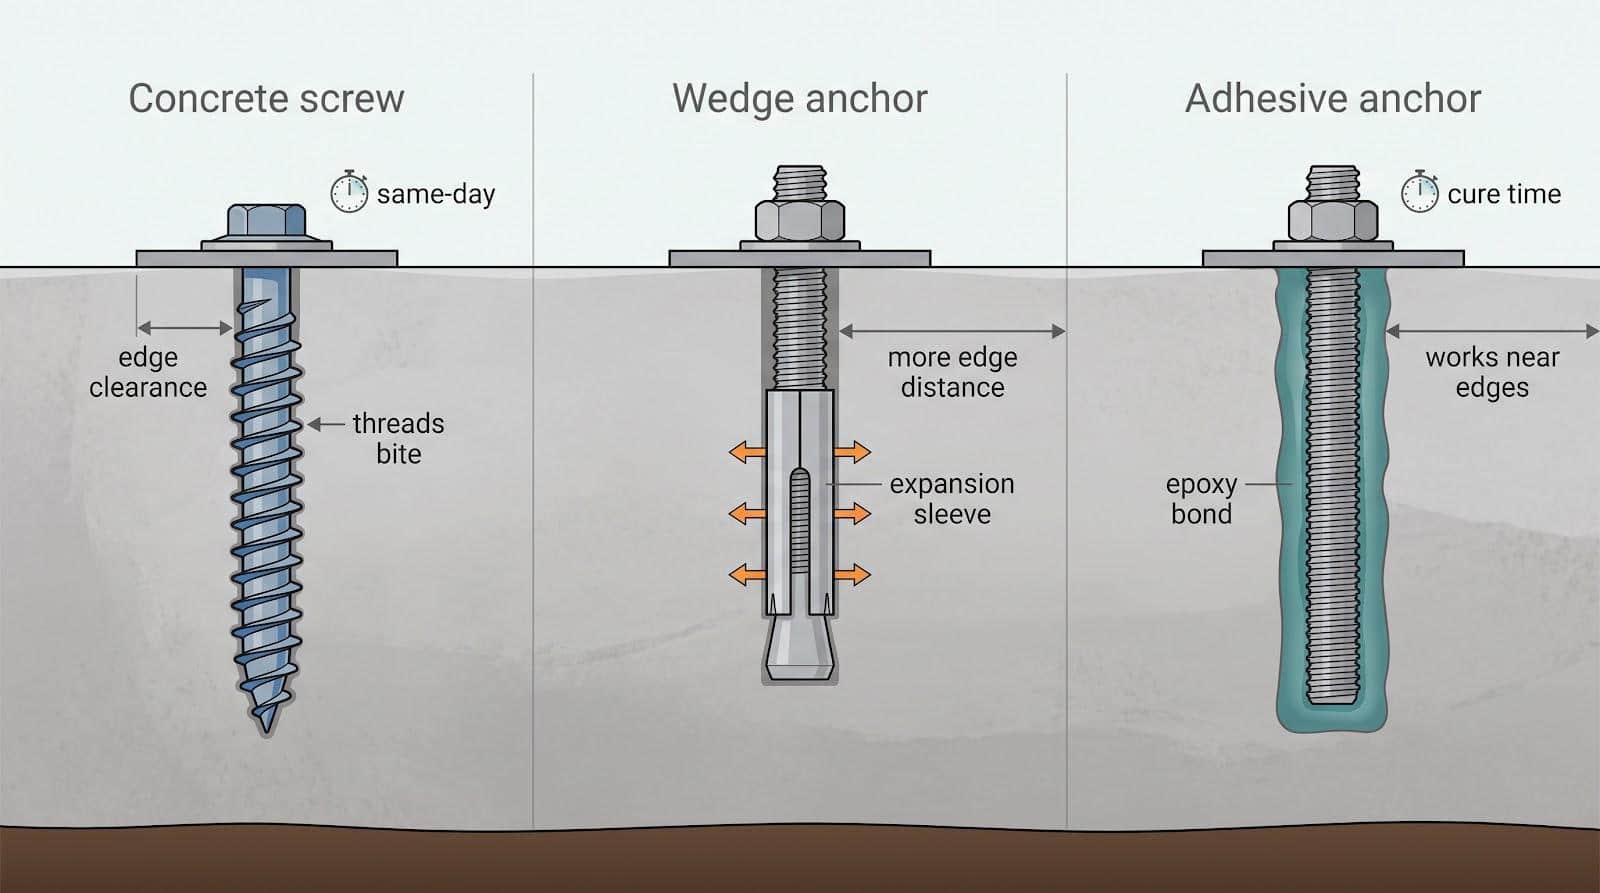
- Use screws when the slab meets ER-712 thickness and edge limits, and you want to build today.
- Use wedges when the slab is thicker, edge clearance is generous, and instant strength with mechanical redundancy is desirable.
- Use adhesive when edge distances are tight or deeper embedment is specified, so budget time for cure and inspection.
Tools and Materials
Drilling and dust control
- Rotary hammer with an SDS-plus 3⁄16-in. carbide bit (the bit size ER-712 lists for ¼-in. Titen Turbo screws).
- Depth stop or tape flag set ½ in. deeper than the 1¾-in. embedment.
- A drill shroud with dust collection (OSHA Table 1 calls for a filter of 99 percent or greater efficiency) and a HEPA-filtered vacuum to clean the holes.
Layout and hardware
- Post bases sized for your posts.
- Matched concrete anchors (eight ¼-in. screws, or the specified wedge or adhesive rods).
- Manufacturer-supplied SD/SDS wood screws, washers, and decorative nuts.
- Twenty-five-foot tape, 50-ft chalk line, two string lines, and a 4-ft level.
Safety and bracing
- ANSI-rated eye and hearing protection, N95 (or better) respirator, and cut-resistant gloves.
- Two straight 2 × 4 braces per post, plus stakes.
Install the Brackets Step by Step
Step 1: Confirm the plan, permit, and drilling zones
- Paperwork first. Check local setback limits, height caps, and whether your pergola’s area falls under the accessory-structure exemption (often 120–200 sq ft, but it varies).
- Call before you dig or drill. In the United States, call 811 a few business days ahead (the notice period depends on your state); locators will mark buried public utility lines at no cost.
- Define structural loads. Decide now if the pergola will stay open, carry lattice, or support a solid roof or privacy wall. Those choices set the wind and uplift numbers you’ll use for anchor spacing and bracket selection in later steps.
Step 2: Mark and drill the holes
- Center-punch each hole. Hold the bracket like a stencil and tap a nail set once; the dimple keeps the bit from skating.
- Select the exact bit. ER-712 calls for a 3⁄16-in. carbide bit that complies with ANSI B212.15 and a 1¾-in. nominal embedment for ¼-in. Titen Turbo screws.
- Set drilling depth. Add ½ in. to the embedment (a 2¼-in. hole for a 1¾-in. embedment) so dust can settle behind the anchor. Lock a depth stop or wrap tape at that mark.
- Drill plumb. Hold the rotary hammer square in both planes; a tilted hole shortens embedment and leaves the screw head proud. Pulse the trigger to start, then let the hammer advance without forcing it.
- Manage dust. Capture the dust as you drill with the shroud and vacuum, and stop when the depth collar touches the slab.
Step 3: Install, plumb, and brace the posts
- Fasten the post to the base. Drive the twelve SD #10 × 1½-in. screws that ER-280 lists for each Sage post base; leave no holes empty.
- Set the first post plumb. Check with a 4-ft level on two faces and adjust until the bubble centers (keep the post within ⅛ in. of plumb over 8 ft).
- Add temporary bracing. Clamp a straight 2 × 4 to the post about 4 ft up and stake it to the slab edge, then repeat at 90 degrees so the post cannot wander.
- Repeat for the remaining posts. Verify each post lands on its centerline and that top elevations match. Trim length only after the posts stand plumb.
- Keep braces until the top frame and knee braces lock the structure. The post base resists uplift and shear, but the frame, not the bracket, stops sway.
What to do with a Sloped, Thin, Cracked, or Uneven Patio
Mild slope (≤ 1 in. over 8 ft). Cut each post so beam tops finish level; avoid stacking shims under a structural base because they compress and loosen anchors.
Slope beyond 1 in. over 8 ft. Pour level concrete pads at each post location or core-drill for full-depth piers; surface brackets alone cannot handle the twist.
Thin or badly cracked slab (< 3¼ in. thick or with through-cracks). Cut out the slab at each post, dig to your local frost depth, and pour a reinforced pier sized to your local code. Fasten the post base to the new concrete. ER-712’s 3¼-in. minimum thickness confirms many thin patios will not qualify.
Uneven settlement (> ½ in. drop). Slab-jacking or foam lifting can restore level if soil is stable; recurring movement calls for new piers instead. Ask a structural engineer to look at any slab that keeps moving.
Cost and Diy-Versus-Pro Decision
Prices change by region and by slab, so get current prices from your home center and two or three local quotes. The cost order is usually the same:
| Approach | Relative cost | Who usually does it | When it applies |
|---|---|---|---|
| Surface-mount with screw anchors | Lowest: post bases, matched anchors, and a drill bit | Most DIYers with a rotary hammer | Verified slab that meets ER-712 limits |
| Wedge-anchor install | Similar hardware cost | DIY or pro | Thicker slabs with generous edge distance |
| Adhesive anchor or new pier | Highest: epoxy, rods, concrete, and often digging | Often a pro | Thin slabs, tight edges, or frost-depth footings |
Permit fees depend on your city. A DIY build saves the contractor’s labor charge but adds your own time and learning curve. Balance weekend time, warranty, and inspection confidence before you decide.
Frequently Asked Questions
Can I mount a pergola on a 4-in. patio slab?
Yes, if the slab meets the anchor report’s limits: 3¼-in. or greater actual thickness, 1¾-in. or greater edge distance, and sound uncracked concrete (ER-712, Table 2). Otherwise, core-drill piers below the slab.
Are wedge anchors stronger than concrete screws?
Neither anchor is universally stronger. Wedges need thicker concrete and more edge clearance; ¼-in. Titen Turbo screws have a minimum specified ultimate steel strength of 125,000 psi in ER-712 and put no expansion pressure on the concrete. Use the anchor specified by the bracket report or an engineered alternative.
Is epoxy safer near slab edges?
Epoxy puts no expansion force on the concrete, so it is gentler near edges, but only if the hole is brushed, blown, and cured as the adhesive maker specifies; skip a step and strength can drop sharply.
Do post bases eliminate the need for knee braces?
No. ER-280 states that post bases “do not provide adequate resistance to prevent members from rotating about the base.” Simpson Strong-Tie suggests considering knee braces for pergolas taller than 8 ft, bay widths over 10 ft, solid walls or roofs, and high-wind areas.
Will I need a permit?
Many jurisdictions exempt open-roof structures under 120–200 sq ft from full plan review, but setbacks, frost-depth footings, and wind design still apply. Confirm requirements with your local building department before drilling.
Conclusion
A safe pergola on an existing patio starts below the bracket. Confirm the slab can act as a footing, choose the bracket and concrete anchor as one tested system, and follow the anchor report for edge distance and hole cleaning. When the slab is thin, cracked, or sloped, build a new footing instead. The pergola is only as trustworthy as what lies beneath it.

Robert Thompson, a proud alum of the University of Oregon with a degree in Landscape Architecture, has been a leading figure in outdoor space enhancement for over 17 years. He started his career with a landscape design firm, gaining invaluable experience creating functional and attractive outdoor living areas. Robert joined our website in 2018, where he quickly became known for his innovative yet practical advice on outdoor renovations. He has been the chief editor of our deck and patio section ever since then, helping readers transform their outdoor spaces into personal retreats. When not drafting designs or writing, Robert is an avid kayaker, often drawing inspiration from nature for his creative projects.