
A bathroom vanity is one of the first things anyone notices when they walk into the space, making its condition more important than most people realize.
Scuffed paint, stained wood, or dated hardware can pull the entire room down, regardless of how clean or well-maintained the rest of the room is.
It sets the tone for the entire bathroom when the vanity looks good, the whole space feels more put together and cared for.
This blog walks you through the tools, materials, and steps needed to refinish a bathroom vanity at home, along with paint tips and mistakes to avoid before starting the project.
Why Refinish a Bathroom Vanity Instead of Replacing?
Replacing a vanity means buying a new unit, coordinating plumbing adjustments, arranging disposal of the old cabinet, and paying for professional installation.
Refinishing skips every one of those steps. The process works directly on the existing cabinet structure, which means no demolition, no delivery wait times, and no contractor scheduling.
For most bathrooms, the entire project can be completed over a weekend without taking the space out of use for days.
The result looks clean and updated and holds up well with the right products applied correctly. Refinishing a bathroom vanity delivers the same visual improvement as a full replacement at a significantly lower overall cost.
How to Refinish a Bathroom Vanity?
Taking the process one step at a time makes the entire project manageable, even for a first-timer. Here is exactly how to get it done.
Tools and Materials Needed
Before starting your project to refinish the bathroom vanity, gather the right tools and bathroom vanity paint to keep the process smooth and stress-free.
| Tools | Materials |
|---|---|
| Screwdriver or Wrench | Sandpaper (120–220 grit) |
| Caulk Scraper or Utility Knife | Painter’s Tape |
| Sanding Block or Orbital Sander | Bonding Primer |
| Paint Roller and Paintbrush | Bathroom Vanity Paint |
| Mixing Containers & Stir Sticks | Epoxy Kit (Part A & B) |
Step-by-Step Guide to Refinish Bathroom Vanity
Refinishing may look like a big task, but with the right approach, it becomes a simple way to refinish a bathroom vanity at home with clean, long-lasting results.
1. Remove Fixtures and Caulk
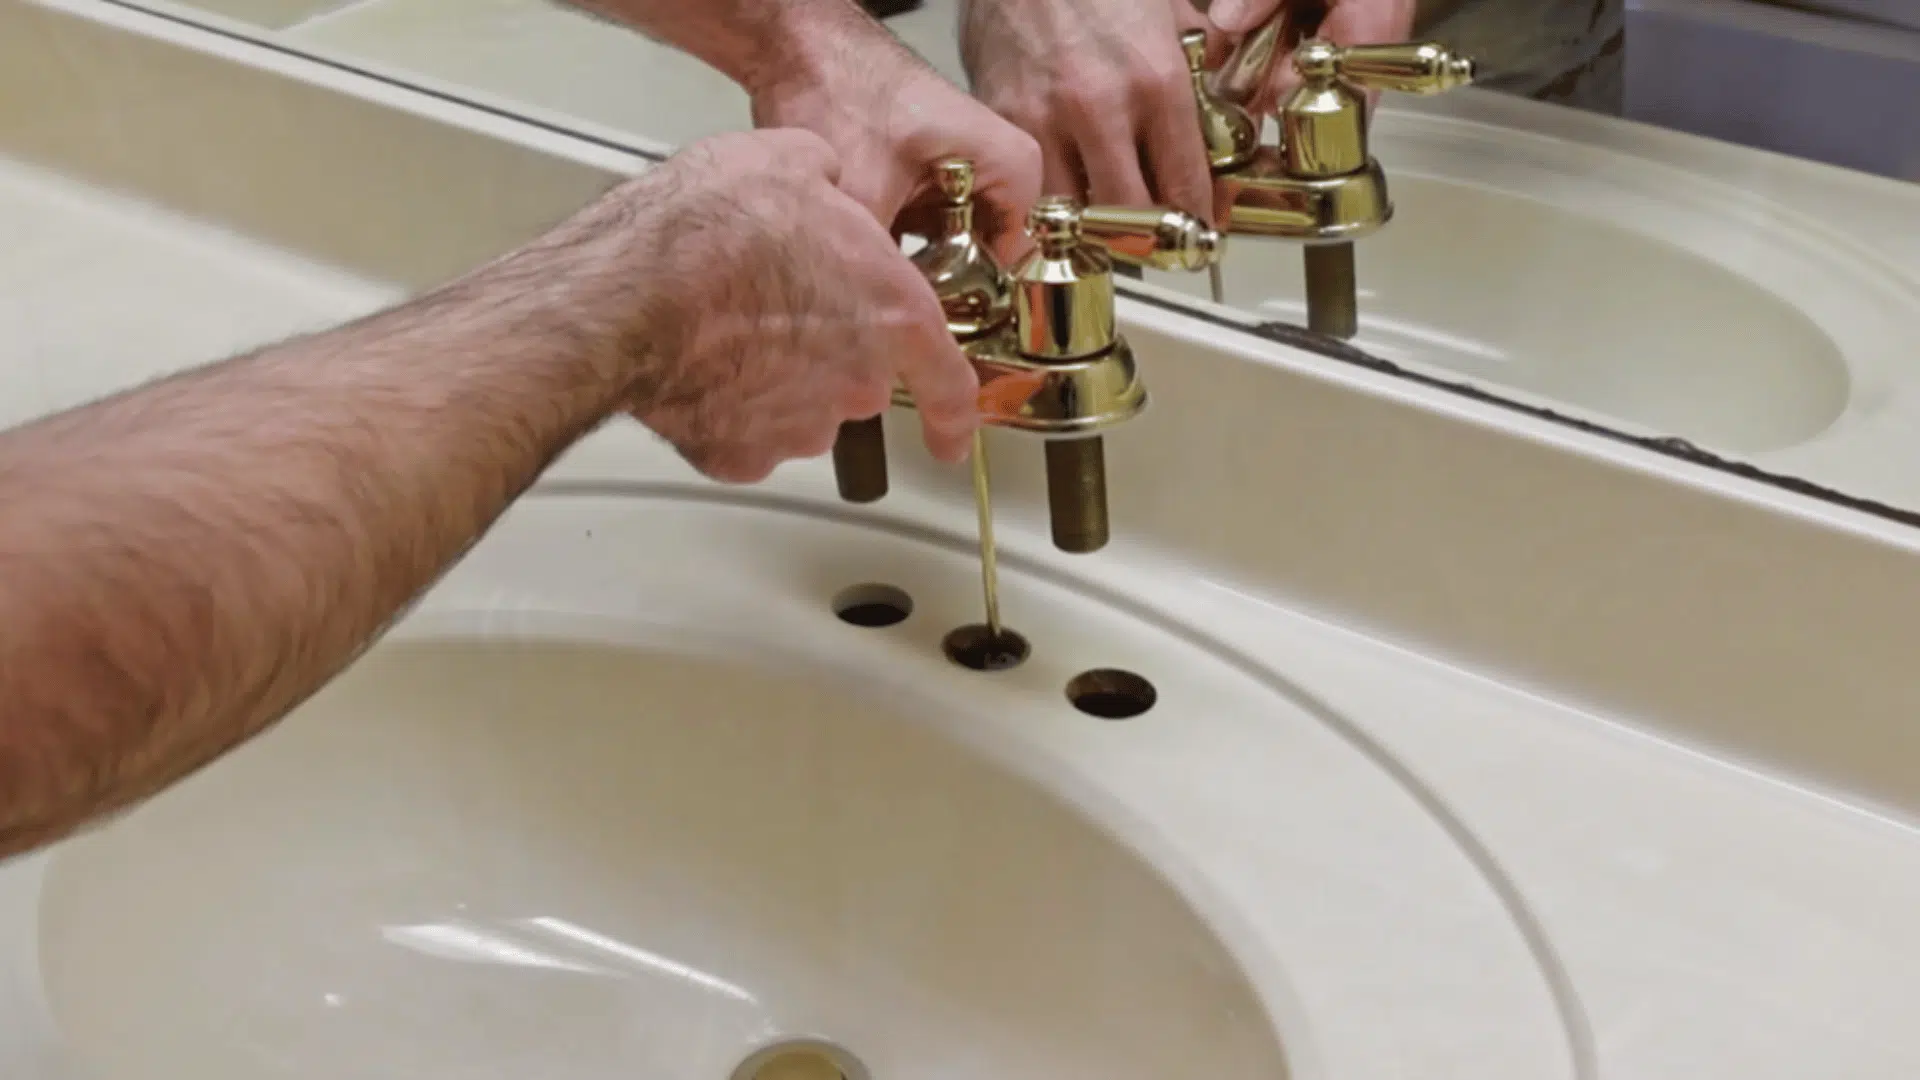
Begin by removing the faucet and the drain plug, so the vanity surface is fully open and easier to work on. After that, scrape away any old caulk around the backsplash and side splashes.
This step matters because damaged or loose caulk can get in the way of a clean finish. If your existing caulk still looks good, it can stay. But if you notice silicone caulk, it needs to go.
Silicone prevents epoxy from sticking properly. Once removed, plan to replace it later with a latex-based, water-resistant caulk that works well with epoxy finishes.
2. Sand the Surface
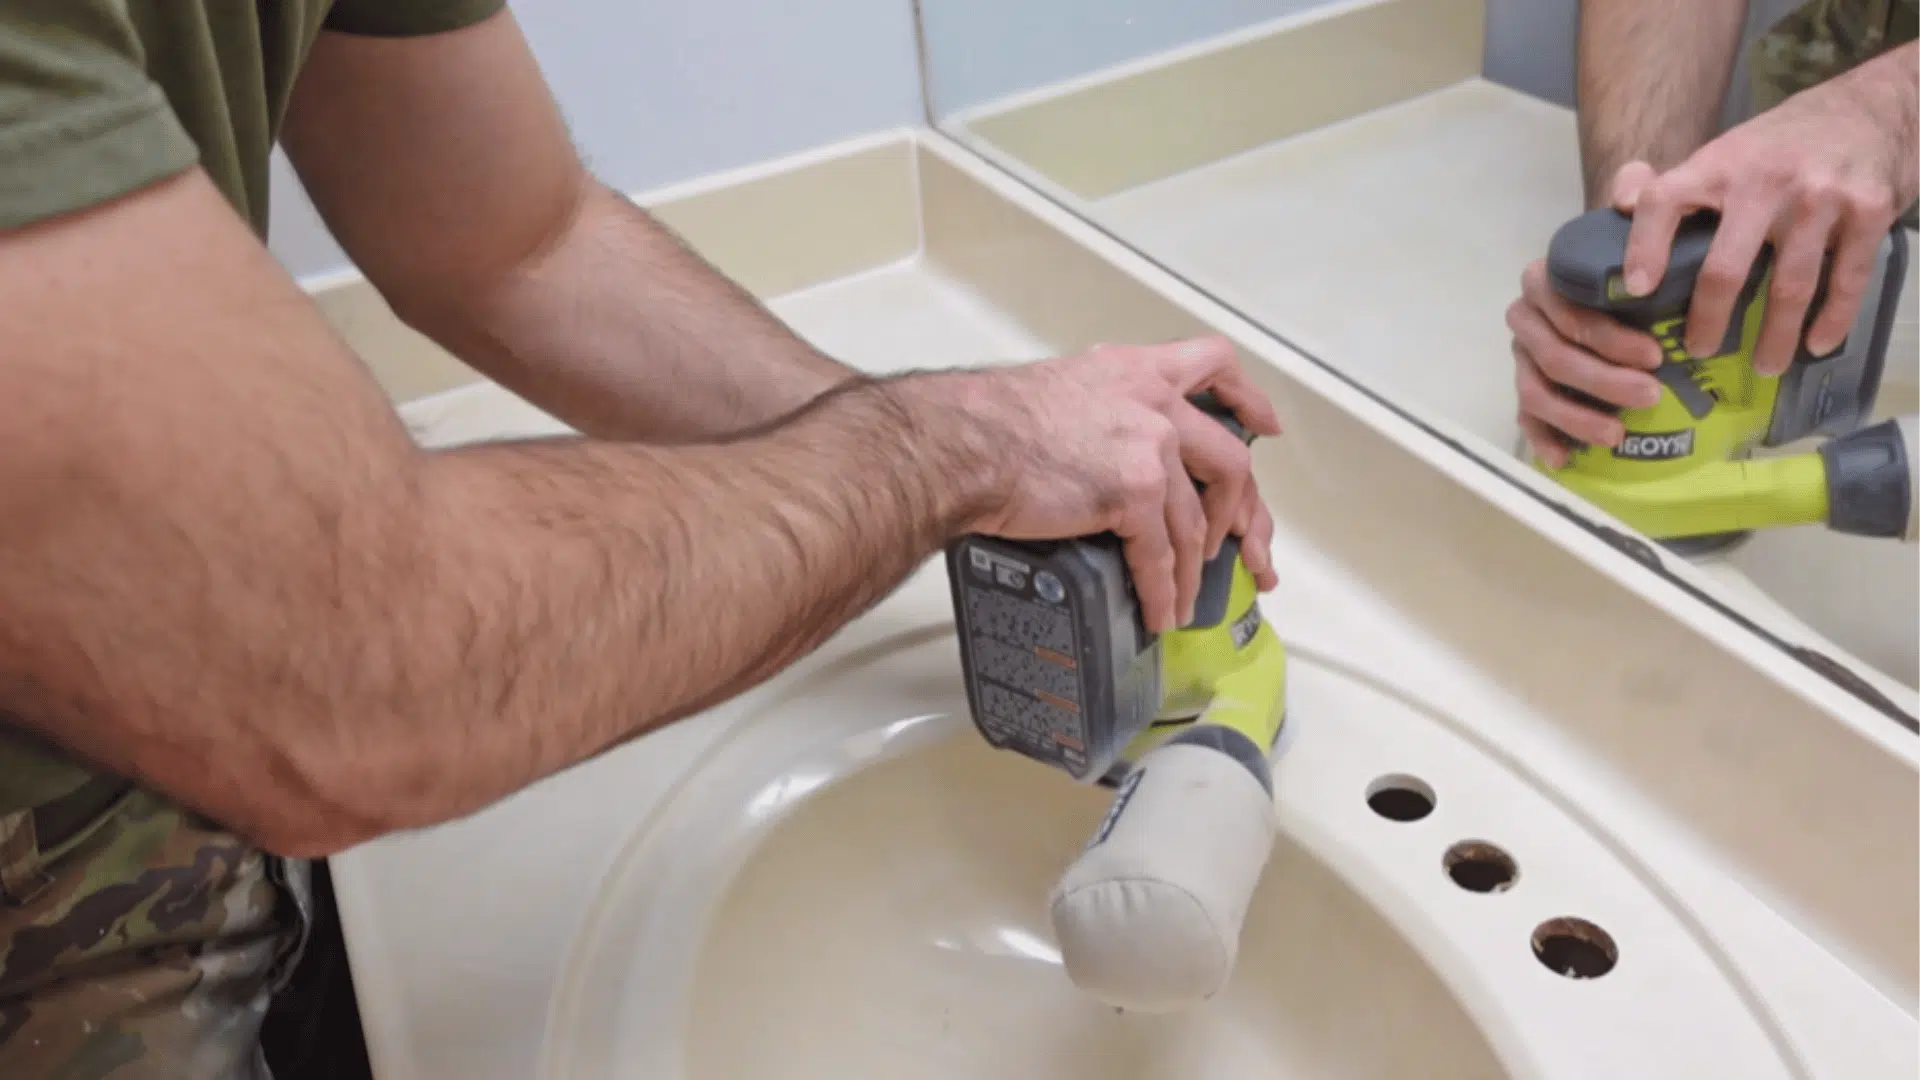
Cultured marble has a very smooth surface, so sanding is needed to help the next layers stick properly. The goal here is not to remove material but to lightly scratch the surface.
Use sandpaper between 120 and 220 grit, with 220 grit being a safe choice. Sand the countertop, backsplash, sink bowl, and even inside the faucet and drain holes.
Power sanders work well can flat areas, but hand sanding is best for edges and curves. Keep the sanding light and even throughout.
3. Tape Off the Area
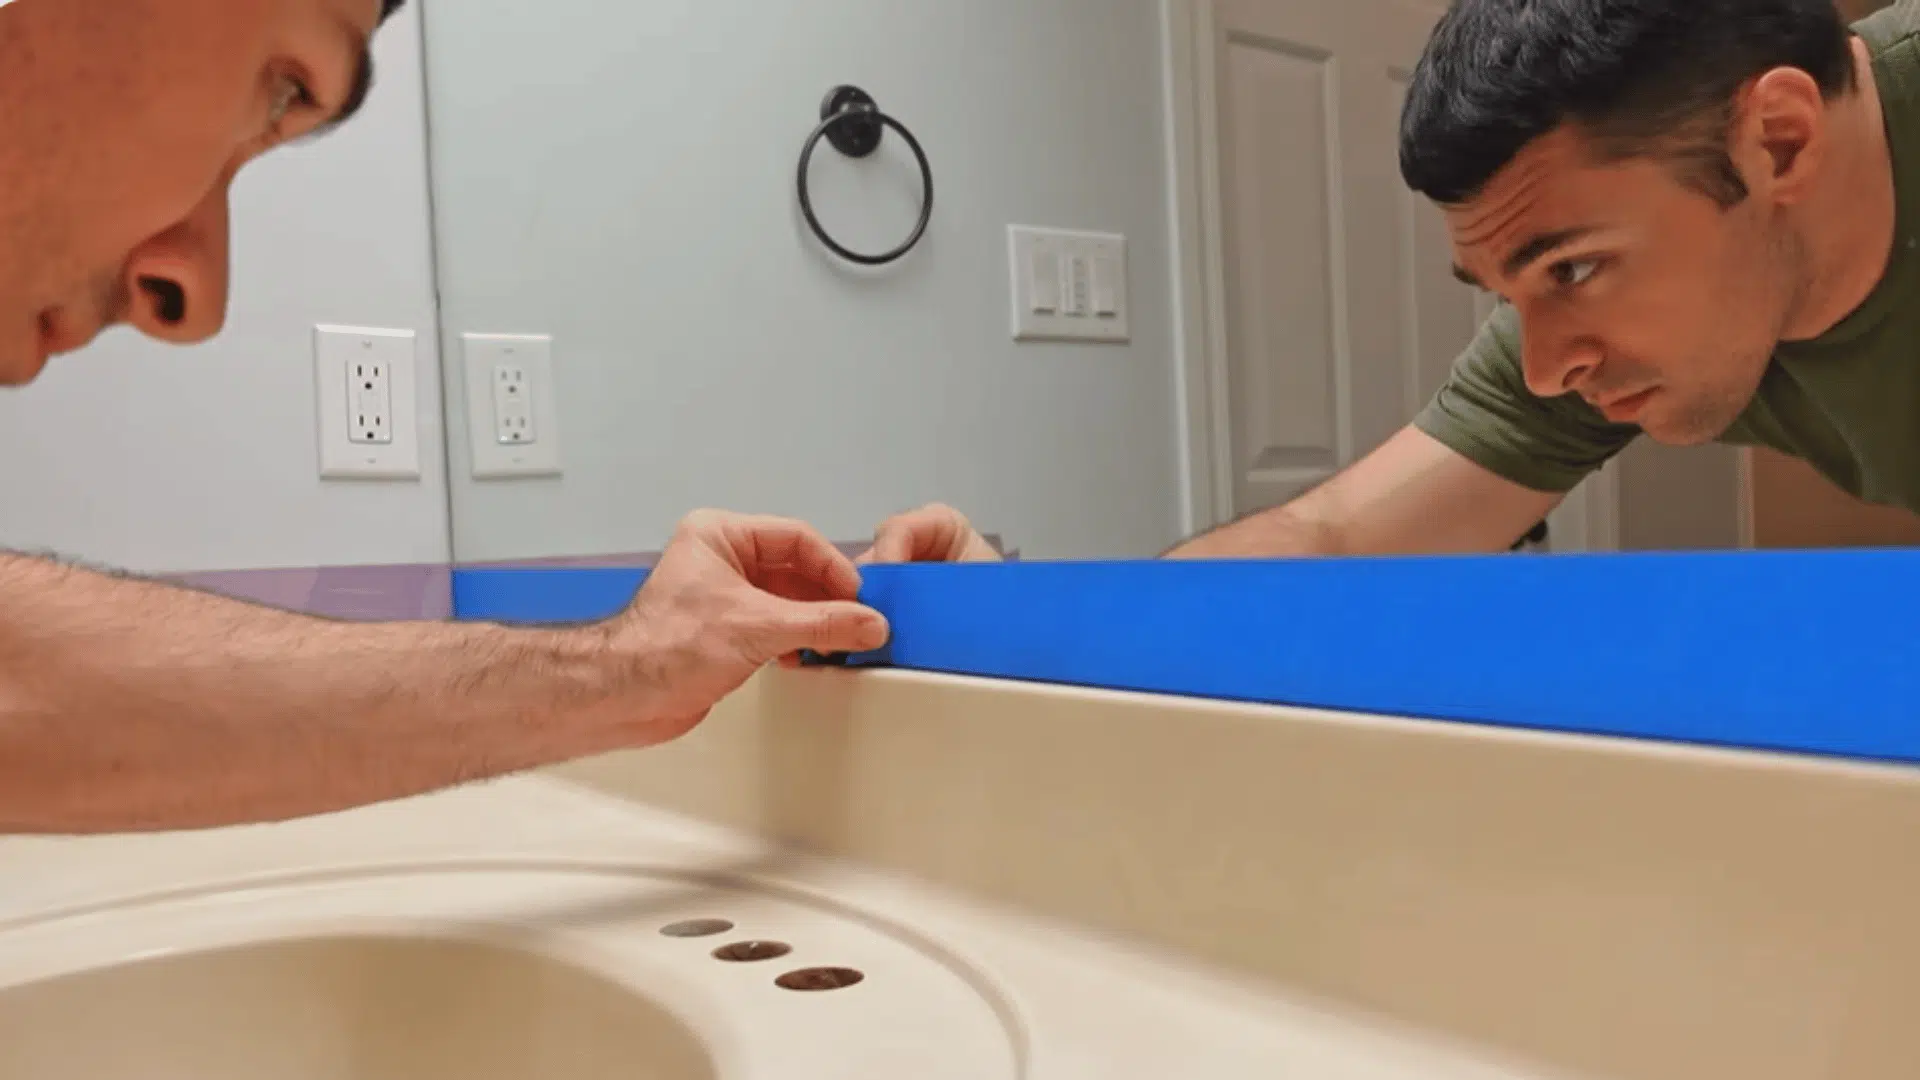
Before moving forward, protect everything around the vanity. Tape along the walls, cabinet edges, and floor area if needed.
Make sure to cover the faucet holes and drain opening so epoxy does not run through later. It also helps to place a container or sheet inside the cabinet to catch any drips.
Taking time here keeps the process clean and easier to manage. Rushing this step often leads to epoxy or paint landing on surfaces that are difficult to clean afterward.
4. Apply Bonding Primer
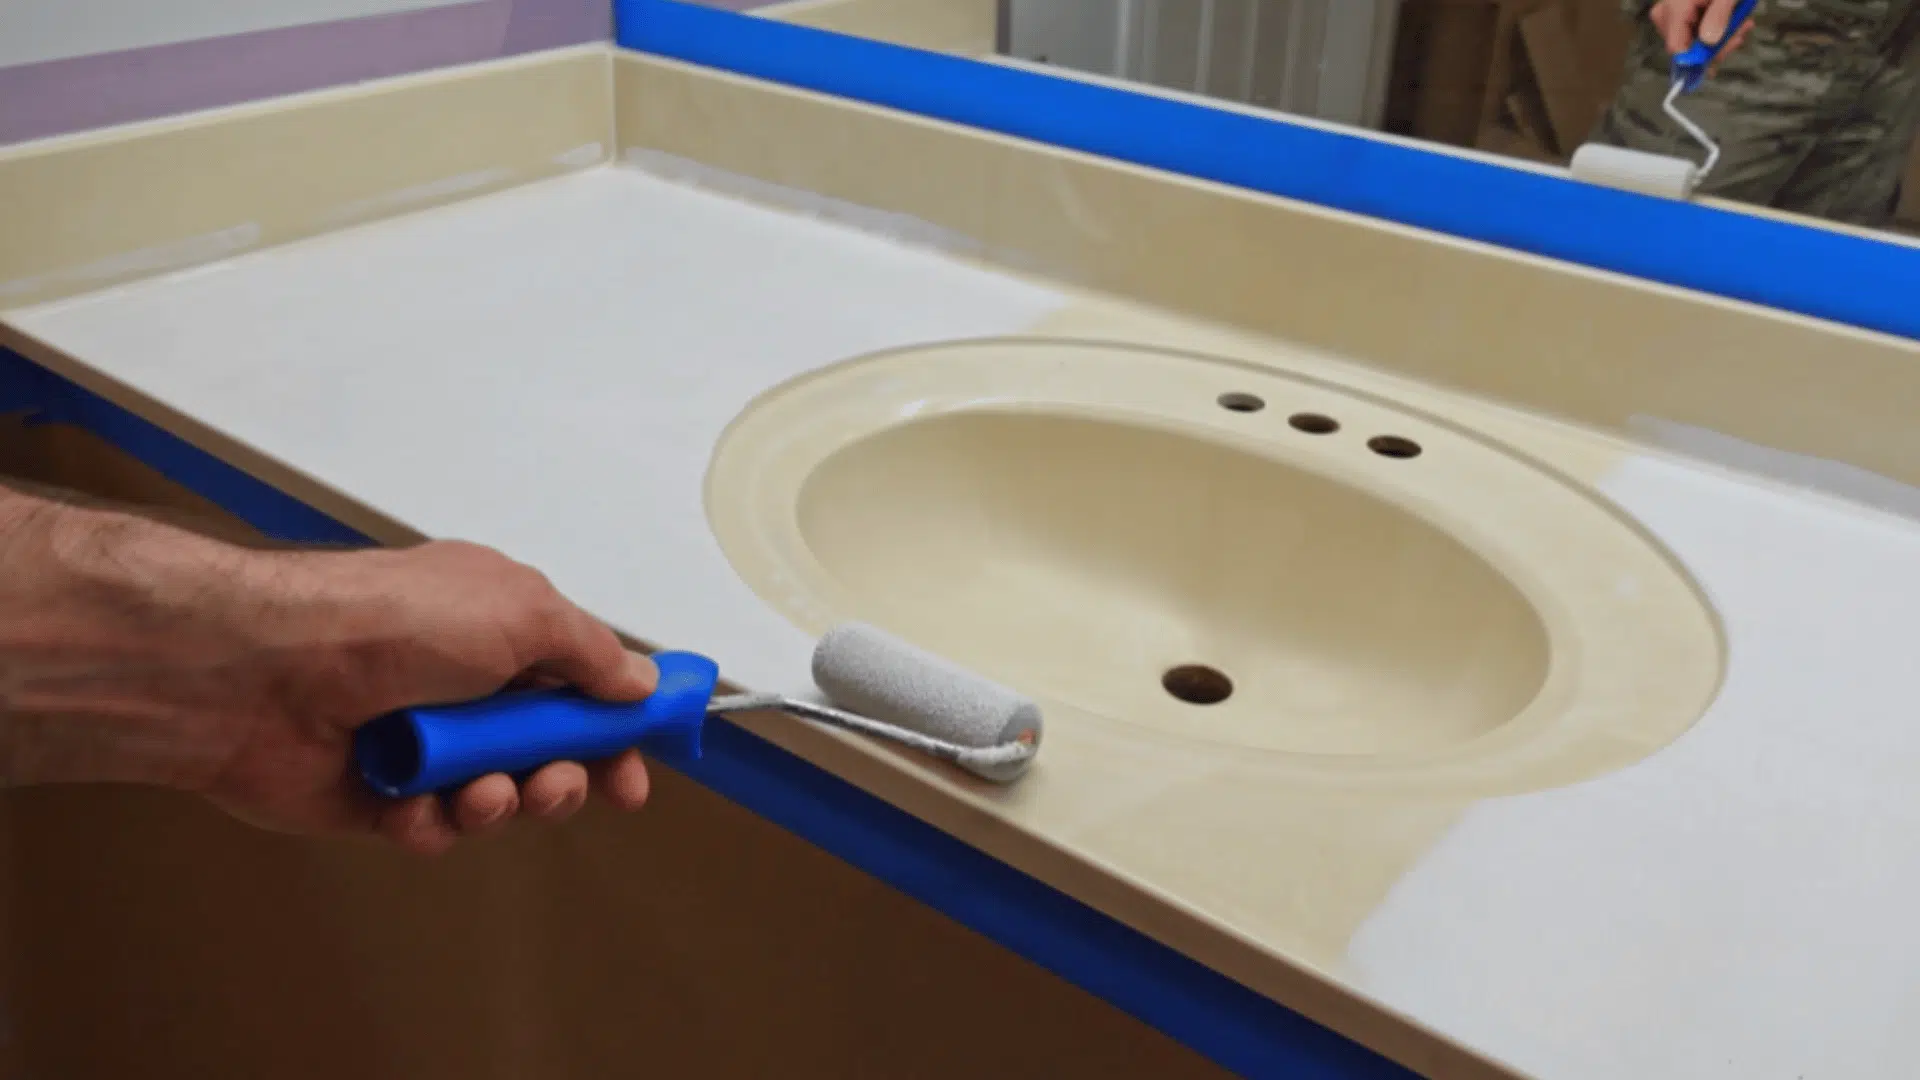
Now apply a bonding primer designed for smooth surfaces. This step helps the paint and epoxy stick properly. Use a roller for larger flat areas and a brush for corners and the sink bowl.
The sink area can be tricky, so work slowly and make sure it is evenly coated. Apply a thin, even layer and allow it to dry completely before moving to the next step.
Skipping primer or applying it too thickly are two of the most common reasons a refinished job peels within months.
5. Apply the Base Paint
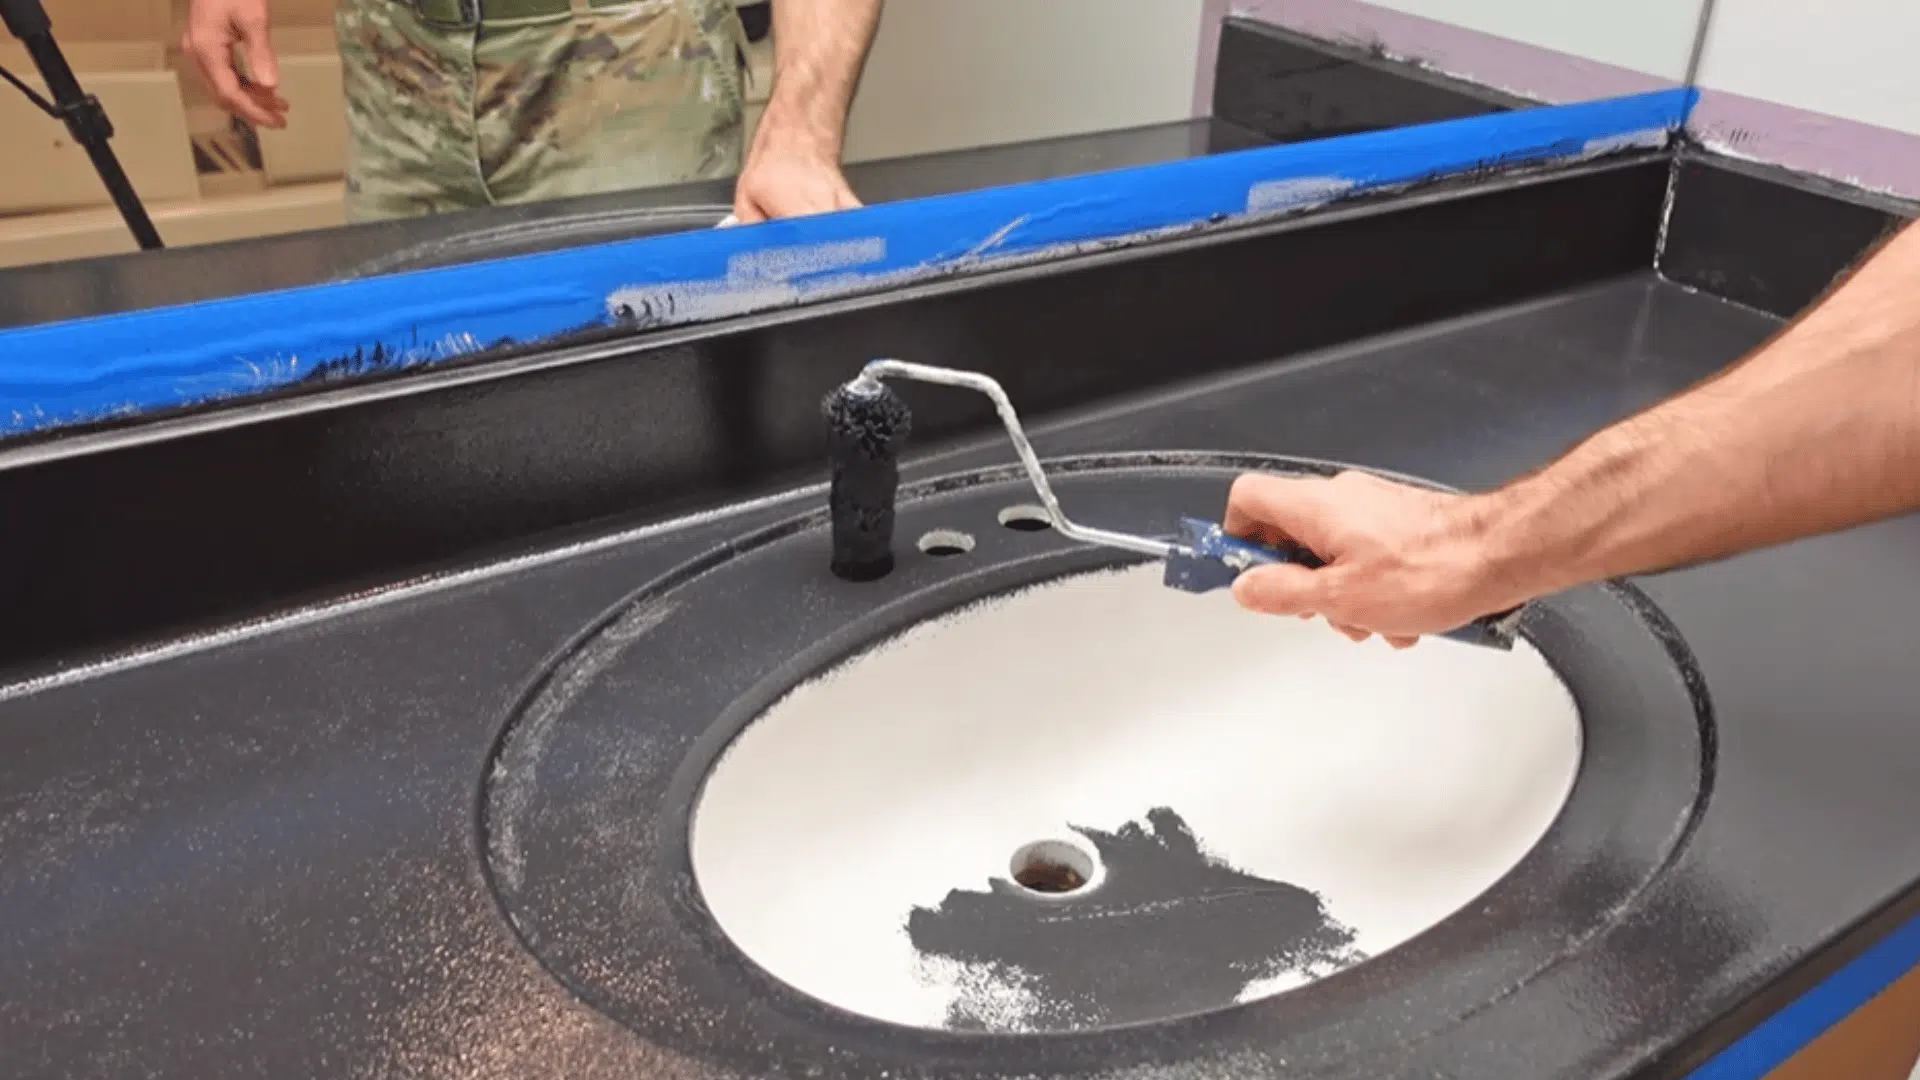
Once the primer is dry, apply your base paint. In this case, black paint is used to create a marble-style finish under the epoxy.
Apply three thin coats, letting each coat dry fully before adding the next. Light sanding between coats helps remove dust or small imperfections.
Keep the area clean during this time so nothing sticks to the surface. Good ventilation in the bathroom during this stage helps the paint dry more evenly and reduces fume buildup.
6. Mix and Apply Epoxy
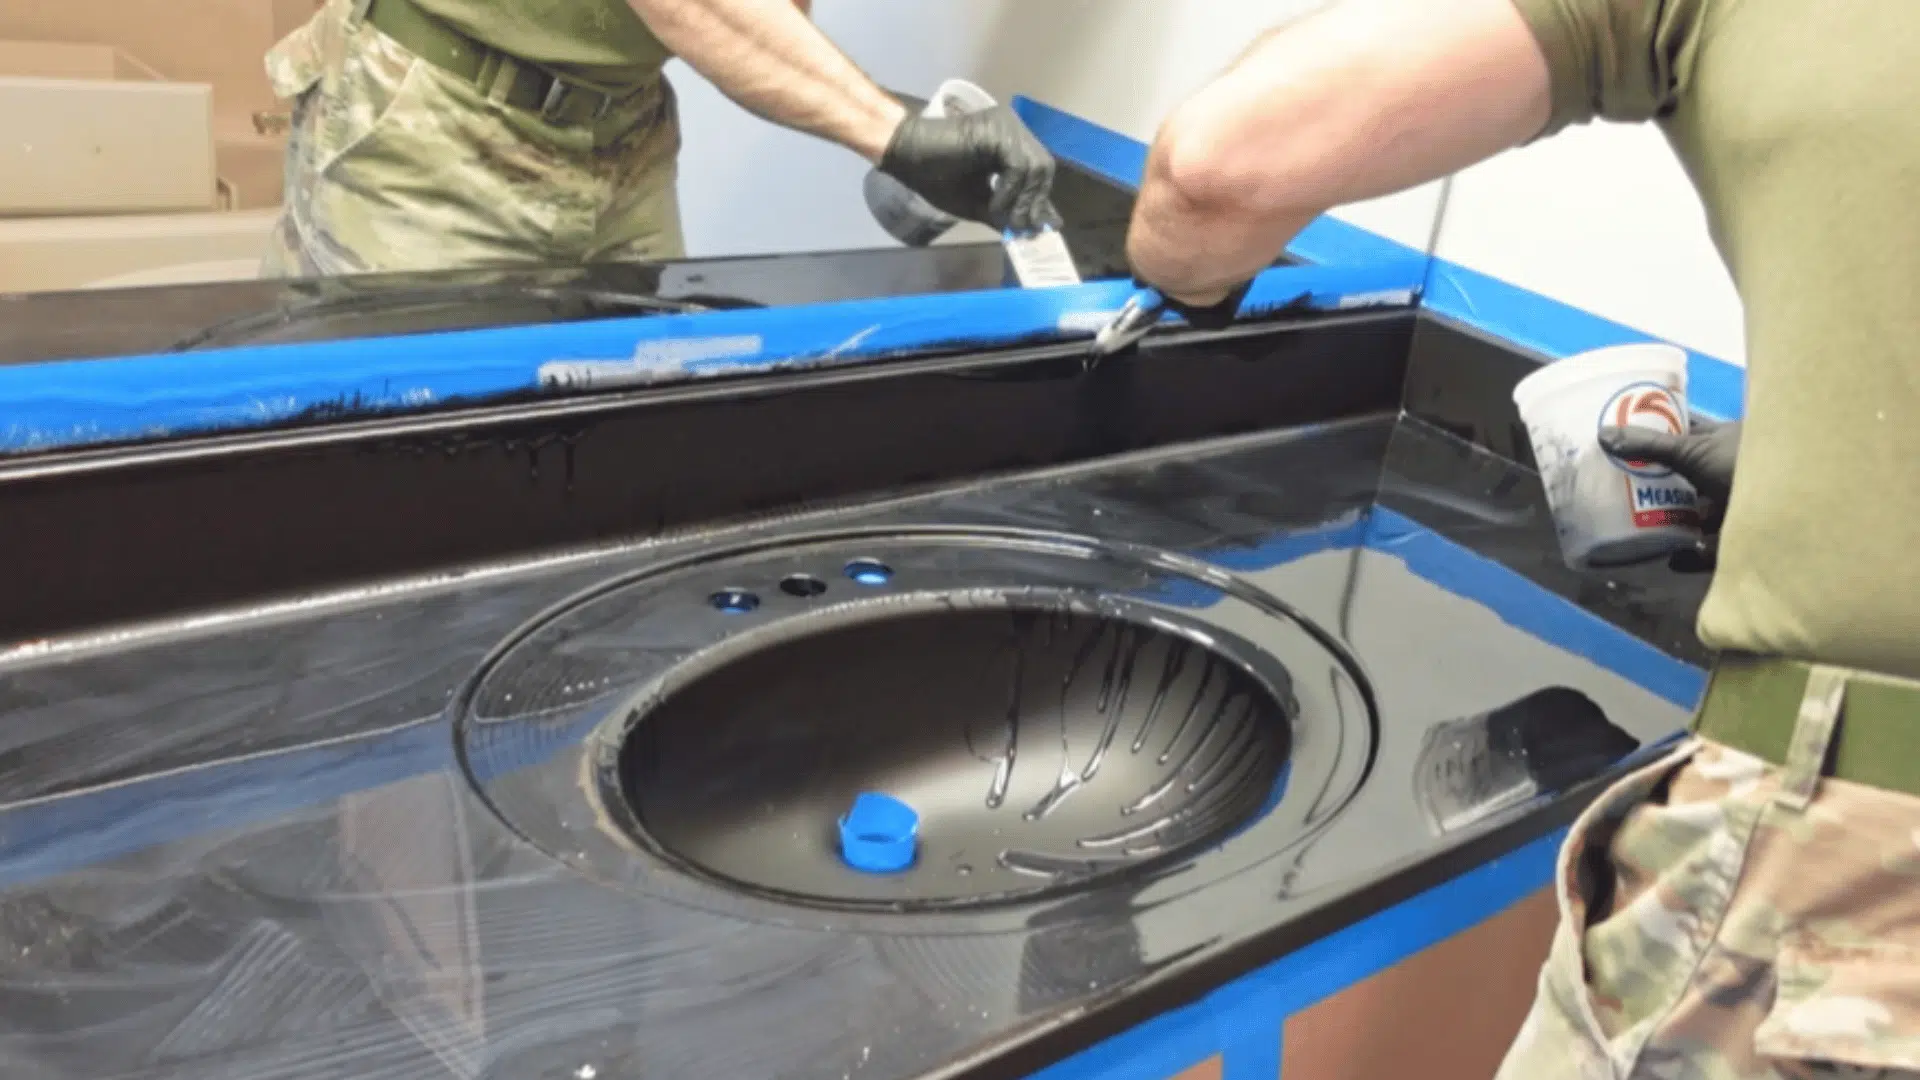
Epoxy is what gives the vanity its final protective layer, so getting the mix right matters. Start by reading the product instructions carefully before opening either part.
Avoid whipping the mixture as this pulls in air and creates more bubbles. Work steadily as the epoxy begins to set within a limited window.
Pour the epoxy onto the surface in a steady stream and use a putty knife or spreader to guide it evenly across the entire area, including the sink and backsplash.
7. Remove Bubbles with Heat

Once the epoxy is spread, use a heat gun to remove air bubbles and help the surface settle smoothly.
Hold the heat gun a few inches above the surface and move it gently across the surface. The heat will bring bubbles to the surface and pop them.
Avoid holding the heat gun in one spot for too long, as concentrated heat can cause the epoxy to discolor or cure unevenly.
8. Remove Tape and Cure
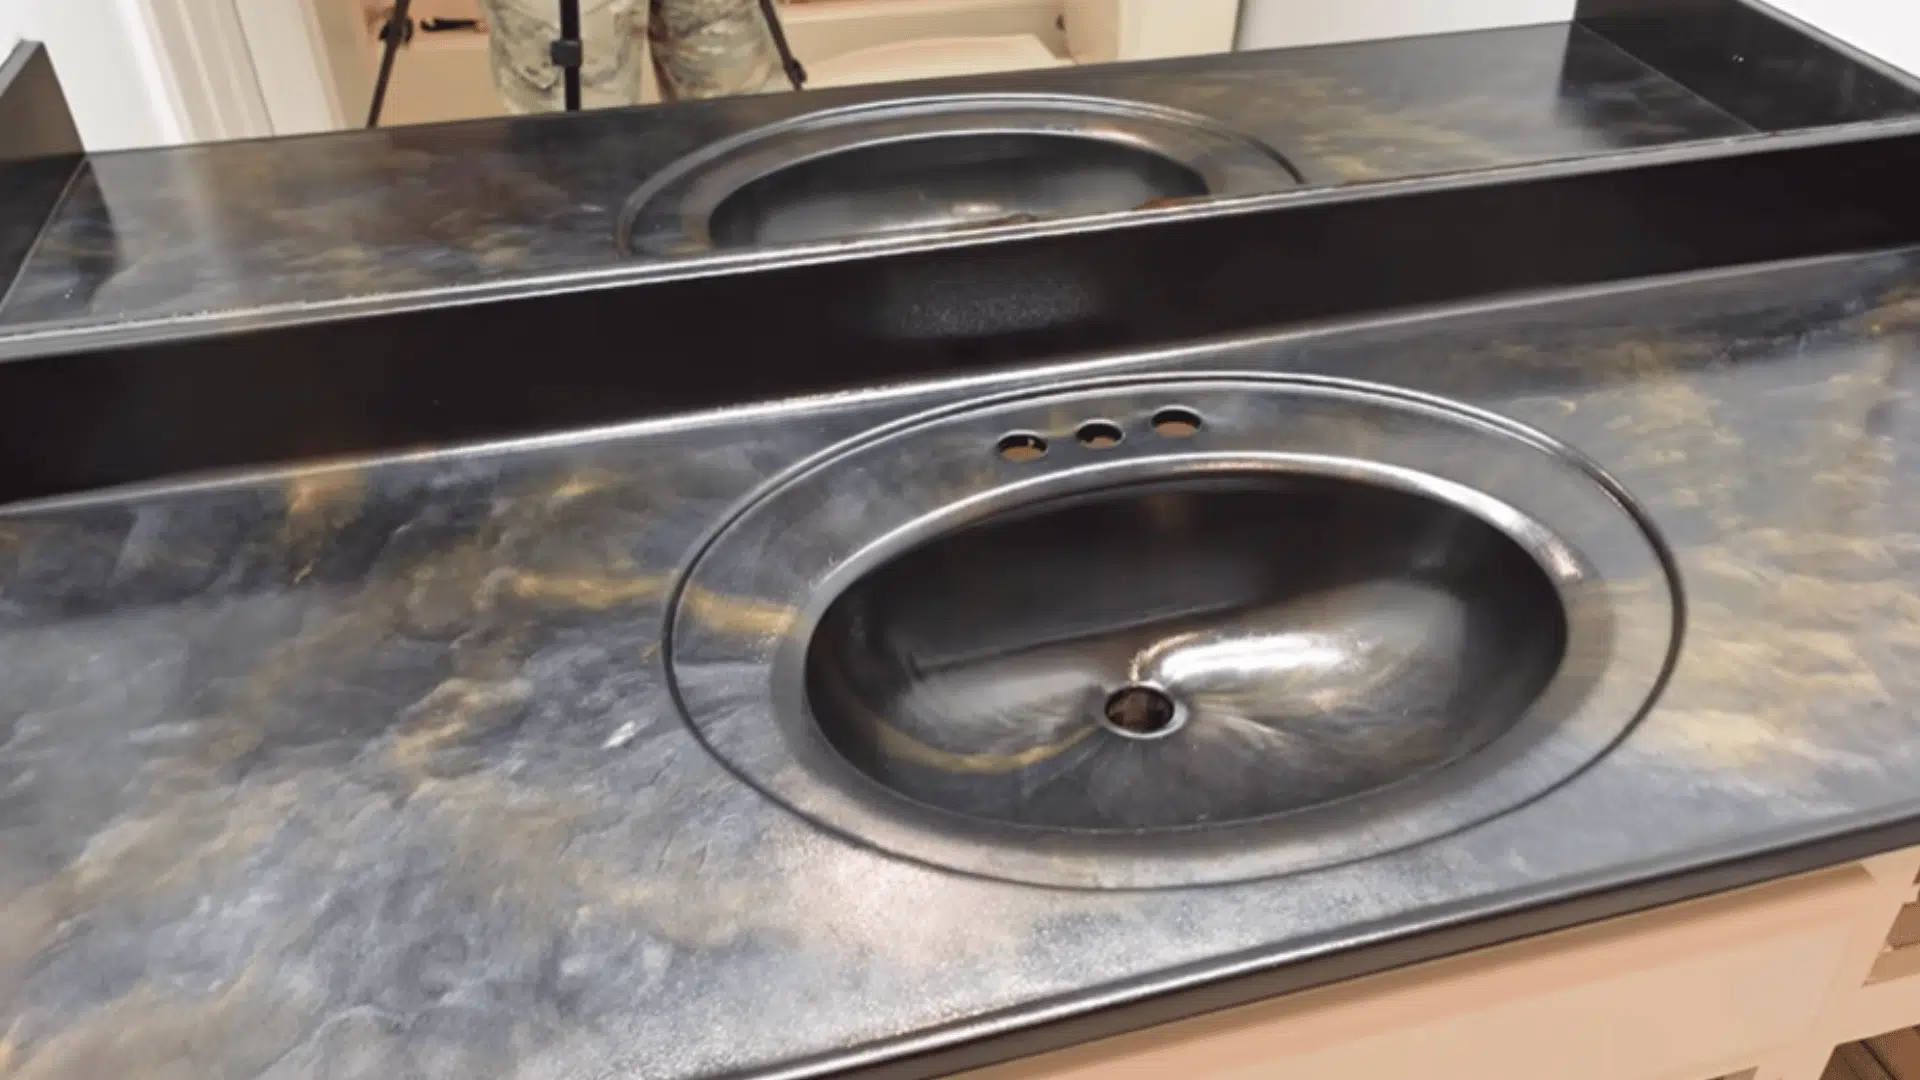
After about 90 minutes, carefully remove the tape while the epoxy is still slightly soft. This helps prevent pulling or damaging the edges. Be gentle and avoid touching the surface directly.
Let the vanity cure fully before reinstalling the faucet and drain. Finish by applying fresh latex-based caulk where needed.
Give the surface a full 72 hours before placing any items back on the vanity to allow the epoxy to reach its maximum hardness.
For a hands-on walkthrough, watch the full tutorial below:
What the Community Recommends
People who have tackled a refinished bathroom vanity project firsthand share what actually worked for them.
One user shared that pigmented shellac primer offers the strongest stain hiding and adhesion, with oil-based primers also performing well over factory finishes after a light sand.
Pigmented shellac primers like Zinnser’s BIN is the ultimate primer when it comes to both stain hiding and adhesion. Normally most oil base primers will do ok over factory finishes after a light sanding. Sanding promotes good adhesion but generally there is no need to completely sand off the existing finish.-marksr, DoItYourself.com
One user strongly recommended priming before painting, citing better adhesion, stain blocking, and a smoother overall finish as the key reasons.
I highly recommend priming first with a Bondable latex primer and a dense foam roller for paint adhesion, blocking dark staining, and a smooth finish. Anita Sayles, Houzz
One user shared that gel stain is an easy, effective alternative to a full paint job, requiring no sanding and delivering results that hold up well over time on the bathroom vanity.
I personally love gel stain (General Finishes), which is really easy to use with very good looking results. No sanding required, and much less work than a proper paint job. It’s positively addictive. nosoccermom, Houzz
Common Mistakes to Avoid when Refinishing
Even a well-planned refinish bathroom vanity project can fall short when small but costly mistakes are made during the process.
- Skipping Sanding: Sanding is what allows primer and paint to properly grip the surface. Without it, even the best bathroom vanity paint will begin peeling within weeks.
- Skipping Primer: Applying paint directly without primer leads to poor adhesion and an uneven finish. It breaks down quickly with daily exposure to moisture and humidity.
- Thick Coats: Applying paint too thickly in a single coat results in drips, uneven texture, and significantly longer drying times, disrupting the entire refinishing schedule.
- Rushing Drying: Moving to the next coat before the previous layer is fully dry is one of the most common reasons a refinish job fails within the first few months.
- Poor Ventilation: Working in a closed bathroom without airflow can slow drying time and cause fumes to build up. This directly affects how evenly each coat settles on the surface.
Wrapping It Up
A well-executed refinish does more than improve how the vanity looks; it extends the life of the existing structure without the cost of a full replacement.
The condition of the surface before any product is applied determines how long the result lasts, which is why preparation carries as much weight as the finishing steps.
Anyone willing to work through each step carefully will end up with a result that looks and performs well above what the budget suggests.
Pick up your supplies and get started this weekend with a refinished bathroom vanity project.

James McLaren, with a rich background in architecture from the University of Manchester, has been contributing his expertise to the world of creative construction and home innovation for over 20 years. His journey began as a project manager for a leading construction firm, where he honed his skills in bringing complex designs to life. James joined our platform as a freelancer in 2019, quickly becoming a favorite for his insightful and practical advice. He has been a pivotal force to our wing ever since, bringing our readers a blend of technical know-how and creative flair. Beyond his professional life, James is an avid woodworker and enjoys restoring vintage furniture, a hobby that complements his professional insights beautifully.