
Fresh herbs can transform an ordinary meal, and among all the herbs I’ve worked with over nine years of horticulture, chives consistently top my list for home gardeners.
They’re forgiving, productive, and genuinely rewarding to grow, if you’re tending a container on a kitchen windowsill or managing a full backyard garden bed.
This guide covers everything involved in growing chives successfully: when to plant, how to create the right growing conditions, a step-by-step process from seed to harvest, seasonal care, storage, and troubleshooting the most common problems.
If you follow these steps, you’ll have a healthy, productive chive plant that returns season after season with minimal effort.
What are Chives and Why Should You Grow Them?
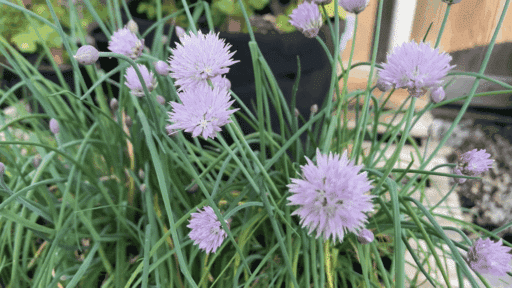
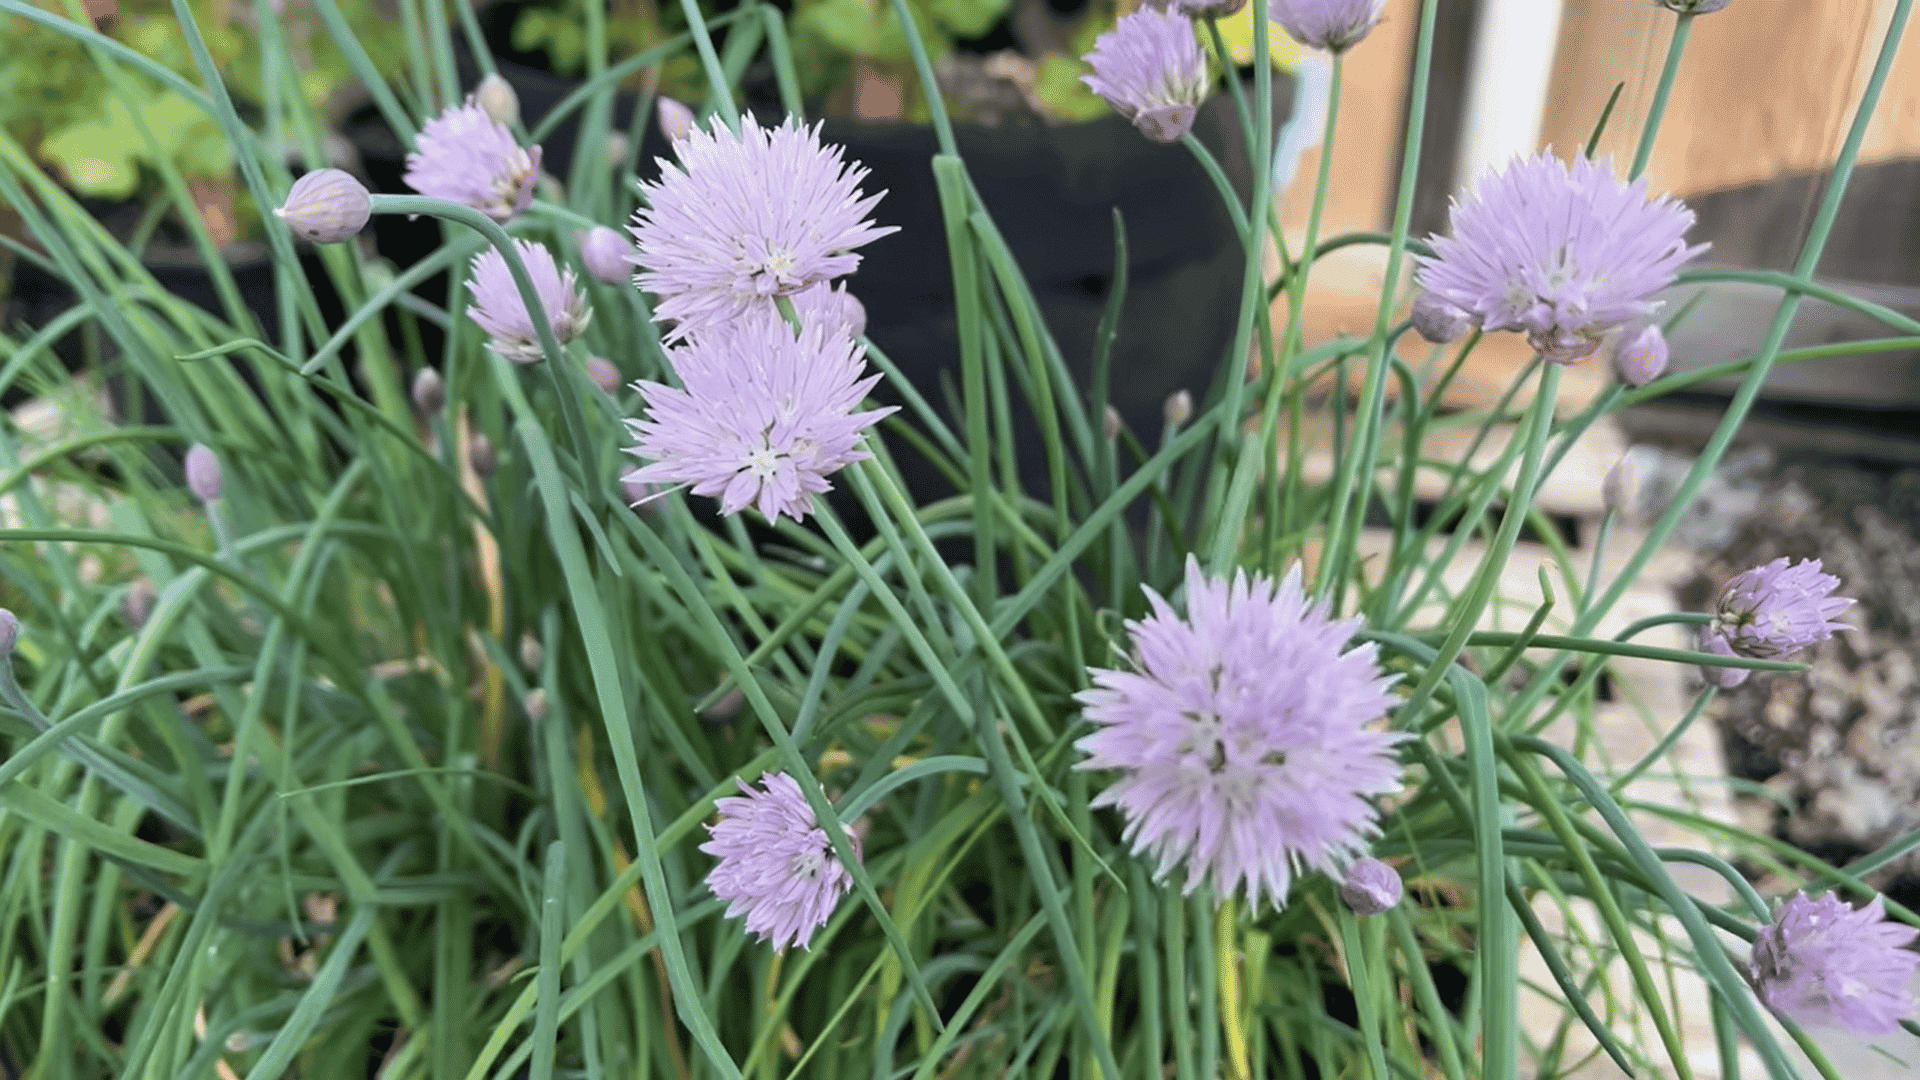
Chives are a small green herb from the onion family. They have thin leaves, a mild onion taste, and soft purple flowers that can also be eaten.
You can use chives in salads, soups, eggs, potatoes, and many other meals. They add fresh flavor without being too strong.
One reason many people like growing chives is that they are very easy plants to grow and simple to care for. They do well in garden beds, raised planters, and even small pots on a windowsill.
They also grow back every year in many climates, which makes them a good long-term herb for home gardens.
I also think chives are great for beginners because they do not need much space or constant attention. With the right sunlight and regular watering, they can grow quickly and stay healthy through most of the season.
Another helpful benefit is that chives can attract pollinators like bees while helping keep some garden pests away. That makes them useful in many vegetable and herb gardens.
When is the Best Time to Plant Chives?
The best time to plant chives is usually in early spring after the ground starts to warm up. This gives the plants enough time to grow strong before the hot summer heat arrives.
If you live in a warmer area, you can also plant chives in the fall because cooler temperatures help the roots settle in well.
Chives grow best in mild weather with plenty of sunlight. Many gardeners start seeds indoors about 6 to 8 weeks before the last frost date.
Once the weather becomes warmer and more stable, the plants can be moved outside.
Chives are also more flexible than many other herbs. You can grow them in garden beds, raised planters, or small containers near a sunny window.
As long as the soil drains well and the plants get regular water, they usually grow without much trouble.
Things to Know Before Growing Chives
Chives are easy to grow, but a few simple details can make a big difference. Knowing these basics early can help you avoid common growing problems later.
- Sunlight: Chives grow best in a spot that gets around 6 hours of sunlight each day. Too much shade can make the leaves thin and weak.
- Soil Type: Use loose, well-draining soil to help the roots stay healthy. Heavy or soggy soil can slow growth and cause root problems.
- Watering: Keep the soil slightly moist but not overly wet. Chives do not like sitting in water for long periods.
- Space Requirements: Give chives enough room to spread as they grow. Crowded plants may not grow as fully or as healthily.
- Growing Location: You can grow chives in garden beds, raised planters, or containers. They adapt well to both indoor and outdoor spaces.
- Regular Trimming: Cutting chives often helps them grow back thicker and healthier. Leaving old leaves too long can slow fresh growth.
- Temperature Needs: Chives prefer mild weather and usually grow best in spring and early summer. In many areas, they can survive year after year.
- Starter Plants vs Seeds: Seeds take longer to grow, while starter plants give faster results. I think starter plants are easier for those new to gardening.
- Companion Planting: Chives grow well near vegetables and herbs. Their smell may help keep some pests away from nearby plants.
- Flower Growth: Chives produce purple flowers during the season. The flowers are edible and can also attract pollinators like bees.
How to Grow Chives Step by Step
Growing chives is simple when you follow a few basic steps. You do not need much space or experience to grow healthy plants at home.
Everything You Need to Grow Chives Successfully
- Chive seeds
- seed starting soil
- Pots or containers
- Watering can or garden hose
- potting mix
- Small gardening tools
- Mild fertilizer
1. Plant the Seeds in Light Soil
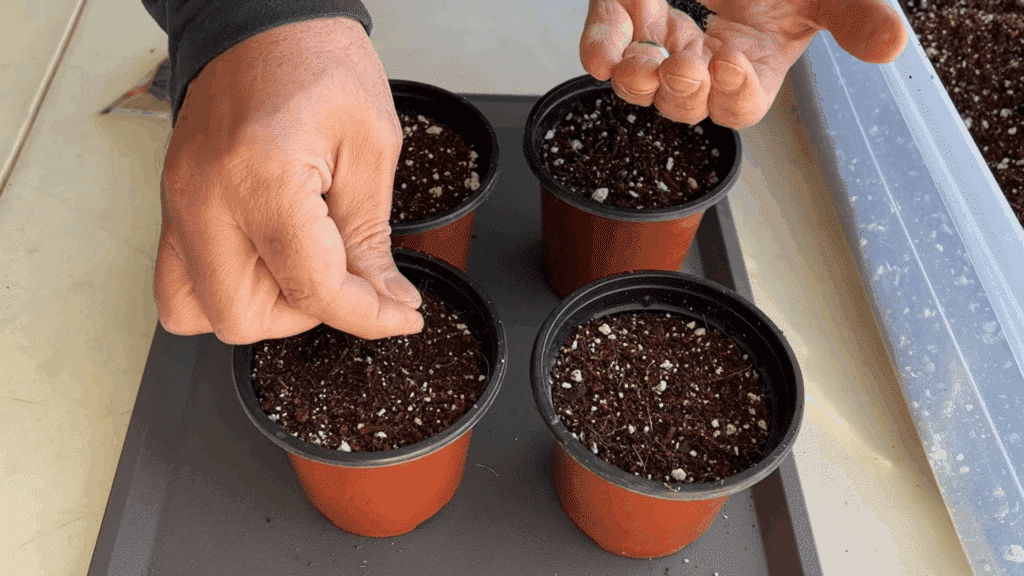
Begin by filling small pots or seed trays with seed-starting soil. Place about 4 to 6 chive seeds in each pot and lightly cover them with the same soil.
You do not need to plant them too deeply, as chive seeds grow better near the surface.
Press the soil down gently so the seeds stay in place after watering. Using light and loose soil helps the seeds sprout more evenly.
Keep the pots in a warm area while waiting for the first signs of growth. Most seeds begin sprouting within a couple of weeks under the right conditions.
2. Keep the Soil Evenly Moist
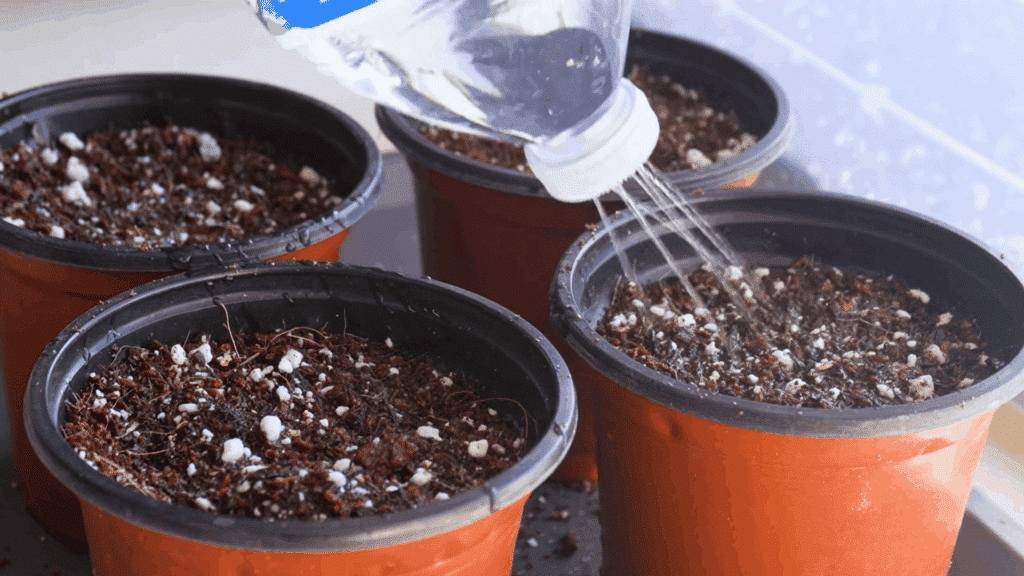
After planting, water the soil gently until it feels moist. The soil should stay slightly damp but not soaking wet.
Too much water can weaken young roots and slow growth. A spray bottle or light watering can works well because it prevents the seeds from moving around.
Checking the soil daily helps stop it from drying out completely. Chive seeds need steady moisture during the early growing stage.
If the top layer feels dry, add a small amount of water rather than soaking the entire pot at once.
3. Place the Seedlings in Sunlight
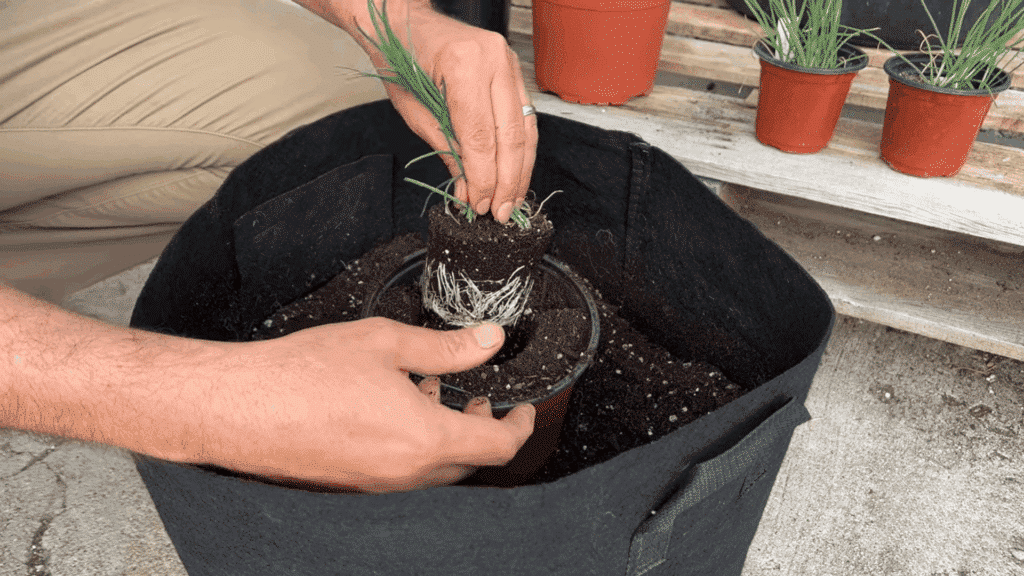
Once the seedlings appear, move them to a sunny place where they can get around 6 hours of sunlight each day.
A windowsill, balcony, or outdoor garden space usually works well. After about 35 days, the seedlings should look greener and stronger.
At this stage, the roots are becoming more stable, and the leaves will start filling out. Regular sunlight helps chives grow upright and healthy.
Plants grown in low light often become thin and weak, especially during the first few weeks of growth.
4. Transplant the Seedlings to Bigger Pots
As the chives continue growing, the roots will need more space to spread. Move the plants into a larger container or garden bed once they start to look crowded.
Be gentle during transplanting so the roots do not get damaged. Add fresh soil to the new container and water lightly after moving the plants.
More growing space helps improve airflow and root development.
Leave some space between clumps so the plants can continue growing without competing for water, nutrients, or sunlight for the rest of the season.
5. Harvest the Leaves Carefully
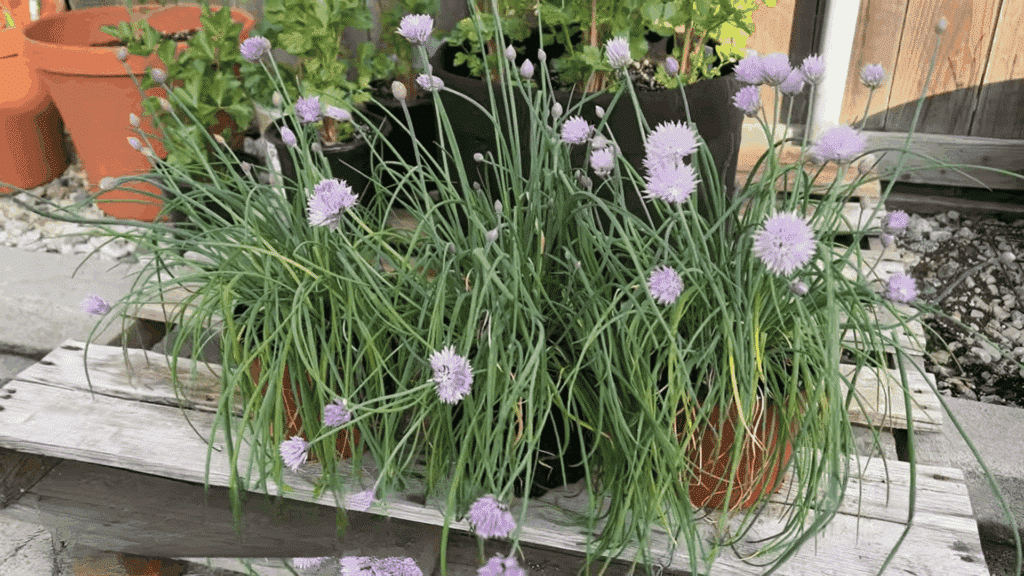
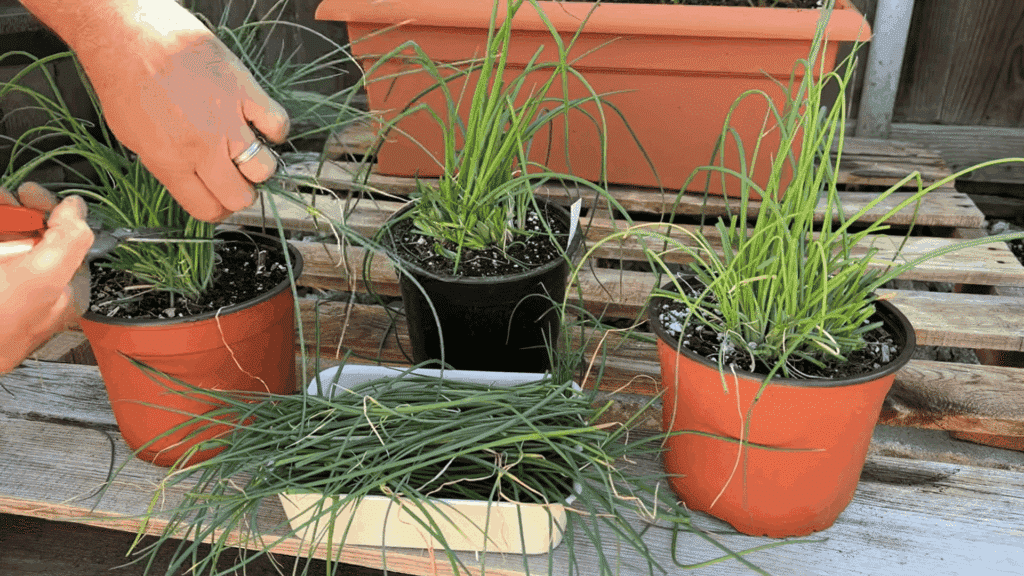
After around 75 days, the chives are usually ready for harvesting. Use clean scissors to cut the leaves a few inches above the base instead of pulling them by hand.
This helps the plants continue producing fresh leaves after each harvest. You can trim small amounts often whenever needed for cooking.
Regular harvesting supports fuller and healthier growth over time.
Avoid cutting the entire plant down at once because leaving some green leaves behind helps the roots stay active and keeps the plant growing steadily throughout the season.
6. Trim Flowers to Support New Leaves
In late spring, chive plants may begin producing purple flowers. The flowers are edible, but many gardeners trim them so the plant can focus more energy on growing leaves.
Cut the flower stems about 2 inches above the base using clean scissors or pruning tools. After trimming, fresh green leaves usually begin growing again fairly quickly.
Removing old flowers can help the plant stay productive longer.
Regular trimming also keeps chive plants looking neat and prevents them from becoming dry or overcrowded later in the growing season.
Watch this quick video guide by Toward Garden to see the full chive growing process step by step, from planting seeds to harvesting fresh leaves at home.
Caring for Your Chives Throughout the Season
Chives are easy to maintain once they start growing well.
A few simple habits can help the plants stay healthy, green, and productive through the season.
- Water regularly: Chives grow best when the soil stays slightly moist. Water the plants when the top layer of soil starts to feel dry, especially during hot weather.
- Give Them Enough Sunlight: Try to keep chives in a spot that gets around 6 hours of sunlight daily. Good light helps the leaves grow fuller and stronger.
- Trim the Leaves Often: Regular trimming encourages fresh growth and keeps the plants from becoming weak or overgrown. Cut the leaves with clean scissors instead of pulling them.
- Remove Flower Stems: Purple flowers usually appear in late spring or early summer. Cutting the flower stems can help the plant focus more energy on growing leaves.
- Use Light Fertilizer if Needed: Chives do not need heavy feeding, but a mild fertilizer once in a while can support steady growth during the season.
- Watch for Overwatering: Too much water can cause root problems and yellow leaves. Make sure the soil drains well after watering.
- Keep the Area Clean: Remove dead leaves and weeds around the plants to improve airflow and lower the chance of pests or disease.
- Divide Older Plants: Mature chive clumps can become crowded after a few years. Splitting them into smaller sections helps them continue growing well.
- Protect Indoor Plants From Dry Air: If you grow chives indoors, keep them near sunlight and avoid placing them too close to heaters or air vents.
- Harvest Carefully: Leave part of the plant behind during harvesting so new leaves can continue growing throughout the season.
How to Store Fresh Chives After Harvest
Fresh chives stay at their best when they are stored properly right after harvesting. A simple storage method can help keep the leaves fresh, green, and ready to use for a longer time.
Before storing them, remove any damaged or yellow leaves and make sure the chives are mostly dry. Too much moisture can make them soft or slimy after a few days.
One easy way to store chives is by wrapping them loosely in a slightly damp paper towel and placing them inside a plastic bag or airtight container in the refrigerator.
Cool storage helps the leaves stay fresh longer.
Fresh chives usually taste best within the first week, so smaller harvests often work better than storing large amounts for too long.
If you want to keep them longer, freezing is usually the best option.
Chop the chives into small pieces and place them in freezer bags or ice cube trays with a little water or oil.
Frozen chives still work well in soups, eggs, potatoes, and other cooked meals. I usually avoid fully drying chives because they can lose some of their flavor that way.
Common Growing Problems and How to Fix Them
Small growing issues are normal when caring for chives. Most problems can be fixed quickly with simple changes to watering, sunlight, or plant care.
| Problem | How to Fix It |
|---|---|
| Yellow Leaves | Reduce watering and make sure the soil drains well so the roots do not stay wet. |
| Thin or Weak Growth | Move the plants to a brighter location with at least 6 hours of sunlight daily. |
| Slow Growth | Add compost or mild fertilizer and divide crowded plants if needed. |
| Dry Leaf Tips | Water more consistently during hot or dry weather conditions. |
| Root Rot | Use well-draining soil and avoid letting water sit around the roots. |
| Pests on the Leaves | Wash the leaves gently with water or use mild insecticidal soap. |
| Crowded Plants | Divide older chive clumps every few years to improve airflow and root space. |
| Too Many Flowers | Trim flower stems early so the plant can focus more energy on leaf growth. |
| Weak Indoor Growth | Place indoor chives near a sunny window and keep them away from dry heat sources. |
| Poor Harvesting Habits | Use clean scissors to trim the leaves instead of pulling them by hand. |
I made this mistake when I first grew chives and watered them too often, which caused the leaves to turn yellow very quickly.
After adjusting the watering schedule and giving them more sunlight, the plants became much healthier and started growing thick green leaves again.
Best Tips for Growing Bigger and Healthier Chives
Healthy chives usually come from steady care instead of complicated gardening methods. Small changes in watering, trimming, and sunlight can make a noticeable difference over time.
- Give Chives Enough Sunlight: Chives grow fuller and greener when they get at least 6 hours of sunlight each day. Low light can slow growth and make the leaves thin.
- Harvest Regularly: Frequent trimming encourages fresh leaves to grow back faster. Cutting small amounts often works better than waiting too long between harvests.
- Avoid Overwatering: Keep the soil slightly moist but not soggy. Too much water can weaken the roots and lead to yellow leaves.
- Use Well-Draining Soil: Loose soil helps the roots grow properly and prevents water from sitting around the plant for too long.
- Trim Flower Stems Early: Removing flower stems can help the plant focus more energy on leaf production instead of seed growth.
- Divide Older Plants: Mature chive clumps can become crowded after a few years. Splitting them into smaller sections helps improve growth and airflow.
- Add Compost Occasionally: A small amount of compost or organic matter can improve soil quality and support steady leaf growth during the season.
- Keep Weeds Away: Weeds compete with chives for water and nutrients. Clearing the area around the plants helps them grow stronger.
- Choose the Right Container Size: If you grow chives in pots, use containers with enough depth and drainage holes so the roots have room to spread.
- Protect Plants During Extreme Heat: Very hot weather can dry out chives quickly. Watering earlier in the day can help the plants stay healthier during warmer weeks.
Common Mistakes to Avoid When Growing Chives
Small mistakes can affect how well your chives grow throughout the season. Most of these problems are easy to avoid with simple care and regular attention.
| Common Mistake | Why It Causes Problems |
|---|---|
| Overwatering the Plants | Too much water can weaken the roots and lead to yellow leaves or root rot. |
| Growing Chives in Too Much Shade | Low sunlight can cause thin, weak, and slow-growing leaves. |
| Using Heavy Soil | Dense soil holds too much moisture and limits healthy root growth. |
| Skipping Regular Trimming | Chives grow better when harvested often rather than left untouched for long periods. |
| Planting Too Many Seeds Together | Overcrowded plants compete for sunlight, water, and nutrients. |
| Ignoring Flower Growth | Too many flowers can reduce leaf production because the plant shifts energy toward seed growth. |
| Using Pots Without Drainage Holes | Excess water can stay trapped in the container and damage the roots. |
| Harvesting Too Much at Once | Cutting all the leaves can weaken the plant and slow future growth. |
| Forgetting to Divide Older Plants | Crowded root systems can reduce airflow and limit healthy growth over time. |
| Keeping Indoor Plants Too Close to Heat | Dry heat can cause indoor chives to dry out and weaken quickly. |
Final Thoughts
Growing chives is one of the easiest ways to start a home herb garden without needing a lot of space, tools, or experience.
Once you understand the basics of planting, watering, trimming, and harvesting, the plants usually take care of themselves with very little effort.
Fresh chives can add flavor to everyday meals, and it feels rewarding to cut herbs straight from your own garden or kitchen window.
The good thing about chives is that you can keep improving as you grow them. Small changes in sunlight, watering, or harvesting can make a big difference over time.
The more regularly you care for your chives, the healthier and fuller they usually become.
If you have already grown chives or plan to start soon, share your experience, tips, or questions in the comments below.
Frequently Asked Questions
Do Chives Grow Back Every Year?
Yes, chives are perennial plants in many climates. They usually grow back every year after winter, especially when planted in healthy soil with enough sunlight, water, and regular trimming during the growing season.
Can Chives Grow Indoors Year-Round?
Yes, chives can grow indoors throughout the year if they get enough sunlight. Place them near a bright window and water them regularly so the soil stays slightly moist but not soggy.
How Long do Chives Take to Grow?
Chive seeds usually begin sprouting within 1 to 2 weeks. Most plants are ready for light harvesting in about 60 to 75 days, depending on sunlight, watering, and growing conditions.
Can You Grow Chives from Kitchen Scraps?
Yes, you can regrow chives from leftover roots. Place the roots in water or soil near sunlight, and fresh green leaves will usually begin growing again within several days.
Why are My Chives Turning Yellow?
Yellow chive leaves are often caused by overwatering, poor drainage, or not enough sunlight. Check the soil moisture, improve drainage, and move the plants to a brighter growing location if needed.

With a Master’s in Landscape Architecture from the University of Virginia, Sophia Stephenson has dedicated the last 20 years to creating and maintaining vibrant outdoor spaces. Her professional journey started in landscape design, where she gained a reputation for innovative and sustainable approaches. Sophia became a part of our editorial team as a freelancer in 2019, offering a fresh perspective on outdoor living. Since 2020, she has been the chief for our outdoor design content, blending aesthetic appeal with environmental stewardship. In her leisure time, Sophia is a keen photographer, capturing the beauty of natural landscapes, a hobby that complements her professional expertise.