Do you feel that sharing a bathroom can get frustrating fast when the space feels cramped, busy, or poorly planned? That is exactly why a smart jack-and-jill bathroom layout makes such a big difference.
The right setup can help the space feel more open, organized, and comfortable for everyone using it. Also, it can make busy mornings run much more smoothly.
Small layout choices can completely change how the bathroom functions day to day.
If you are looking for designs perfect for compact homes, keep reading for layout ideas that make shared bathrooms feel stylish, practical, and easy to use.
What is a Jack and Jill Bathroom Layout?
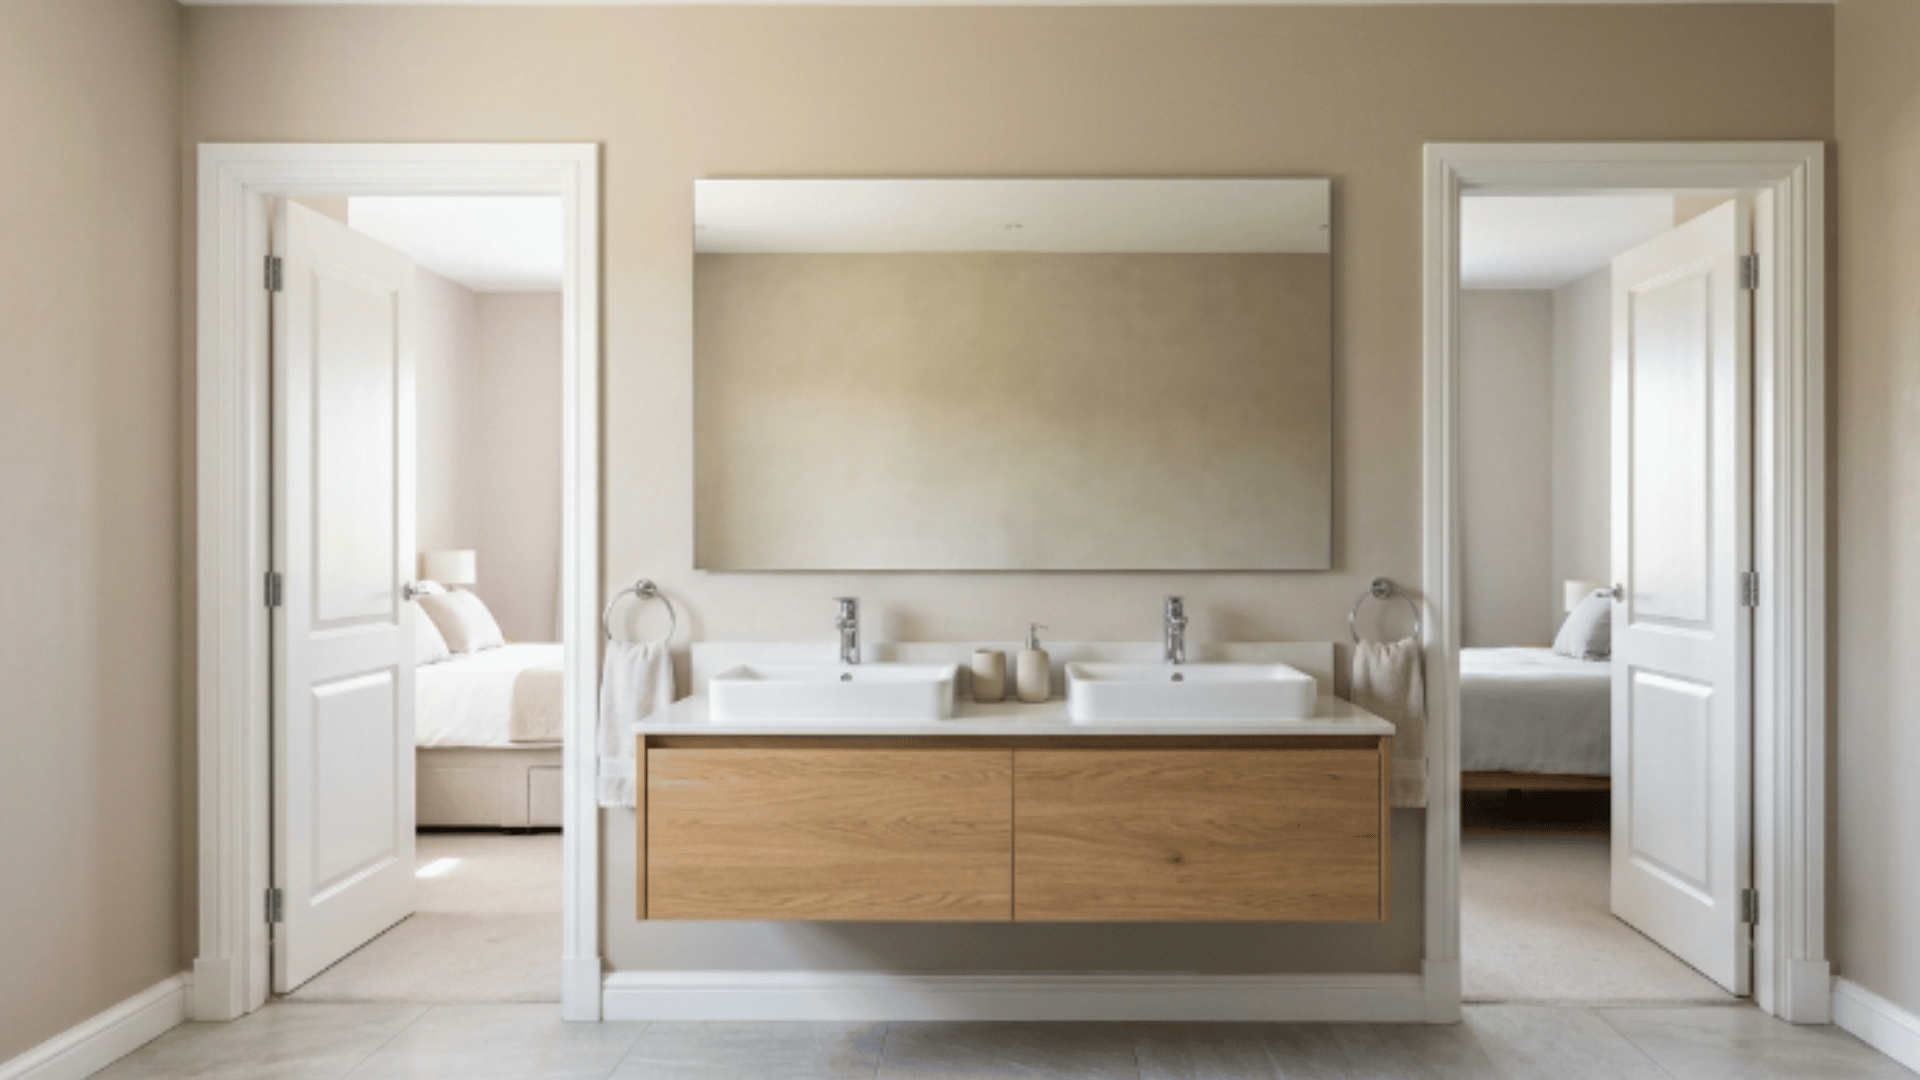
A jack-and-jill bathroom layout is a shared full bathroom located between two separate bedrooms, with a private entrance door leading directly into the bathroom from each room.
The name comes from the classic nursery rhyme and reflects the idea of two people sharing one connected space.
Each bedroom gets its own door into the bathroom, making it function like a personal en-suite for both rooms at the same time.
The shared area typically includes a toilet, shower or tub, and one or two sinks, all arranged so two people can use different parts of the bathroom without getting in each other’s way.
Smart Jack and Jill Bathroom Floor Plans
These floor plans cover a range of layouts and room sizes, offering a clear picture of how a jack-and-jill bathroom layout can be arranged to suit different spaces and needs.
Floor Plan 1: Linear Split Vanity Layout
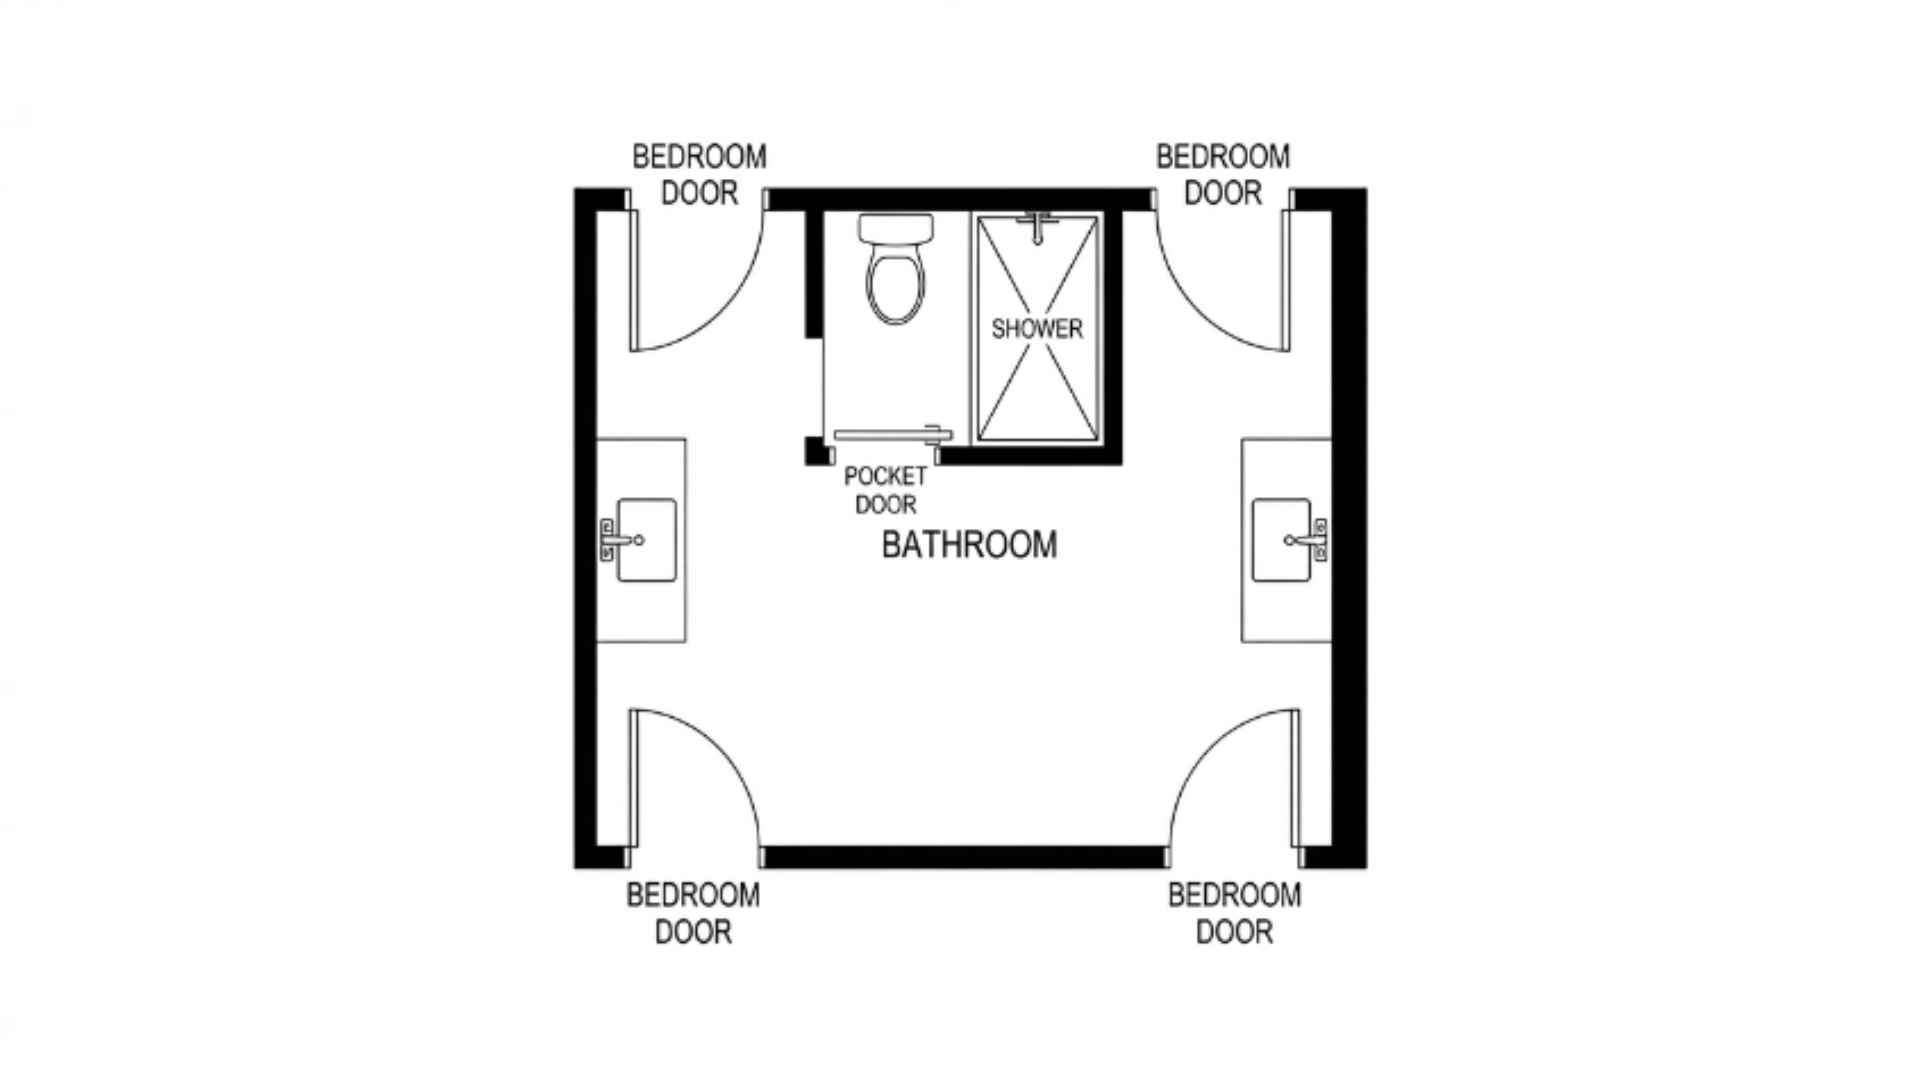
Two separate vanities sit on opposite side walls with a shared toilet and shower enclosed in a private compartment at the center.
Each bedroom door opens directly beside its own vanity, keeping morning routines completely independent. The enclosed center section uses a pocket door, keeping the floor space open.
This layout works best when two users need to get ready at the same time without any overlap.
Floor Plan 2: L-Shaped Corner Layout
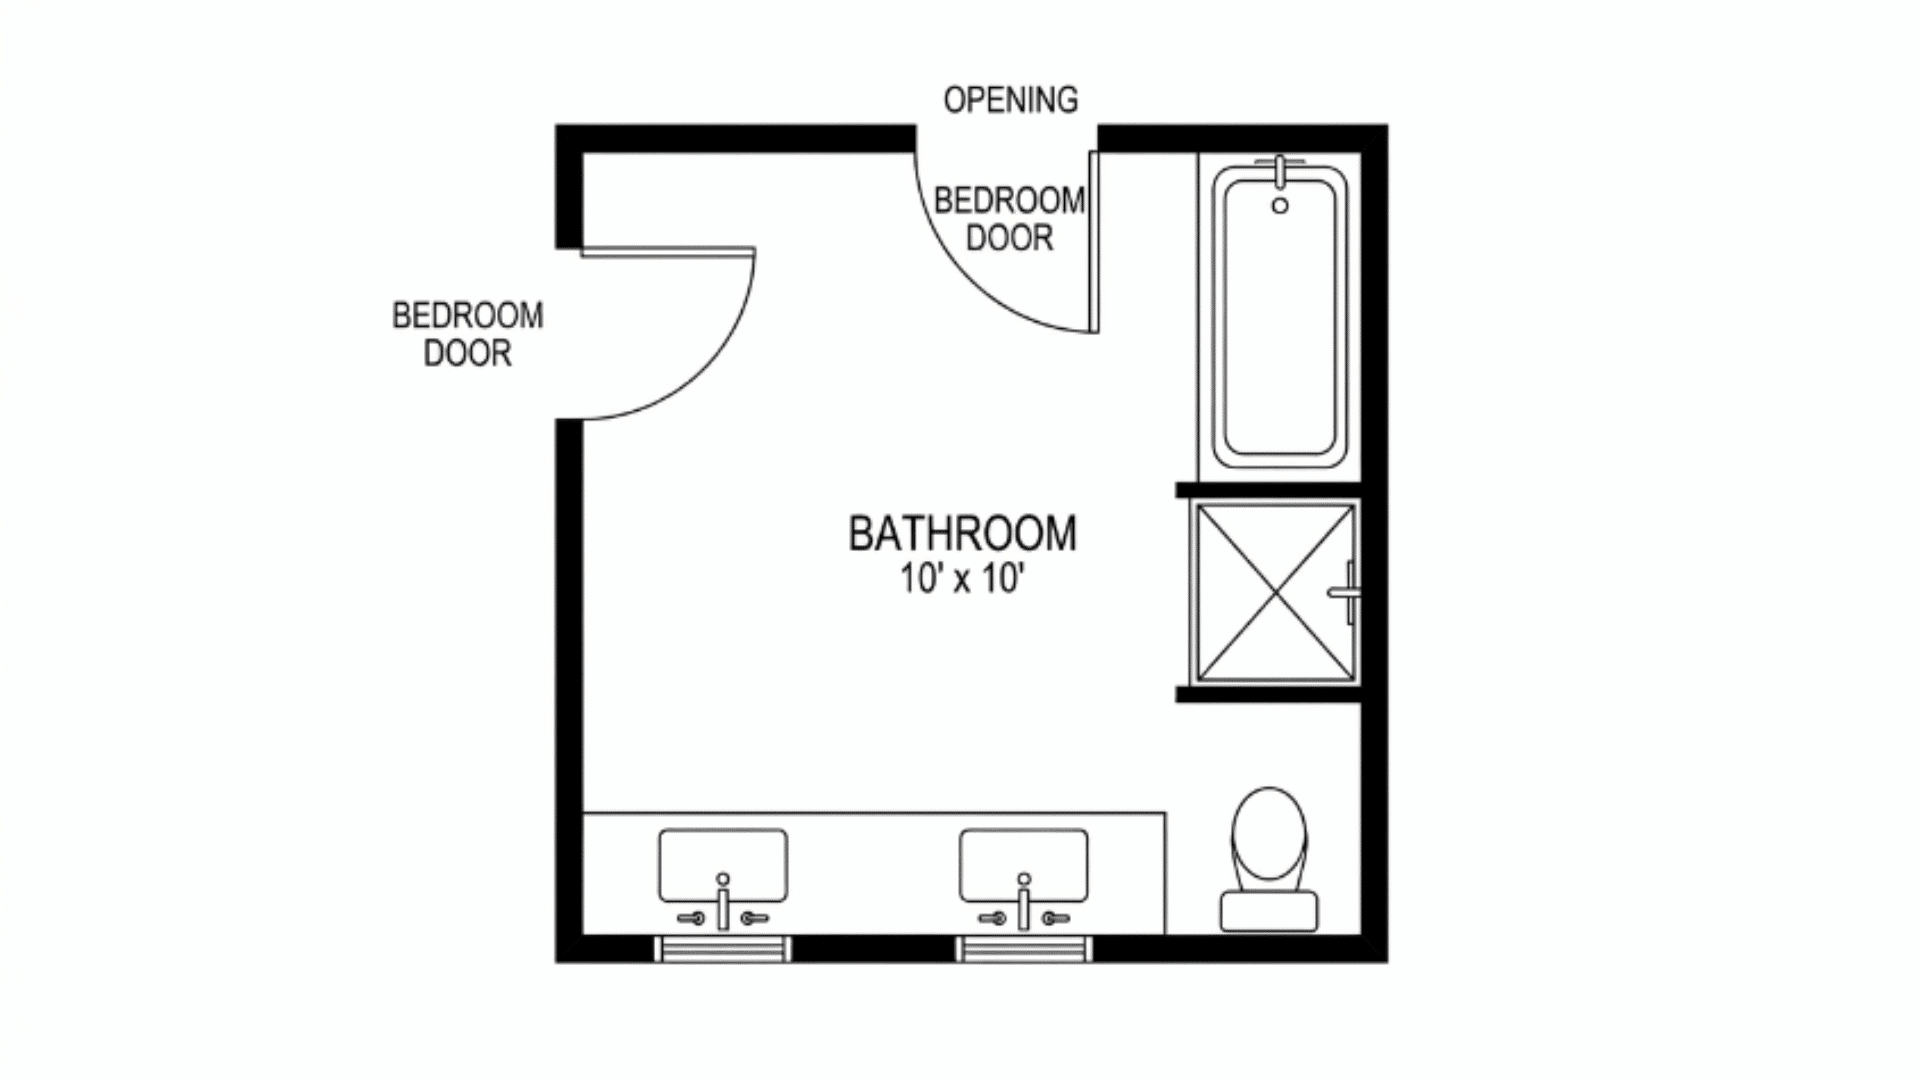
The two-bedroom doors enter from adjacent walls rather than directly opposite each other, creating an L-shaped traffic flow through the bathroom.
The shower and tub occupy the far corner, while a long shared vanity with two sinks runs along one full wall.
This layout gives the bathroom a more open feel and reduces door-to-door sightlines for better privacy. It works particularly well when the two bedrooms are positioned at a right angle to each other.
Floor Plan 3: Central Wet Room with Dual Dry Zones Layout
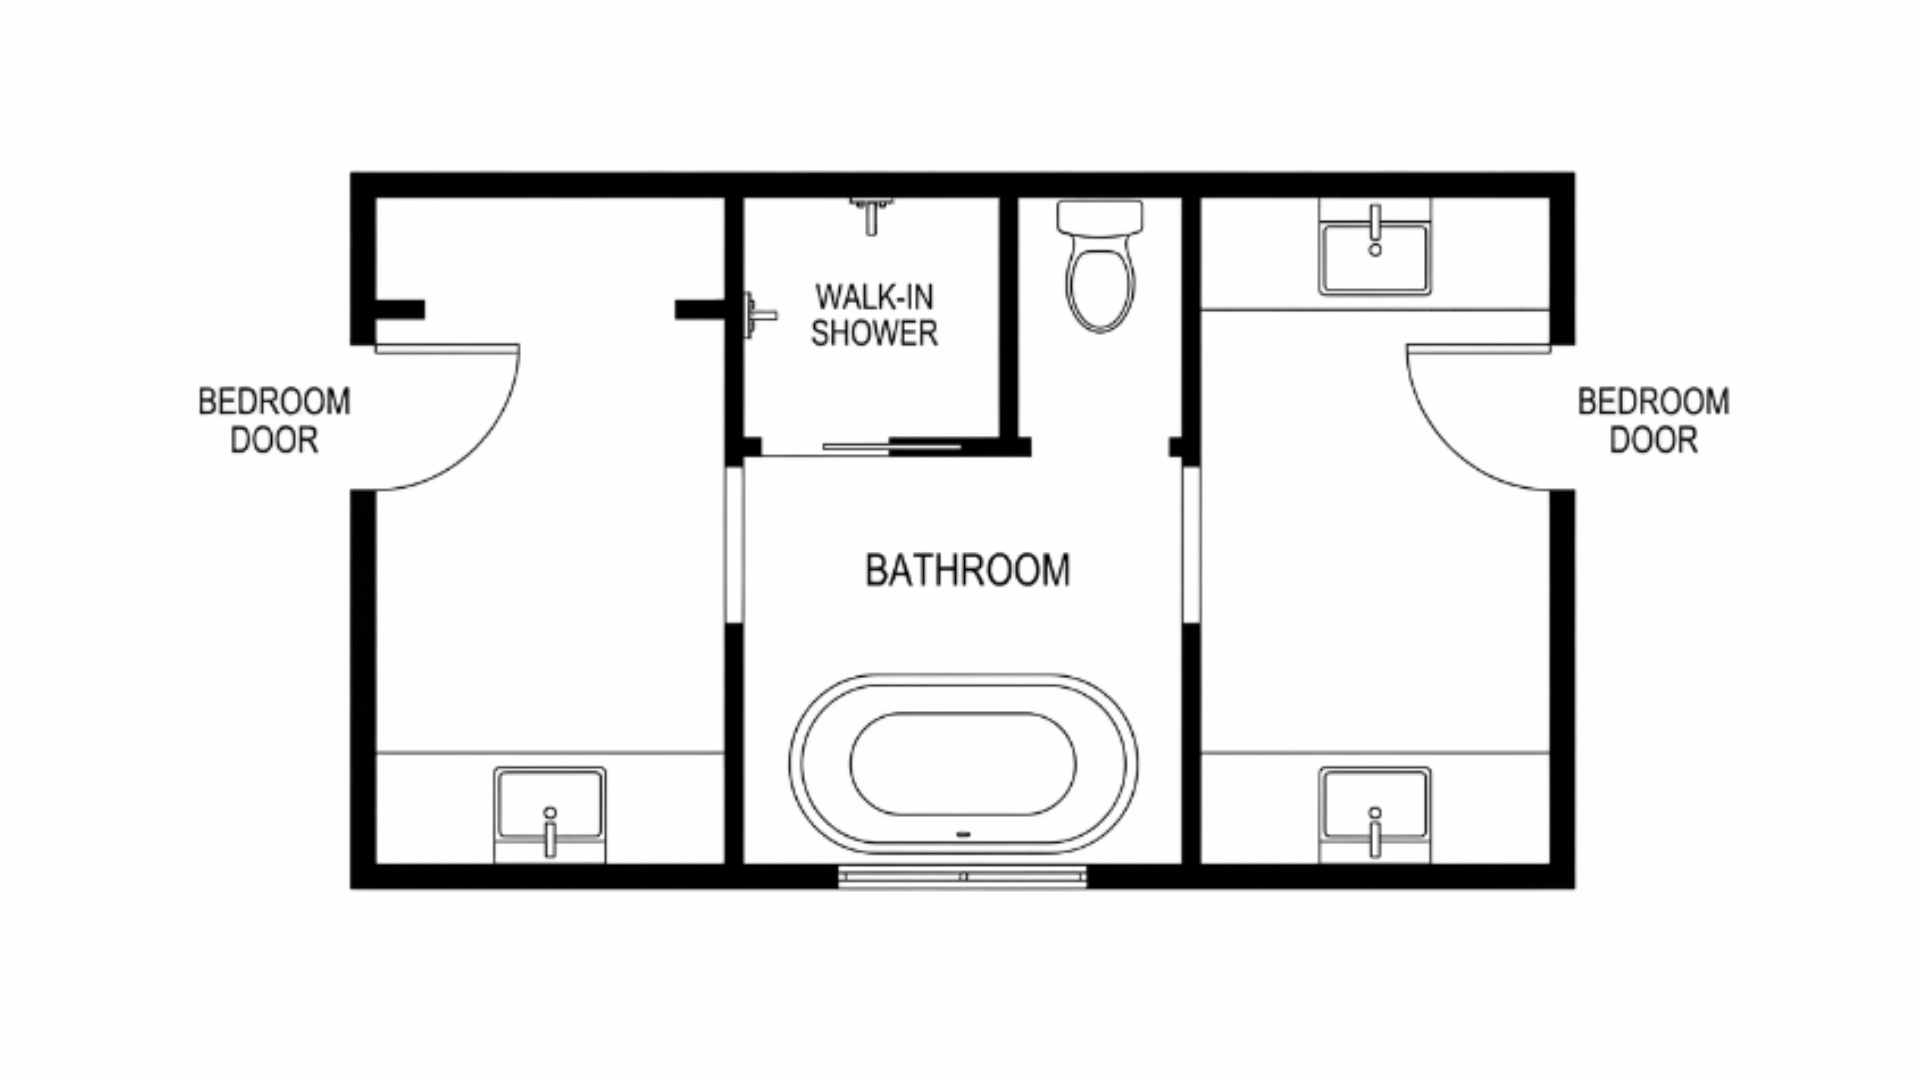
The bathroom is divided into three clear zones running left to right: a dry vanity zone on the left, accessed from bedroom one; a central, fully tiled wet room containing the shower and tub; and a second dry vanity zone on the right, accessed from bedroom two.
The toilet is in the wet zone, behind a low privacy wall. Each user has full control over their own vanity area without ever needing to cross over to the other side.
Floor Plan 4: Compact Layout
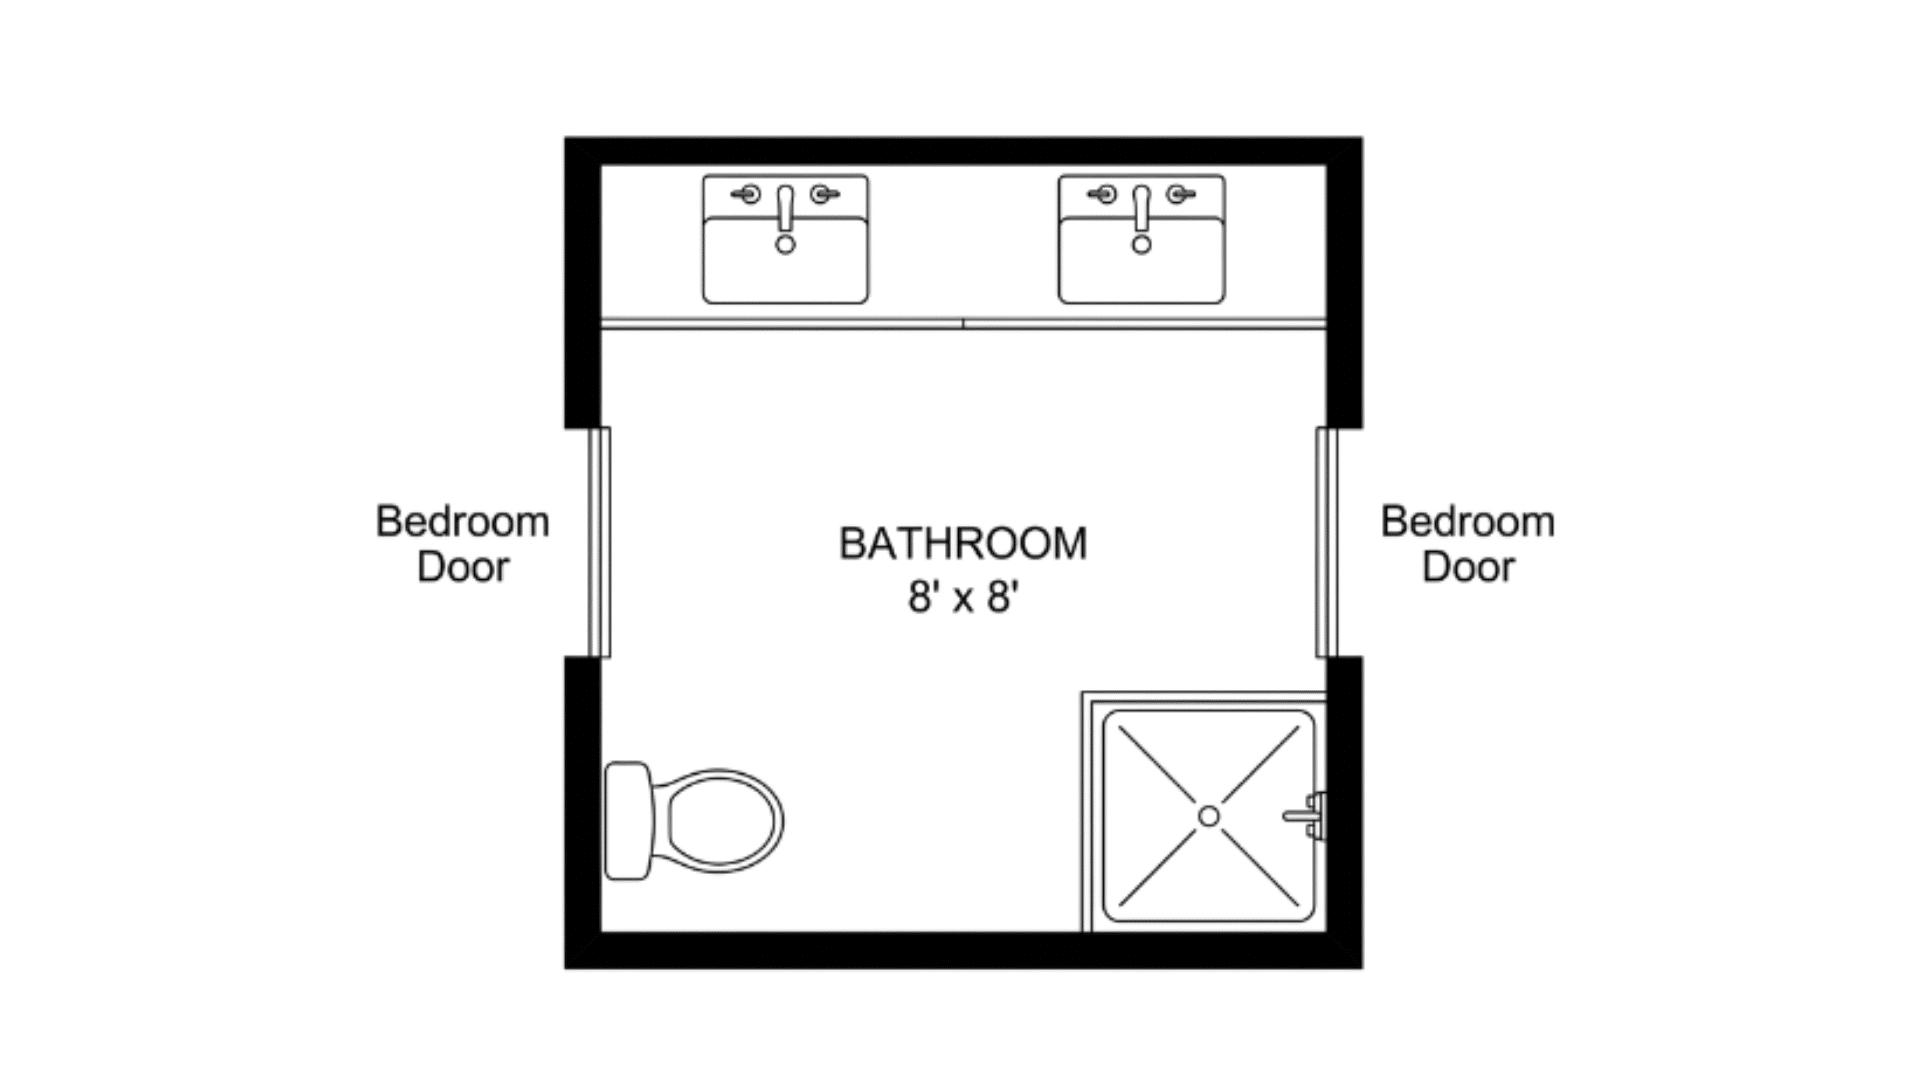
A space-efficient compact layout where all fixtures are arranged along the perimeter walls, leaving the center of the bathroom completely clear for movement.
One combined vanity with two sinks runs along the back wall, the toilet sits in one corner, and a compact corner shower occupies the opposite corner.
Both bedroom doors enter from the two side walls, allowing easy access without any pathways crossing.
Jack and Jill Bathroom Layout Ideas Worth Considering
Every jack and jill bathroom layout on this list is built around a different approach to space, privacy, and daily use. So, there is something here for every home size and floor plan.
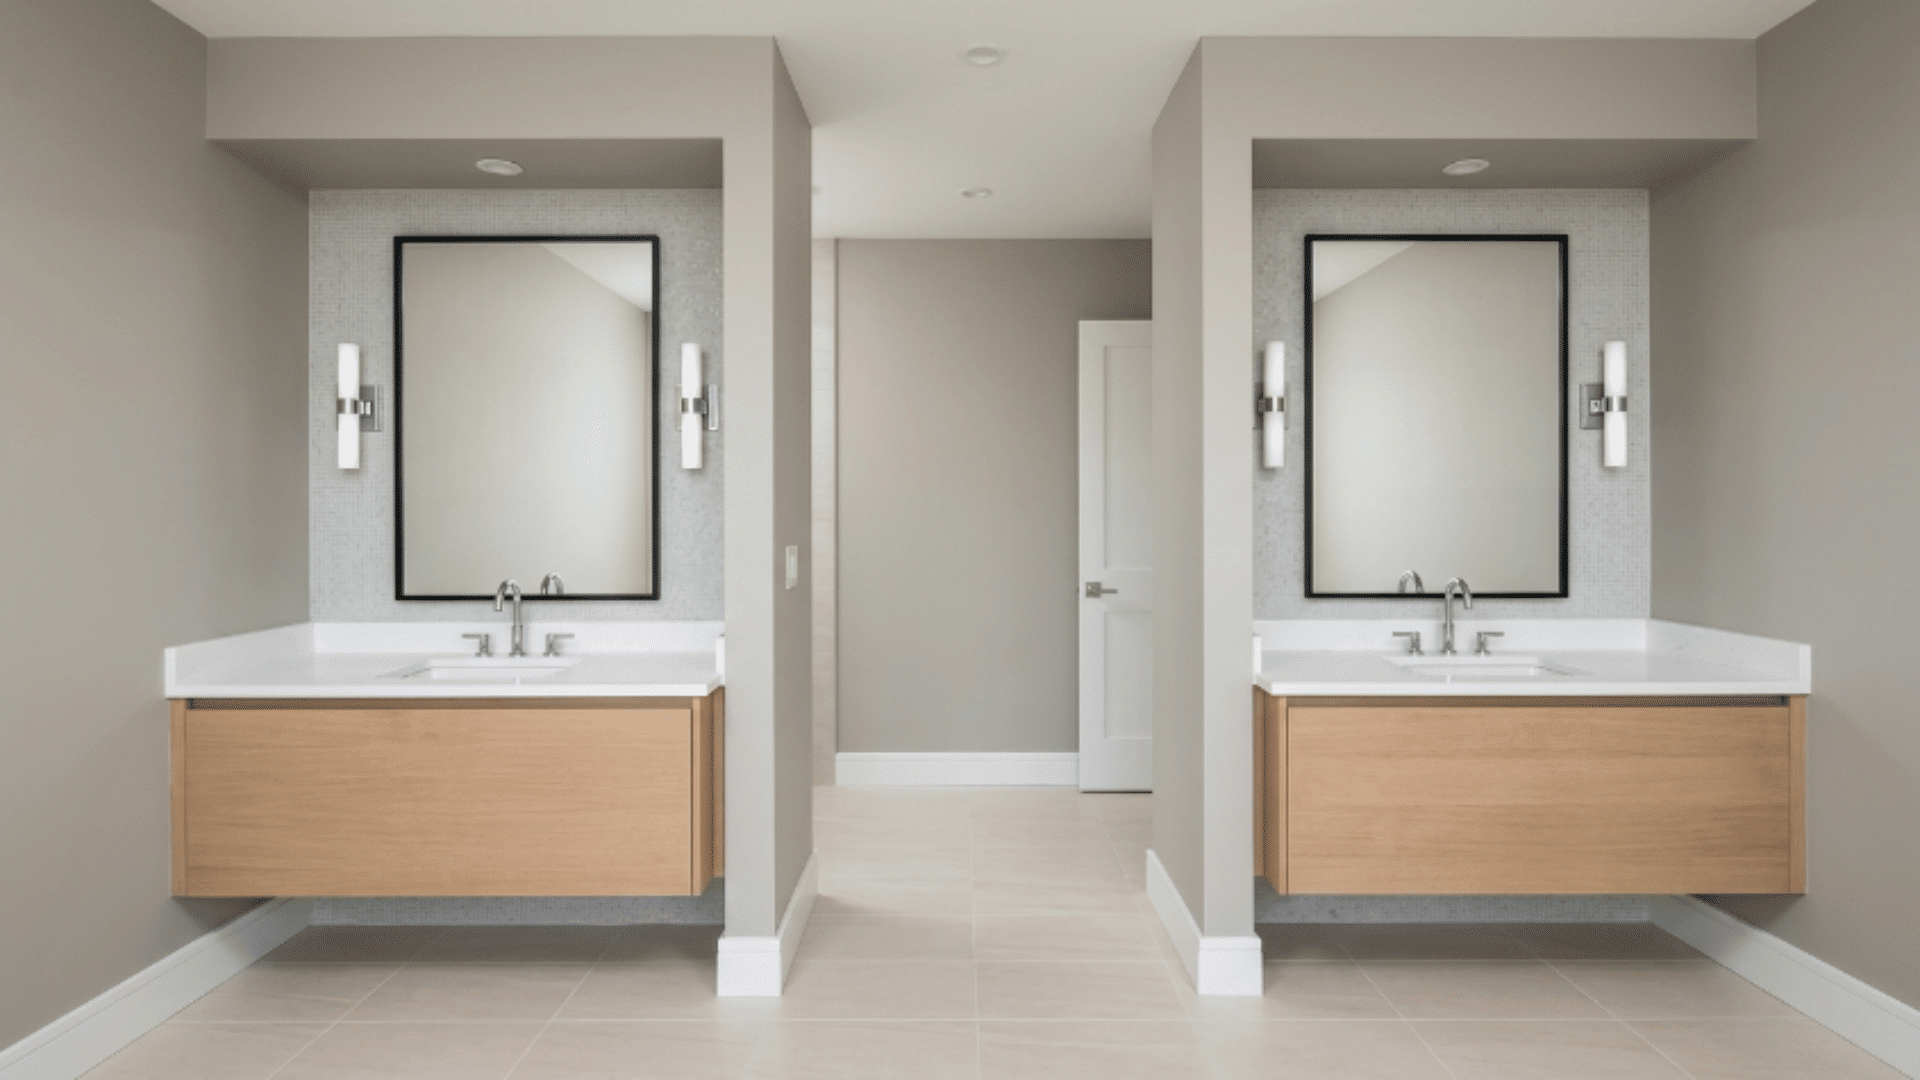
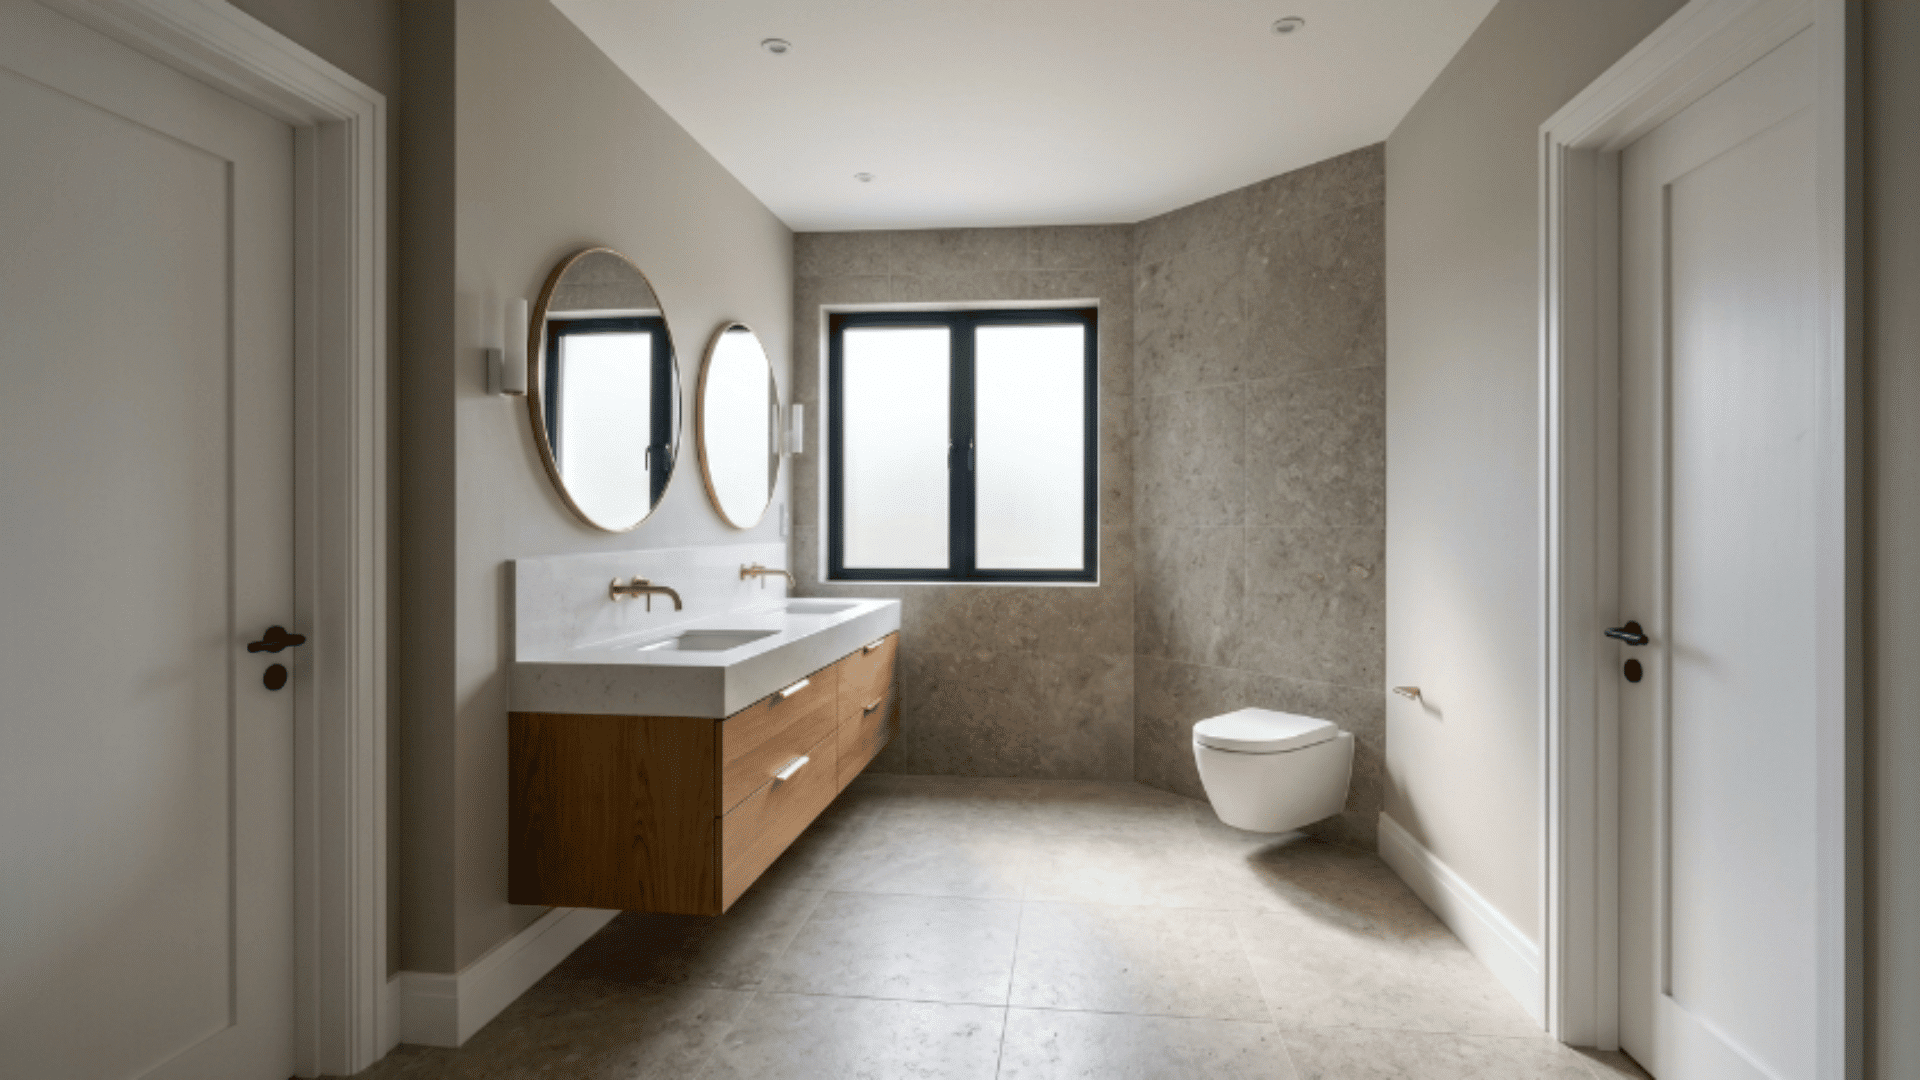
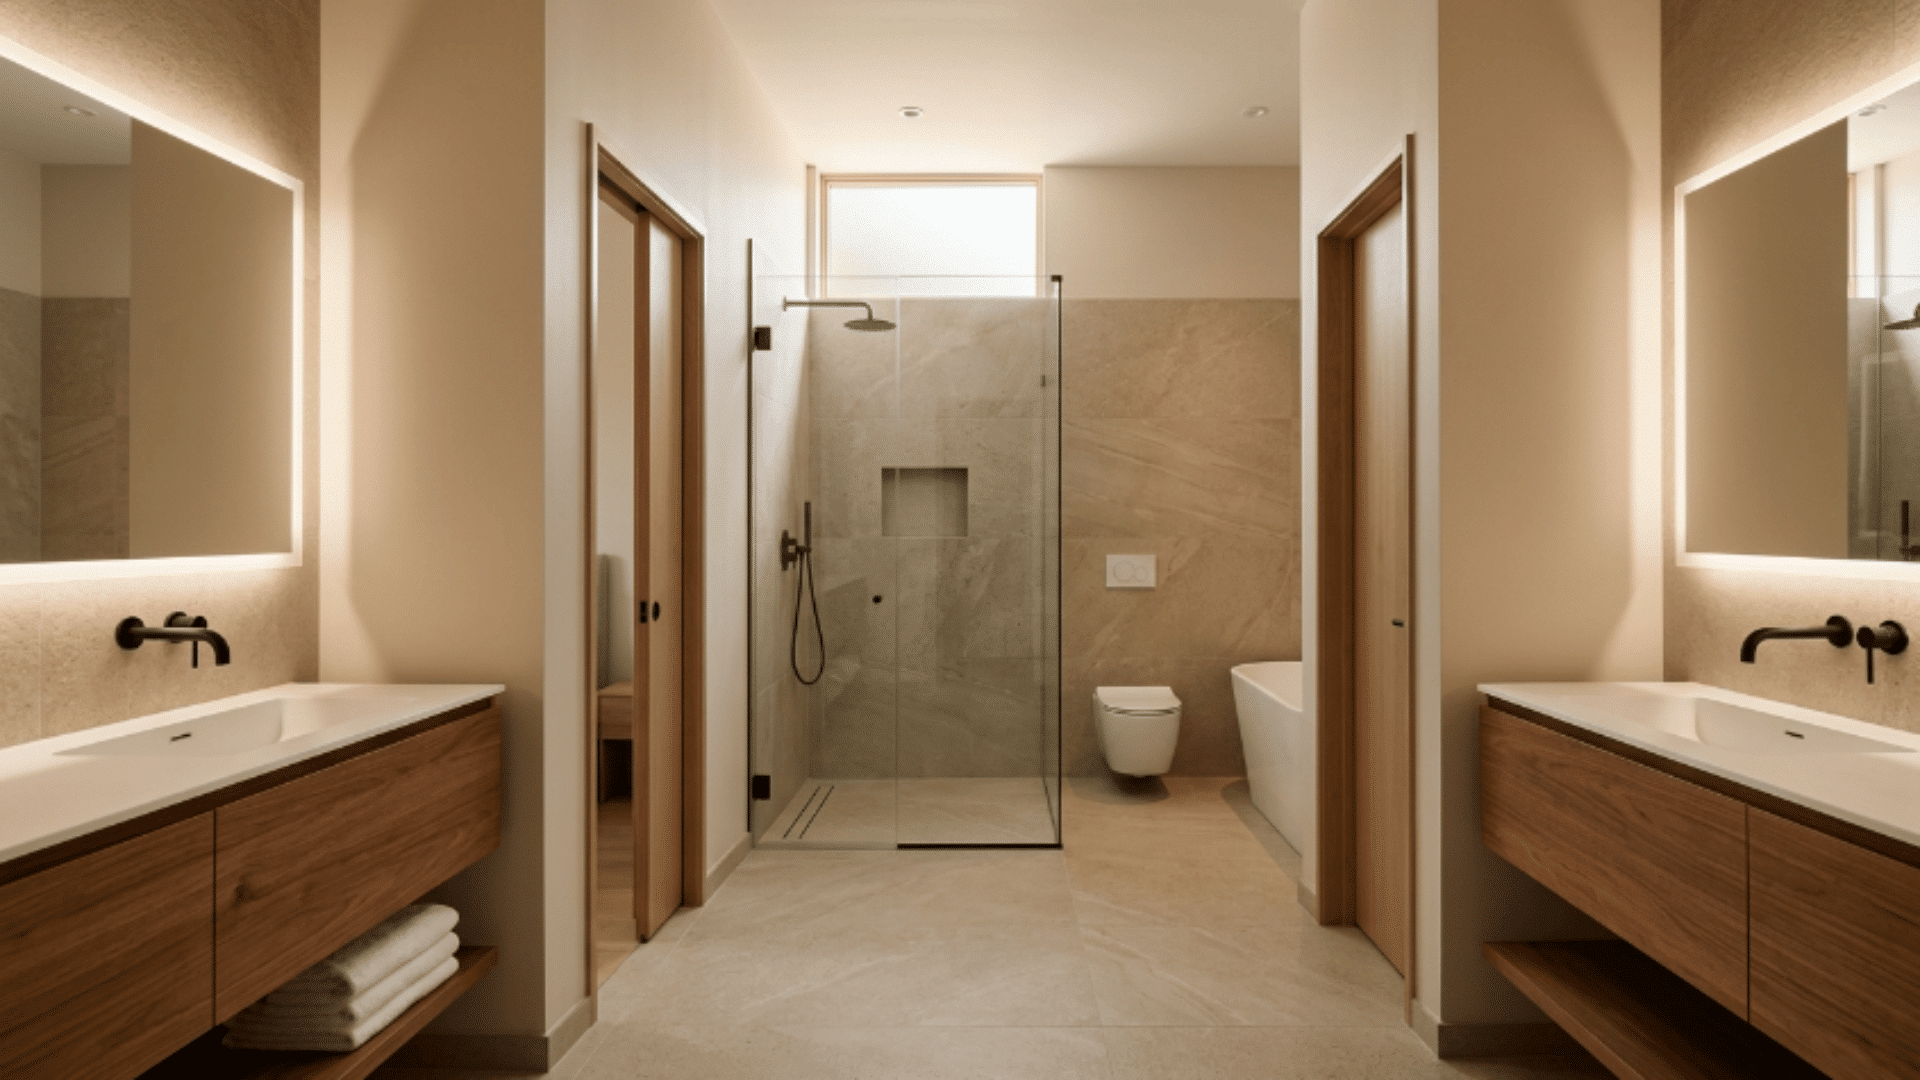
1. Corridor Walkthrough Layout
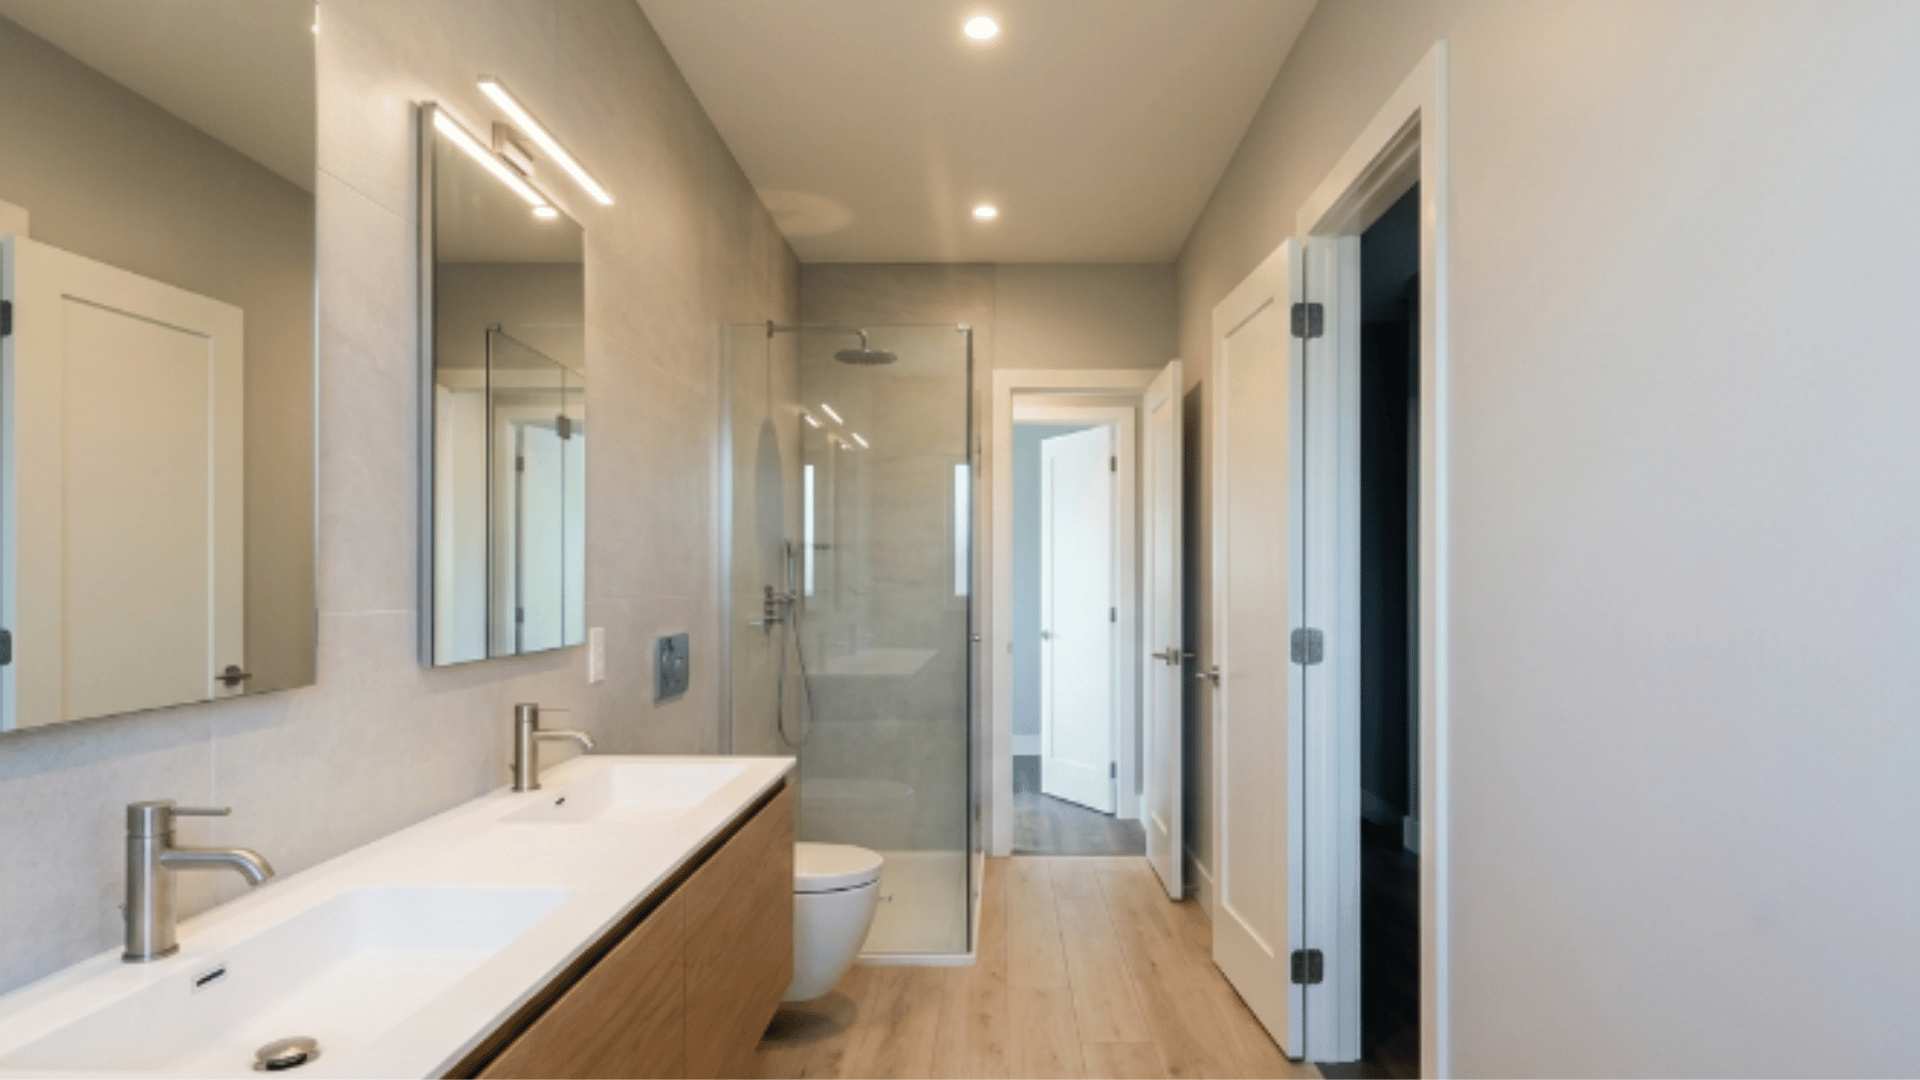
A long, narrow jack and jill bathroom layout where both bedroom doors open at opposite ends of the bathroom, with all fixtures neatly arranged along one wall.
How to Style It:
- Keep floors clear for an open walkway
- Use floating vanities and wall-mounted fixtures
- Pick one floor tile pattern for a longer look
- Add recessed lights in a straight ceiling line
- Use a long frameless mirror to reflect light and widen the space
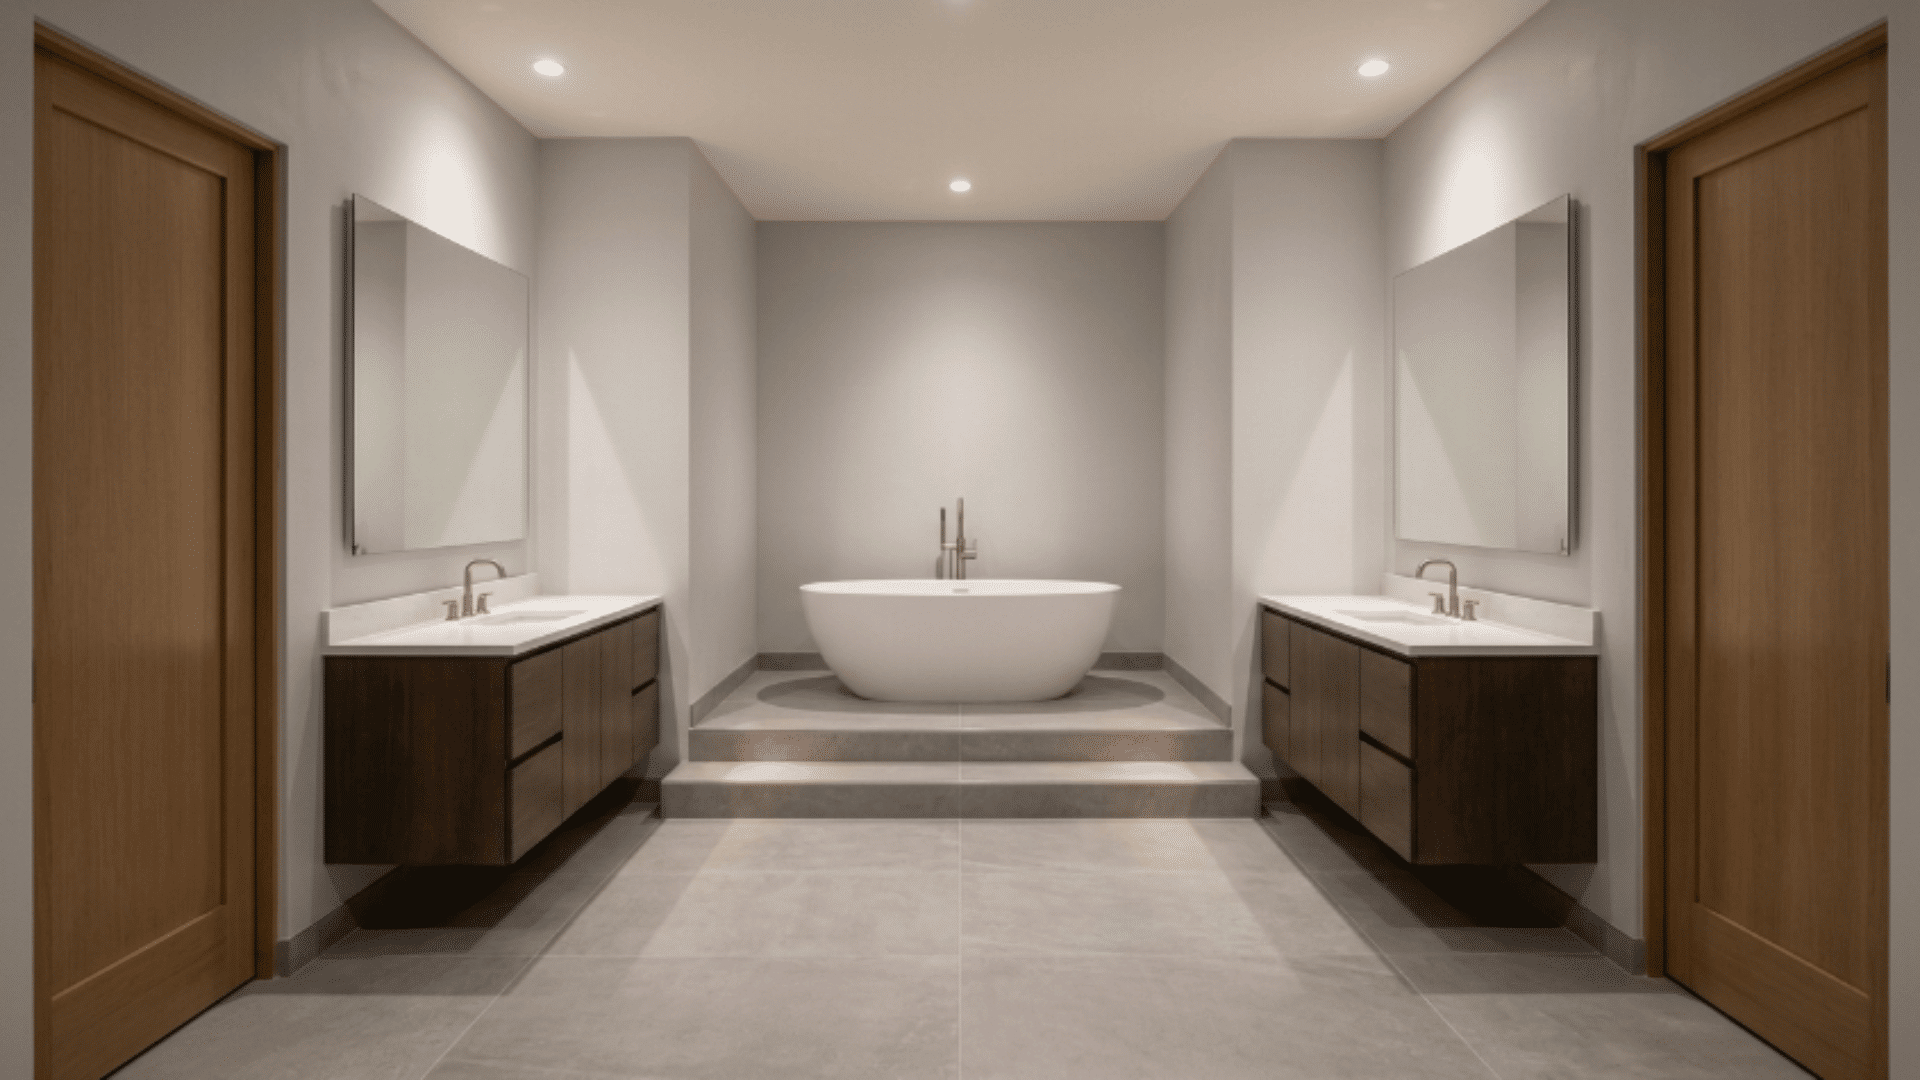
2. Freestanding Tub Center Layout
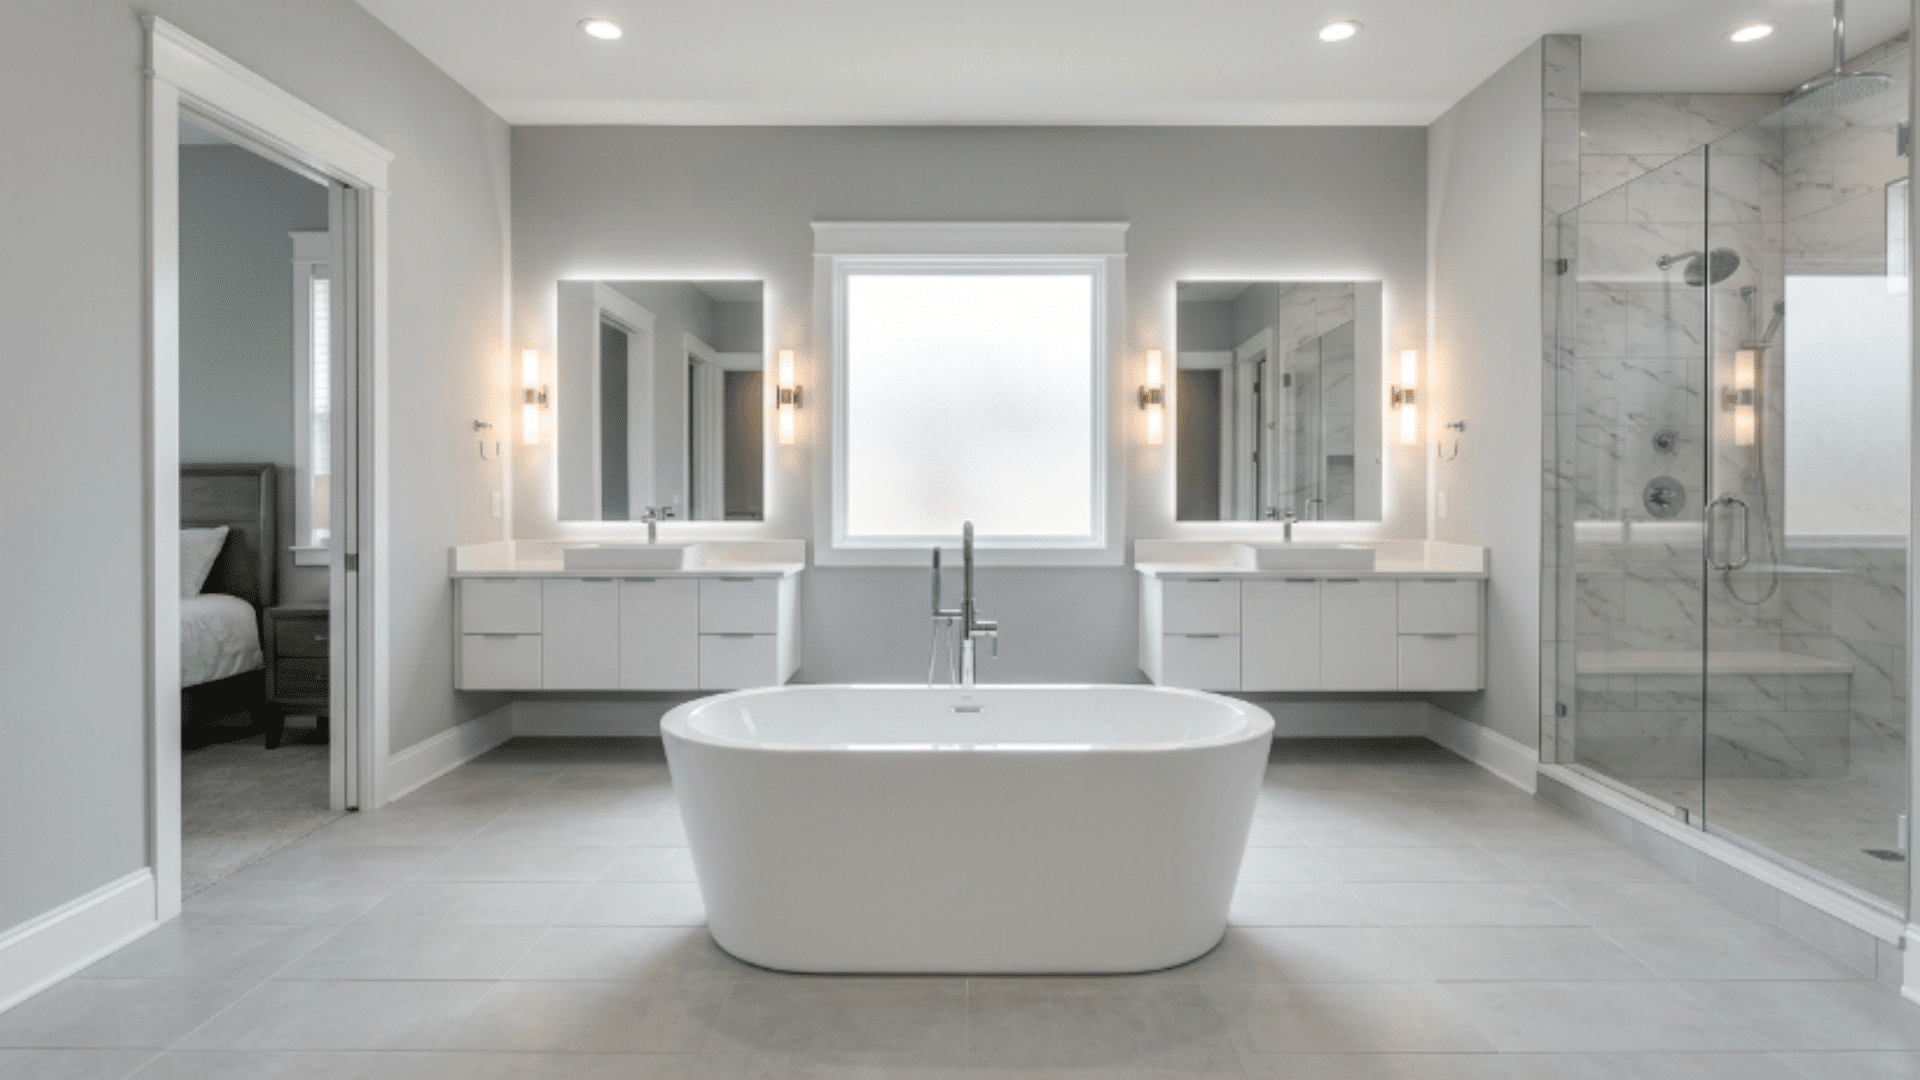
A freestanding tub is placed in the center of the bathroom, while the shower, vanity, and toilet are neatly arranged along the walls.
How to Style It:
- Keep the floor around the tub completely open
- Use a sculptural tub shape as the focal point
- Pick large floor tiles for a smooth look
- Use simple wall fixtures to avoid visual clutter
- Add soft lighting above the tub for balance
3. Corner Diagonal Entry Layout
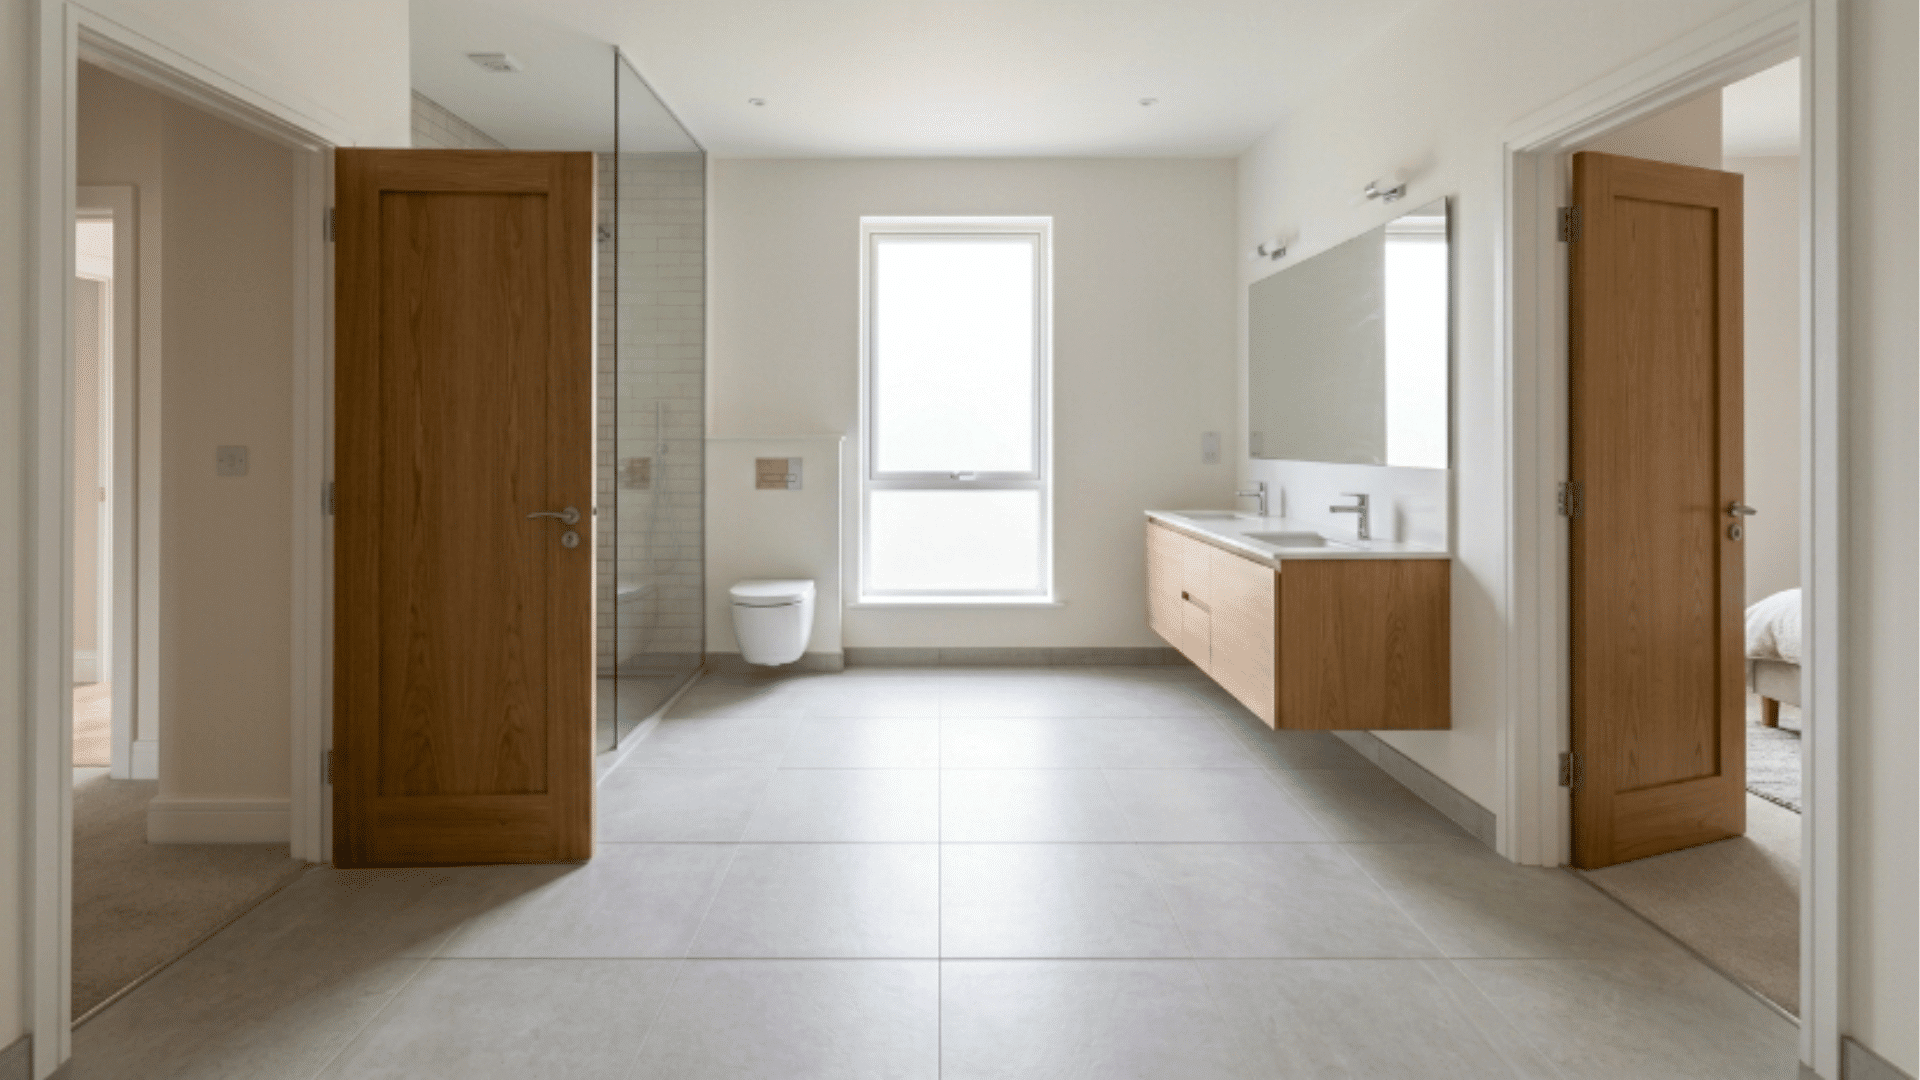
Both bedroom doors are placed at diagonal corners rather than opposite walls, opening up the center area and improving movement throughout the bathroom.
How to Style It:
- Keep the center area open for smooth movement
- Use matching finishes on both entry walls
- Position the vanity on the longest straight wall
- Choose diagonal floor tiles for visual flow
- Add centered ceiling lighting for balance
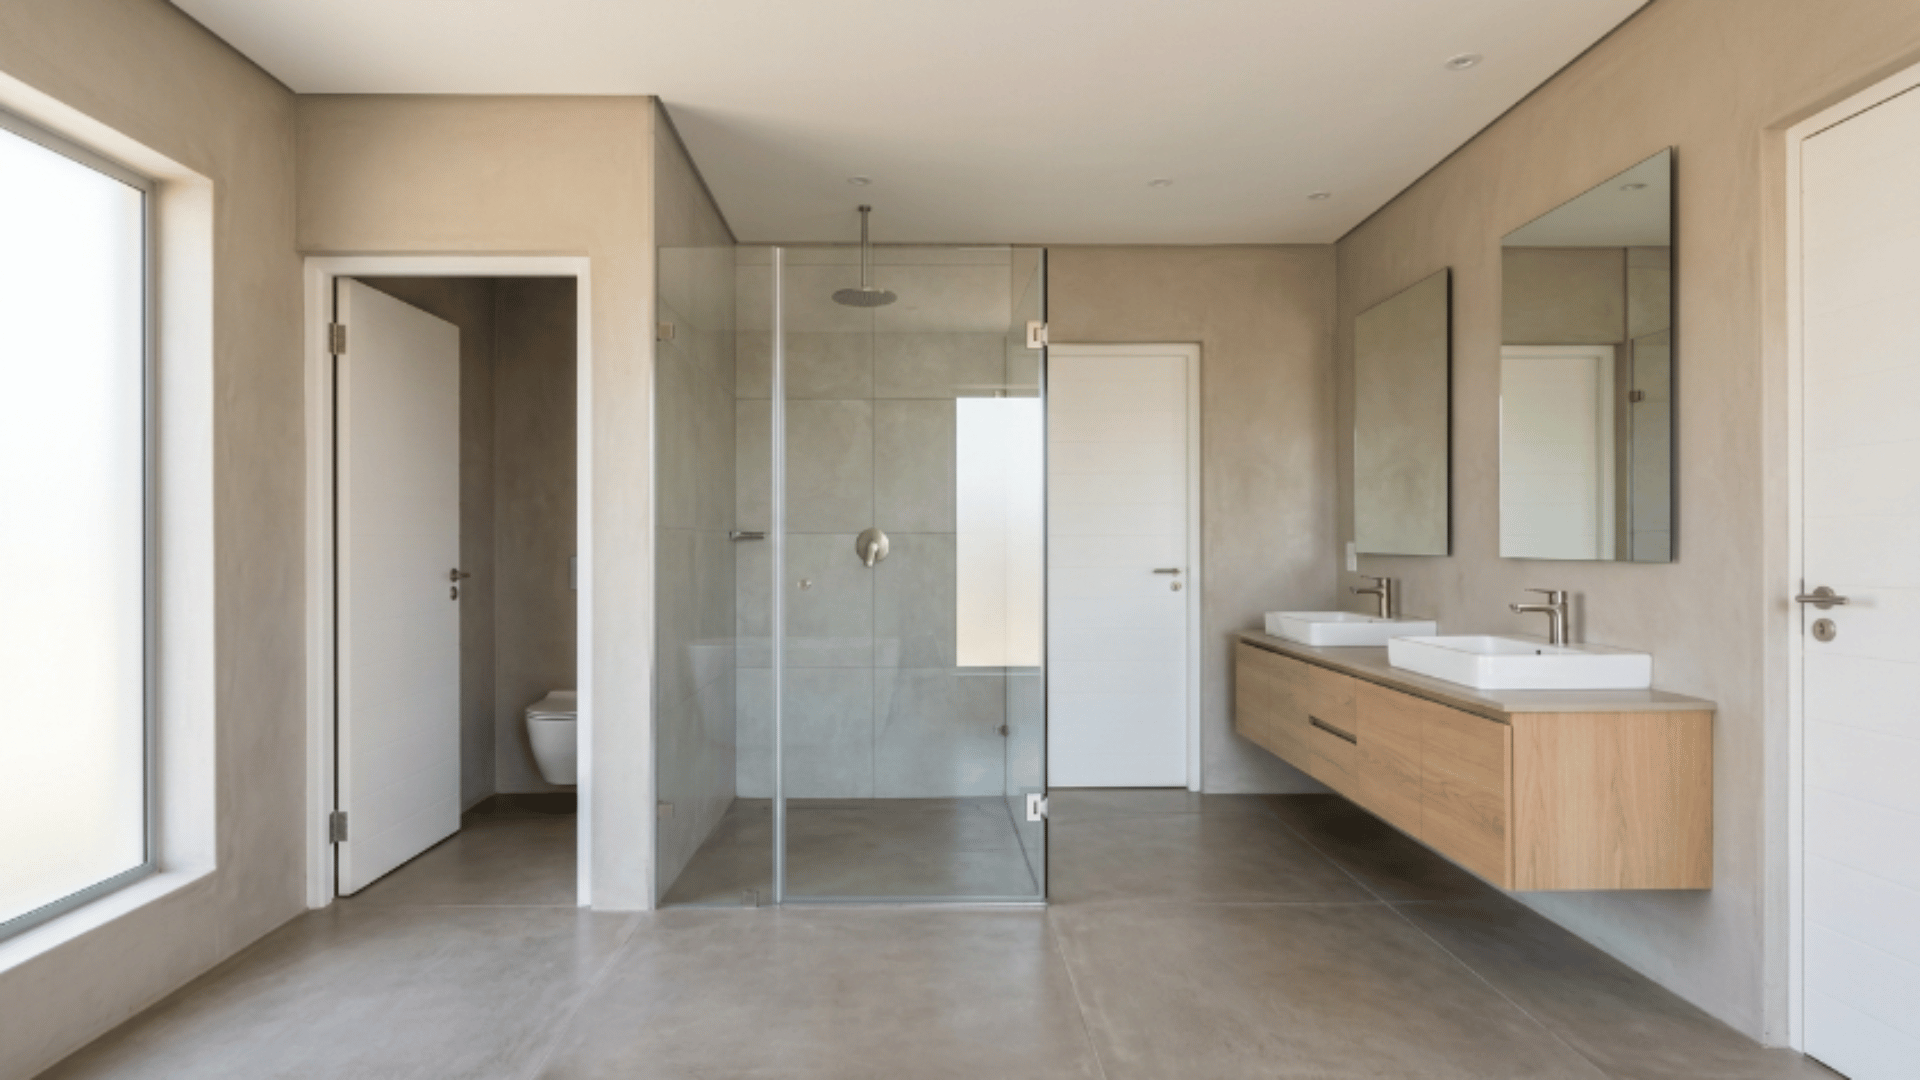
4. Wet Zone Dry Zone Split Layout
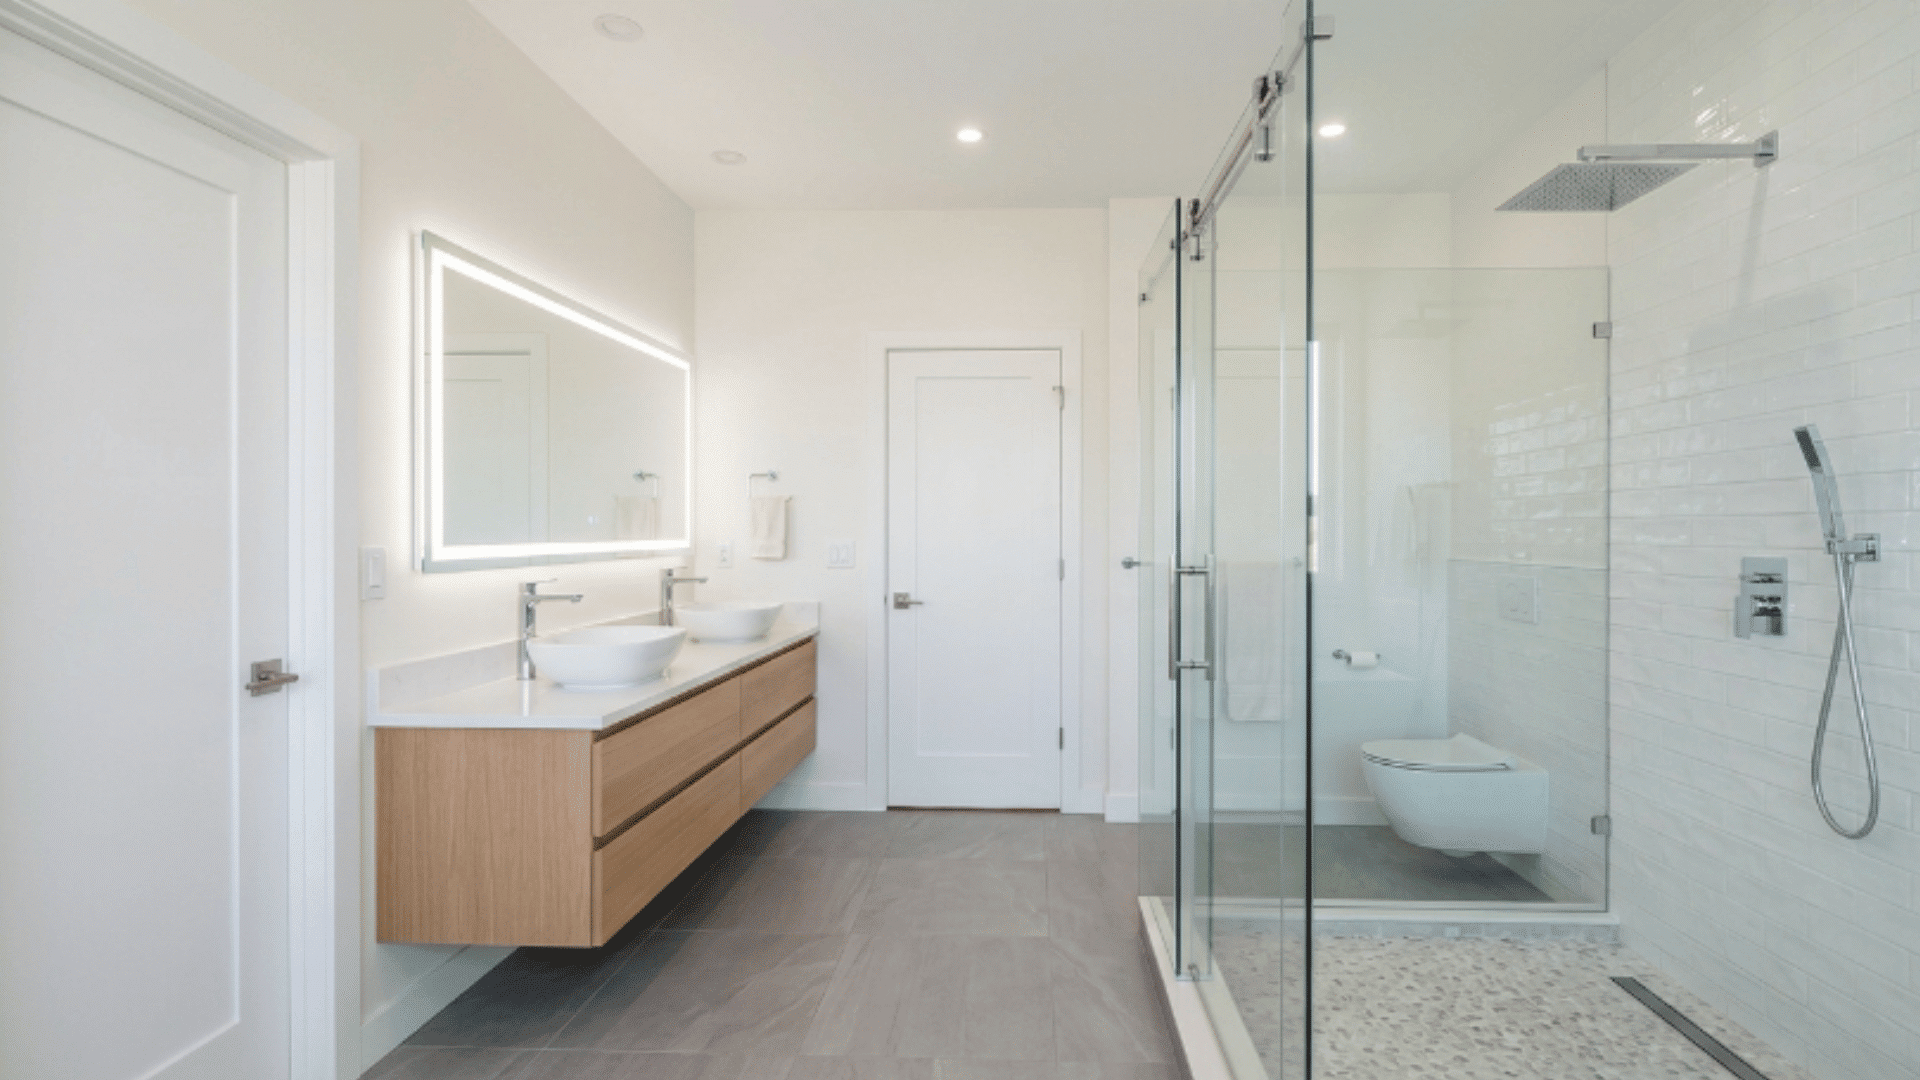
The bathroom is divided into a waterproof wet area for the shower and tub, while the vanity and storage stay in a separate dry section.
How to Style It:
- Use different floor tiles for each zone
- Keep all water fixtures inside the wet area
- Add a glass divider for separation
- Use matte tiles in the shower section
- Keep towels and storage in the dry zone
5. Recessed Cabinet Layout
Built-in recessed cabinets above each sink create storage without making the bathroom feel crowded or bulky.
How to Style It:
- Use mirrored cabinet fronts above each sink
- Keep cabinets flush with the wall surface
- Match cabinet hardware on both sides
- Leave the surrounding wall space uncluttered
- Add soft interior cabinet lighting
6. Bench Seat Shower Layout
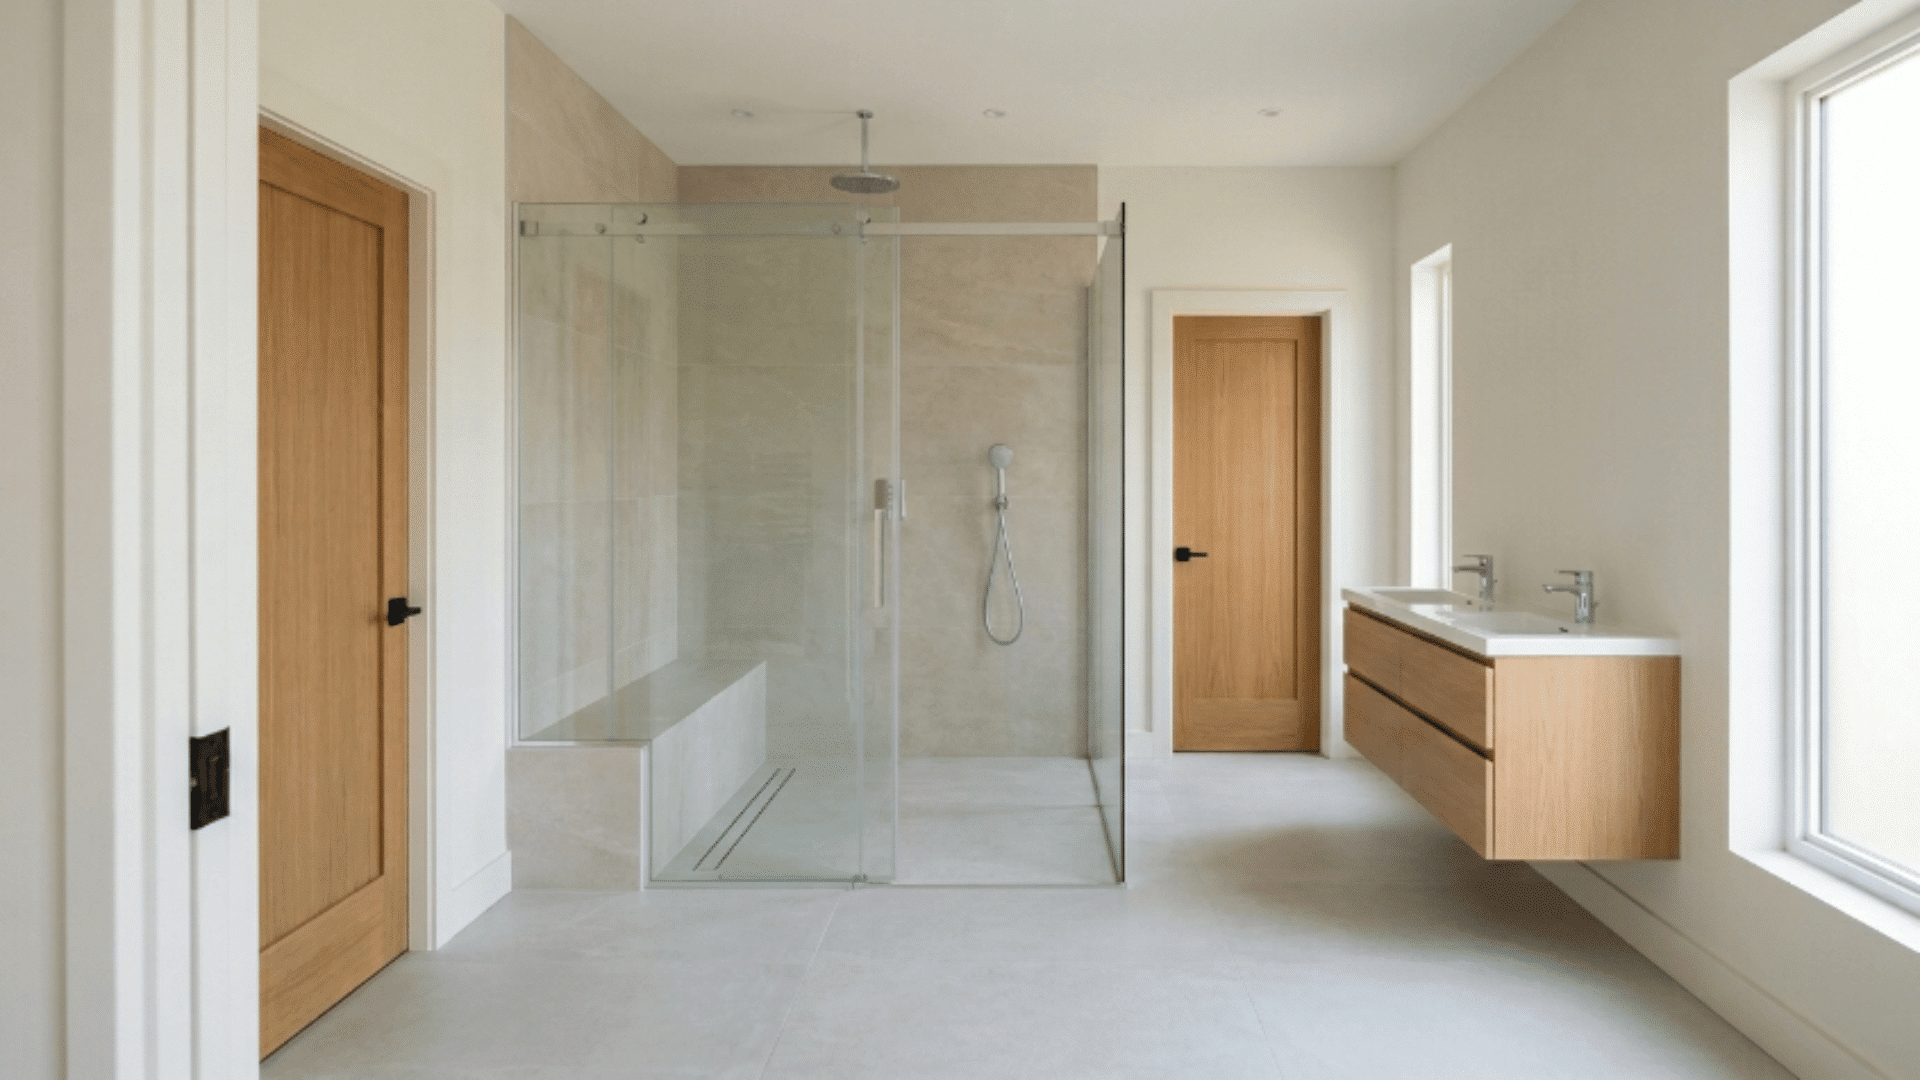
A walk-in shower with a built-in bench creates a comfortable, open shower without a bulky enclosure.
How to Style It:
- Keep the bench at a comfortable seat height
- Use matching tiles on the walls and the bench
- Position the shower head opposite the bench
- Add a linear drain for a cleaner look
- Keep the bench surface simple and open
7. Split Entry Vestibule Layout
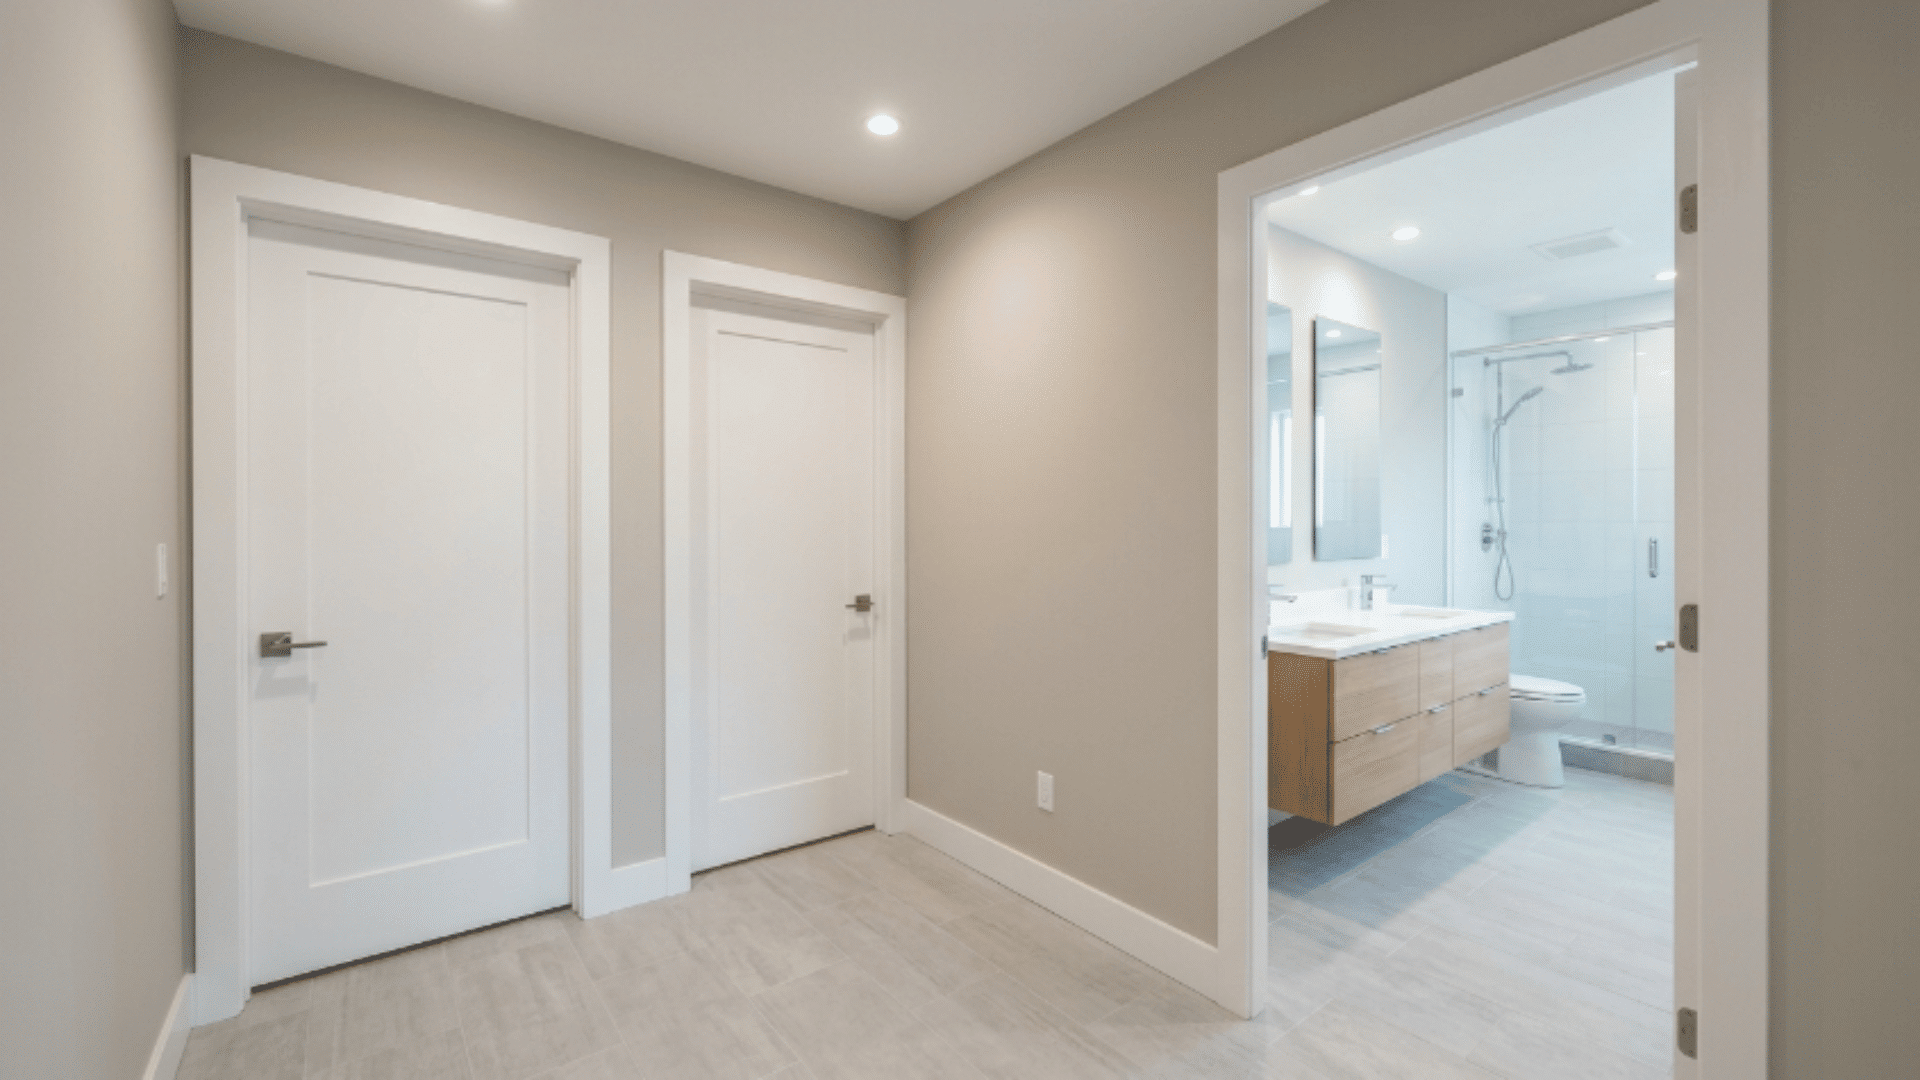
Both bedroom doors open into a small shared vestibule that leads to the main bathroom area for added separation.
How to Style It:
- Keep the vestibule clear of bulky fixtures
- Use different flooring to define the space
- Add a small mirror near the entry area
- Match wall colors throughout both sections
- Use lightweight doors for an open feel
8. Half-Height Divider Wall Layout
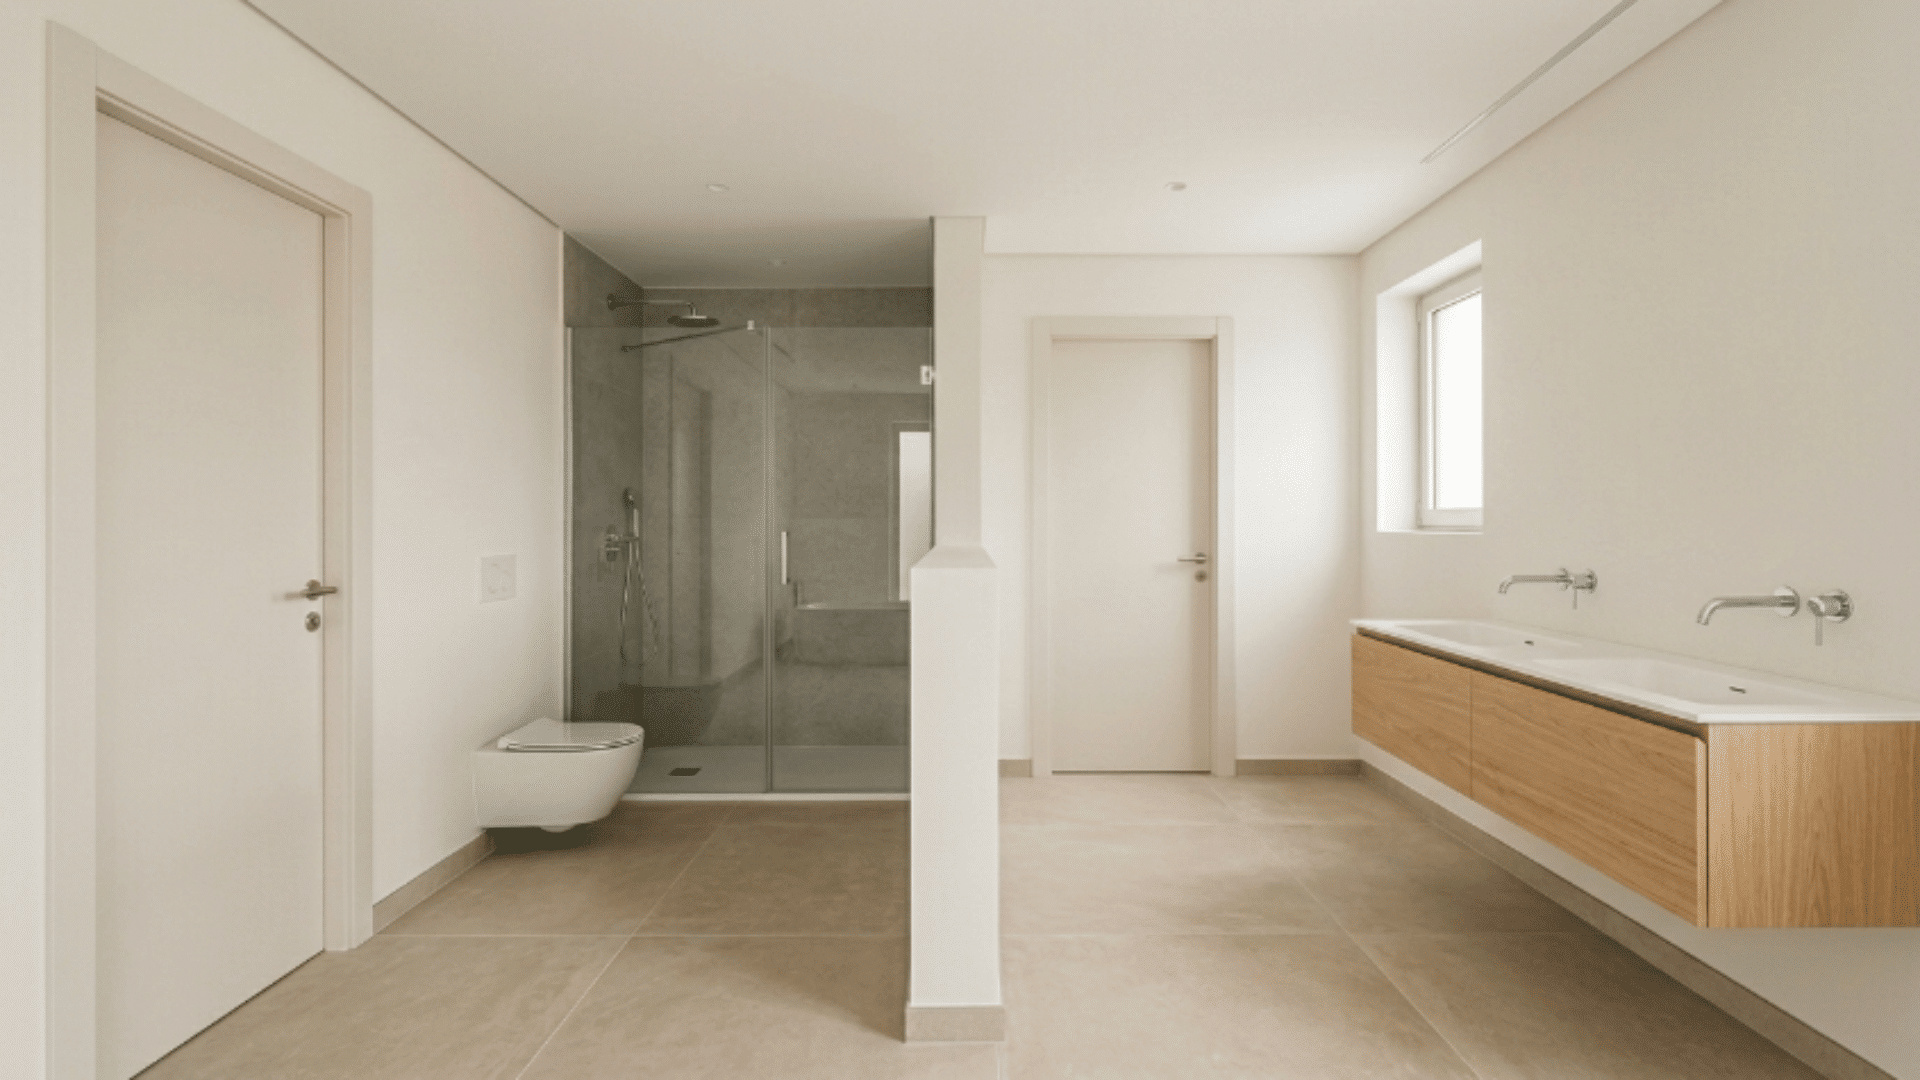
A low divider wall separates the toilet or shower area from the vanity while keeping the bathroom visually open.
How to Style It:
- Keep the divider wall between 42-48 inches high
- Use the top surface for small decor pieces
- Match the divider finish with the surrounding walls
- Keep the wall design clean and straight
- Align the divider with the natural walkway
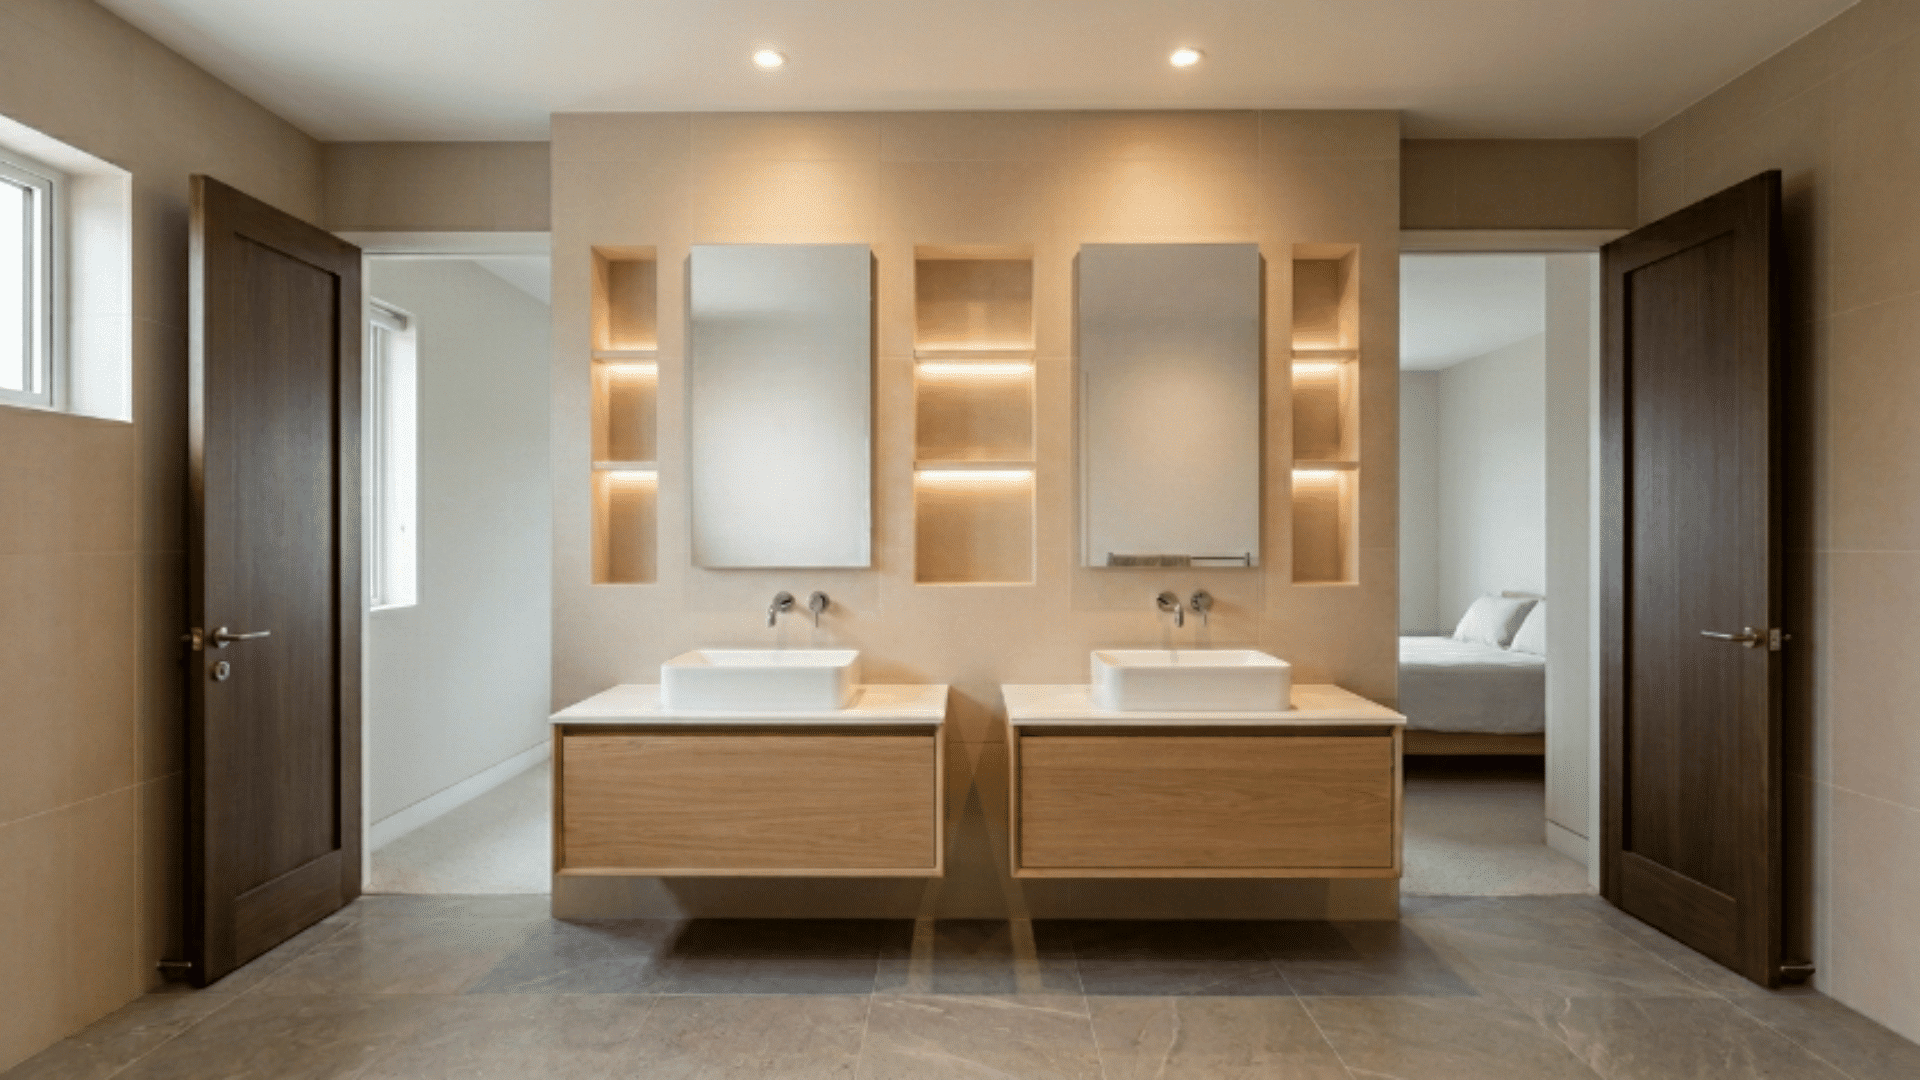
9. Dual Mirror Alcove Layout
Each sink sits inside its own recessed alcove, giving both users a more defined and personal grooming space.
How to Style It:
- Keep each alcove spacious and balanced
- Use accent tiles inside the alcove walls
- Add matching lighting on both sides
- Include recessed shelving for toiletries
- Keep the center area visually simple
10. Offset Shower Core Layout
The shower is slightly off-center, creating separate zones for the vanity, toilet, and storage.
How to Style It:
- Use the larger side for vanity and storage
- Keep the smaller side for the toilet area
- Choose a glass shower enclosure for openness
- Use the same flooring throughout the room
- Keep ceiling lighting centered for balance
11. Sliding Glass Partition Layout
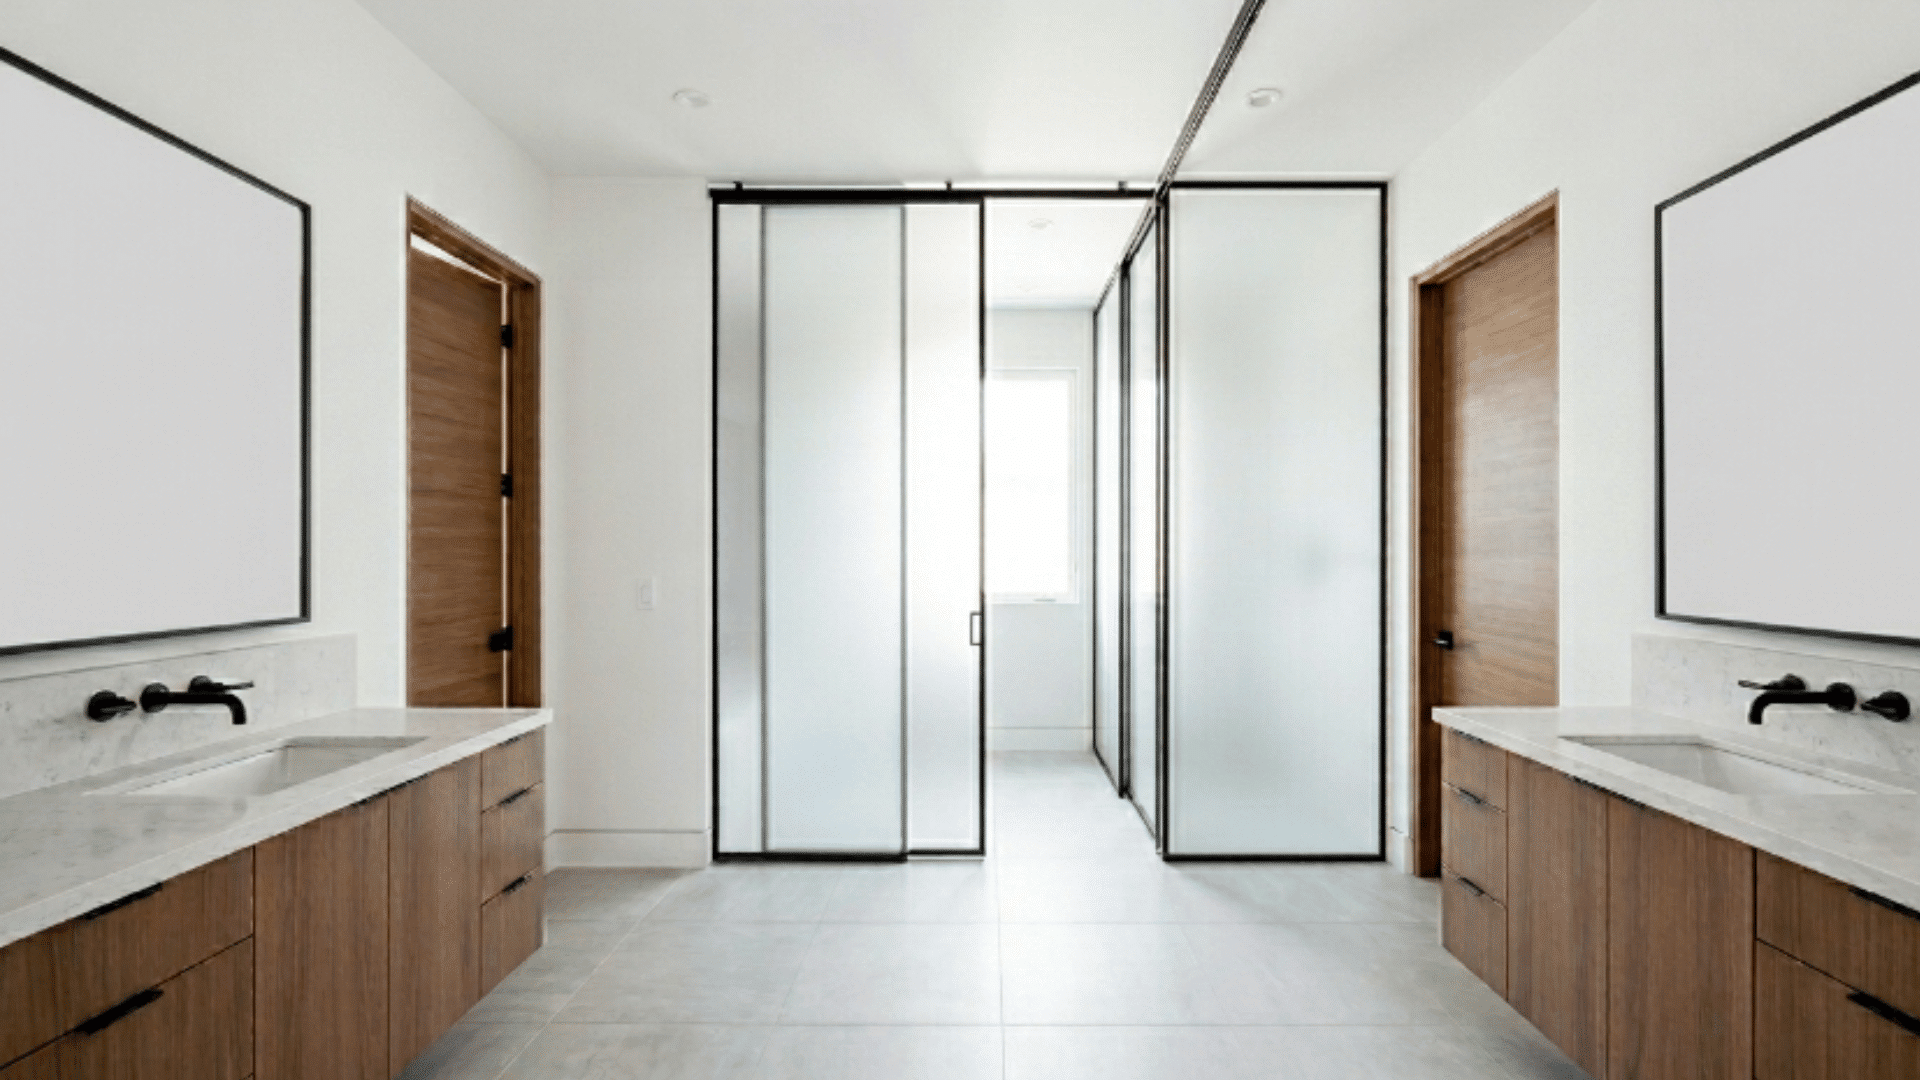
Sliding glass panels divide the bathroom into separate sections while still allowing the space to feel open when needed.
How to Style It:
- Use frameless glass panels for a cleaner look
- Install ceiling tracks flush with the ceiling
- Choose frosted glass near private areas
- Keep floor tiles continuous across the space
- Use matte hardware for a softer finish
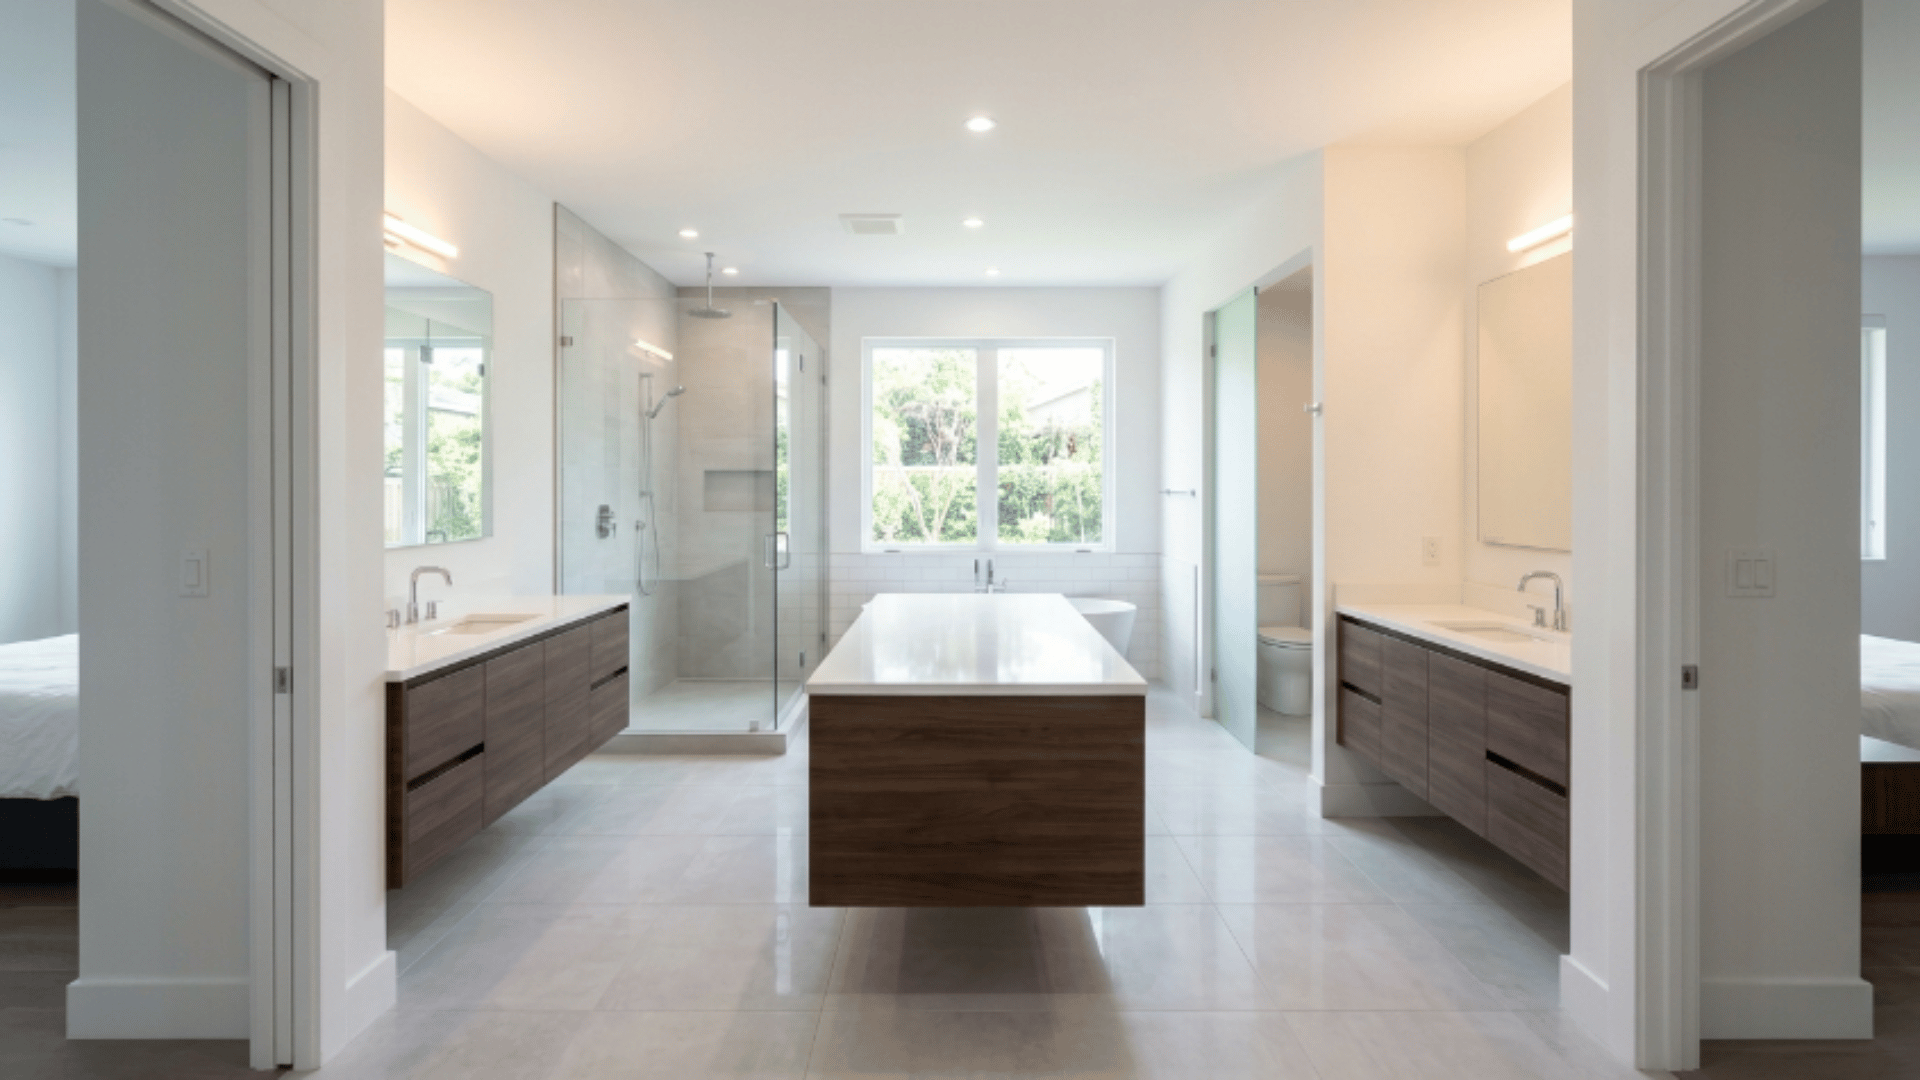
12. Island Vanity Layout
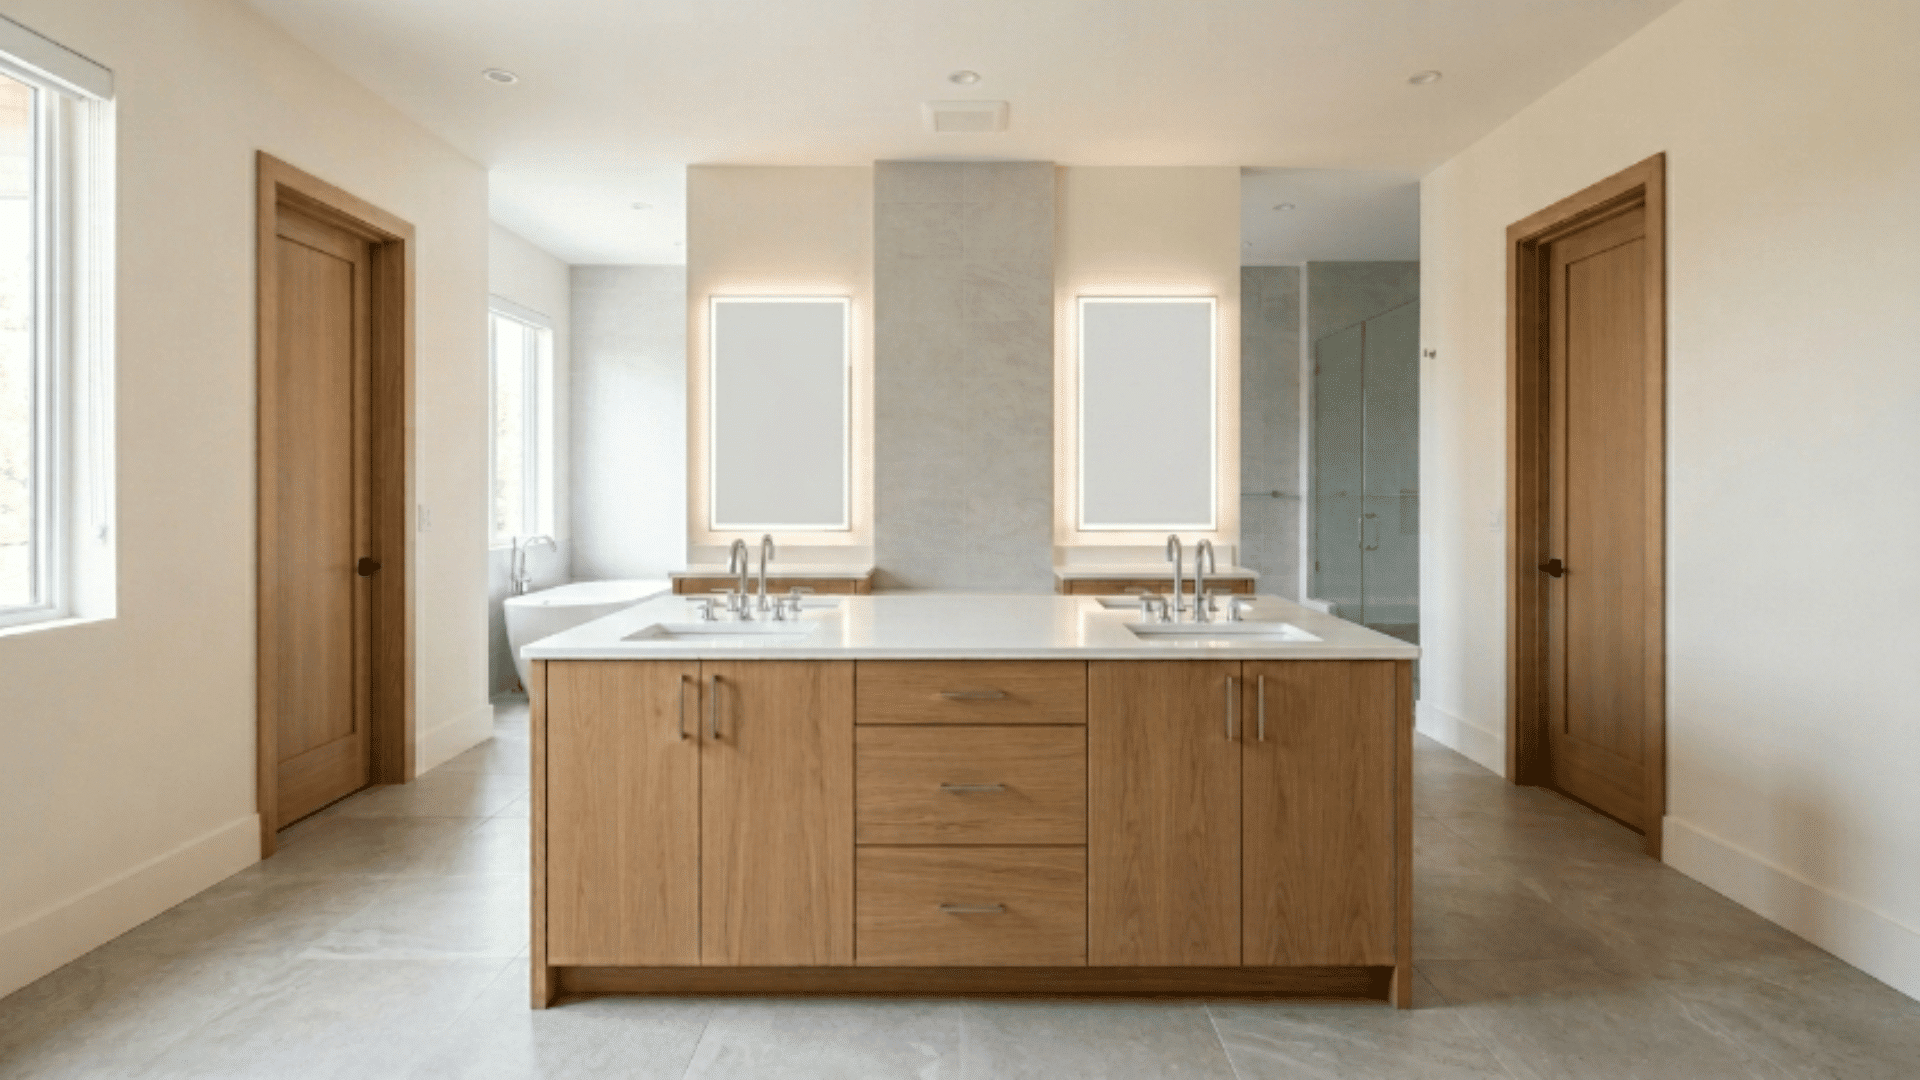
A freestanding island vanity sits in the center of the bathroom, allowing access from all sides for both users.
How to Style It:
- Use sinks on opposite vanity ends
- Keep surrounding walls free of vanity fixtures
- Add a waterfall countertop for a clean finish
- Store essentials inside the island unit
- Hang pendant lights directly above the vanity
13. Skylight-Centered Layout
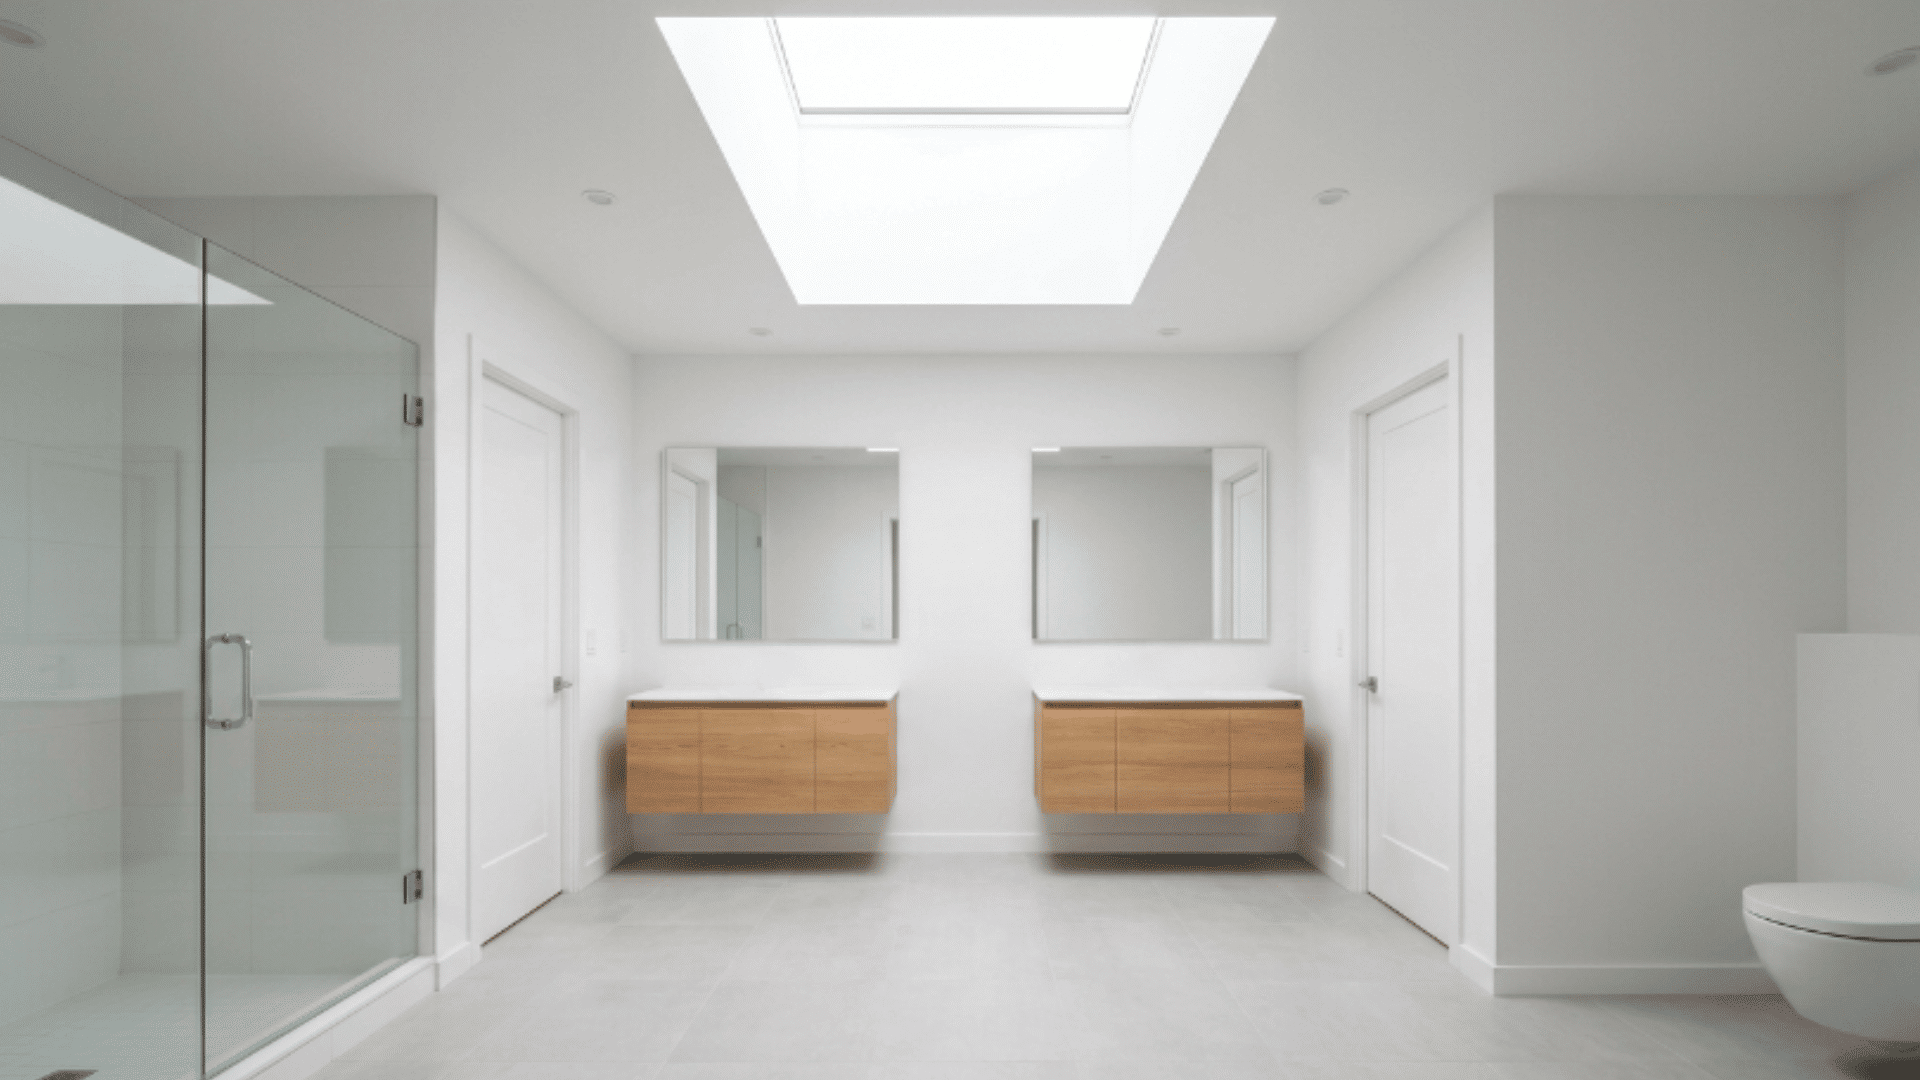
A skylight placed above the center of the bathroom becomes the main focal point, bringing natural light into the entire space.
How to Style It:
- Position the skylight over the center area
- Use light-colored tiles to reflect sunlight
- Keep fixtures low-profile and wall-mounted
- Avoid heavy ceiling lighting near the skylight
- Add indoor plants beneath the natural light
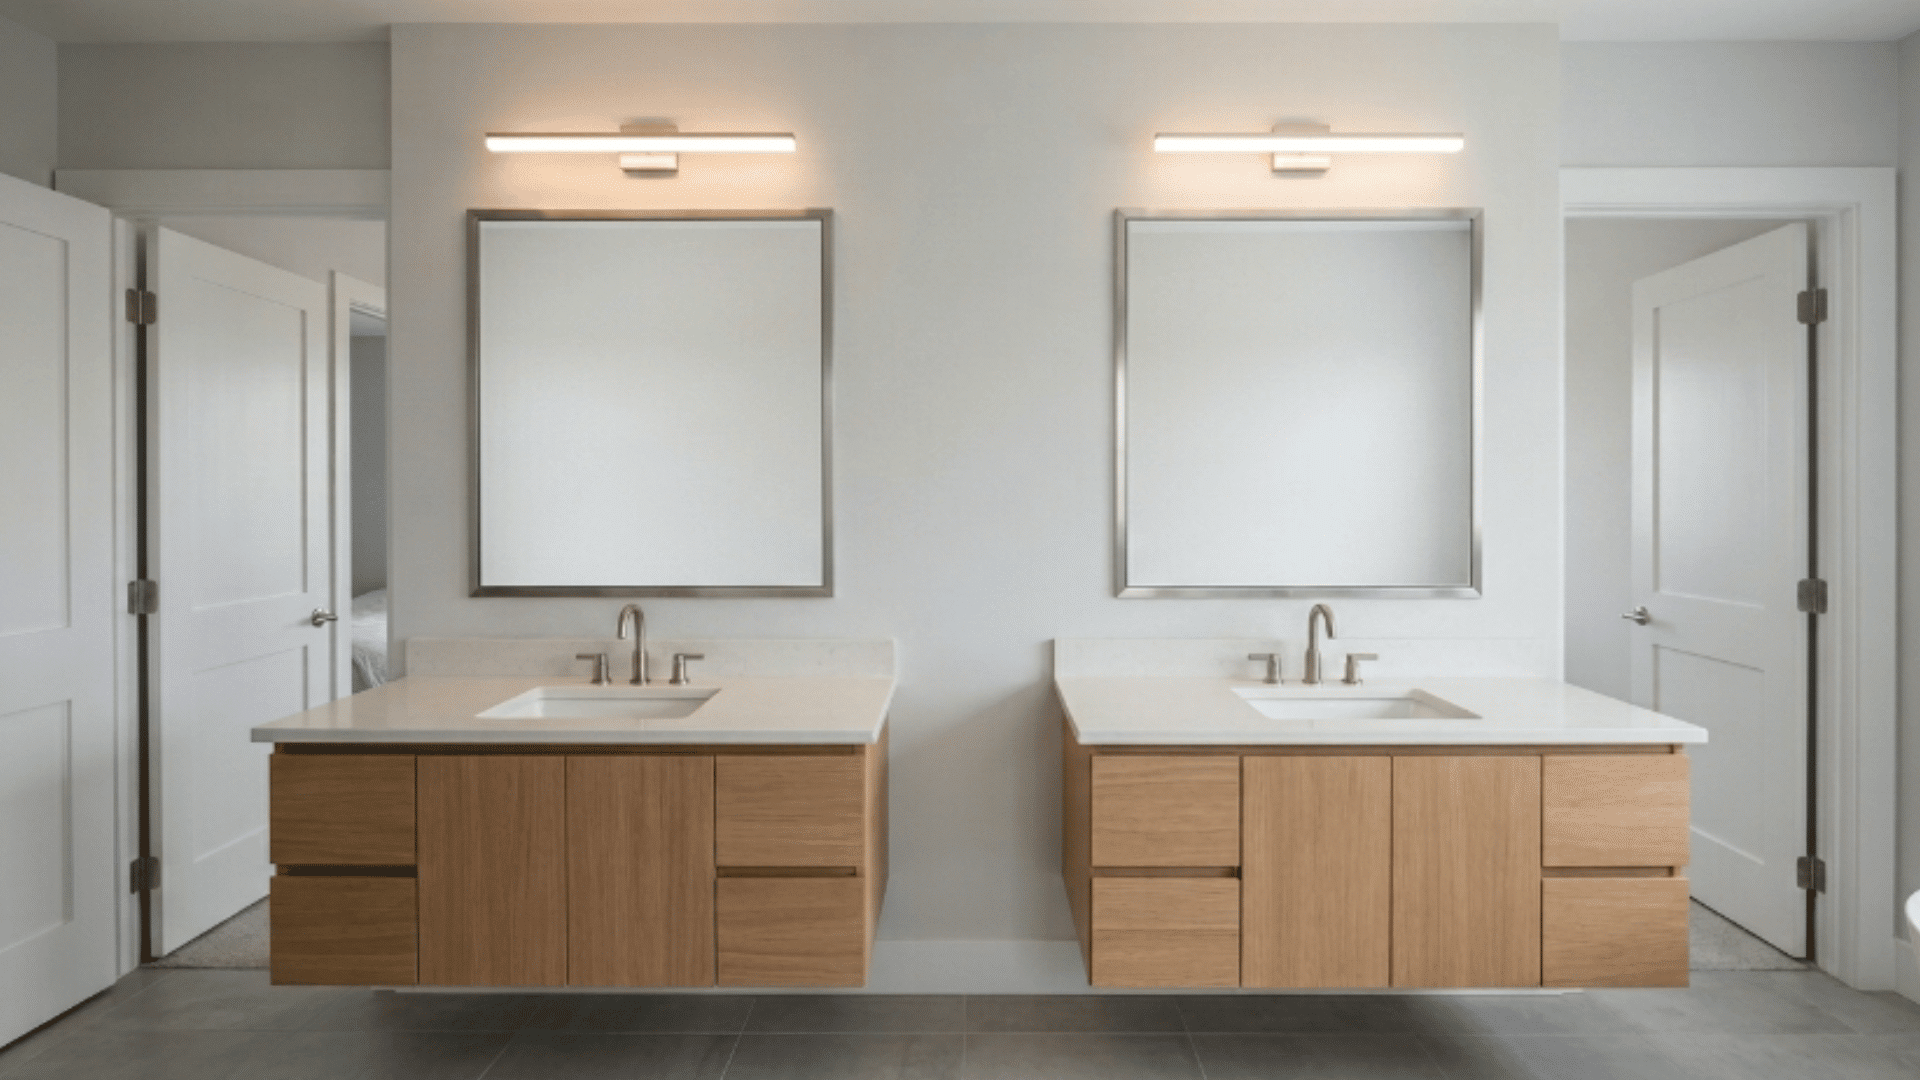
14. Split Sink + Shared Mirror Layout
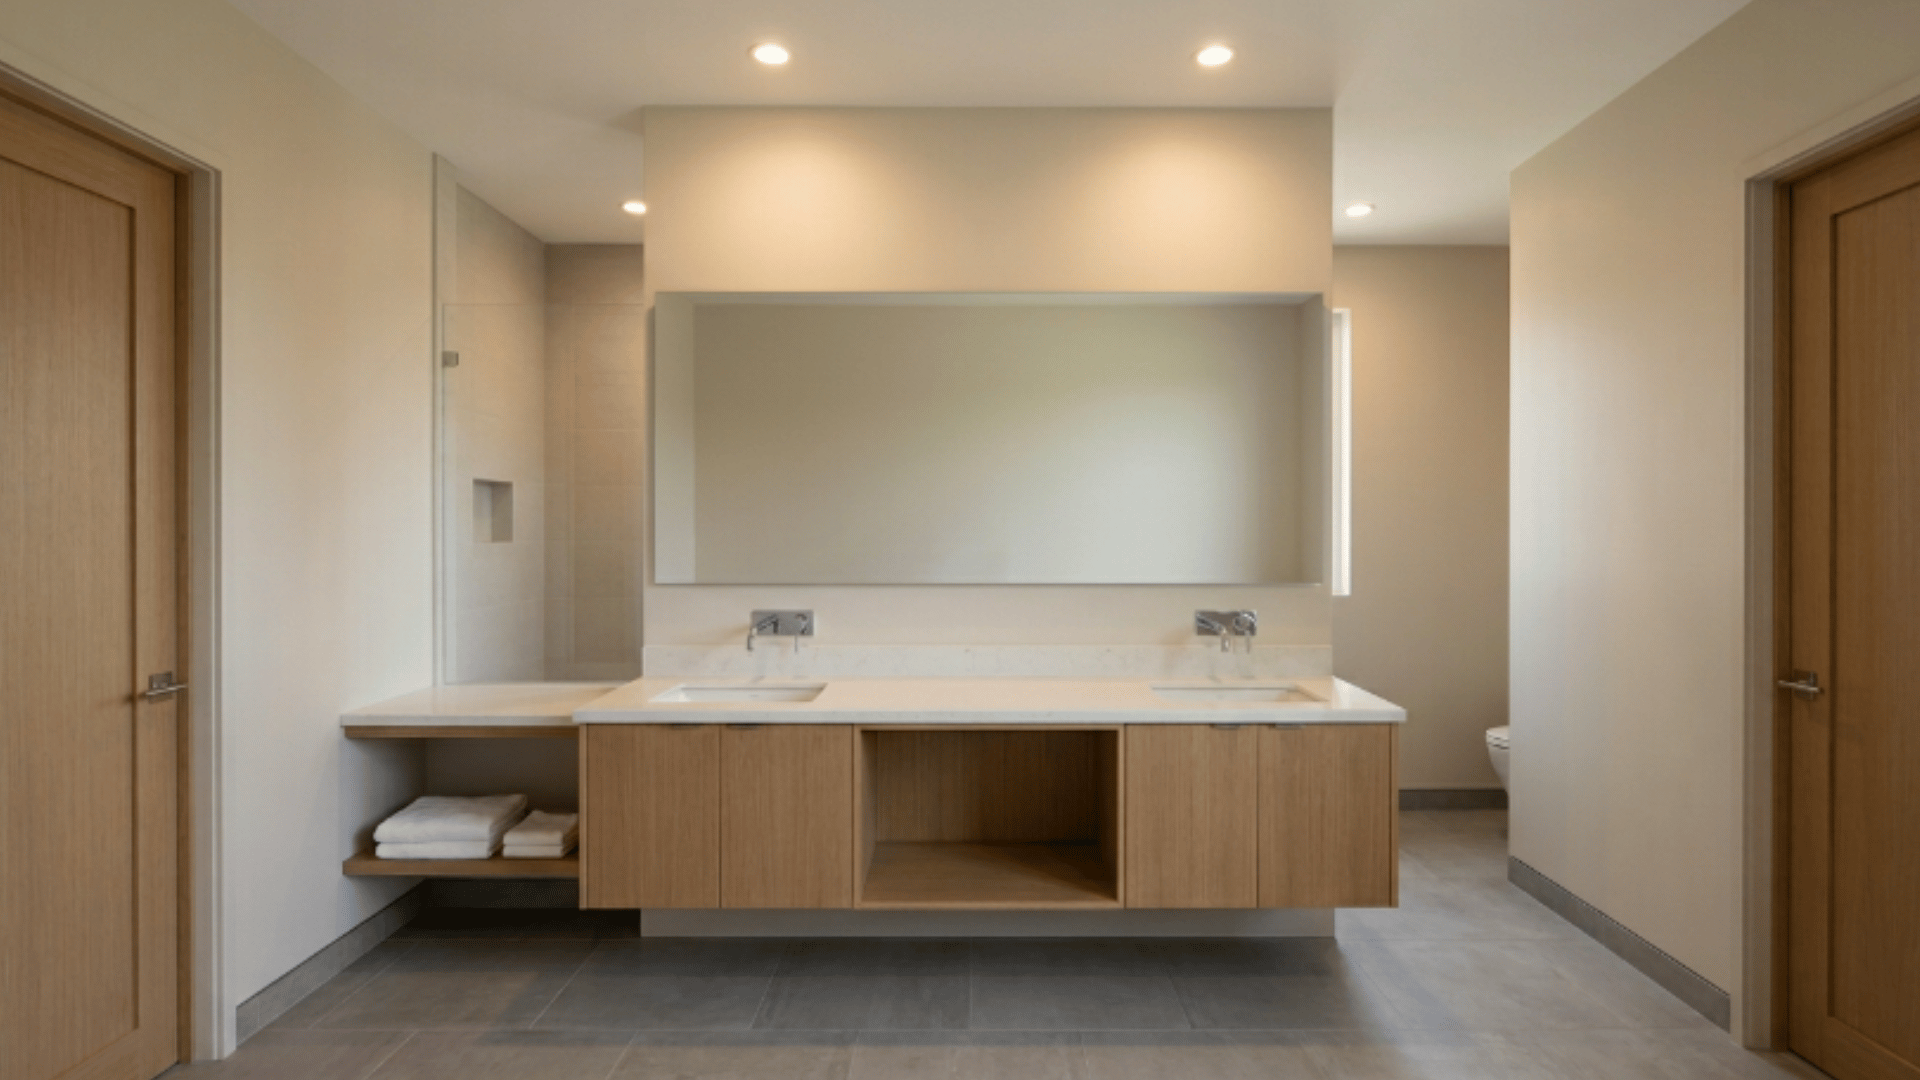
Two sinks are spaced beneath a long mirror, creating separate grooming areas while keeping the vanity visually connected.
How to Style It:
- Leave enough space between both sinks
- Use one continuous countertop surface
- Pick a frameless mirror for a cleaner look
- Add separate sconces above each sink
- Keep the center counter area uncluttered
15. Built-In Wall Niche Layout
Recessed wall niches provide storage without needing bulky cabinets or shelves around the bathroom.
How to Style It:
- Size niches based on storage needs
- Use contrasting tile inside each niche
- Keep niche edges sharp and clean
- Maintain equal niche spacing on both sides
- Avoid overcrowding the wall with extras
16. Angled Wall Layout
One bathroom wall is built at an angle rather than straight, creating separate zones and adding visual variety to the space.
How to Style It:
- Use the wider area for the shower or tub
- Position the vanity along the angled wall
- Lay floor tiles parallel to the angle
- Center ceiling lights within the angled section
- Keep the wall free from extra detailing
17. Dual Path Circulation Layout
Two separate walking paths allow both users to move through the bathroom at the same time without interruption.
How to Style It:
- Keep pathways at least 36 inches wide
- Arrange fixtures along each walking route
- Use subtle tile direction changes for flow
- Mount storage on walls to save floor space
- Keep both entry paths easy to follow
18. Square Layout
All fixtures are placed along the perimeter walls, leaving the center of the bathroom open for easier movement.
How to Style It:
- Use wall-mounted fixtures throughout the space
- Separate the vanity, toilet, and shower walls
- Choose large square floor tiles for consistency
- Keep accessories recessed or wall-mounted
- Add one centered overhead light fixture
19. Hidden Door Layout
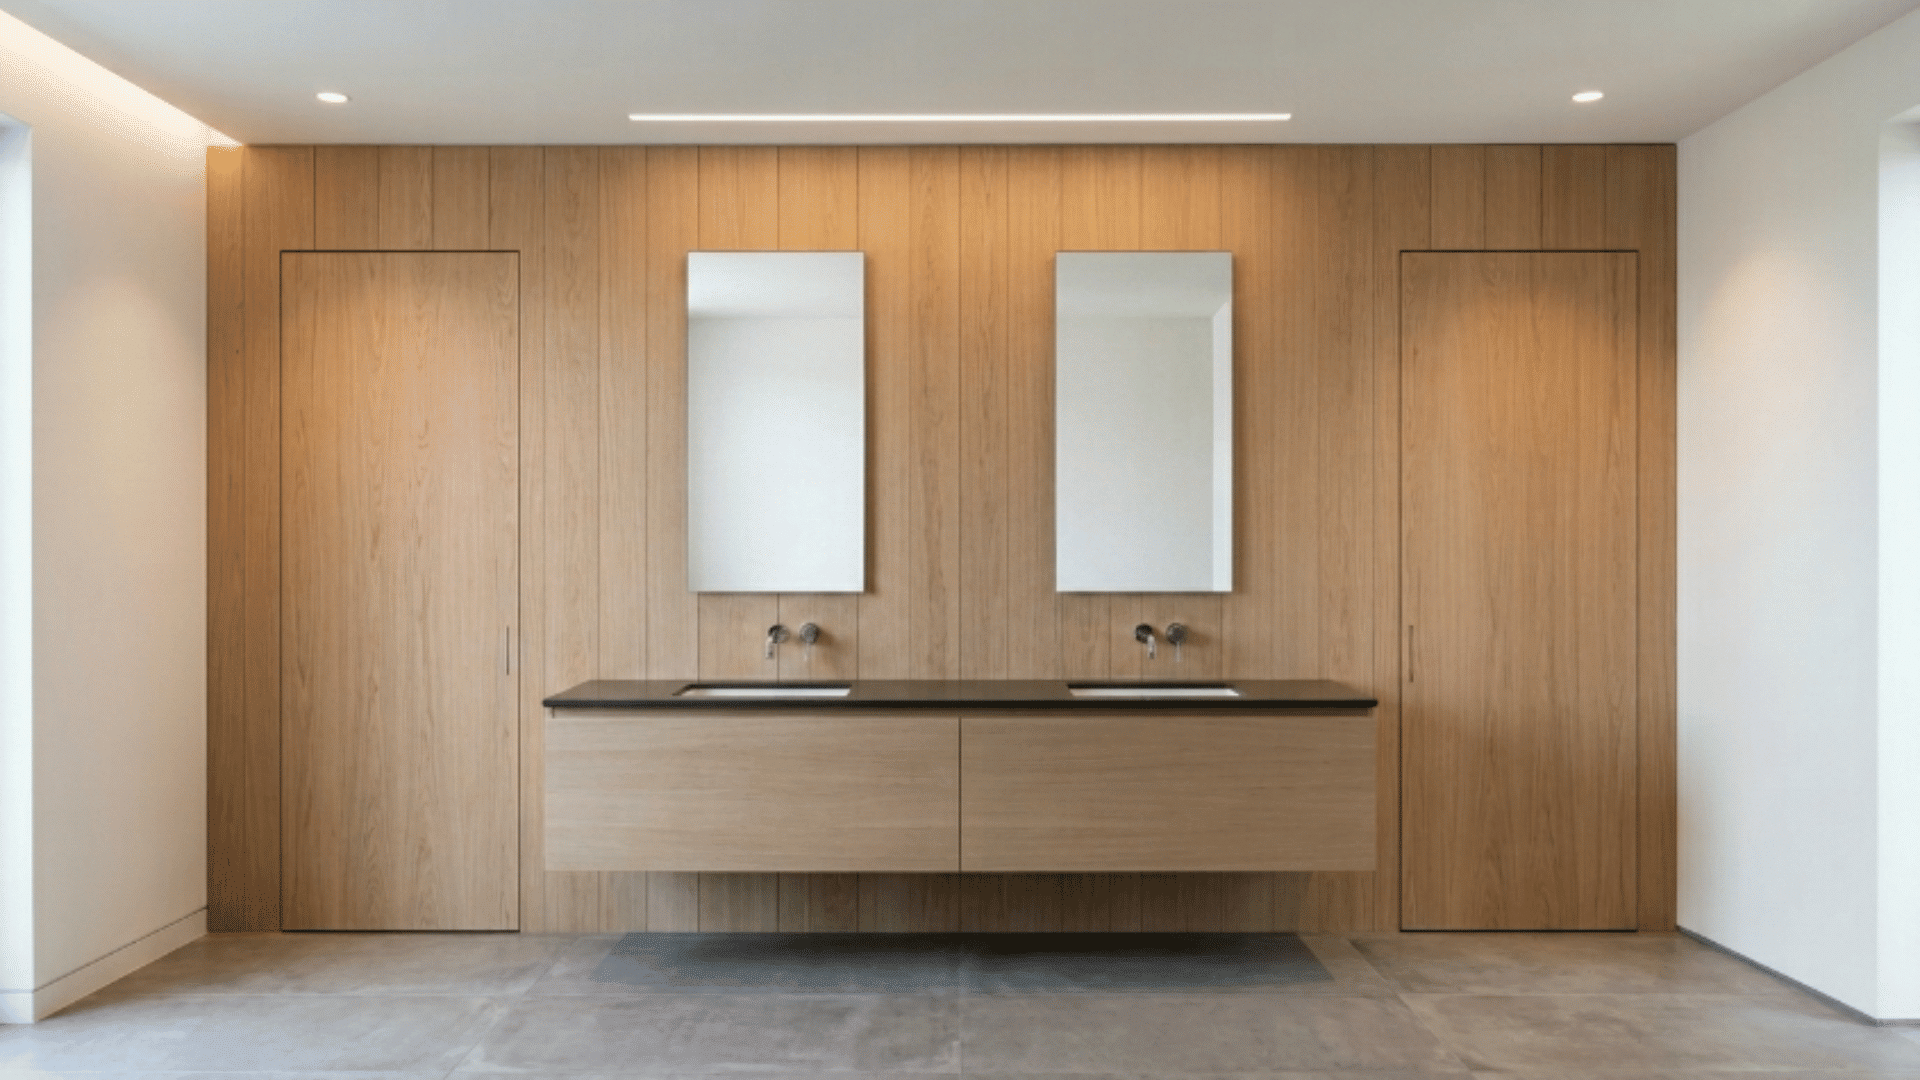
The bedroom doors blend into the surrounding walls, creating a cleaner, more smooth bathroom design.
How to Style It:
- Use push-to-open hidden door systems
- Match the door finishes with the surrounding walls
- Avoid visible trim around door edges
- Continue the wall tile across the hidden doors
- Keep the rest of the design minimal
20. Raised Platform Bath Layout
The bathtub or shower sits on a slightly raised platform, separating the bathing area from the rest of the bathroom.
How to Style It:
- Keep the platform height between 6 and 8 inches
- Use contrasting tile on the platform surface
- Maintain straight and clean platform edges
- Add recessed step lighting around the base
- Keep surrounding fixtures at floor level
21. Back-to-Back Fixture Layout

Key fixtures are arranged on opposite sides of one shared plumbing wall to save space and simplify the layout.
How to Style It:
- Use the plumbing wall as the main focal line
- Keep the surrounding floor space open and clear
- The match finishes on both sides of the wall
- Choose wall-mounted fixtures for openness
- Add separate lighting for each side
Common Mistakes to Avoid in Layout Planning
Avoiding these mistakes before finalizing a jack-and-jill bathroom layout can save significant time, money, and effort during and after the build. Here is what you need to look out for:
- Poor Door Placement: Doors placed directly opposite each other remove privacy the moment either one is opened.
- No Privacy for Toilet or Shower: A layout without an enclosed zone for the toilet and shower leaves users with no personal privacy during daily use.
- Not Enough Storage: Without dedicated storage on each side, shared bathrooms quickly become cluttered and frustrating for both users.
- Tight or Crowded Layout: Too many fixtures in a small space without proper clearance make the bathroom difficult to use when both people are inside.
- Ignoring Ventilation: A shared bathroom produces more moisture than a standard one, and poor ventilation leads to damp and mold over time.
Wrapping it Up
A well-plannedjack-and-jill bathroom layout can make a shared bathroom feel far more comfortable than expected. When the layout flows properly, your space feels easier to use, less crowded, and much more functional
There are layout ideas for almost every room size and home style. So work with the right design choices, a shared bathroom can still feel organized, modern, and private enough for everyday use.
Smart planning now can save you a lot of frustration later.

Ava Taylor, holding a Bachelor’s degree in Interior Design from the Pratt Institute, has made her mark in creating engaging and functional living spaces for over 14 years. She began her career with a New York-based design studio, where she gained a reputation for her innovative and user-centric designs. Ava joined our team in 2019, bringing a blend of artistic flair and practicality to our home improvement section. Since the she has been the lead contributor to our room transformation series, inspiring readers with her unique approach to maximizing space utility and aesthetic appeal. Beyond her professional work, Ava is a passionate collector of vintage furniture, a hobby that enriches her design perspective.