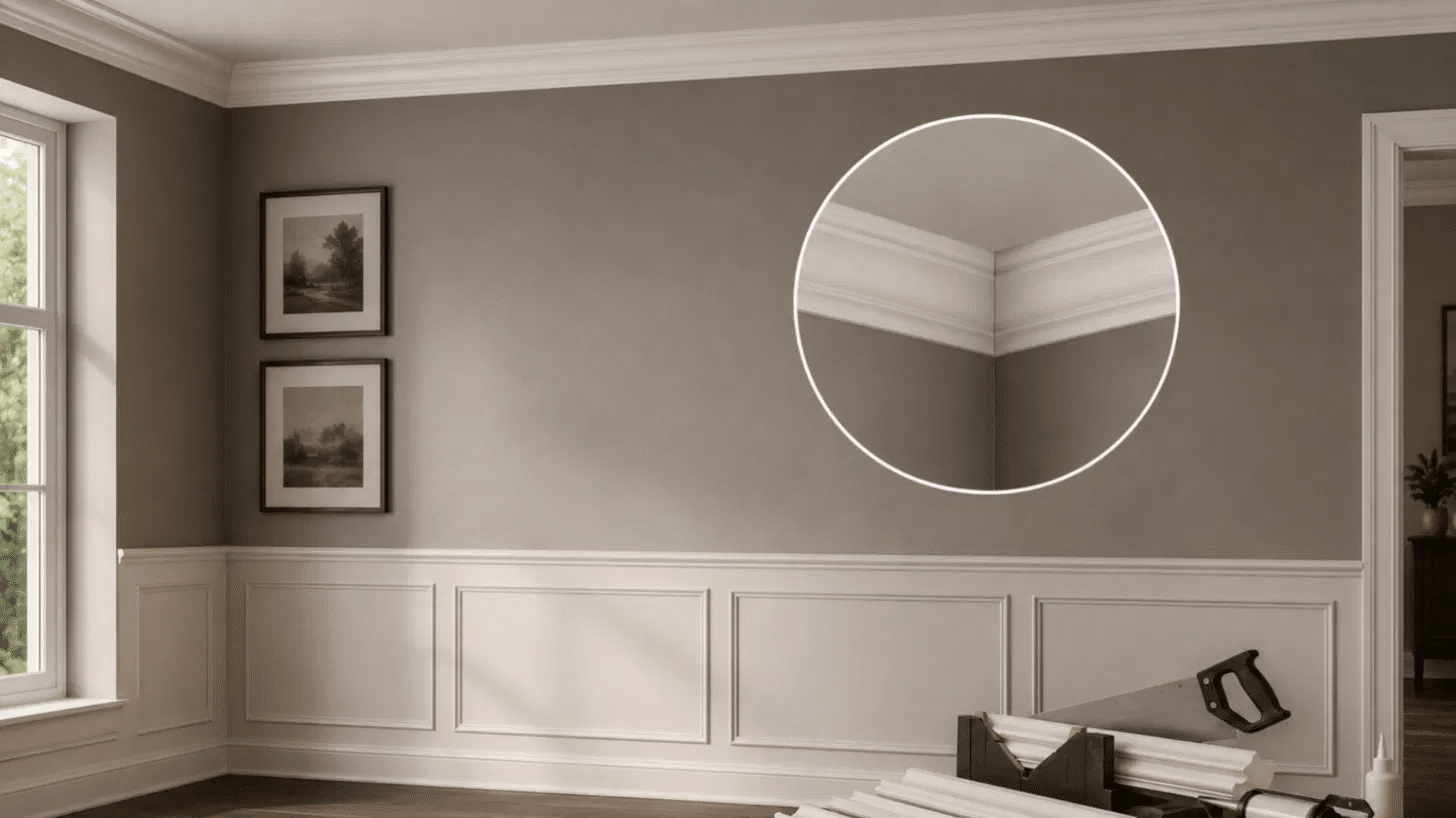

That little gap where the wall meets the ceiling can make a room feel unfinished, even when everything else looks right.
Crown molding is decorative trim installed along the wall-ceiling joint, originally used to hide uneven seams, cracks, and small construction gaps.
Today, it is one of those details that can quietly change how a room feels. It can make a simple bedroom look more complete, give a living room a classic finish, or help cabinets and built-ins feel custom.
If you are comparing styles, materials, or planning a DIY project, it helps to know what you are choosing first.
This guide covers crown molding types, materials, sizing, design ideas, costs, and the basic steps for cutting and installing it.
What is Crown Molding, Exactly?
Crown molding is a decorative trim that covers the joint where a wall meets the ceiling, giving the transition a cleaner, more finished look.
It first became popular for helping hide small gaps and uneven plaster, but today it is mostly used to add character and visual balance to a room.
You will also find crown molding above kitchen cabinets, around fireplace mantels, over doorways, and on built-in shelving to create a custom finish.
Its design has roots in ancient Greek and Roman architecture, where molded profiles were used on temples and public buildings.
Many of the curves and details used in modern crown molding still reflect those classical design principles.
Crown Molding vs Cornice, Coving, and Picture Rail
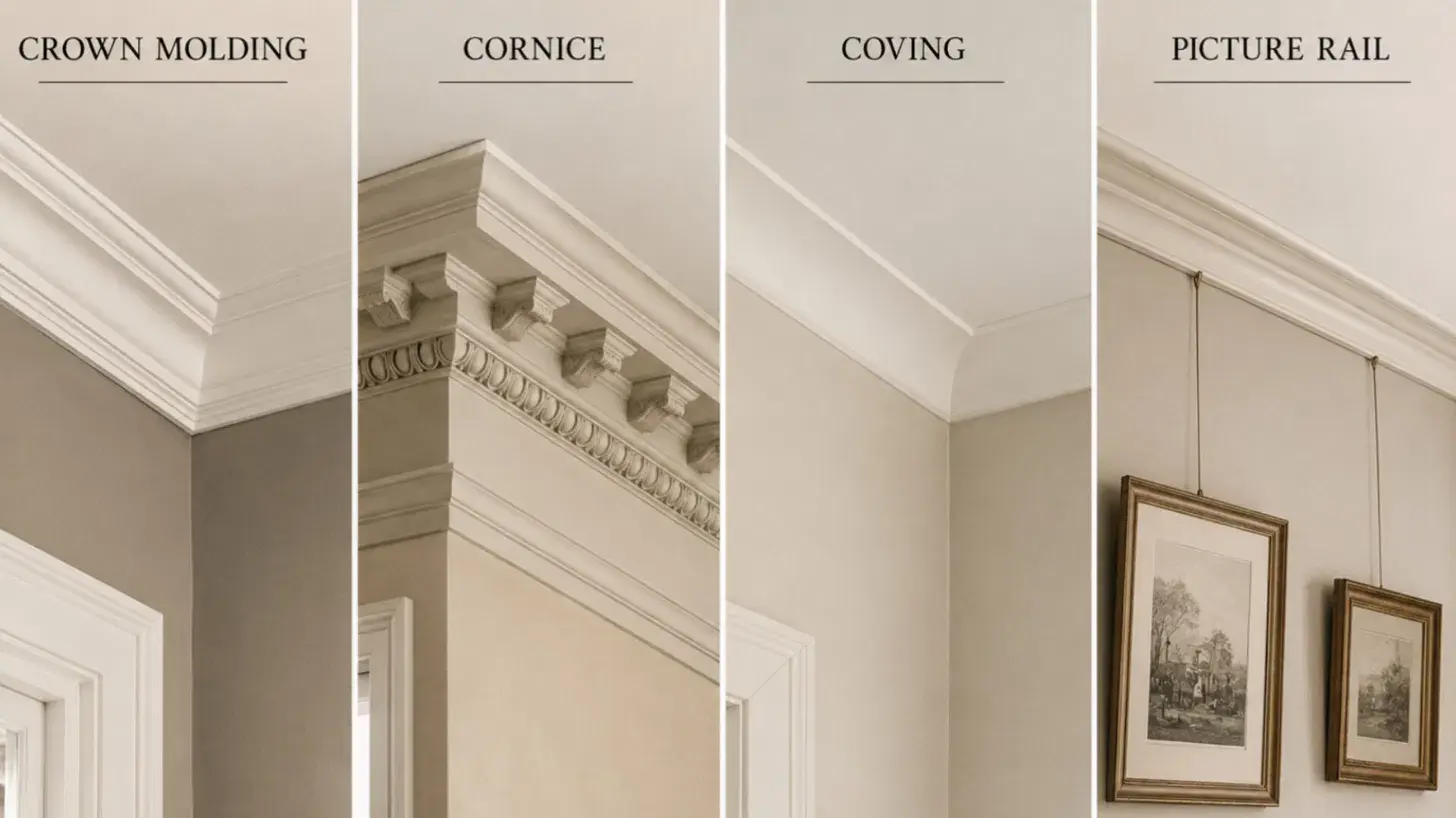
These terms are easy to mix up because they all relate to decorative trim, but each one has a different purpose and appearance.
Knowing where they are installed and how they are used will help you choose the right trim for your room, rather than relying on the name alone.
- Crown Molding: Installed where the wall meets the ceiling. It usually has curved, stepped, or layered profiles and is the most common choice for adding a finished look to living rooms, bedrooms, dining rooms, and even above cabinets.
- Cornice: Also placed at the wall-ceiling joint, but generally larger and more decorative than standard crown molding. The term is commonly used in British architecture to refer to traditional homes with detailed trim work.
- Coving: Installed at the wall-ceiling joint like crown molding, but it has a simple concave curve without extra detailing. It works well in modern, minimalist, and contemporary interiors.
- Picture Rail: Mounted several inches below the ceiling rather than directly at the ceiling line. It was originally designed to hang artwork with hooks and wires, though it is now often used as decorative trim.
Crown Molding Materials Compared
The material you choose affects more than just the price. It also changes how easy the molding is to install, how well it handles moisture, how long it lasts, and where it works best.
Comparing the most common options side by side makes it easier to match your budget and project.
| Material | Typical Cost (Per Linear Foot) | Best Rooms | DIY Difficulty | Durability & Moisture Resistance |
|---|---|---|---|---|
| Wood | $2–$12+ | Living rooms, dining rooms, historic homes | Moderate to High | Very durable but can expand or shrink with humidity unless properly sealed. Great for staining or painting. |
| MDF (Medium-Density Fiberboard) | $1–$3 | Bedrooms, hallways, living rooms | Easy to Moderate | Smooth, budget-friendly, and easy to paint. Not recommended for bathrooms or other damp areas, as it can swell when exposed to moisture. |
| Polyurethane | $2–$6 | Most interior rooms, including kitchens and bathrooms | Easy | Lightweight, resists dents, insects, and moisture. A popular choice for DIY projects because it cuts and installs more easily than wood. |
| Polystyrene/Foam | $1–$4 | Apartments, rental homes, quick room updates | Very Easy | Extremely lightweight and often installed with adhesive. Handles moisture well but dents more easily than other materials. |
| PVC | $2–$5 | Bathrooms, laundry rooms, basements, kitchens | Easy | Waterproof and highly resistant to humidity, making it a good choice for moisture-prone spaces. Usually painted after installation. |
| Flexible/Rubber | $4–$10 | Curved walls, arches, rounded ceilings | Moderate | Designed to bend without cracking. Moisture-resistant and ideal for areas where standard rigid molding will not fit. |
There is no single material that works for every project. Pick the one that fits your room, budget, and the amount of maintenance you are comfortable with.
Pro Tip: For a cleaner finish, prime and paint crown molding before installing it. Then only touch up nail holes and seams afterward.
Popular Crown Molding Profiles
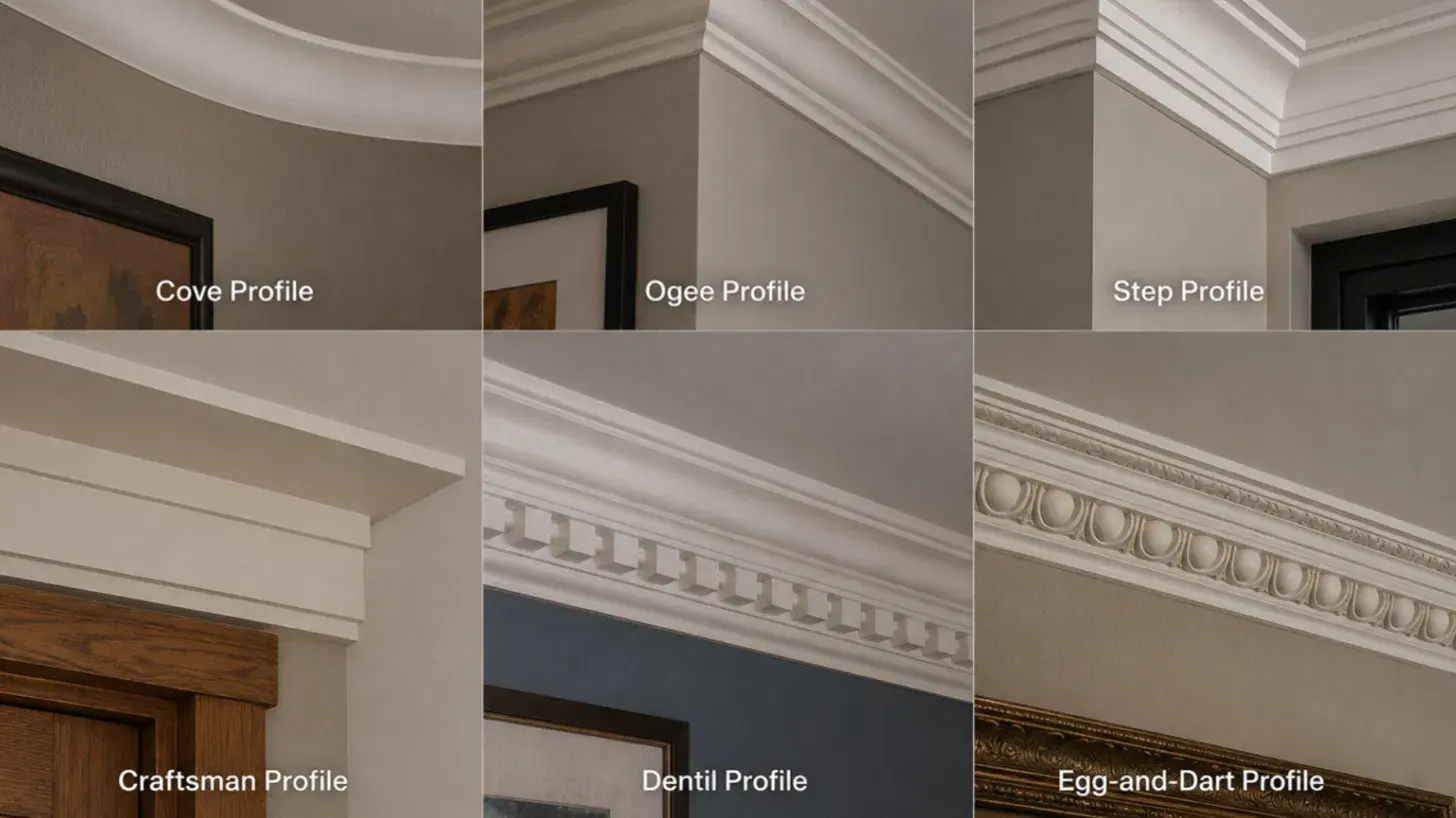
Once you know the material, choose the profile. This is the visible shape of the molding, so it controls how simple, classic, or detailed the room feels.
- Cove Profile: A smooth inward curve. Best for modern rooms, bedrooms, hallways, and small spaces where you want a clean finish.
- Ogee Profile: An S-shaped curve with a traditional look. Works well in dining rooms, living rooms, and homes with classic trim.
- Step Profile: Clean squared edges. A good match for contemporary homes, open layouts, and modern cabinets.
- Craftsman Profile: Straight lines and flat boards. Best for bungalows, farmhouse spaces, and homes with simple wood details.
- Dentil Profile: Small repeated block details. Works best in Colonial, Georgian, or formal rooms.
- Egg-and-Dart Profile: Alternating oval and pointed shapes. Best for historic homes, libraries, dining rooms, and tall ceilings.
What Size Crown Molding Fits Your Ceiling?
Choosing the right crown molding size is just as important as choosing the material or style. A profile that is too small can look out of place in a tall room, while one that is too large may make a low ceiling feel cramped.
As a general rule, taller ceilings can handle wider molding because there is more vertical space to balance it. Your room’s size, furniture, and overall trim also influence what looks right.
Use the table below as a starting point, then adjust based on your home’s proportions and personal preference.
| Ceiling Height | Recommended Crown Molding Width |
|---|---|
| 8 ft | 2–3.5 inches |
| 9 ft | 3.5–5 inches |
| 10–12 ft | 5–8 inches |
| 12+ ft | 6–10+ inches or built-up crown molding |
Keep in mind: These are general guidelines, not strict rules. A simple profile can look larger than its actual width, while layered or built-up molding works better in rooms with high ceilings.
Crown Molding Ideas by Style
The right crown molding should match your home’s style, not just your ceiling height. Here are some ideas I often recommend based on the look you want and how much visual detail you prefer.
1. Traditional and Colonial
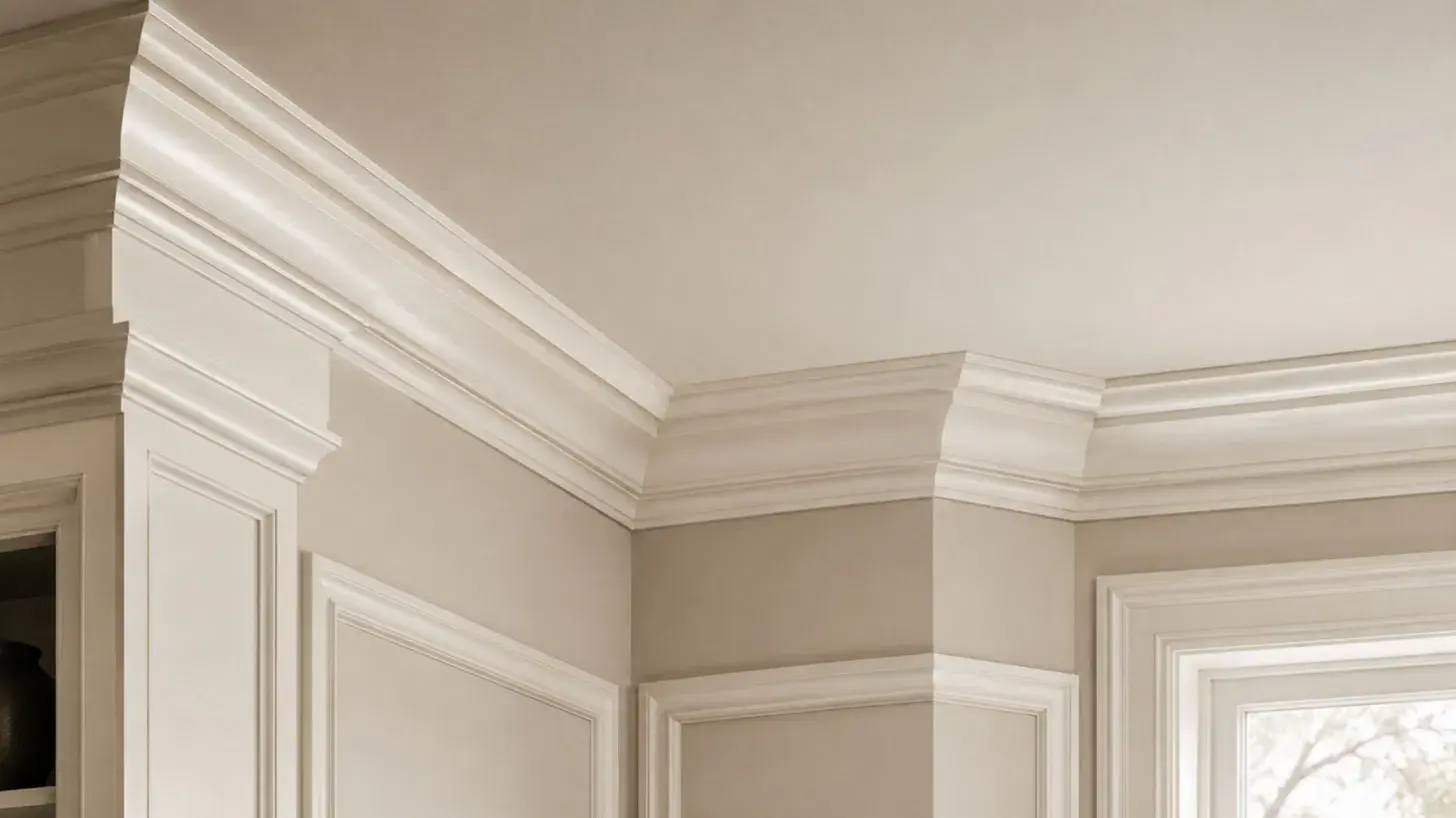
If your home has classic trim, paneled walls, or formal spaces, traditional crown molding is hard to beat. It usually features layered curves and decorative profiles that create a refined transition between the wall and ceiling.
I like pairing it with white paint because it highlights the profile without making the room feel too busy. It works especially well in dining rooms, living rooms, and entryways.
Quick Pairing
- Best with: Wainscoting, chair rails, ceiling medallions
- Common colors: White, off-white, cream
2. Modern and Minimal
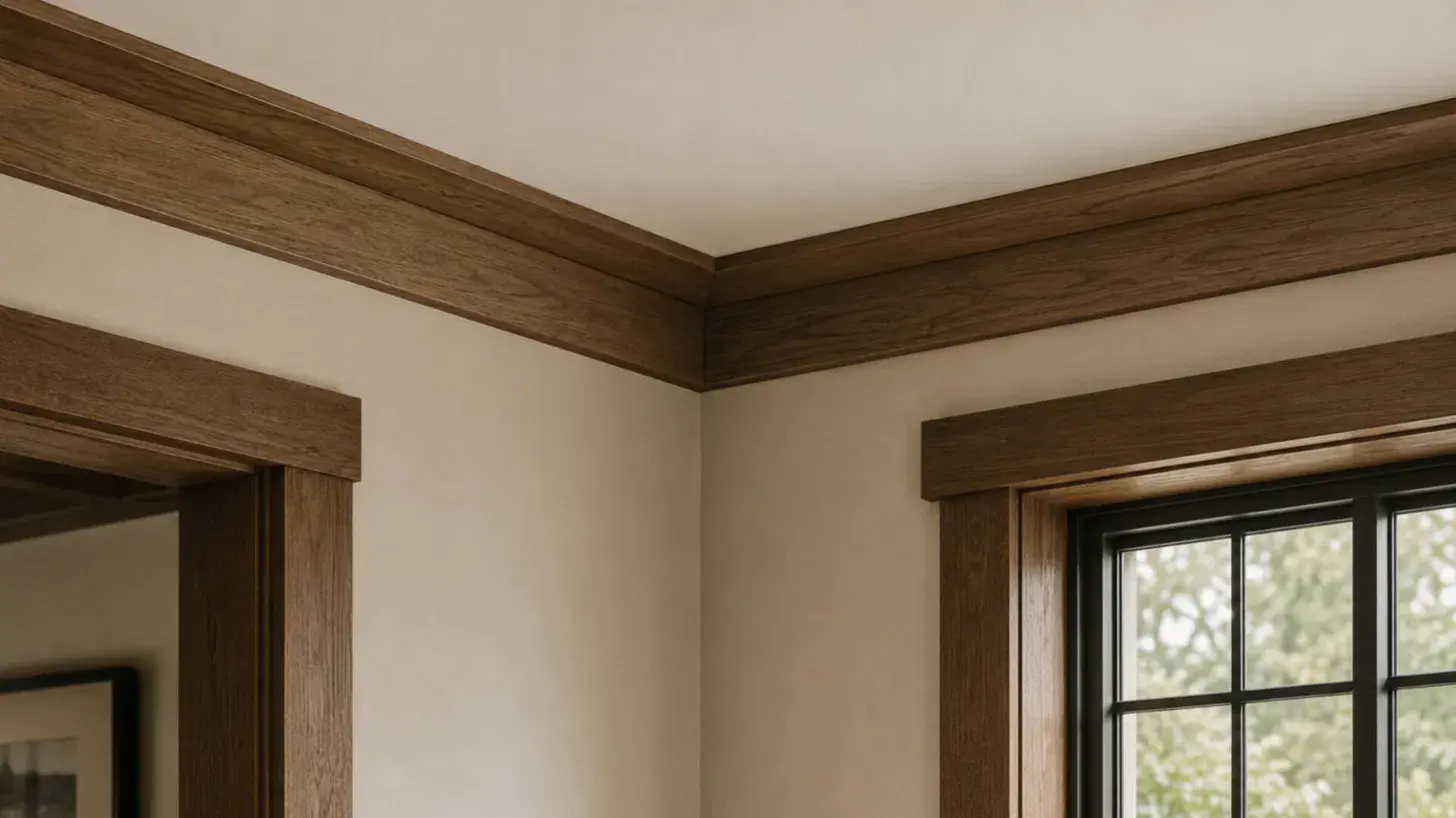
Modern homes usually look better with clean, simple crown molding instead of highly detailed profiles. A square-edged or slim design keeps the ceiling line neat without drawing too much attention.
I usually suggest this style when the goal is to let furniture, artwork, or large windows stand out instead of the trim itself.
Works Best In
- Apartments
- Contemporary homes
- Open-concept spaces
3. Craftsman
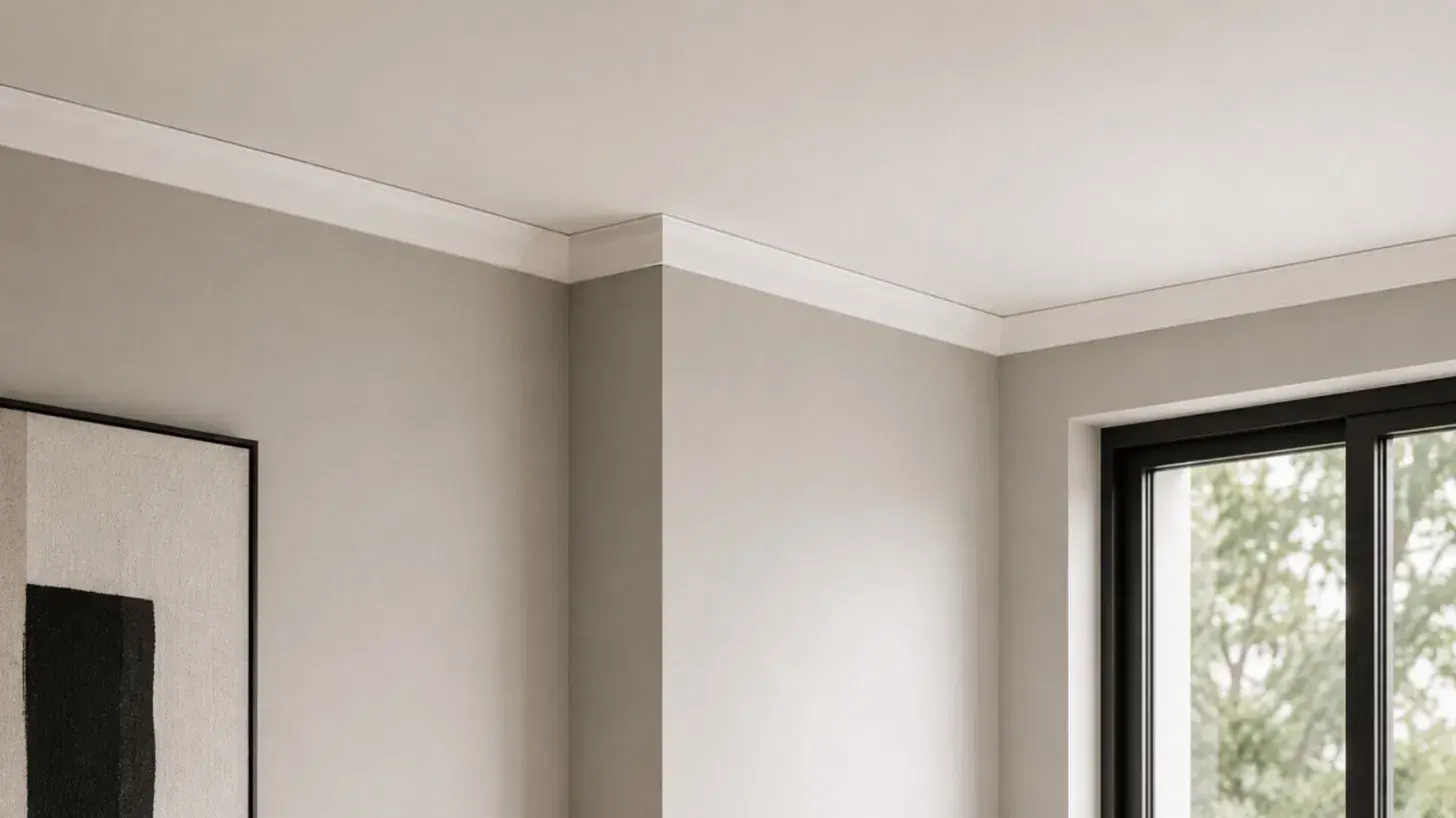
Craftsman crown molding has straight lines and flat boards rather than ornate curves. It creates a clean, sturdy look that complements natural wood finishes and simple architectural details.
I often recommend it for bungalows, farmhouse interiors, and homes with exposed beams because it blends naturally with those features.
Common Features
- Flat profiles
- Square edges
- Natural wood or painted finishes
4. Cove and Simple Profiles
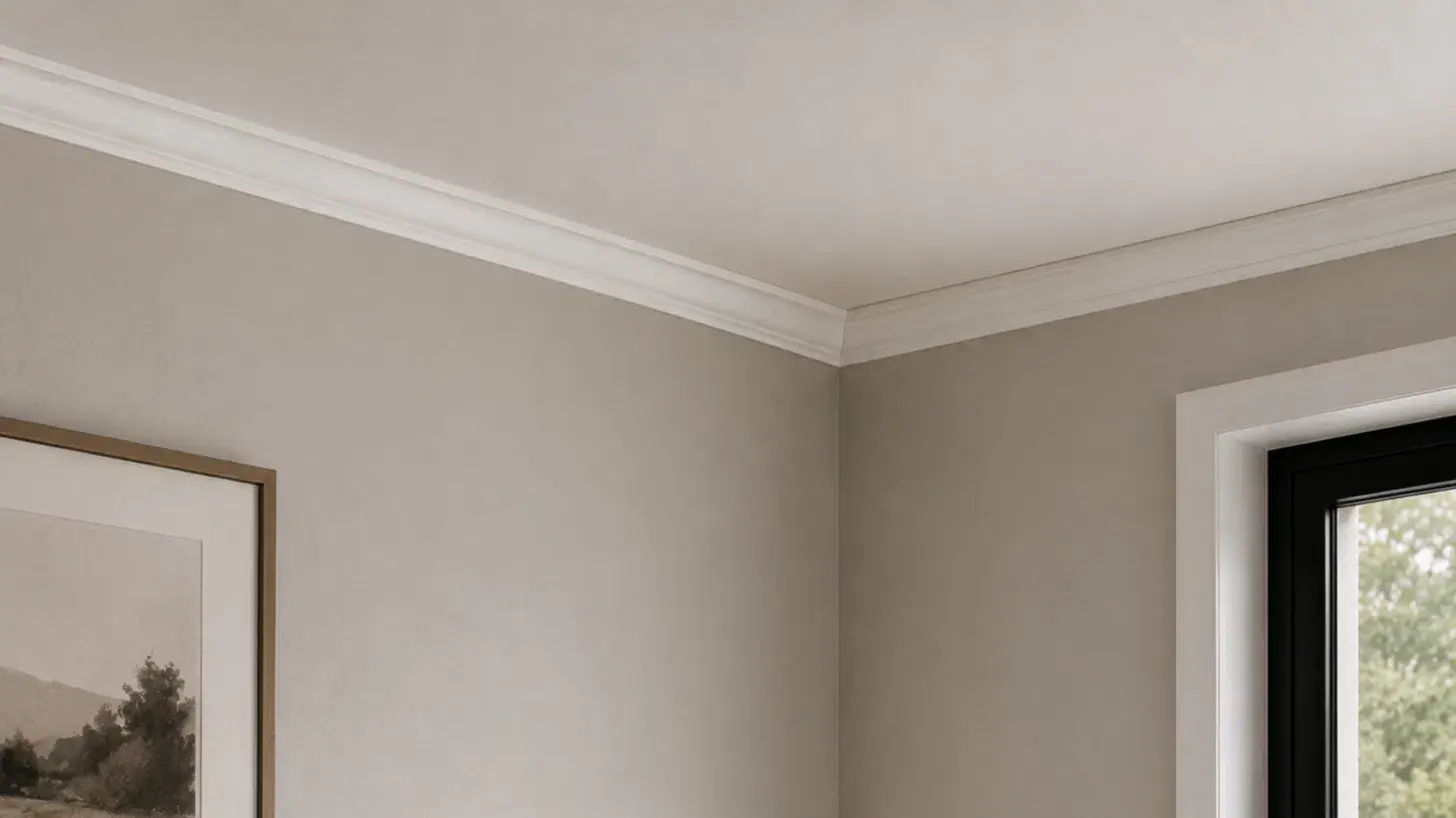
Cove molding has a smooth concave curve that creates a soft transition from wall to ceiling.
It is less decorative than traditional crown molding, making it a good choice if you want subtle detail without changing the room’s overall style. I find it especially useful in smaller rooms because it keeps the ceiling from feeling crowded.
Good Choice For
- Bedrooms
- Hallways
- Home offices
5. Built-Up or Layered Crown for High Ceilings
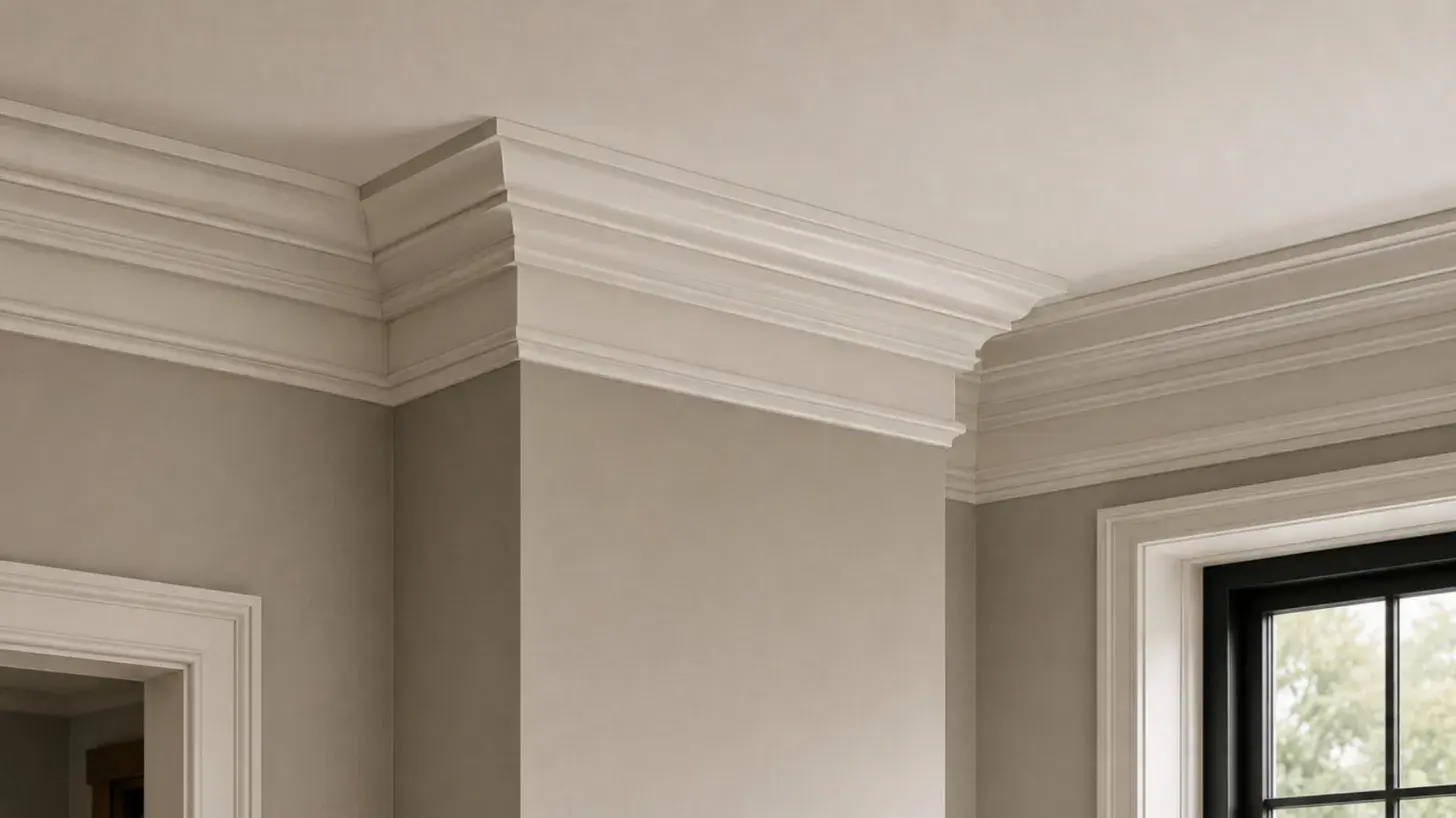
Rooms with tall ceilings can make standard molding look undersized. A built-up crown combines two or more trim pieces to create a wider, more substantial profile.
I usually recommend this approach for ceilings over 10 feet because it fills the extra wall space without looking oversized.
Built-Up Combination Example
| Baseboard Cap | Crown Molding | Backer Board |
| ✓ | ✓ | Optional |
6. Lighting Integration (LED Cove Lighting)
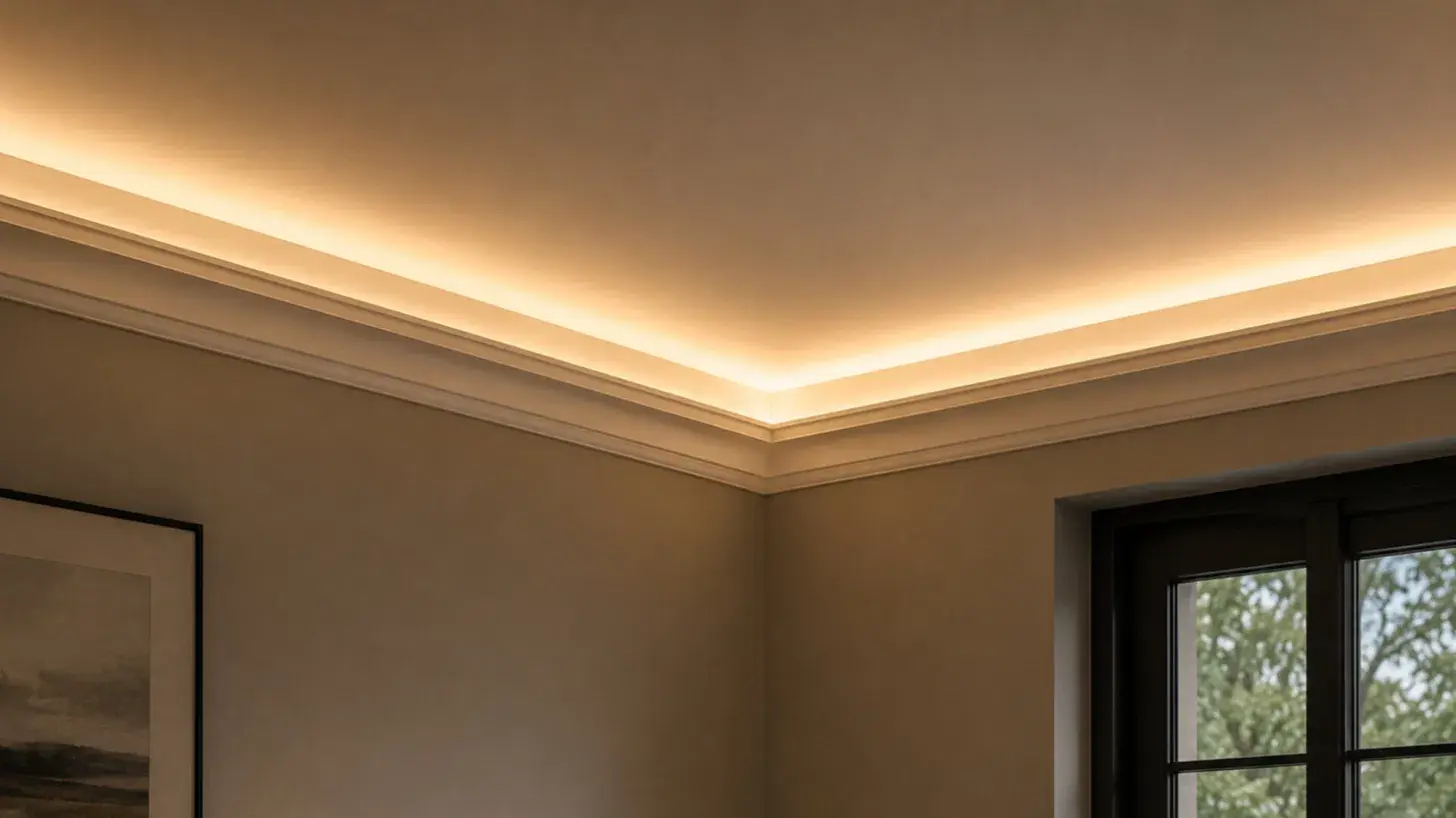
Hidden LED strip lighting behind crown molding creates a soft glow that makes the ceiling appear higher and adds gentle evening lighting.
I like this option for media rooms, bedrooms, and living spaces because it adds both function and style without taking up extra space.
LED Lighting Tips
- Use warm white (2700K–3000K) for living spaces.
- Plan wiring before installing the molding.
- Leave enough space behind the trim for the light strip.
7. Rental-Friendly and No-Nail Options
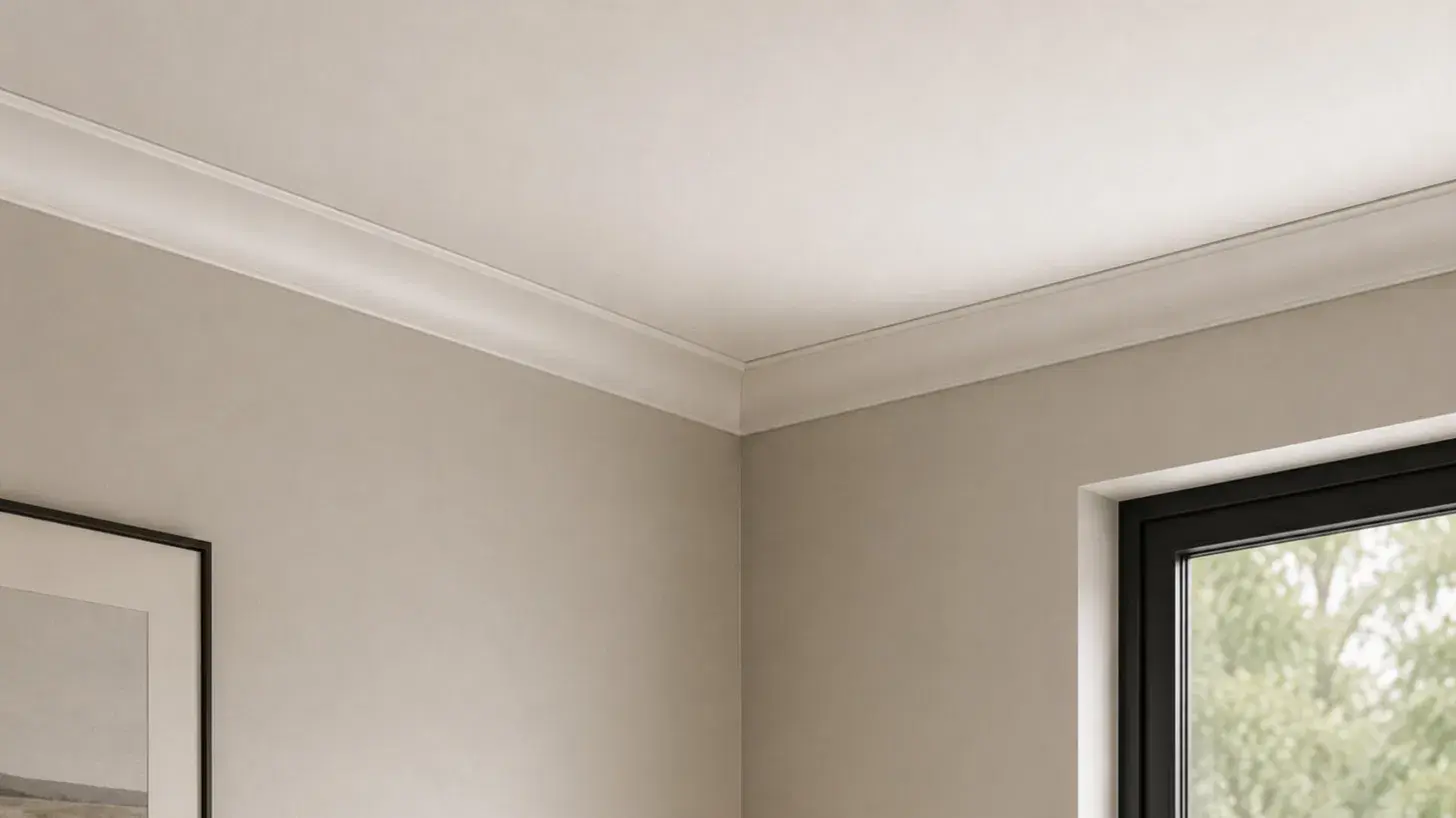
If you rent or want to avoid permanent changes, lightweight foam or adhesive-backed crown molding can give the room a finished look without nails.
I always recommend checking your lease first, but many peel-and-stick products can be removed with much less wall damage than traditional installations.
Rental-Friendly Options
- Peel-and-stick foam molding
- Lightweight polystyrene trim
- Paintable adhesive molding strips
Paint Grade vs Stain Grade Crown Molding
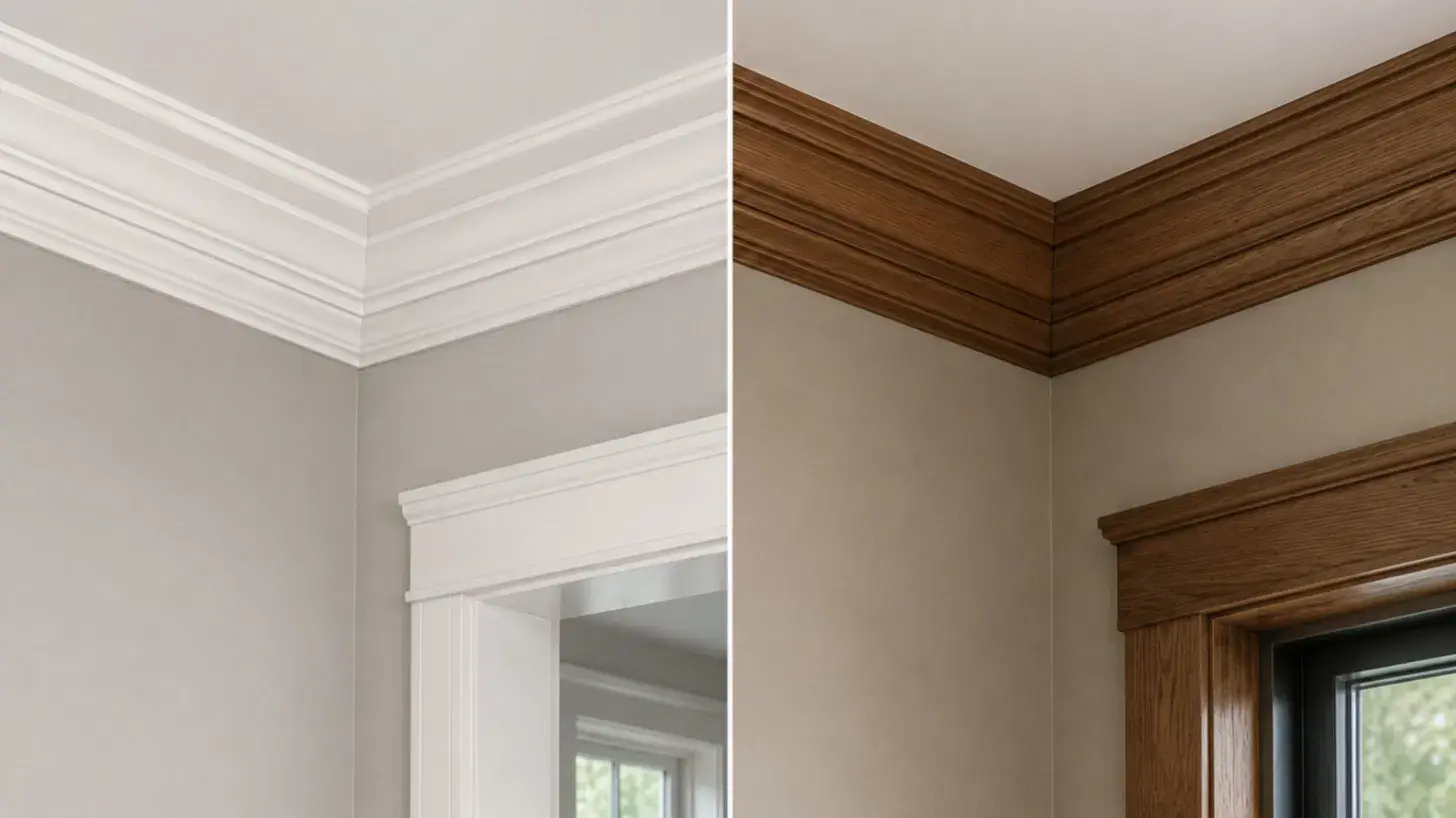
Paint-grade and stain-grade crown molding look similar before installation, but they finish very differently.
I usually choose paint grade when the goal is a clean white or color-matched trim. Stain grade is better when you want the natural wood grain to show.
| Paint Grade | Stain Grade |
|---|---|
| Lower cost | Higher cost |
| Painted finish | Natural wood finish |
| Hides seams and small flaws better | Shows wood grain clearly |
| Common in MDF, finger-jointed pine, and polyurethane | Common in oak, maple, cherry, and walnut |
| Best for modern, rental, and budget projects | Best for traditional, historic, and high-end rooms |
How Much Does Crown Molding Cost?
Crown molding typically costs $7 to $16 per linear foot installed, including materials and labor, according to HomeGuide’s cost data.
A typical 15-foot by 14-foot living room runs $460 to $1,100, a 10-foot by 10-foot kitchen runs $210 to $570, and a whole-home install falls between $2,000 and $4,000.
| Material | Cost Per Linear Foot (Materials Only) |
|---|---|
| Polystyrene or foam | $1 to $2 |
| Vinyl or PVC | $1 to $3 |
| MDF | $1 to $3 |
| Wood (common species) | $1 to $6 |
| Polyurethane | $2 to $6 |
| Plaster | $6 to $12 |
| Exotic wood | $10 to $45 |
| Metal (aluminum, steel, copper) | $20 to $25 |
Labor ranges from $6 to $12 per linear foot, depending on the installer’s experience and the material’s difficulty, and installation takes roughly 10 to 26 minutes per linear foot.
Three factors drive prices up the most: choosing hardwood, plaster, or metal over MDF or foam; taller ceilings that call for wider profiles; and rooms with several corners that require precise custom cuts.
Should You Install Crown Molding Yourself?
Crown molding is one of those projects that looks simple until you start cutting corners, literally. Before I commit to a DIY installation, I run through a few practical checks.
They help me decide if I can handle the project or if hiring a professional is the smarter choice. Before You Get Started, Ask Yourself:
- Do I have the right tools? A miter saw for angled cuts, a coping saw for inside corners, and a brad nailer to secure the molding will make the job much easier.
- How many corners does the room have? A square room is beginner-friendly. Bay windows, alcoves, and multiple doorways add more cuts and fitting.
- Are my walls and ceiling straight? Older homes often have uneven corners that need trimming, coping, or extra caulk to hide gaps.
- Do I have enough time? I usually set aside most of a day for one room, especially if it’s my first time. Rushing almost always leads to wasted material.
If any of these points make you hesitate, there is nothing wrong with bringing in a professional. Sometimes paying for experience costs less than replacing miscut molding.
How to Cut and Install Crown Molding Step by Step
Cutting crown molding is easier when you break the job into smaller parts. Start with your tools, measure carefully, plan each type of cut, then finish with nailing, caulking, and paint touch-ups.
Step 1: Start with the Basic Cuts
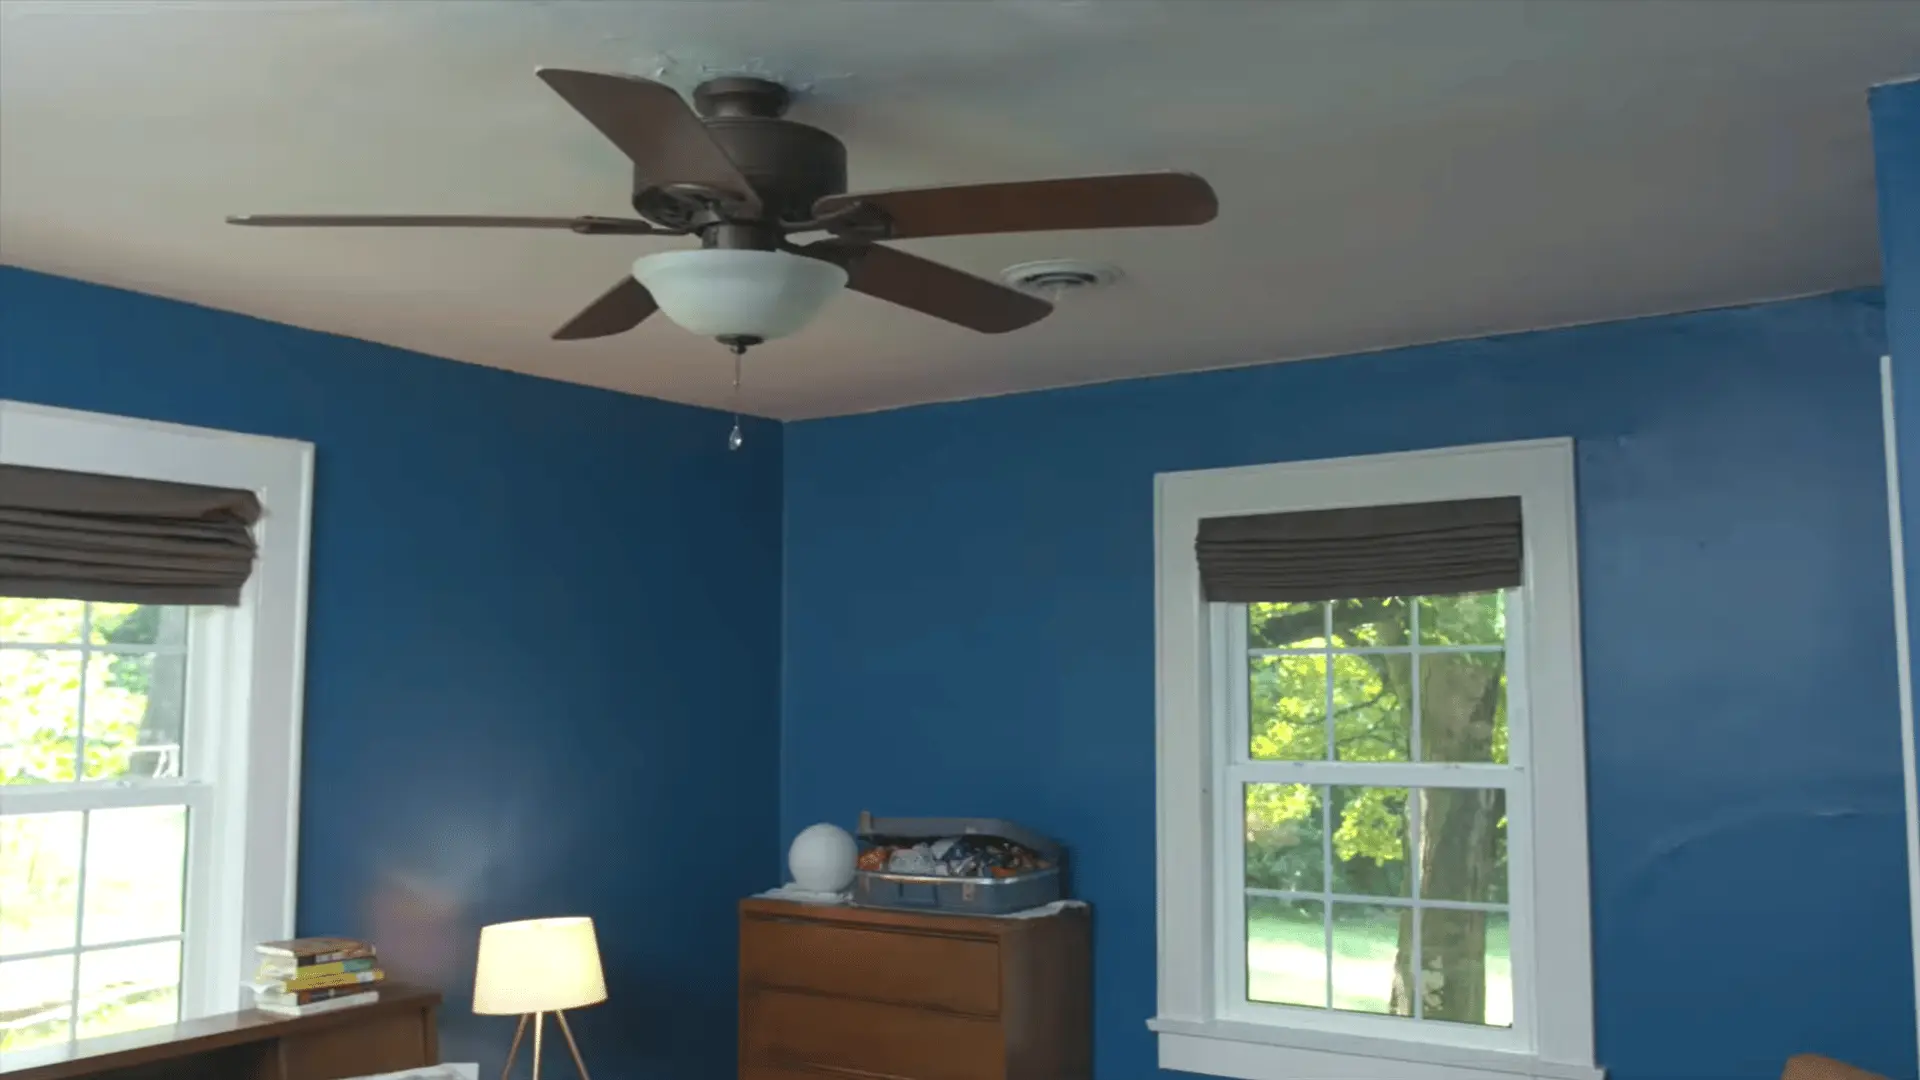
Before cutting, know the three cuts used in most crown molding projects: inside corners, outside corners, and scarf joints.
- Inside corners form where two walls meet and turn inward.
- Outside corners wrap around outward-facing wall edges.
- Scarf joints connect two pieces on a long wall. Once you understand which cut goes where, the whole project feels much easier to control.
Step 2: Gather the Tools and Materials
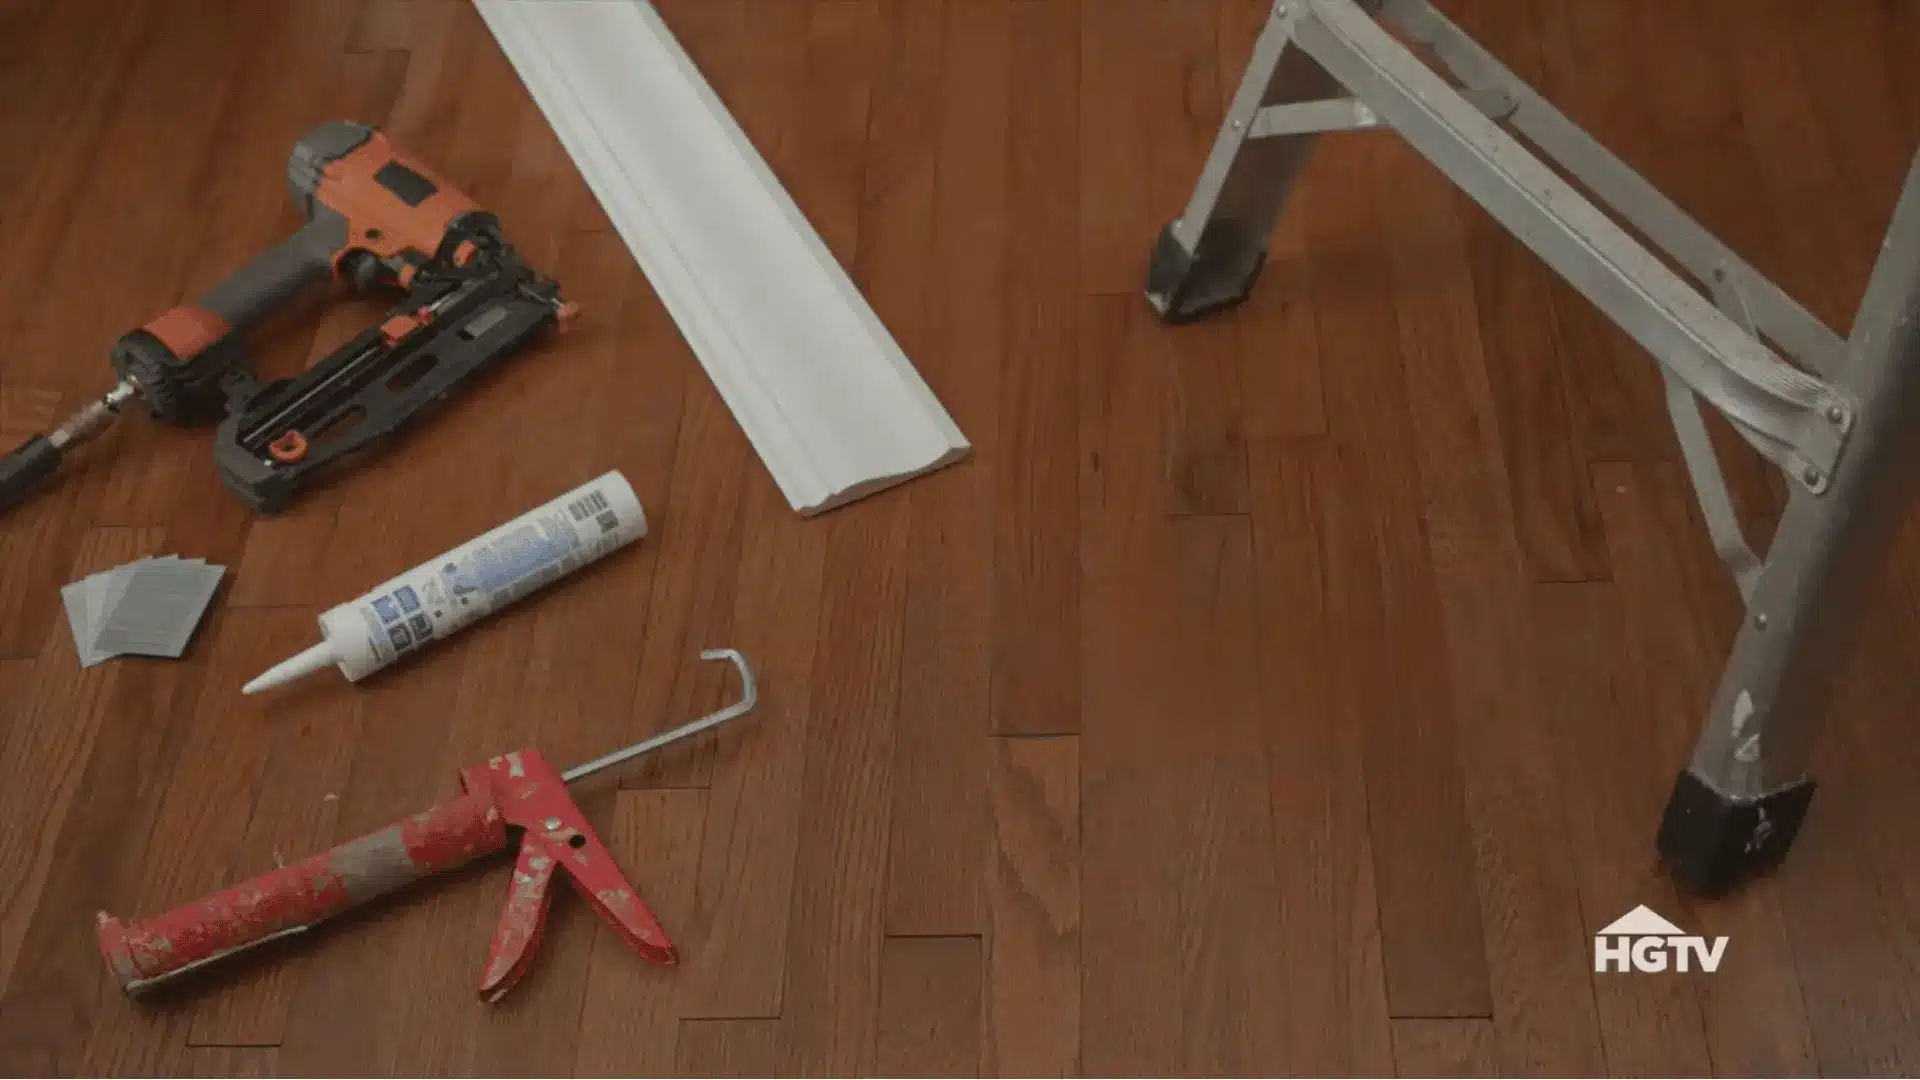
Before starting, gather crown molding, 18-gauge 2½-inch nails, a nail gun, paintable caulk, a caulk gun, a ladder, a miter saw, a tape measure, and safety glasses.
I like setting everything within reach before the first cut. Crown molding needs steady measuring and cutting, so stopping midway to find tools can lead to rushed work.
Step 3: Measure and Mark Each Piece
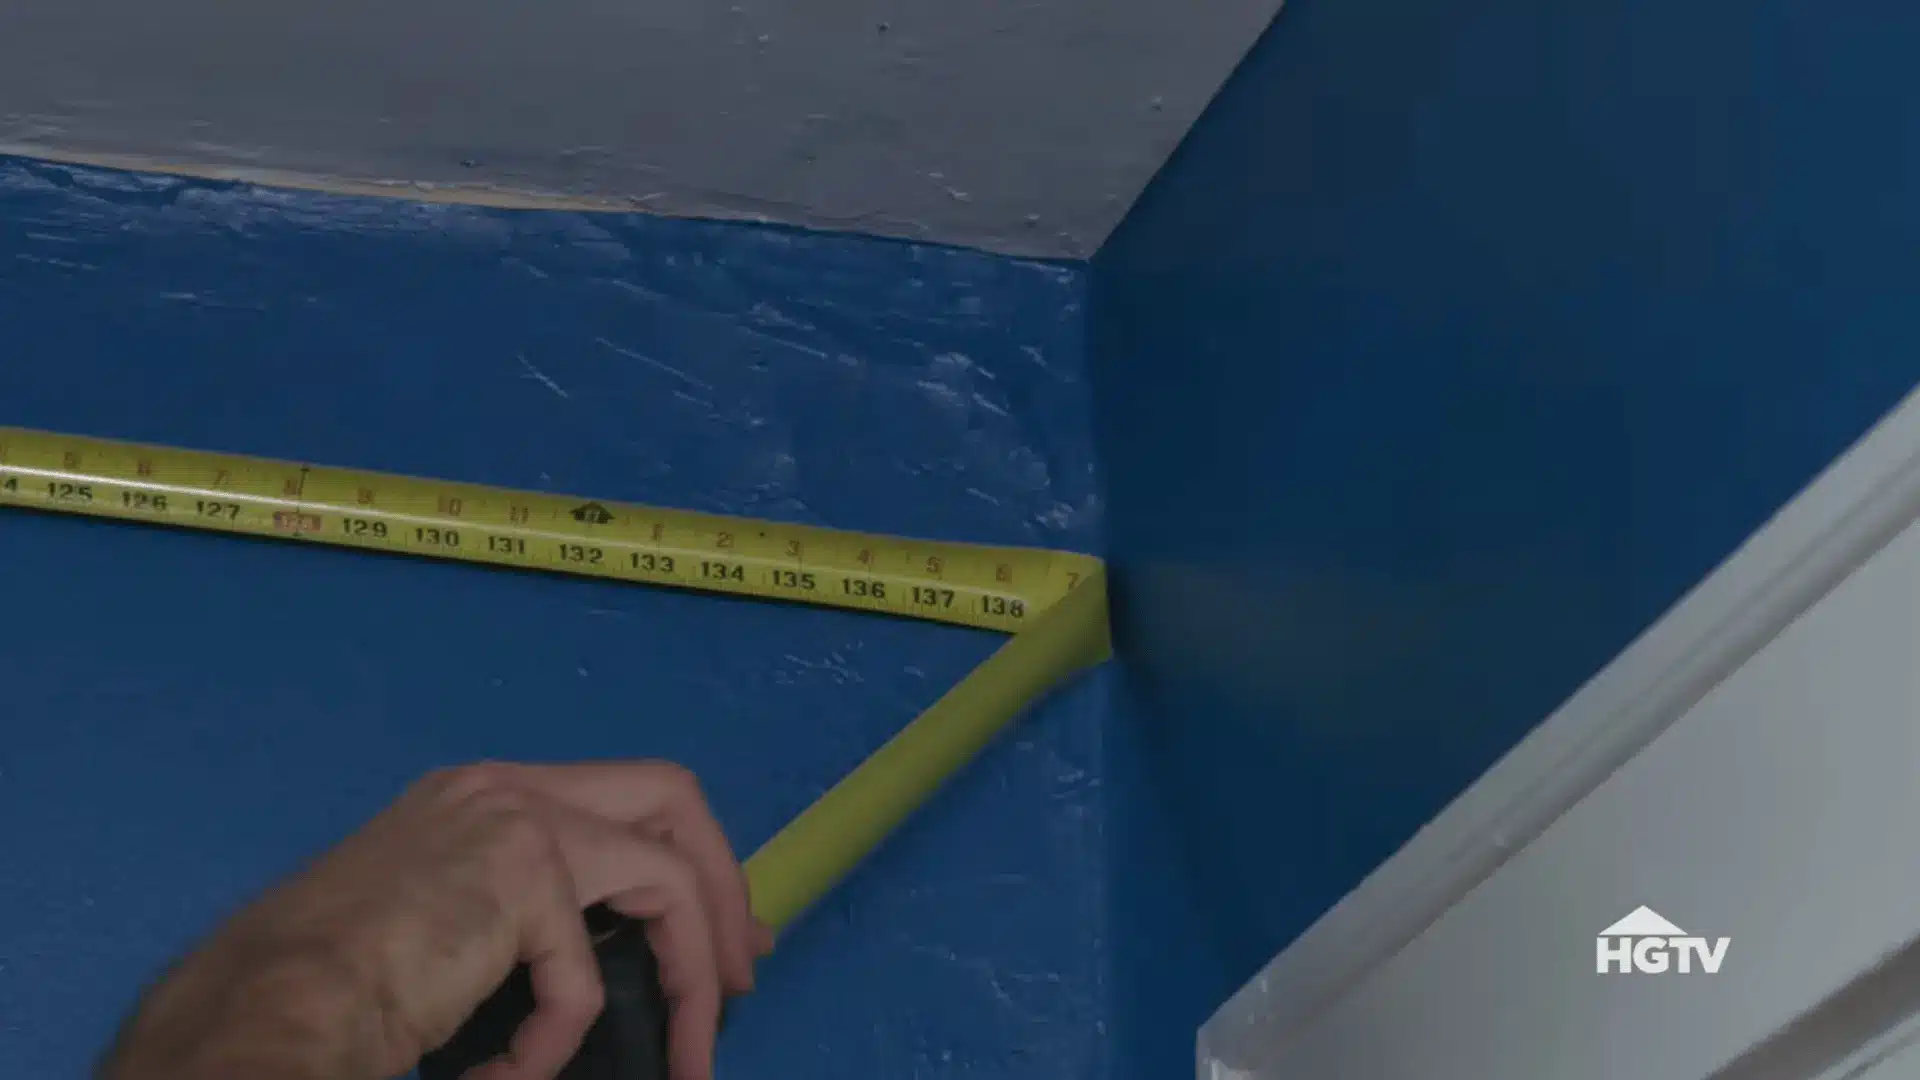
Measure the wall where the bottom of the crown molding will sit, going corner to corner. For inside corners, the bottom edge is usually longer, while the top edge is shorter.
Mark the wall measurement on the bottom of the molding, then draw a small guide line showing the cut direction. This helps keep each board clear before it reaches the saw.
Step 4: Cut the Outside Corners

For outside corners, the bottom edge is shorter, and the top edge is longer. Measure from the bottom again, then place the board upside down on the saw.
On the right side of an outside corner, the cut angles up to the left. On the left side, it angles up to the right. Set the saw to 45 degrees and follow your marks.
Step 5: Make Scarf Joints on Long Walls
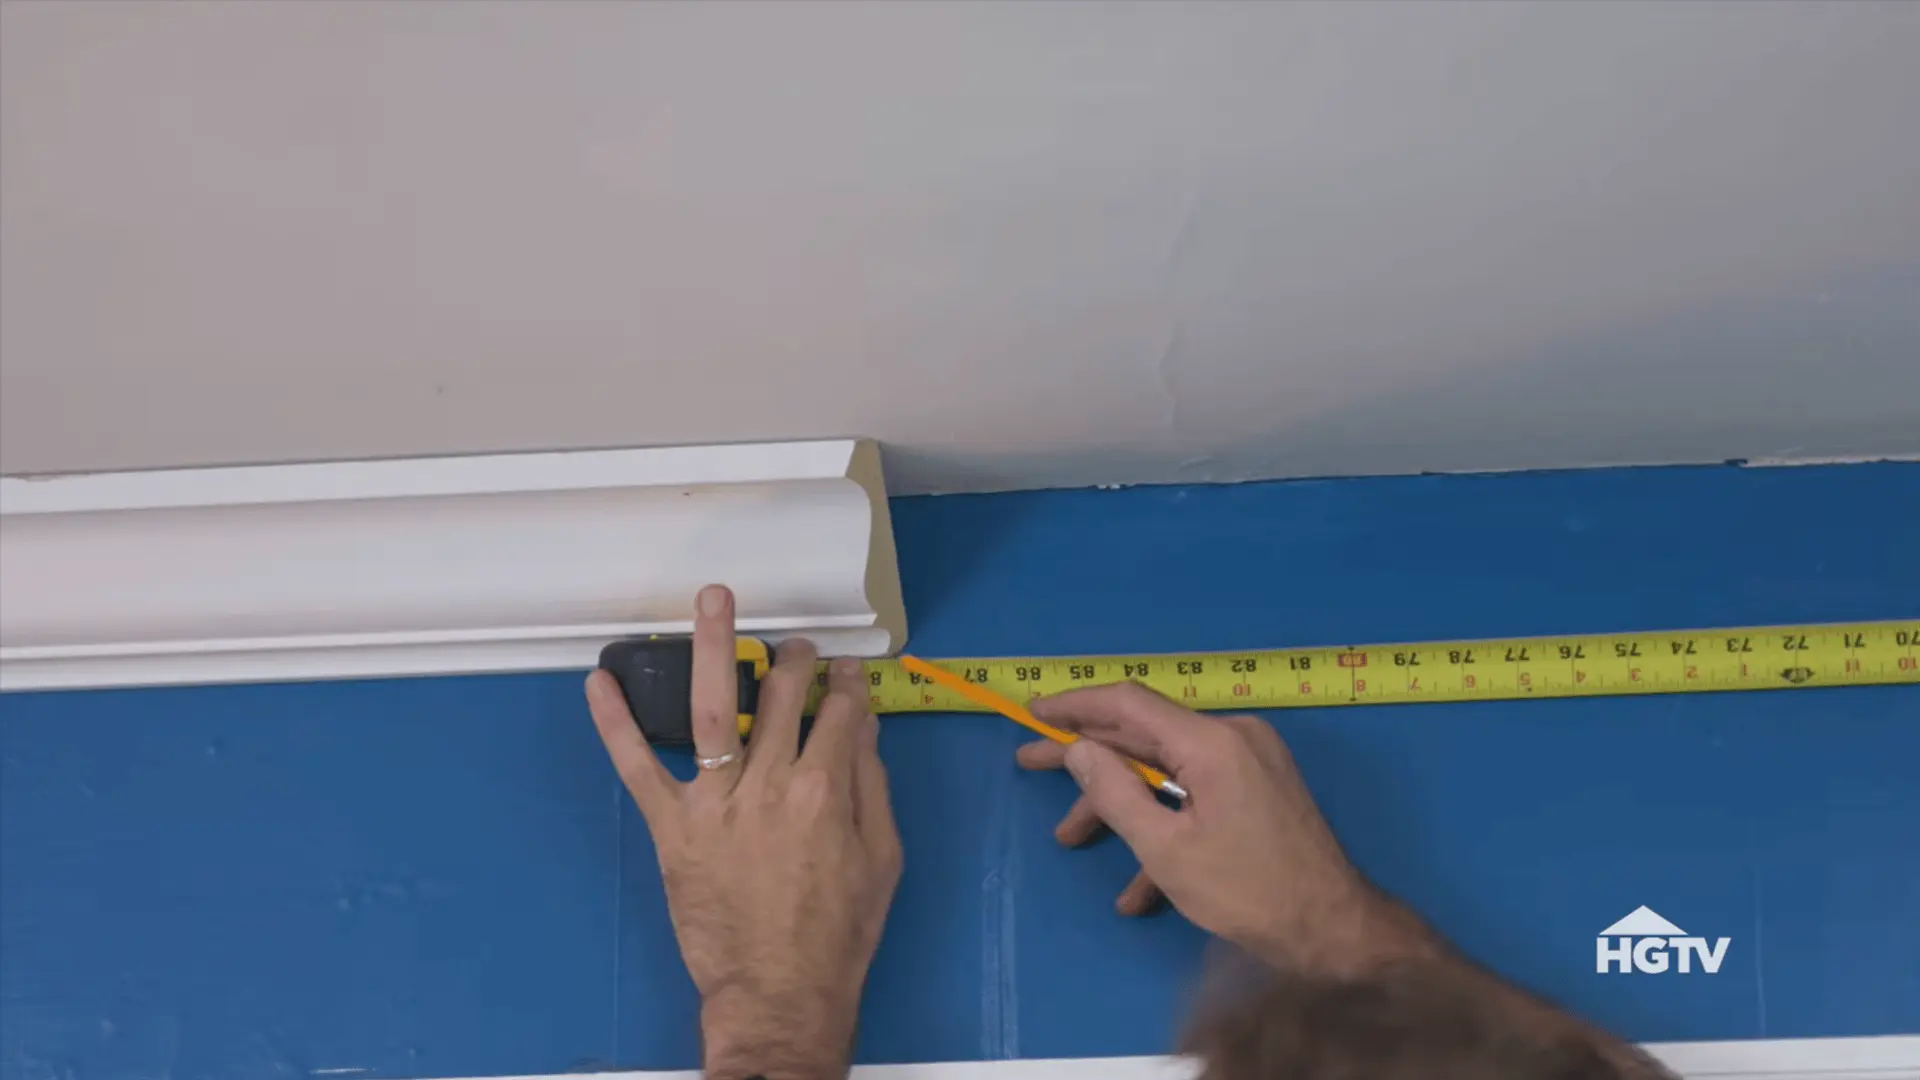
A scarf joint helps hide the seam when two molding pieces meet on a long wall.
Measure to the lowest point of the front-facing edge. For both right and left sides of the joint, the cuts angle in the same direction.
Unlike corner cuts, the boards lay flat on the saw, and the blade tilts to 45 degrees before cutting.
Step 6: Fit Nail Caulk And Finish
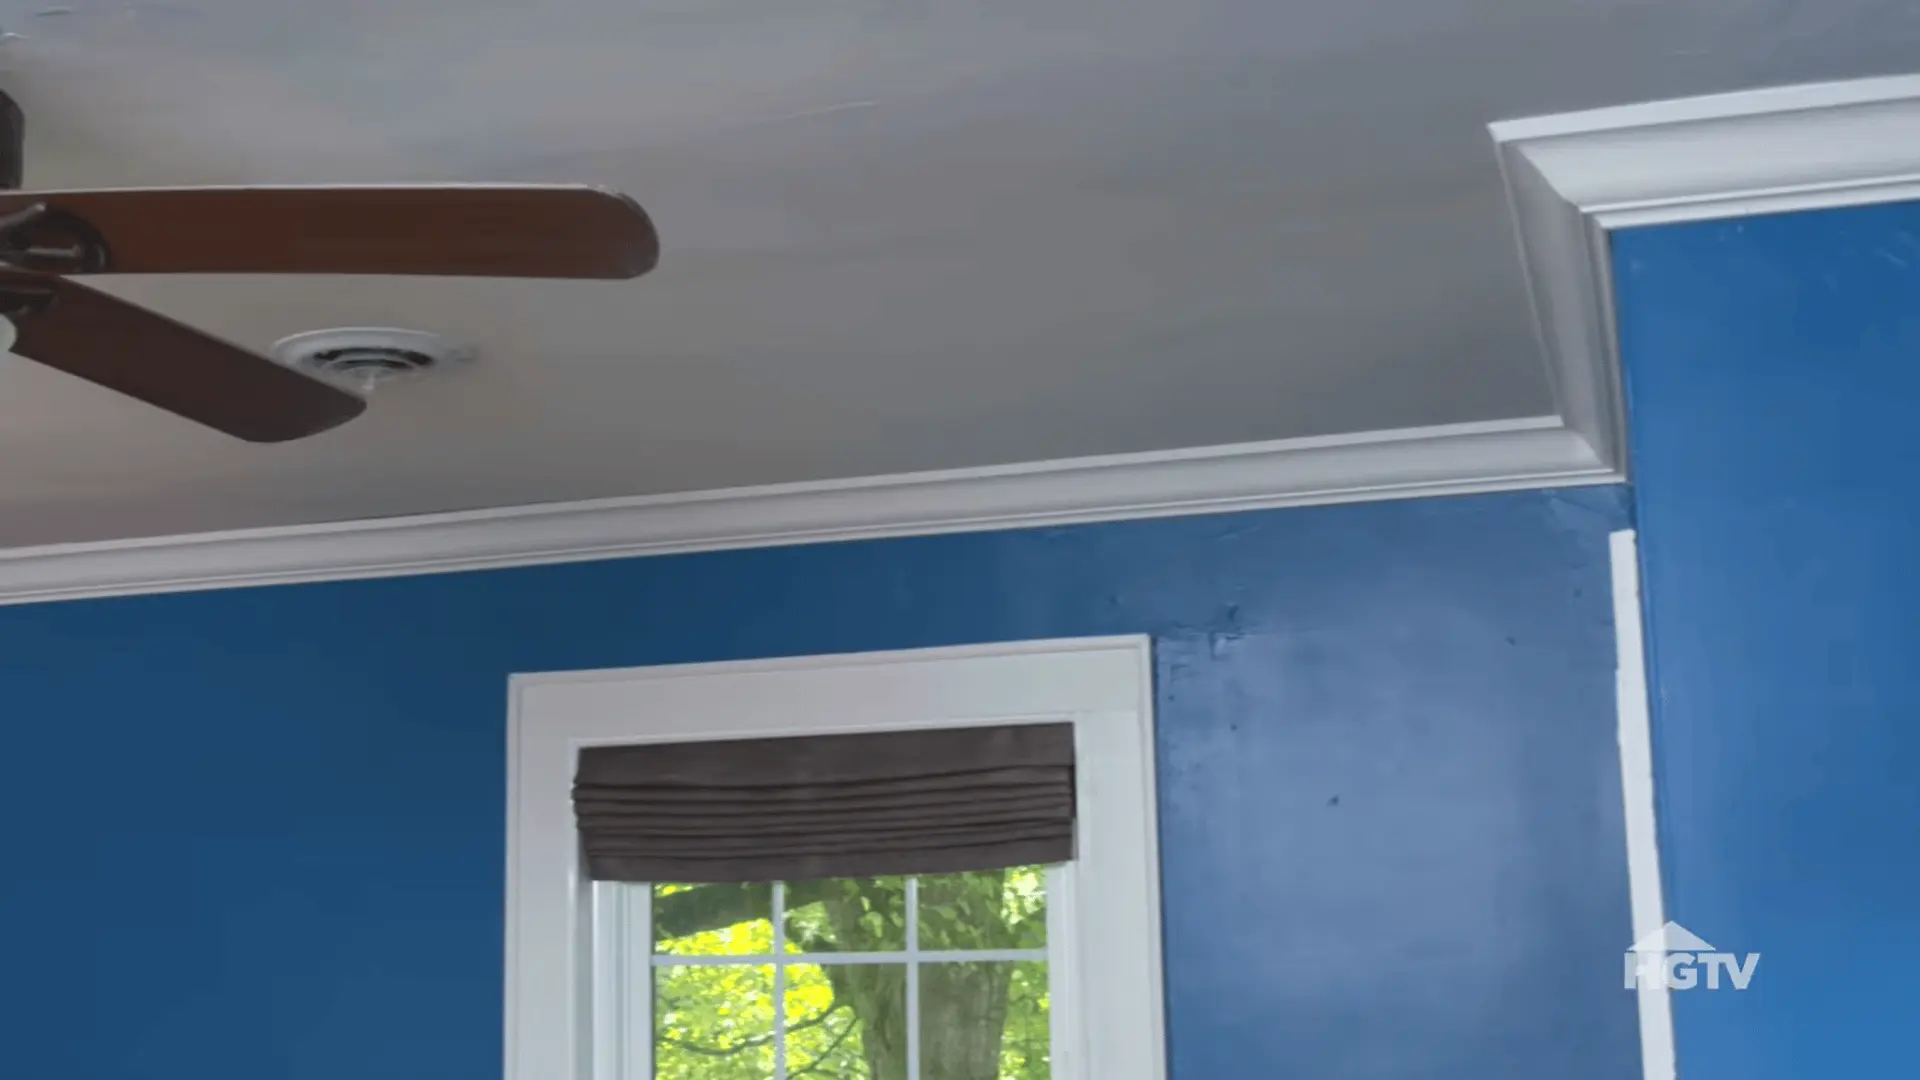
Once the pieces are cut, fit them snugly together and nail them in place.
Small gaps at inside corners, ceiling lines, and nail holes can be filled with paintable caulk, then wiped smooth with a damp rag.
Outside corners need a tighter fit because caulk will not hide larger gaps well there. After caulking and paint touch-ups, the trim should look clean and finished.
For a visual walkthrough of the cutting angles and installation steps, you can watch HGTV’s video below.
Common Crown Molding Mistakes to Avoid
Even a quality molding profile can look poorly installed if a few basic steps are missed. I pay close attention to these common mistakes because they are much easier to prevent than fix later.
| Mistake | What Can Go Wrong | What I Recommend Instead |
|---|---|---|
| Skipping acclimation time | Wood can expand or shrink after installation, creating gaps. | Let the molding sit indoors for 24–48 hours before cutting. |
| Measuring flat instead of in cutting position | The finished angles may not fit correctly. | Measure and cut the molding in the same position it will be installed. |
| Ignoring out-of-square corners | Standard 45° cuts often leave visible gaps. | Test-fit first and adjust the angle or cope inside corners. |
| Nailing into drywall only | The molding may loosen over time. | Nail into studs or ceiling framing whenever possible. |
| Rushing without dry-fitting | Misaligned joints are harder to fix after installation. | Test-fit every piece before applying glue or nails. |
| Skipping caulk and paint touch-ups | Nail holes and small gaps remain visible. | Fill, caulk, and paint for a smooth, built-in finish. |
Final Thoughts
Crown molding is a small detail, but it can make a noticeable difference when you choose the right material, profile, and size for your space.
From classic wood trim to lightweight foam options, there is a style for almost every budget and skill level.
If I have learned anything from installing it over the years, it is that careful planning matters far more than buying the most expensive molding.
Taking accurate measurements, making clean cuts, and choosing a profile that fits your room will give you better results than rushing the job. Before you pick up the saw, take a few minutes to compare your options and plan your layout.
Once you’ve made your choice, use this guide as your checklist and work one step at a time.
A little patience now can leave you with a room that feels complete every time you walk in.
Frequently Asked Questions
Can Crown Molding Increase Home Value?
It can improve buyer appeal, especially in formal rooms, but it does not guarantee a higher resale price.
How Long does Crown Molding Last?
Quality crown molding can last for decades when installed well and protected from moisture damage.
Can Crown Molding Hide Ceiling Imperfections?
Yes, it can cover small gaps, cracks, uneven seams, and rough paint lines near the ceiling.
Can You Mix Crown Molding Styles?
Yes, but keep connected rooms consistent so the trim does not feel mismatched.

With a Master in Architectural Studies from University of Pennysylvania, Marwa Haydar has pioneered living spaces since 2005. Her expertise, initially honed in a prestigious architectural firm, is evident in her approach to creating environments. Marwa became part of our team in 2019 and has since been a driving force in our home improvement section, known for her practical yet stylish solutions. She’s been spearheading our design workshops since then, infusing her passion for teaching into her work. In her leisure time, Marwa enjoys exploring historic architecture and is an enthusiastic pottery hobbyist, further enriching her understanding of form and texture.