Building a DIY sauna in your backyard is way more doable than it sounds. You don’t need fancy tools or years of building experience to pull it off.
All you need is the right plan, the right materials, and a little patience. A sauna helps you sleep better, feel less stressed, and recover faster after a long day.
The best part is that you can build one yourself and save a lot of money in the process.
This breaks everything down into simple, actionable steps covering materials, costs, and tips to get it done right. Your dream backyard sauna is closer than you think.
What to Figure Out Before You Start Building
Before you start building, a few key things are worth knowing to avoid costly mistakes down the line. Your location matters a lot when planning your sauna build.
Backyards work great for outdoor builds and give you plenty of space to work with. Basements, garages, and bathrooms are all solid options if you want an indoor setup instead.
Make sure your chosen spot has good airflow and proper ventilation at all times. Size is another big factor to figure out before buying any materials at all.
A single-person sauna needs at least a 4×4-foot floor space to feel comfortable. Families need more room to sit and stretch out on the benches easily.
What You’ll Need to Build Your Sauna
Before you start learning how to build your own sauna, it helps to know exactly what you need. Here is a full list of materials with estimated costs:
| Material | Estimated Cost |
|---|---|
| Concrete cinder blocks | $30–$60 |
| Aspen tongue and groove boards (1.5-inch, 8ft) | $2,000–$2,800 |
| Local pine logs | $50–$150 |
| 2×6 aspen boards | $100–$200 |
| Metal roofing sheets | $200–$300 |
| Wood stove with install kit | $500–$1,500 |
| Sauna rocks (approx. 700 lbs) | $100–$200 |
| Wood screws | $20–$40 |
| Linseed oil | $20–$40 |
| Total | $3,020–$5,290 |
Total costs will vary depending on your location and the source of your wood. You can bring the overall budget down by using cheaper wood for the structure and saving Aspen only for the benches and floor.
How to Build a Sauna: Step-by-Step Instructions
Building a DIY sauna is simpler than it looks; you just need the right materials and a clear plan. Here are the seven steps to get it done:
Step 1: Build a Simple Foundation
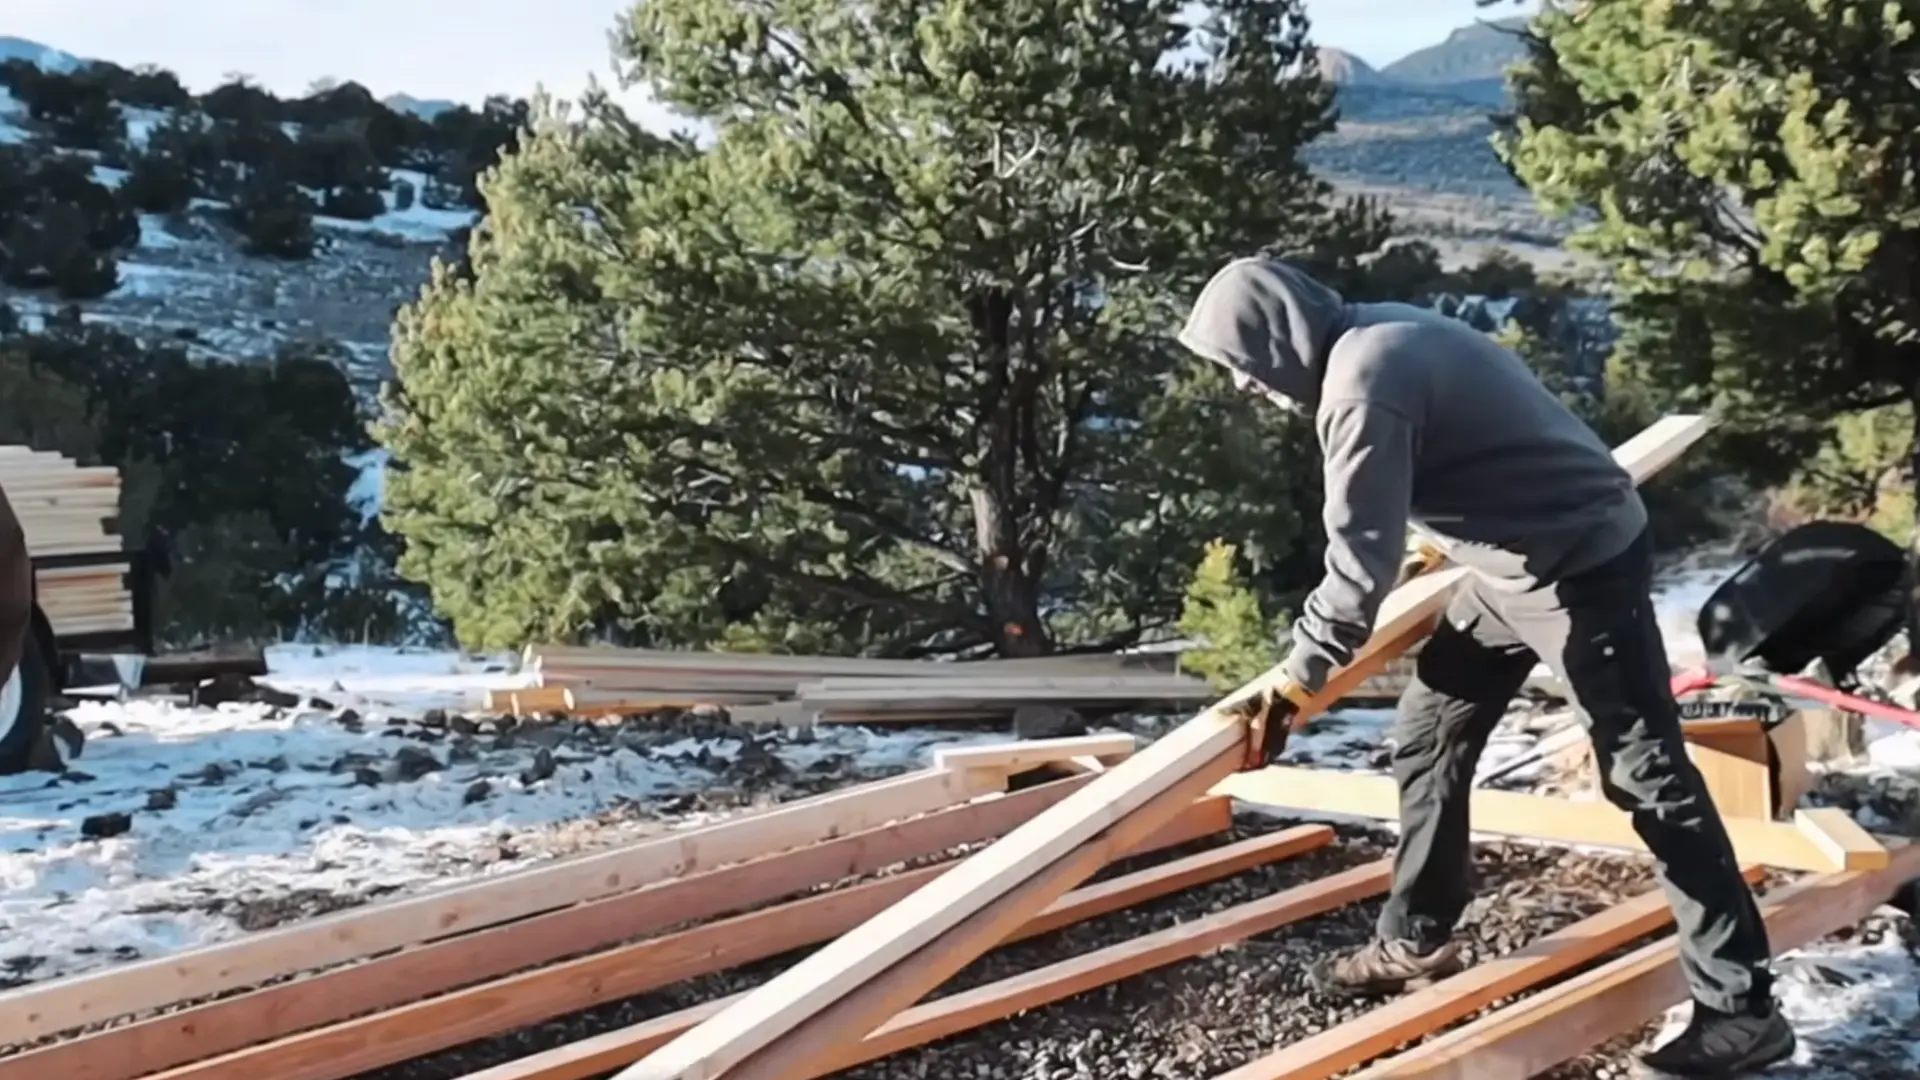
Lay cinder blocks as your base on solid, level ground. Use plastic footers filled with gravel for stability. Reinforce the middle section and the area beneath the stove with extra cinder blocks.
Getting everything level and square at this stage is critical. It makes stacking tongue-and-groove boards much easier later.
Even slight unevenness can cause gaps and misalignment as you build the walls.
Step 2: Set Up Your Post and Beam Frame
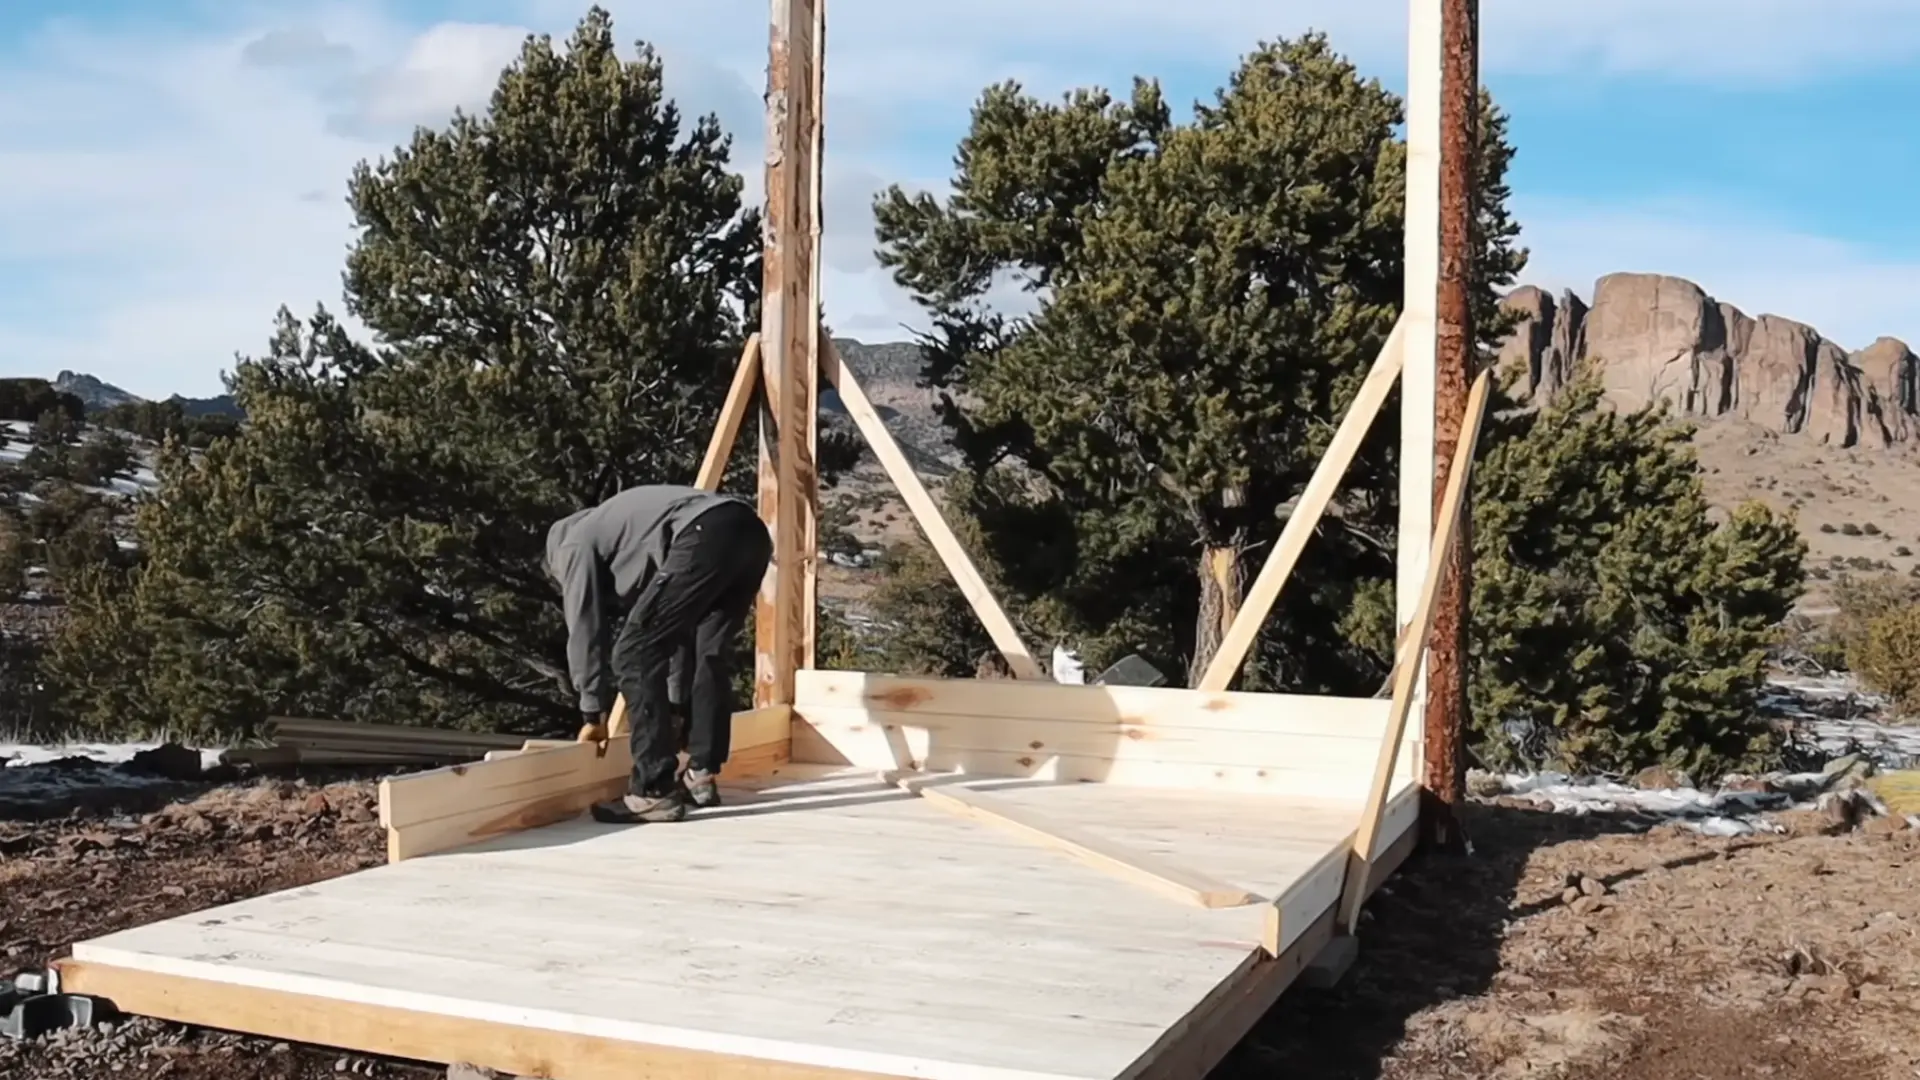
Use a swing blade sawmill to cut local pine logs into corner posts. Make a precise 90-degree cut on each log. The first pass cuts the vertical line, and the return pass cuts the horizontal.
This creates a clean corner joint that covers the tongue-and-groove seams. Once posts are plumb and secured, your 8x8x8 frame is ready. This exact dimension creates the ideal löyly pocket inside.
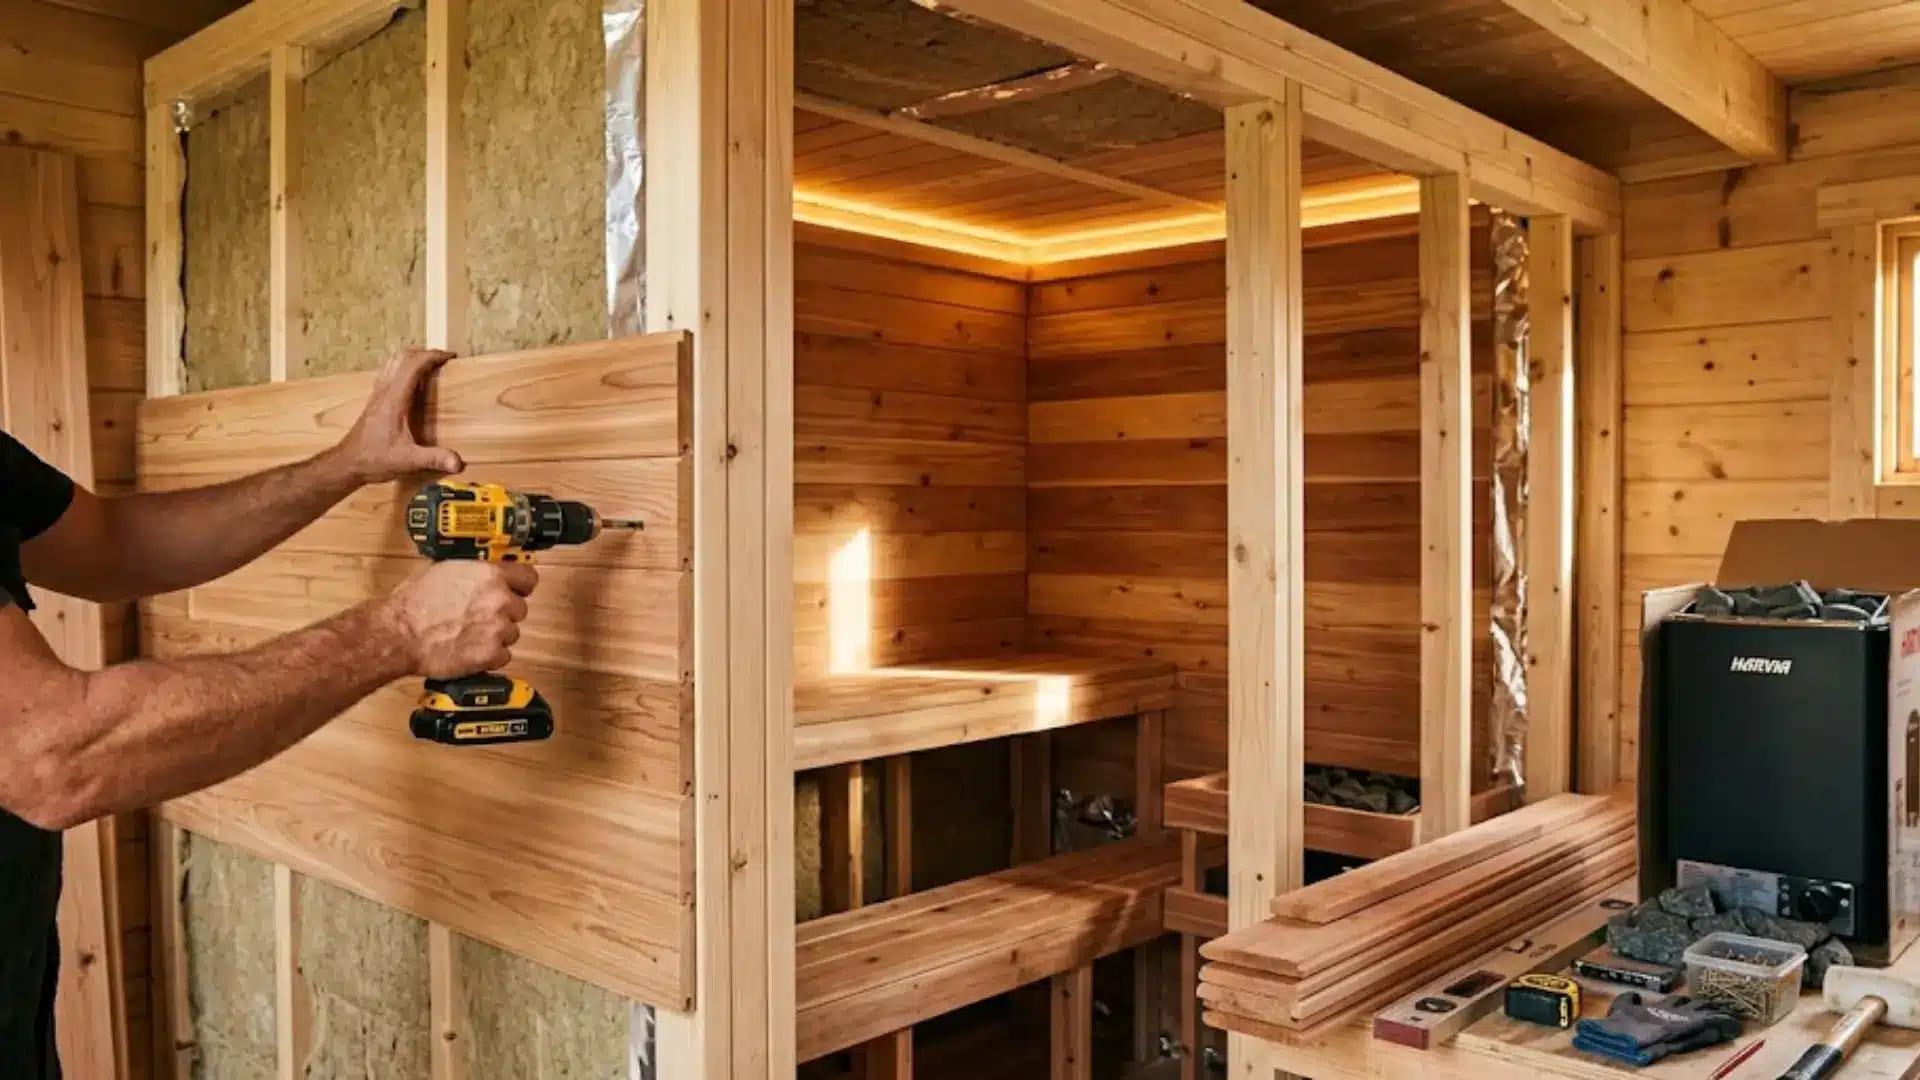
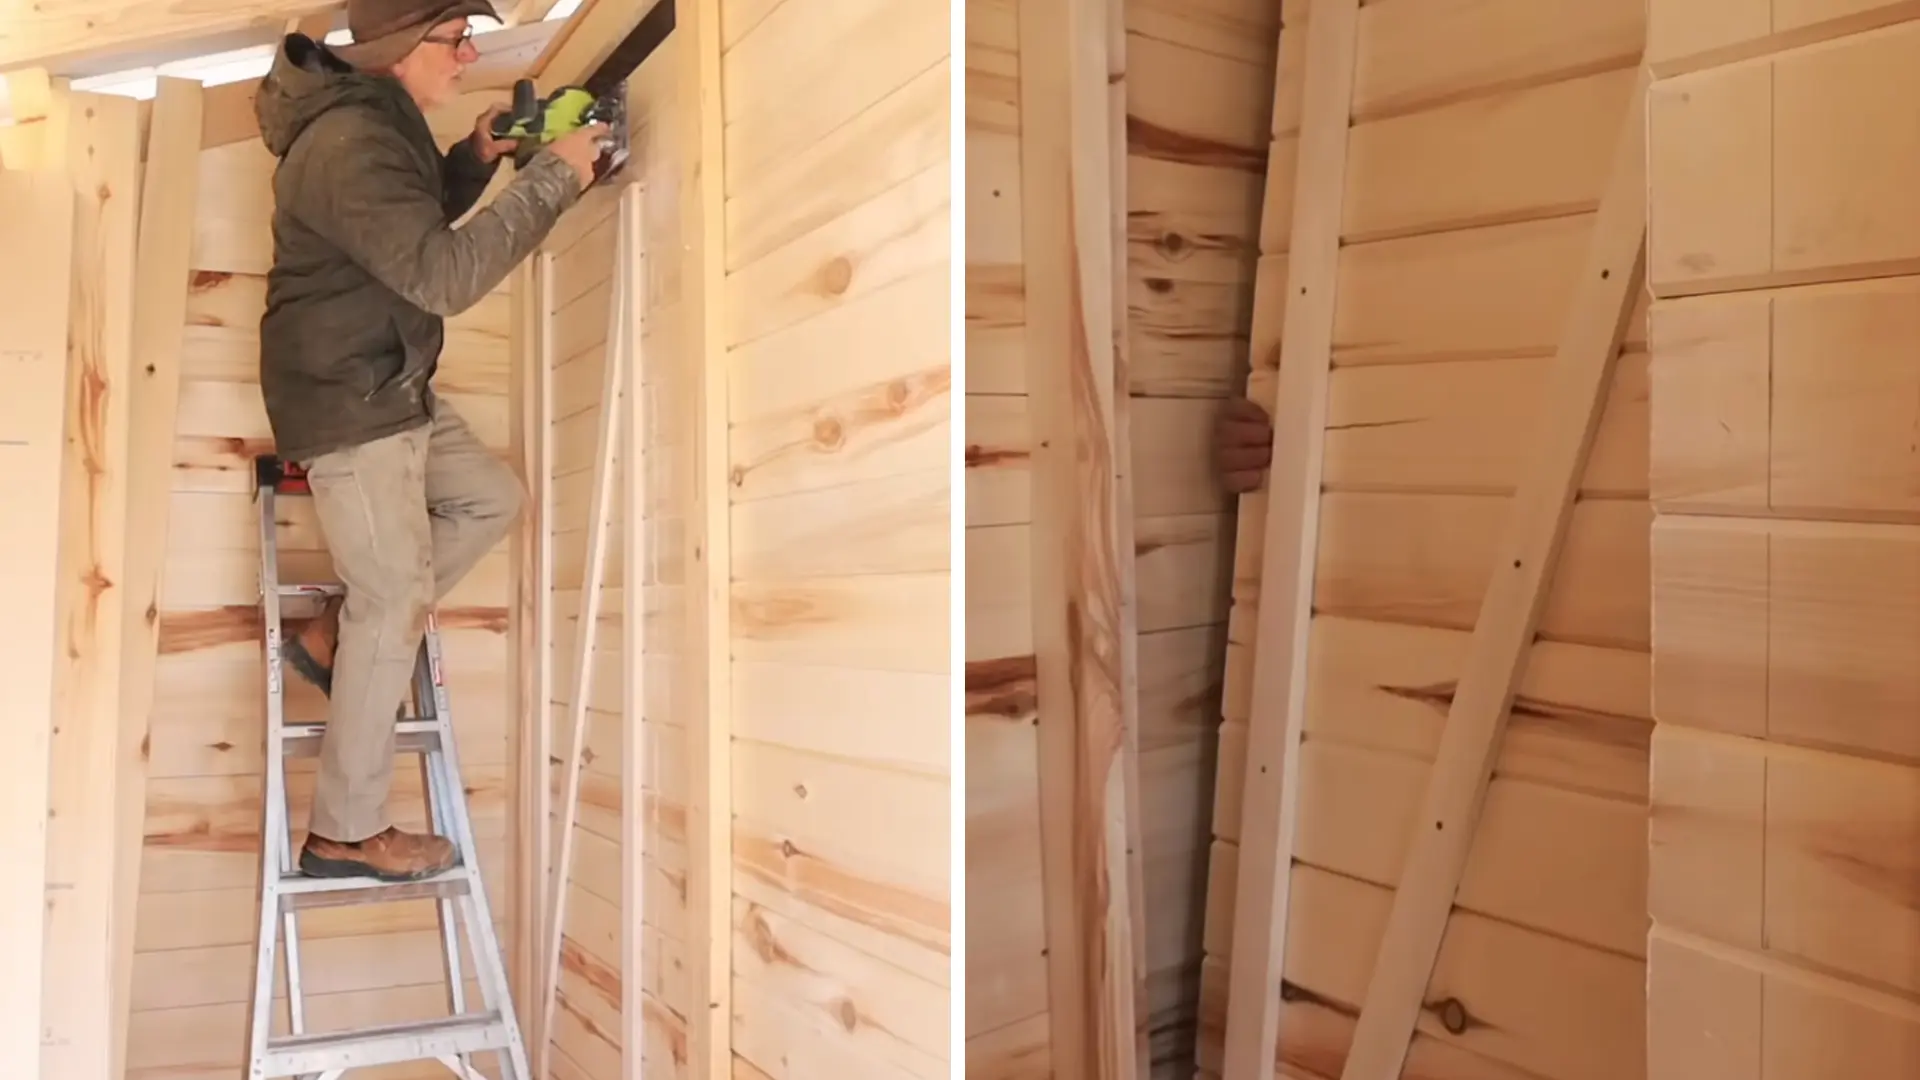
Step 3: Stack the Tongue and Groove Walls
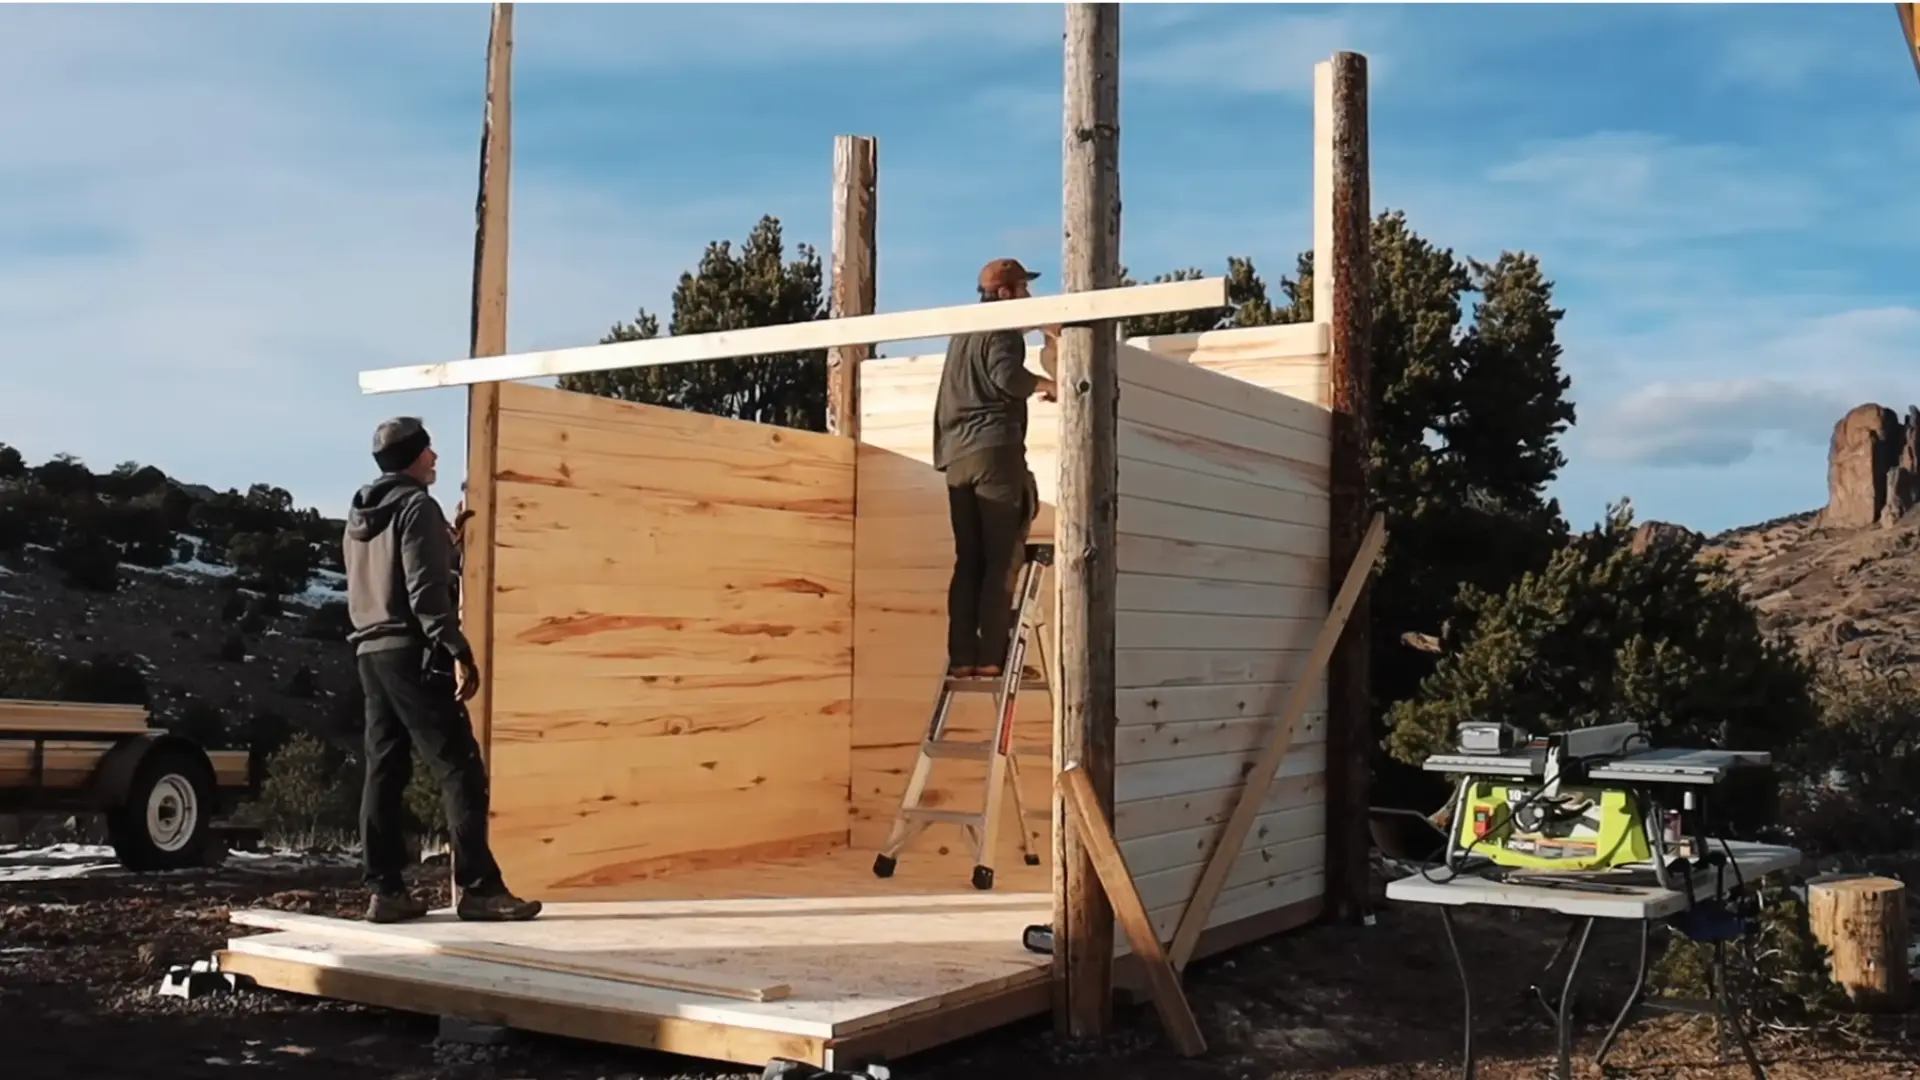
Use 1.5-inch thick aspen tongue and groove boards cut to 8-foot lengths. Screw them directly into the beams rather than nailing at steep angles.
These boards finish both the interior and exterior walls in one pass. No vapor barrier or insulation is needed with this thickness.
It provides roughly 3 hours of heat retention, which easily covers a standard 2-hour sauna session, including warm-up time.
Step 4: Build and Install the Roof
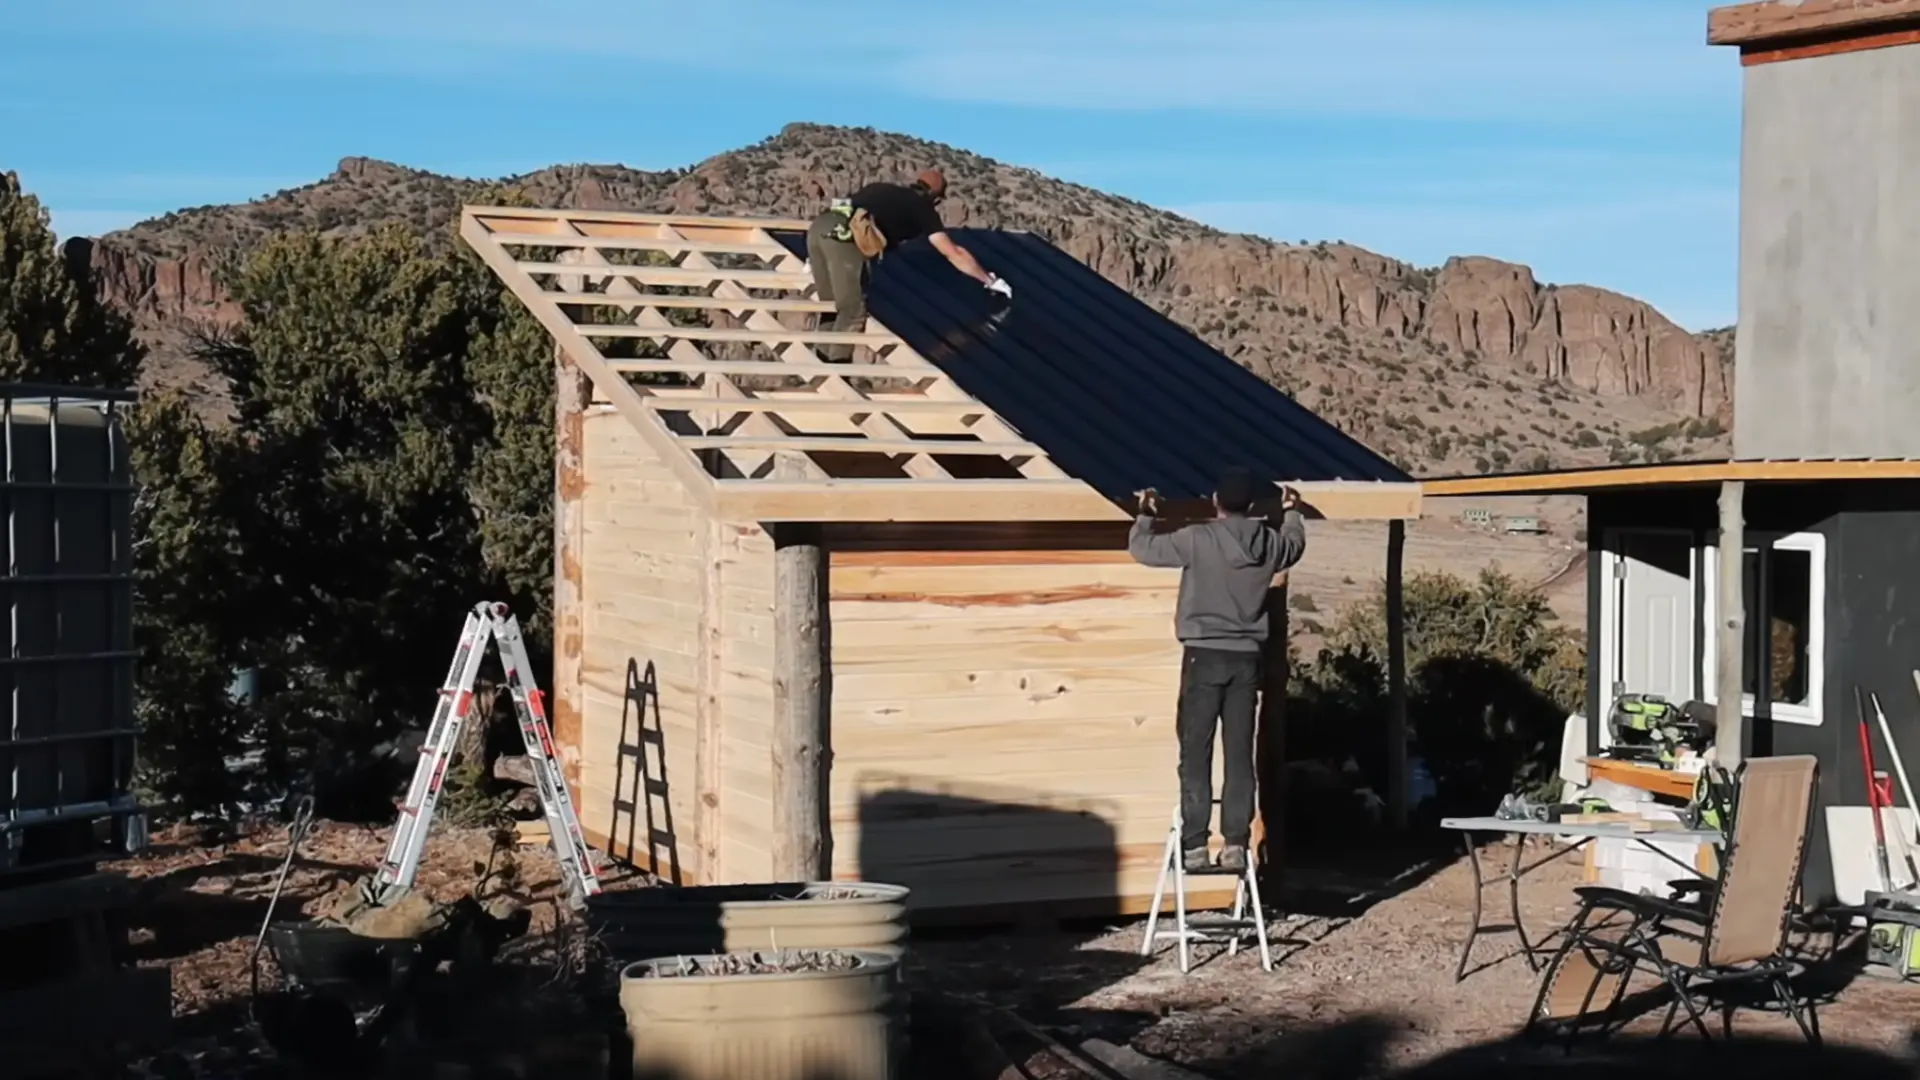
Frame the roof at a steep angle to shed snow and allow solar panel mounting. Keep the interior ceiling completely flat, not gabled or slanted.
A flat ceiling distributes heat evenly at a consistent temperature throughout the 8x8x8 box. Gabled ceilings concentrate heat unevenly at the highest point.
The steep exterior pitch also creates usable attic storage space. You can add roof insulation later to improve efficiency if needed.
Step 5: Cut and Hang the Door
Cut the door directly from your tongue and groove boards for a seamless look. If the door bows, attach a long handle across the full width to straighten it.
Maintain a minimum two-foot header above the door opening. This header stops hot air from escaping every time the door swings open.
Proper door placement also helps maintain the löyly pocket by keeping balanced heat, steam, and ventilation inside the sauna.
Step 6: Install the Wood Stove
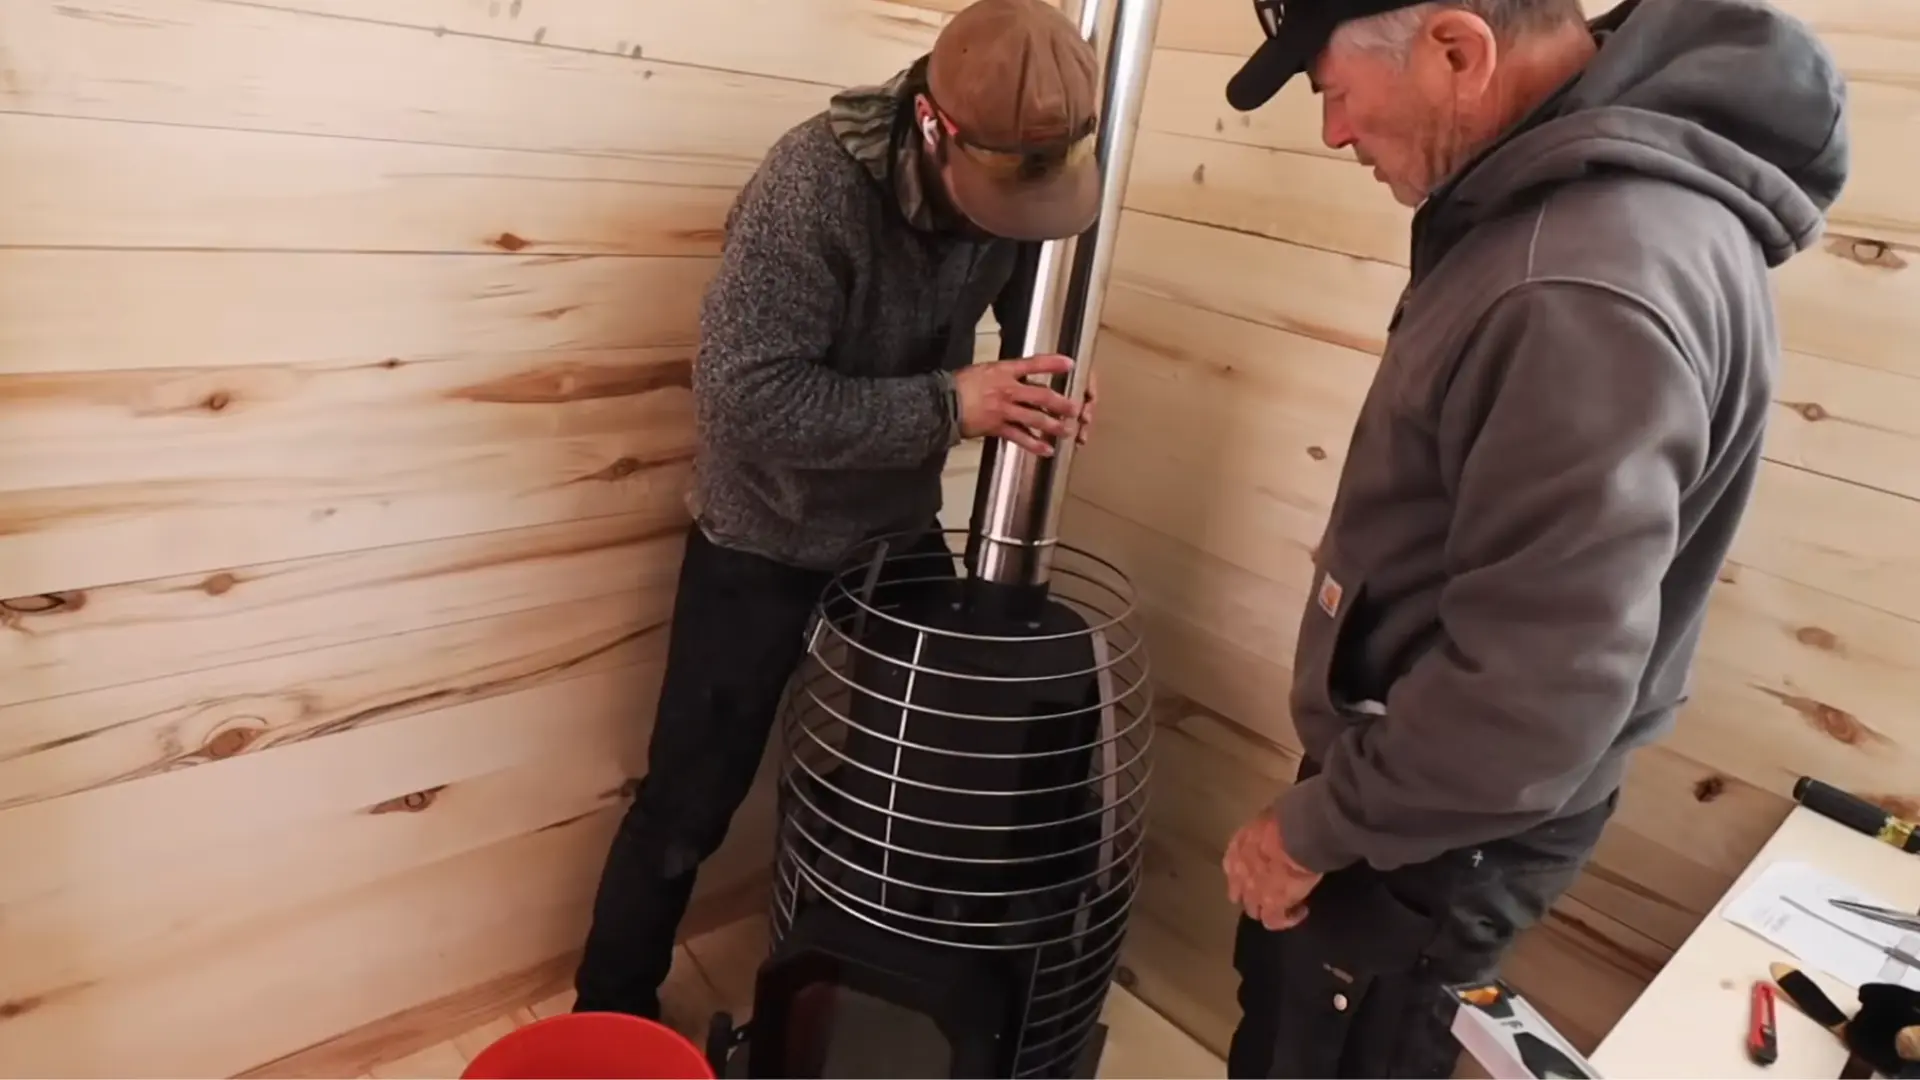
Position the stove with adequate clearance from all walls to prevent fire risk. Use the included flashing kit around the stove pipe roof penetration for added protection.
Load approximately 700 pounds of sauna rocks directly onto and around the stove body. Rocks in direct contact with the stove’s metal heat up fast.
Also, line the single-wall stovepipe section with rocks to capture additional heat. This maximizes thermal output from every piece of wood burned.
Step 7: Add Benches and Finishing Touches
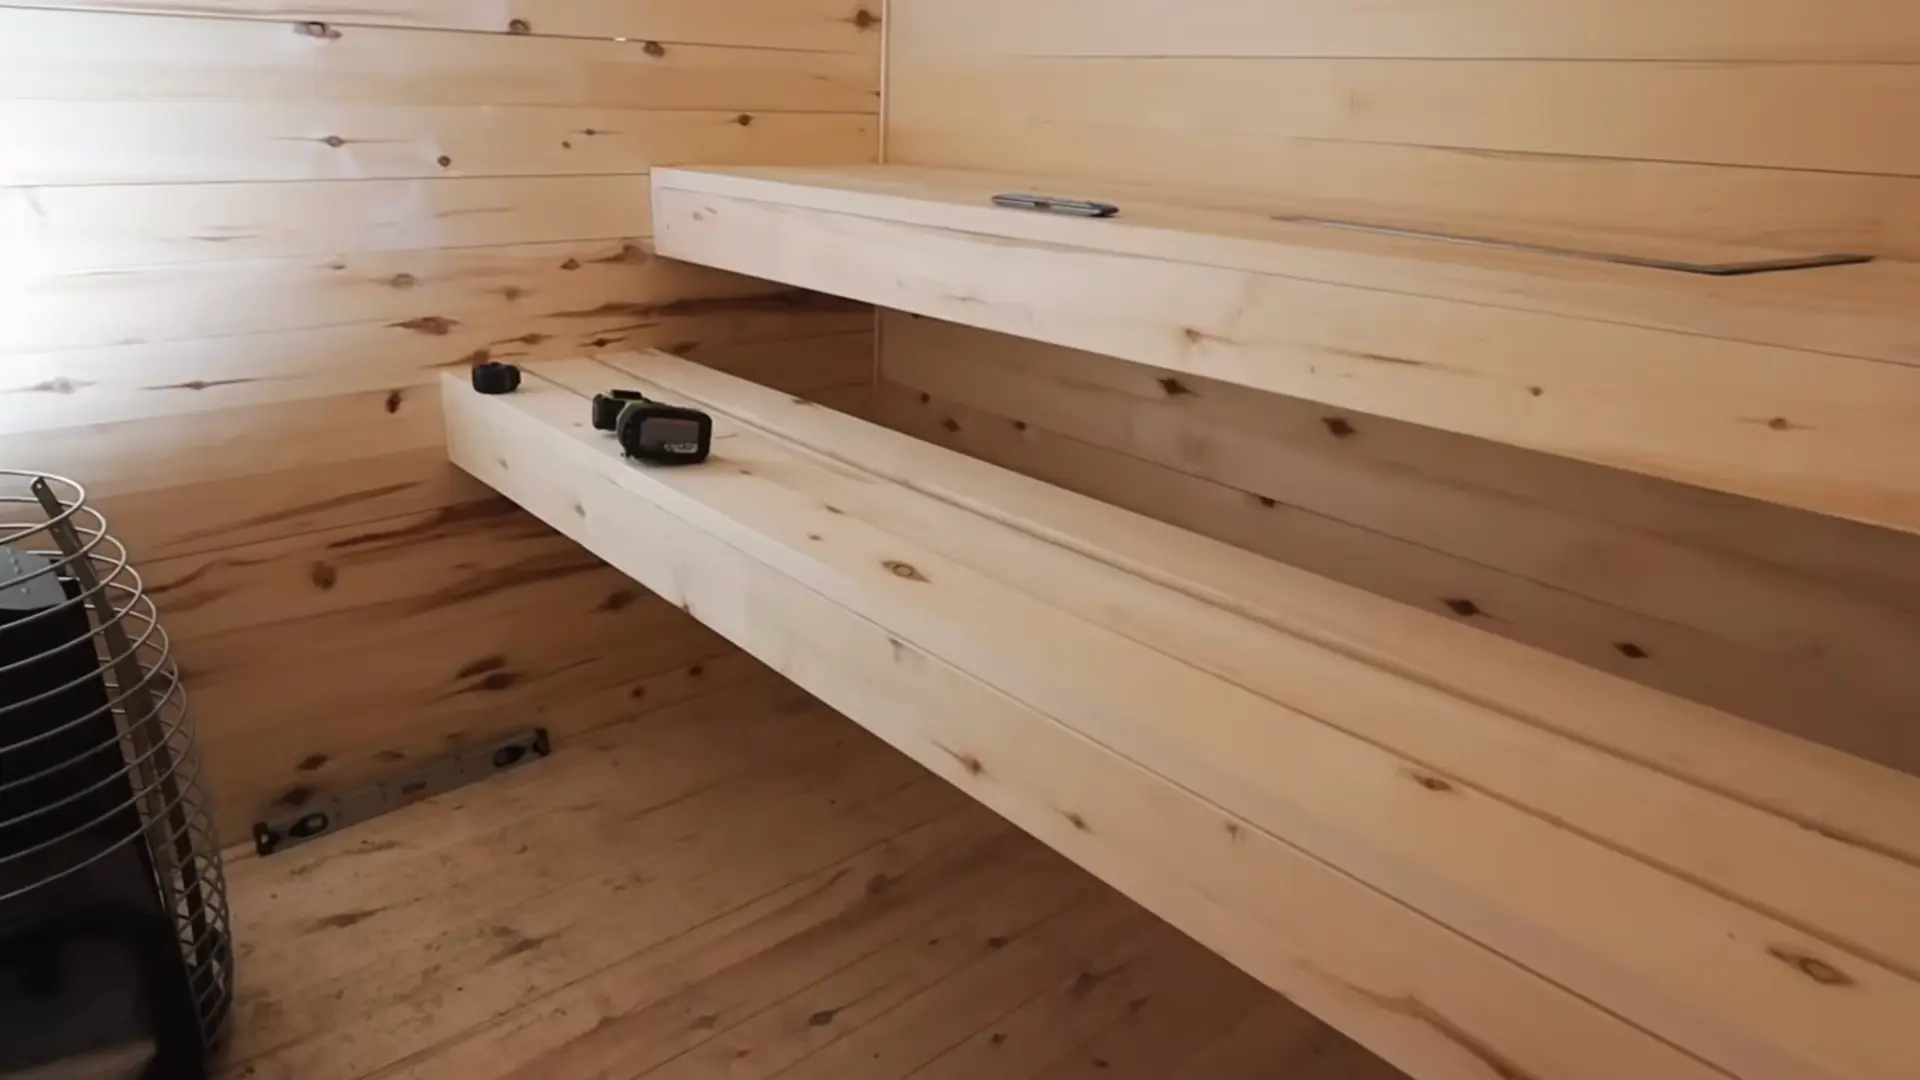
Build benches from 2×6 aspen boards and set them high enough so your feet stay above the stove level. This keeps heat balanced from head to toe.
Avoid placing boards with dense knots on the seating surface, as knots get significantly hotter than the surrounding wood.
Cut leftover tongue-and-groove boards into 3/4-inch trim pieces to cover all wall seams. Char the exterior using the Shou Sugi Ban method and finish with linseed oil.
For more information, visit Elsa Rhae and Barron
Common DIY Sauna Mistakes to Avoid
Building a sauna is straightforward, but a few common mistakes can cost you time and money. Watch out for these key pitfalls before you start:
| Mistake | Why It’s a Problem | How to Fix It |
|---|---|---|
| Using the wrong wood | Treated or resinous lumber releases harmful fumes when heated | Use aspen, cedar, or untreated pine for all interior surfaces |
| Poor ventilation setup | Makes the sauna stuffy and starves a wood stove of oxygen | Add intake and exhaust vents at the right heights during the build |
| Incorrect heater sizing | An undersized heater struggles to heat up, and an oversized one overheats too fast | Match heater size to your sauna’s cubic footage before buying |
| Skipping insulation | Forces your stove to work harder and burns more wood in colder climates | Add insulation to walls and roof, especially in cold regions |
| Making the sauna too small | Limits bench height, ruins the löyly pocket, and makes sessions uncomfortable | Plan for at least 8x8x8 dimensions for the best heat distribution |
Getting these basics right from the start saves you from expensive fixes later. A little planning goes a long way in building a sauna that works well and lasts for years.
DIY Sauna Cost Breakdown
A DIY sauna build typically costs between $3,000 and $10,000. The final number depends on your size, location, and how much work you do yourself.
If you hire a contractor, labor alone adds $45 to $200 per hour to everything else. Hiring a professional increases the overall cost by at least $2,000 to $5,000.
Going fully DIY saves the most money by cutting out labor costs completely. If you hire a general contractor for the full build, add $5,000 to $15,000 on top for labor.
Accessories like benches, lights, and thermometers can add another $100 to $500 to your total. Planning your budget early helps you avoid surprise costs later.
Note: These costs are estimated and may vary depending on your location, material availability, and current market prices.
Sauna Maintenance Tips After Installation
Taking care of your sauna after installation keeps it running well for years to come. Here are the key maintenance habits you should build into your routine:
- Wipe down the benches and walls with a damp cloth after every session to prevent sweat and dirt buildup
- Let the sauna air out completely after each use to stop moisture from settling into the wood and causing mold
- Sand the wood surfaces lightly once a year to keep them smooth and free from rough, splintered spots
- Check the heater and stove pipe regularly for cracks, rust, or buildup that could affect heat output or create a fire risk
- Inspect the sauna rocks every few months and replace any that have cracked or crumbled from repeated heating cycles
A well-maintained sauna stays safer, smells fresher, and lasts much longer. A little regular upkeep saves you from big repair costs down the road.
Frequently Asked Questions
What is the best wood for a sauna?
Aspen and cedar are the top choices. Both stay cool to the touch, resist moisture well, and hold up great under high heat.
Can I build a sauna indoors?
Yes, you can build one in a basement, bathroom, or garage. Just make sure the space has proper ventilation and can handle heat and moisture.
How long does it take to build a sauna?
A simple DIY sauna can take anywhere from a few days to a couple of weeks, depending on your skill level and available help.
Do DIY saunas need ventilation?
Yes, ventilation is essential. It keeps the air fresh, feeds oxygen to the stove, and prevents moisture buildup that can lead to mold and wood damage.
Is it cheaper to build your own sauna?
Yes, building your own sauna is significantly cheaper than buying a pre-built one. You can save thousands by sourcing materials locally and doing the labor yourself.
Final Thoughts
A diy sauna is one of the most rewarding projects you can take on at home. The work you put in pays off every single time you step inside. You get a personal space to relax, unwind, and take care of your body.
The build itself teaches you a lot about planning, materials, and problem-solving along the way. Skipping the contractor means keeping more money in your pocket.
And once it’s standing, it is yours for years to come. Take it one step at a time and don’t rush the process. The results are absolutely worth it.
Start your diy sauna build today and drop your questions in the comments below!

James McLaren, with a rich background in architecture from the University of Manchester, has been contributing his expertise to the world of creative construction and home innovation for over 20 years. His journey began as a project manager for a leading construction firm, where he honed his skills in bringing complex designs to life. James joined our platform as a freelancer in 2019, quickly becoming a favorite for his insightful and practical advice. He has been a pivotal force to our wing ever since, bringing our readers a blend of technical know-how and creative flair. Beyond his professional life, James is an avid woodworker and enjoys restoring vintage furniture, a hobby that complements his professional insights beautifully.