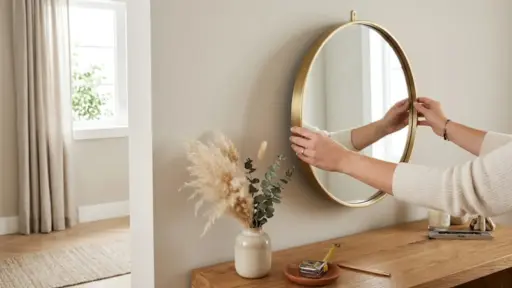

A blank wall has a way of making even a nice room feel incomplete. Knowing how to hang a mirror correctly is one of the easiest ways to fix that.
Mirrors are one of the most versatile things you can add to any room. But the hanging process trips up many people. You might be unsure where to start, what to grab, or how to do it safely.
That feeling is completely normal. Luckily, the process is much more straightforward than it looks. You do not need special skills or experience to get a great result.
Get it right once, and you will never second-guess yourself again.
The Basics of Hanging a Mirror
Hanging a mirror sounds simple, but there are a few things worth knowing before you start. Skipping the prep work can lead to crooked frames, wall damage, or a mirror that won’t stay put.
Before you grab a nail, it helps to think through three things. Mirror weight changes everything about how you hang it. Wall type matters too; drywall, plaster, brick, and tile all need different hardware.
And placement is more important than most people realize. Height, centering, and room type all play a role. Get these three things right first. The rest of the job gets a whole lot easier.
Tools and Materials Needed to Hang a Mirror
Having the right tools and hardware before you start saves a lot of back-and-forth. Here is everything you need to get the job done:
| Essential Tools | Hardware Options |
|---|---|
| Tape Measure | Wall Anchors |
| Pencil | Toggle Bolts |
| Level | Mirror Clips |
| Drill | D-Rings |
| Screwdriver | French Cleats |
| Stud Finder | Adhesive Strips |
| Hammer | — |
You may not need every item on this list. The tools and hardware you use will depend on your mirror size, weight, and wall type.
How to Hang a Mirror on the Wall: Step-by-Step Guide
Hanging a mirror the right way takes just five simple steps. From measuring your wall to doing a final safety check, here is what to do:
Step 1: Measure and Mark the Placement
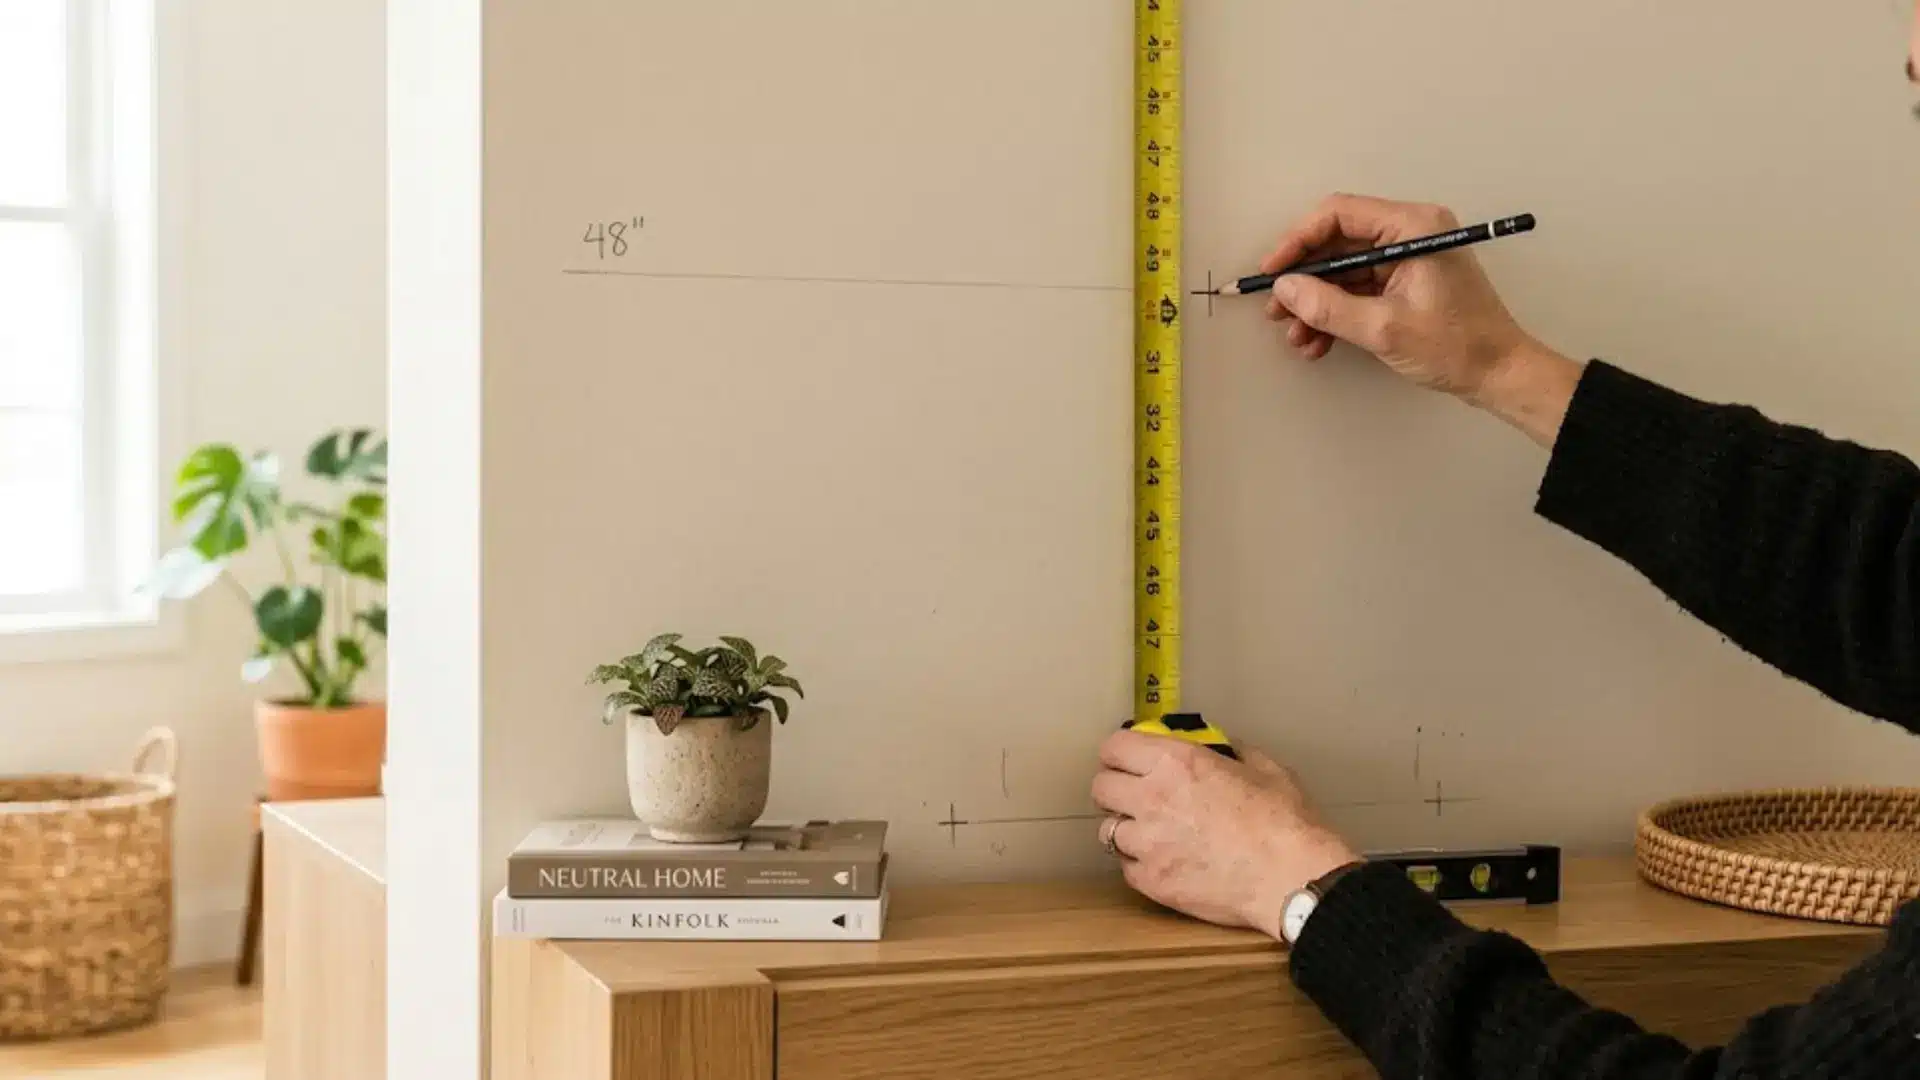
Start by finding the right mirror height. Aim for 57 to 60 inches from the floor. Measure up and mark that spot. Now measure the full mirror width.
Divide that number by 2 (Example: 36 ÷ 2 = 18 inches from each side). Mark that center point on the wall. Next, find the hanging hardware on the back.
Measure from the mirror top to the hardware. Subtract that from your height mark. Example: 57 − 3 = 54 inches from the floor. That is your final screw point. Double-check every measurement before drilling.
Step 2: Locate Wall Studs
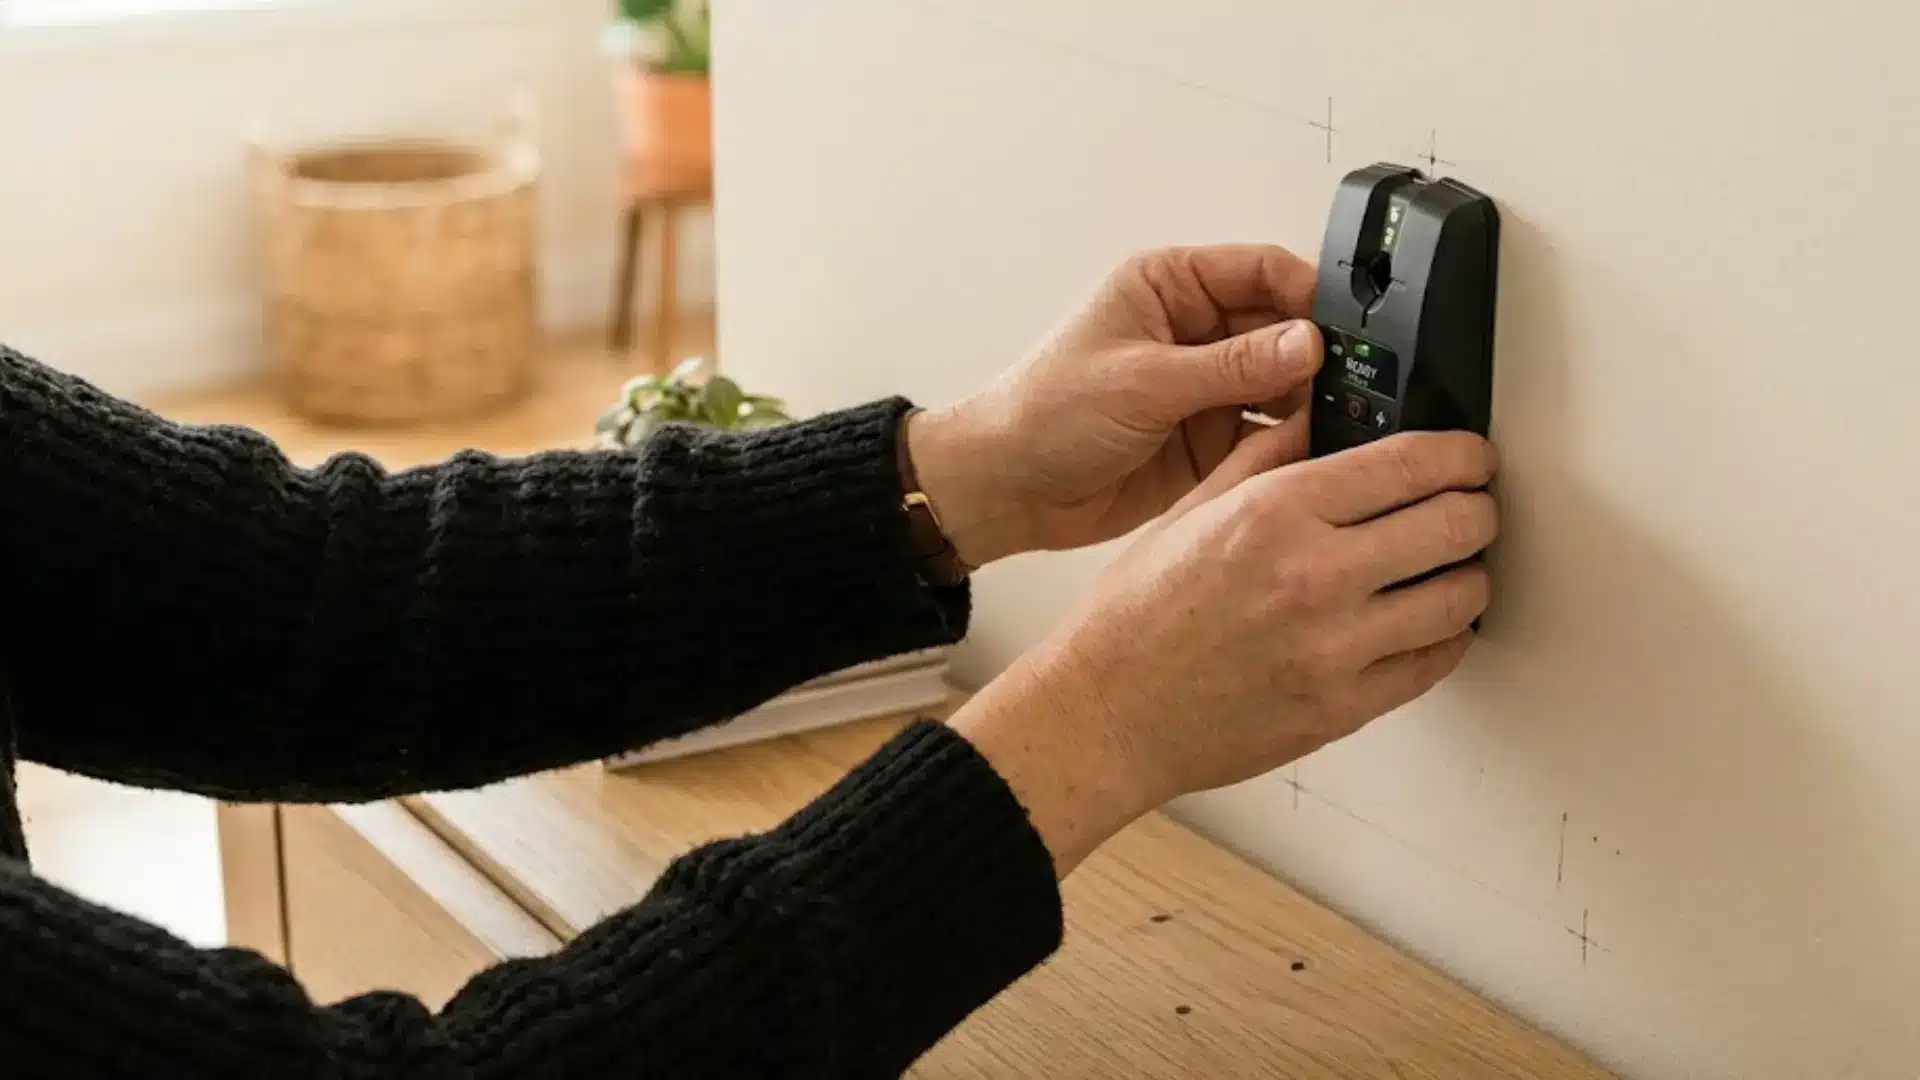
Studs are the wooden beams inside your wall. They give screws something solid to grip. Without a stud, a heavy mirror can pull right out of the wall.
Run a stud finder slowly across the wall. It beeps or lights up when it hits a stud. Mark the stud location with a pencil. If no studs line up, use toggle bolts or anchors rated for your mirror’s weight.
Step 3: Install the Mounting Hardware
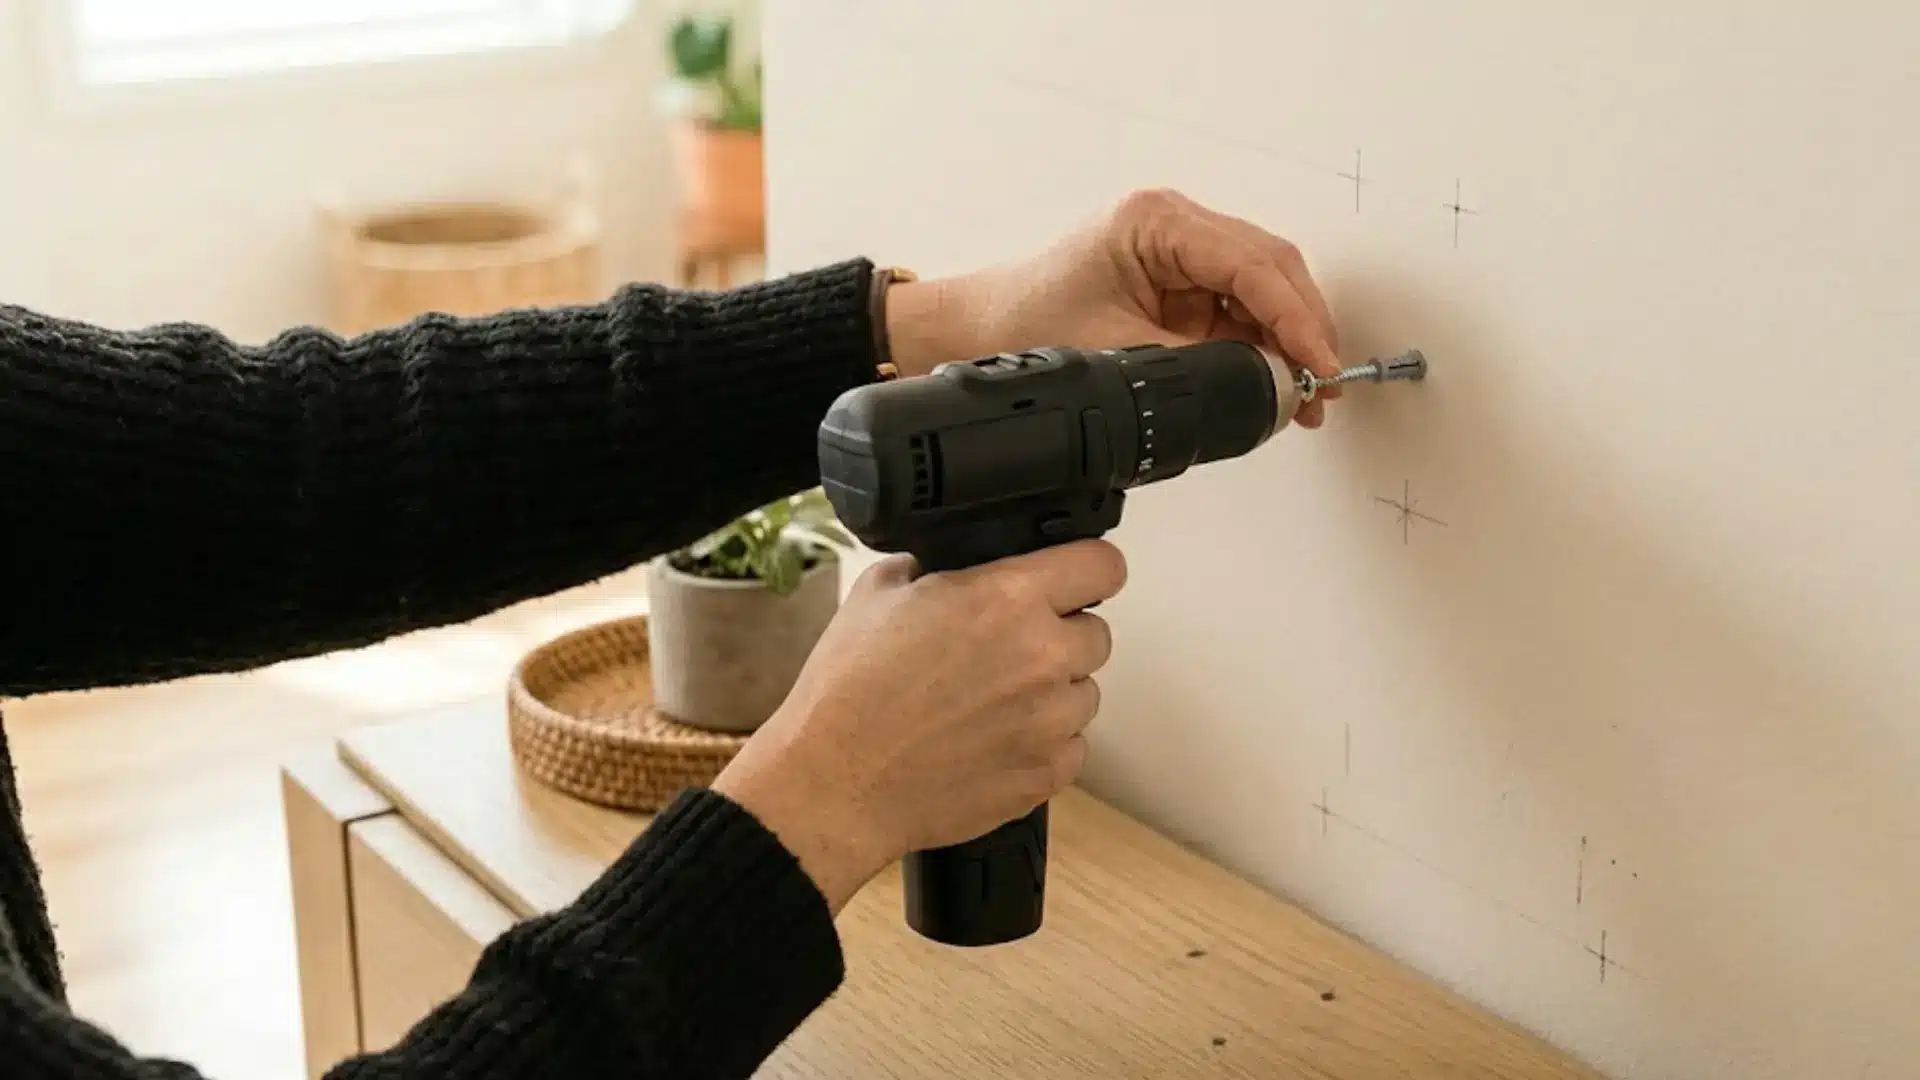
Mirrors weighing less than 20 pounds can use adhesive strips or basic wall anchors. Mirrors between 20 and 50 pounds need screw-in anchors or a stud.
Anything over 50 pounds should be mounted into studs or with a French cleat. Drill holes at your marked spots. Tap anchors in with a hammer if needed. Drive screws in firmly.
Do not overtighten; it can crack drywall or strip the anchor.
Step 4: Hang the Mirror Carefully
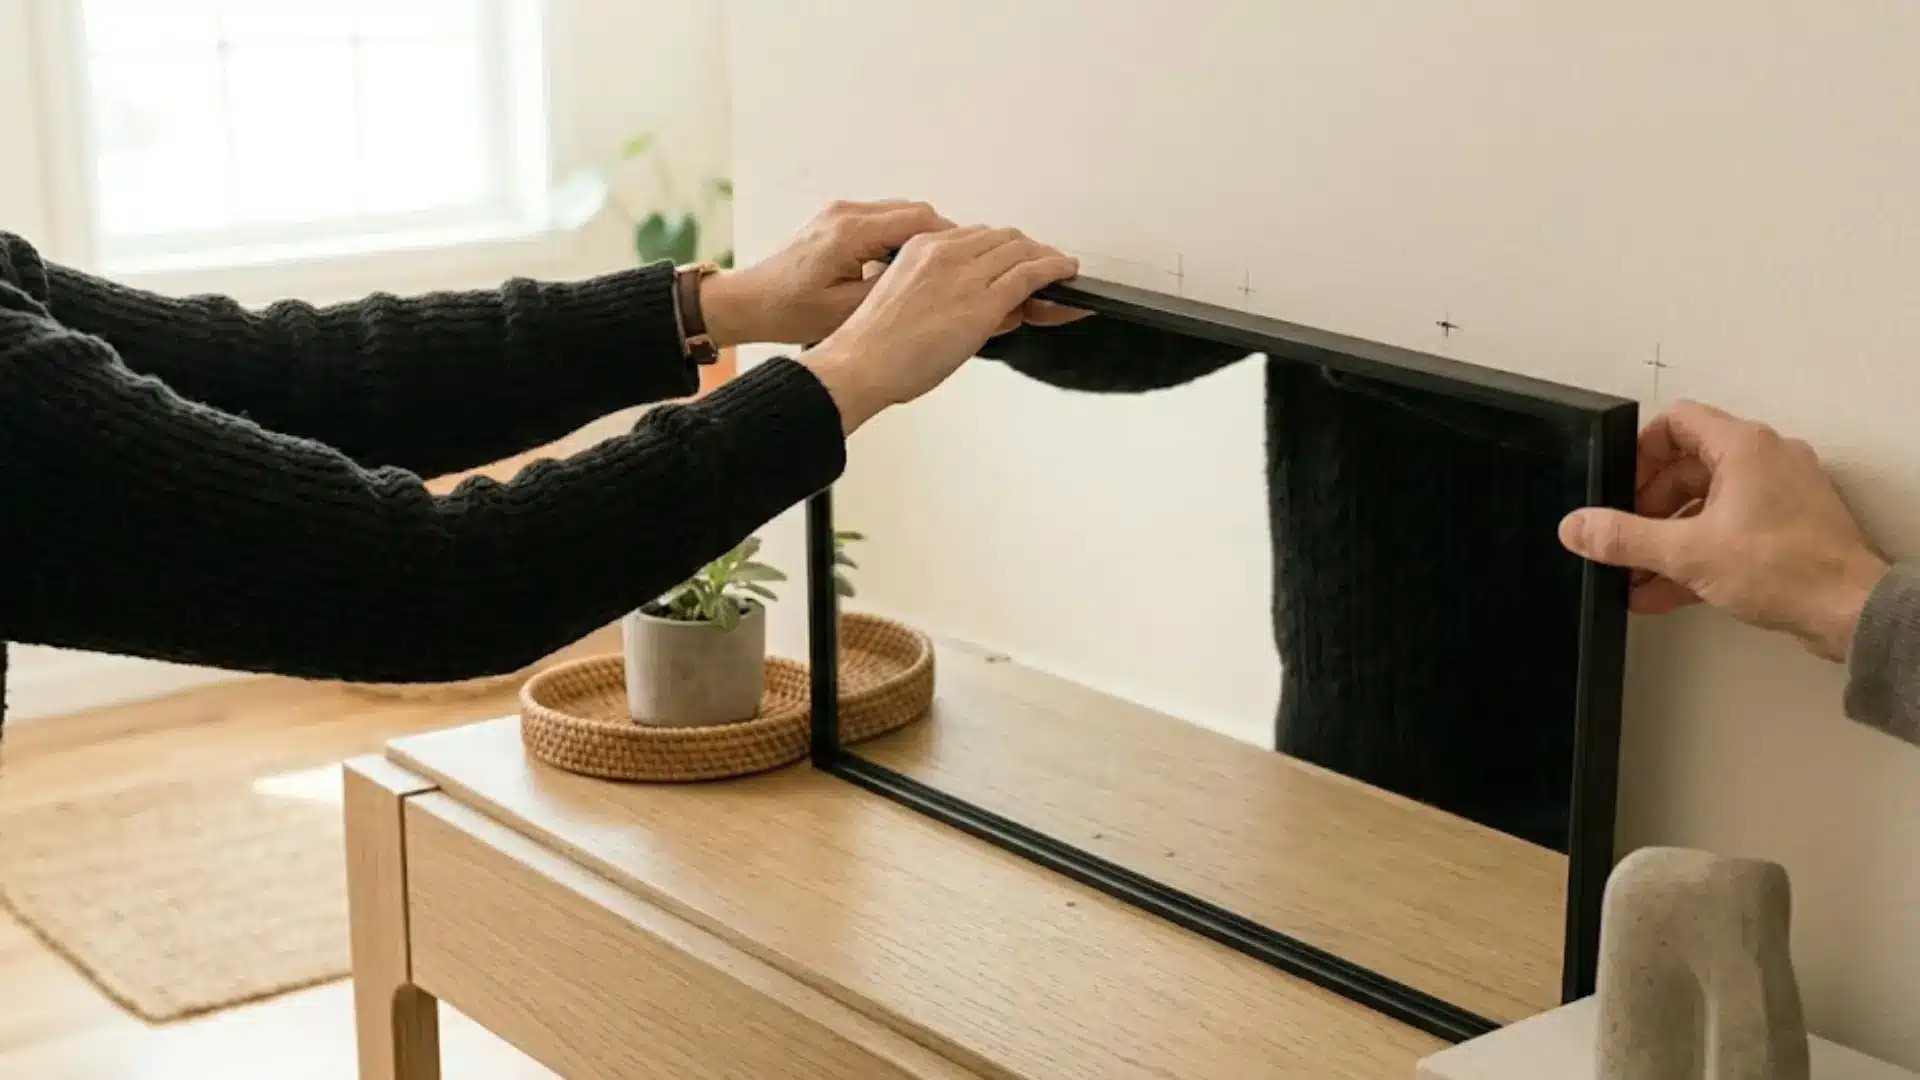
For mirrors weighing more than 20 pounds, always use two people. One person holds the mirror while the other guides it into place. Lift with your knees, not your back.
Hold the mirror flat and slide it onto the screws or hooks. Check that it feels secure before letting go fully. Give it a gentle side-to-side wiggle.
If it shifts or feels loose, take it down and recheck the hardware.
Step 5: Check Level and Security

Place a bubble level on top of the mirror. The bubble should sit right between the two lines. If it tilts left or right, adjust the mirror slightly.
Most hanging systems allow small adjustments without removing screws. Once it looks level, press gently on each corner. The mirror should not move or rock.
Finally, check that no screws are loose. A well-hung mirror should feel completely solid against the wall.
How to Hang a Heavy Mirror Safely
Heavy mirrors need more than a basic nail. Using the wrong hardware can damage your wall or cause the mirror to fall.
Best Hardware for Heavy Mirrors
The right hardware depends on your mirror’s weight and wall type. Picking the wrong one is the most common reason heavy mirrors fall. Here is a breakdown of the best options:
| Hardware Type | Best For | Weight Capacity |
|---|---|---|
| Heavy-Duty Anchors | Drywall without studs | Up to 50 lbs |
| Toggle Bolts | Hollow walls | Up to 100 lbs |
| French Cleat System | Large, wide mirrors | Up to 200 lbs |
| Security Brackets | Extra stability on studs | Up to 150 lbs |
| Lag Screws into Studs | Very heavy mirrors | 100 lbs and above |
Always check the weight rating on your hardware packaging. Never guess when it comes to heavy mirrors.
Safety Tips for Hanging Heavy Mirrors
One small mistake with a heavy mirror can cause serious damage. Keep these tips in mind before and during installation:
- Always use two people for mirrors over 20 lbs.
- Mount into wall studs whenever possible for maximum hold.
- Keep mirrors away from high-traffic areas like hallways.
- Use safety backing film to hold the glass together if the mirror cracks.
- Secure the bottom edge with a small bracket if the mirror is very tall.
Check your hardware every few months for any loosening. A quick inspection can prevent a costly accident down the line.
Note: Call a professional for oversized, antique, or fragile mirrors. Tile and plaster walls also need expert handling. It is not worth the risk of damage or injury.
How to Hang a Mirror Without Nails
Picking the right material makes all the difference with no-nail hanging. Here is a quick look at what works best for each situation:
Materials You Can Use Instead of Nails
There are a few solid options for hanging a mirror without nails. Each works best for specific mirror weights and wall surfaces:
| Material | Best For | Weight Limit | Best Surfaces |
|---|---|---|---|
| Adhesive Strips | Lightweight mirrors | Up to 16 lbs | Smooth drywall, glass, tile |
| Mounting Tape | Small decorative mirrors | Up to 10 lbs | Flat, clean, dry surfaces |
| Adhesive Hooks | Mirrors with hanging wire | Up to 20 lbs | Painted walls, tiles |
| Heavy-Duty Adhesive Anchors | Medium-weight mirrors | Up to 30 lbs | Drywall and plaster |
| Picture Hanging Strips | Framed mirrors | Up to 16 lbs | Smooth painted walls |
Always check the weight rating before buying. Never use adhesive options on textured, dirty, or damp walls.
Steps to Hang a Mirror Without Nails
Once you have your materials ready, the process is simple and straightforward. Follow these steps carefully to get a secure, straight hang:
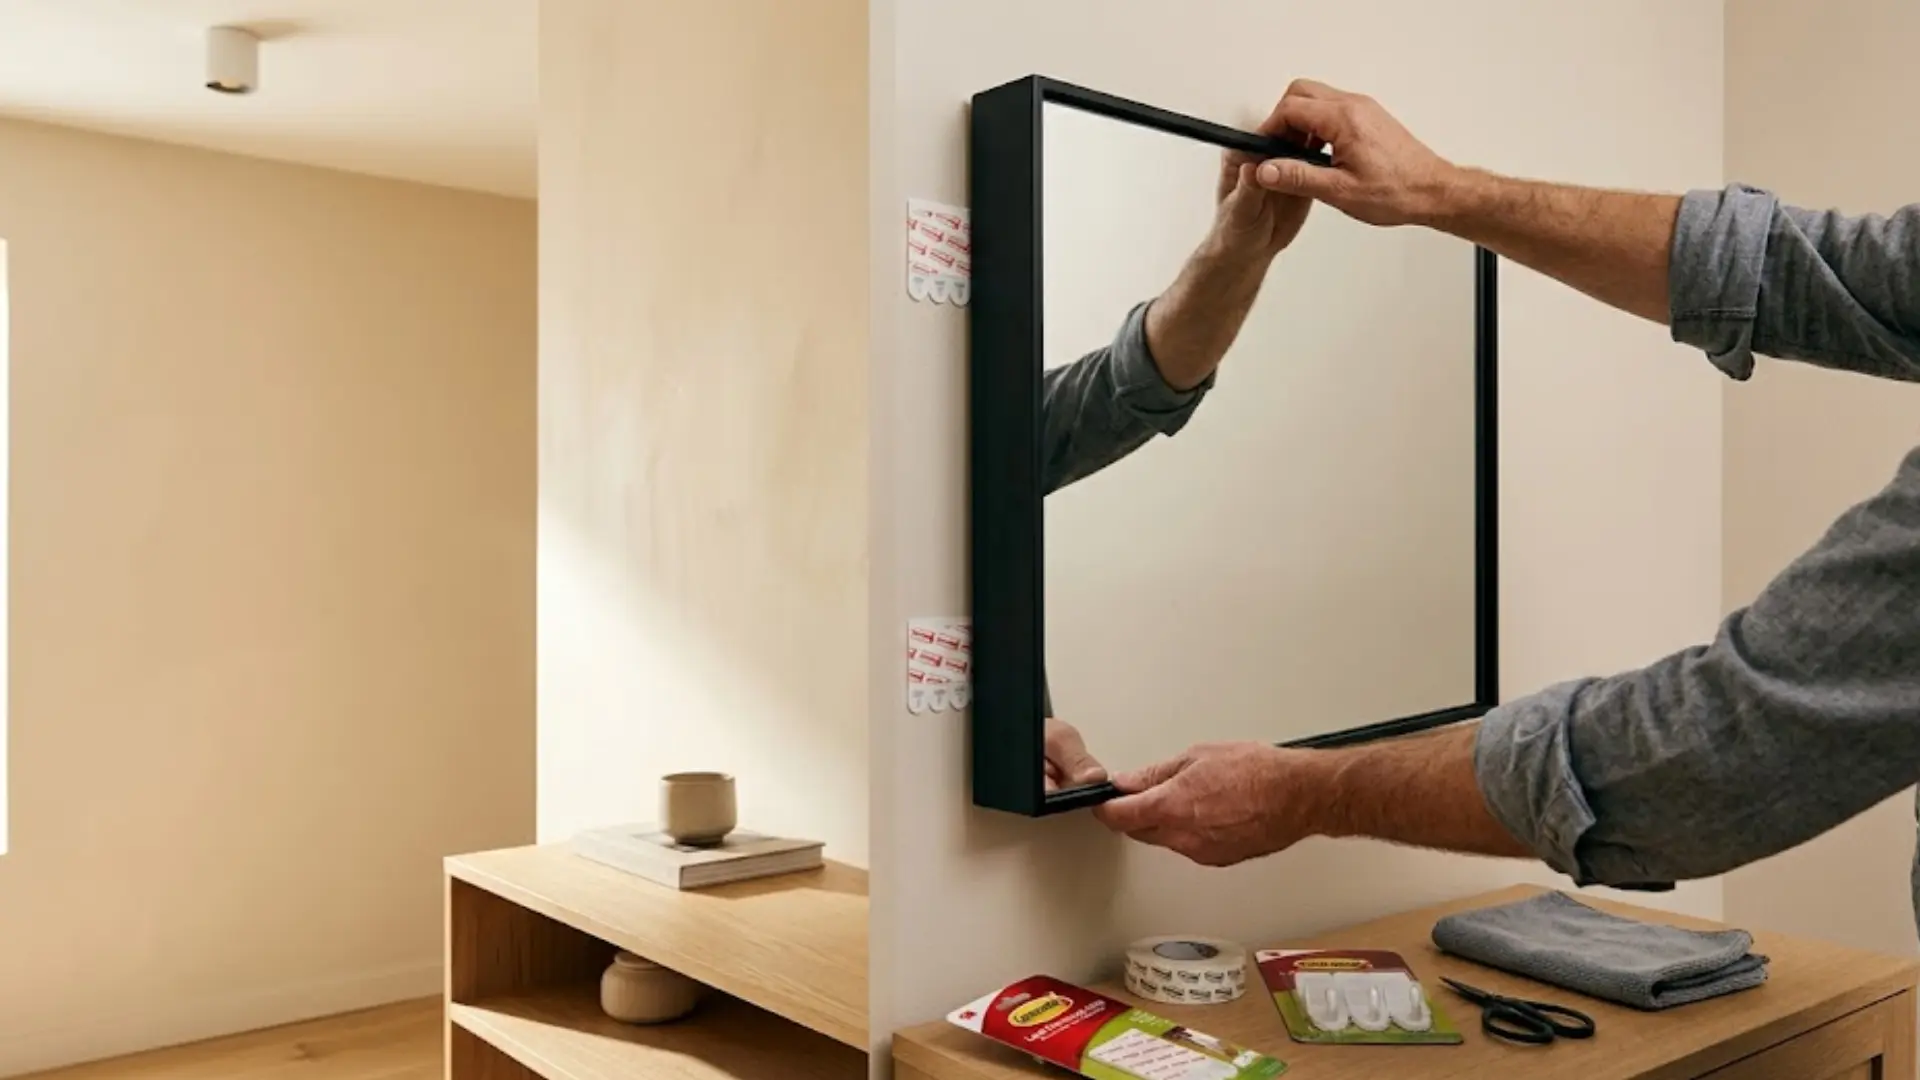
- Clean the wall surface with a dry cloth. Remove all dust and grease.
- Hold the mirror against the wall. Mark the top and side edges lightly with a pencil.
- Attach the adhesive strips or hooks to the back of the mirror first.
- Peel the backing off the adhesive. Press the mirror firmly against the wall.
- Hold it in place for 30 seconds. Do not adjust or move it after pressing.
- Wait at least 1 hour before letting go fully. Some adhesives need up to 24 hours to set.
Always follow the wait time on the packaging. Rushing the process is the top reason no-nail mirrors fall.
Common Mistakes to Avoid When Hanging a Mirror
Even small mistakes can lead to a crooked mirror, wall damage, or a dangerous fall. Knowing what to avoid makes the whole process much smoother.
| Mistake | Why It’s a Problem | How to Avoid It |
|---|---|---|
| Using the Wrong Anchors | Wrong anchors cannot hold the mirror’s weight and pull out of the wall | Always match the anchor type and weight rating to your mirror |
| Ignoring Mirror Weight Limits | Exceeding hardware limits causes screws to loosen and mirrors to fall | Check the weight of your mirror before choosing any hardware |
| Hanging a Mirror Too High or Too Low | Poor height makes the mirror uncomfortable to use and looks off | Keep the mirror centered at 57 to 60 inches from the floor |
| Skipping the Level Check | Even a slight tilt looks obvious on a wall and is hard to ignore | Always use a bubble level before and after hanging |
| Mounting on Weak Wall Surfaces | Thin, damaged, or crumbling walls cannot hold hardware securely | Test your wall first and use the right hardware for its type |
Avoiding these mistakes takes only a few extra minutes. Getting these details right leads to a secure and great-looking result every time.
Tips to Make Your Mirror Look Better in Any Room
Hanging a mirror in the right spot can completely change how a room feels. A few simple placement and sizing choices go a long way. Here are some easy tips to get the most out of your mirror:
- Hang a mirror opposite a window to bounce natural light around the room and make the space feel brighter.
- Place a mirror in a narrow hallway or entryway to make the area feel wider and more open.
- Choose a mirror size that fits the wall; a small mirror on a large wall looks out of place.
- Hang a mirror above a fireplace or console table to add balance and draw the eye upward.
- Use a large mirror in a small room to create the illusion of more space without any renovation.
The right mirror in the right spot does more than just reflect. It adds light, depth, and a finished look to any room.
Final Words
Now you have everything you need to hang a mirror with real confidence. Knowing how to hang a mirror the right way is a skill that always pays off.
A well-placed mirror can quietly change the look of any room. The best part is that you did it all yourself. There is real satisfaction in stepping back and seeing it hang perfectly straight.
And once you have done it once, the next one gets even easier. Take your time, use the right tools, and trust the process.
The result will speak for itself. Have a question or a tip that worked for you? Drop it in the comments below.

James McLaren, with a rich background in architecture from the University of Manchester, has been contributing his expertise to the world of creative construction and home innovation for over 20 years. His journey began as a project manager for a leading construction firm, where he honed his skills in bringing complex designs to life. James joined our platform as a freelancer in 2019, quickly becoming a favorite for his insightful and practical advice. He has been a pivotal force to our wing ever since, bringing our readers a blend of technical know-how and creative flair. Beyond his professional life, James is an avid woodworker and enjoys restoring vintage furniture, a hobby that complements his professional insights beautifully.