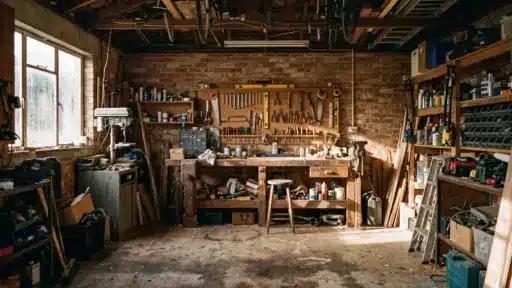
Looking for fun ways to get creative at home? Sometimes, all it takes is one simple project to get creative again. There’s always something new to try when free time feels a little boring.
Some projects are quick and relaxing, while others let creativity flow for hours. But you dont always need to be an expert to enjoy it.
So, if you’re looking for cozy DIY projects or fresh craft ideas for adults, keep scrolling to find ideas that are fun, simple, and easy to start.
Why Starting a New Craft Project Can Be an Interesting Activity?
Trying a new craft project can help you relax, feel creative, and enjoy your free time more. Many people look for crafting ideas because making something with their hands feels rewarding and calming.
It gives your mind a break from screens, stress, and busy schedules. You can also turn simple stuff into something personal and meaningful. For adults, crafting is not just a hobby; it can improve focus, patience, and confidence.
That’s why craft ideas for adults are becoming more popular every day. You do not need to be perfect. The best part is simply enjoying the process and creating something that feels uniquely yours.
Creative Craft Ideas for Adults to Try
These ideas focus on simple projects that are fun to work on and useful once finished. The list below includes a variety of crafting ideas and practical stuff to make:
1. Sweater Pillows
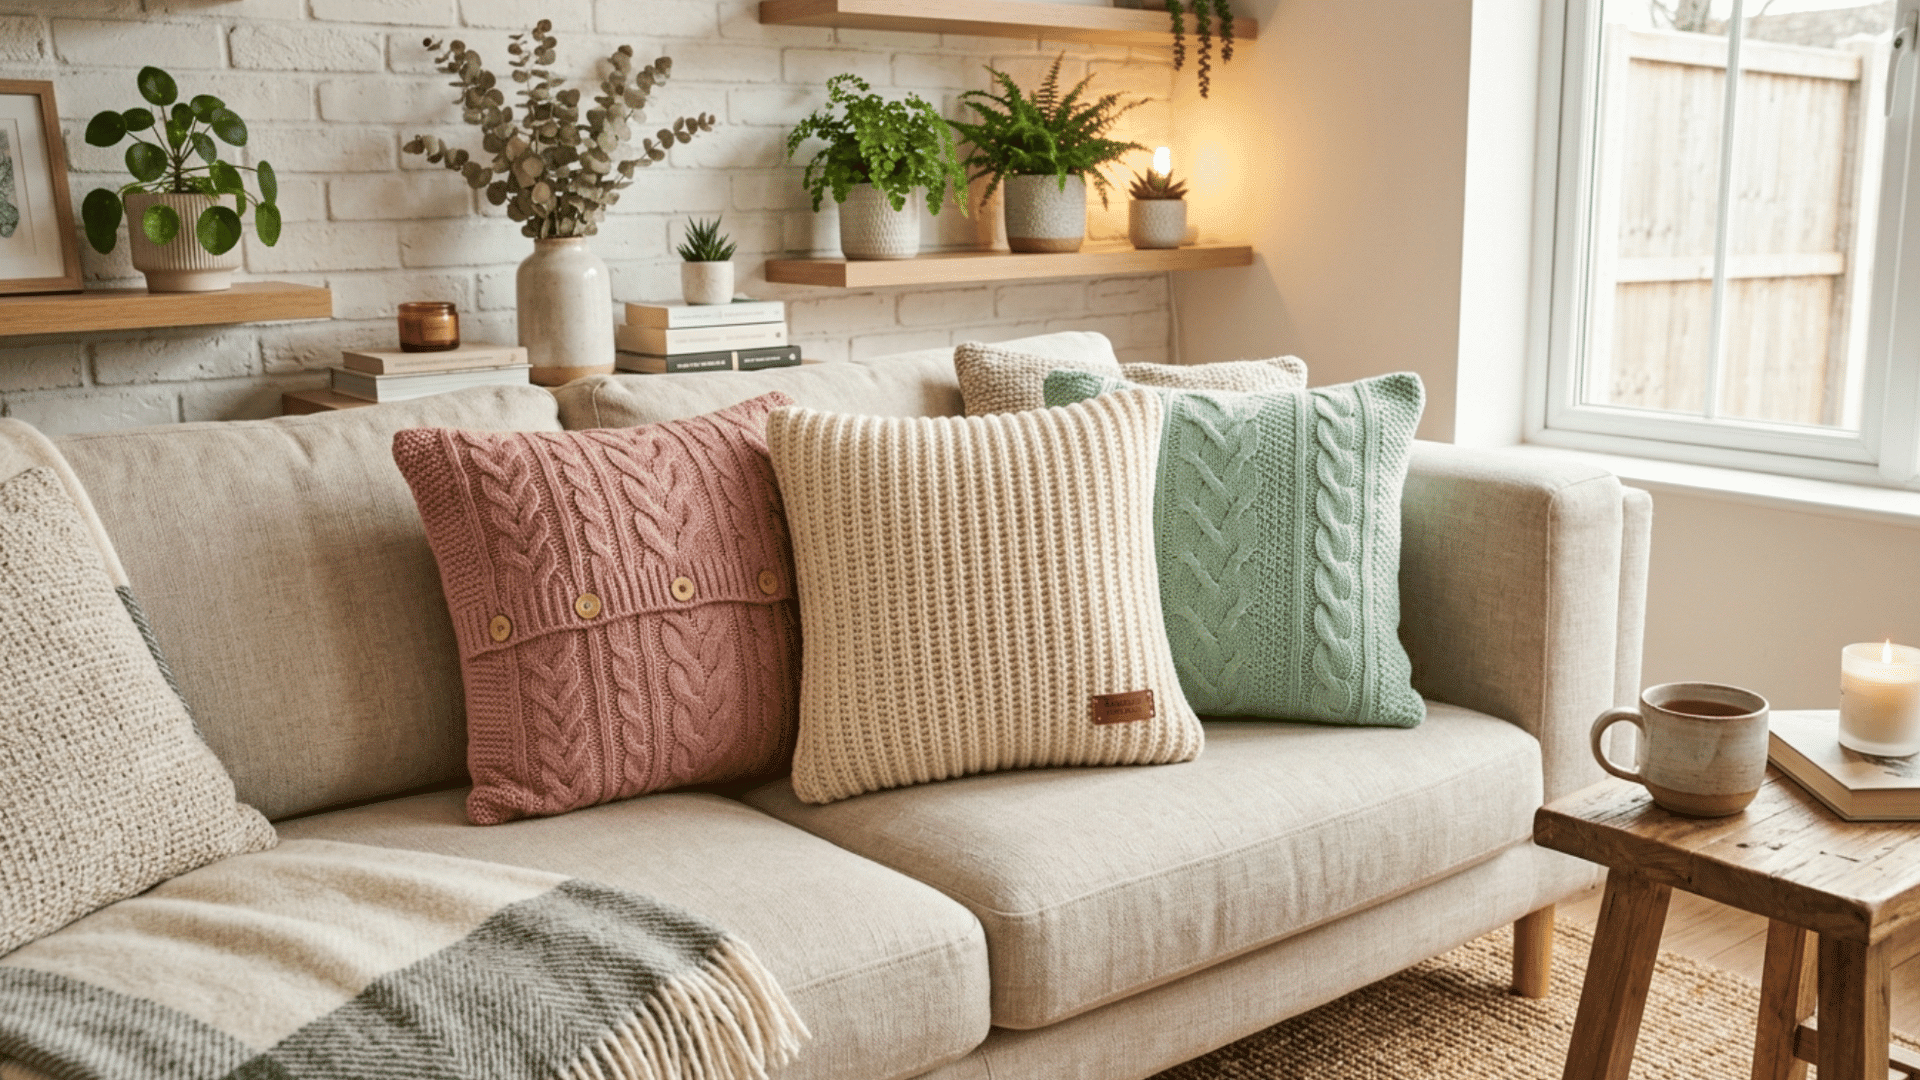
Give your old or thrifted sweaters a cozy second life by turning them into charming throw pillows. These soft, textured cushions add warmth and personality to any sofa or bed.
- Time Required: 30 to 45 minutes
- Materials to Gather: Old sweater, pillow insert or stuffing, scissors, needle and thread or sewing machine, pins
How to Make It:
- Cut the sweater into two equal squares or rectangles slightly larger than your pillow insert.
- Place the two pieces inside out and sew three sides together.
- Turn the right side out, insert the pillow stuffing, and then hand-stitch the open side closed.
2. DIY Soap Making
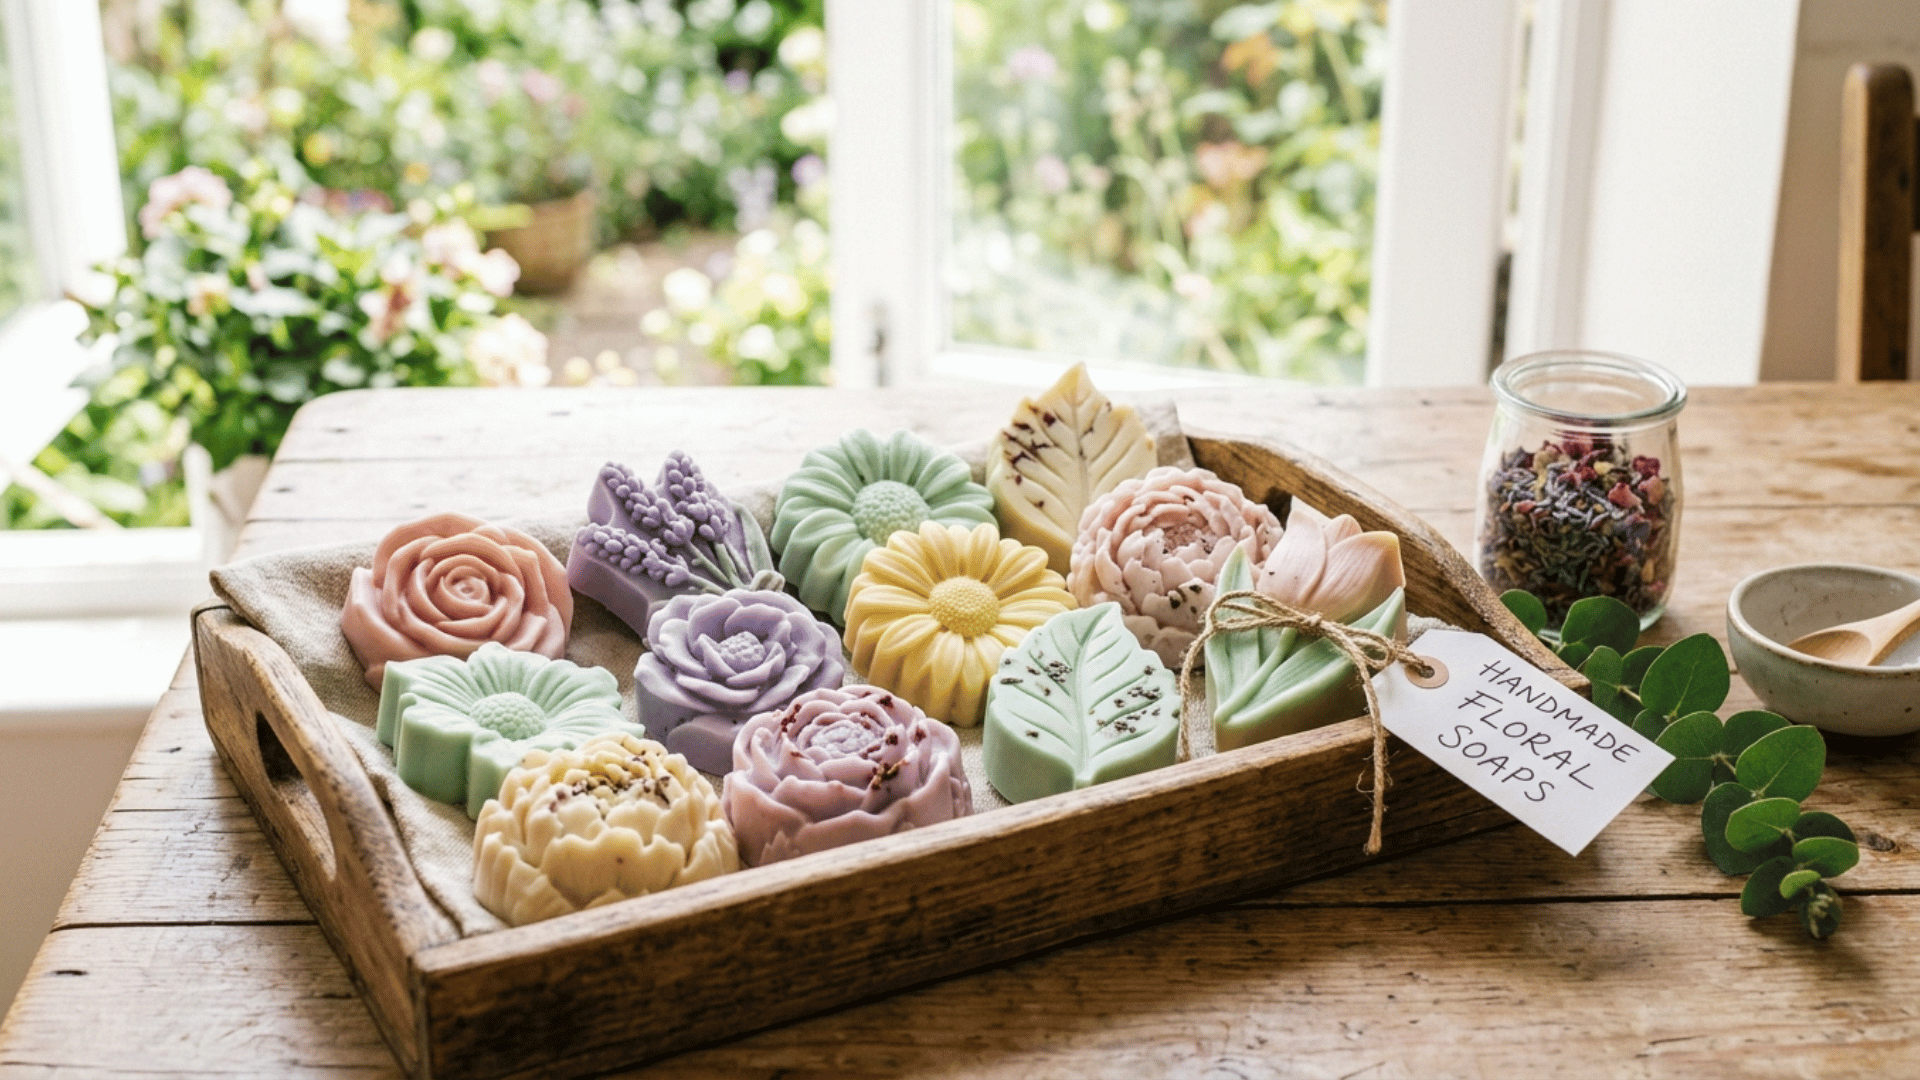
Homemade soap is a wonderful blend of science and creativity, letting you choose your own scents, colors, and skin-nourishing ingredients. It also makes a gorgeous, personal gift for friends and family.
- Time Required: 1 to 2 hours (plus 24 hours setting time)
- Materials to Gather: Melt-and-pour soap base, fragrance or essential oils, soap colorant, silicone mould, mixing bowl, microwave or double boiler
How to Make It:
- Cut the soap base into chunks and melt in the microwave or in a double boiler, stirring until smooth.
- Add a few drops of color and fragrance, mixing gently to avoid bubbles.
- Pour into your silicone mould and leave to set for at least 24 hours, then pop out and trim any rough edges.
3. Yarn Wall Hanging
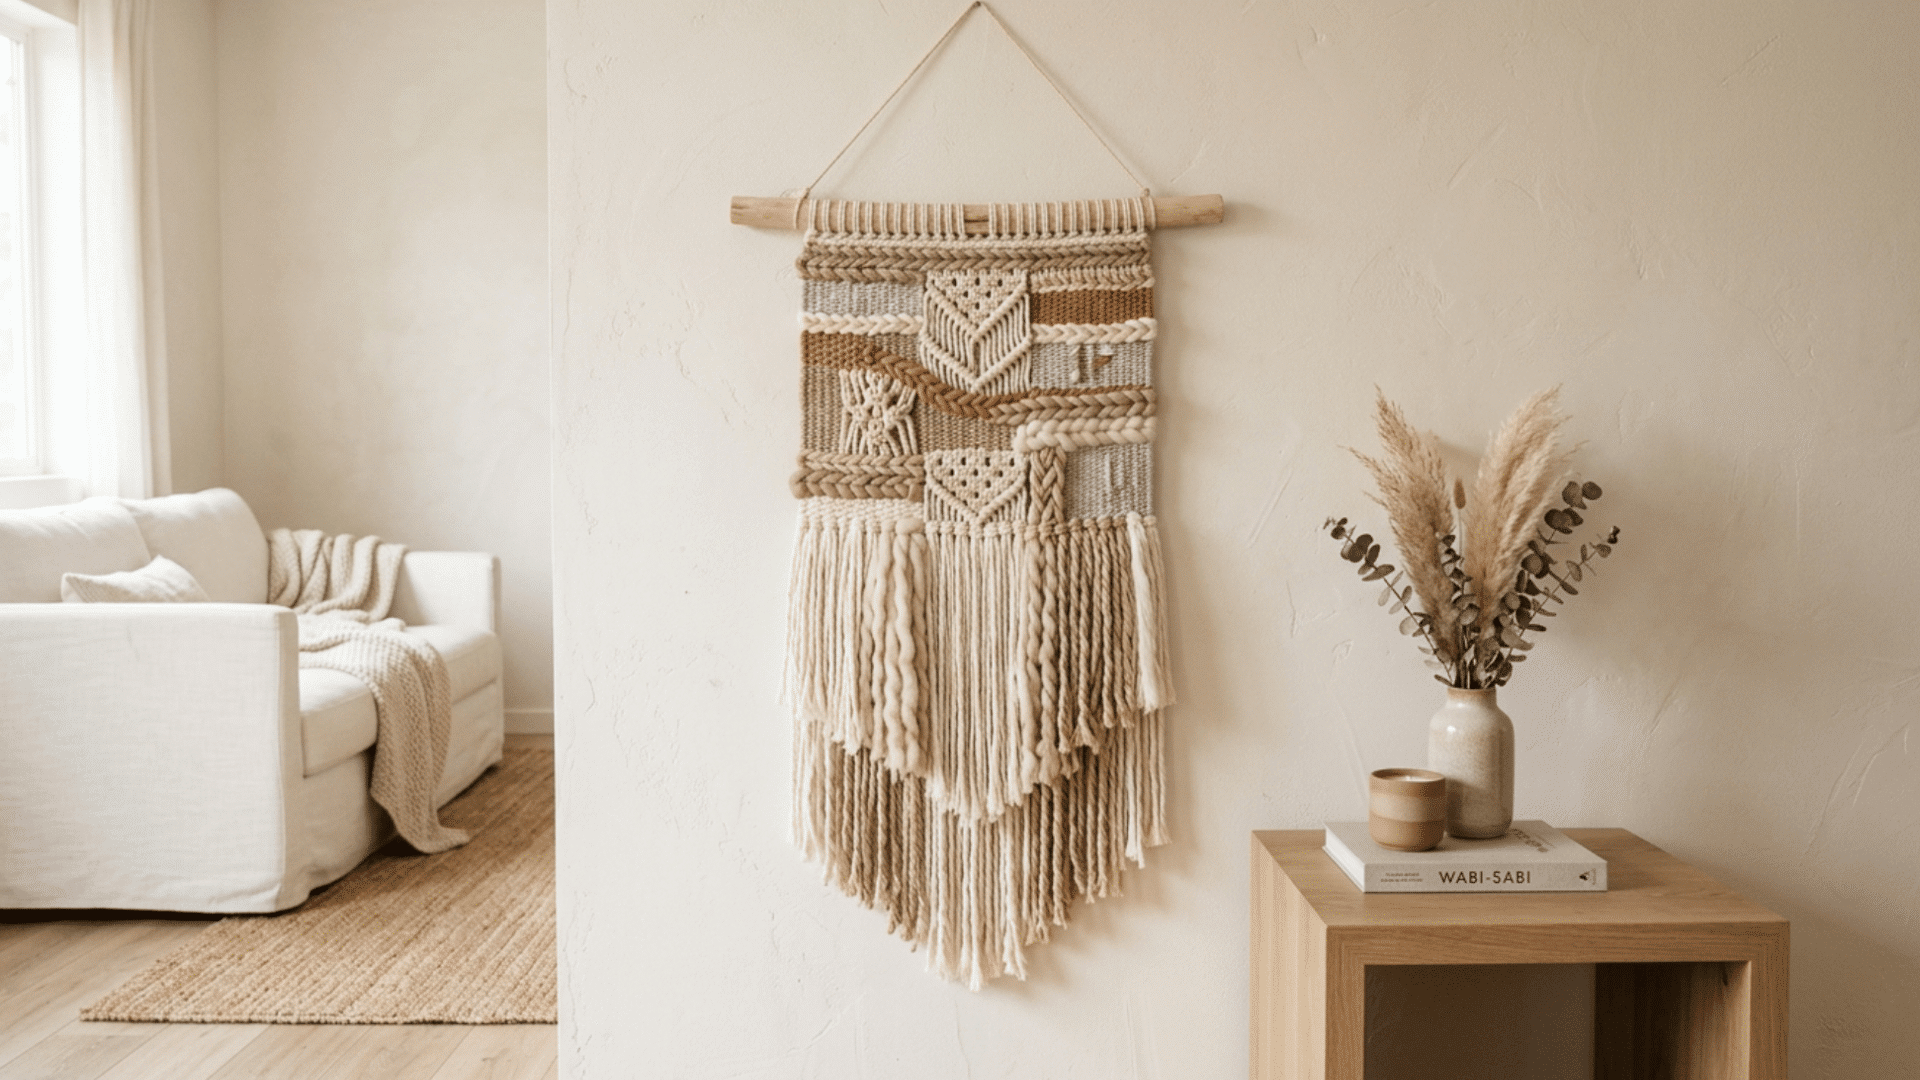
Yarn wall hangings bring bohemian texture and softness to any blank wall. They are endlessly customizable in color, length, and weave style.
- Time Required: 2 to 3 hours
- Materials to Gather: Wooden dowel or branch, assorted yarn, scissors, comb or fork for fringing, measuring tape
How to Make It:
- Cut lengths of yarn roughly twice the desired hanging length, fold each in half, and loop onto the dowel using a lark’s head knot until full.
- Tie simple knots or weave patterns across the strands to create texture and design.
- Trim the bottom into a V-shape, straight line, or freeform fringe using scissors.
4. Colorful Basket Gallery
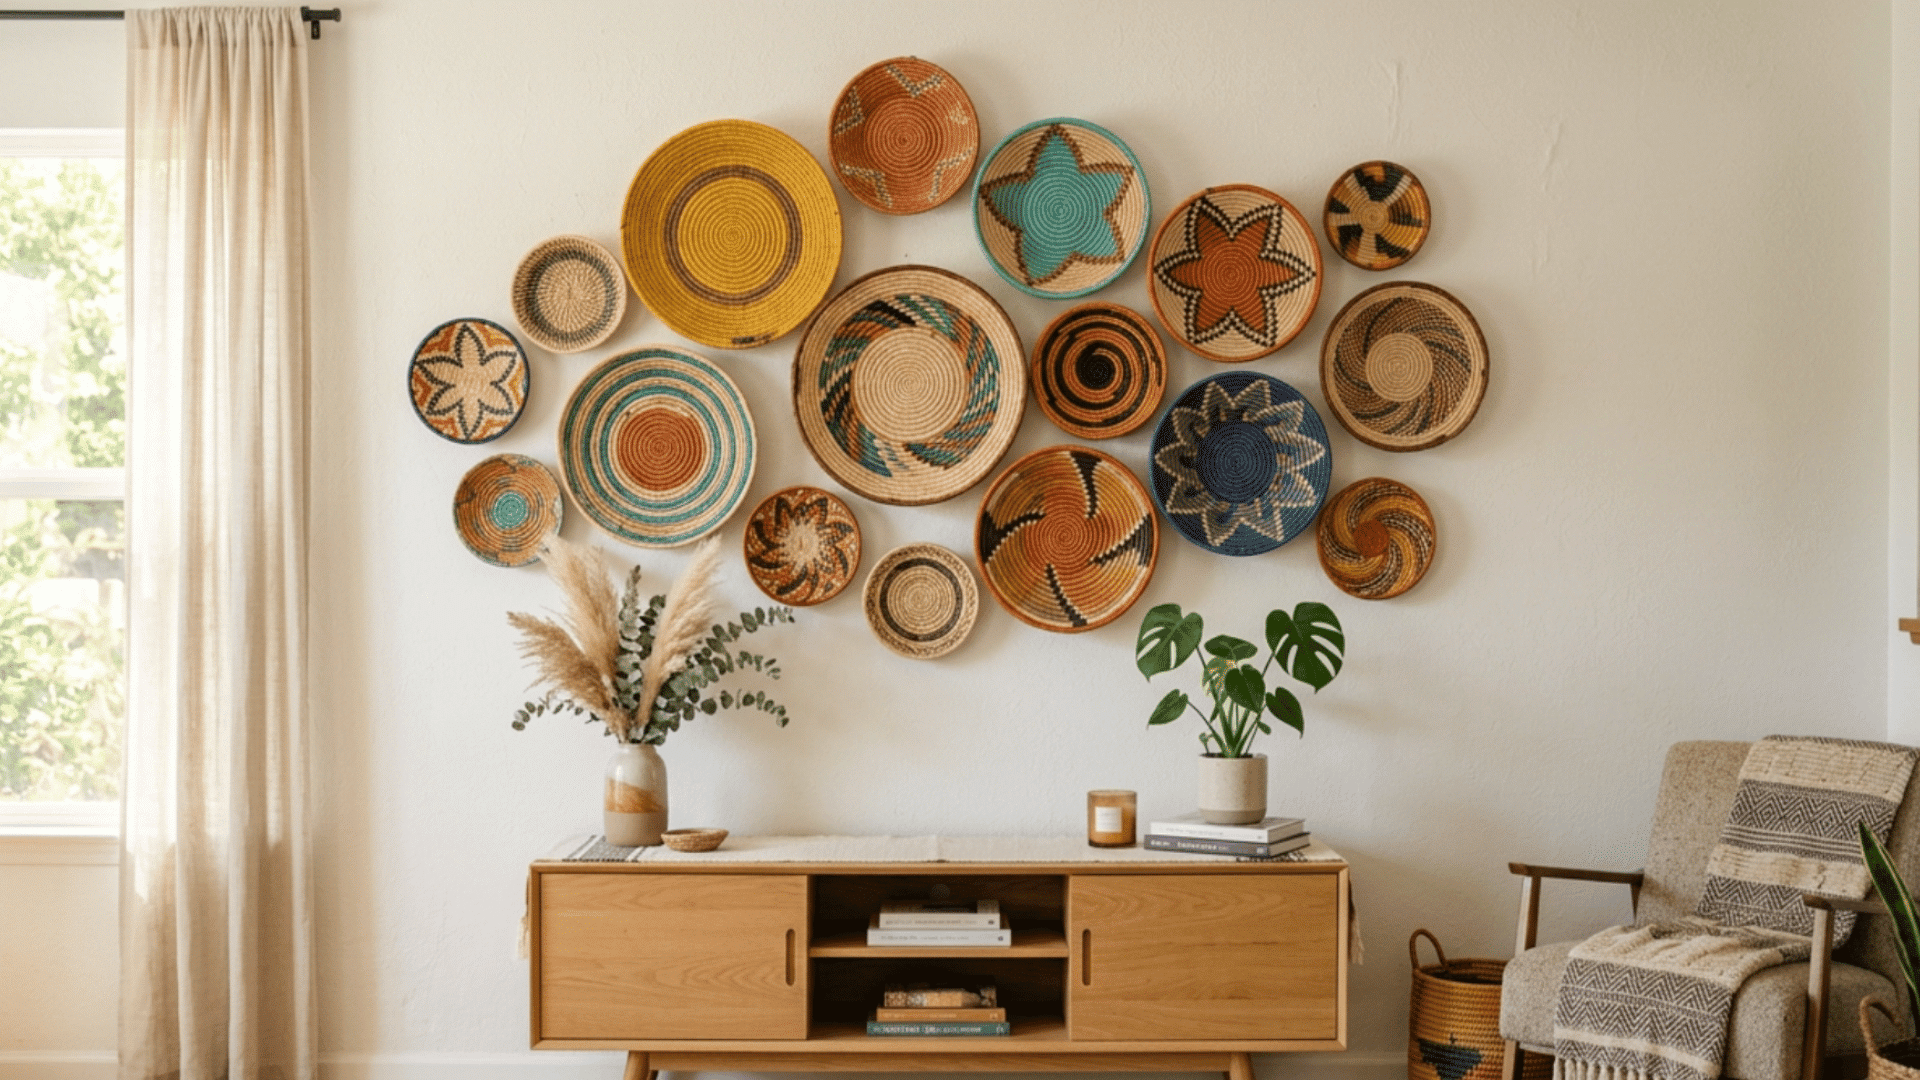
A gallery of handwoven or painted baskets grouped on a wall creates a stunning, artful display. This trend blends global craft traditions with modern interior styling.
- Time Required: 1 to 2 hours (excluding drying if painted)
- Materials to Gather: Assorted wicker or woven baskets, acrylic paint (optional), paintbrush, picture hooks or nails, hammer, pencil for layout planning
How to Make It:
- Lay out your baskets on the floor to plan the arrangement before hanging.
- Paint any baskets you would like to add color to and let them dry completely.
- Mark the wall lightly with a pencil to guide placement, then hammer in nails or hooks and hang each basket.
5. Making Candles
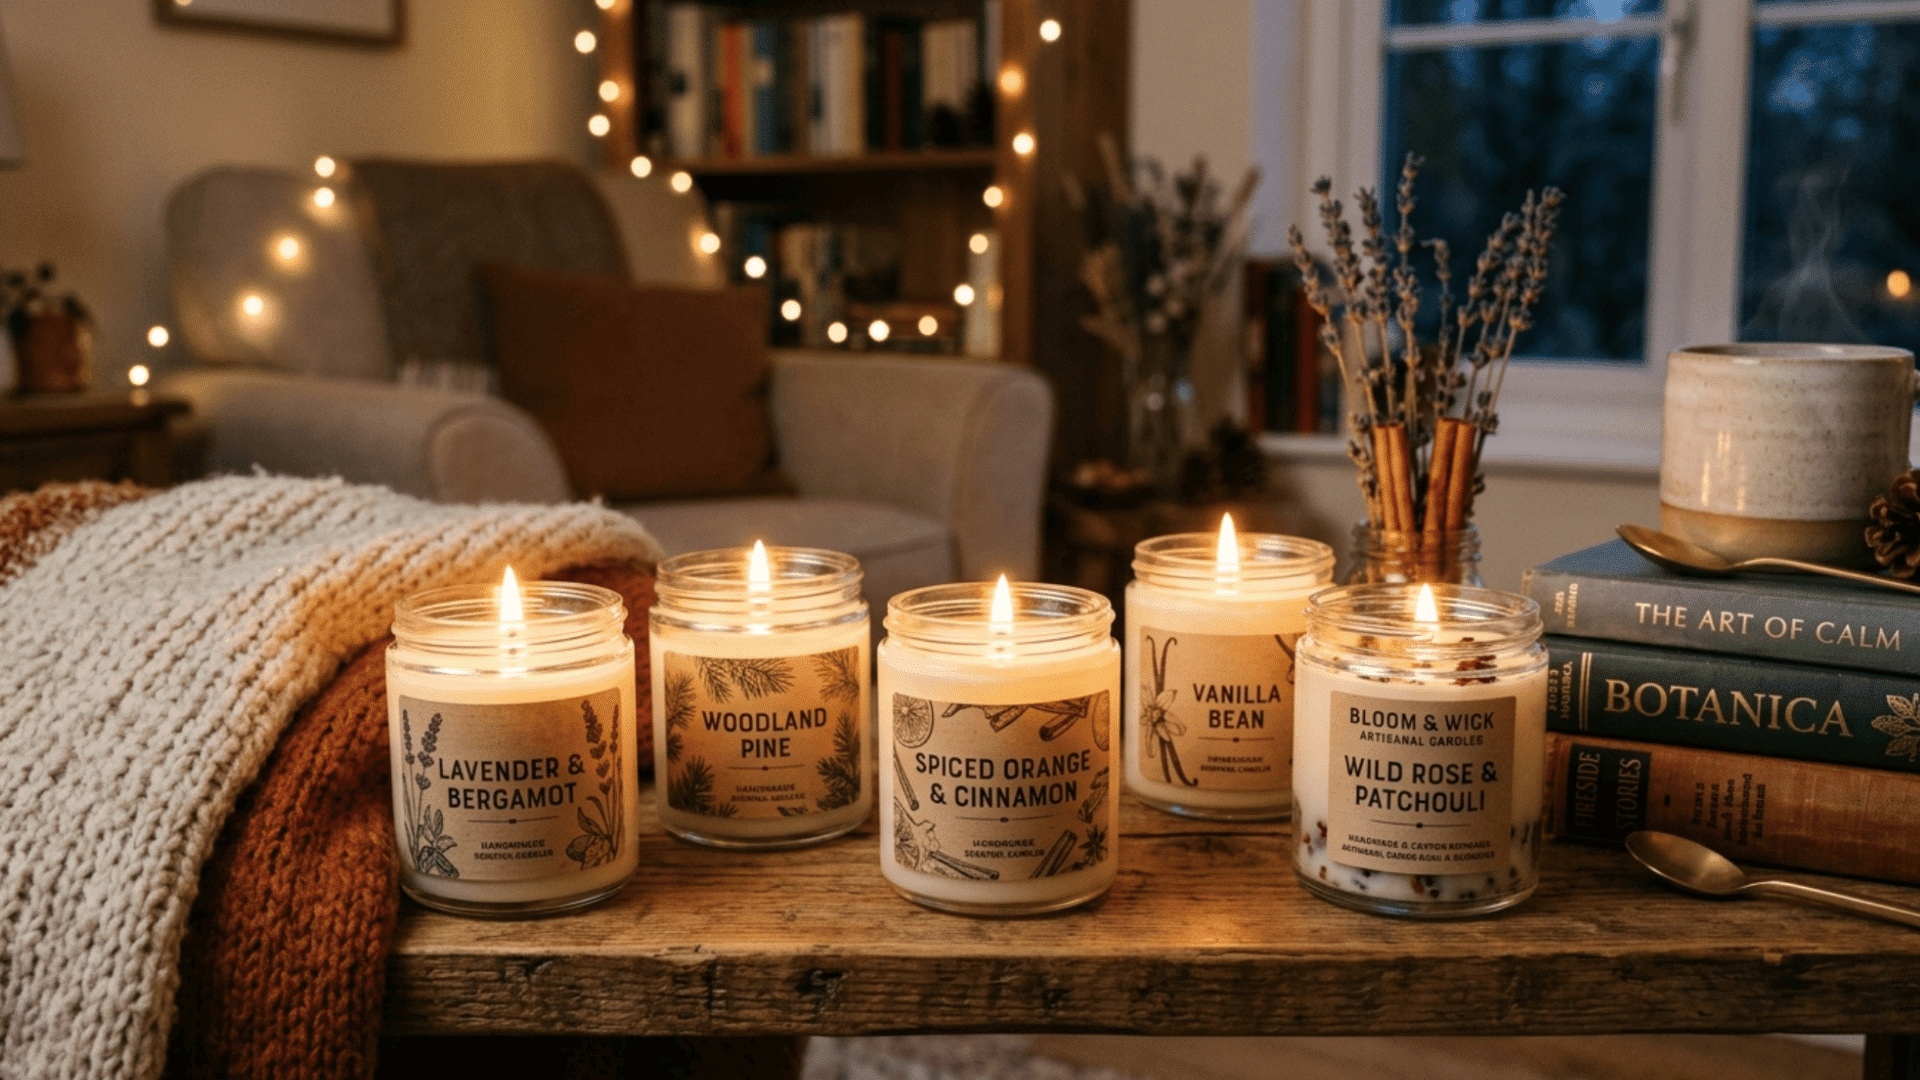
Candle making is a relaxing and rewarding craft that fills your home with beautiful fragrance and warm light. You can customize the scent, color, and vessel to match any style or season.
- Time Required: 1 to 2 hours (plus 24 hours cooling time)
- Materials to Gather: Soy or paraffin wax, candle wicks, fragrance oil, candle dye (optional), glass jars or tins, double boiler, thermometer, pencil to hold wick
How to Make It:
- Melt the wax in a double boiler, then stir in fragrance oil and dye at the right temperature.
- Secure the wick to the bottom of your jar with a dab of melted wax, then rest it upright on a pencil laid across the rim.
- Pour the wax into the jar, allow it to cool for 24 hours, then trim the wick to about 1 cm before lighting.
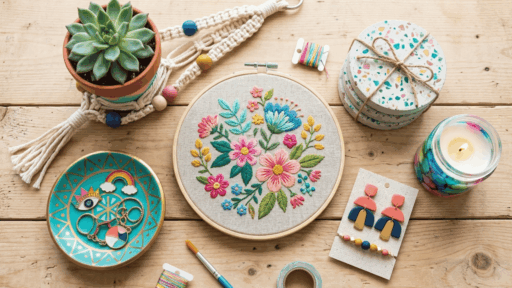
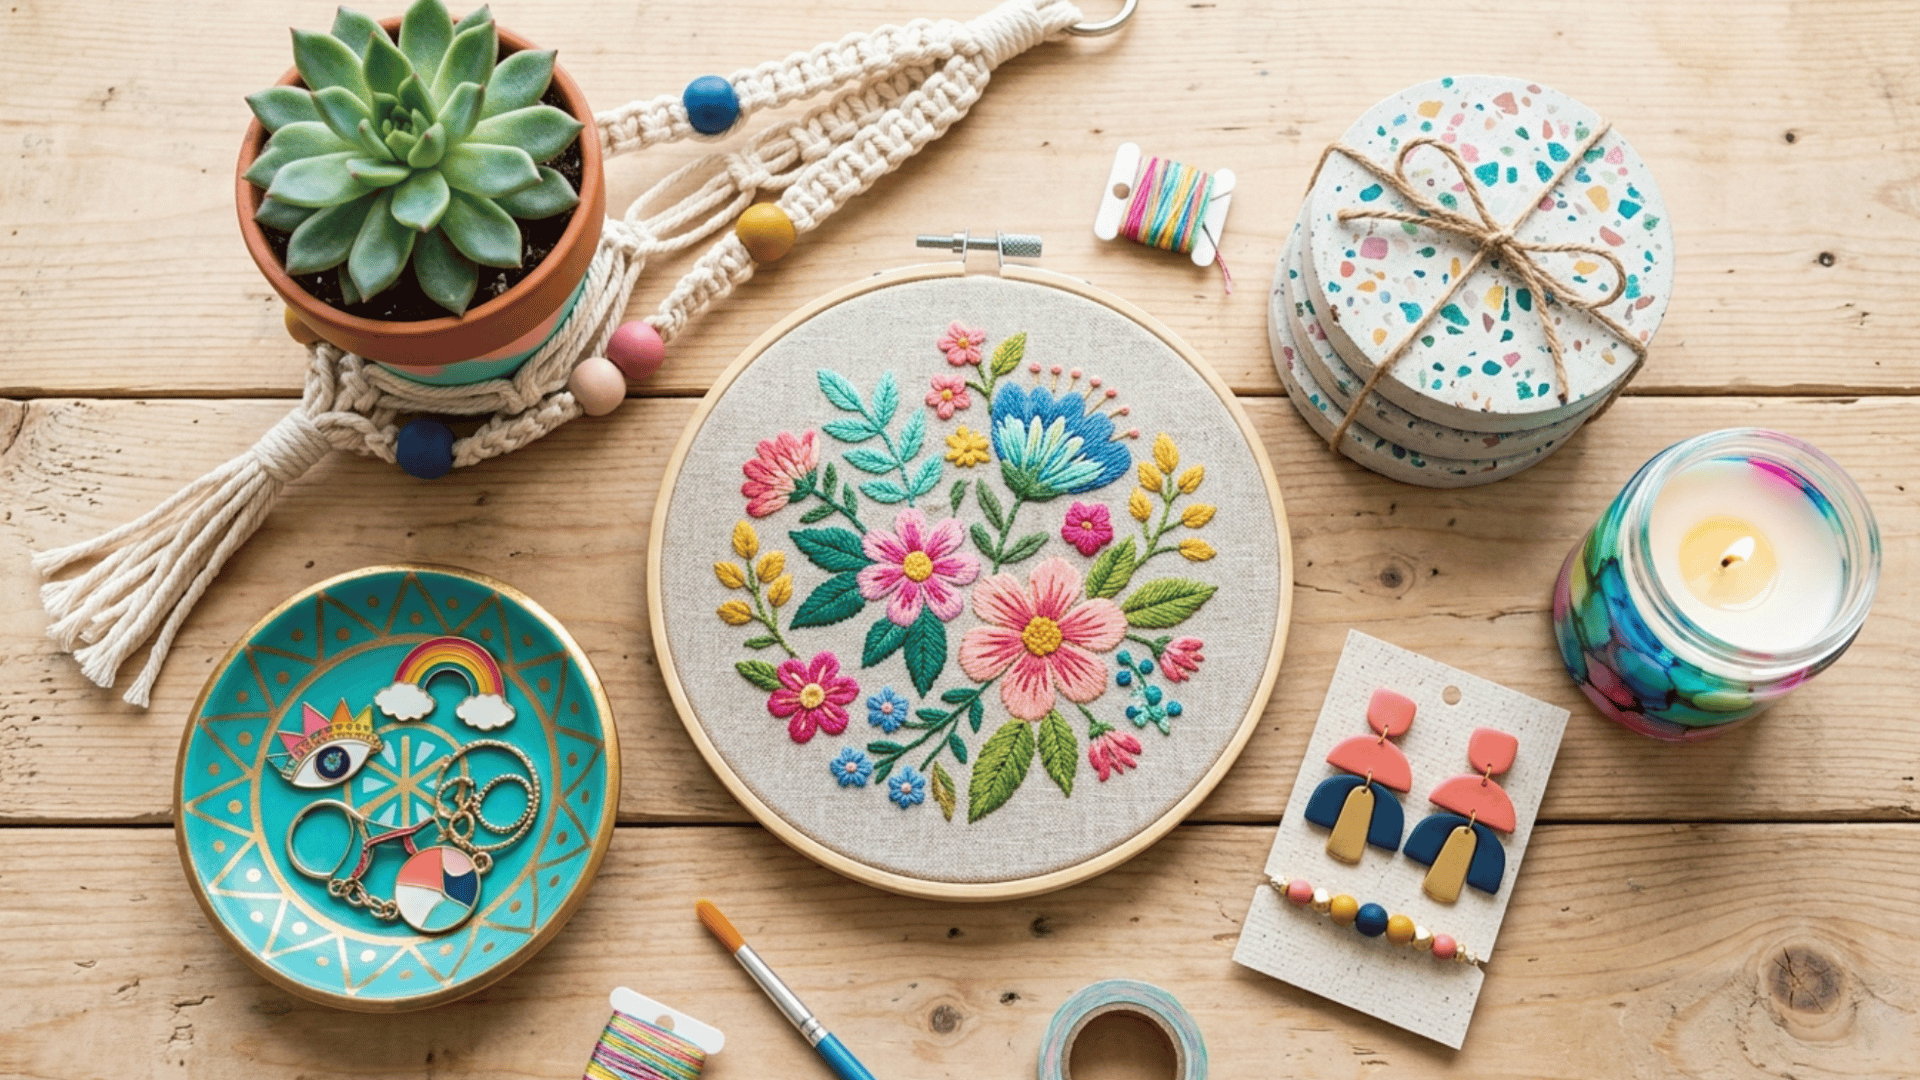
6. Embroidery Hoop Art
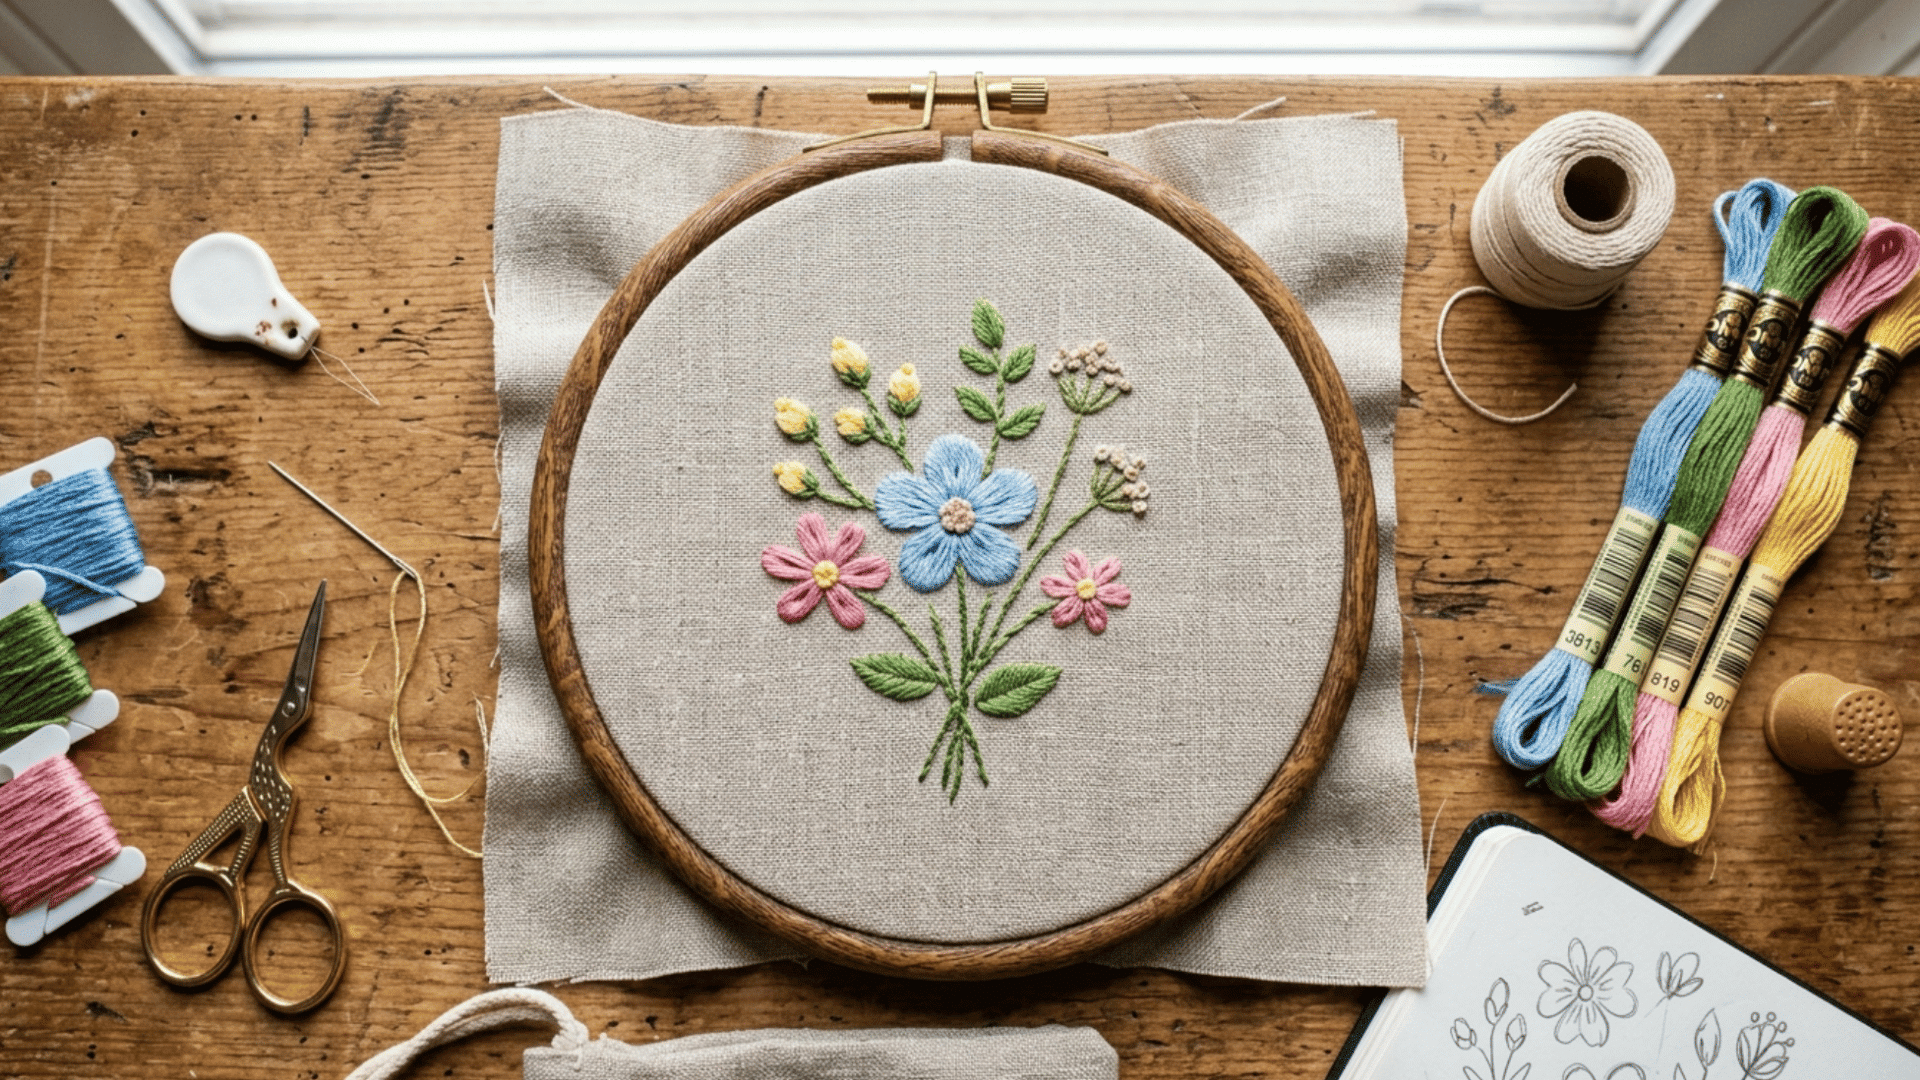
Embroidery hoop art transforms simple stitching into beautiful framed pieces ready to hang on the wall. It is a meditative craft perfect for beginners and experienced stitchers alike.
Time Required: 2 to 4 hours, depending on complexity
Materials to Gather: Embroidery hoop, cotton or linen fabric, embroidery thread, needle, scissors, design template, water-soluble fabric pen
How to Make It:
- Stretch your fabric tightly across the inner hoop, secure the outer hoop over it, and trace your design with a water-soluble pen.
- Stitch your design using your chosen stitches, such as satin, backstitch, or French knots.
- Trim any excess fabric around the back of the hoop and hang or display as-is.
7. Decorating Coasters
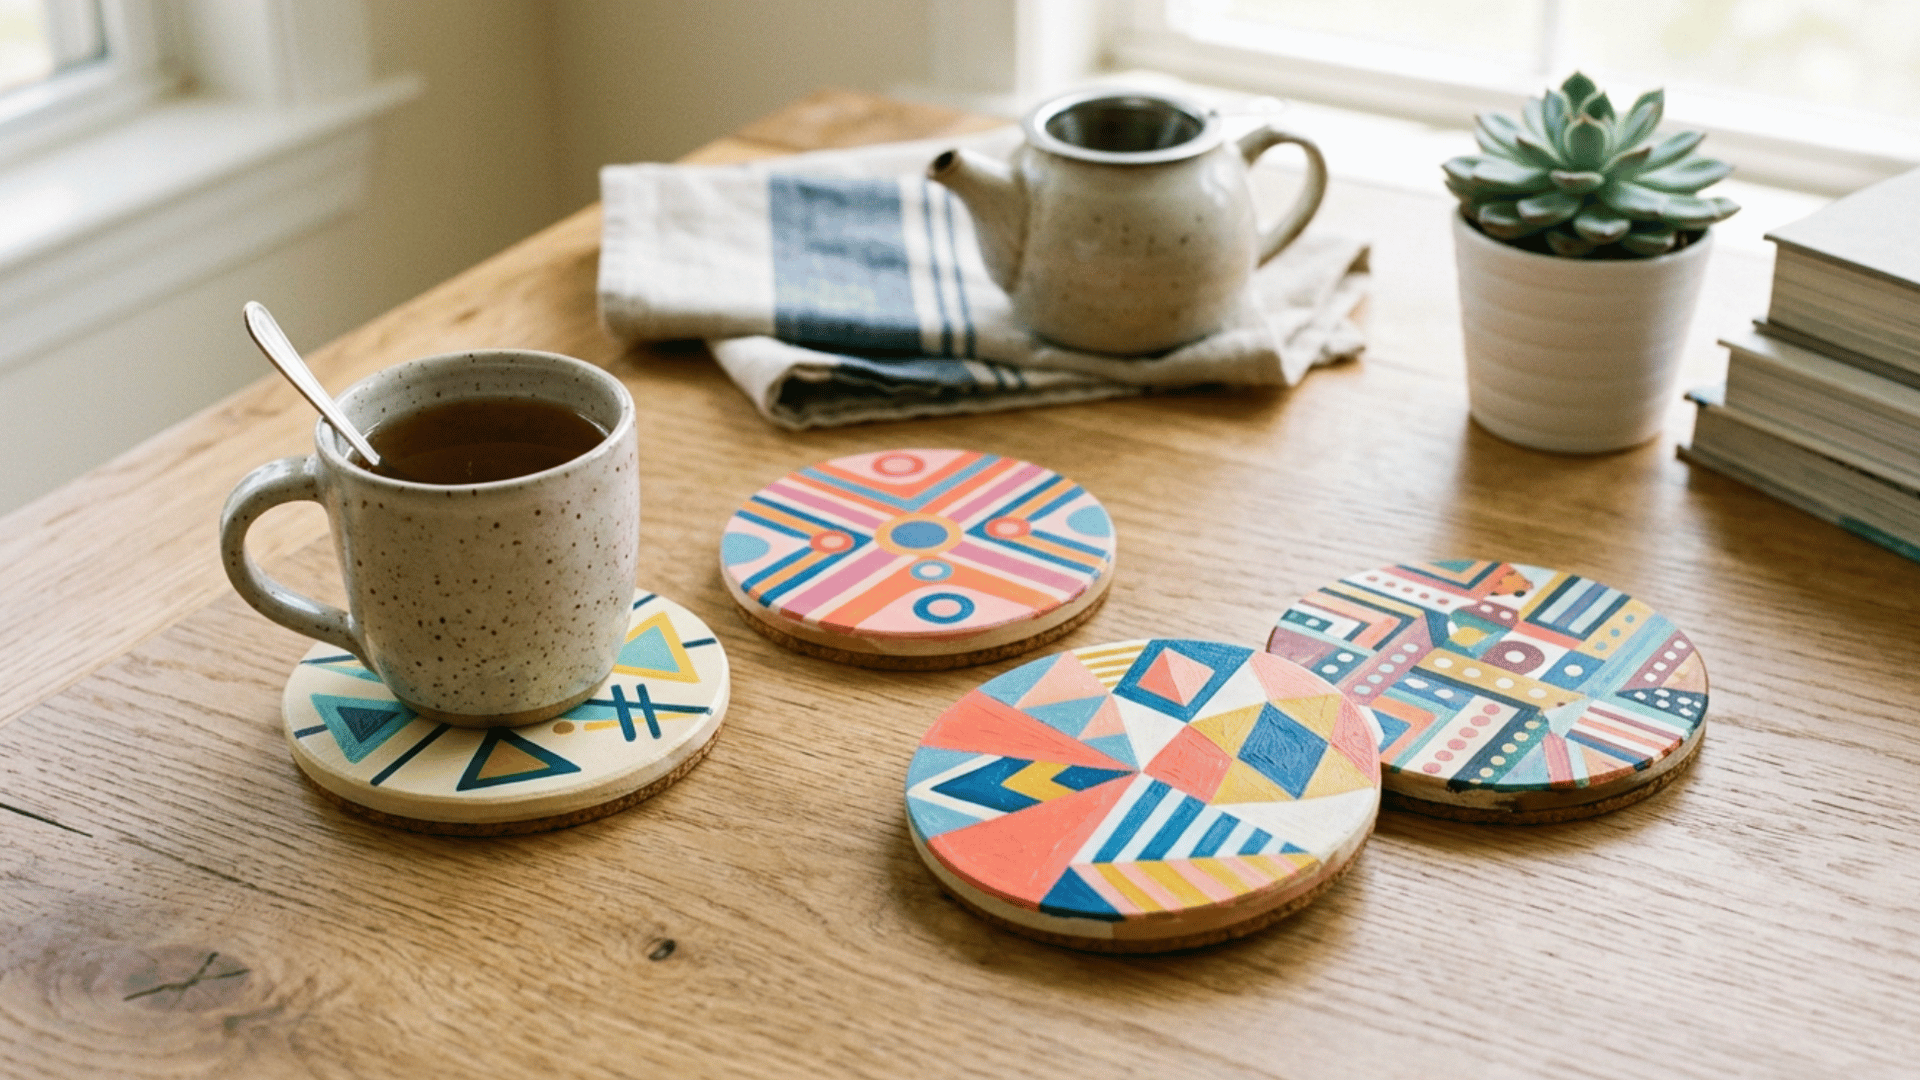
Plain cork or tile coasters become unique home accessories with just a bit of paint or decoupage. They make brilliant personalized gifts and protect your surfaces in style.
- Time Required: 1 hour (plus drying time)
- Materials to Gather: Plain cork or ceramic coasters, acrylic paint or napkins for decoupage, Mod Podge or sealant, paintbrush, painter’s tape (optional)
How to Make It:
- Clean the coasters, then apply a base coat of paint and let it dry fully.
- Paint your design, press tissue or napkin motifs using Mod Podge, or use painter’s tape to create geometric patterns.
- Once dry, apply two coats of waterproof sealant and allow to cure for 24 hours before use.
8. Painted Wine Bottles
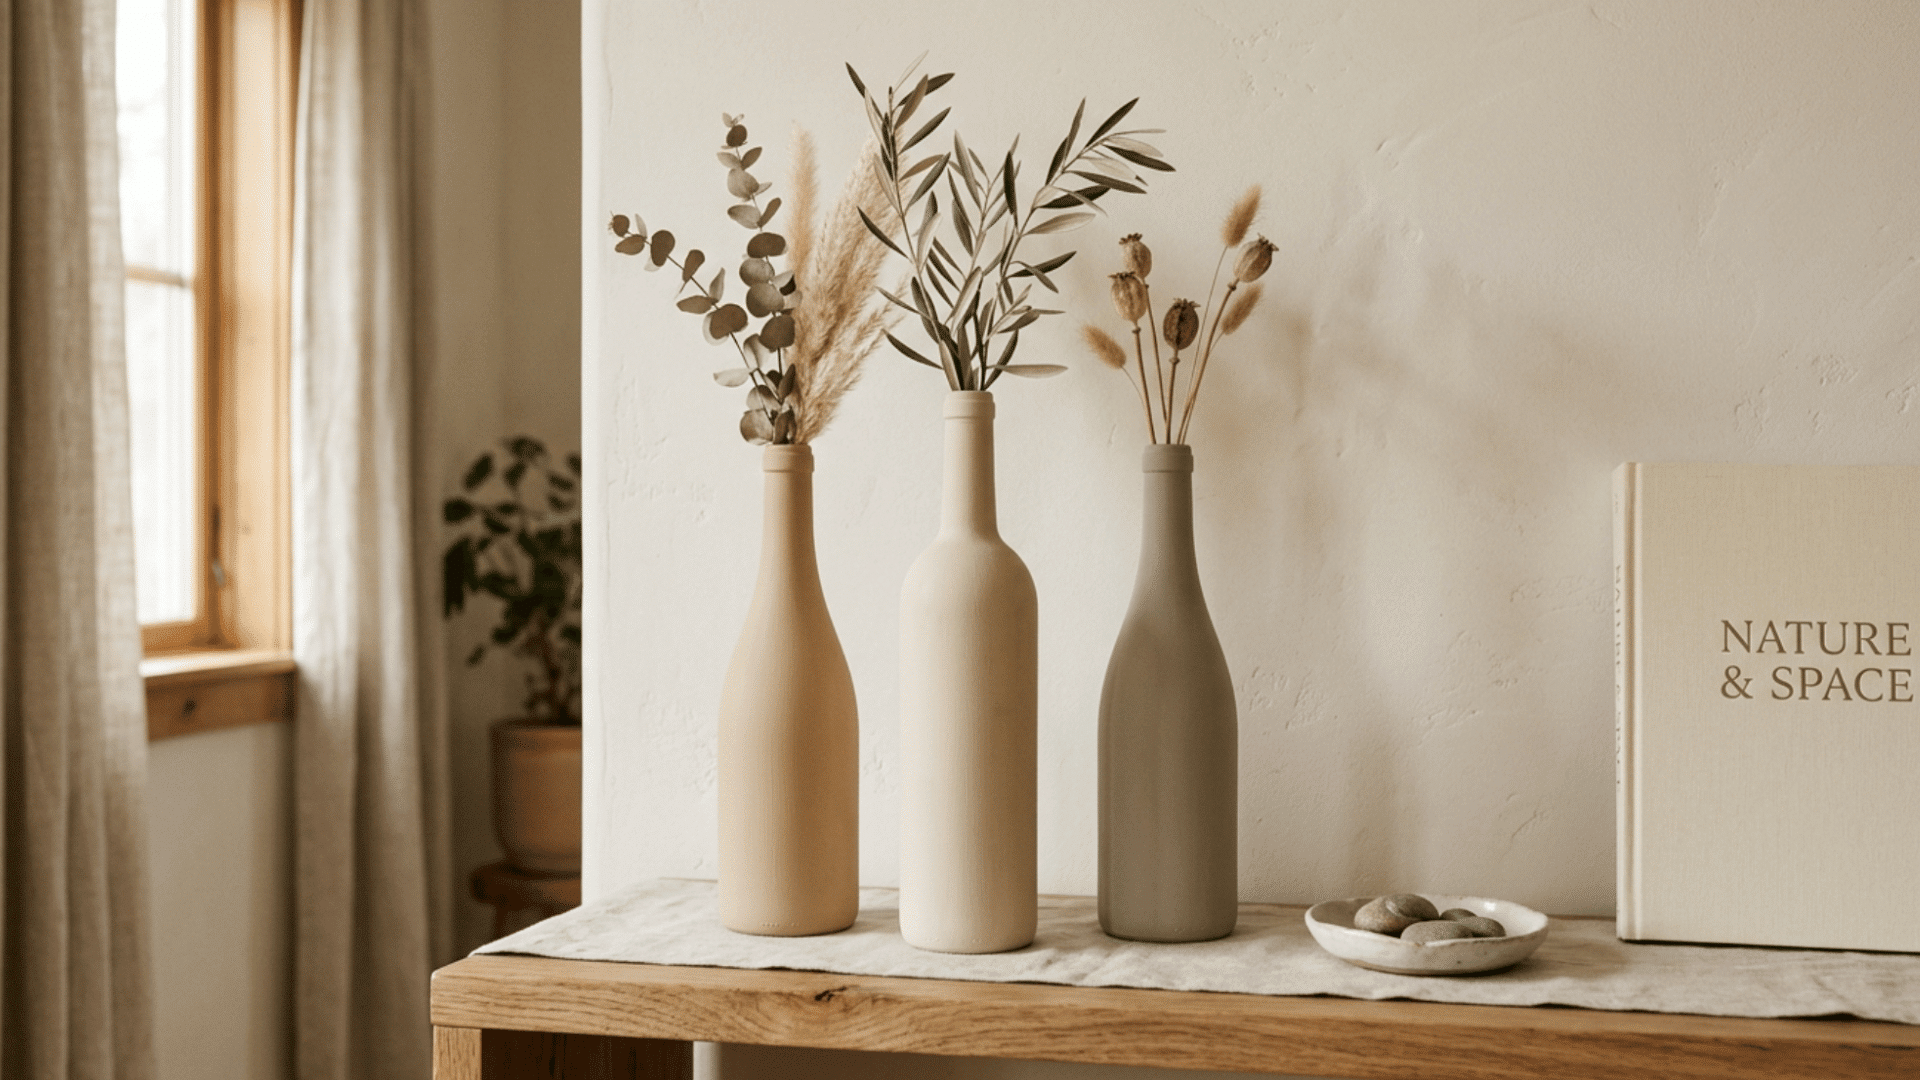
Empty wine bottles become stylish vases or decorative pieces with a little paint and creativity. They look stunning grouped together or used as centerpieces.
- Time Required: 45 minutes (plus drying time)
- Materials to Gather: Empty wine bottles, chalk paint or spray paint, paintbrush, sandpaper (fine grit), protective sealant, twine or ribbon (optional)
How to Make It:
- Clean and dry the bottles, then lightly sand the surface for better paint adhesion.
- Apply two coats of chalk paint or spray paint, allowing each coat to dry fully, then add decorative touches like twine wrapping or stenciled words.
- Seal with a clear coat to protect the finish and display as desired.
9. Mod Roc Pen Holder
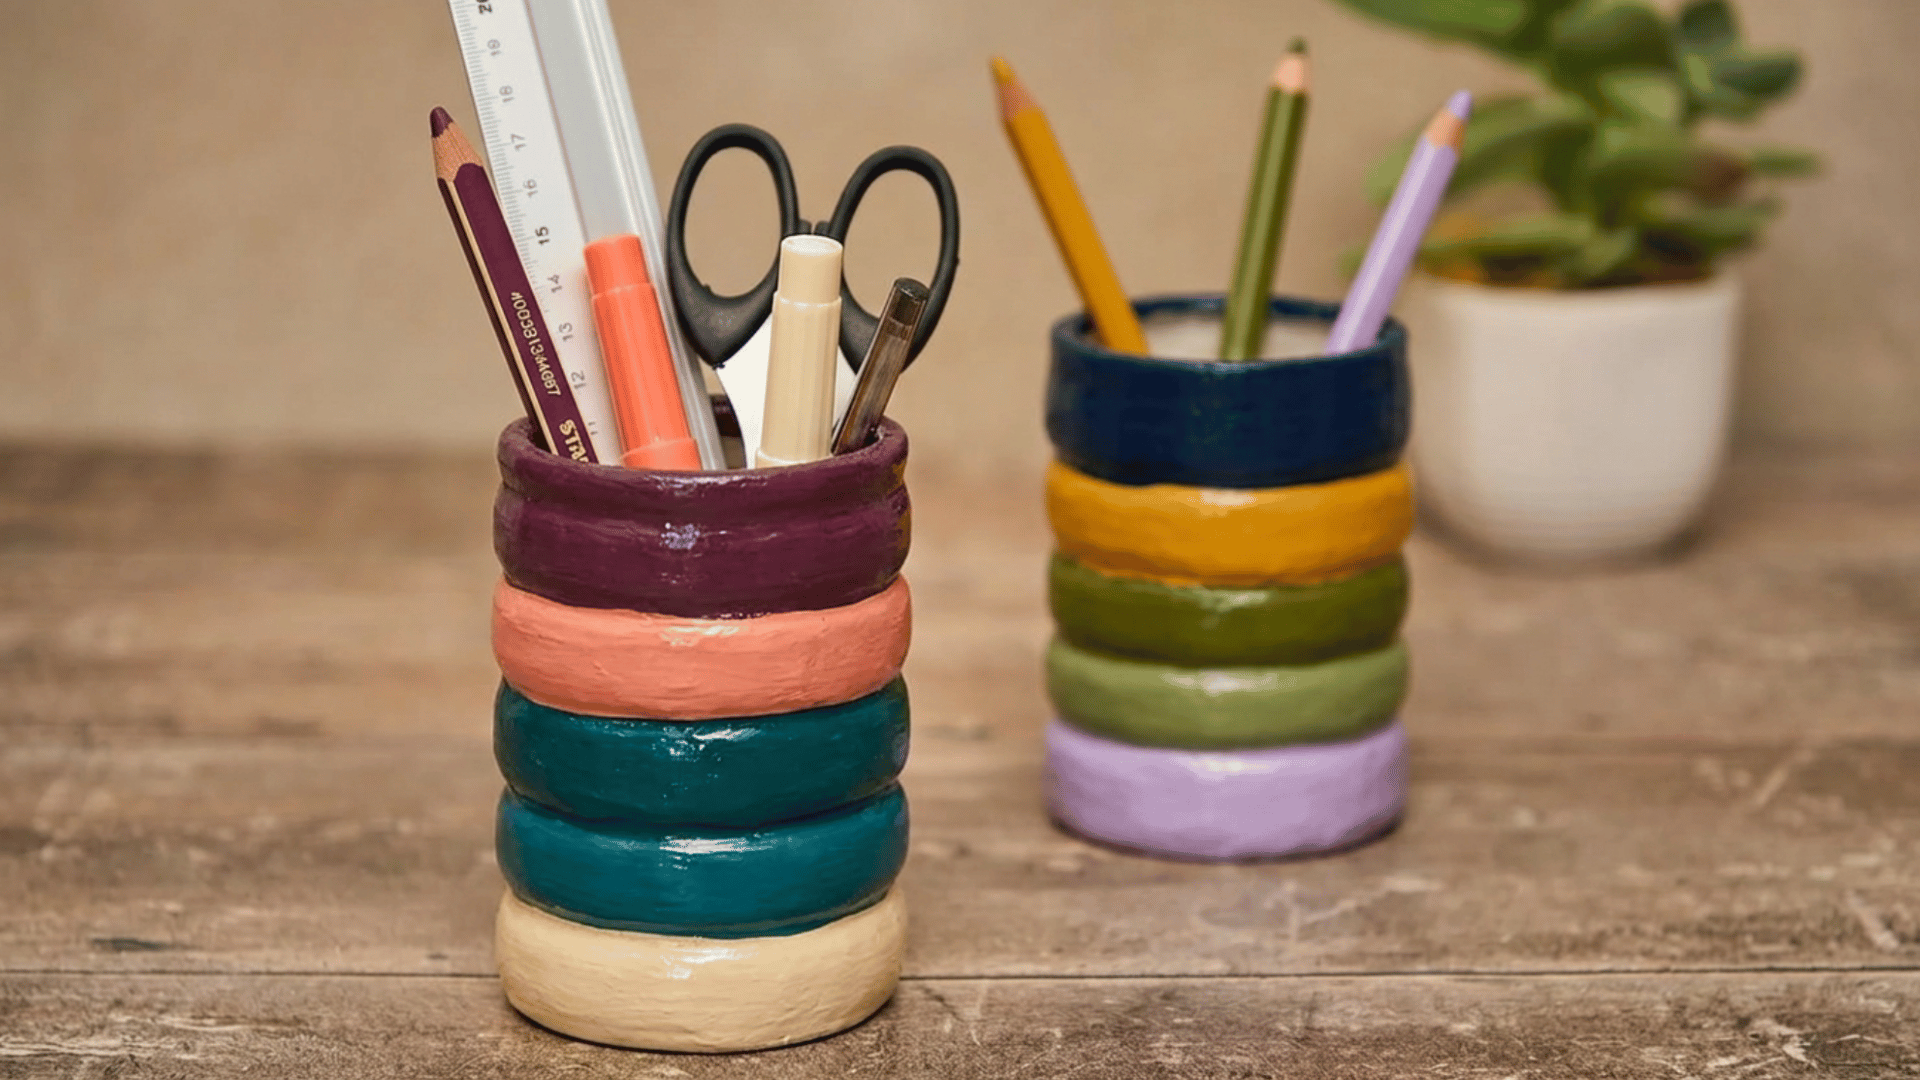
A Mod Roc (plaster bandage) pen Holder is a wonderfully tactile and easy craft that creates an earthy, sculptural container. It makes an excellent personalized gift for dads or teachers.
- Time Required: 1 hour (plus drying time)
- Materials to Gather: Mod Roc plaster bandage, a small jar or cardboard tube as a base, water, bowl, acrylic paint, paintbrush, varnish
How to Make It:
- Cut the Mod Roc into strips, dip each briefly in water, and wrap around your jar or tube form, smoothing as you go. Build up 2 to 3 layers.
- Leave to dry completely for 1 to 2 hours, then paint in your chosen color and add any personal touches like a name.
- Seal with varnish once fully dry.
10. Crochet Bag Charm
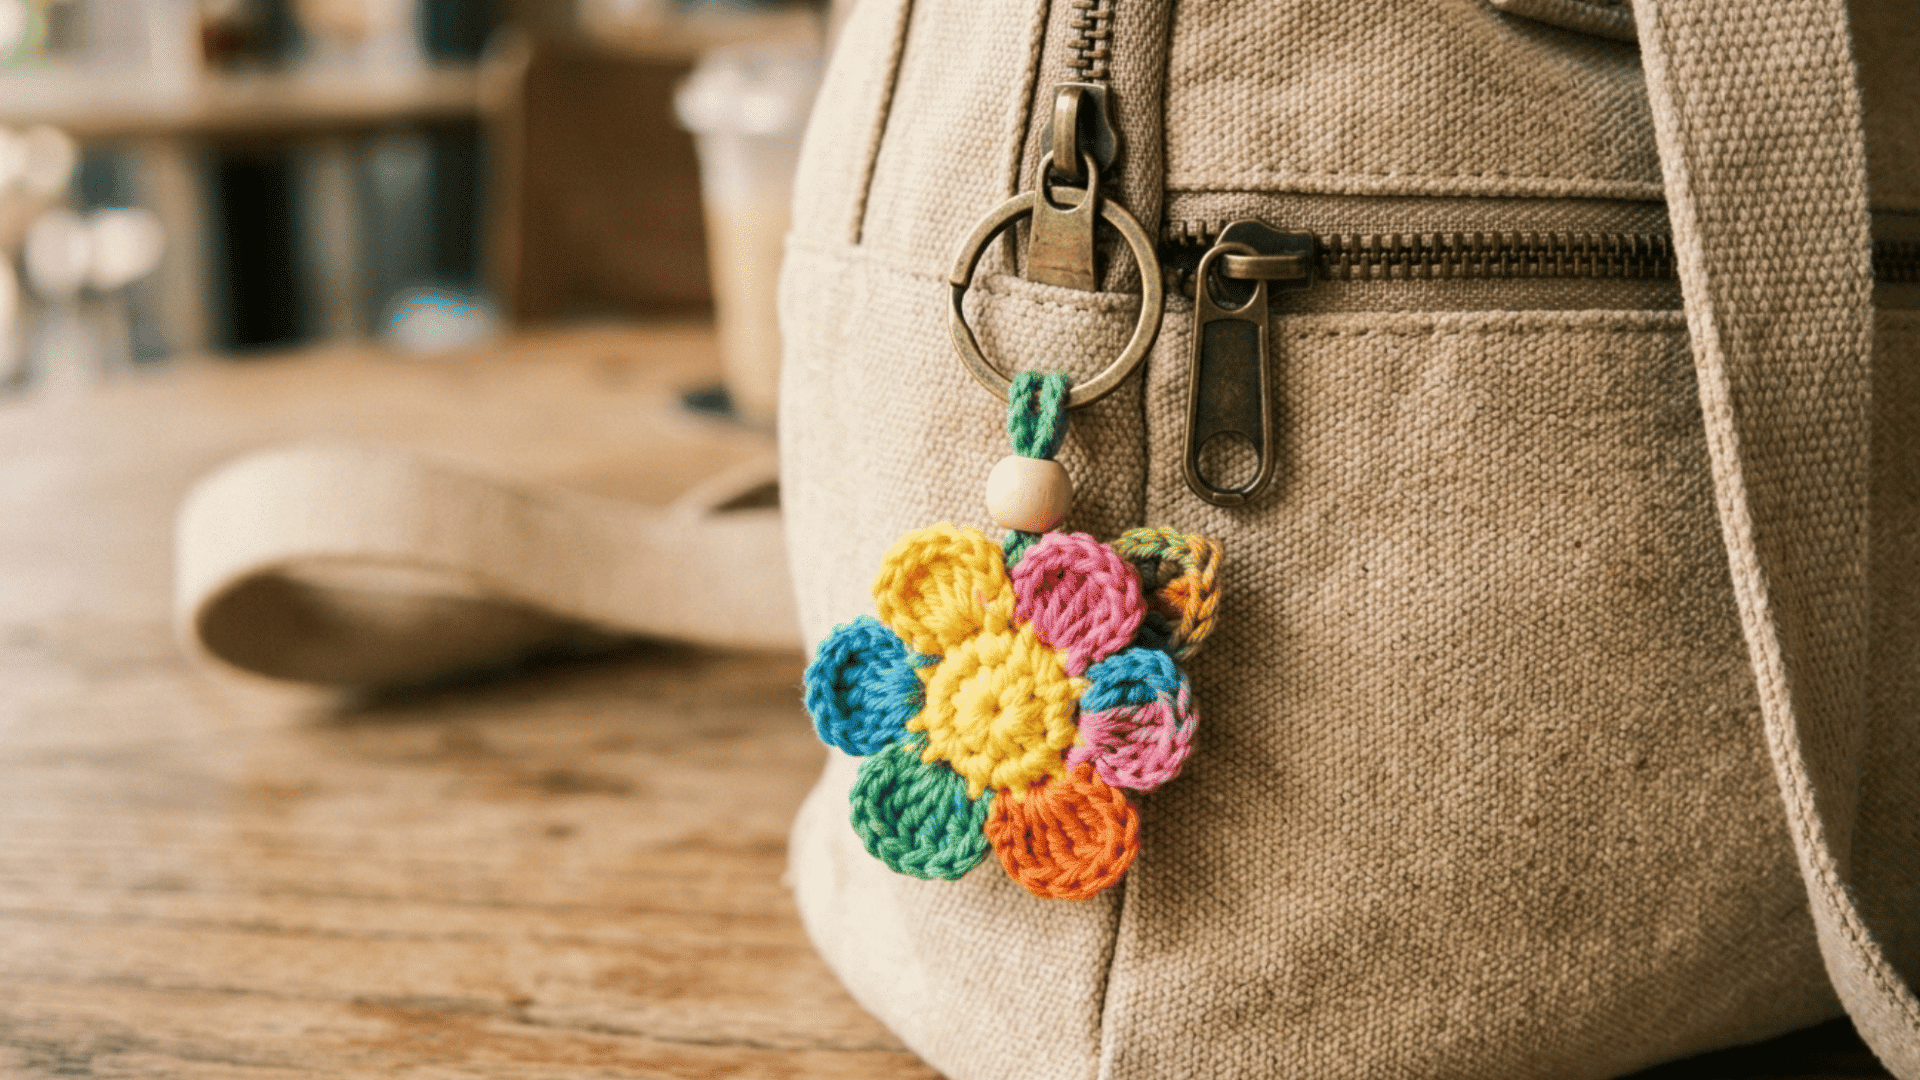
A small crocheted charm adds personality and flair to any bag, backpack, or set of keys. They are quick to make and can be customized in any color or shape.
- Time Required: 1 to 2 hours
- Materials to Gather: DK or sport weight yarn, small crochet hook (3 to 4mm), stuffing, stitch marker, scissors, keyring or lobster clasp, tapestry needle
How to Make It:
- Start with a magic ring and crochet in the round to form your base shape, increasing and decreasing as needed to create a ball, heart, or other design.
- Stuff firmly as you work towards closing, fasten off, and sew a keyring or clasp securely to the top.
- Weave in all ends neatly and attach to your bag.
11. Macrame Jar Plant Holder
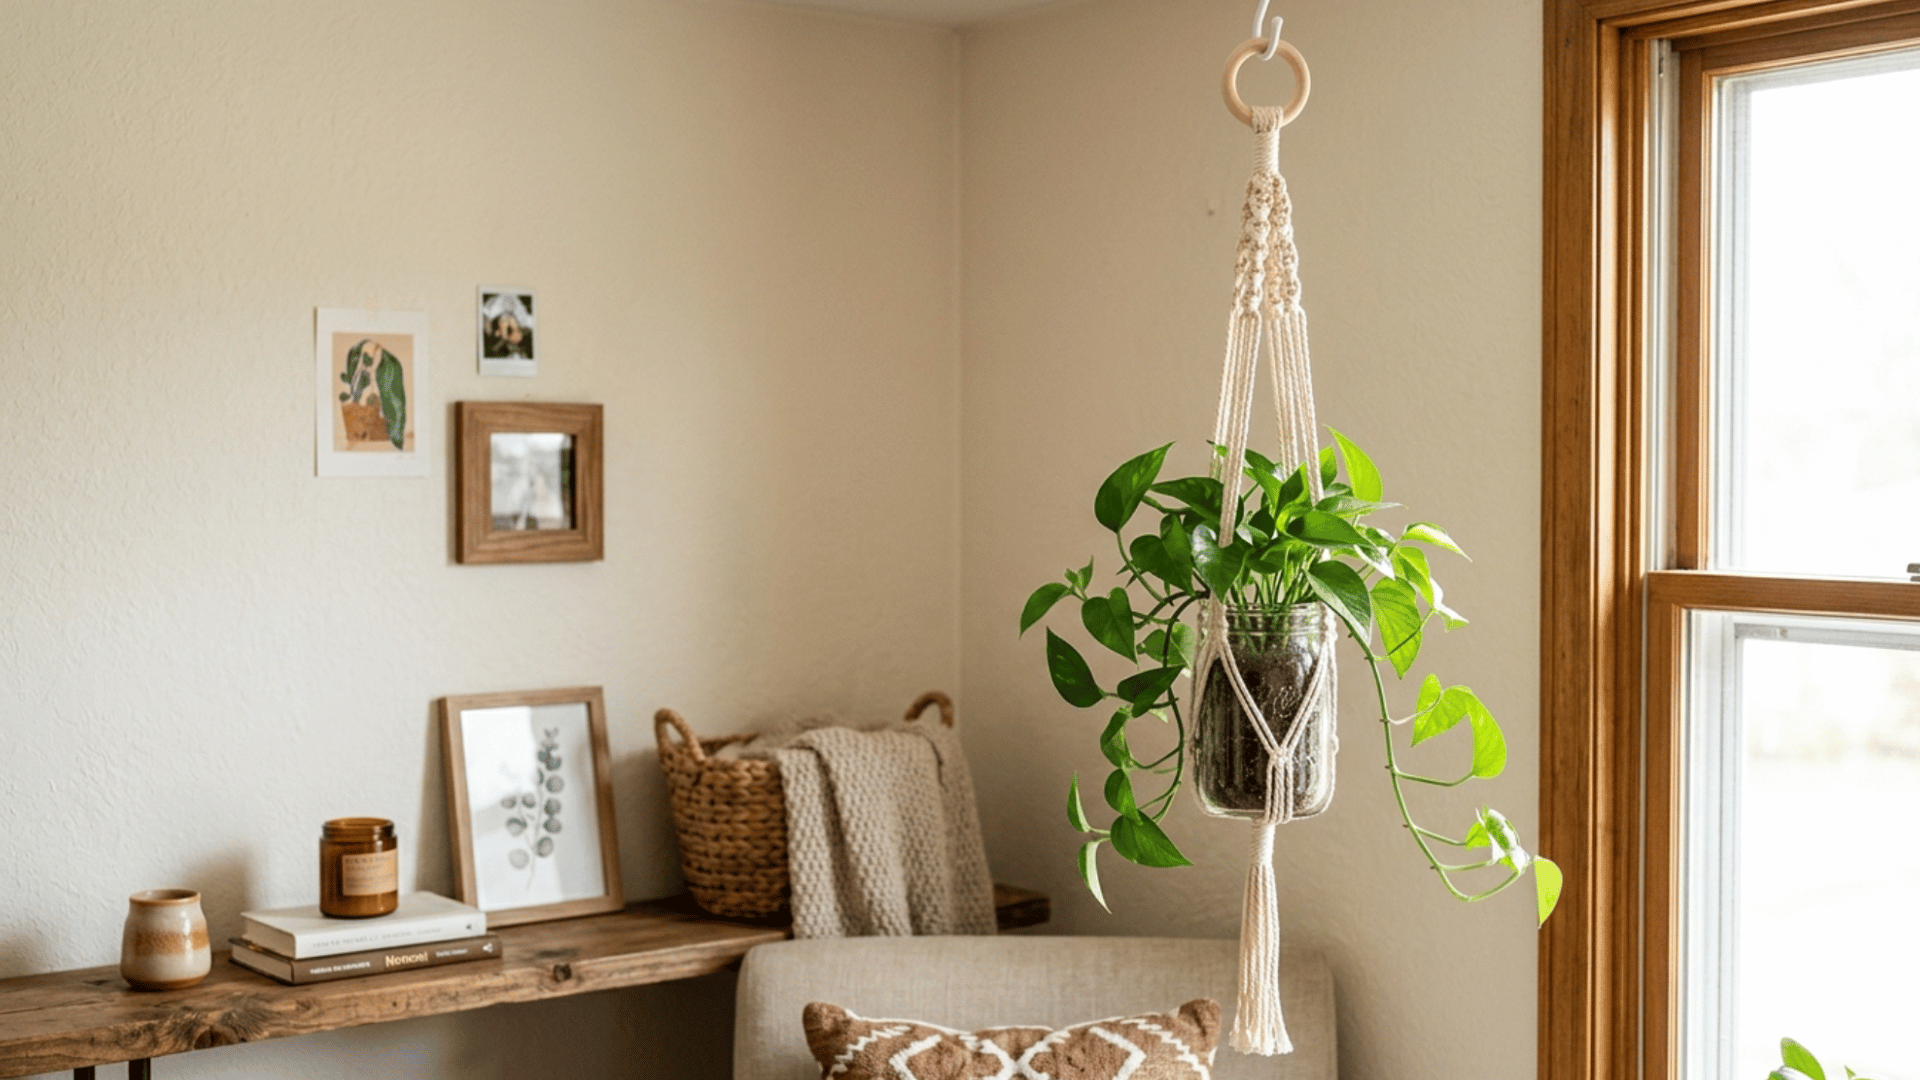
A macrame jar plant holder is a beautiful way to display small plants or candles at different heights. The knotted rope adds a natural, boho-chic feel to any space.
- Time Required: 1 to 2 hours
- Materials to Gather: Cotton macrame rope, scissors, glass jar, measuring tape, metal ring (optional for hanging)
How to Make It:
- Cut four lengths of rope about four times the desired finished length, fold each in half, and loop through a metal ring using a lark’s head knot.
- Divide the 8 strands into pairs and tie square knots at regular intervals, then gather all strands and tie a gathering knot to cradle the base of the jar.
- Tie a final knot below the jar for support, trim the ends evenly, and hang in place.
12. Paper Wall Art

Paper wall art is an affordable and endlessly creative way to decorate your walls with texture and color. From quilling to cut-paper sculptures, paper offers stunning visual impact.
- Time Required: 1 to 3 hours
- Materials to Gather: Coloured or patterned cardstock, scissors or craft knife, cutting mat, glue or double-sided tape, frame or backing board
How to Make It:
- Plan your design and cut shapes carefully using scissors or a craft knife on a cutting mat.
- Layer and glue the pieces onto a backing board, building dimension by folding or curling the edges of each piece.
- Frame the finished piece or mount it directly onto the wall.
13. Beaded Bracelets

Beaded bracelets are a fun, quick craft that lets you express your style through color and pattern combinations. They make wonderful gifts and can be made for any occasion.
- Time Required: 30 to 60 minutes
- Materials to Gather: Assorted beads (glass, seed, or clay), elastic cord or beading wire, scissors, clasp (if using wire), bead tray, tape to hold cord end
How to Make It:
- Measure the elastic cord around your wrist, add a few centimeters for knotting, and secure one end with tape.
- Thread beads in your chosen pattern along the cord.
- Tie a secure double knot, tuck the ends inside a nearby bead, trim excess cord, and give a gentle stretch to test the knot.
14. Fabric Scrap Bookmarks
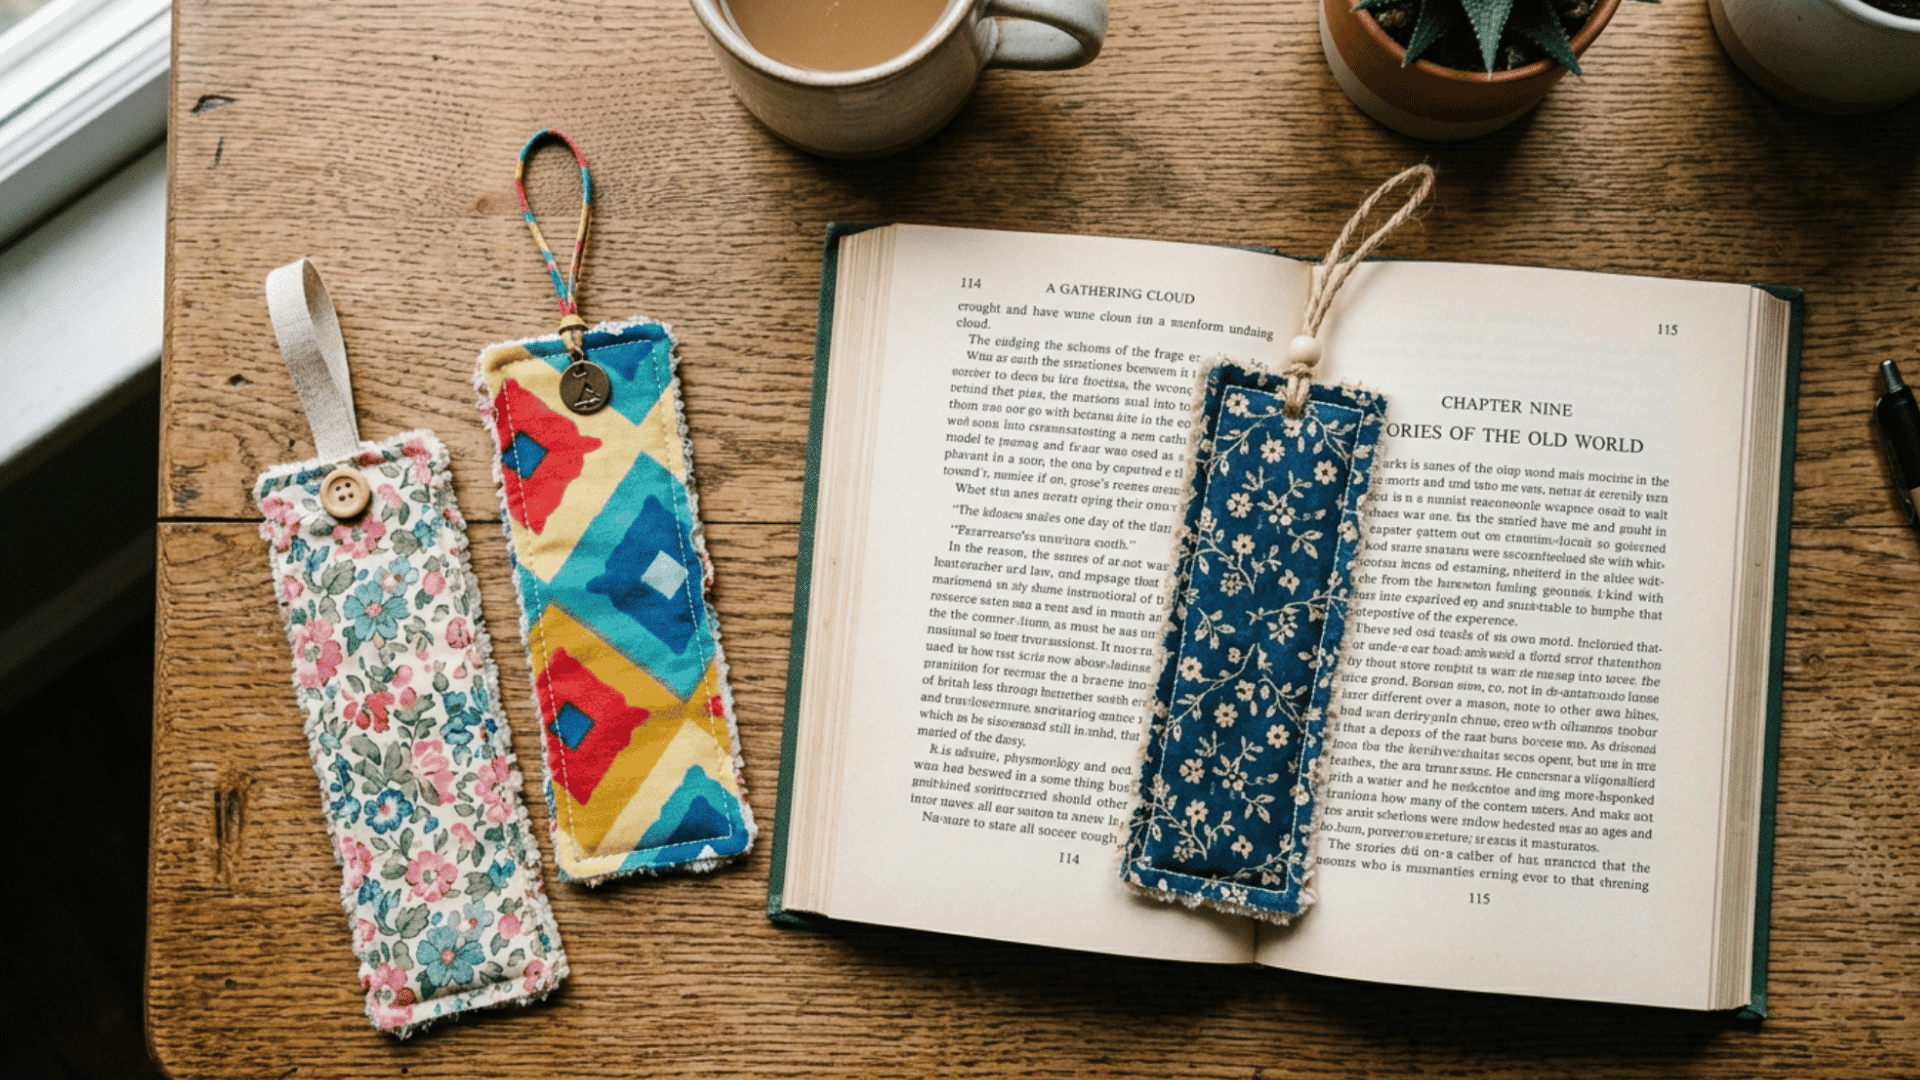
Fabric scrap bookmarks are a lovely way to use up leftover fabric while creating something practical and charming. They are especially sweet as gifts tucked inside a book.
- Time Required: 30 to 45 minutes
- Materials to Gather: Fabric scraps, iron-on interfacing, scissors, iron, sewing machine, or needle and thread
How to Make It:
- Cut two matching fabric pieces and one interfacing piece to bookmark size (roughly 5 x 18 cm), then iron the interfacing to the wrong side of one fabric piece.
- Place fabric pieces right sides together and sew around the edges, leaving a small gap to turn inside out.
- Turn right side out, press flat with an iron, and slip-stitch the gap closed.
15. Clay Keychains
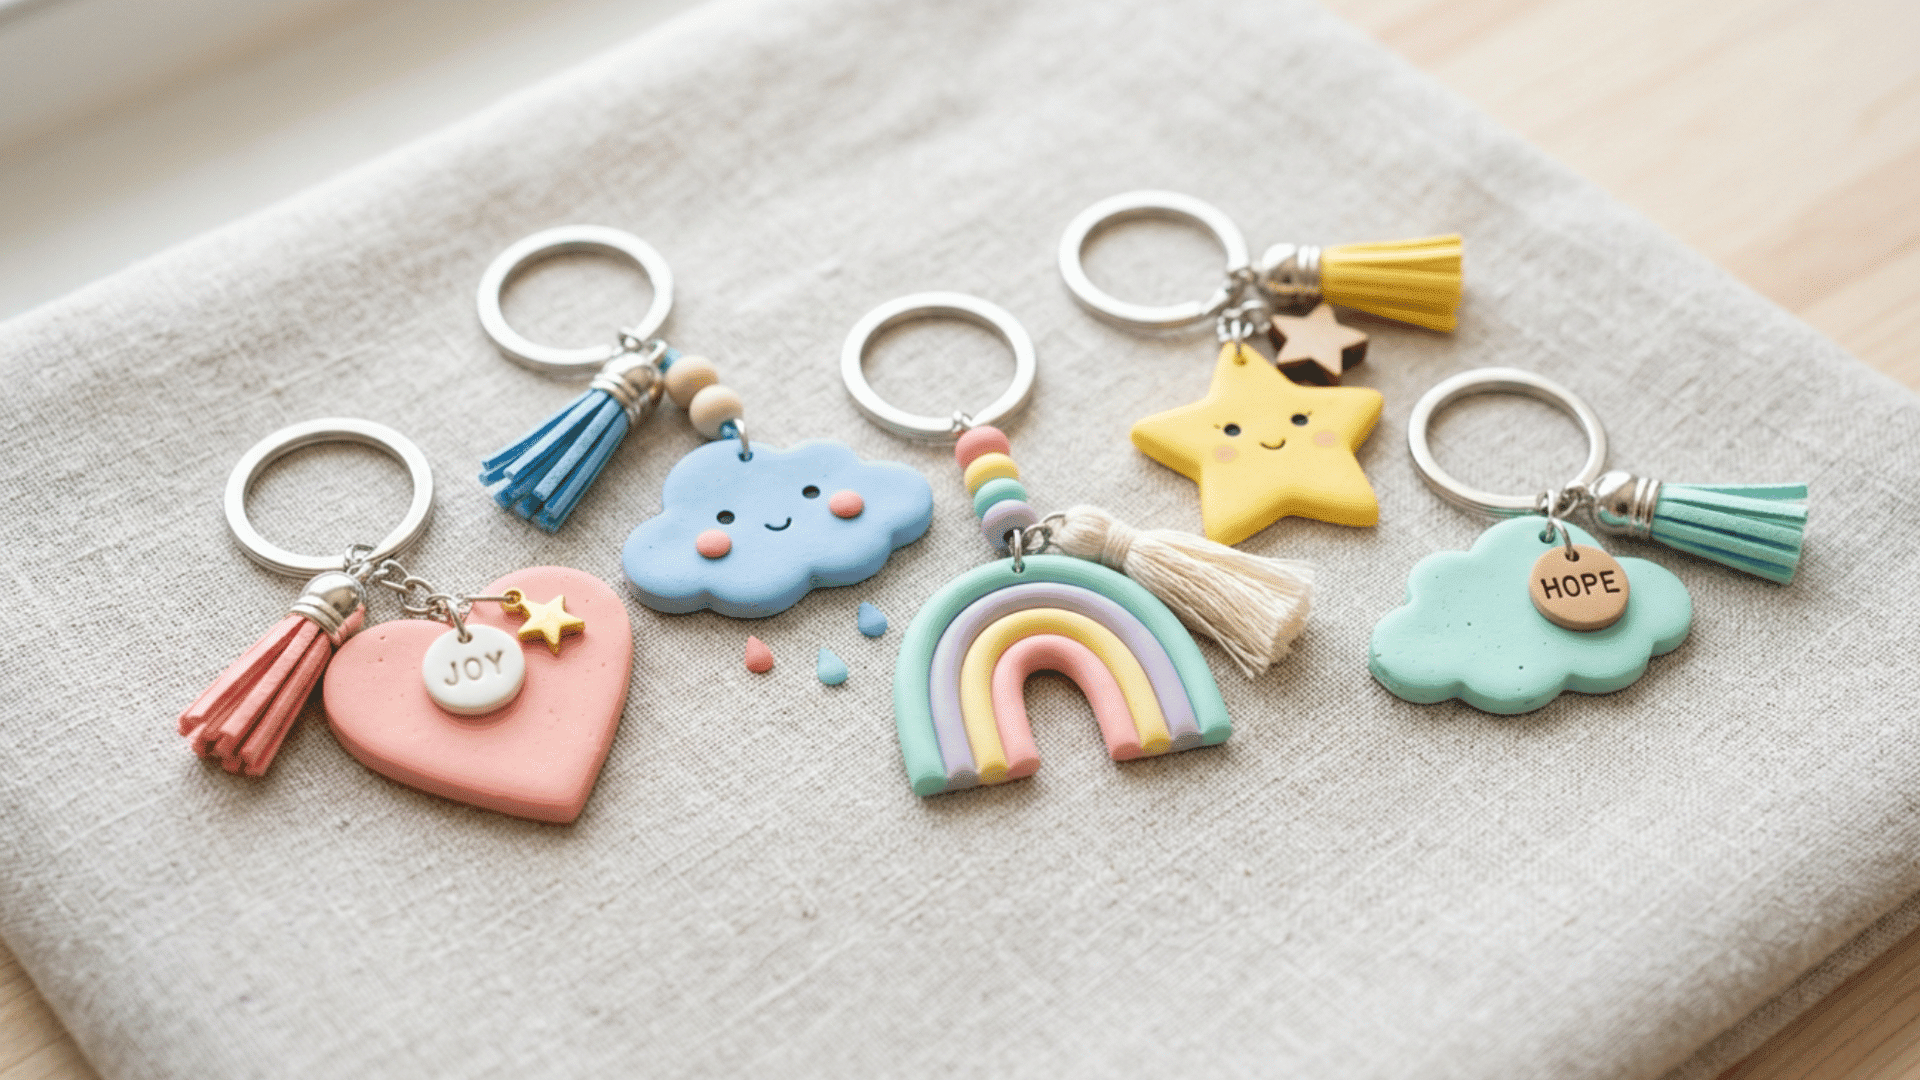
Clay keychains are adorable, lightweight accessories you can shape into any design, such as initials, animals, fruits, or abstract shapes. Air-dry clay makes this a no-bake project.
- Time Required: 1 hour (plus 24 hours drying time)
- Materials to Gather: Air-dry clay, rolling pin, cookie cutter or craft knife, toothpick or straw, acrylic paint, sealant, keyring hardware
How to Make It:
- Roll out the clay to about 5mm thickness, cut your desired shape, and use a toothpick to create a clean hole near the top.
- Allow to air-dry for 24 to 48 hours, then paint with acrylic paint and seal with varnish.
- Attach the keyring hardware through the hole once fully dry.
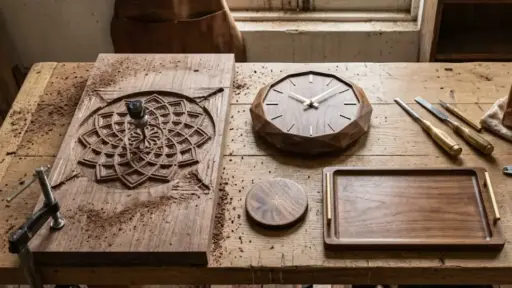
16. Wooden Name Signs
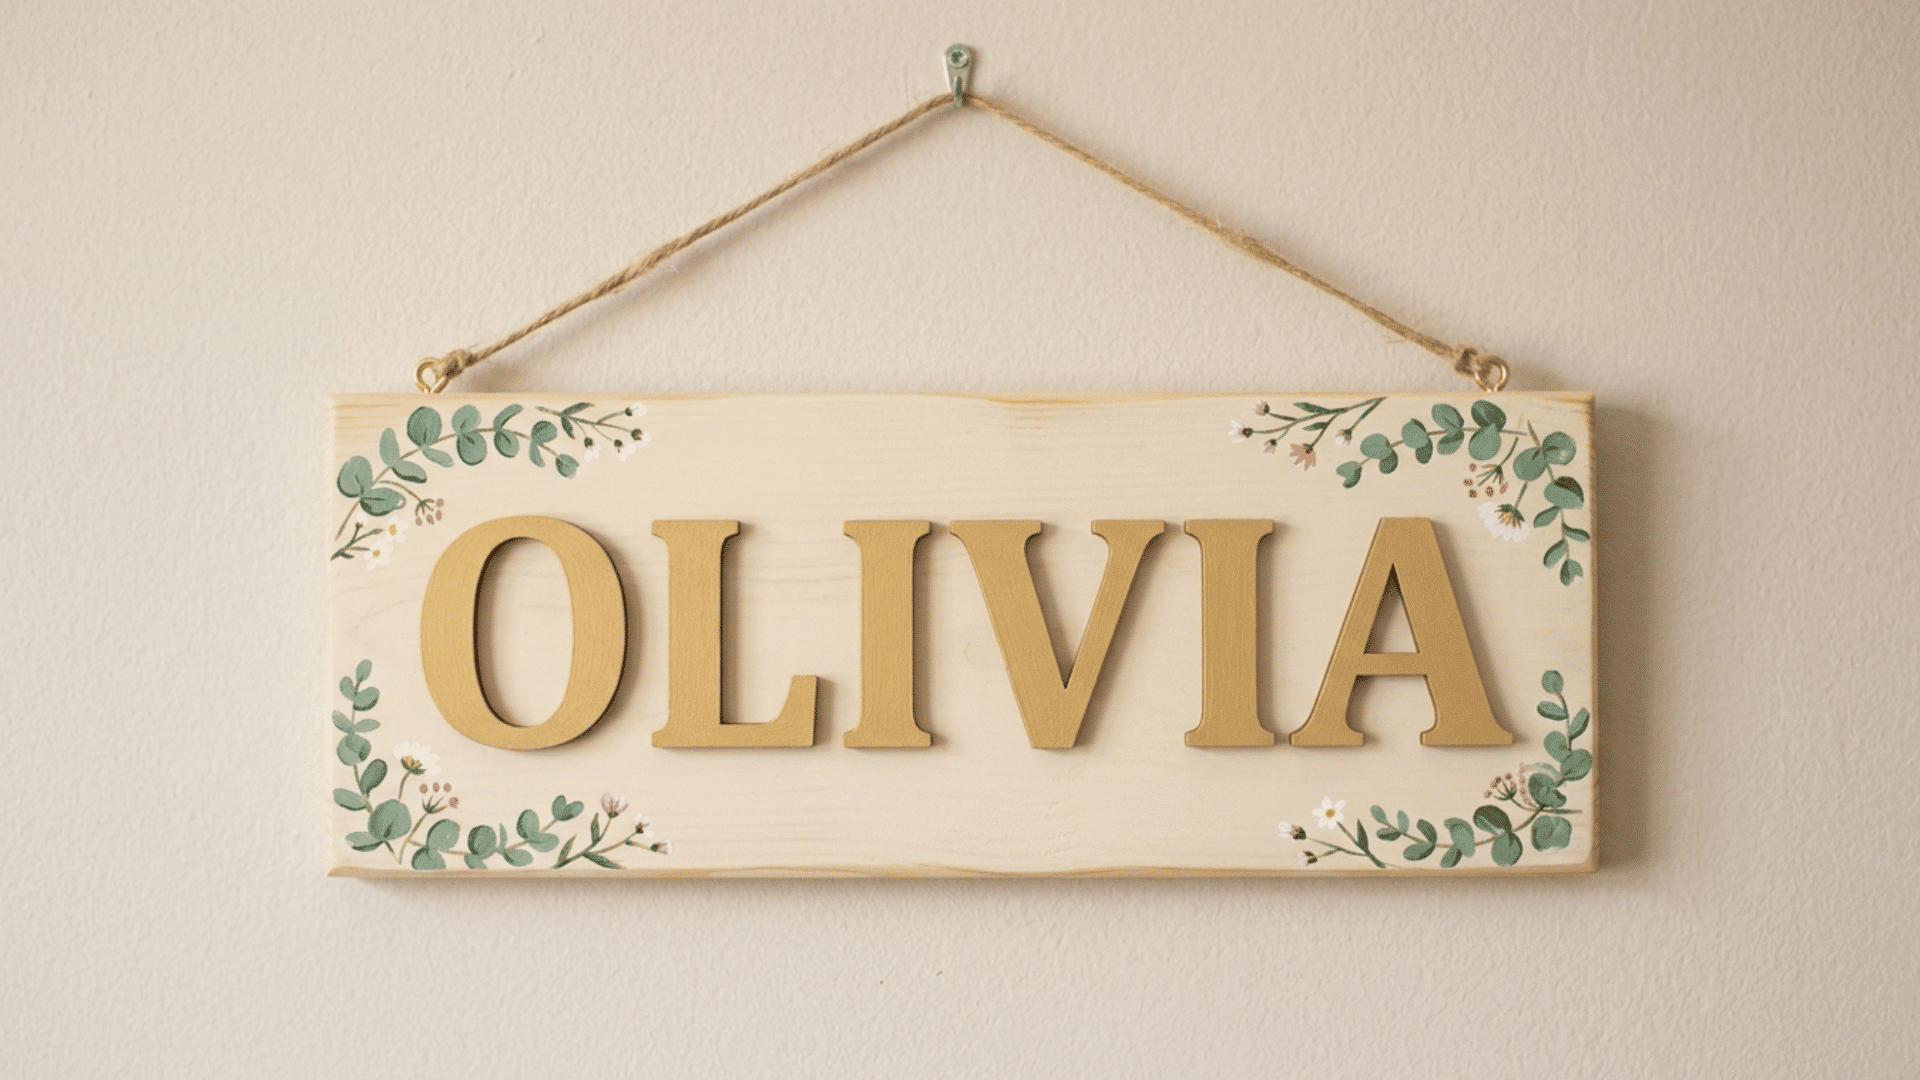
Personalized wooden name signs make beautiful decorations for nurseries, bedrooms, or front doors. They are a heartfelt, professional-looking craft with minimal effort.
- Time Required: 1 to 2 hours (plus drying time)
- Materials to Gather: Wooden letters or plank, sandpaper, acrylic paint, paintbrush, stencils or vinyl lettering (optional), wood glue (if using individual letters), hanger or ribbon
How to Make It:
- Sand all wooden surfaces until smooth, wipe off dust, then paint in your chosen base color and allow to dry.
- Add decorative details, such as florals, patterns, or contrasting colors, using a fine brush or a stencil.
- Attach letters to a backing if needed, then add a hanger, ribbon, or adhesive strips to the back.
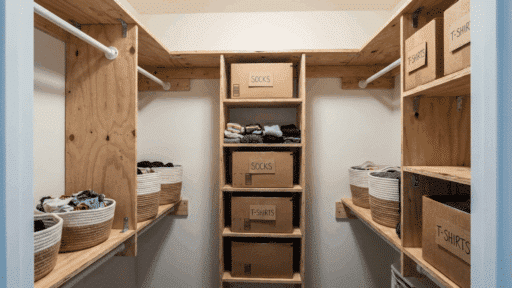
17. DIY Storage Boxes
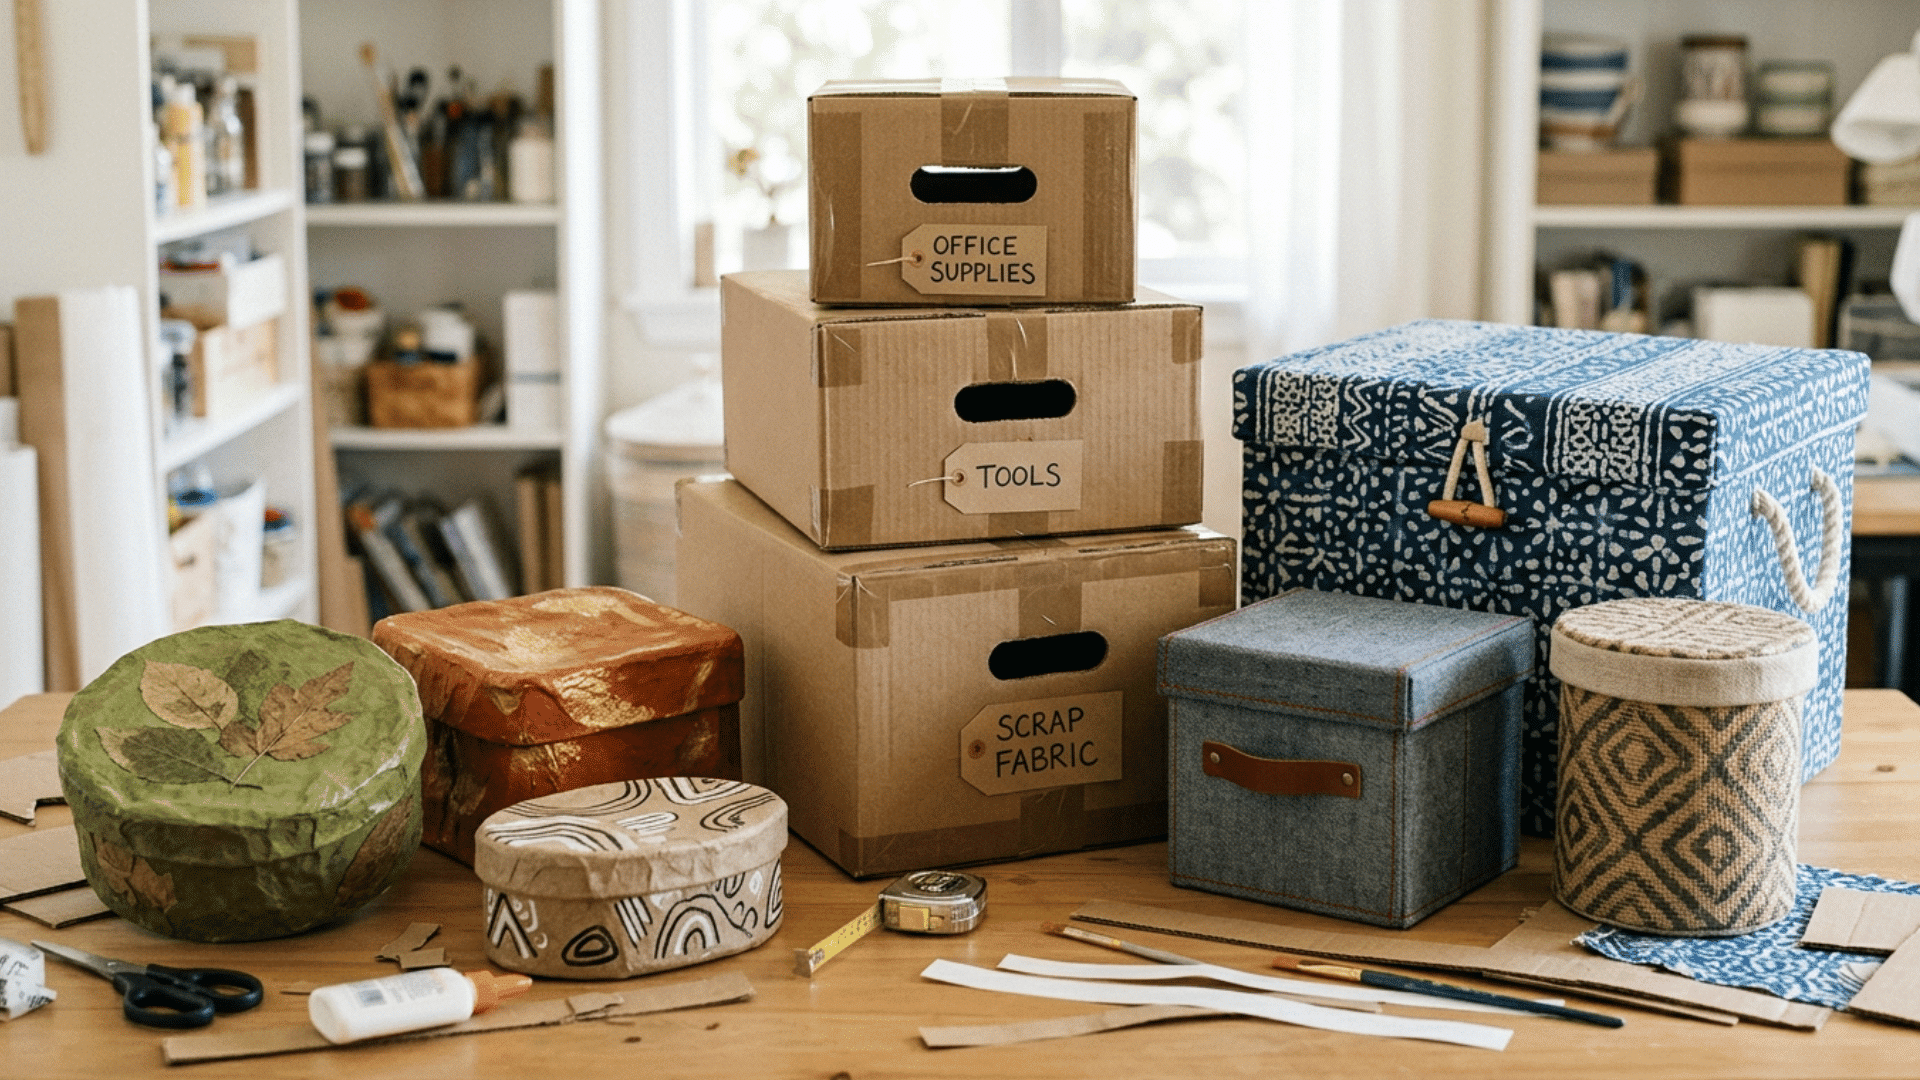
Homemade storage boxes are both practical and decorative, letting you organize your space in style. Use cardboard, fabric, or papier-mache to create boxes in any size you need.
- Time Required: 1 to 2 hours
- Materials to Gather: Cardboard or wooden crate, fabric or decorative paper, Mod Podge or glue, scissors, ruler, brush, ribbon or rope handles (optional)
How to Make It:
- Cut cardboard to size and assemble the box shape, securing corners with strong glue or tape.
- Cover the outside and inside with fabric or decorative paper using Mod Podge, smoothing out air bubbles as you go.
- Apply a sealing coat of Mod Podge, allow to cure fully, then attach rope or ribbon handles if desired.
18. DIY Hoop Earrings With Beads
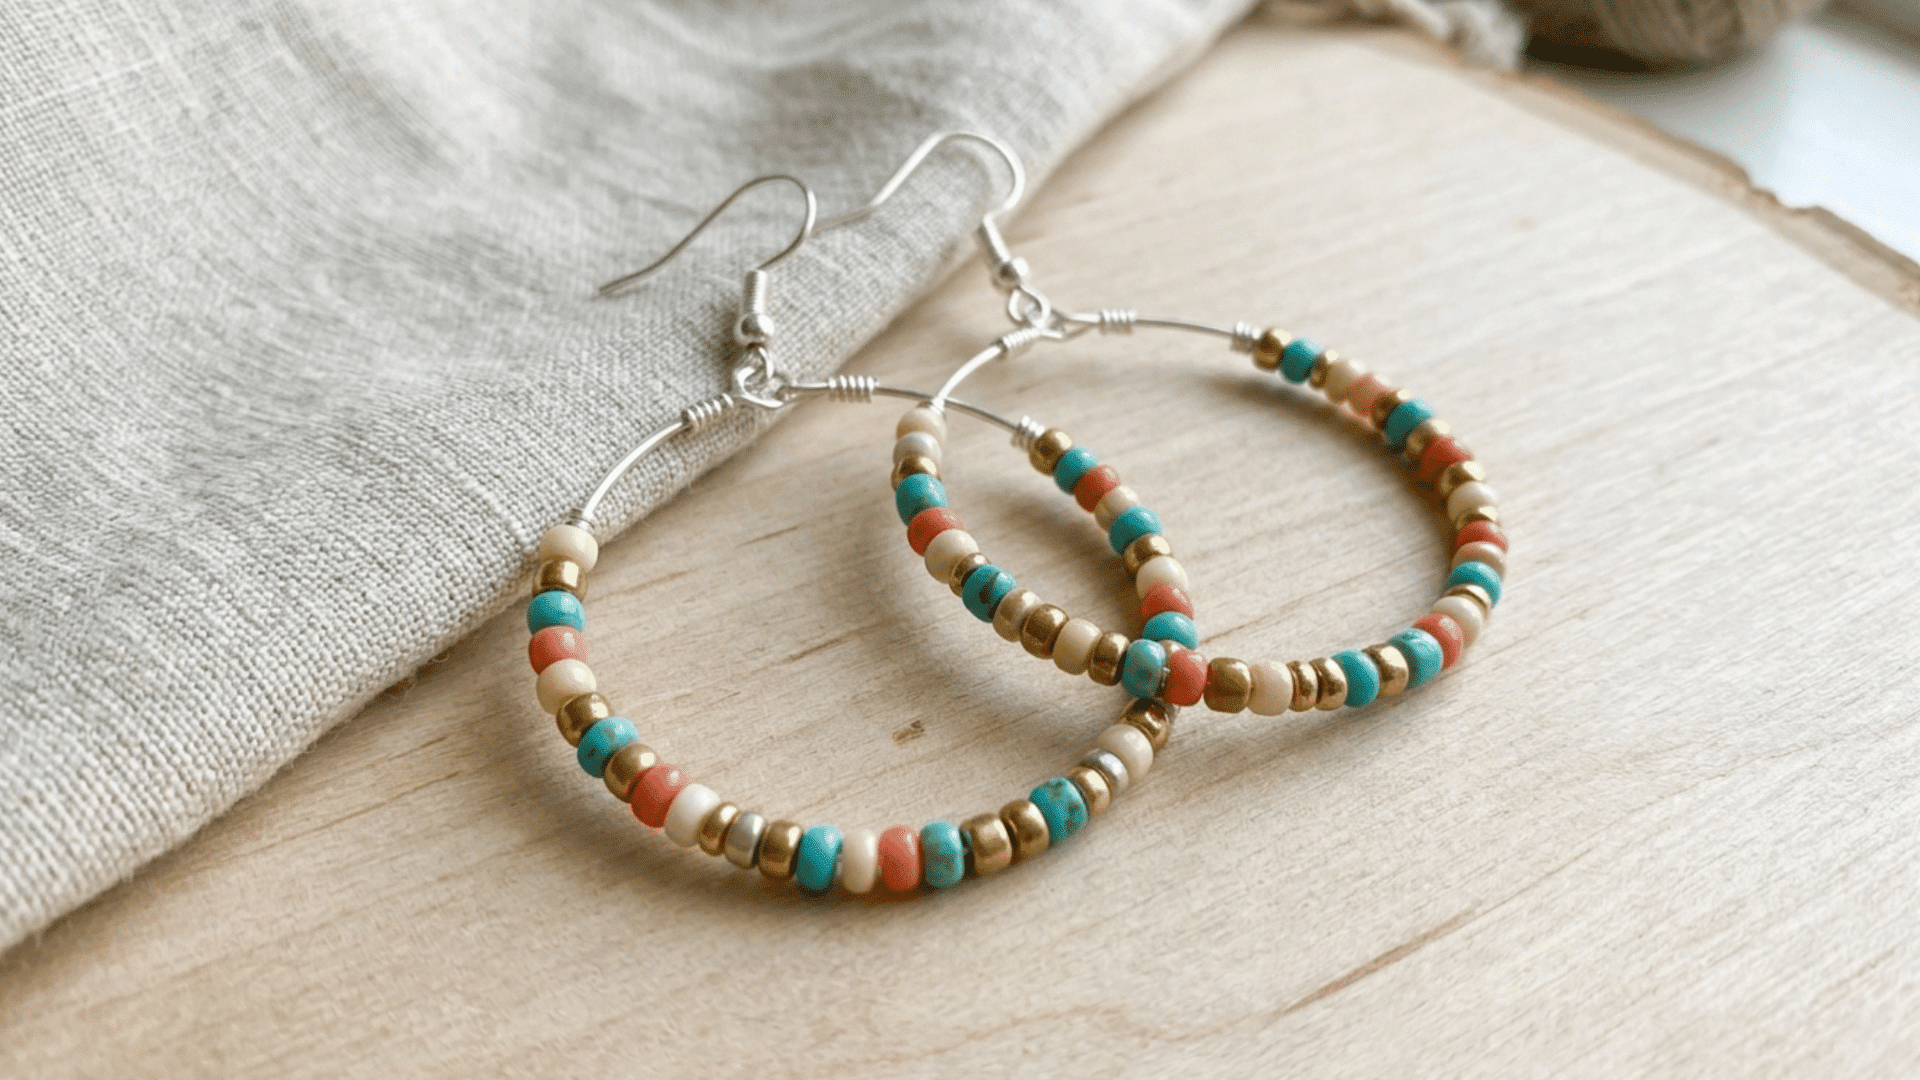
Hoop earrings are simple to make and easy to customize with colors and patterns you like. This is one of those craft ideas for adults that turns basic supplies into stylish stuff to make and wear.
- Time Required: 20 to 30 minutes
- Materials to Gather: Thin jewelry wire or ready-made hoops, assorted beads, pliers, wire cutter, earring hooks (if making from scratch)
How to Make It:
- Cut a piece of wire and shape it into a hoop, or use ready-made hoops for an easier option.
- Slide beads onto the hoop in your preferred pattern, mixing colors and sizes for a unique look.
- Secure the ends tightly using pliers so the beads stay in place.
- Attach earring hooks if needed, and your DIY hoop earrings are ready to wear.
19. Terrarium Making
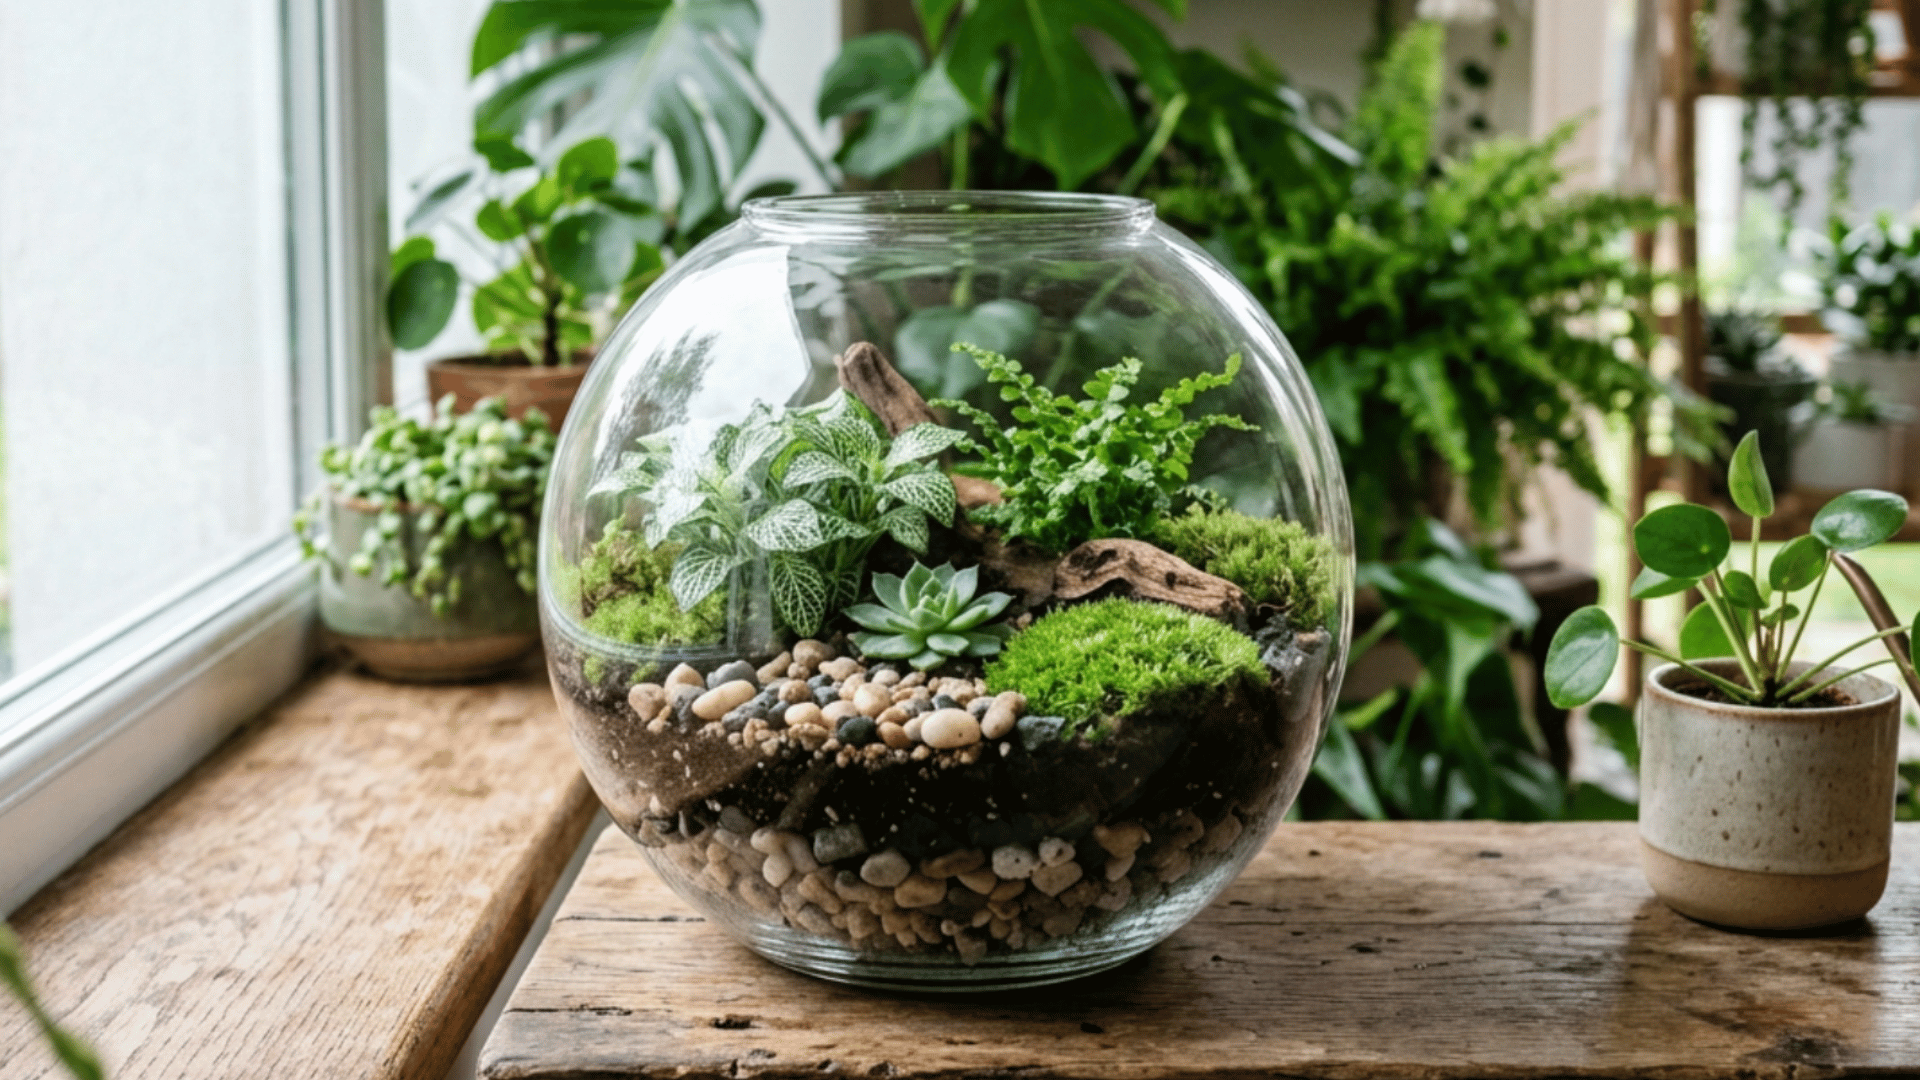
Terrariums are miniature ecosystems enclosed in glass that bring the beauty of nature indoors. They are low-maintenance and endlessly versatile, from mossy woodland scenes to desert cactus gardens.
- Time Required: 1 to 2 hours
- Materials to Gather: Glass container (jar, bowl, or geometric vessel), gravel, activated charcoal, potting soil, small plants or succulents, moss, decorative pebbles, tweezers or chopsticks for placement
How to Make It:
- Add a 2-3 cm layer of gravel to the bottom, then a thin layer of activated charcoal, and finally a generous layer of potting soil.
- Plant your chosen plants using tweezers, pressing roots firmly into the soil.
- Fill gaps with moss, pebbles, or miniature decorative items and mist lightly with water.
20. DIY Jewelry Organizers

A handmade jewelry organizer keeps your accessories tidy and turns them into a decorative display. From framed mesh to painted corkboards, there are easy options for every style.
- Time Required: 1 to 2 hours
- Materials to Gather: Picture frame, wire mesh or corkboard, staple gun or small nails, small hooks, paint, sandpaper, pliers
How to Make It:
- Remove the glass and backing from a picture frame, paint the frame in your chosen color, and allow it to dry.
- Cut wire mesh to fit the frame opening, secure it tightly with a staple gun or small nails, and attach small hooks along the wire for hanging accessories.
- Mount on the wall using D-ring hangers on the back of the frame.
21. Painted Canvas Art
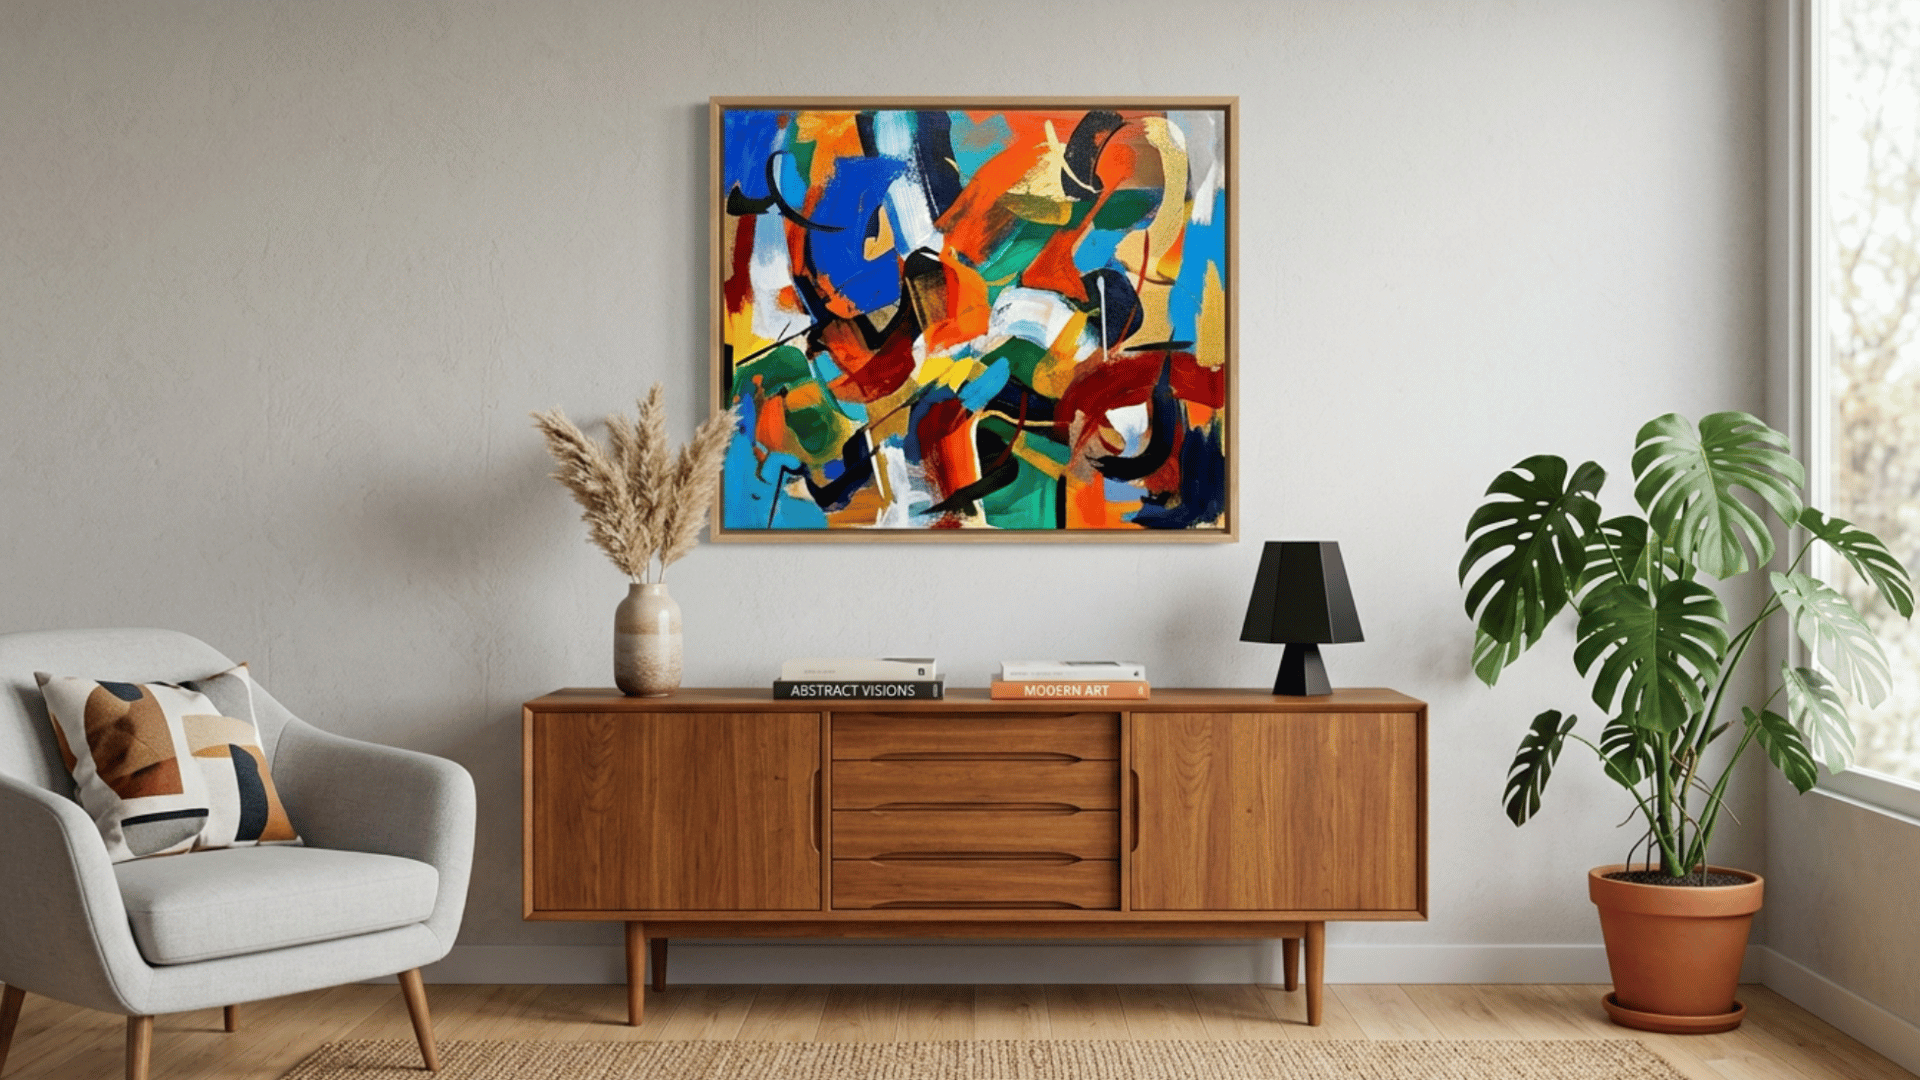
Painted canvas art lets you create bold, personalized pieces that perfectly suit your space. Abstract painting, geometric shapes, and color wash techniques all look stunning even without prior experience.
- Time Required: 1 to 3 hours (plus drying time)
- Materials to Gather: Blank stretched canvas, acrylic paints, paintbrushes in various sizes, palette, water jar, painter’s tape (optional), varnish
How to Make It:
- Sketch your composition lightly in pencil or dive straight in with paint for a more abstract result.
- Apply a base layer and build up colors and details using different brush sizes, using tape for clean geometric lines if desired.
- Allow to dry fully, then seal with a layer of varnish to protect and enhance the colors.
22. Decoupage Trinket Tray
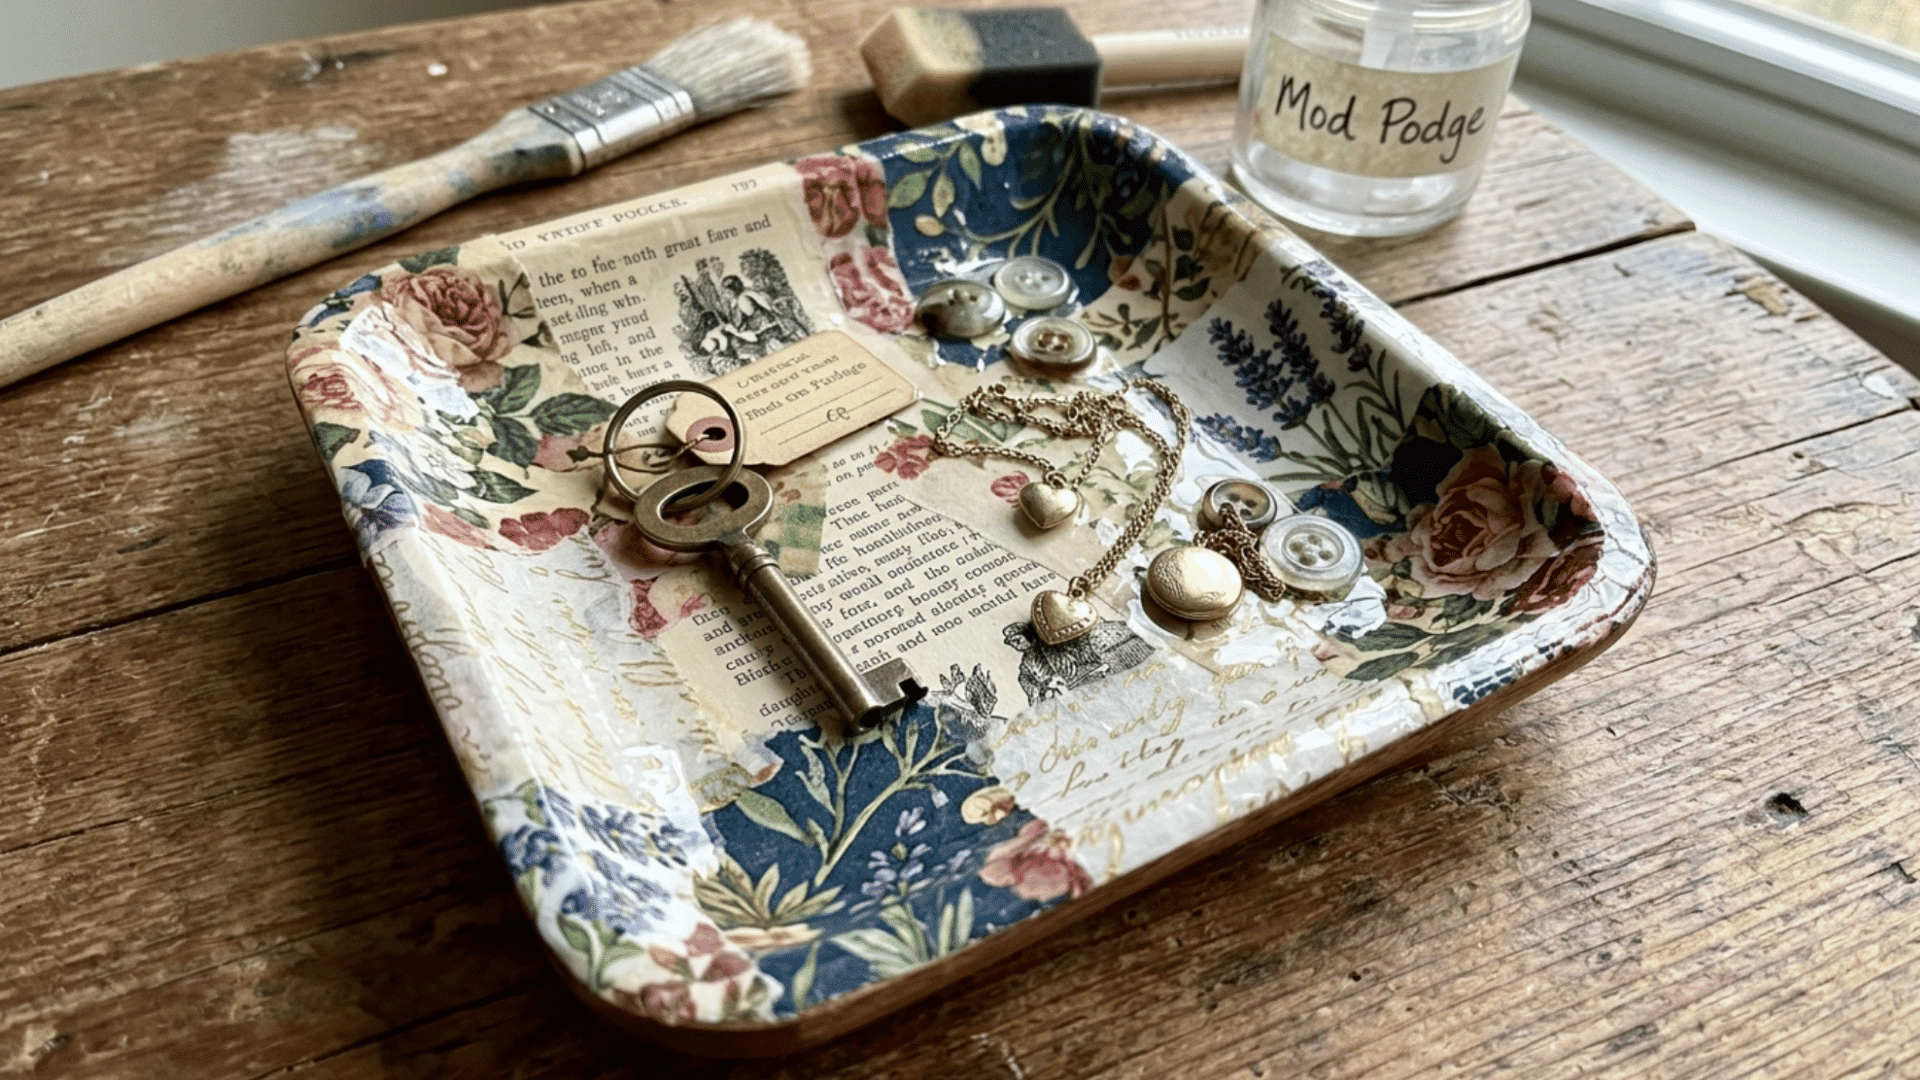
Take a plain wooden or ceramic tray and cover it with torn tissue paper, printed napkins, or book pages, layered with Mod Podge for a vintage, collage-style finish.
- Time Required: 45 to 60 minutes (plus drying time)
- Materials to Gather: Plain wooden or ceramic tray, tissue paper, printed napkins or book pages, Mod Podge, paintbrush, scissors, and clear sealant
How to Make It:
- Tear your chosen paper into irregular pieces and arrange them loosely on the tray before committing to placement.
- Brush a layer of Mod Podge onto a small section of the tray, press the paper pieces down, then brush another layer of Mod Podge on top. Repeat until the tray is fully covered.
- Allow to dry completely, then apply two finishing coats of sealant for a smooth, durable surface.
23. Bottle Cap Magnets
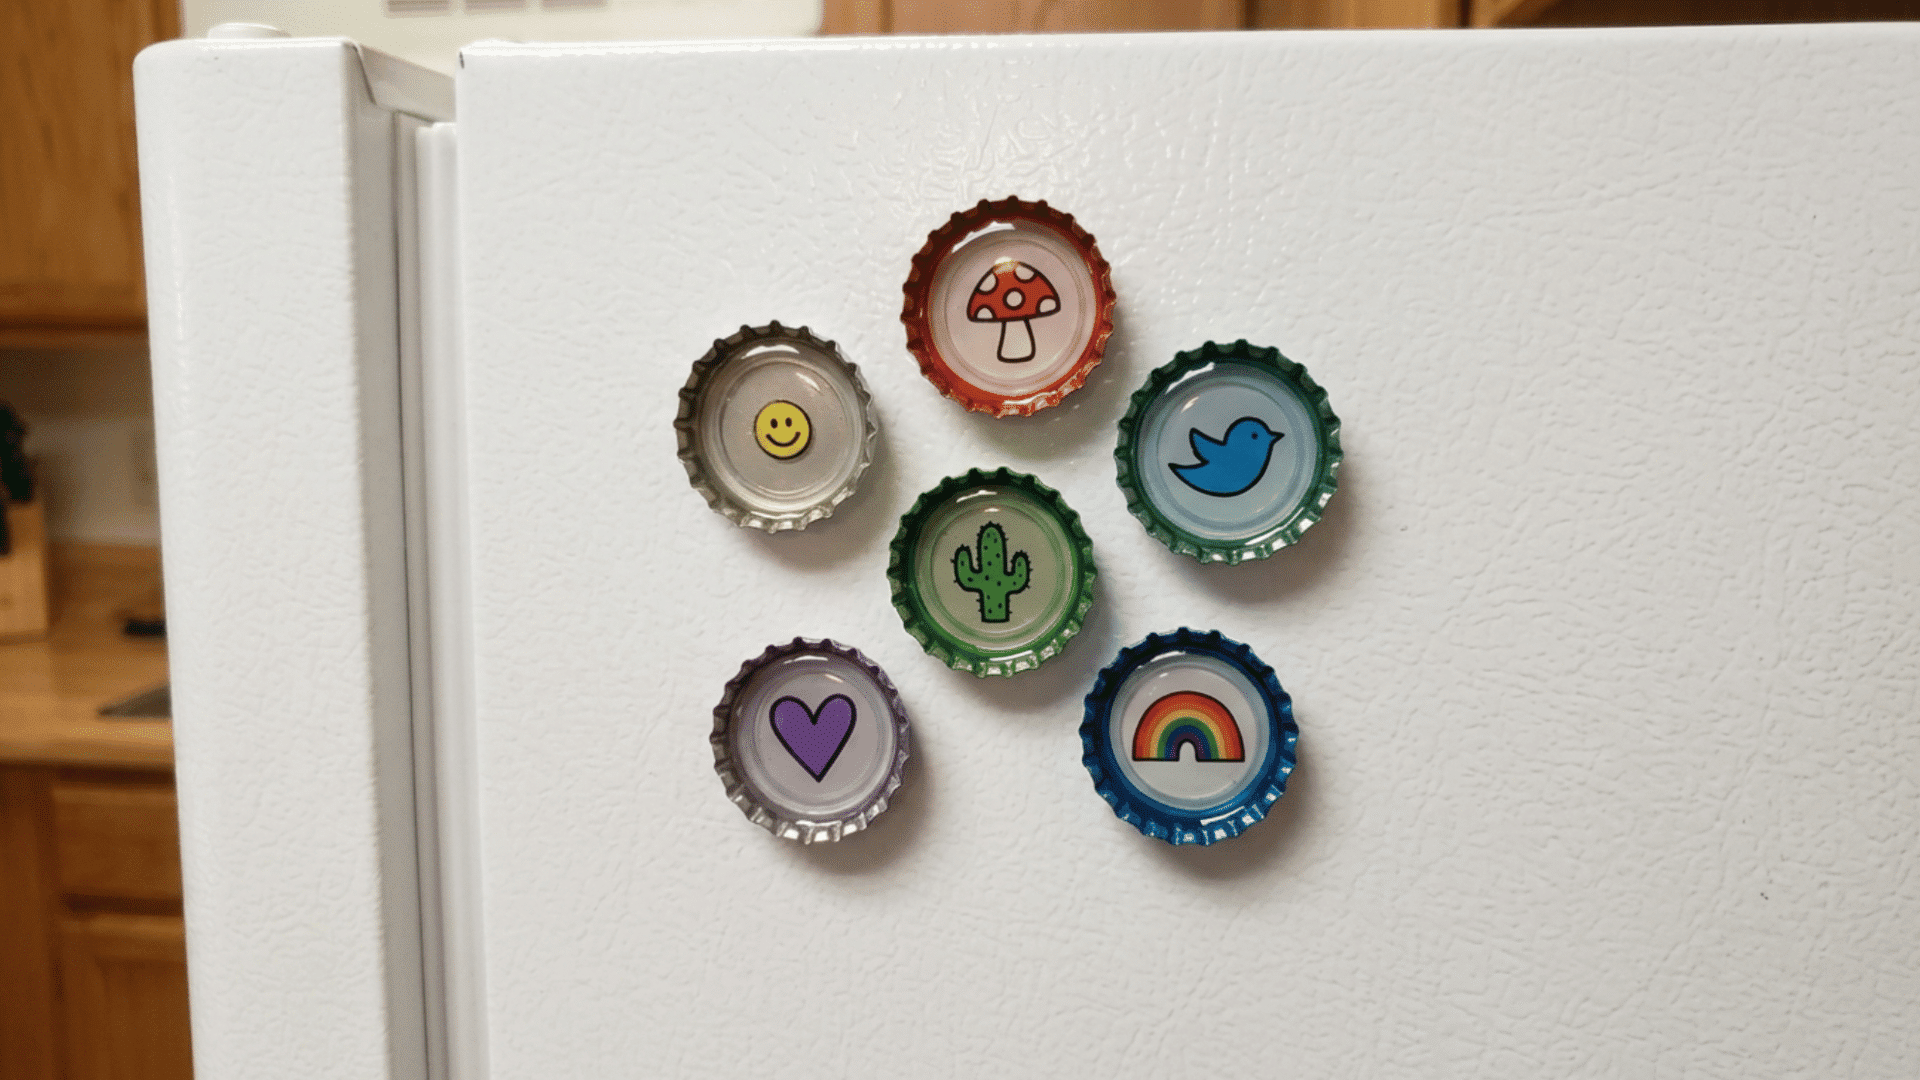
Bottle cap magnets are tiny, cheerful crafts that turn a recycled item into a functional fridge or magnetic board decoration. Fill them with pictures, resin, or small illustrations for a personalized touch.
- Time Required: 30 to 45 minutes (plus resin curing time if used)
- Materials to Gather: Metal bottle caps, strong adhesive magnets, small circular photos or printed images, clear resin or dimensional glaze, scissors, glue
How to Make It:
- Cut your chosen images into circles to fit inside the bottle caps and glue them in place.
- Pour a small amount of clear resin or dimensional glaze over the top and allow to cure fully (12 to 24 hours).
- Glue a strong magnet to the back of each cap once the front has fully set.
24. Old T-Shirt Tote Bags
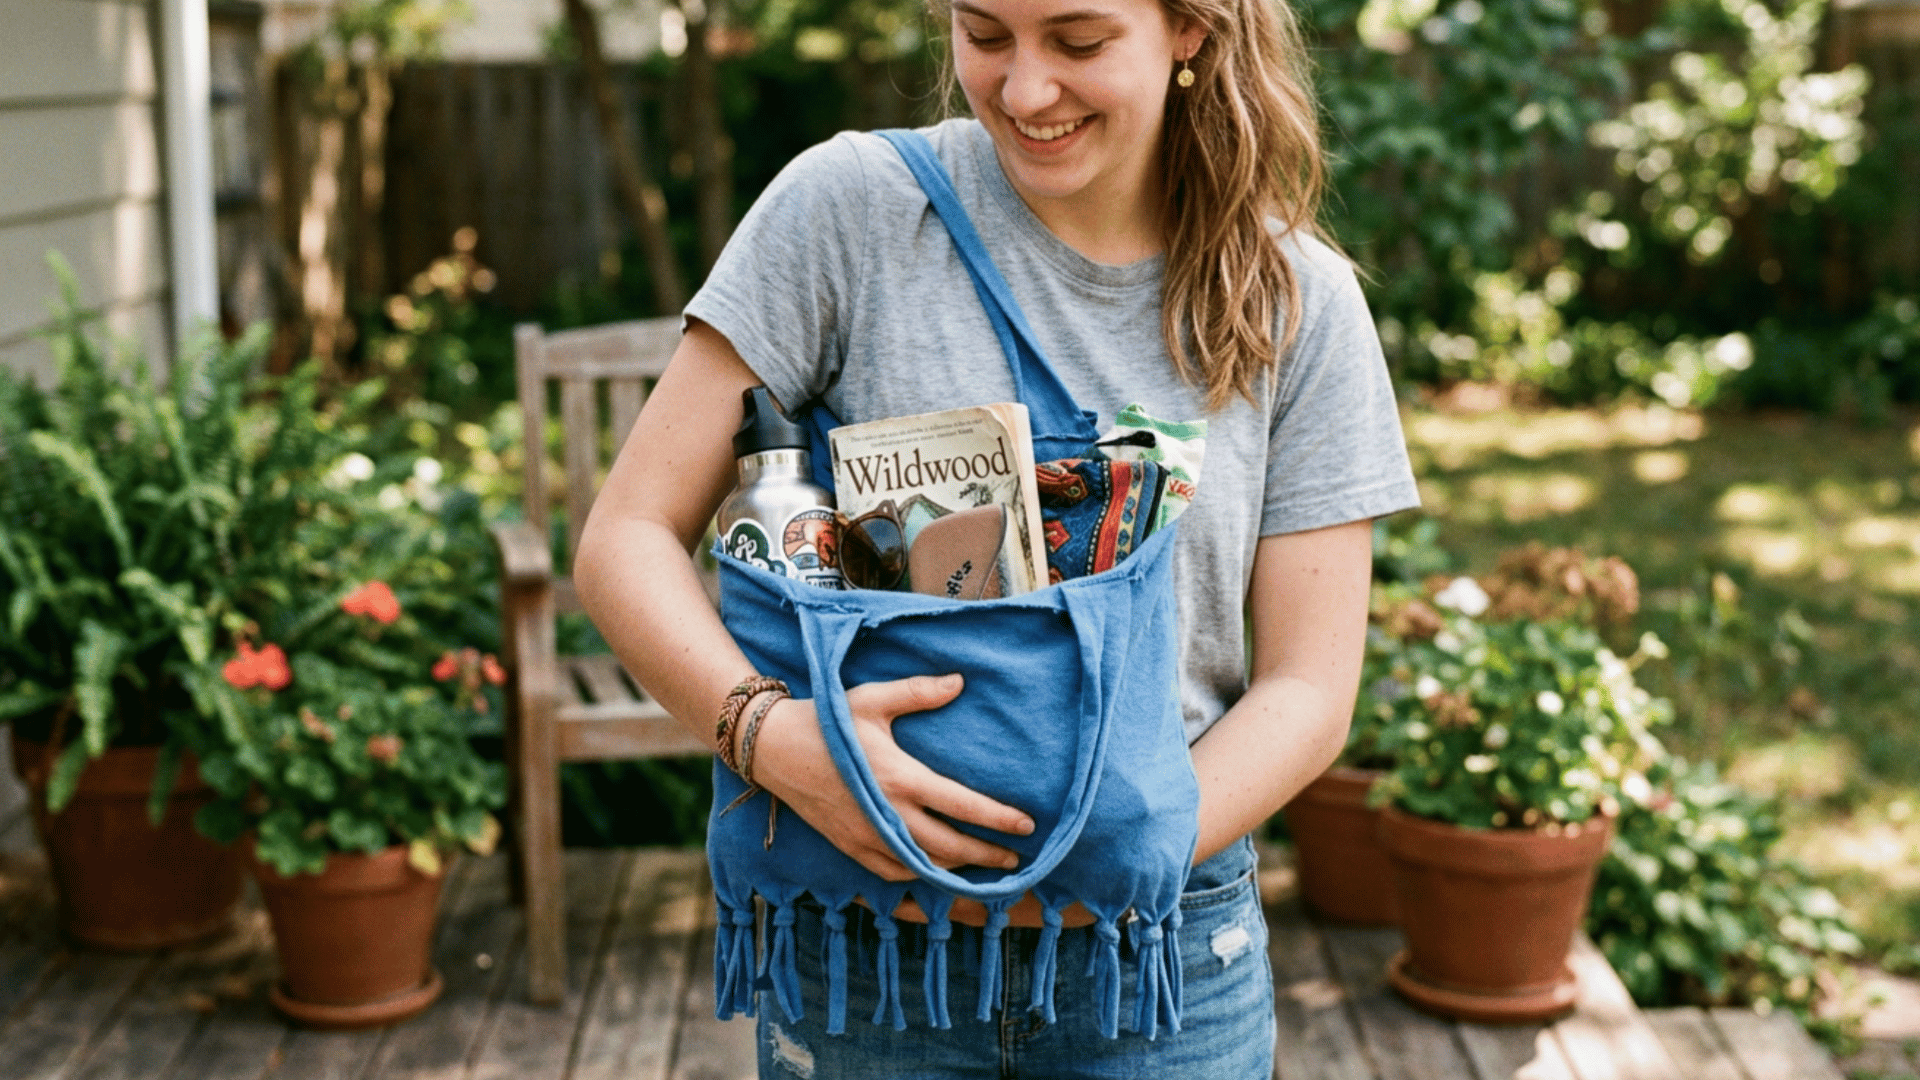
Turning an old T-shirt into a tote bag requires no sewing and takes under 20 minutes, making it a perfect, quick beginner craft project. The result is a reusable bag with built-in color and character.
- Time Required: 20 to 30 minutes
- Materials to Gather: Old T-shirt (large size), scissors, ruler, or chalk
How to Make It:
- Lay the T-shirt flat, cut off the sleeves, and cut a wider, rounded neckline to create the handles.
- Turn the shirt inside out and cut fringe strips about 2 cm wide along the bottom hem, roughly 8 cm deep. Tie each front strip to its matching back strip in a double knot to close the base.
- Turn the tote right-side out, and it’s ready to use.
25. Painted Flower Pots
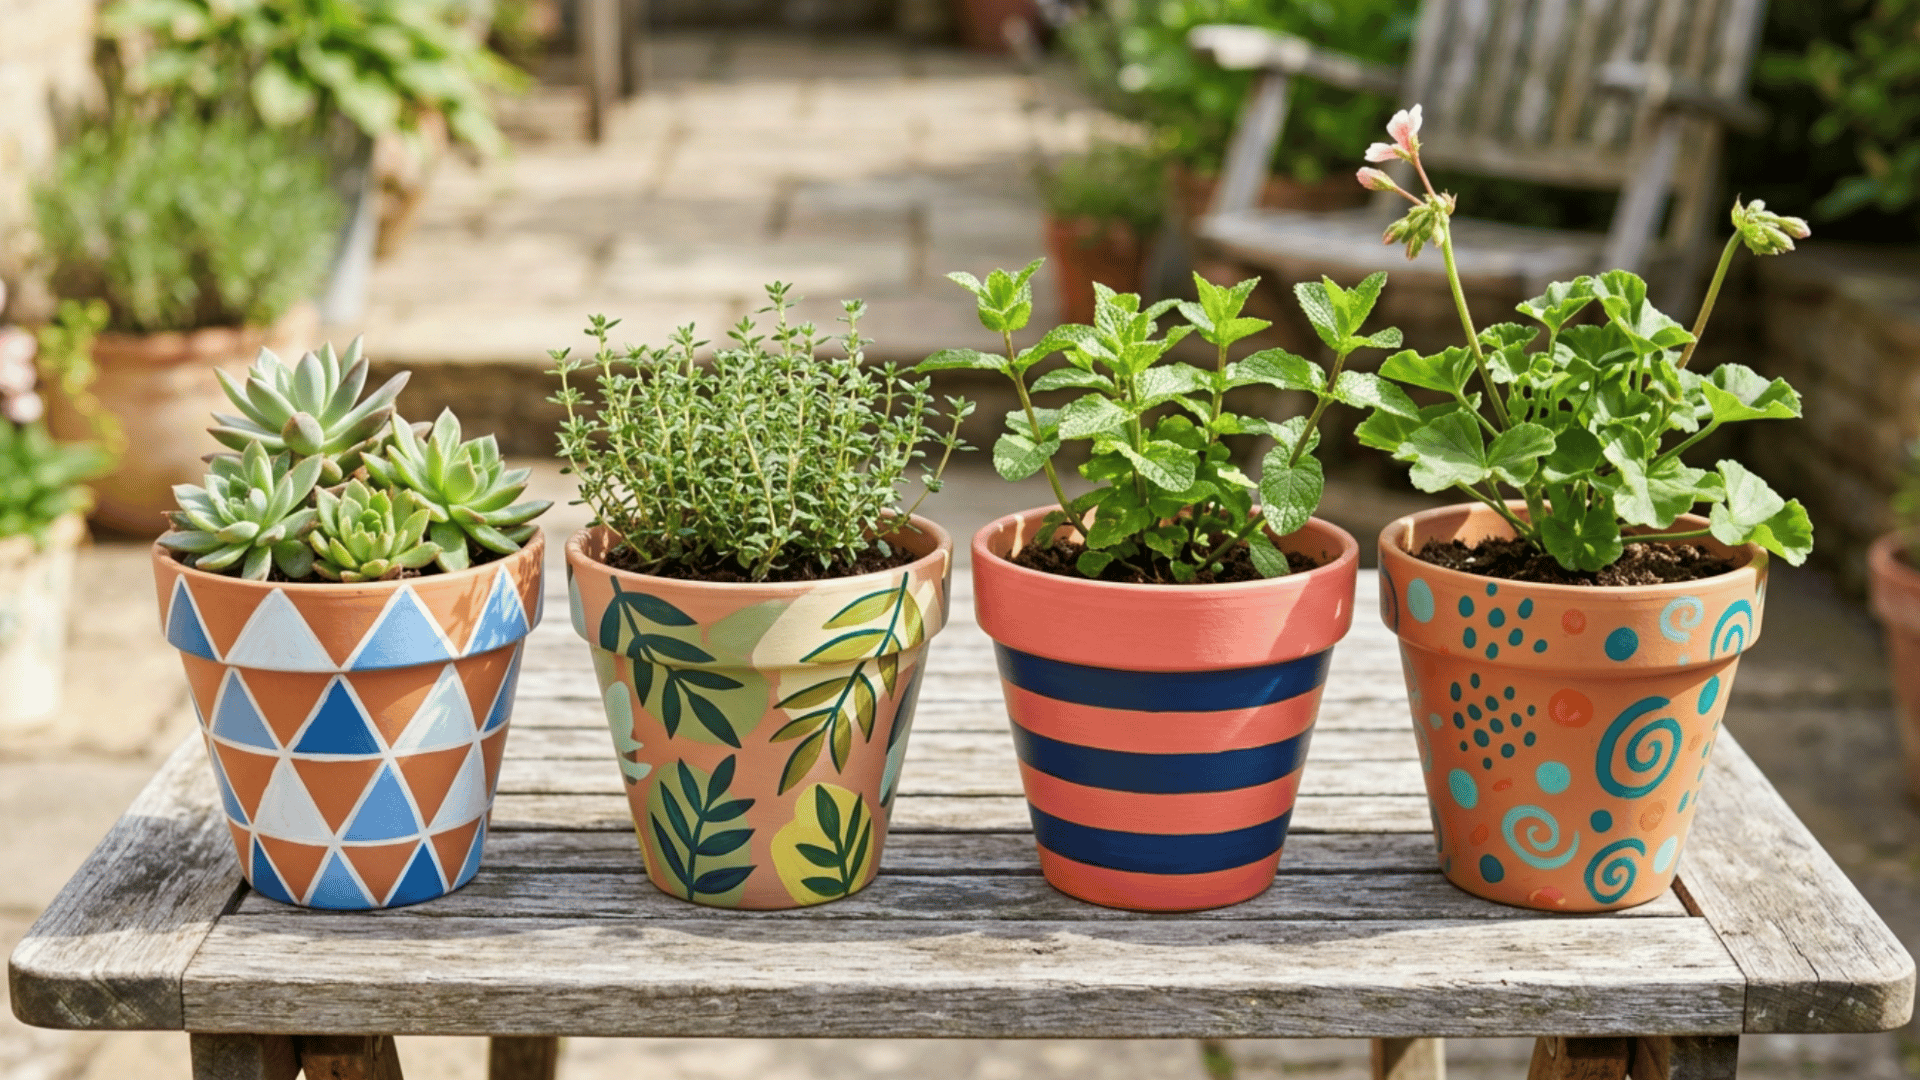
Plain terracotta pots become charming statement pieces with just a few coats of paint and a bit of creative pattern-making. They are perfect for gifting or styling your own home and garden.
- Time Required: 1 hour (plus drying time)
- Materials to Gather: Terracotta flower pots, acrylic or outdoor paint, paintbrush, sealant or varnish, painter’s tape, sponge (optional for texture)
How to Make It:
- Clean and dry the pots, then apply a base coat and allow it to dry fully.
- Add your design using a fine brush or tape for stripes, geometric patterns, or freehand motifs, layering colors as desired.
- Seal the finished design with outdoor-safe varnish to protect it from weather and watering.
26. Resin Art Pieces
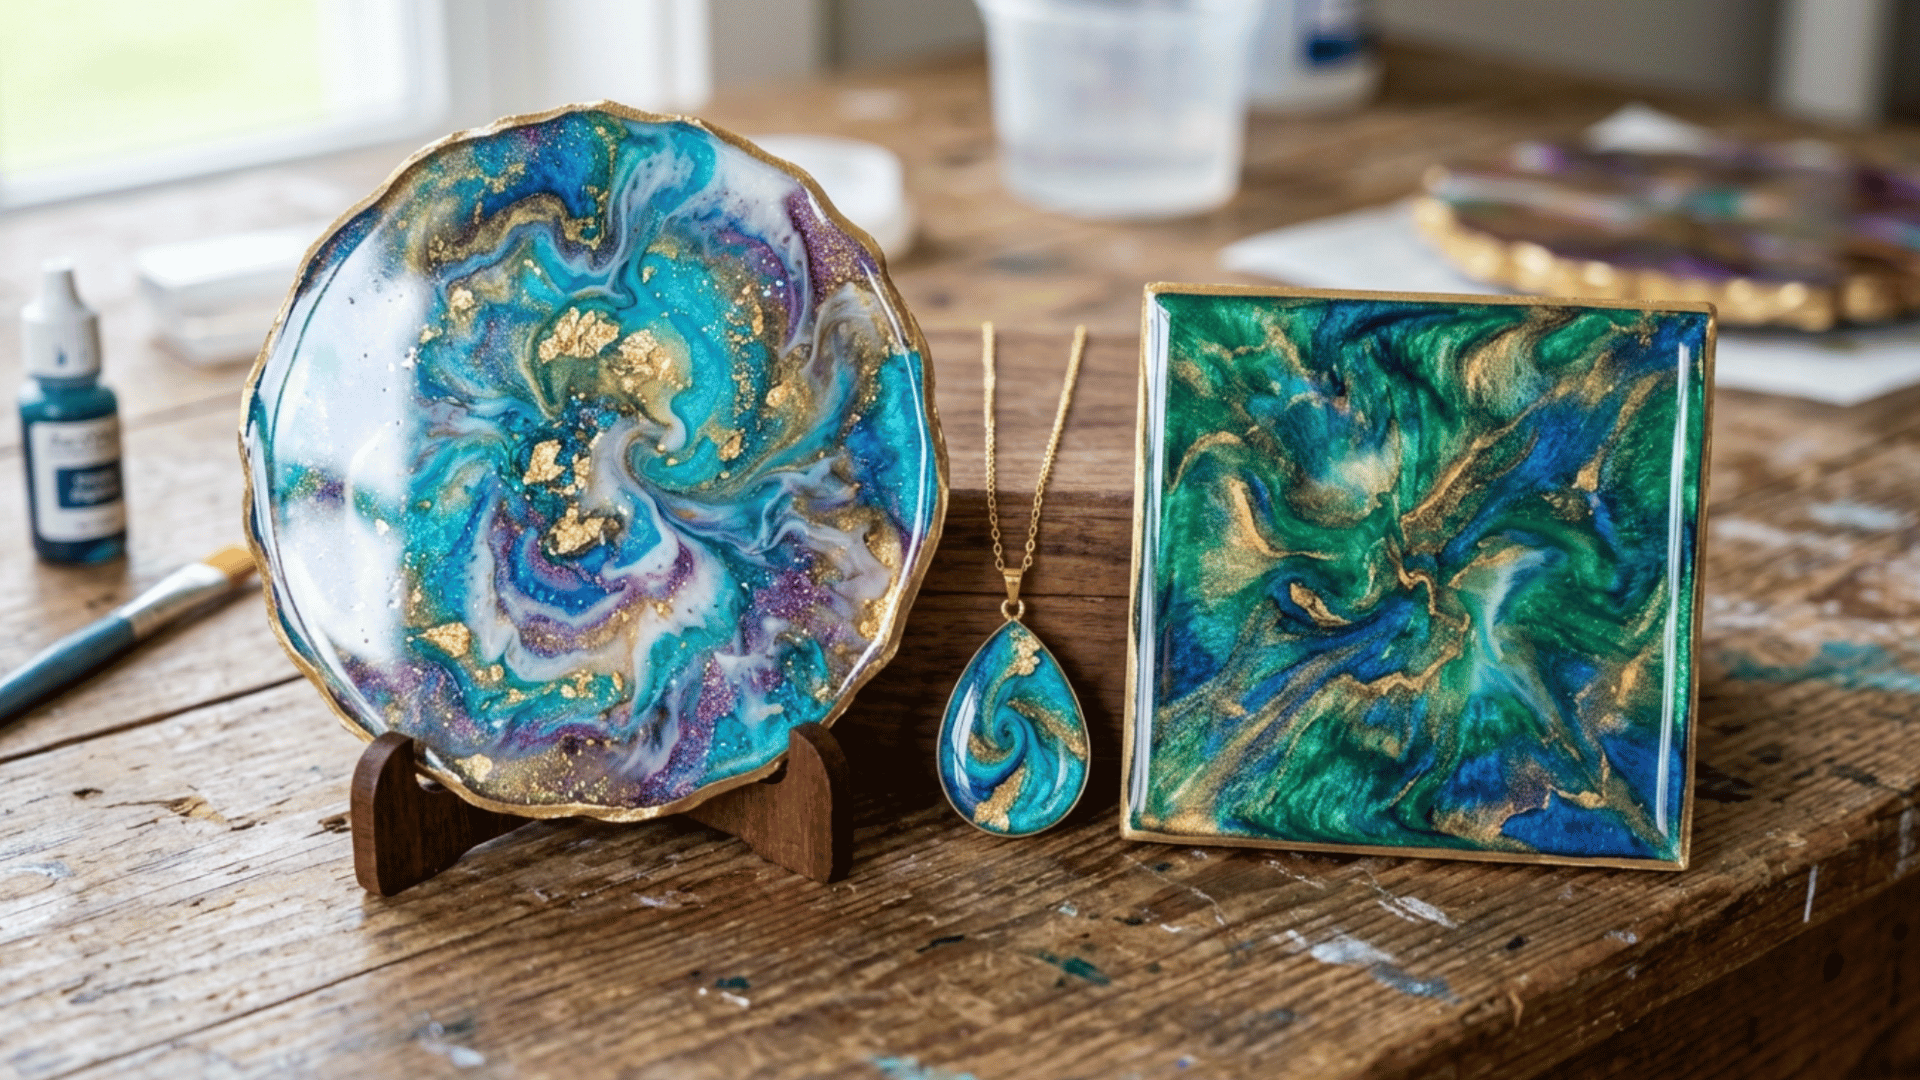
Resin art creates mesmerizing, glassy finished pieces with swirling colors and incredible depth. It can be poured into molds to make coasters, jewelry, or wall art.
- Time Required: 1 hour active (plus 24 to 72 hours curing)
- Materials to Gather: Two-part epoxy resin, resin pigments or alcohol inks, silicone molds or canvas, gloves, mixing cups and sticks, heat gun or torch, protective mat
How to Make It:
- Mix the two resin components according to the manufacturer’s ratio, stirring slowly for 3 to 5 minutes.
- Divide into cups, add your chosen pigments or inks, then pour into your mould or onto a canvas. Use a heat gun or torch briefly to pop bubbles and encourage color blending.
- Cover loosely and leave to cure on a level surface for the recommended time before removing from the mould.
27. Pressed Flower Butterfly Frame
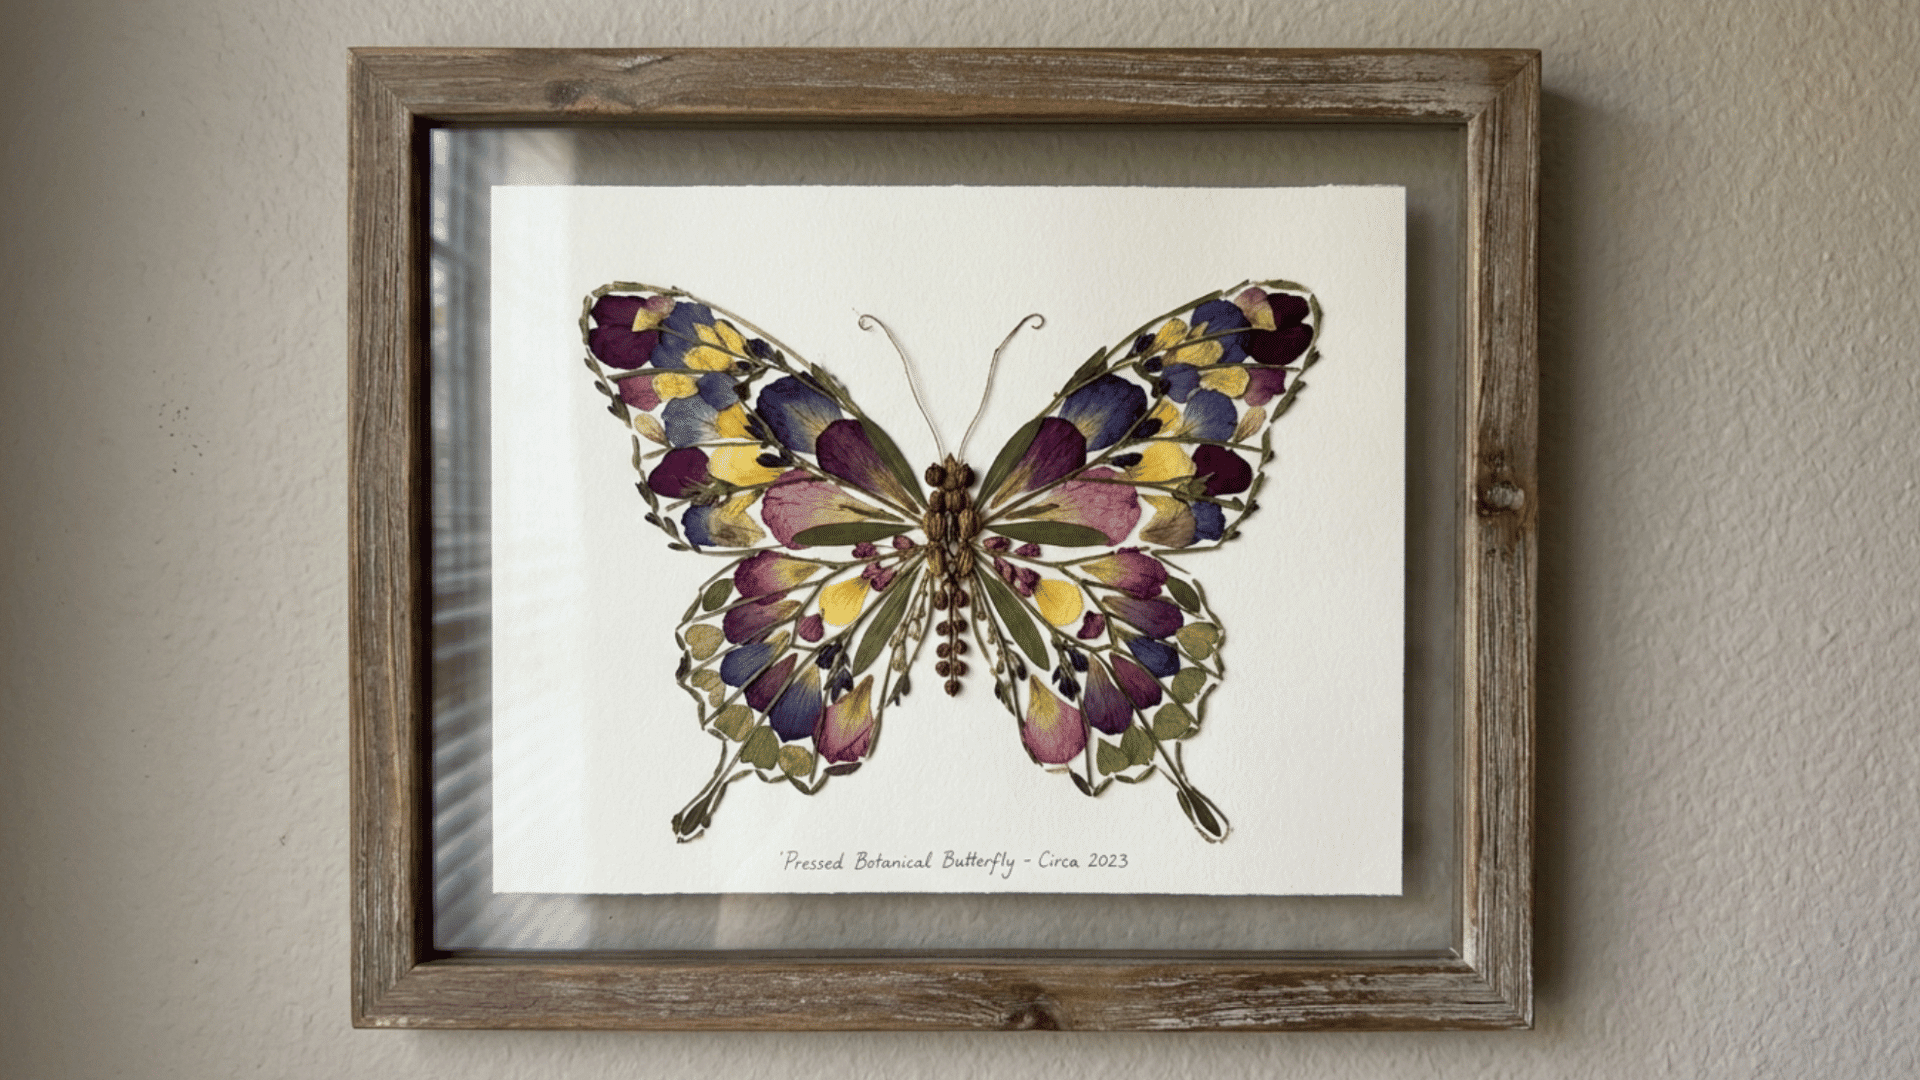
A pressed-flower butterfly frame combines the delicate beauty of botanical pressing with the art of creating a butterfly silhouette from real petals and leaves. The result looks like a piece from a natural history museum.
- Time Required: 1 to 2 hours (plus 2 weeks pressing time)
- Materials to Gather: Pressed flowers, leaves, and petals, white cardstock or watercolor paper, butterfly template, tweezers, PVA glue, fine brush, frame
How to Make It:
- Print or draw a butterfly outline on your cardstock as a placement guide.
- Using tweezers, arrange pressed petals and leaves within the butterfly wings, experimenting with color and texture before committing.
- Carefully glue each piece in place using a fine brush with diluted PVA glue, allow to dry fully, then frame behind glass.
28. Marble Painted Mason Jar
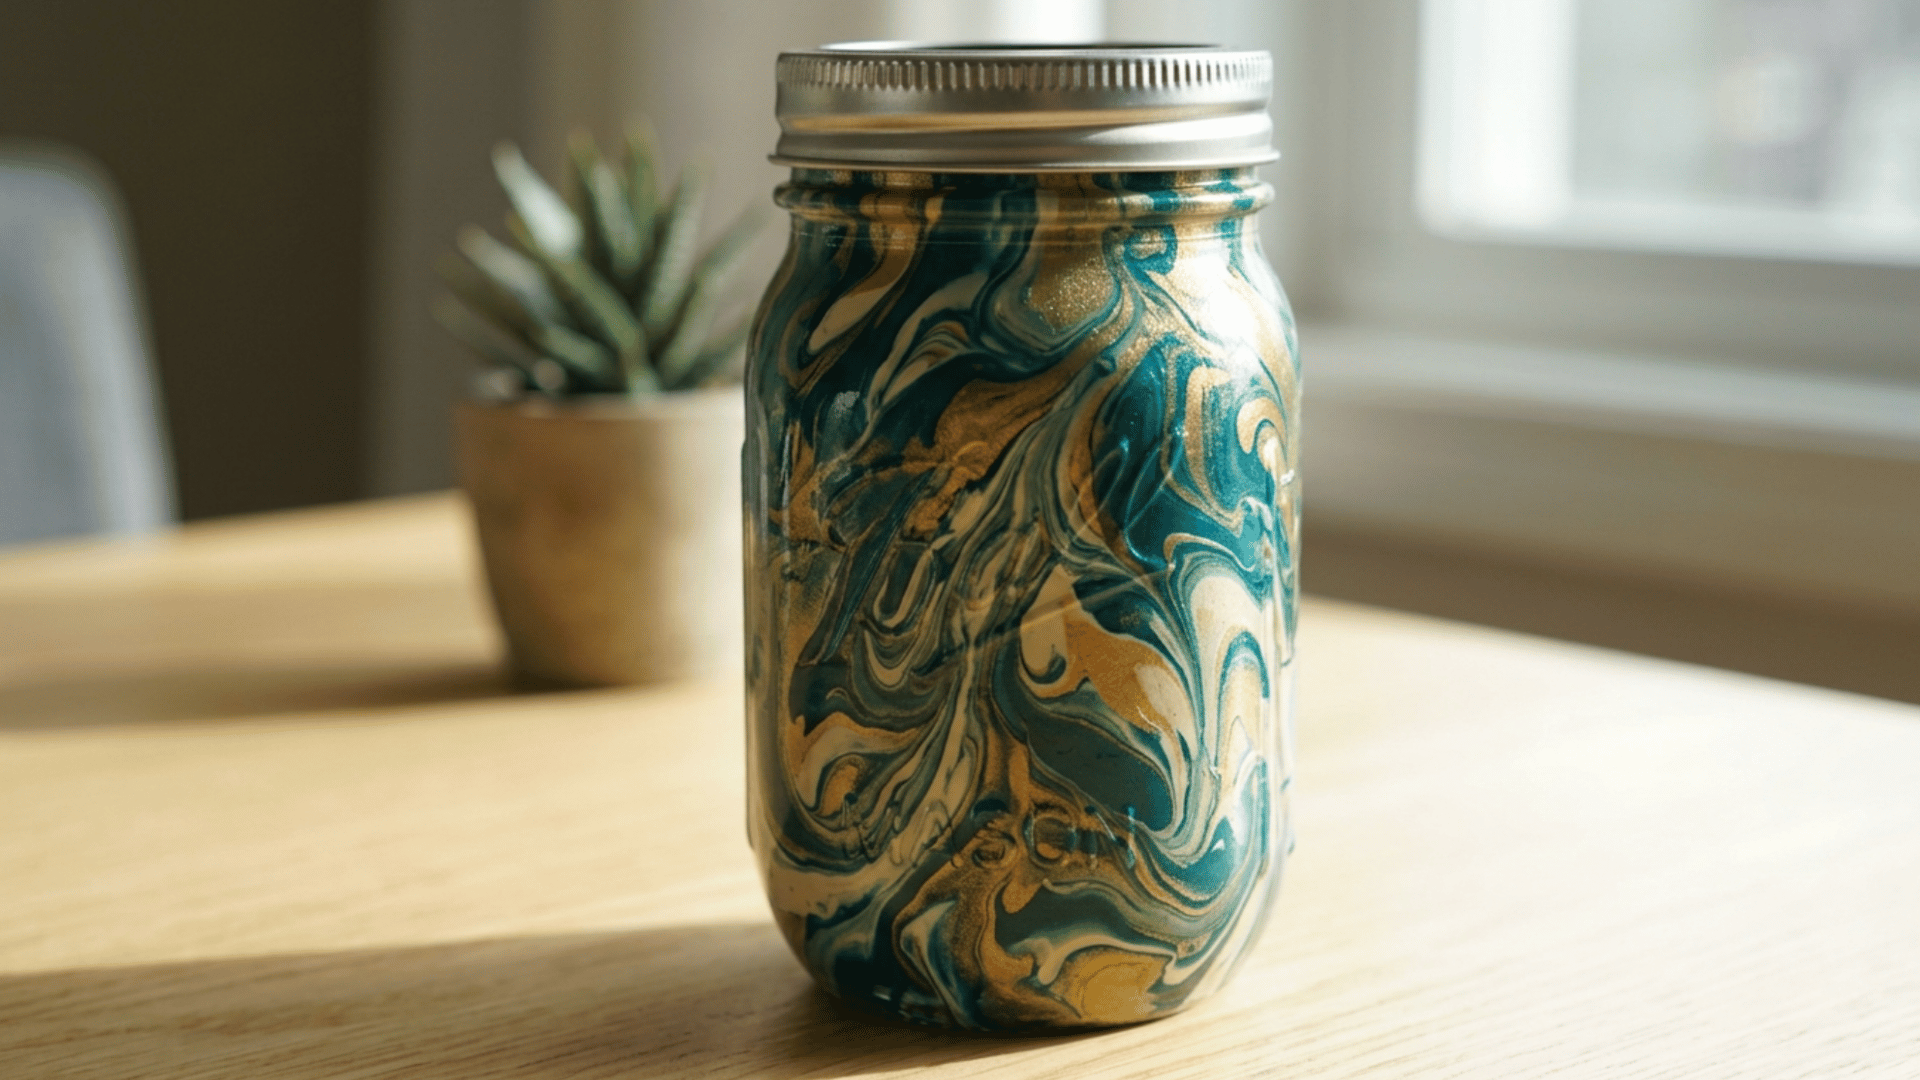
A marble-painted mason jar is a stunning decorative piece that looks far more complex than it actually is. Using just nail polish and water, you can achieve swirling, luxurious marble effects on any glass jar.
- Time Required: 30 to 45 minutes (plus drying time)
- Materials to Gather: Mason jar or glass jar, nail polish in 2 to 3 colors, a bowl of room temperature water, cocktail stick or toothpick, newspaper or protective mat, clear sealant
How to Make It:
- Fill a bowl with room temperature water and drop in your nail polish colors one by one, swirling gently with a toothpick to create a marble pattern on the surface.
- Slowly dip and rotate the jar through the polish, lifting it out carefully to transfer the pattern onto the glass.
- Allow to dry fully, then seal with a clear varnish to protect the finish.
29. DIY Hand-Painted Wind Chime
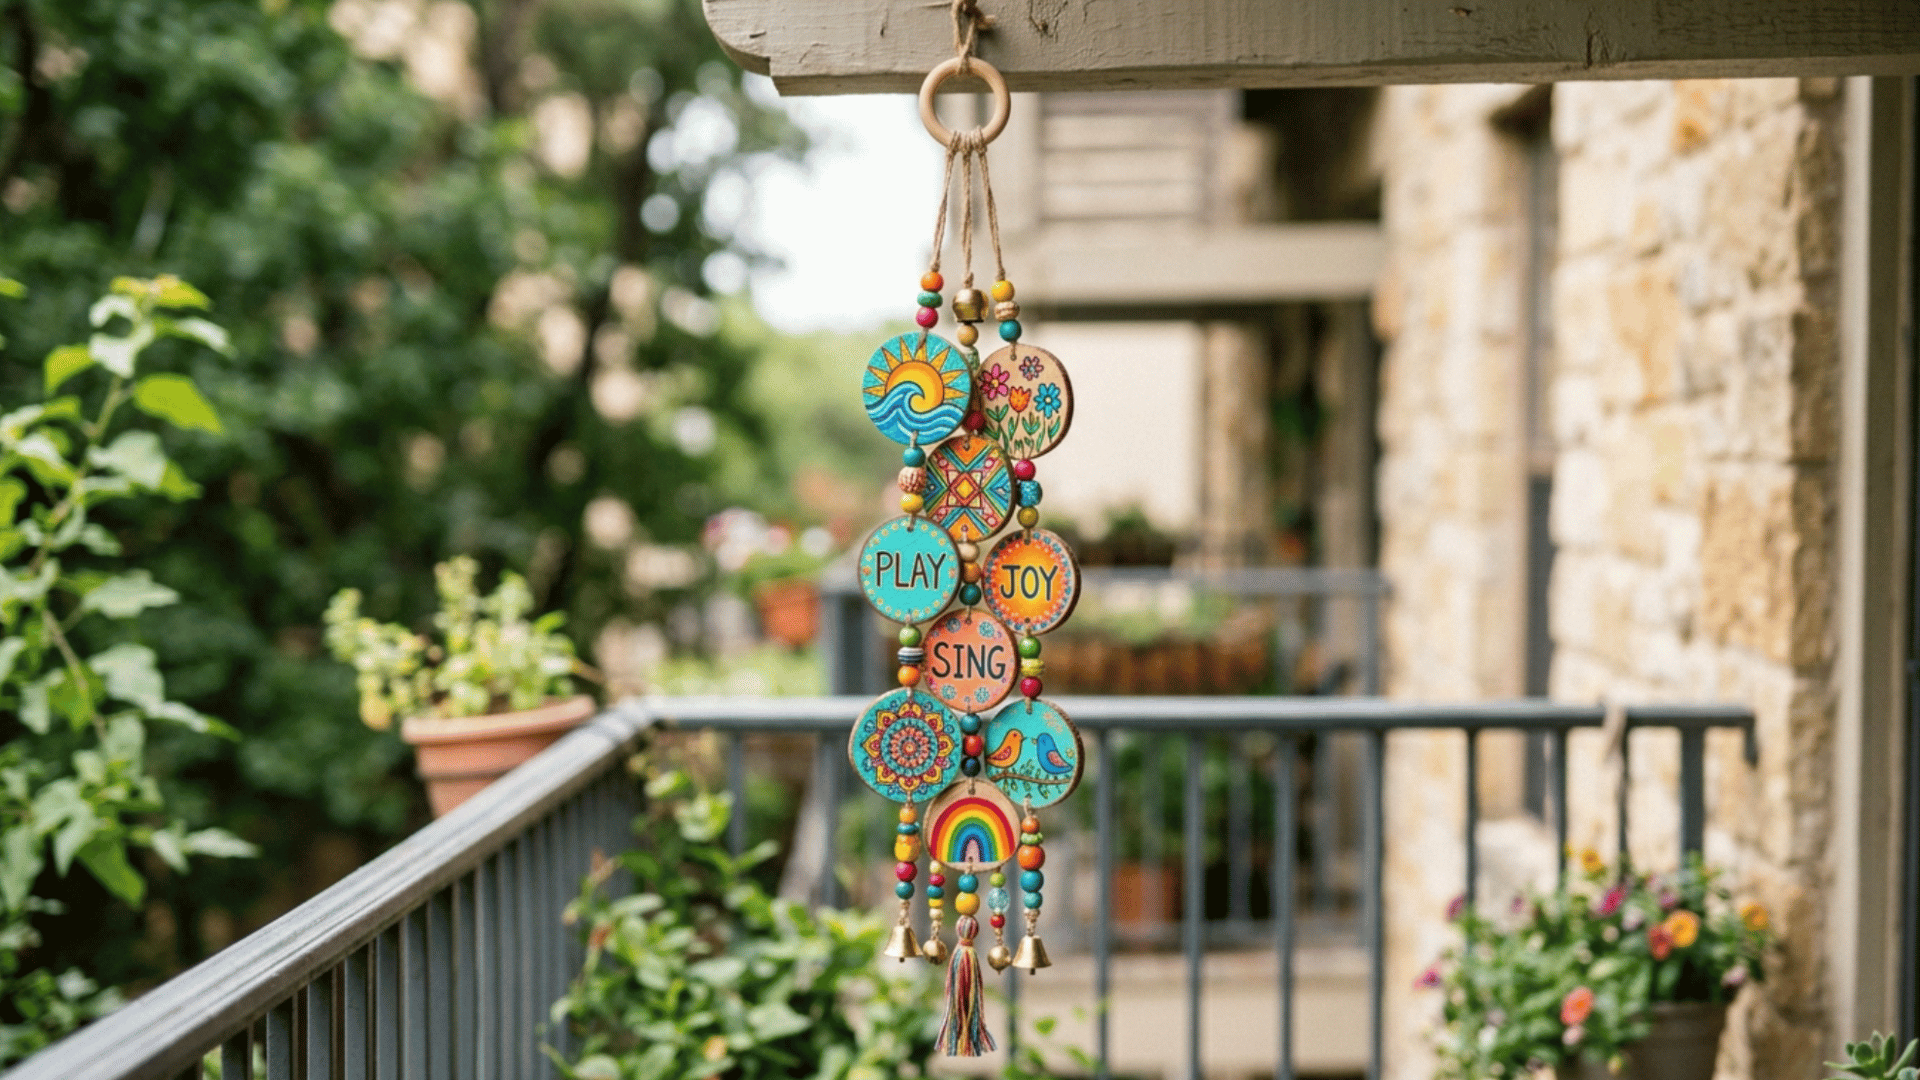
A hand-painted wind chime adds a personal, artistic touch to any garden, balcony, or window. You can paint wooden discs, clay beads, or flat stones and string them together for a soothing, colorful hanging piece.
- Time Required: 1 to 2 hours (plus drying time)
- Materials to Gather: Wooden discs, clay beads, or flat stones, acrylic paint, paintbrush, outdoor sealant, strong twine or fishing line, a stick or dowel to hang from, drill or awl for making holes
How to Make It:
- Paint each piece in your chosen colors and patterns and allow to dry fully before sealing with outdoor varnish.
- Once dry, thread each painted piece onto individual lengths of twine, spacing them at different heights.
- Tie each strand to your dowel or stick, trim to your preferred lengths, and hang outdoors.
30. Mood Board Collages
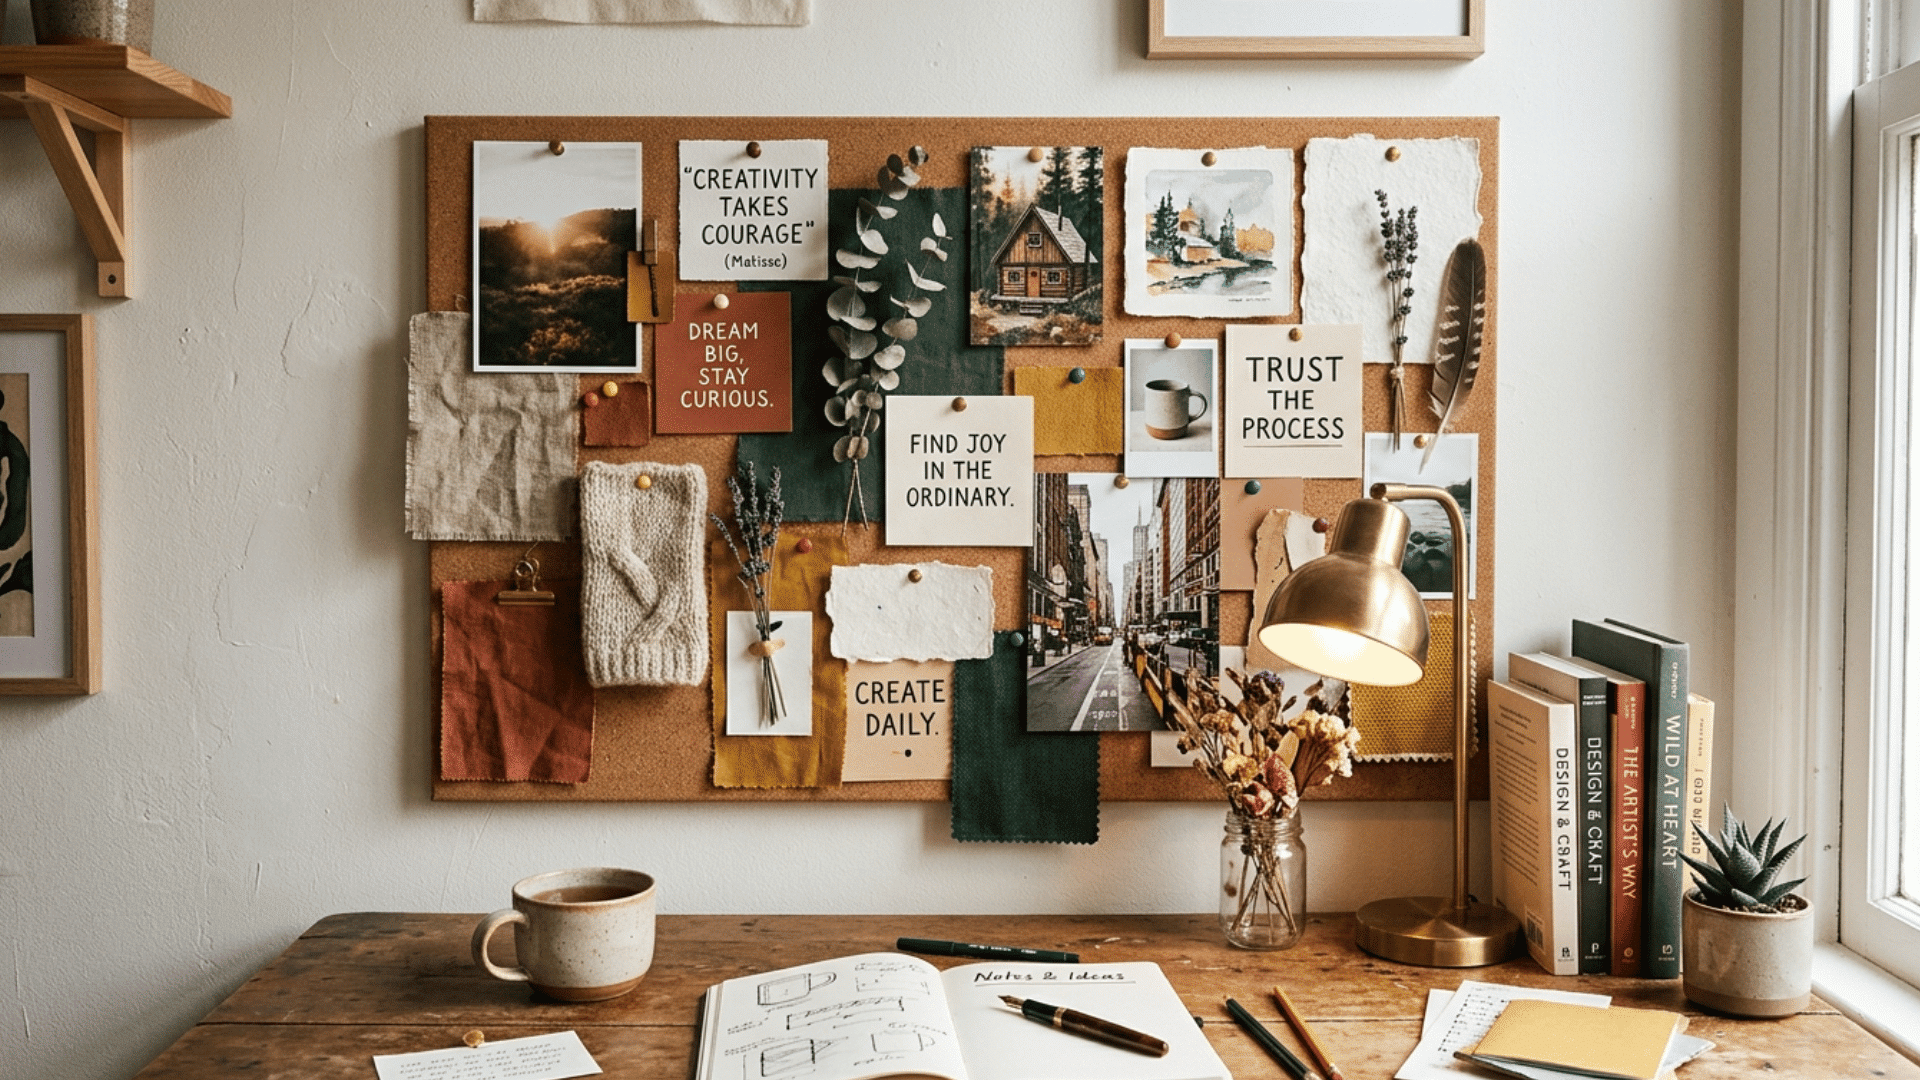
A mood board collage is a joyful, freewheeling craft that lets you capture a feeling, season, goal, or aesthetic through images, textures, and words. It is a form of visual journaling that is both therapeutic and beautiful.
- Time Required: 1 to 2 hours
- Materials to Gather: Printed photos or magazine cuttings, backing board or thick cardstock, glue stick or Mod Podge, scissors, washi tape, markers or stickers (optional)
How to Make It:
- Gather your images and materials, sorting them loosely by color, theme, or mood.
- Lay everything out on your board before gluing, overlapping images, and experimenting with arrangement.
- Glue everything down, add washi tape borders or hand-written words for extra character, then seal with a thin layer of Mod Podge if desired.
Tips You Can Follow to Uplift Your Crafting Skills
Small changes can make a big difference in how your final piece looks. Paying attention to the details below can help your crafting ideas feel cleaner and more polished:
- Choose The Right Colors: Stick to 2–3 colors that go well together for a more balanced look
- Keep Edges Clean: Trim, cut, or paint carefully to avoid rough or uneven finishes
- Use Quality Materials: Better materials often give a neater and longer-lasting result
- Layer for Depth: Adding layers can make simple stuff to make look more detailed
- Take Your Time: Rushing can lead to mistakes, so work slowly for better results
- Finish With a Sealant: A clear coat helps protect your project and gives a smooth finish
- Keep Your Workspace Clean: A tidy space helps you focus and avoid unwanted marks or spills
Final Thoughts
Crafting is less about perfection and more about enjoying the process of making something with your own hands. Even simple ideas can turn into pieces that feel useful and personal over time.
Trying different projects helps you figure out what you enjoy most and builds confidence along the way.
All you need to do is keep experimenting with new materials, mix ideas, and don’t worry about getting everything right the first time. A small effort can still lead to something meaningful.
So, pick one idea from this list today, gather your supplies, and start creating something that feels truly your own.

James McLaren, with a rich background in architecture from the University of Manchester, has been contributing his expertise to the world of creative construction and home innovation for over 20 years. His journey began as a project manager for a leading construction firm, where he honed his skills in bringing complex designs to life. James joined our platform as a freelancer in 2019, quickly becoming a favorite for his insightful and practical advice. He has been a pivotal force to our wing ever since, bringing our readers a blend of technical know-how and creative flair. Beyond his professional life, James is an avid woodworker and enjoys restoring vintage furniture, a hobby that complements his professional insights beautifully.