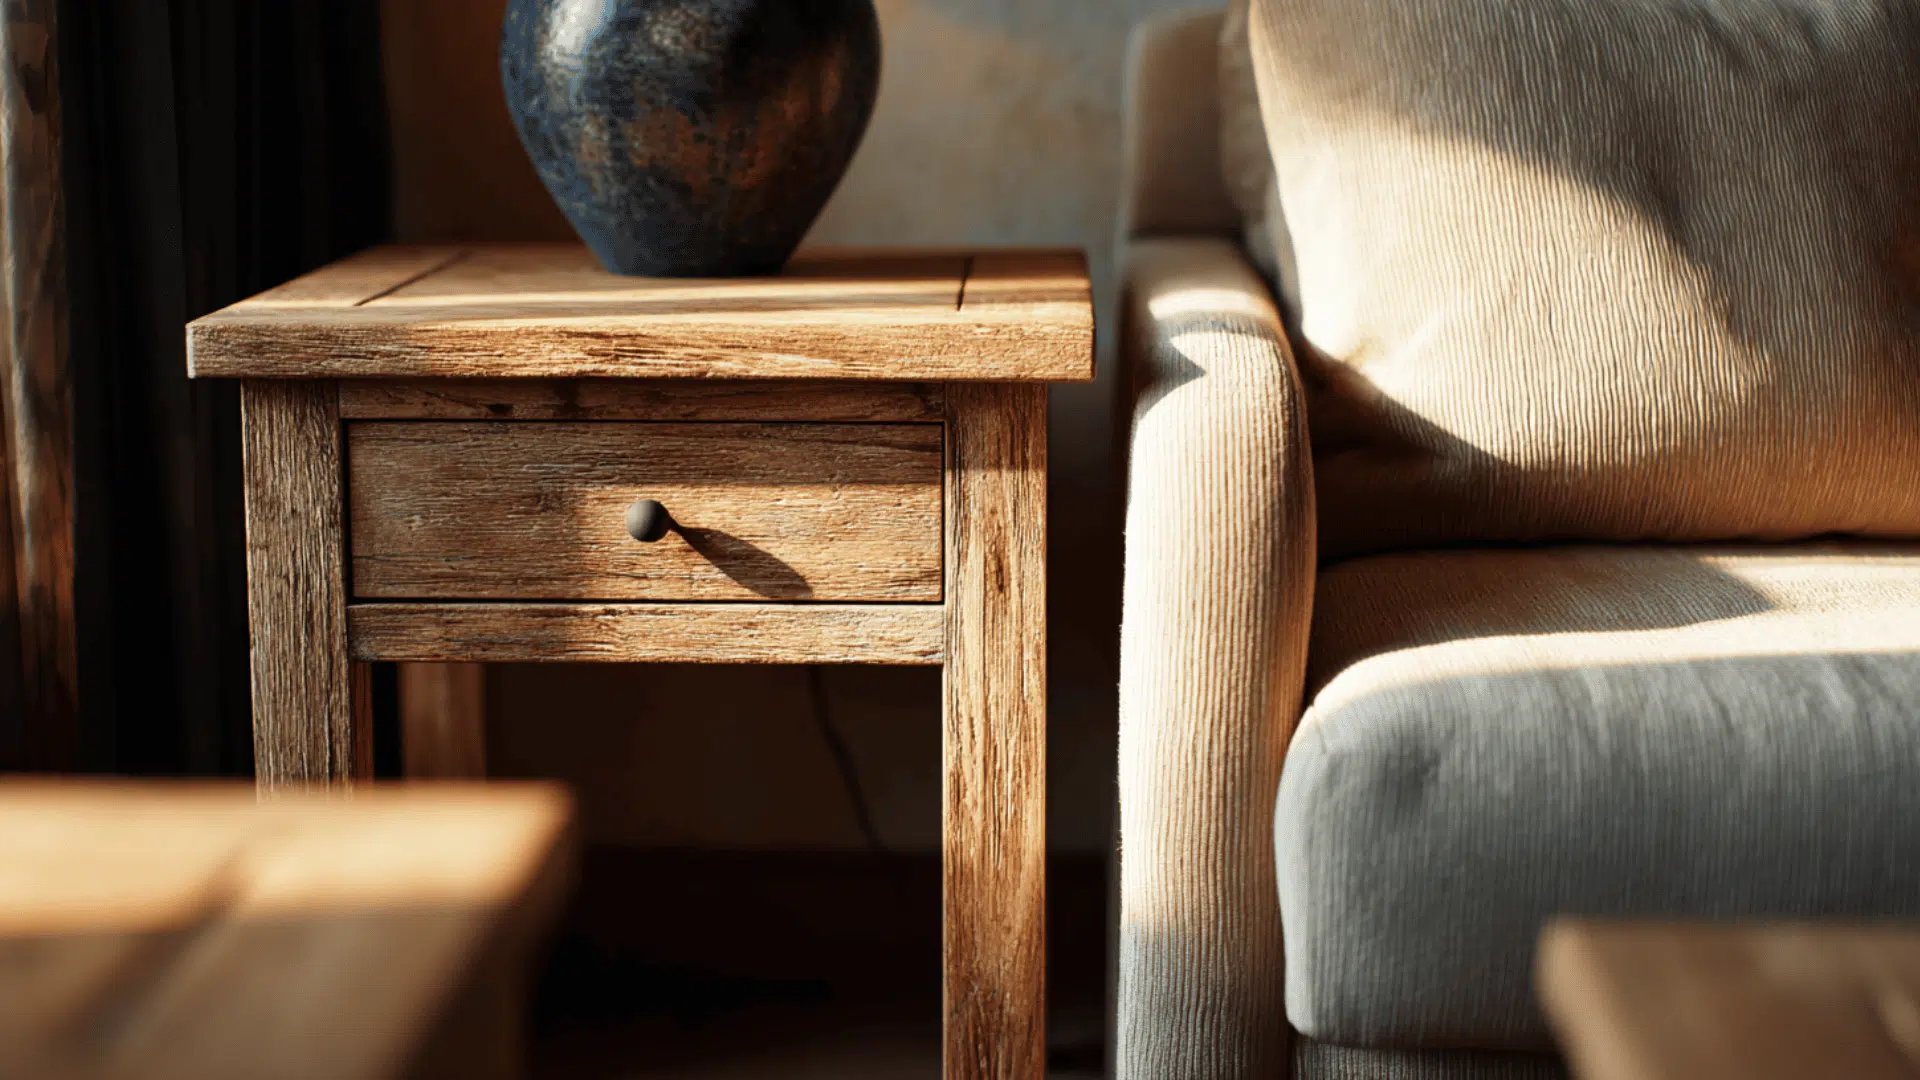
Store-bought end tables rarely match the exact style or size needed for a space. And when they do, they’re often overpriced for what they actually are.
That’s exactly why a diy end table makes far more sense. Building one from scratch costs a fraction of the retail price and takes just a few hours.
This blog covers everything: free plans, exact measurements, a full materials list, and clear step-by-step instructions.
No prior woodworking experience is required. Just the right tools, the right wood, and a solid plan.
Planning Your DIY End Table
Planning your DIY end table properly helps avoid mistakes and keeps the build smooth from start to finish. A clear plan makes it easier to understand the structure and assemble each part correctly.
- Clear Structure Layout – Shows how all pieces connect and form a stable table
- Beginner-Friendly Design – Simple build with no complex tools or techniques needed
- Practical Size – Compact dimensions fit easily in bedrooms or living spaces
- Budget-Friendly Build – Uses affordable materials like pine for a cost-effective project
Tools and Materials You’ll Need
Building a diy end table requires a basic set of tools and materials. Here’s everything needed before starting the build:
| Item | Notes |
|---|---|
| Drill/Driver | The cordless option is easier to handle |
| Saw (circular, miter, or hand saw) | Choose based on availability and comfort |
| Measuring tape | At least 10–12 ft recommended |
| Speed square | Helps maintain straight angles |
| Clamps | Keeps joints steady during assembly |
| Sandpaper (120–220 grit) or sander | Use multiple grits for smoother results |
| Level | Helps ensure the table stands evenly |
| Wooden boards (pine or oak) | Pine is budget-friendly, and oak is stronger |
| Wood screws (1.25”–2”) | Size depends on board thickness |
| Wood glue | Adds extra joint strength |
| Drawer slides (optional) | Match length with drawer depth |
| Drawer handle/knob | Pick based on preference |
| Wood filler | Covers small gaps or screw holes |
| Paint, stain, or sealant | Choose based on desired finish |
Step-by-Step: How to Build a DIY End Table
Building a diy end table is straightforward when each step is followed in the right order. Rushing through any stage often leads to alignment issues and loose joints.
Step 1: Measure and Cut All Pieces
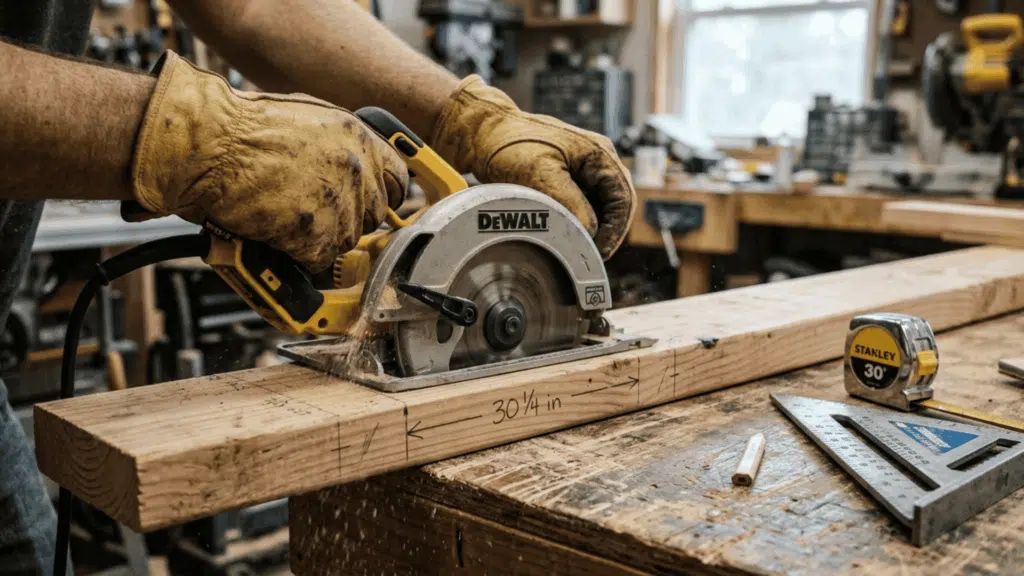
This is the most critical step in the entire build. All dimensions should be marked clearly on the wood before making a single cut.
Using a measuring tape and speed square together ensures every mark is accurate and straight. Once all the pieces are marked, cut the tabletop, legs, apron pieces, and drawer parts if applicable.
A clean, accurate cut at this stage ensures that every subsequent step fits together without any forced adjustments.
Step 2: Build the Table Frame
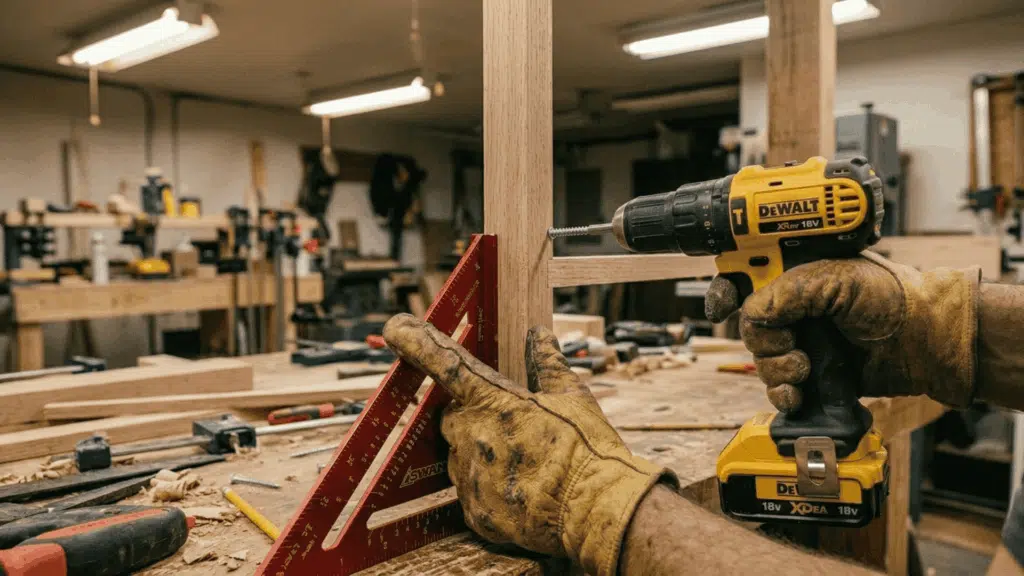
This step is where the diy end table starts taking its actual shape. The apron pieces need to be attached to the legs using wood screws and glue.
Pressing each joint firmly after applying glue ensures full contact between the wood surfaces before the screws go in. Once all four apron pieces are in place, check the frame for square alignment.
A speed square works well here to confirm each corner is at a true 90-degree angle. Tighten all joints fully before moving forward.
Step 3: Attach the Tabletop
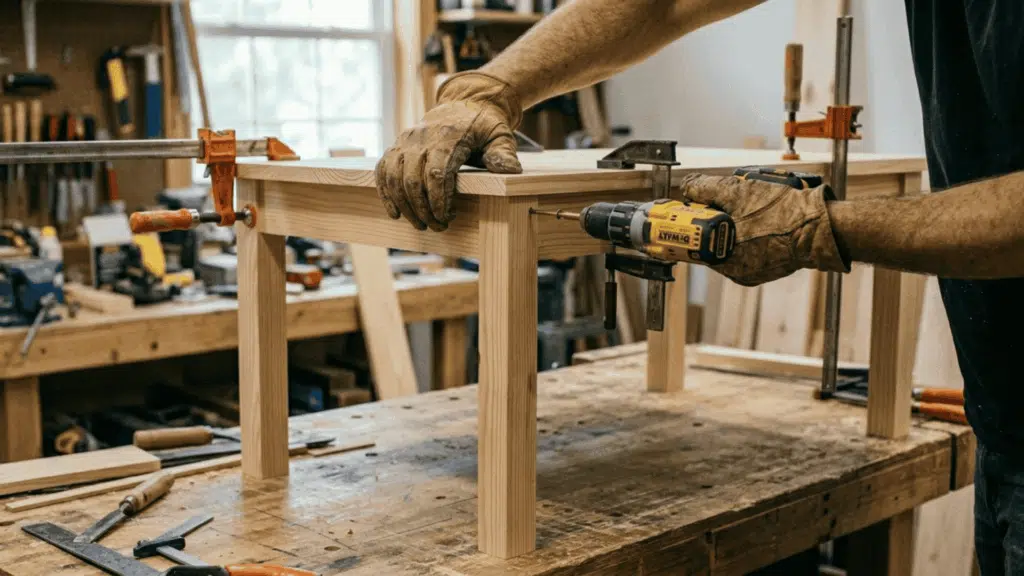
Position the tabletop evenly over the frame before securing it. There should be an equal overhang on all four sides for a balanced look.
Using clamps here helps hold everything in place during this step. Once aligned, secure the top using screws driven up through the apron into the tabletop.
Brackets can also be used for a cleaner finish if preferred. Confirm the top sits flush with no gaps visible between the board and the frame edge
Step 4: Build and Install the Drawer
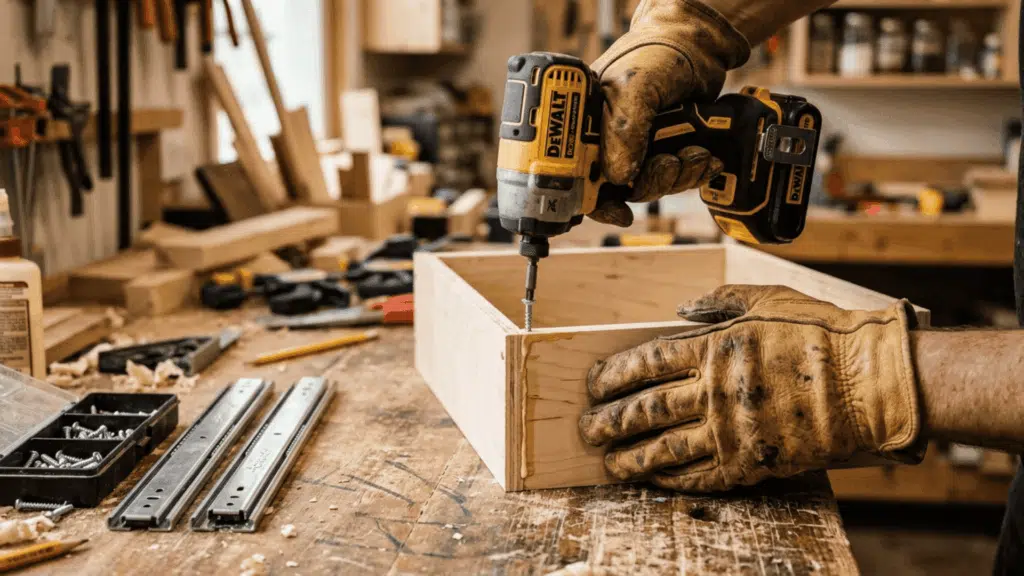
Adding a drawer gives the diy end table extra storage and a more complete look.
Start by assembling the drawer box using wood screws and glue on each corner joint. Let the glue set fully before moving to the next part.
Once the box is ready, install the drawer slides inside the frame according to the manufacturer’s spacing guide. Slide the drawer in to test the fit and adjust if needed. Attach the drawer front and handle as the final touch.
Step 5: Sand and Finish the End Table Build
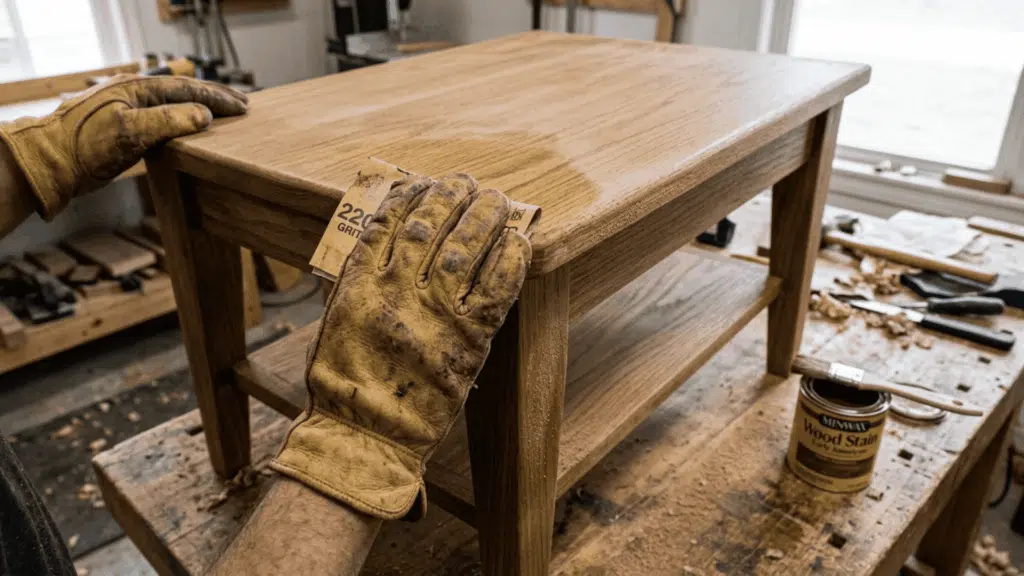
Start sanding with 120-grit sandpaper to remove any rough spots and sharp edges. Work through to 220 grit for a smooth, even surface that takes paint or stain evenly across all sides.
Once sanding is complete, wipe down all surfaces with a clean cloth before applying the finish.
Paint, stain, or sealant can be applied depending on the desired look. Apply in thin, even coats and allow full drying time between each layer.
Step 6: Final Assembly Check and Finished Table
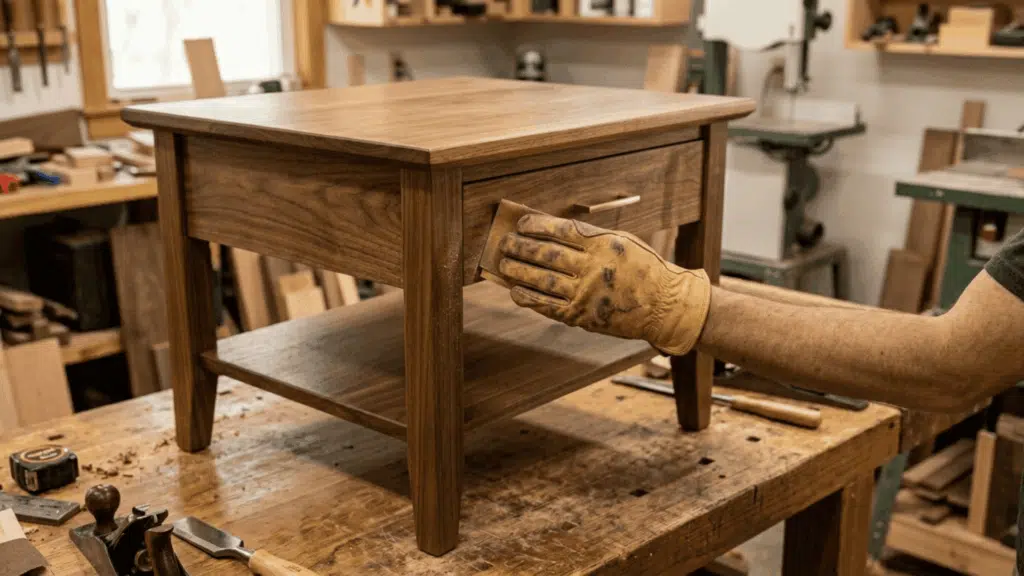
This last step confirms the diy end table is fully stable and ready to use. Go through every joint and tighten any screws that may have loosened during the build.
A quick check with a level confirms the table sits evenly on all four legs. Test the drawer by sliding it in and out a few times to check for smooth movement.
If it sticks, a light sanding on the drawer sides usually fixes the issue. At this point, the table is complete and ready to be placed and used.
Common Mistakes to Avoid
Even a well-planned diy end table build can run into problems when these common mistakes are overlooked. Knowing them in advance keeps the process smooth from start to finish.
- Skipping measurements before cutting leads to mismatched pieces that throw off the entire frame structure. Always measure twice and mark clearly before making any cut.
- Not drilling pilot holes before screwing into wood causes splitting, especially near the ends and edges of boards where the grain is tighter.
- Ignoring square alignment during frame assembly results in a wobbly table that never sits evenly, and fixing it after the glue sets is far more difficult.
- Using too little glue or too few screws on joints creates weak connections that loosen over time, especially on the apron-to-leg joints that take the most stress.
- Rushing through sanding and finishing leaves a rough surface, causes uneven paint or stain absorption, and significantly reduces the durability of the final coat.
Conclusion
A DIY end table is a practical project that delivers useful results without requiring a large budget or advanced woodworking skills. It is a simple way to create furniture that fits both space and needs.
This plan walks through each stage of the build, from cutting materials to applying the final finish. Following the steps carefully helps ensure the table is stable, durable, and well-constructed.
Dimensions and finishes can be adjusted to match different interiors and preferences. Small changes in design or color can make the final piece feel more customized and suited to the space.

James McLaren, with a rich background in architecture from the University of Manchester, has been contributing his expertise to the world of creative construction and home innovation for over 20 years. His journey began as a project manager for a leading construction firm, where he honed his skills in bringing complex designs to life. James joined our platform as a freelancer in 2019, quickly becoming a favorite for his insightful and practical advice. He has been a pivotal force to our wing ever since, bringing our readers a blend of technical know-how and creative flair. Beyond his professional life, James is an avid woodworker and enjoys restoring vintage furniture, a hobby that complements his professional insights beautifully.