
Does your home need something special to make it stand out? Plain walls can make rooms feel flat and lifeless. Many homeowners want to add character without spending too much money or time.
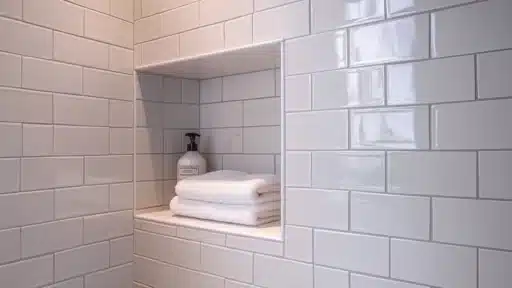
Beadboard wainscoting offers a simple solution to transform your walls. This wall treatment brings texture and protection to any room while staying within your budget. You can install it yourself or hire a professional to create the look you want.
This guide will show you everything about beadboard wainscoting, from picking the right style to keeping it clean. You’ll learn about:
- Different styles and their costs
- Step-by-step installation tips
- Professional vs. DIY options
- Care and maintenance methods
Let’s create walls that make your home feel special.
Why Choose Beadboard Wainscoting?
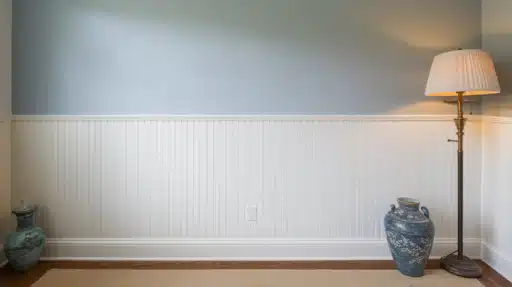
Beadboard wainscoting brings warmth and style to any room. This classic wall treatment has stood the test of time, making homes feel more inviting and well-designed. The vertical panels create visual interest while protecting your walls from daily wear.
Your home deserves special touches that reflect your taste and needs. Beadboard wainscoting adds both texture and purpose to plain walls. The simple lines make rooms feel taller, while the durable materials withstand scuffs from chairs, shoes, and bags.
The value goes beyond looks. When you add beadboard wainscoting, you invest in your home’s future. Buyers often notice and appreciate these thoughtful details. The clean lines work well in many settings – from casual family rooms to formal dining spaces.
Beadboard vs. Traditional Wainscoting
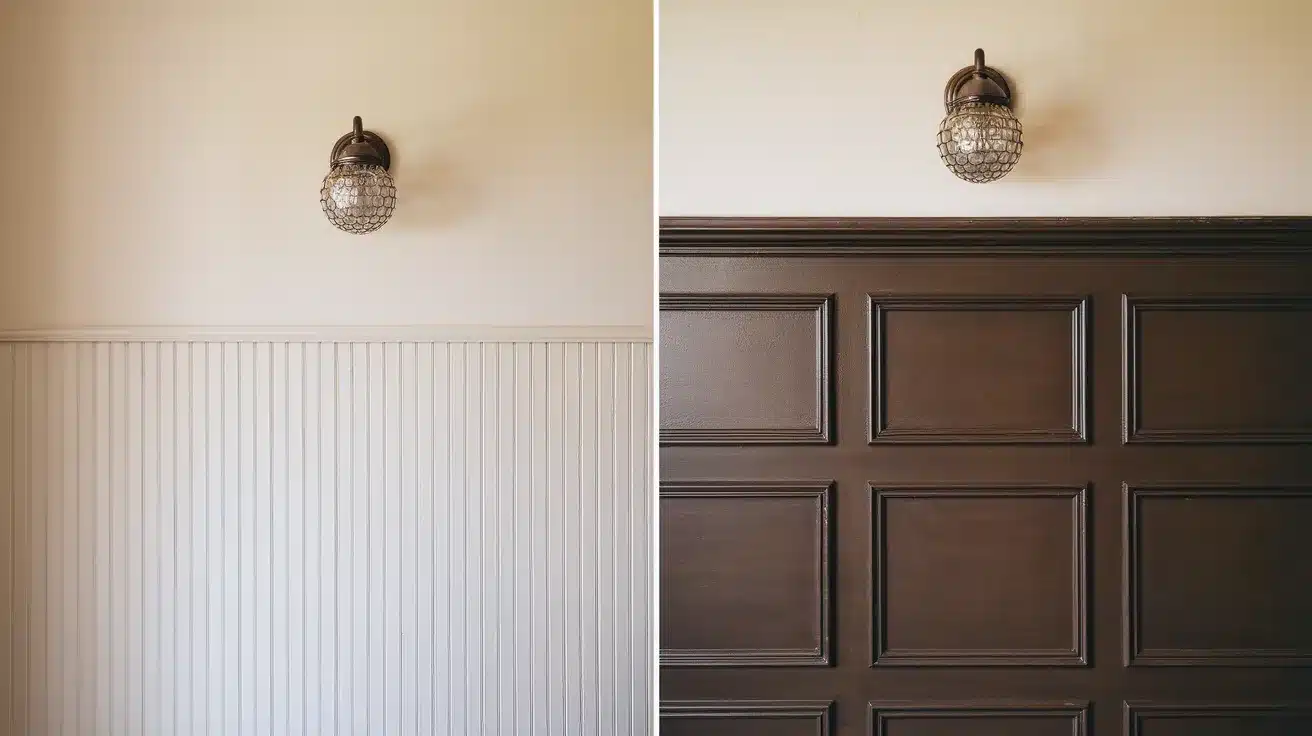
Let’s start with the basics of these wall treatments. The beadboard shows off narrow vertical panels with small ridges between each board. Traditional wainscoting features flat panels with raised frames. Both styles protect your walls while adding visual appeal.
Defining Beadboard and Wainscoting
Beadboard offers a casual, cozy feel that fits well in many homes. The small grooves create shadows and depth on your walls. Traditional wainscoting, with its square or rectangular panels, brings a more formal look. Each style speaks its own design language.
Pros and Cons of Each Style
Here’s a simple breakdown to help you choose the right style for your home:
| Feature | Beadboard | Traditional Wainscoting |
|---|---|---|
| Cost | Lower materials cost | Higher materials cost |
| Installation | Simple to install | More complex installation |
| Maintenance | Quick dusting is needed in grooves | Easy flat surfaces to clean |
| Style | Casual, cottage-like charm | The formal, structured look |
| Flexibility | Works well in bathrooms and mudrooms | Best in dining rooms and studies |
| Wall Height | Often 32-36 inches high | Usually 36-42 inches high |
| Paint Options | Takes paint well | Excellent for paint finishes |
| Durability | Good daily wear resistance | Strong protection for walls |
Beadboard makes sense for busy households. The tight spacing between boards hides small marks and dents. Children’s rooms, hallways, and kitchens benefit from this practical feature.
Traditional wainscoting suits formal spaces. Its clean lines create a structured look that pulls a room together. This classic choice makes living rooms and entryways shine.
Step-by-Step Guide to Installing Beadboard Wainscoting
Essential Tools and Materials
| Tools Needed | Materials Required |
|---|---|
| Stud Finder | Beadboard Panels (4×8 ft sheets) |
| Brad Nailer (18-gauge) | 2-inch Brad Nails |
| Measuring Tape | Wood Spackling |
| Pencil | Caulk |
| Table Saw or Circular Saw | Primed 1×4 Pine (top trim) |
| Multi-tool or Jigsaw | Painter’s Tape |
| Miter Saw | Paint |
| Caulk Gun | Metal Extension Rings (for outlets) |
| Sanding Block | Wood Glue (optional) |
| Level | Finishing Nails (if not using brad nailer) |
Step 1: Preparation
Home improvement stores stock 4×8-foot beadboard sheets. These large panels need special handling. Most stores will cut them into 48-inch pieces for easier transport. You might also find smaller panel packs that better suit your needs.
Step 2: Installing the Baseboards
Set your baseboards first if you plan to replace them. Your beadboard panels will sit perfectly on top of the baseboards. This creates a clean, professional finish and makes the whole project flow better.
Step 3: Examining Beadboard Panels
Each beadboard panel comes with a specific design. One side has small ribs, while the other shows a flat edge. This smart design lets panels connect smoothly. When you place panels side by side, the flat edge meets the ribbed side, making a perfect pattern that flows across your wall.
Step 4: Methods of Attachment
You have two solid options for putting up your panels. An 18-gauge brad nailer offers speed and ease. It makes quick work of securing panels. For those without a nail gun, standard finishing nails and a hammer work well, too. This method takes more time but gives you good results.
Step 5: Choosing the Right Nails
Two-inch brad nails work best for most installations. Your nails need enough length to go through three layers: the beadboard, your drywall, and the wall studs. If you notice nails sticking out, try a slightly shorter size. Just make sure they still reach those studs for proper support.
Step 6: Marking and Installing the First Panel
Begin by finding your wall studs with a stud finder. Mark these spots with small pieces of painter’s tape above where your panel will go. Set your first panel on the baseboard. Ensure it’s level, then secure it with nails at your marked stud points.
Step 7: Cutting and Fitting Additional Panels
Take careful measurements of your spaces. Mark these on your panels with a pencil. Make clean cuts with your saw. Test each panel’s fit before you nail it in place. This helps avoid gaps and ensures your pattern lines up perfectly.
Step 8: Addressing Room Features
Corners and windows need special attention. Place panels tight against door trim, leaving small gaps at baseboards for caulk later. For windows, measure from baseboard to sill. Cut your panels to fit these spaces exactly. Take extra care with corner measurements, as most rooms aren’t perfectly square.
Step 9: Handling Electrical Outlets
Turn off the power to the outlets first. Remove the covers and use painter’s tape to mark outlet spots on your panels. Cut holes carefully with your chosen tool. Some outlets may need extension rings to sit flush with your new wall surface. Always follow proper safety steps with electrical work.
Step 10: Installing Top Trim
Choose quality primed pine boards for your top trim. Measure each section carefully. Cut your angles with a miter saw for clean corners. Attach the trim securely to the wall studs. This final trim piece gives your project a finished look.
Step 11: Finishing Touches
Fill nail holes with spackling compound. After it dries, the sand spots smooth. Apply caulk to seams and gaps, keeping lines thin and neat. Wipe away extra caulk right away for clean edges.
Painting
Your primed panels take paint well. Choose any interior paint color you like. Apply paint evenly for a professional finish. Your new wainscoting will look fresh and clean.
Video Tutorial
Maintenance and Care for Beadboard Wainscoting
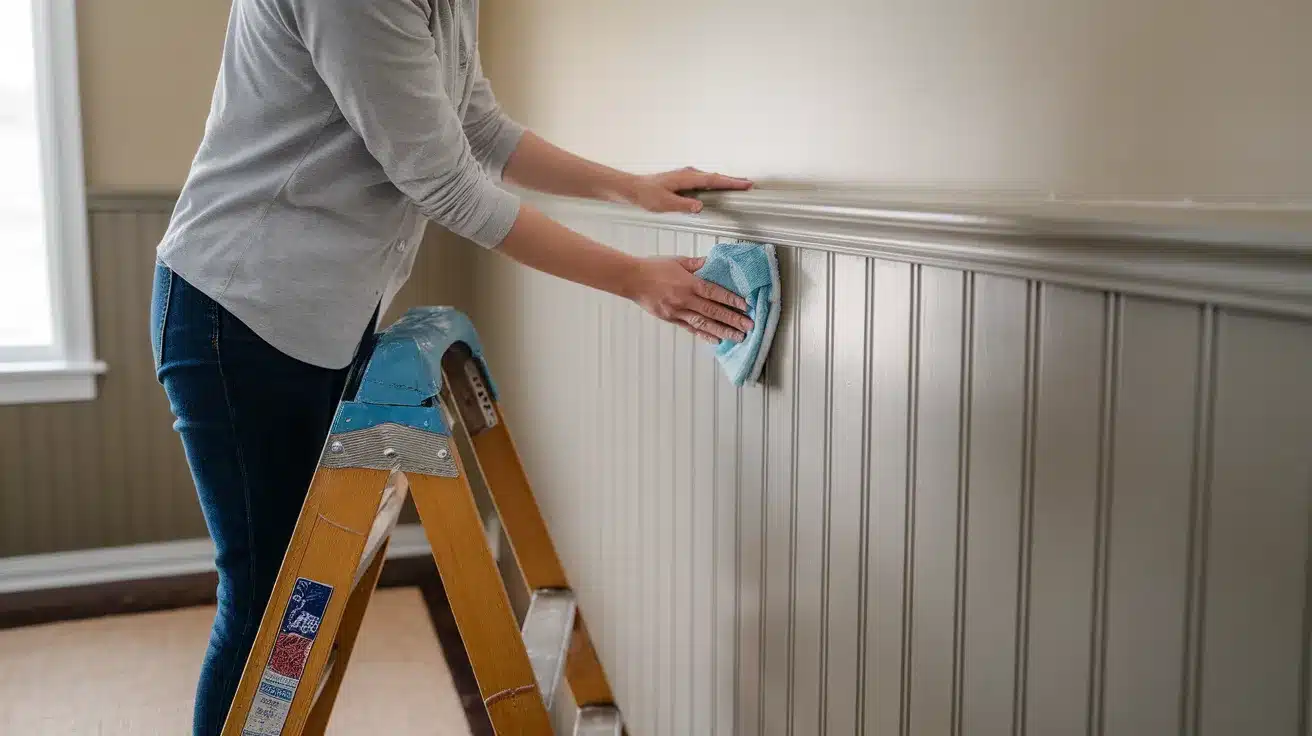
Routine Cleaning Techniques
Keep your beadboard looking fresh with simple cleaning methods. A soft, damp cloth works well for weekly dusting and light cleaning. For tougher spots, mix mild soap with warm water. Avoid harsh chemicals that might harm the paint or wood.
The grooves in the beadboard need special attention. Use a soft brush to clean these areas, moving along the lines of the panels. Always dry the surface after cleaning to prevent water damage. A microfiber cloth helps reach small spaces without leaving scratches.
Preventing Common Issues
Water poses the biggest risk to your beadboard. Keep an eye on areas near sinks, windows, and exterior walls. Apply touch-up paint when needed to seal exposed edges. Maintain proper room ventilation to prevent moisture buildup.
Watch for signs of separation between panels. Small gaps might appear due to house settling or temperature changes. Fill these promptly with quality caulk to prevent further issues. Check baseboards and trim regularly for signs of water seepage.
Long-term Care Strategies
Regular inspections help spot problems early. Check your beadboard every six months for:
- Paint wear or fading
- Loose panels
- Damaged caulk lines
- Signs of water damage
Touch up paint as needed, matching the original color and finish. Keep spare paint for future touch-ups. Seal any new gaps with quality caulk designed for indoor use.
Consider using a dehumidifier in rooms with high humidity, like bathrooms. This helps protect the wood and maintain its shape. Replace damaged sections promptly to prevent problems from spreading.
DIY vs. Professional Installation Comparison
| Factor | DIY Installation | Professional Installation |
|---|---|---|
| Cost (10×10 room) | $350-550 total | $600-1100 total |
| Time Required | 1-2 days | 4-6 hours |
| Best Suited For | Square rooms, few obstacles | Complex spaces, unusual angles |
| Initial Investment | Tools ($150-250) + Materials | Materials only |
| Skill Level | Basic measuring, power tool use | Not required |
| Physical Effort | High (lifting, cutting, installation) | None required |
| Quality Risk | Possible beginner mistakes | Guaranteed results |
| Wall Prep | Must fix issues yourself | Included in service |
| Tool Requirements | Must buy or rent all tools | No tools needed |
| Material Selection | Personal choice, store guidance | Expert recommendations |
| Warranty | None | Usually 1-2 years |
| Additional Benefits | Learning experience, cost savings | Speed, expertise, insurance |
| Best For Budget | Under $500 | $600-1100 |
| Mistake Costs | May need extra materials | Covered by contractor |
| Completion Time | Multiple days, flexible schedule | Single day, set time |
Conclusion
Adding beadboard wainscoting to your walls does more than change their look. This classic wall treatment brings lasting value to your home while protecting your walls from daily wear. From bathrooms to dining rooms, beadboard fits naturally in any space.
This guide covered the basics of beadboard installation, from selecting materials to finishing touches. You’ve learned about cost considerations, tool requirements, and essential care tips.
Both DIY enthusiasts and those who prefer professional help can now make informed decisions about their projects.
Remember, good wall treatments last for years when installed and maintained properly. Your choice of beadboard shows thoughtful attention to your home’s character. The time and effort you invest in this project will enhance your home’s charm for years.

Holding a Master’s in Construction Management from Purdue University, William Ray has dedicated more than two decades to studying and applying construction principles. His professional journey includes a tenure with a prominent construction firm, where he specialized in project management and building technologies. William brought his knowledge to our team, providing in-depth insights into practical construction techniques. As the leader of our beginner’s guide to building since 2019, he has a knack for breaking down intricate processes into easily digestible content. When not involved in writing or onsite consultations, William enjoys woodworking and volunteering in community building projects, which aligns with his passion for hands-on construction and community service.