Most people want a home that feels better and more personal without the cost of hiring someone to fix or upgrade everything.
DIY home projects make that genuinely possible by giving anyone the tools to improve their space at their own pace and budget.
The results are not just financial; a space worked on personally always feels more considered, more intentional, and more lived-in.
This blog covers easy, practical, beginner-friendly home projects suitable for a wide range of skill levels, room types, and budgets.
Why are DIY Home Projects Worth Trying?
Taking on a home project independently does more than save money on labor costs. Each small upgrade adds a personal quality to the space that hired work replicates in the same way.
Working on a home also builds practical skills that carry over into future projects, making each one faster and less intimidating over time.
Small changes like repainting furniture, adding shelving, or updating cabinet hardware can significantly shift the feel of a room without a large financial investment.
Over time, consistent small improvements also add measurable value to a property.
Creative DIY Home Projects for Your Space
These projects cover a range of skill levels, room types, and budgets, making it easy to find a starting point for any space in the home.
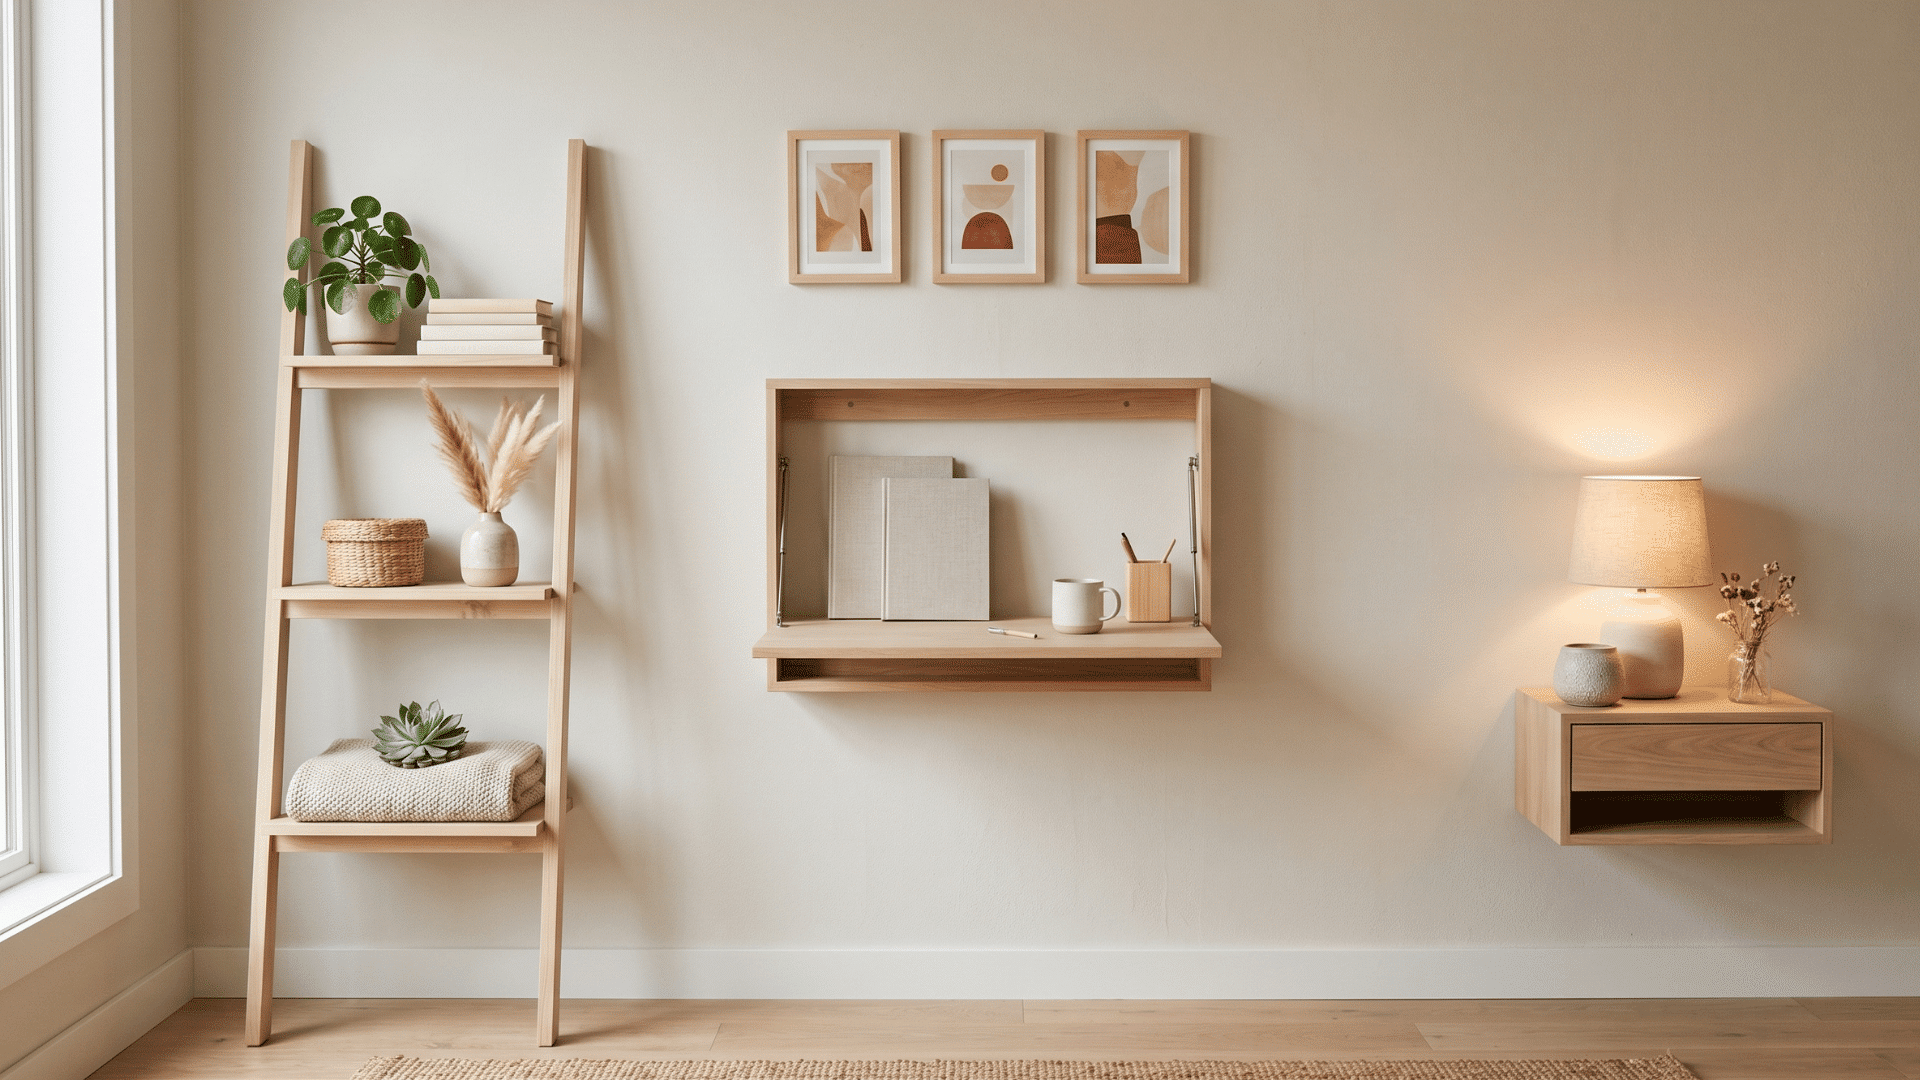
1. Corner Ladder Shelf for Small Spaces
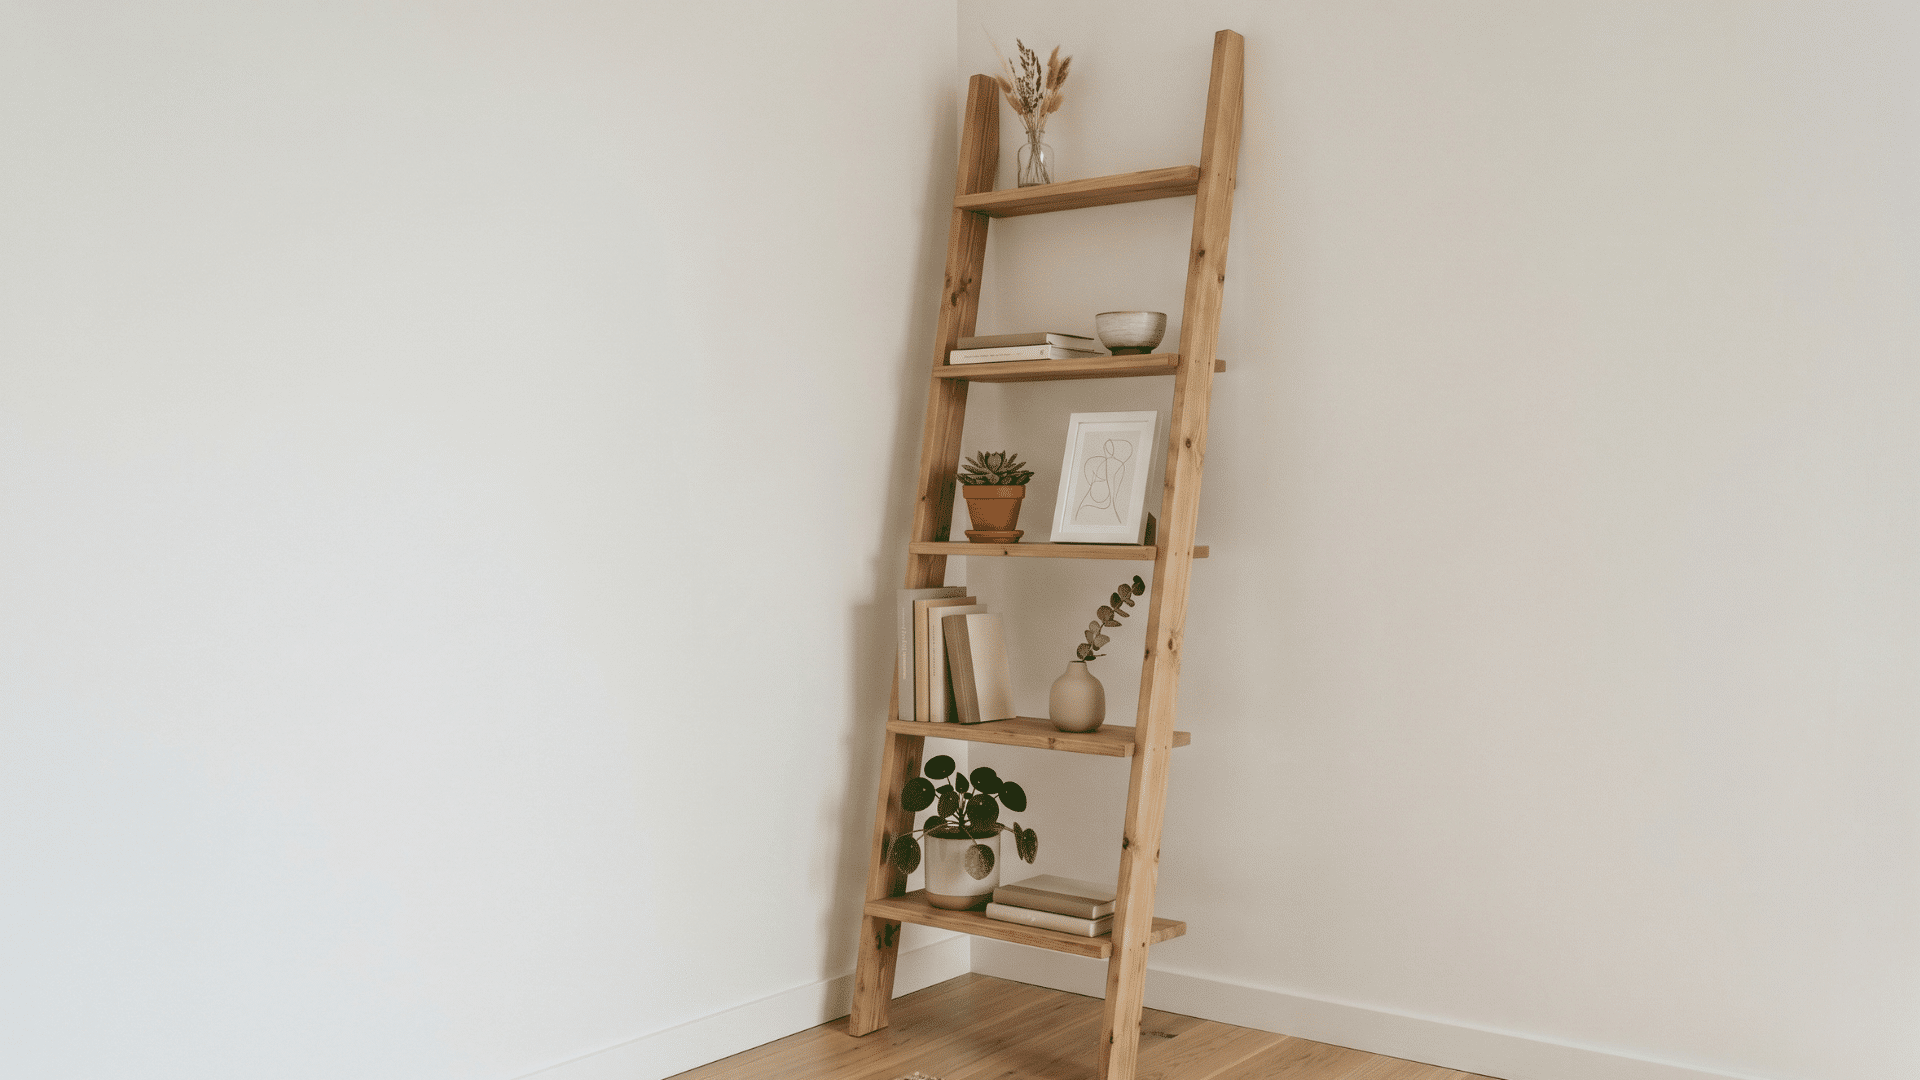
A corner ladder shelf uses unused vertical space in any room and provides open storage without taking up valuable floor space.
Materials Required: Wood planks, screws, wood glue, sandpaper, drill, measuring tape
How to Make:
- Cut two long side rails and several rungs in slightly decreasing widths
- Sand all pieces for a smooth finish
- Attach the rungs evenly between the rails using wood glue and screws
- Lean the finished shelf securely into a corner
- Arrange books, small plants, and decor items on each level
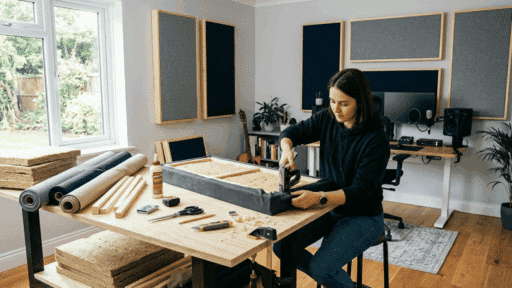
2. Wall-Mounted Foldable Desk
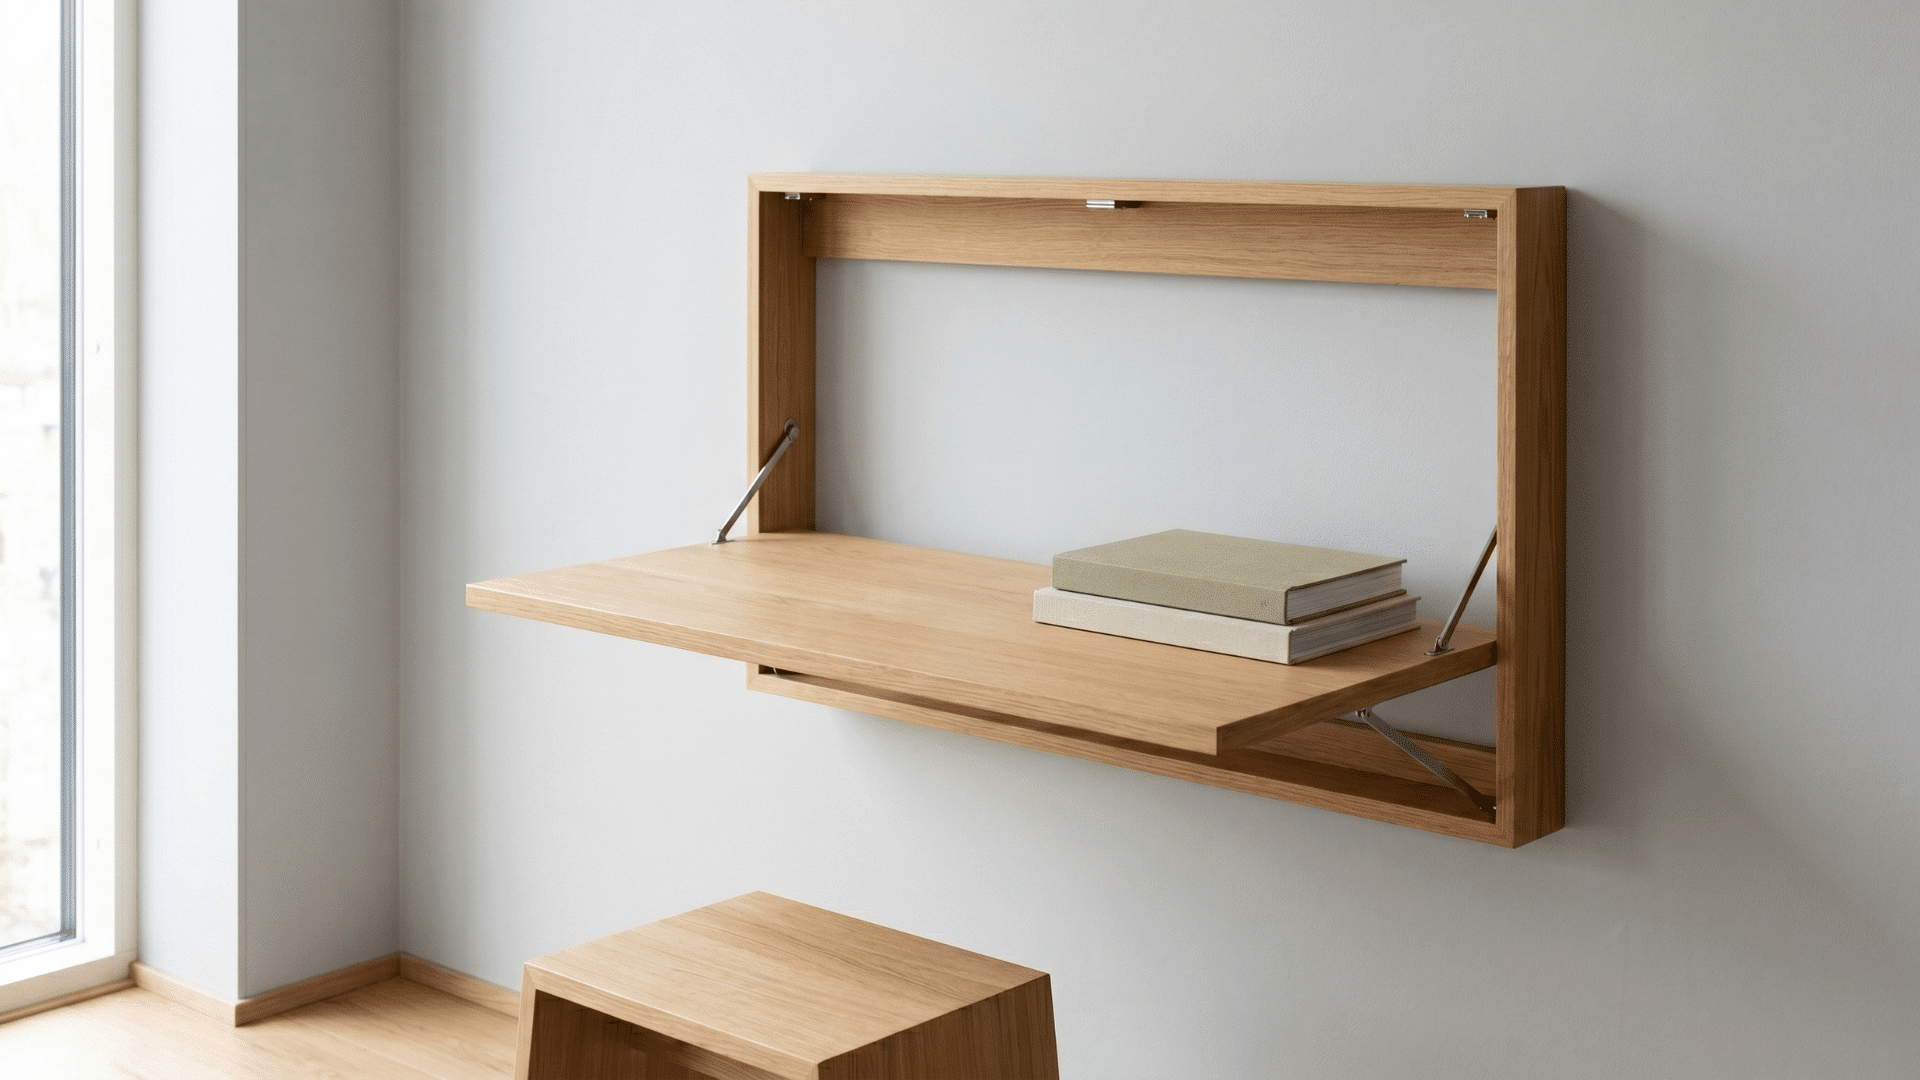
A wall-mounted foldable desk provides a functional workspace that folds completely flat against the wall when not in use.
Materials Required: Solid wood panel, folding brackets, screws, sandpaper, drill, wall anchors, hook or latch
How to Make:
- Cut a solid wood panel to size and sand all edges smooth
- Attach two heavy-duty folding brackets firmly to the wall studs
- Mount the desk panel and test the fold mechanism before use
- Add a small lip along the front edge to prevent items from sliding off
- Fix a hook or latch below the desk so the panel stays flat when folded
3. Hidden Storage Coffee Table

A coffee table with a concealed storage compartment beneath the surface keeps the living room tidy while providing a generous space to store items out of sight.
Materials Required: Plywood or solid wood, piano hinges, furniture legs, screws, wood glue, felt sheet, handles
How to Make:
- Build a rectangular box frame from plywood to form the table base
- Cut a top panel and attach it with piano hinges so it lifts open cleanly
- Line the interior with felt or fabric to protect stored items from scratches
- Add small handles to the top panel for easy and strain-free opening
- Attach four furniture legs to the base corners at a comfortable table height
4. Wood Slat Accent Wall Panel

A wood slat accent wall panel adds texture, warmth, and a designed quality to any room without requiring a full renovation or permanent structural change.
Materials Required: Timber battens, construction adhesive, finishing nails, sandpaper, stain or paint, wood sealer, level
How to Make:
- Cut timber battens to equal lengths and sand each one smooth
- Mark evenly spaced vertical lines across the wall using a level
- Attach each slat to the wall using adhesive and finishing nails
- Use a spacer block to keep the gaps between slats consistent
- Apply a final coat of wood sealer over all slats once installed
5. Floating Nightstand with Drawer
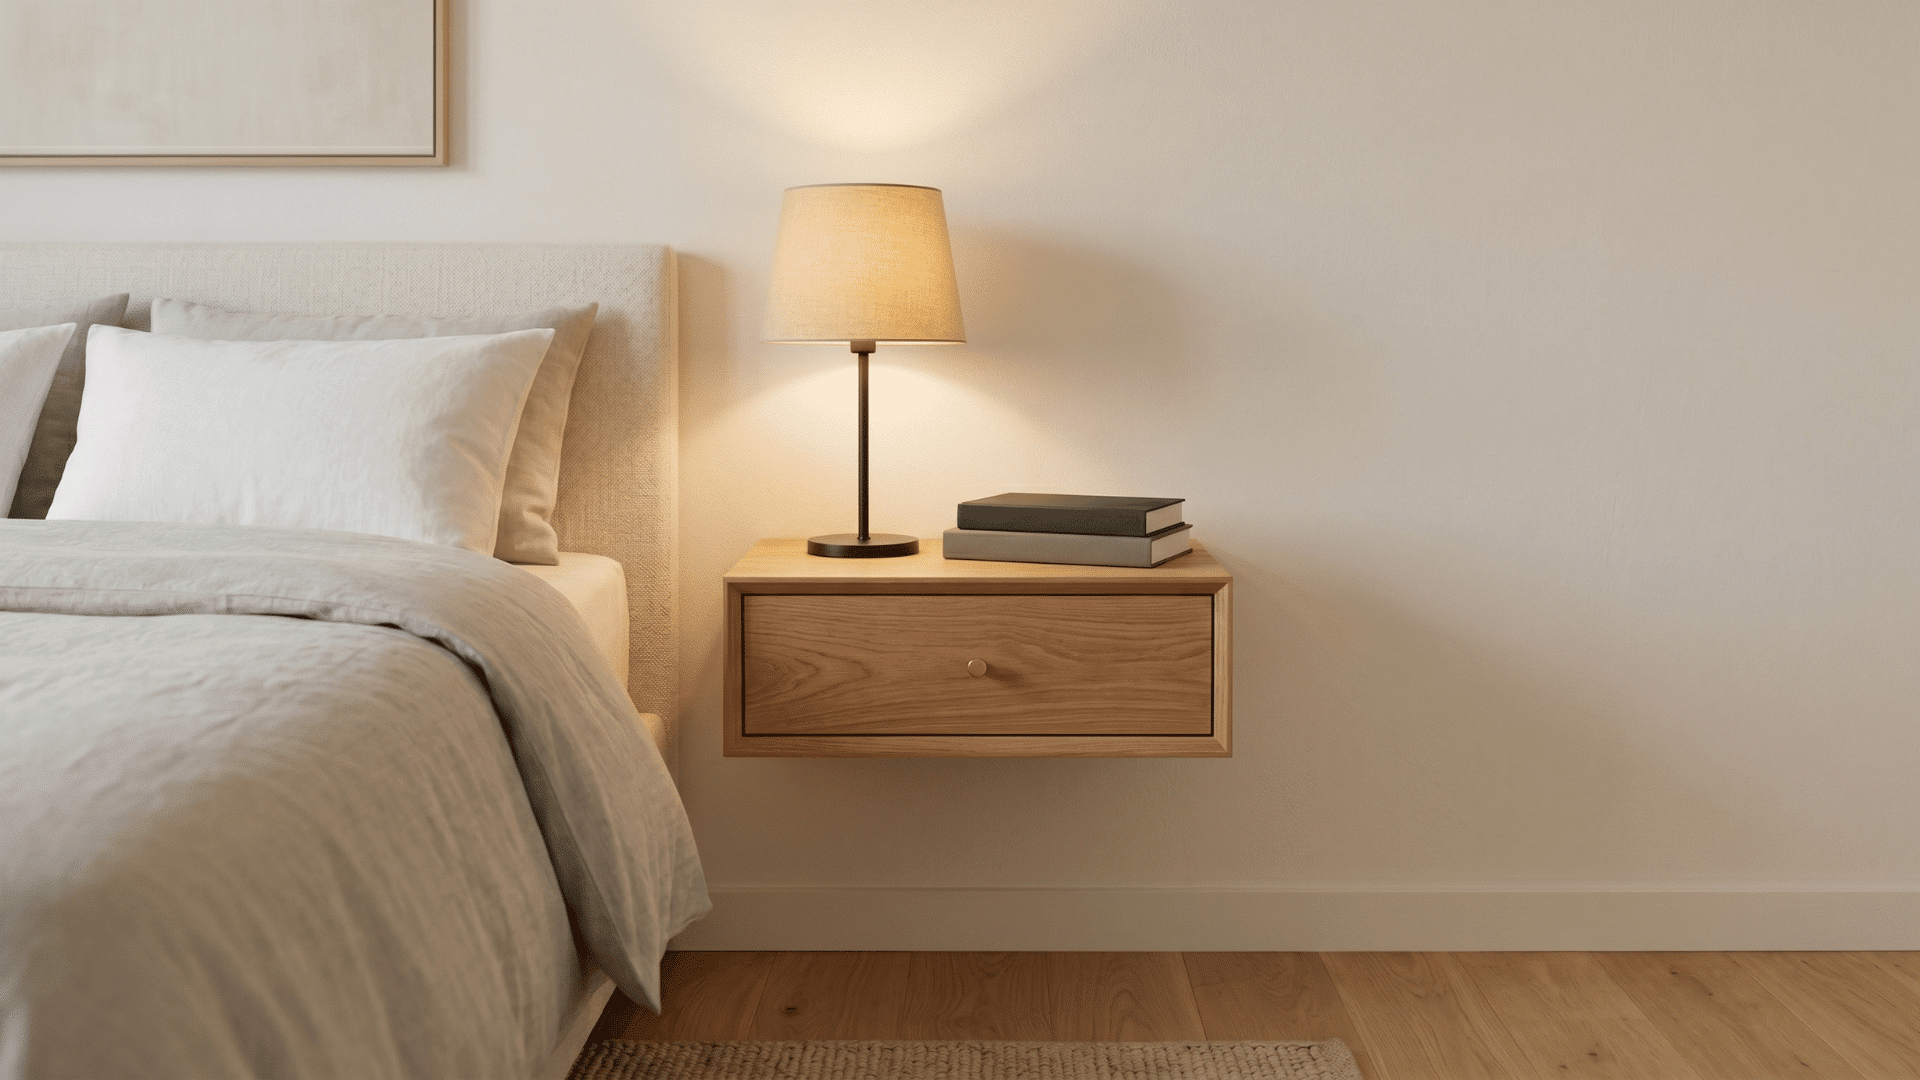
A wall-mounted floating nightstand with a built-in drawer keeps the bedroom floor clear while providing a practical and accessible bedside storage surface.
Materials Required: Plywood, drawer slides, wall bracket or French cleat, screws, sandpaper, handle or knob, drill
How to Make:
- Build a small rectangular plywood box with an open front for the drawer
- Cut a slightly smaller drawer box that slides inside without catching
- Attach a drawer front and a small handle for easy access from the bed
- Mount a French cleat or wall bracket at the correct bedside height
- Check the nightstand is level before tightening all fixings fully
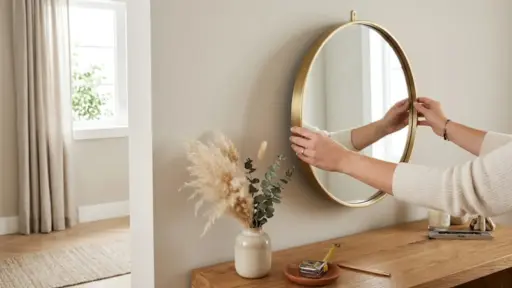
6. Custom LED Backlit Mirror Frame
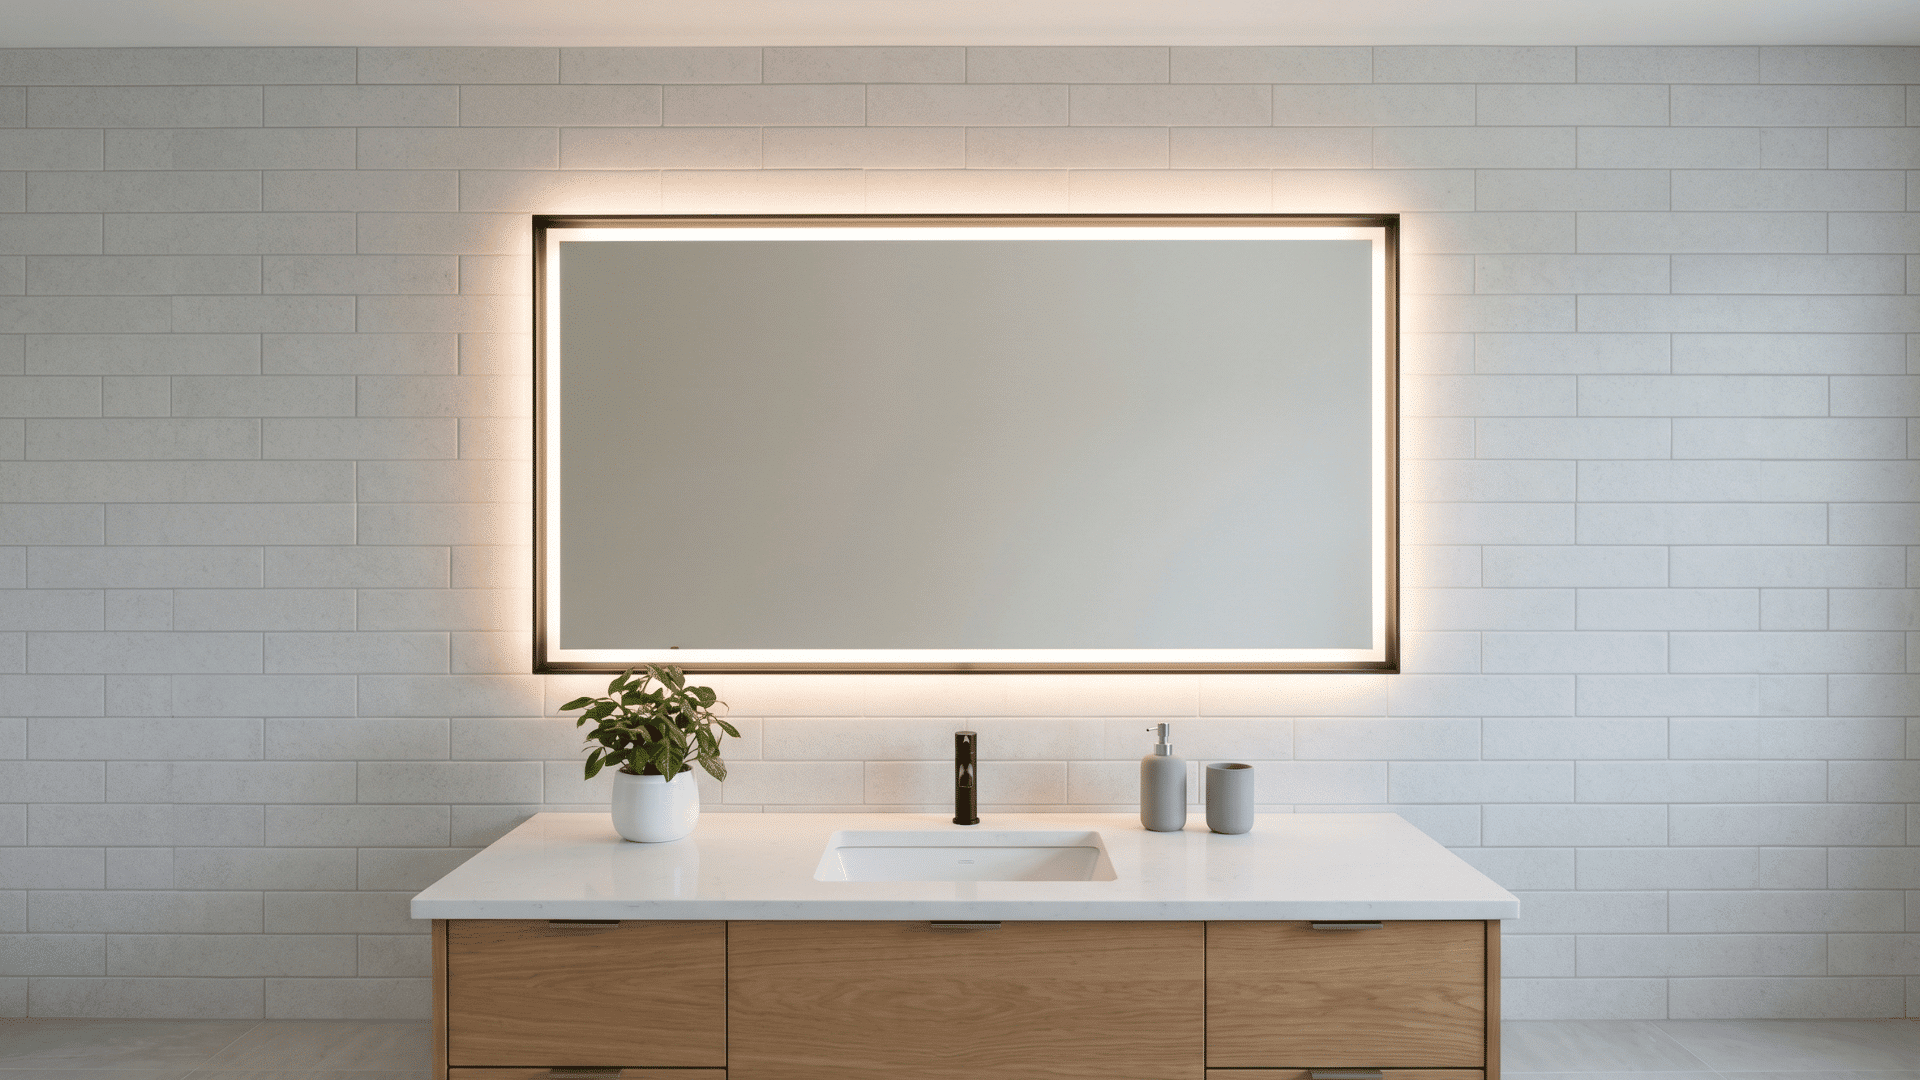
A custom mirror frame fitted with LED strip lighting behind the edges creates a soft backlit glow that adds both function and a designed quality to any wall.
Materials Required: Timber, mirror, LED strip lights, mirror adhesive, router, drill, dimmer switch, power cable
How to Make:
- Build a wooden frame slightly larger than the mirror for the LED gap
- Route a shallow channel around the inner back edge for the LED strip
- Fix the LED strip into the channel and run the cable through the base
- Mount the mirror onto the back of the frame using mirror adhesive
- Connect the power cable to a dimmer switch for adjustable brightness
7. Vertical Herb Garden Wall
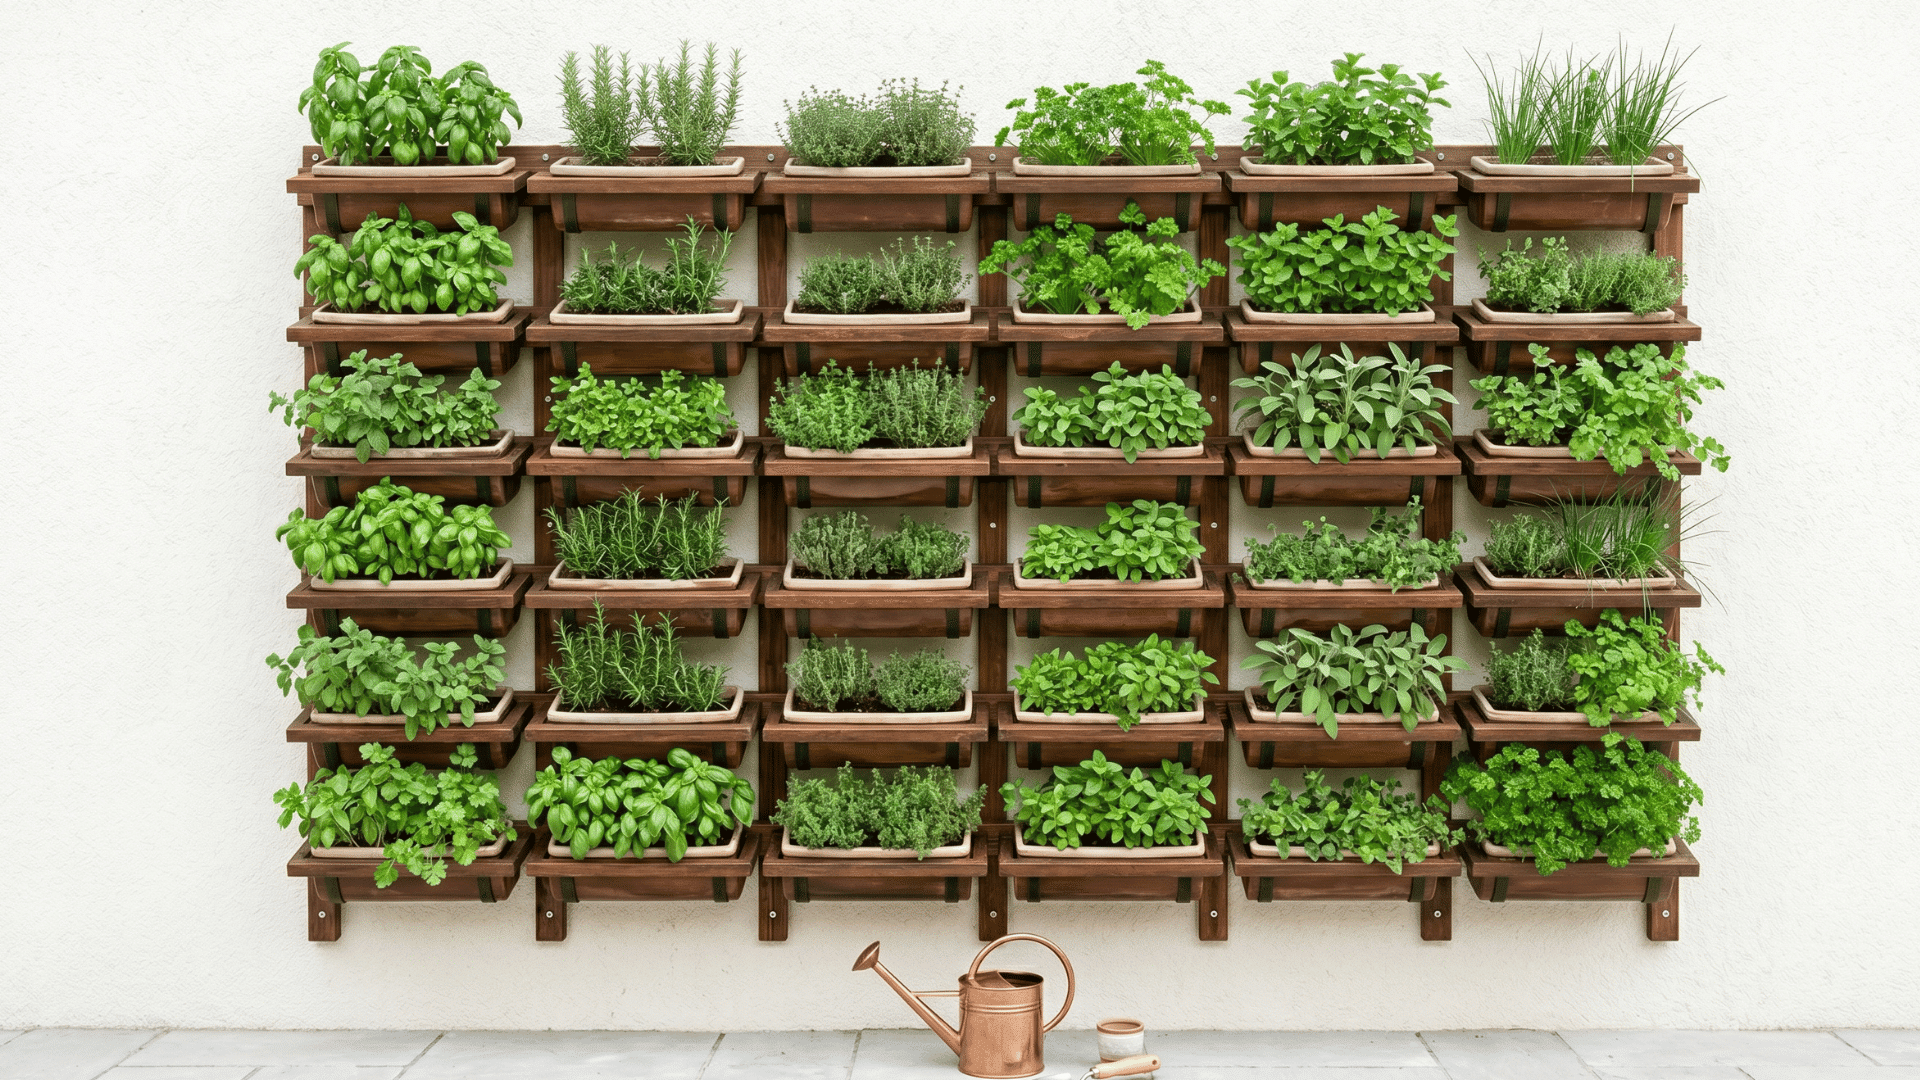
A vertical herb garden mounted on an indoor or outdoor wall keeps fresh herbs accessible and turns a plain wall into a functional and living display.
Materials Required: Planter boxes, backing board, screws, potting soil, drill, labels, and wall anchors
How to Make:
- Attach small planter boxes of equal size to a backing board in rows
- Drill drainage holes in each planter base to prevent waterlogging
- Plant one herb variety per box and label each planter clearly
- Mount the garden on a wall that receives adequate natural light
- Water each planter individually to prevent overflow between boxes
8. Built-In Window Reading Nook
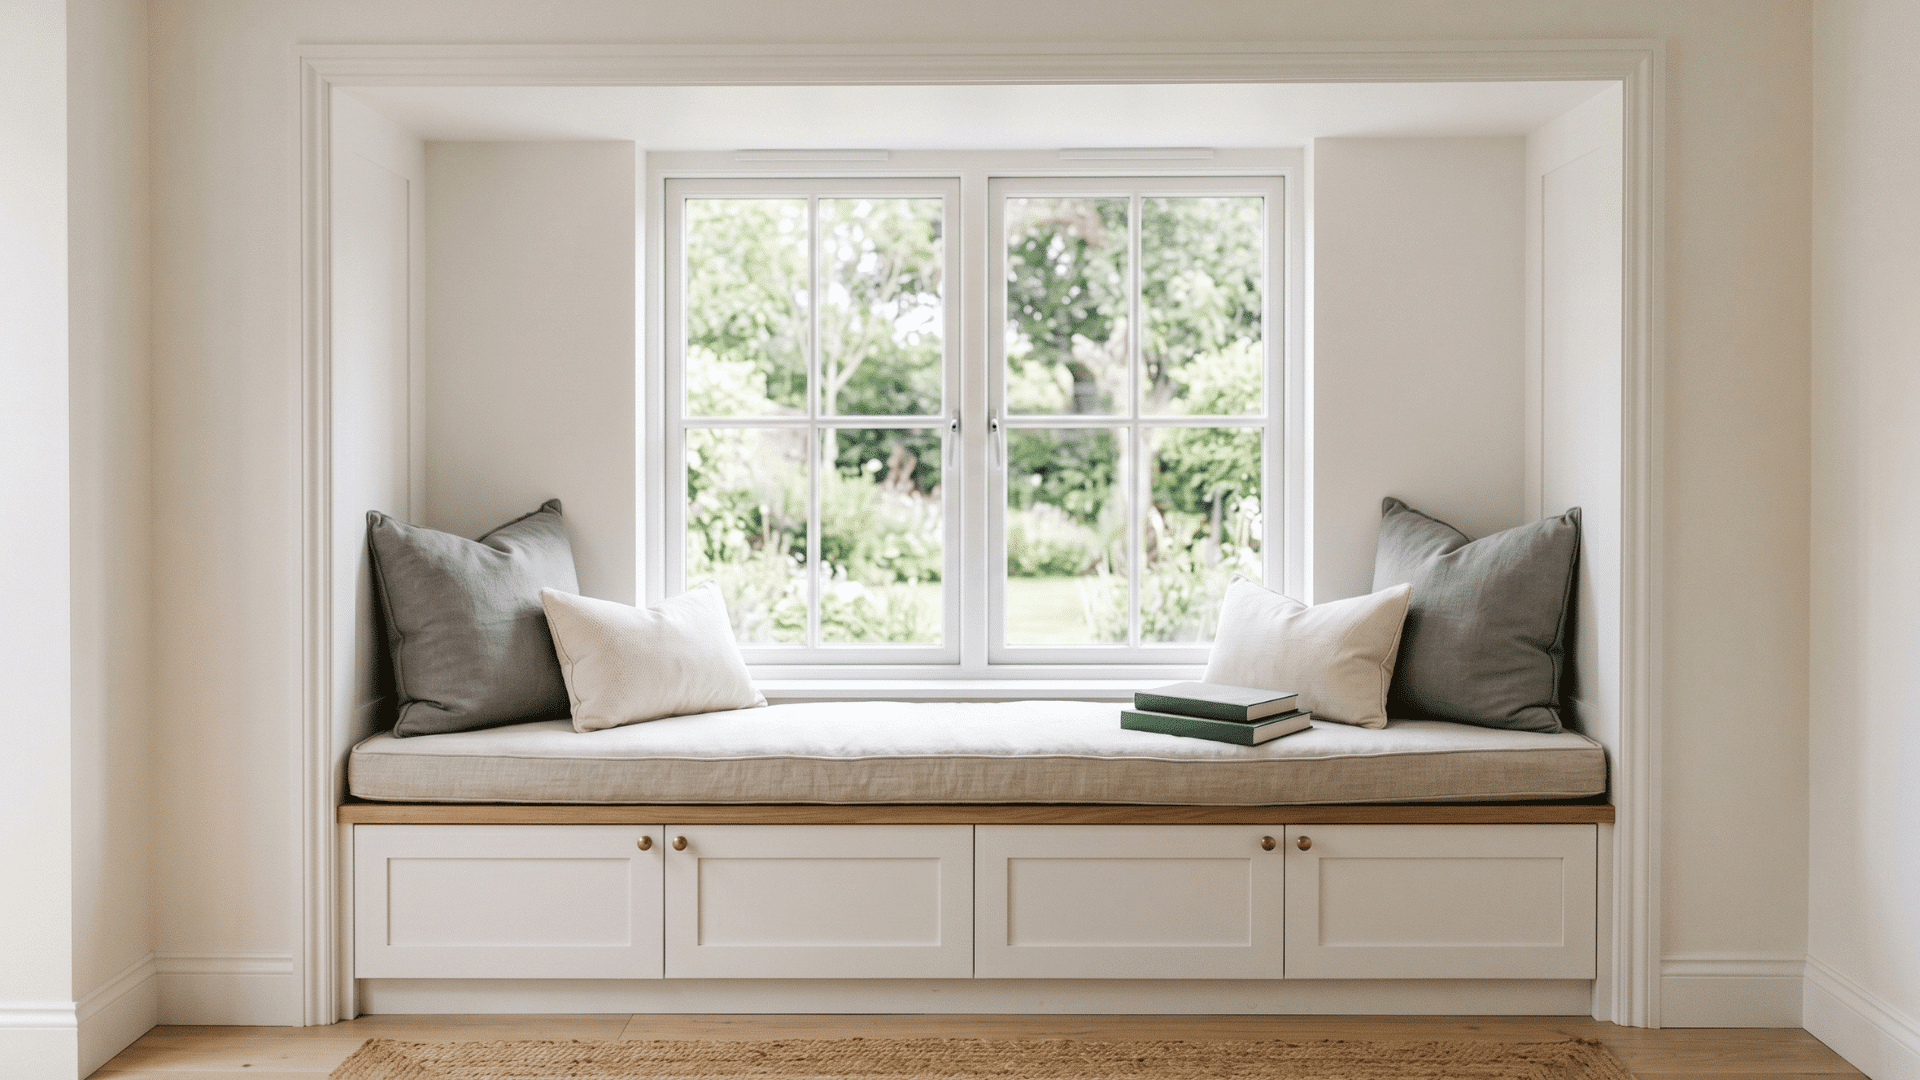
A built-in reading nook fitted into a window recess creates a comfortable, defined spot for reading that makes the most of the available natural light.
Materials Required: Plywood, piano hinges, cushion pad, fabric, screws, narrow shelves, wall-mounted reading light
How to Make:
- Measure the window recess and build a platform box to fit the space
- Add a hinged lid to the platform top for hidden storage beneath the seat
- Cut a cushion pad to size and cover it in a durable, washable fabric
- Install narrow shelves on the side walls to hold books within easy reach
- Add a small wall-mounted reading light so the nook works in the evenings
9. Geometric Painted Feature Wall
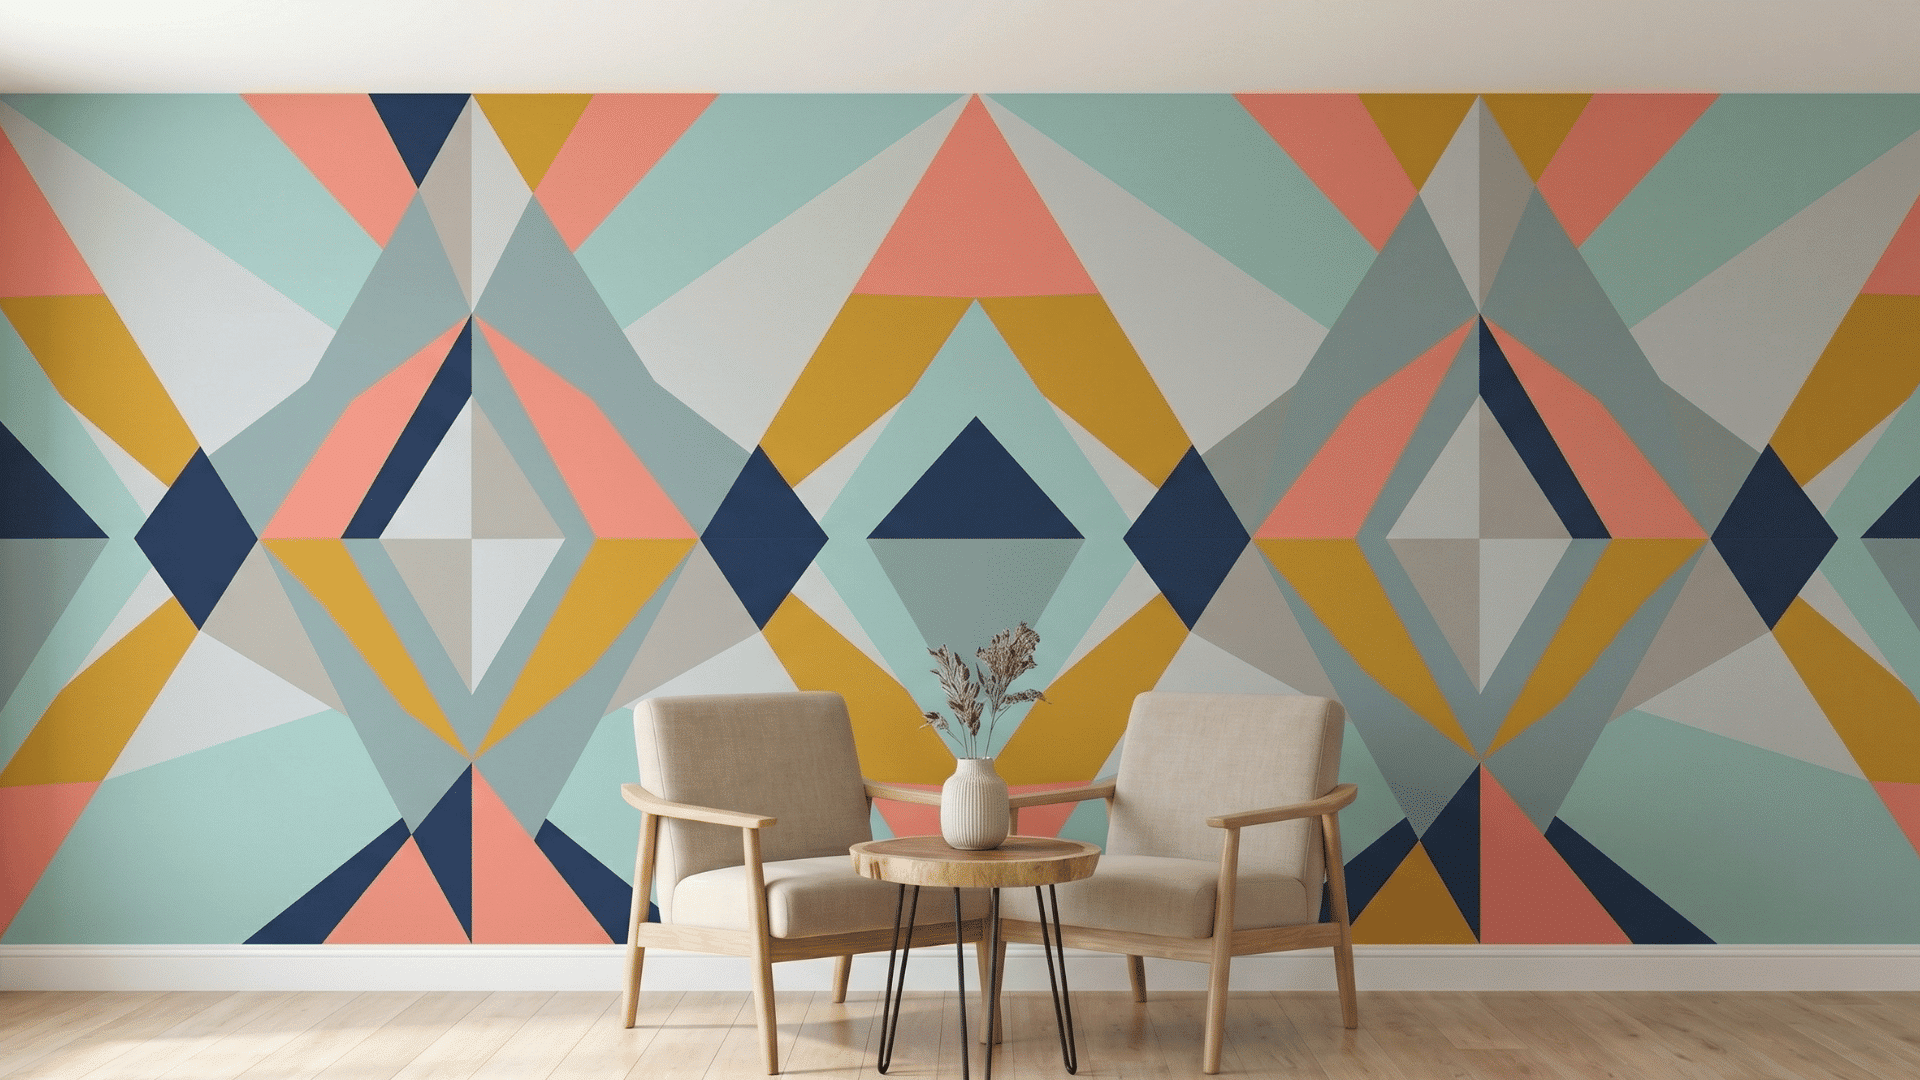
A geometric pattern painted directly onto a wall with tape and paint creates a bold, custom feature that costs very little and requires no specialist skills.
Materials Required: Painter’s tape, wall paint, small roller, pencil, ruler, fine brush
How to Make:
- Plan the design on paper and transfer the key lines onto the wall
- Apply painter’s tape carefully along all pencil lines for clean edges
- Paint each section with a small roller and let each color dry fully
- Remove the tape slowly at a low angle before the paint dries completely
- Touch up any bleed marks with a fine brush once all tape is removed
10. DIY Hanging Rope Shelf Setup
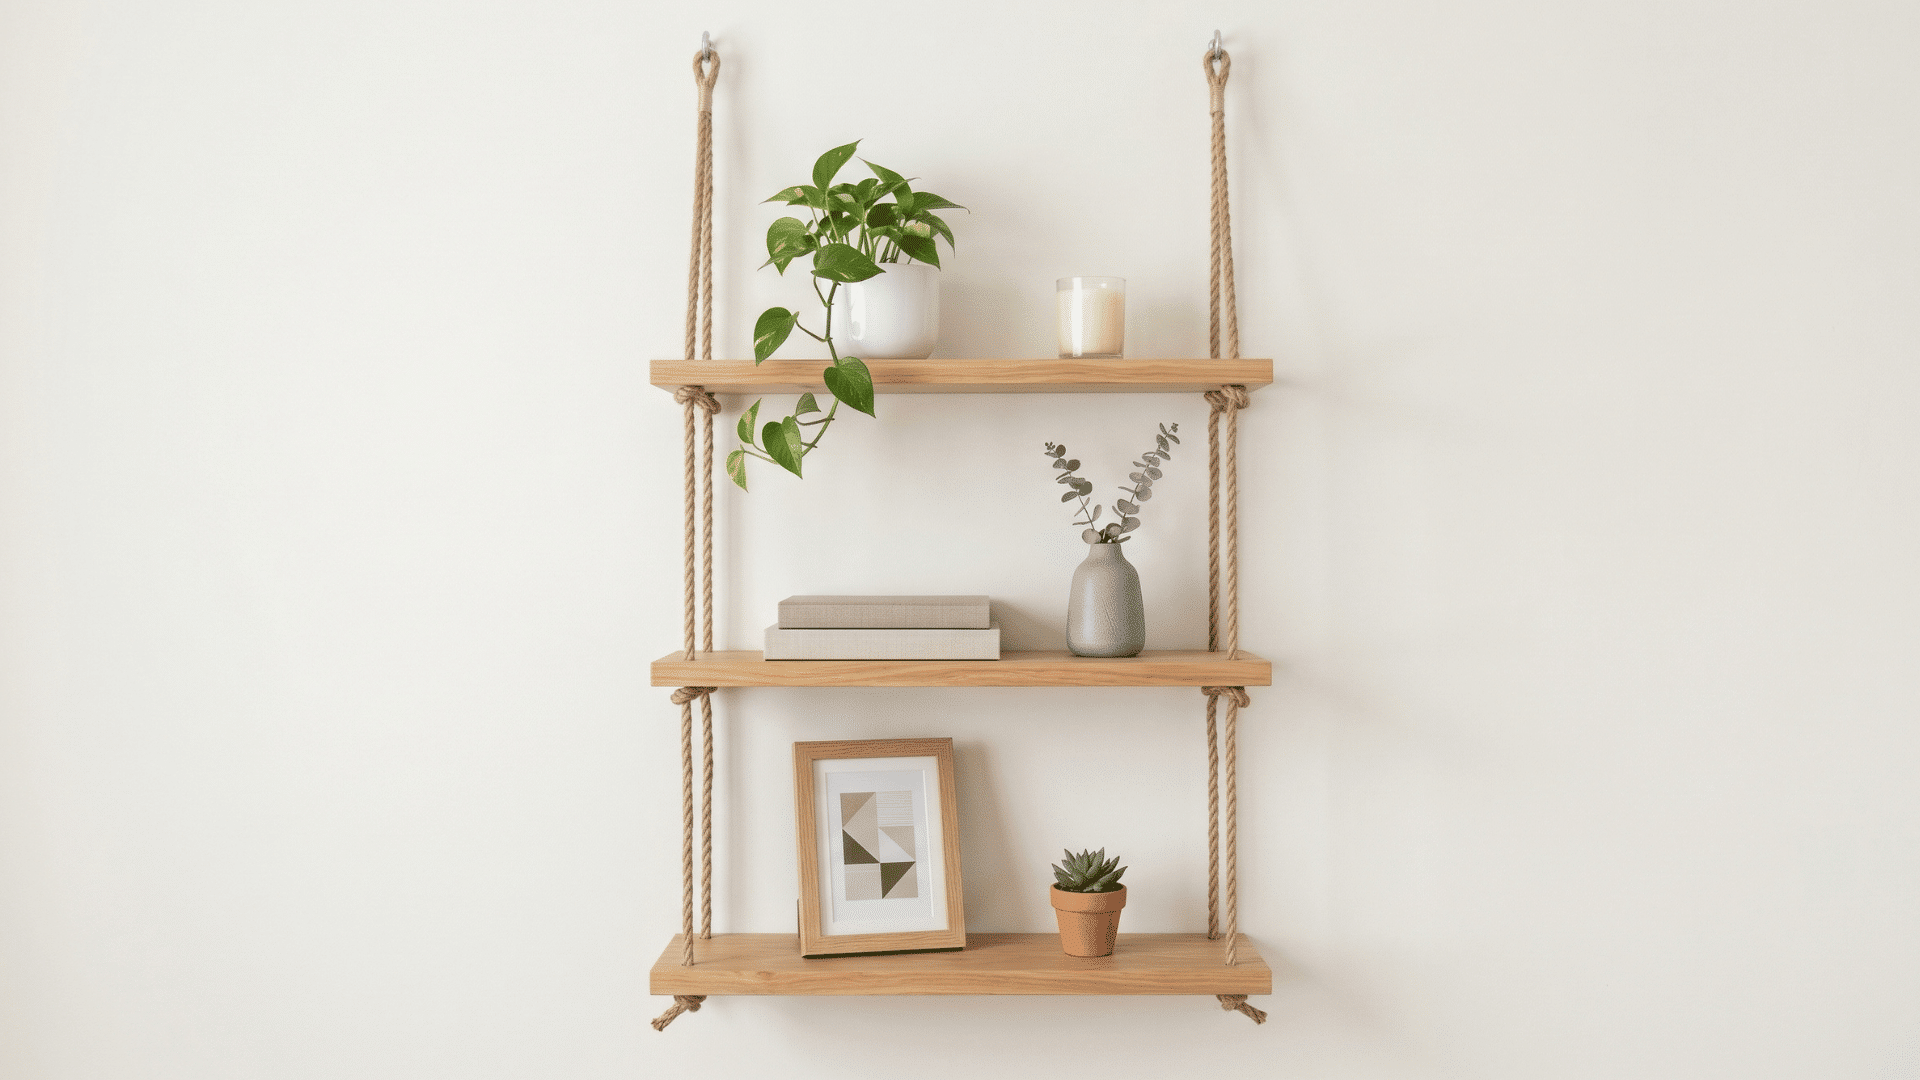
A hanging rope shelf suspended from the ceiling or a wall-mounted rod adds open storage with a natural and textural quality that suits many interior styles.
Materials Required: Thick natural rope, wooden shelf boards, drill, ceiling hooks or mounted rod, measuring tape
How to Make:
- Cut two equal lengths of rope and mark even intervals for shelf positions
- Drill a hole at each corner of every shelf board for the rope to pass through
- Tie a secure knot beneath each hole to hold each shelf firmly in place
- Attach ceiling hooks or a mounted rod to a structural ceiling point
- Adjust all knots so each shelf sits level before securing the rope ends
11. Mini Indoor Greenhouse Cabinet
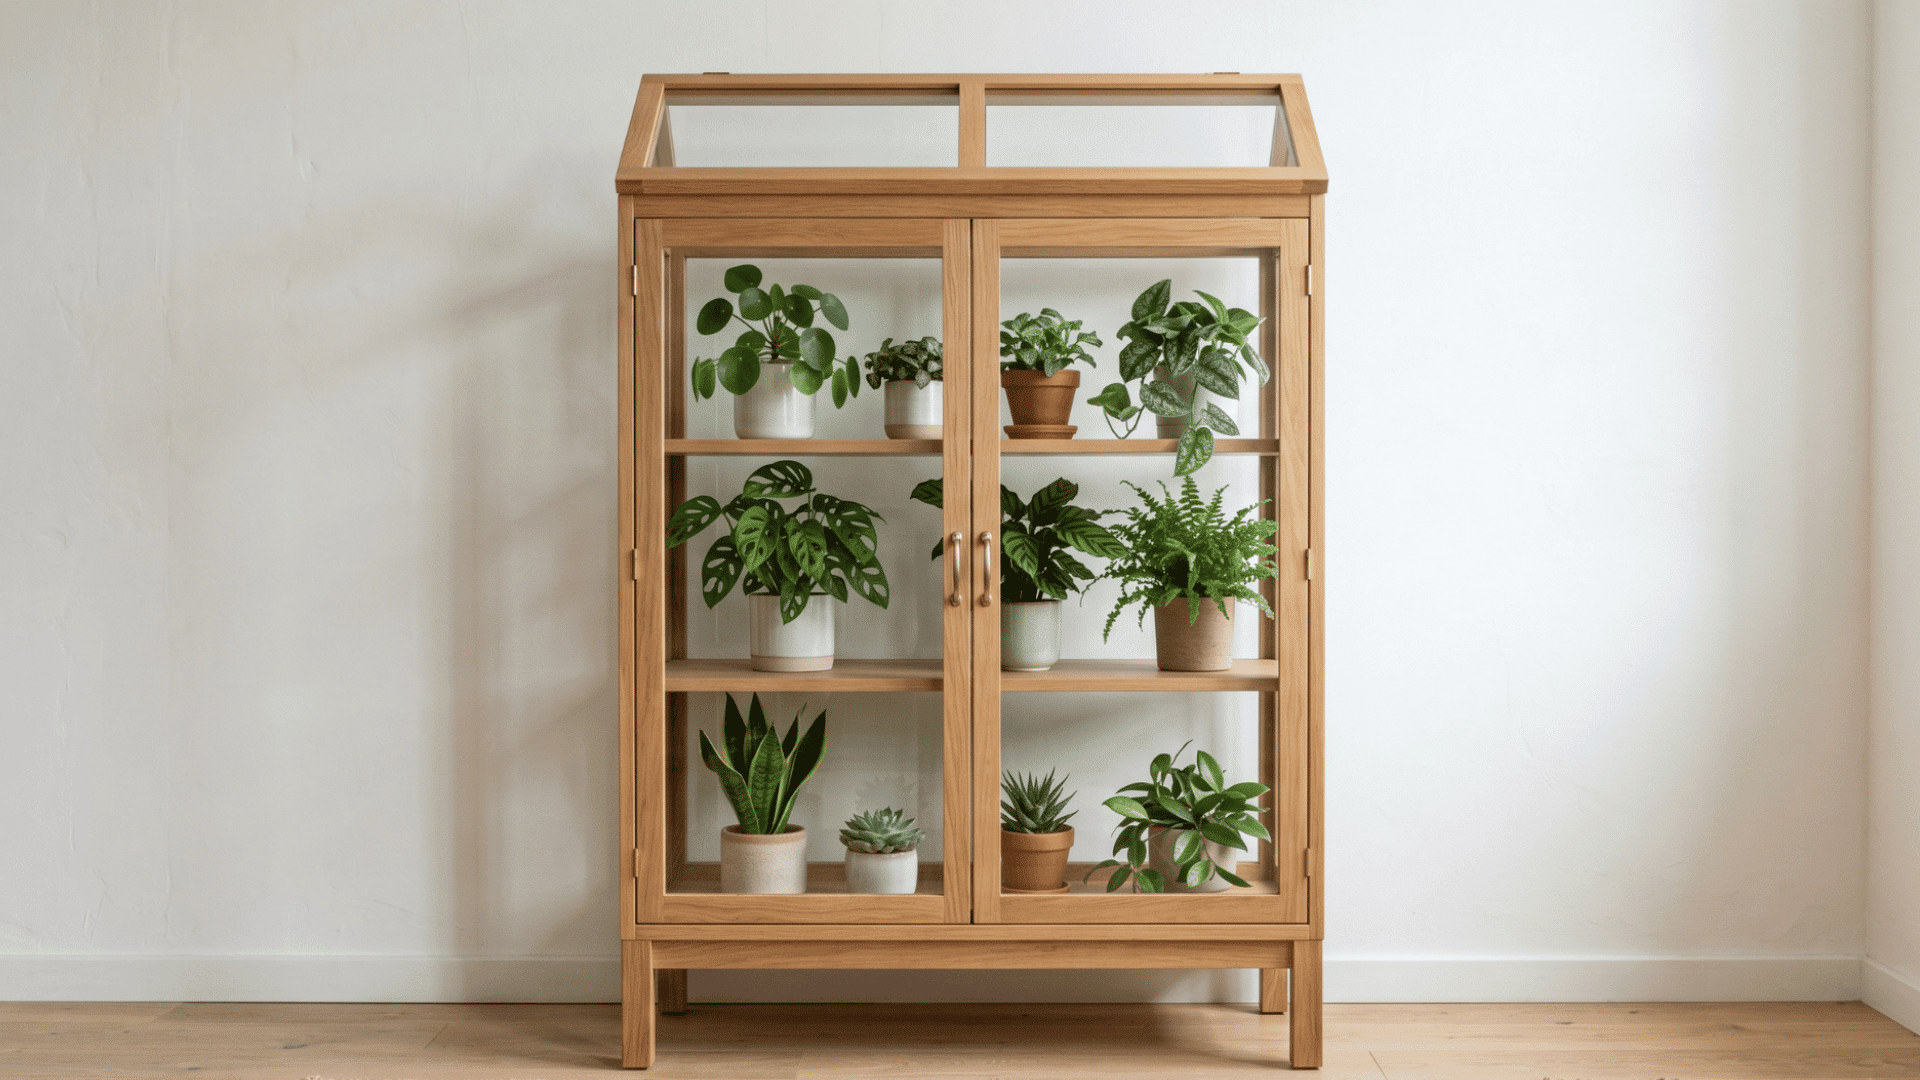
A mini indoor greenhouse cabinet built from a timber frame and clear acrylic panels creates a controlled growing environment for plants inside the home.
Materials Required: Timber, clear acrylic panels, wooden battens, screws, hinges, grow light, drill
How to Make:
- Build a rectangular timber frame with a solid back and an open front for the door
- Cut acrylic panels to fit all sides and secure them with thin wooden battens
- Build a simple door using the same acrylic and timber construction
- Install a small clip-on grow light inside to supplement natural light
- Add slatted shelves at adjustable heights to fit plants of different sizes
12. Rolling Kitchen Island Cart
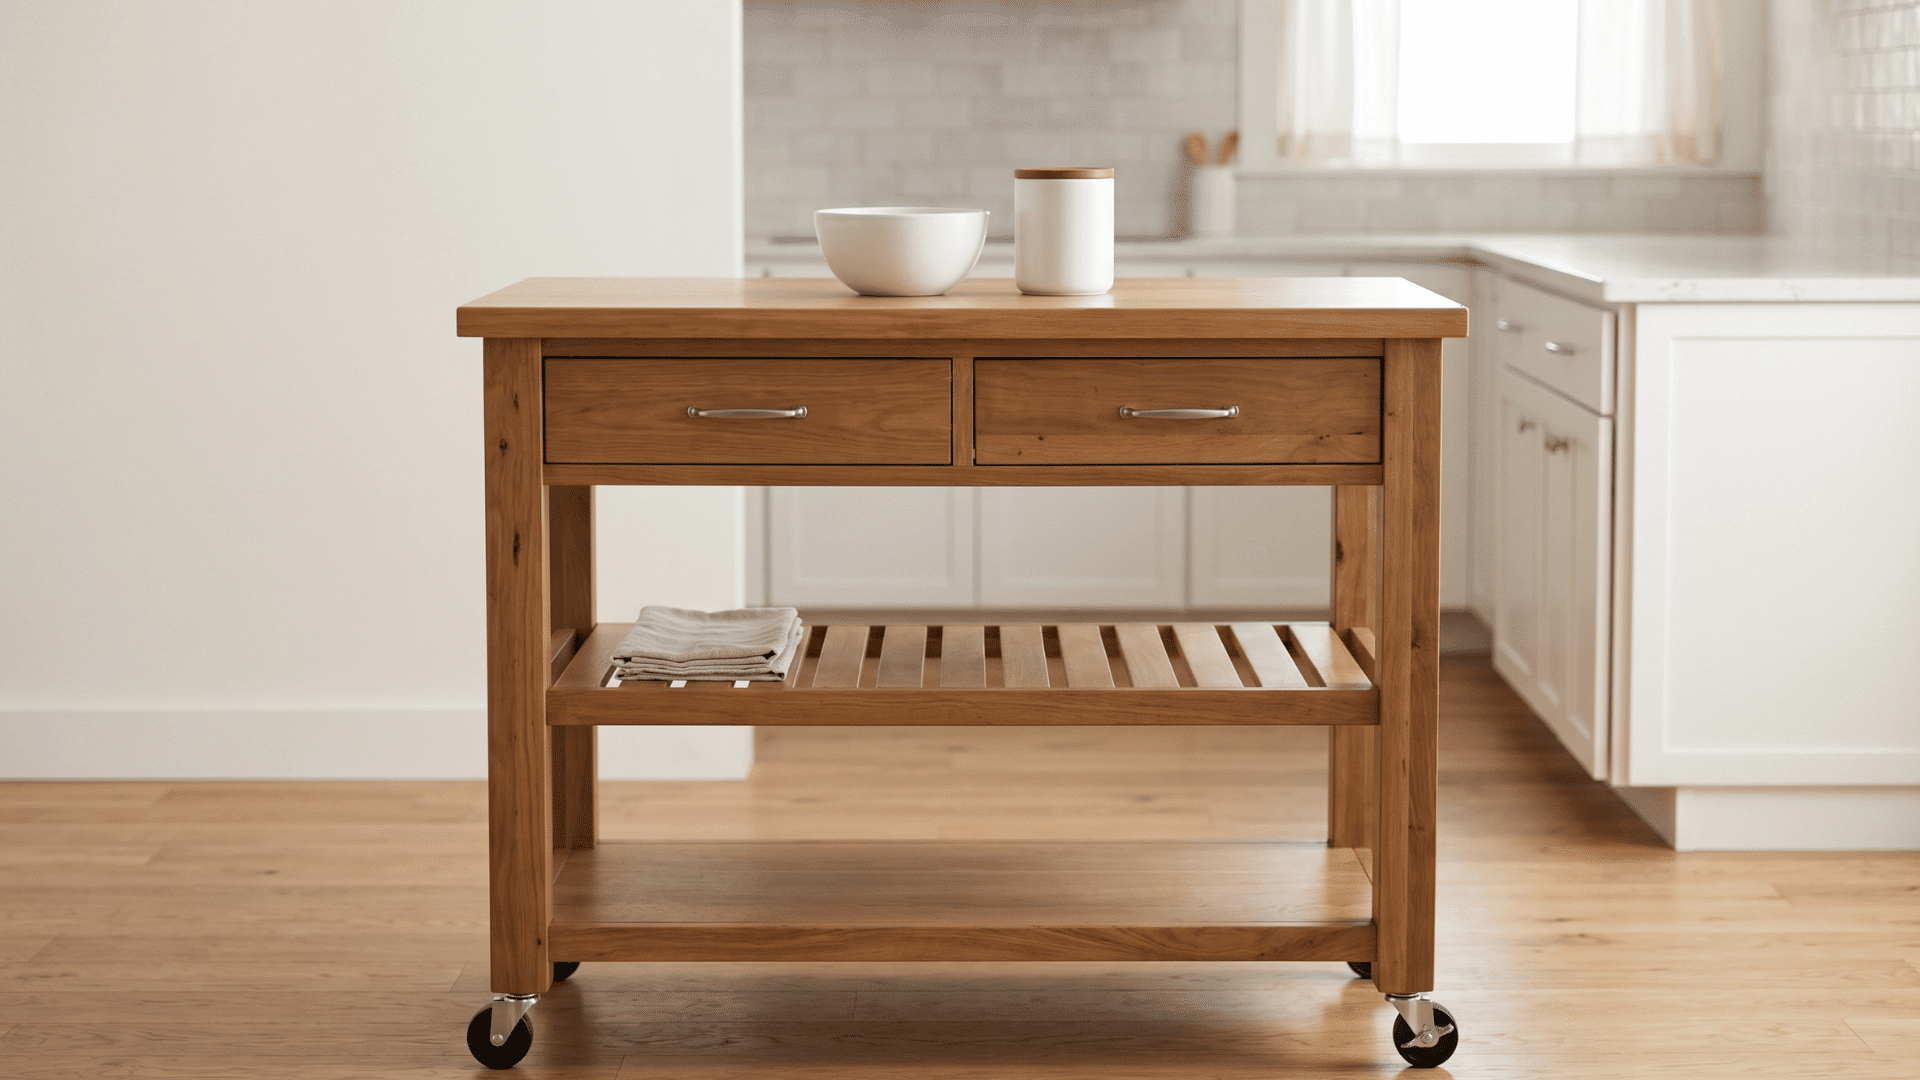
A rolling kitchen island cart adds extra counter space and storage to the kitchen and can be moved wherever it is needed during food preparation.
Materials Required: Timber or repurposed furniture base, butcher block or tile top, locking casters, screws, sandpaper, food-safe sealant
How to Make:
- Build a sturdy rectangular timber frame or repurpose a solid furniture base
- Attach a butcher block or thick timber panel as the main work surface
- Add one or two fixed shelves inside the lower frame for kitchen storage
- Fit four heavy-duty locking casters to the base corners for easy movement
- Sand all surfaces and apply a food-safe finish to the top before use
13. Ceiling-Mounted Plant Hanger Grid

A grid of metal or timber rods mounted to the ceiling creates a structured overhead display for hanging plants, keeping the floor completely clear.
Materials Required: Metal conduit or timber dowels, S-hooks, ceiling hooks, cable ties or wire connectors, drill, measuring tape
How to Make:
- Cut metal conduit or timber dowels to equal lengths for the grid
- Connect all grid intersections using cable ties or metal connectors
- Fix the grid to the ceiling using hooks screwed into joists at each corner
- Hang plants from the grid using S-hooks at varying drop lengths
- Check the weight capacity of each ceiling fixing before loading the grid
14. Modern Pegboard Tool Wall
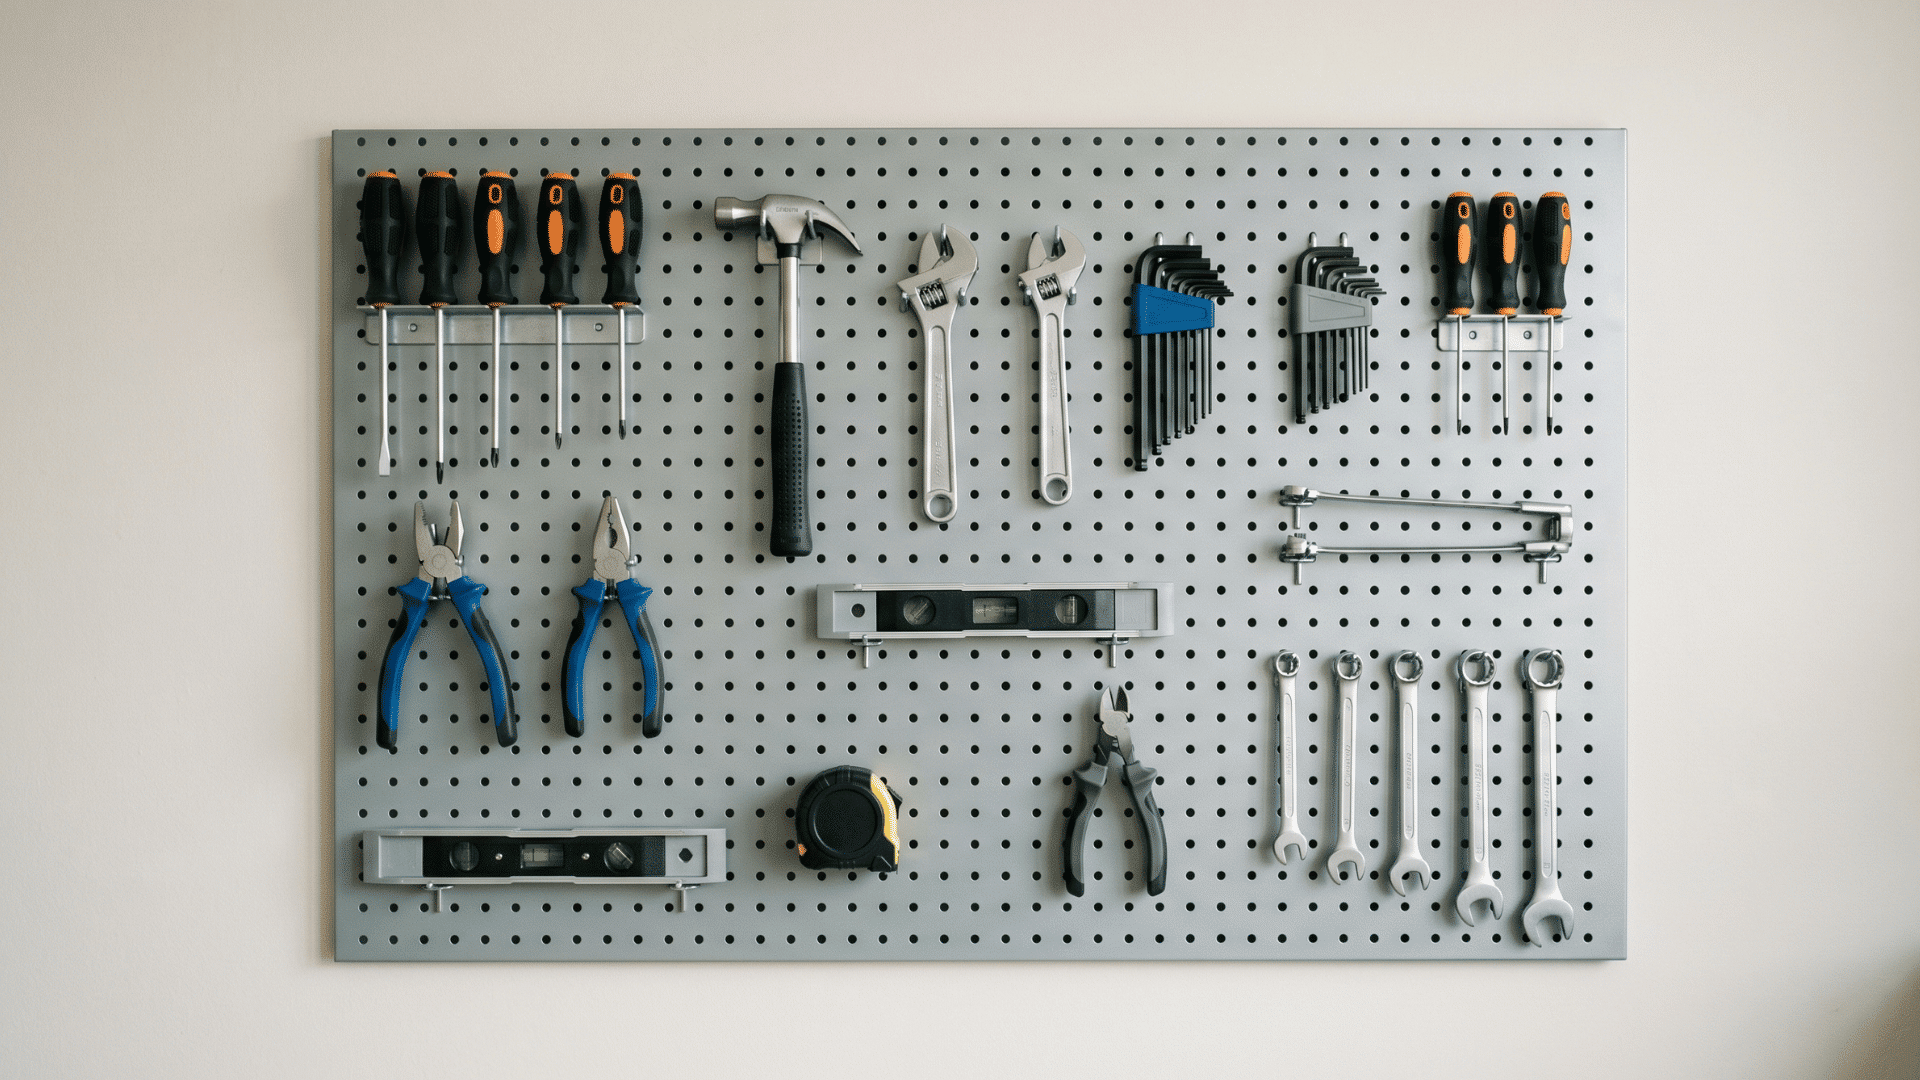
A pegboard mounted on a workshop or garage wall creates a visible, organized storage system for tools, keeping everything accessible and off the floor.
Materials Required: Pegboard panel, paint, spacer blocks, screws, assorted hooks, bins, shelf attachments, marker
How to Make:
- Cut the pegboard to size and paint it before mounting it to the wall
- Fix the pegboard using spacer blocks so hooks fit through the back properly
- Sort all tools by type and frequency before arranging hooks and bins
- Use a mix of straight hooks, double hooks, and shelf attachments throughout
- Outline each tool position so the correct hook is always easy to identify
15. Bed Frame with Under-Bed Storage Drawers
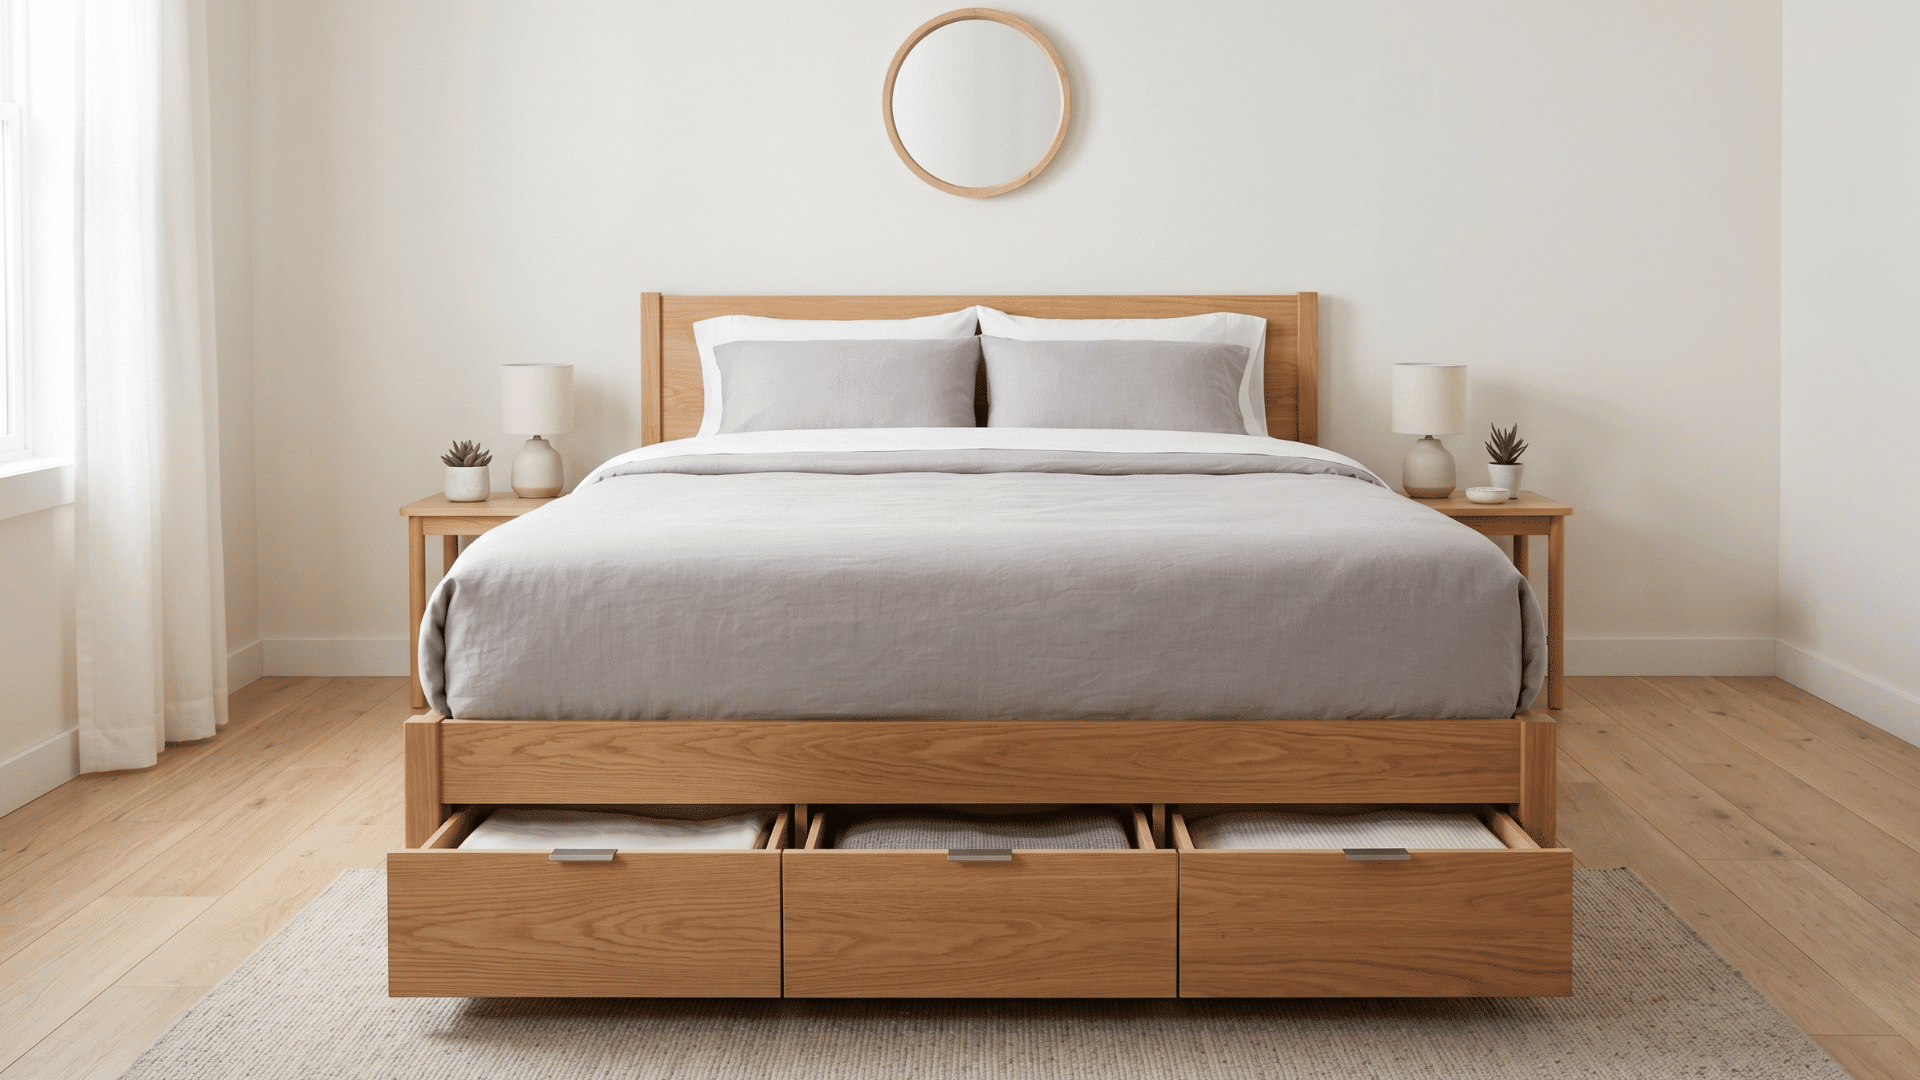
A bed frame with integrated pull-out storage drawers beneath makes full use of the floor space below the bed for organized, hidden storage.
Materials Required: Timber, plywood, drawer slides, handles or recessed pulls, screws, sandpaper, drill
How to Make:
- Build the main bed frame at a height that allows clearance for the drawers
- Construct plywood drawer boxes sized to fit within the frame with small gaps
- Attach drawer slides to the frame interior and the sides of each drawer box
- Add a solid drawer front and a small handle to each drawer for easy access
- Label each drawer on the front so contents are easy to identify from the outside
16. Wall-Mounted Bike Rack Display
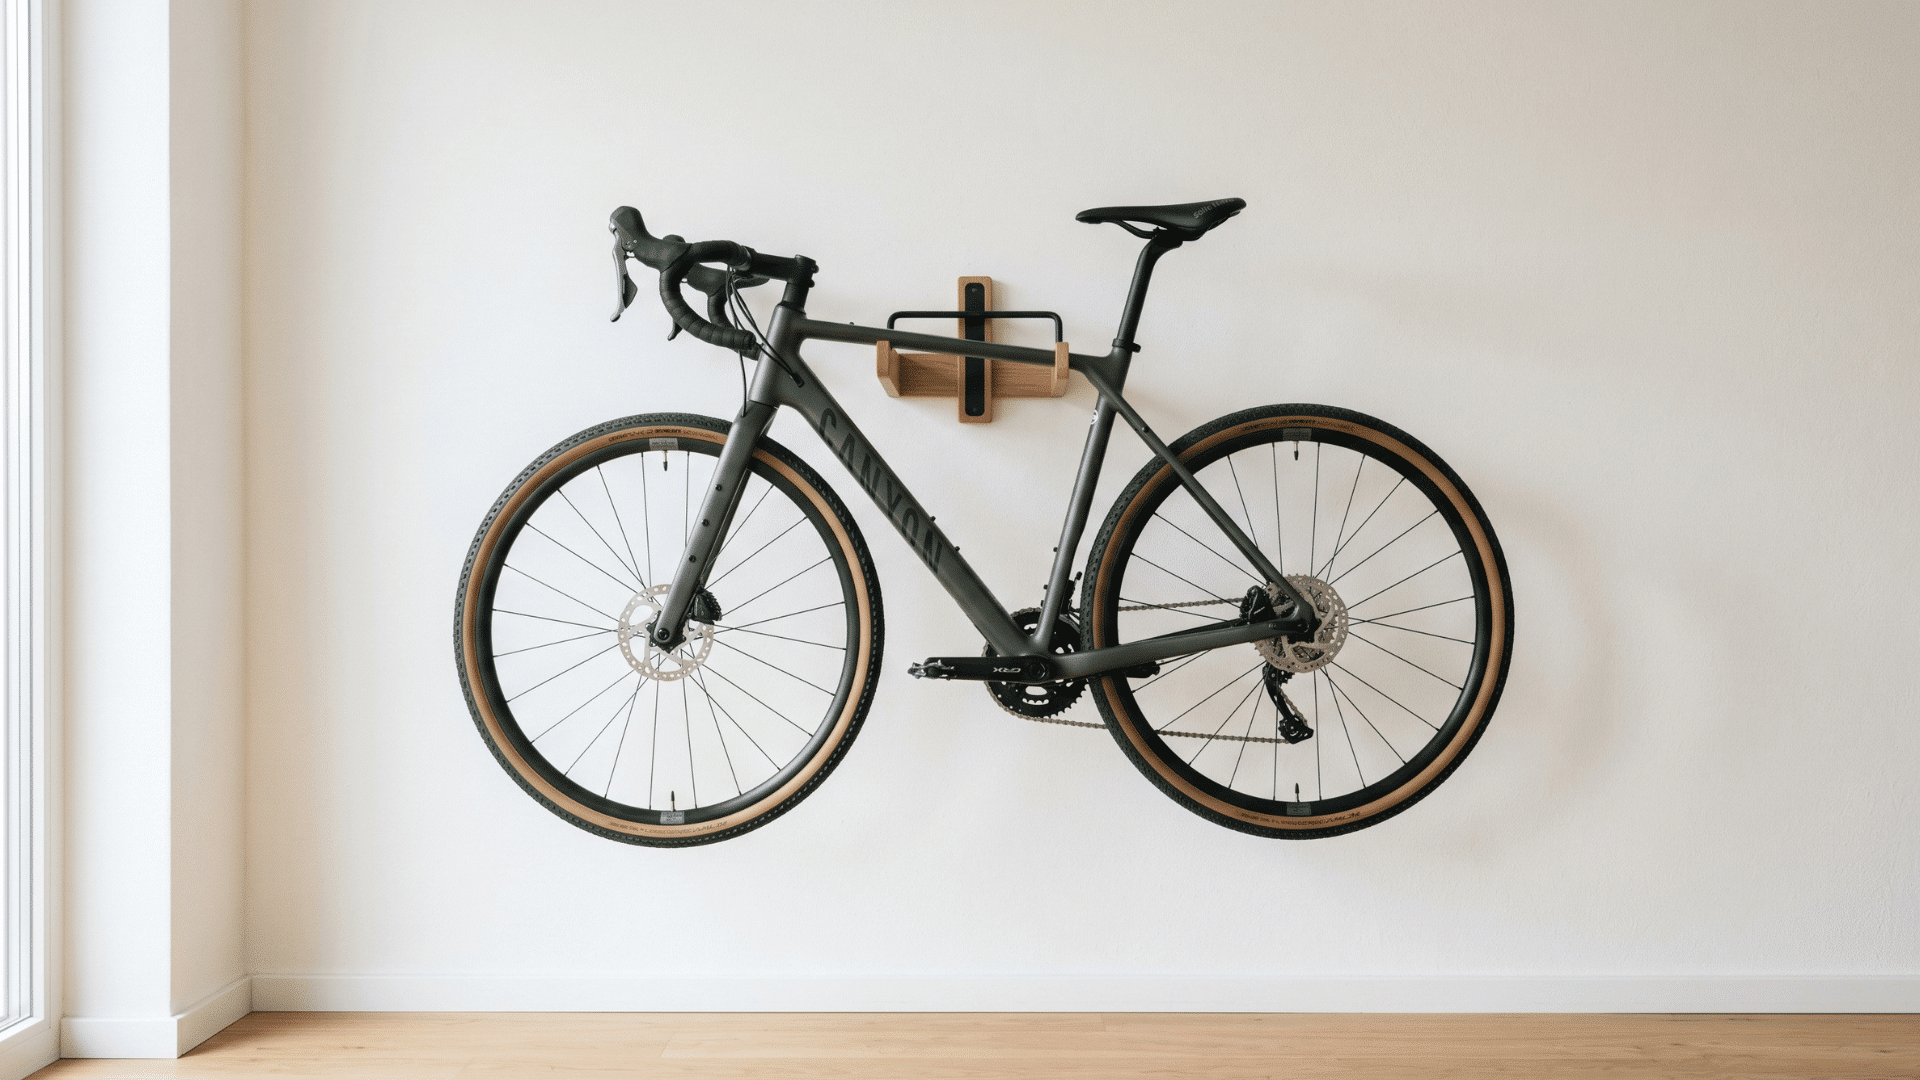
A wall-mounted bike rack keeps bicycles stored vertically off the floor and turns them into a functional display feature on the wall.
Materials Required: Bike rack mounting system, wall anchors, screws, drill, rubber or foam padding, secondary hook
How to Make:
- Choose a mounting system that suits the specific bike frame style
- Locate wall studs and mark fixing points before drilling for secure anchoring
- Mount the rack at the correct height so the bike clears the floor fully
- Add rubber or foam coating to all rack contact points to prevent scratches
- Install a lower hook below the main rack to store a helmet or bag nearby
17. Mudroom Bench with Hooks and Cubbies
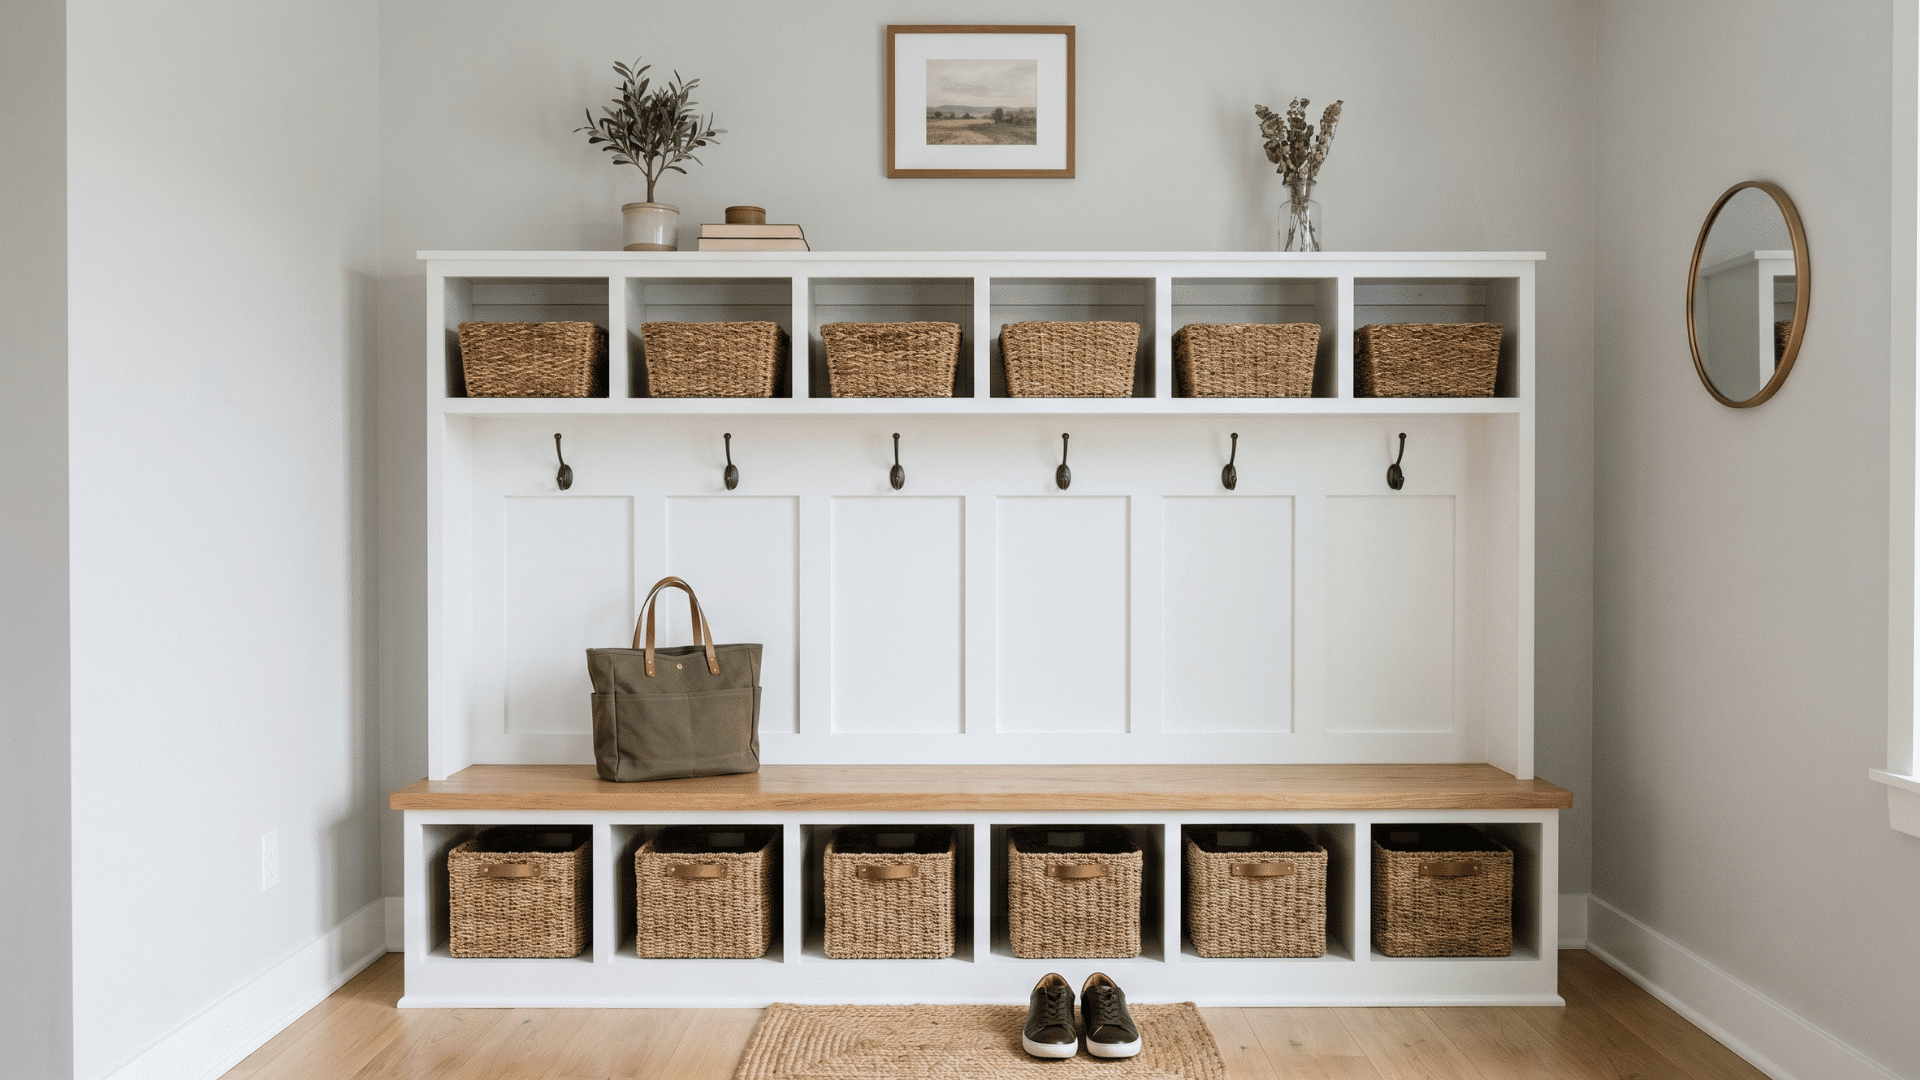
A mudroom bench fitted with wall hooks above and open cubbies below creates a complete entry storage zone for shoes, bags, and outerwear in one unit.
Materials Required: Plywood or timber, vertical dividers, cushion pad, wall hooks, screws, sandpaper, paint or stain, sealer
How to Make:
- Build a sturdy bench box at a comfortable sitting height with a cubby below
- Divide the lower cubby into compartments sized to fit shoes or small baskets
- Add a cushion pad to the bench top for comfortable seating at the entry
- Install a row of wall hooks above the bench for coats, bags, and scarves
- Paint or stain the full unit and seal all surfaces to handle daily wear
18. Custom Closet Organizer System
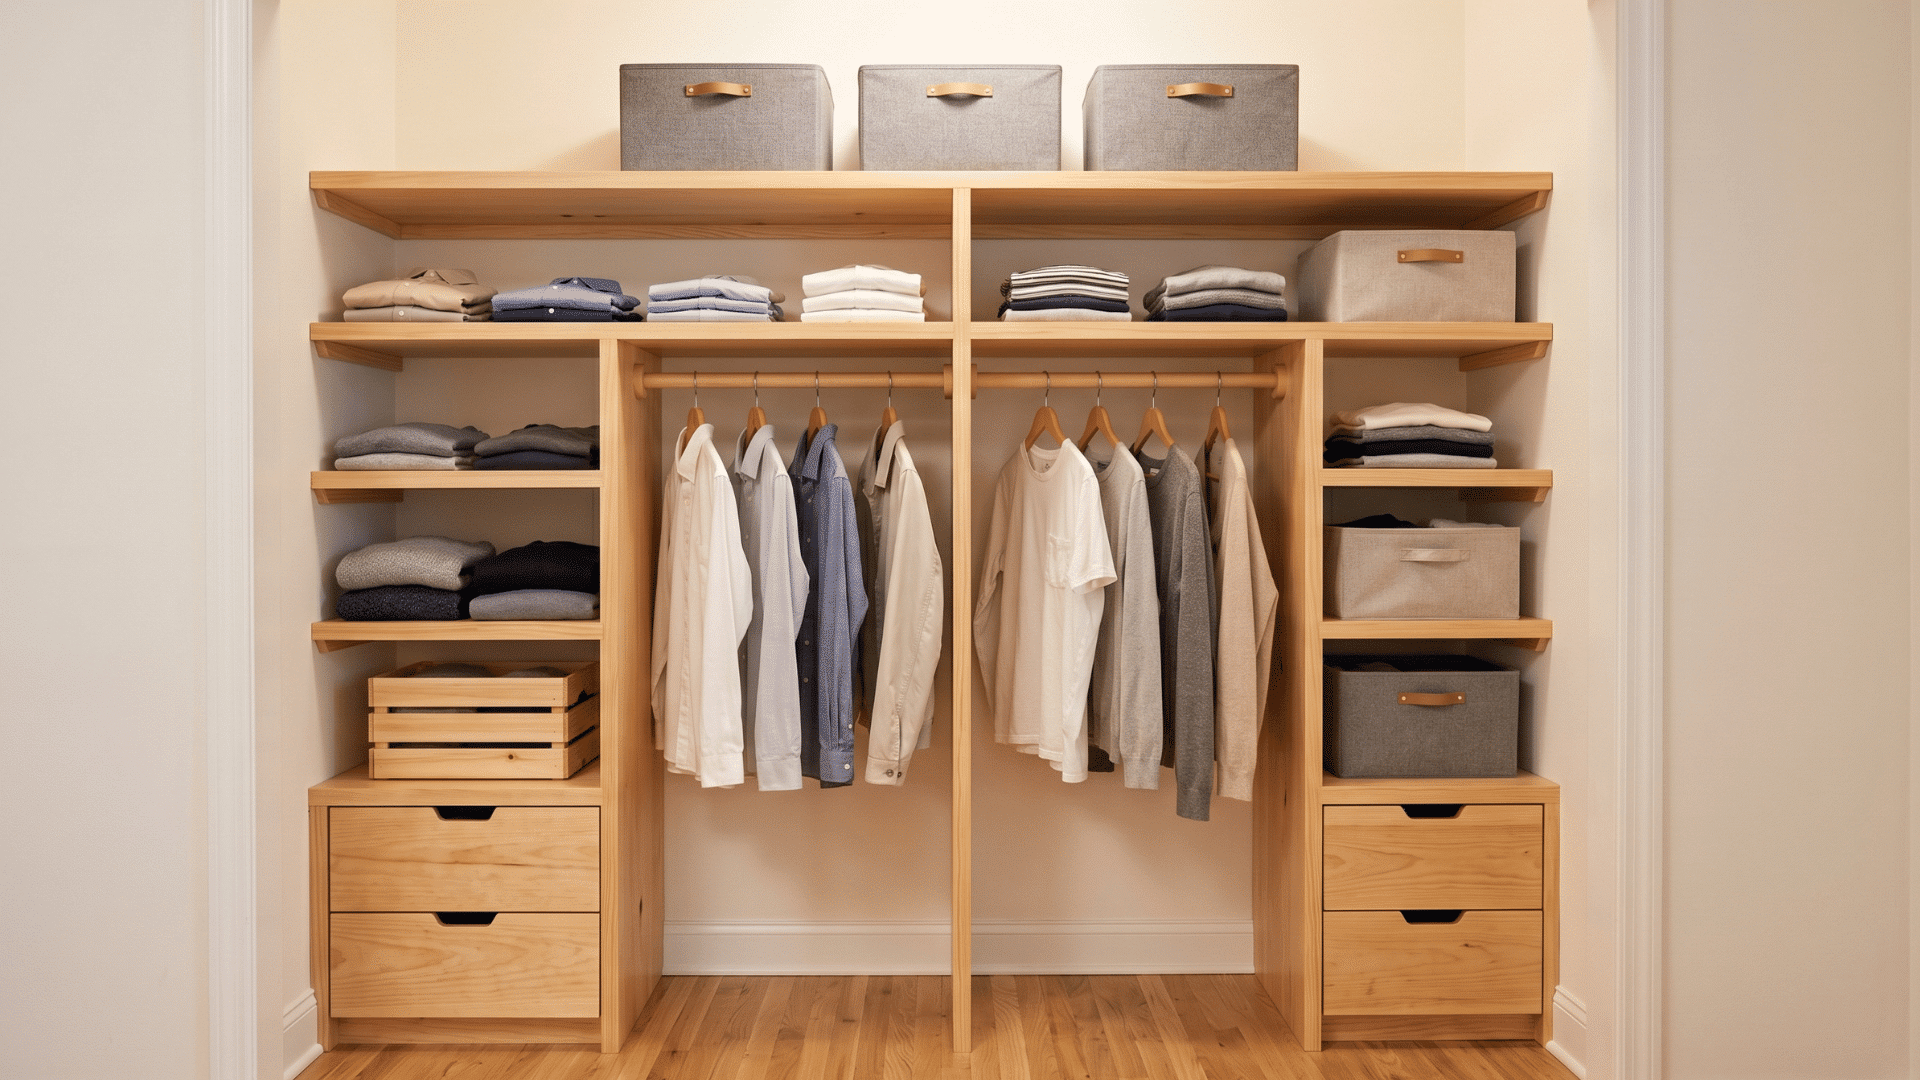
A custom closet organizer built to fit the exact dimensions of an existing wardrobe space makes better use of every available inch for organized daily storage.
Materials Required: Timber, plywood, hanging rods, drawer slides, screws, measuring tape, sandpaper, drill
How to Make:
- Measure the full interior dimensions of the closet before cutting any timber
- Plan the layout on paper and divide the space into hanging and shelf zones
- Build shelf units and drawer boxes, and test the fit before fixing them permanently
- Install a double hanging rod in the shorter section to double the hanging capacity
- Add pull-out drawers or baskets at the base for folded items and accessories
19. DIY Firewood Storage Rack
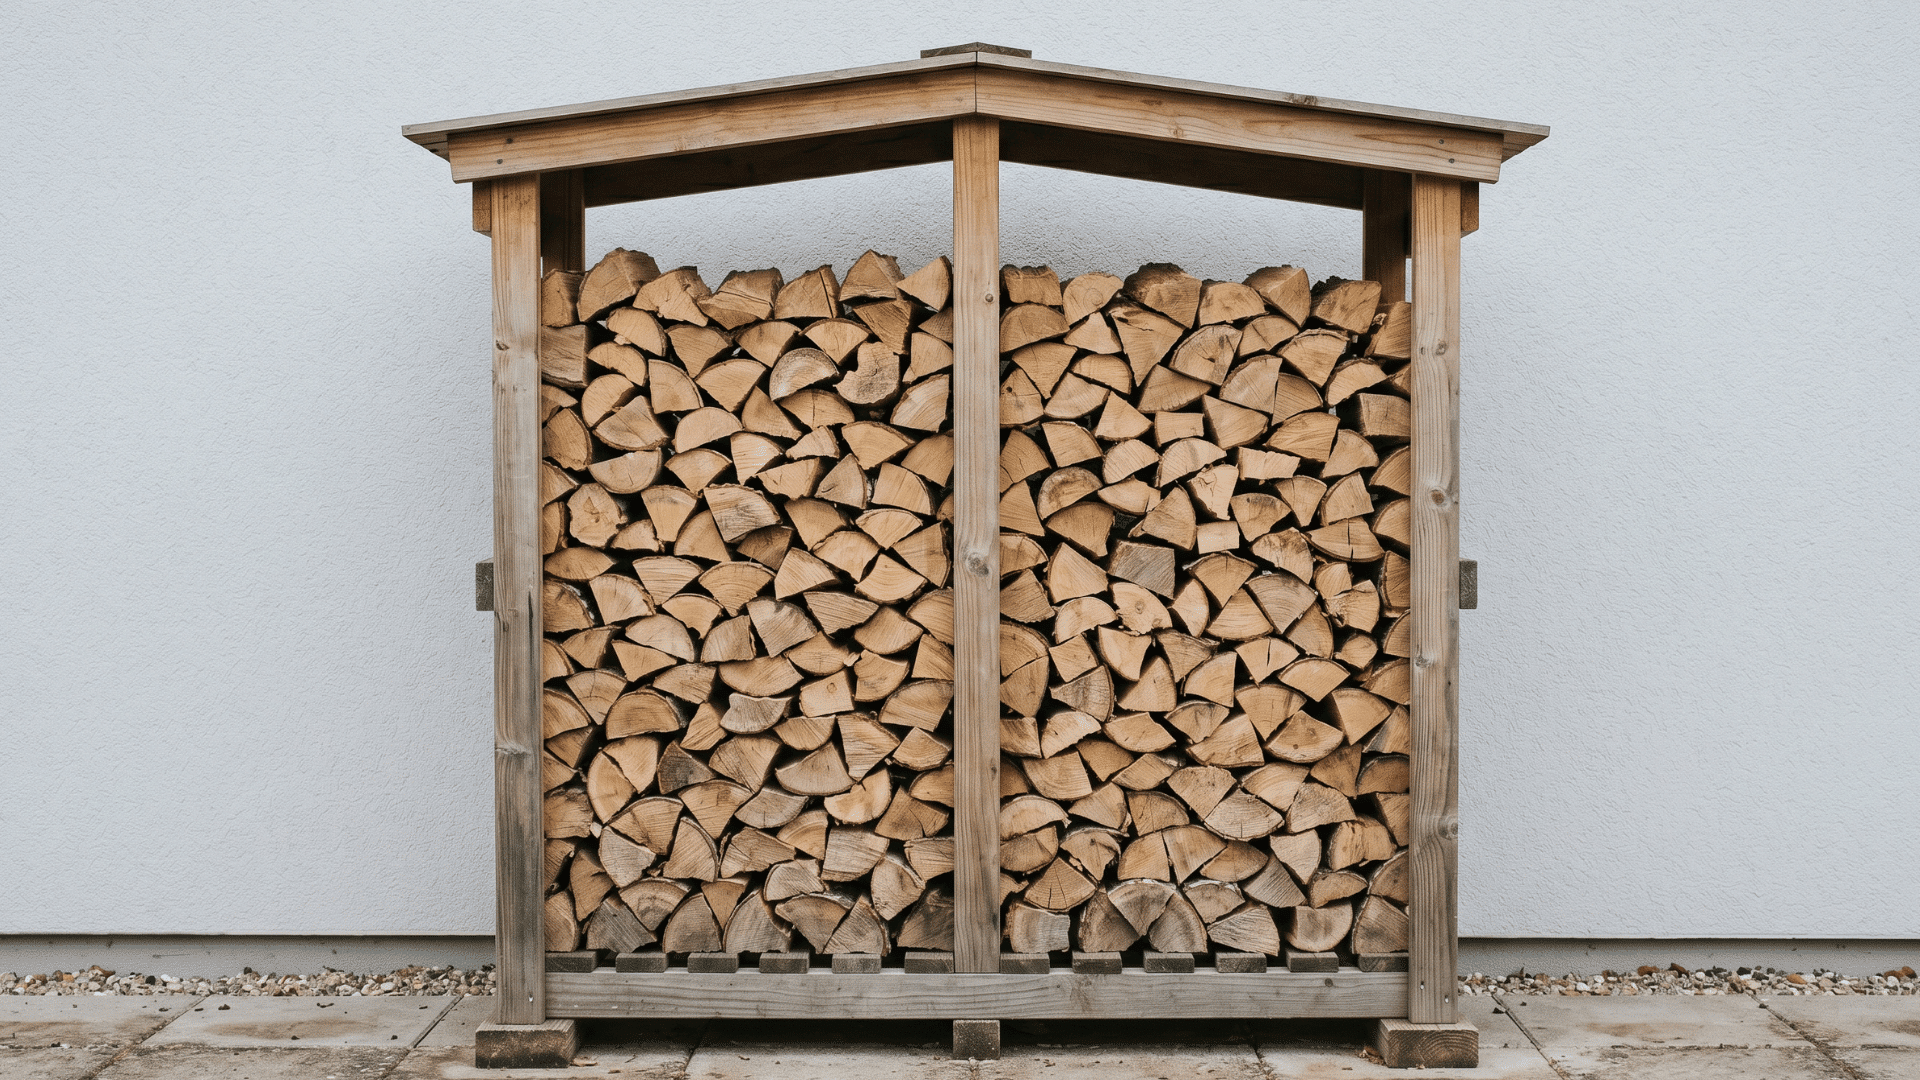
A firewood storage rack, built from timber or steel, keeps logs neatly stacked and off the ground, whether used indoors beside a fireplace or outdoors near a patio.
Materials Required: Timber or steel flat bar, horizontal crossbars, screws or bolts, short feet or casters, exterior paint or wood finish
How to Make:
- Cut two identical side frames and connect them with horizontal crossbars
- Space the crossbars far enough apart to hold a full stack of firewood
- Raise the base off the floor by attaching short feet or casters to each side
- Apply exterior paint or a rust-resistant finish if the rack will be used outside
- Size the rack to hold at least two weeks of firewood for regular use
20. Reclaimed Wood Picture Wall Gallery
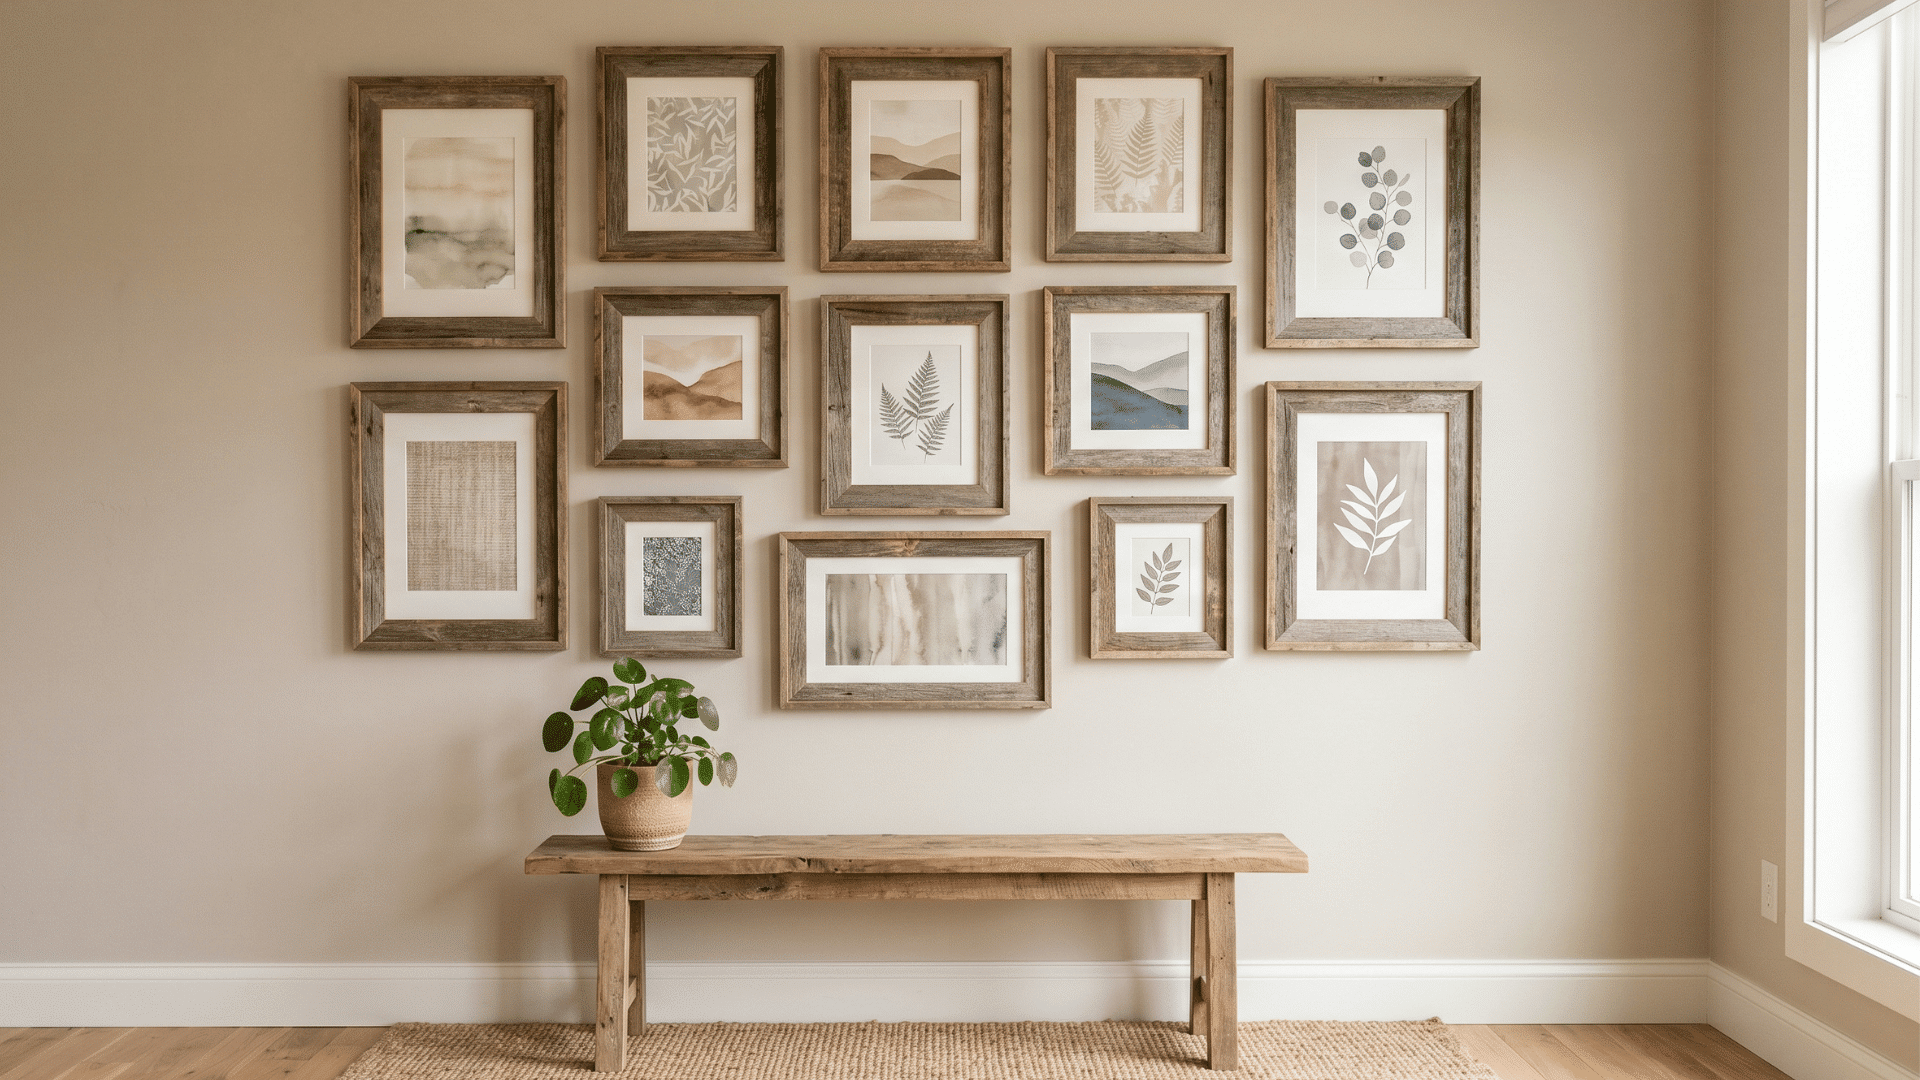
A picture gallery wall, built with reclaimed wood frames and a mix of photographs and prints, gives a plain wall a personal, story-rich character.
Materials Required: Reclaimed timber offcuts, corner joints, sandpaper, picture rail hooks, spirit level, wall fixings
How to Make:
- Cut reclaimed timber into individual frame profiles and assemble with corner joints
- Sand each frame lightly while keeping the natural aged texture of the wood
- Lay the full gallery arrangement on the floor to finalize spacing and composition
- Mix different frame sizes and orientations so the gallery feels naturally collected
- Hang all frames using a spirit level and picture rail hooks where possible
21. Entryway Umbrella and Key Organizer Station
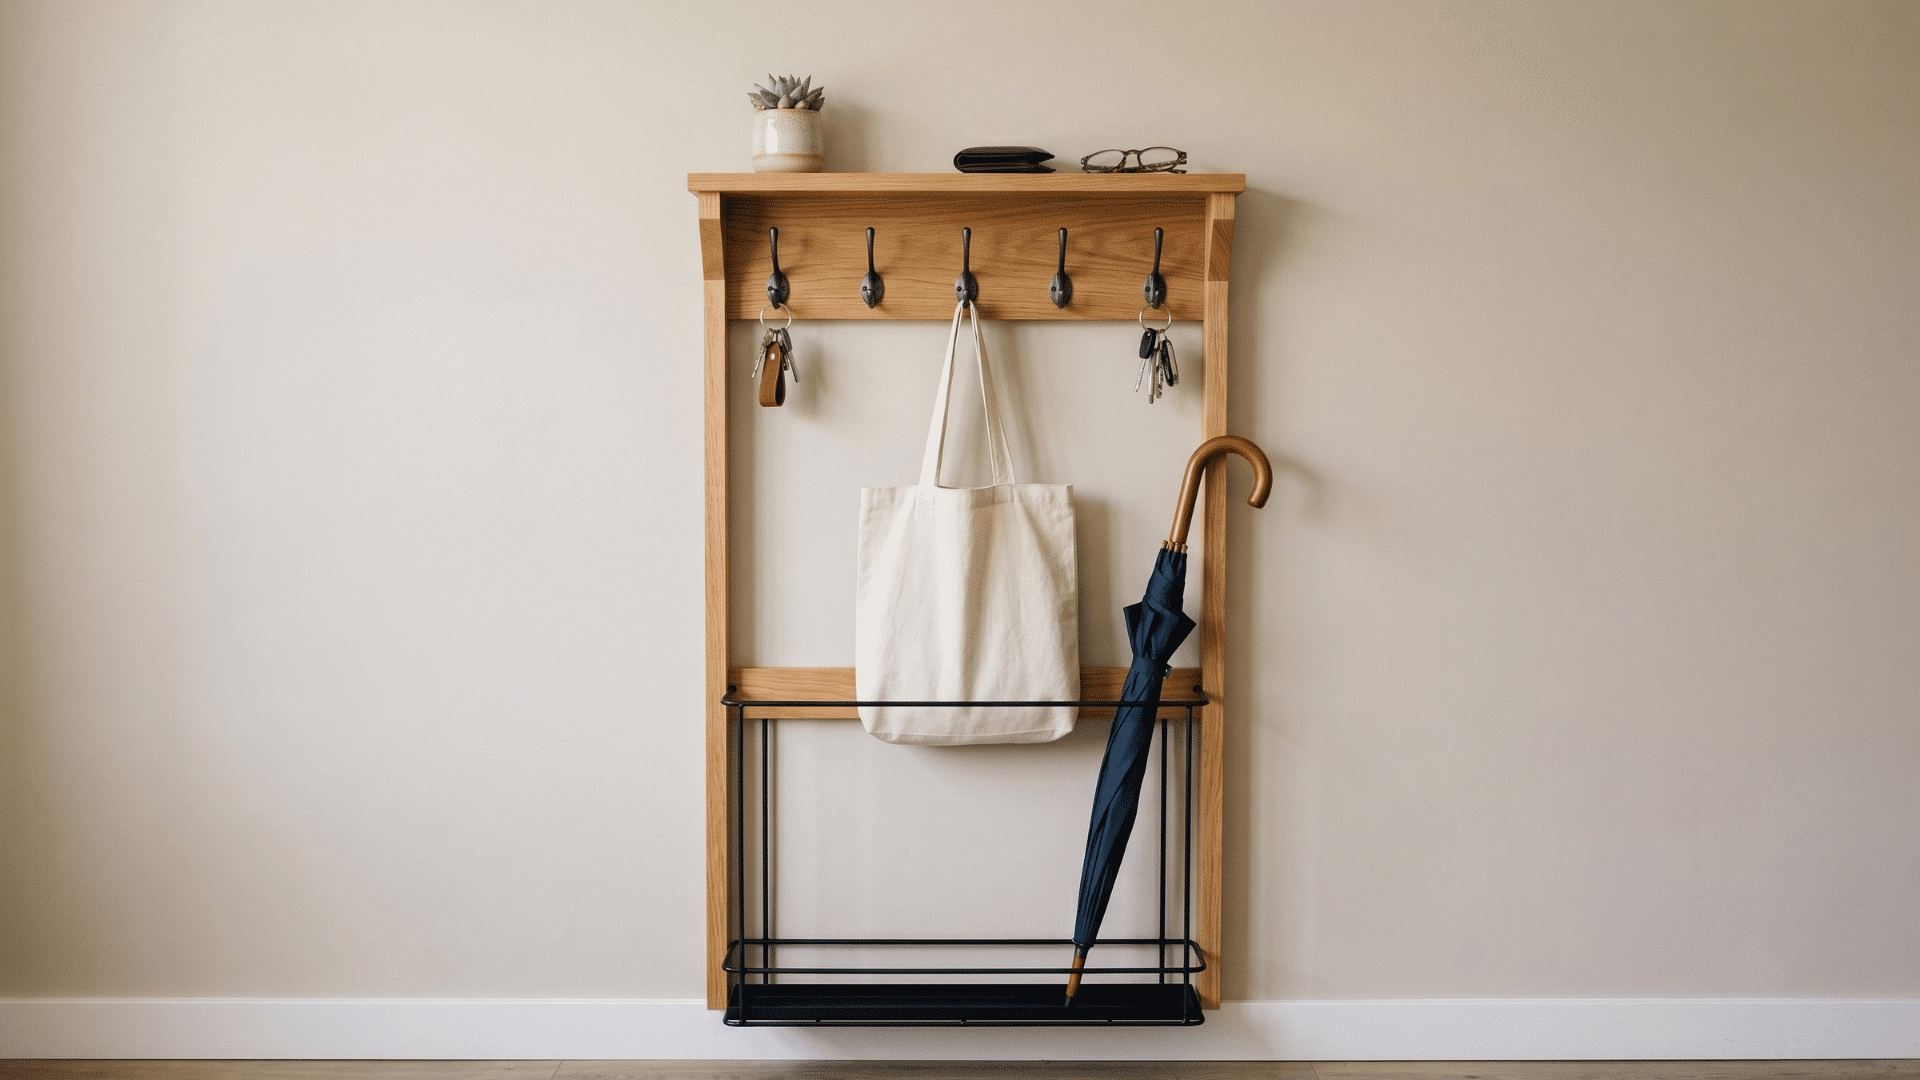
A compact wall-mounted organizer fitted with hooks, a key tray, and an umbrella holder creates a complete and functional entry station beside the front door.
Materials Required: Timber or MDF panel, small shelf, wall hooks, narrow tube or bracket, drip tray, screws, drill
How to Make:
- Build a narrow timber or MDF panel sized to fit the available entry wall space
- Attach a small shelf near the top of the panel for a key dish and daily items
- Install two or three sturdy hooks below the shelf for keys and small bags
- Add a tall, narrow tube or bracket at the base to hold umbrellas upright
- Mount the completed station at a comfortable height beside the front door
22. Floating TV Console Shelf
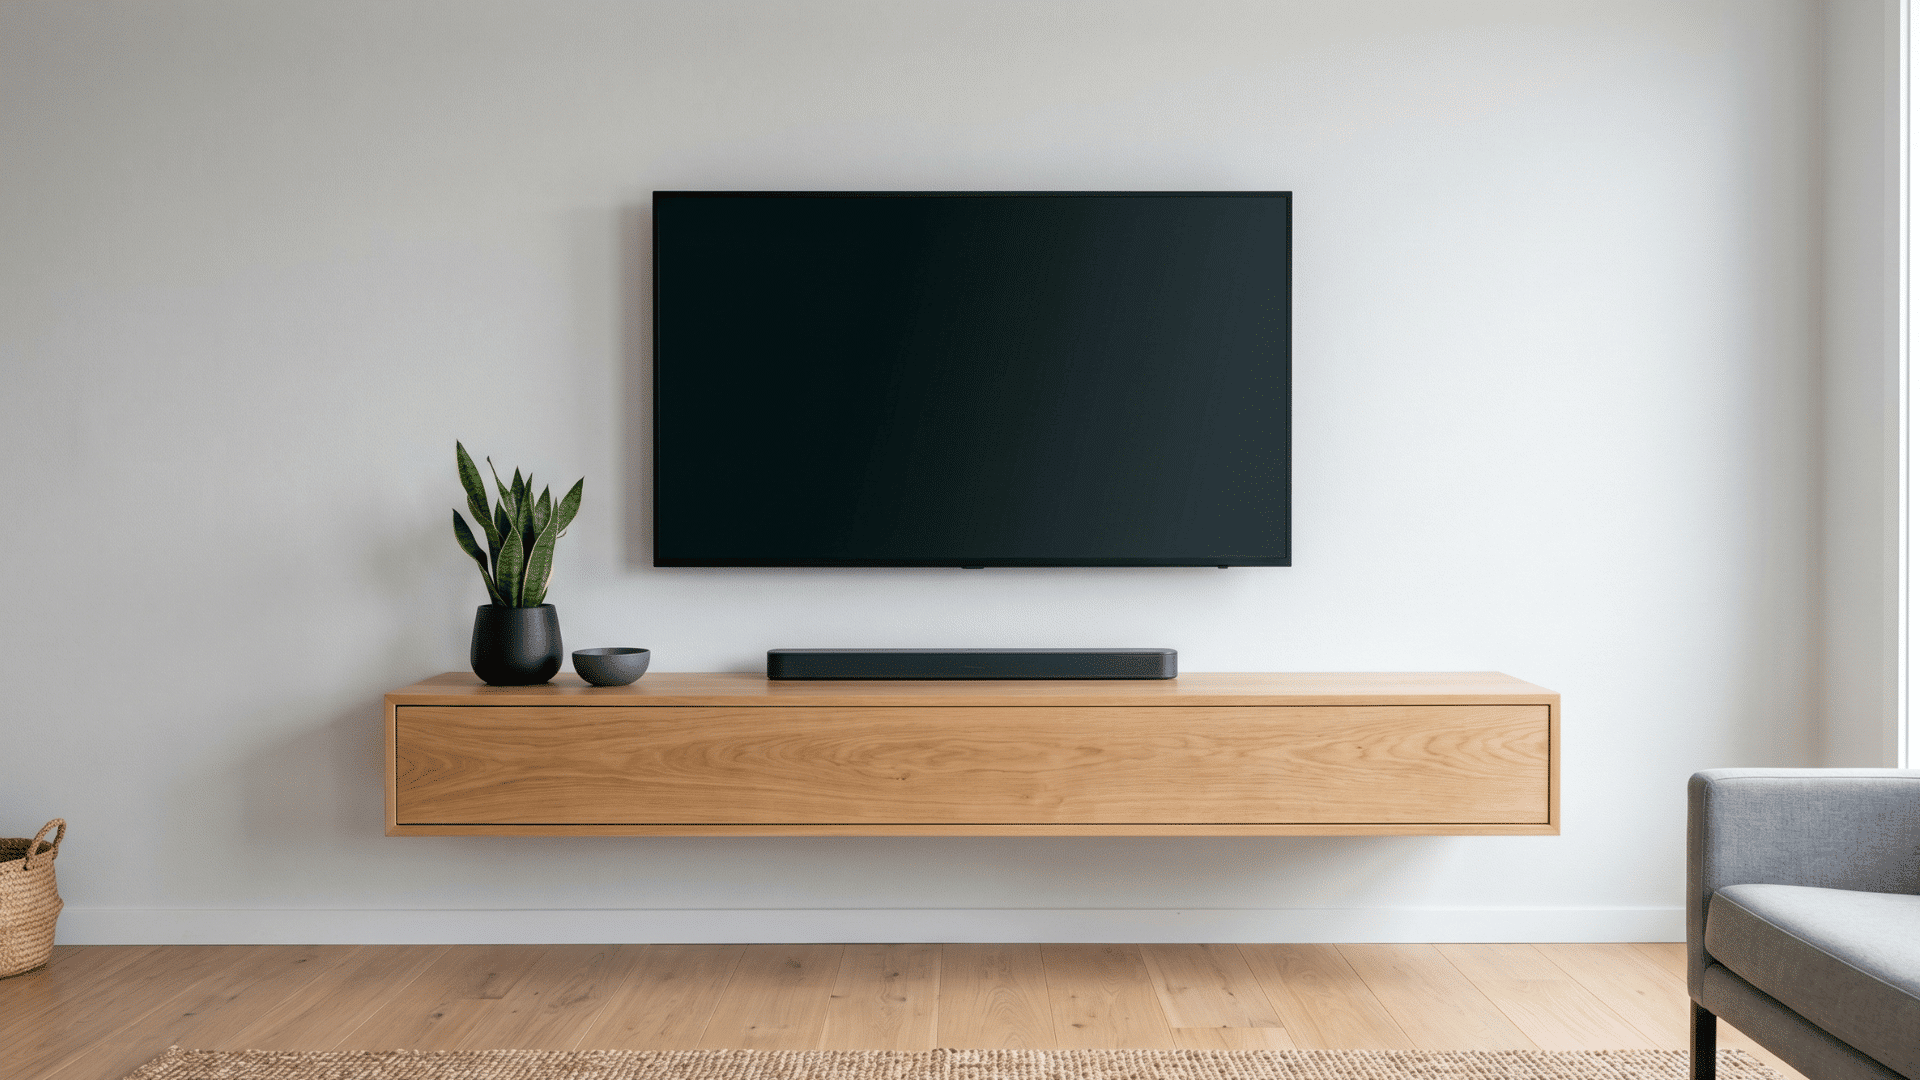
A wall-mounted floating TV console shelf keeps the television at the correct viewing height while removing the need for a bulky floor-standing unit beneath it.
Materials Required: Solid timber shelf panel, French cleat or wall brackets, screws, cable management channel, drill, level
How to Make:
- Cut a solid timber shelf panel deep enough to support the television base
- Attach a French cleat or heavy-duty bracket at the correct viewing height
- Mount the shelf onto the cleat and check it is level before adding any weight
- Route a cable management channel along the back edge to keep wires hidden
- Add a lower shelf or small cabinet below if extra storage for devices is needed
23. DIY Arch Wall Niche
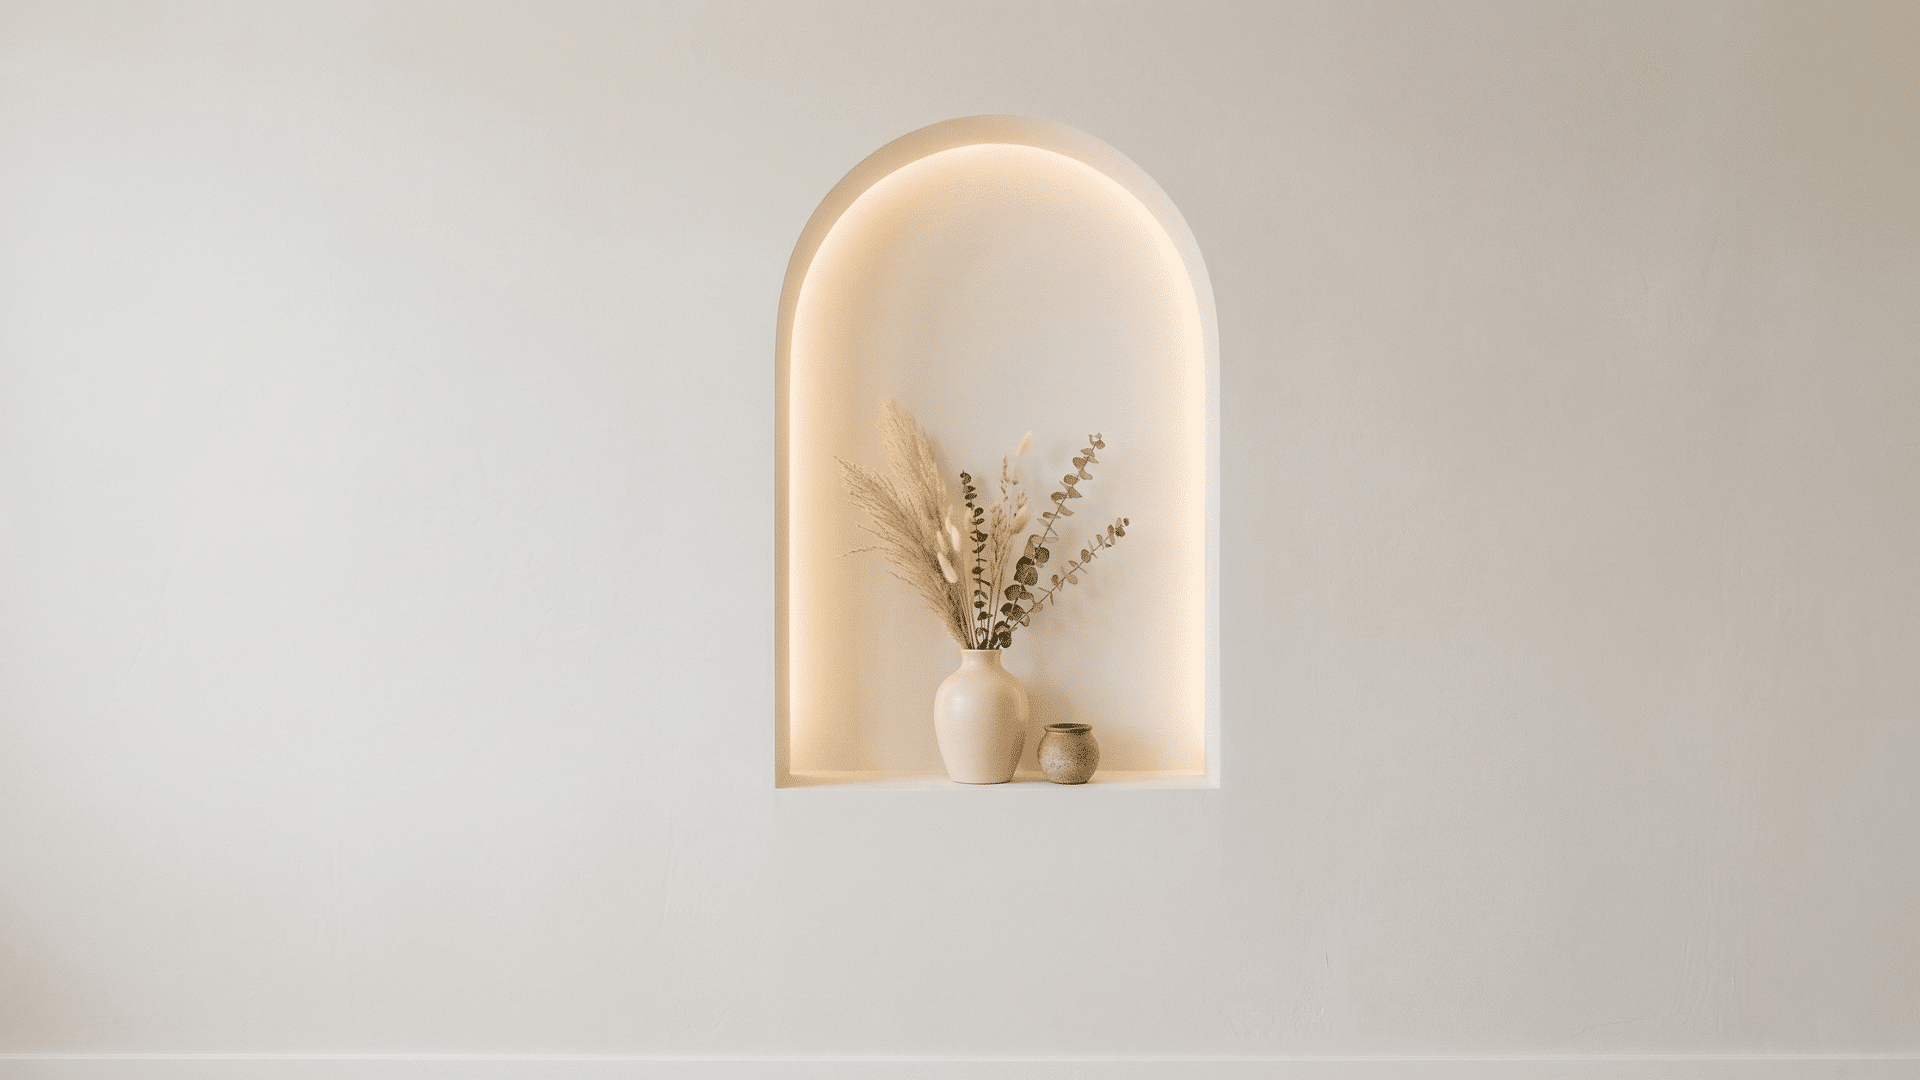
A decorative arch niche built into or applied to a wall creates a recessed display area with a curved frame that adds structural interest to any room.
Materials Required: Flexible MDF or thin plywood, filler, sandpaper, paint, recessed LED light, string compass, pencil
How to Make:
- Mark the arch shape on the wall using a pencil and a string compass
- Cut flexible MDF or layered thin plywood to form the curved arch sides cleanly
- Build a shallow recessed box behind the arch if a true inset niche is desired
- Apply a skim coat of filler over all joints and sand smooth before painting
- Install a small recessed LED light at the top so the niche interior is well-lit
24. Outdoor Pallet Seating Area with Cushions

A seating arrangement made from repurposed wooden pallets fitted with outdoor cushions creates a comfortable, low-cost outdoor lounge area on any patio or deck.
Materials Required: Wooden pallets, bolts or screws, exterior wood stain or paint, outdoor cushions, sandpaper
How to Make:
- Source clean, structurally sound pallets and sand all surfaces thoroughly
- Stack pallets in the desired seating configuration and fix them together with bolts
- Apply exterior wood stain or weather-resistant paint to all pallet surfaces
- Measure the seat dimensions and order outdoor cushions to fit each section
- Add a small pallet side table to complete the full outdoor seating setup
25. Garden Trellis Wall for Climbing Plants
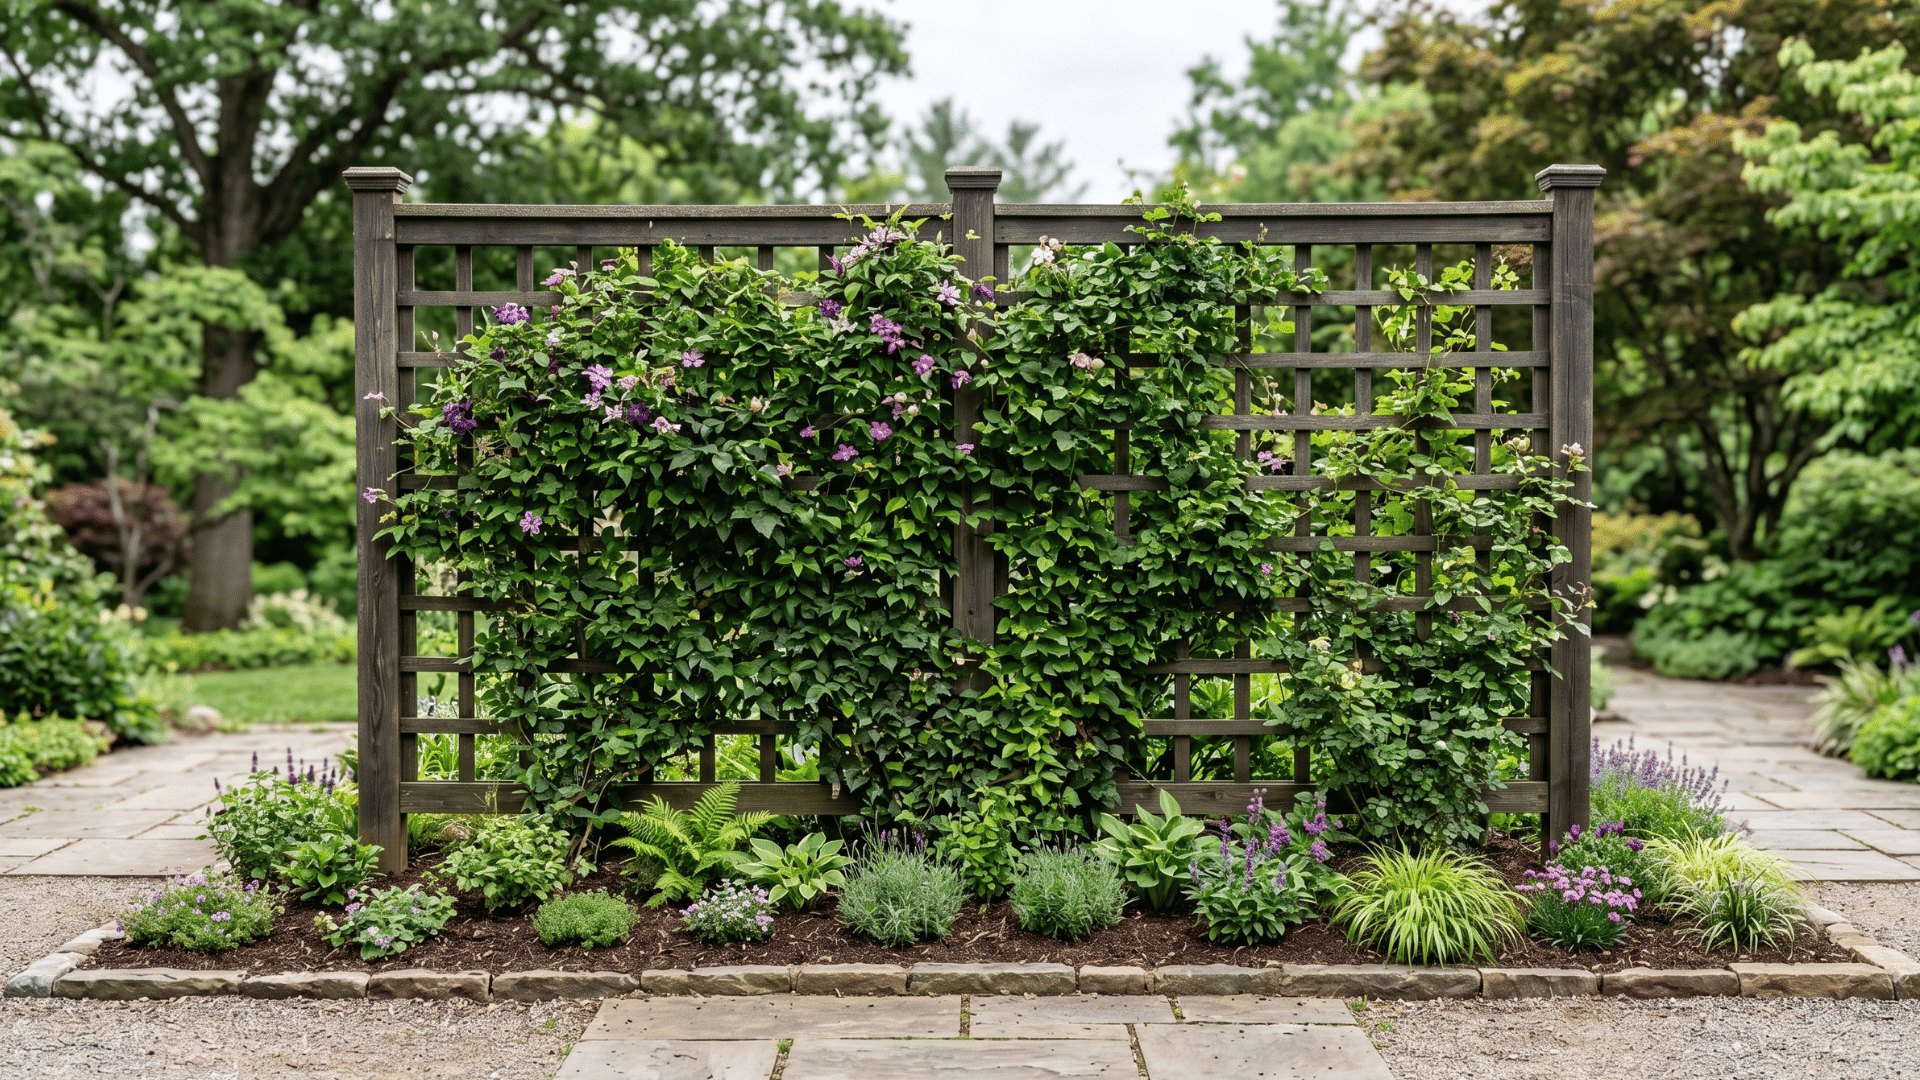
A garden trellis wall built from timber battens or wire provides a structured support system for climbing plants, adding height and greenery to an outdoor space.
Materials Required: Timber battens or wire, screws, wall plugs, exterior wood preservative, freestanding post system
How to Make:
- Cut timber battens to uniform lengths and arrange them in a grid pattern
- Fix the trellis frame to a fence, wall, or freestanding post system securely
- Apply a coat of exterior wood preservative to all timber before installation
- Plant climbing species like clematis or jasmine at the base of the trellis
- Check and retie new growth to the trellis every few weeks during the growing season
Other DIY Home Projects to Try
These DIY home projects are just as practical and beginner-friendly as the first set, covering a wider range of rooms, budgets, and building styles.
- Under-Stairs Storage: Built-in drawers under staircase steps that slide out to create hidden storage without using extra space.
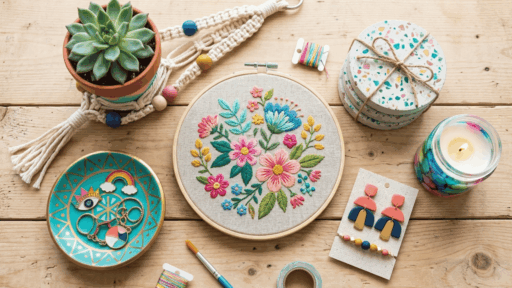
- Macrame Wall Hanging: A knotted rope wall piece that adds texture and a handcrafted quality to any plain wall in the home.
- Barn Door Panel: A sliding timber door panel that divides rooms or covers openings without needing floor space to swing open.
- Mail Organizer: A wall-mounted document and mail sorter that keeps papers, letters, and envelopes in one accessible and tidy location.
- Ombre Accent Wall: A painted wall that transitions smoothly from one tone to another using blended layers of the same color family.
- Wooden Wine Rack: A compact timber rack that stores bottles horizontally and fits neatly into a kitchen corner or dining room shelf.
- Concrete Planter: A hand-formed cement pot that gives any indoor or outdoor plant a minimal and industrial-style container to sit in.
- Fabric Headboard: A padded timber panel covered in printed fabric that mounts directly to the wall above the bed as a soft headboard.
- Picture Ledge Shelf: A shallow wall-mounted shelf with a front lip that displays framed photos and art without needing individual picture hooks.
- Beadboard Wainscoting: A paneled timber treatment applied to the lower section of a wall that adds texture and a classic architectural detail.
- Checkerboard Floor: A painted floor design using two contrasting colors applied in an alternating square pattern across the existing floor surface.
- Privacy Screen: A freestanding outdoor timber panel that blocks sightlines on a patio or garden without requiring any permanent installation.
- Charging Station: A wall-mounted timber box fitted with power points and cable slots that keeps phones and devices charged and organized.
- Stenciled Backsplash: A painted tile effect created using a repeating stencil pattern that mimics the look of real patterned tiles at a low cost.
- Toy Storage Bin: A wooden box with a hinged lid that stores children’s toys neatly and doubles as a seat or surface when closed.
- Macrame Plant Holder: A knotted rope hanger that suspends a potted plant from the ceiling or a wall hook at any chosen height.
- Bold Painted Door: A single interior or exterior door painted in a strong contrasting color that becomes a focal point in the room.
- Outdoor Bench: A simple timber bench built for garden or patio use that provides seating without requiring complex joinery or tools.
- Candle Holder Centerpiece: A wooden base fitted with candle cups or holders, creating a simple and decorative table centerpiece for any room.
- Kitchen Spice Rack: A slim wall-mounted timber shelf positioned near the stove that keeps spice jars visible, accessible, and off the counter.
- Kids Step Stool: A small two-step wooden stool sized for children that helps them reach sinks, counters, and shelves independently.
- Terrarium Display: A glass container filled with soil, moss, and small plants that creates a self-contained living display for any surface.
- Painted Accent Ceiling: A ceiling painted in a bold or contrasting color that draws the eye upward and adds an unexpected design detail overhead.
- Photo Display Ladder: A slim timber ladder, leaning against a wall, with rungs for displaying framed photos, prints, and small decorative objects.
- Outdoor Timber Lantern: A handmade lantern frame built from timber and fitted with glass panels that houses a candle or solar light outside.
- Corner Wall Shelf: A compact triangular shelf unit that fits into room corners and provides display or storage space that would otherwise go unused.
Wrapping It Up
DIY home projects do not always require a professional or a large renovation budget. The smallest changes often make the biggest difference.
A new shelf, a painted wall, or a reorganized corner can shift how an entire room feels. Every project in this blog is achievable, affordable, and worth the time it takes to complete properly.
Start with one small idea and grow from there into something the whole space benefits from. You can also share it with someone planning a home upgrade this weekend.

James McLaren, with a rich background in architecture from the University of Manchester, has been contributing his expertise to the world of creative construction and home innovation for over 20 years. His journey began as a project manager for a leading construction firm, where he honed his skills in bringing complex designs to life. James joined our platform as a freelancer in 2019, quickly becoming a favorite for his insightful and practical advice. He has been a pivotal force to our wing ever since, bringing our readers a blend of technical know-how and creative flair. Beyond his professional life, James is an avid woodworker and enjoys restoring vintage furniture, a hobby that complements his professional insights beautifully.