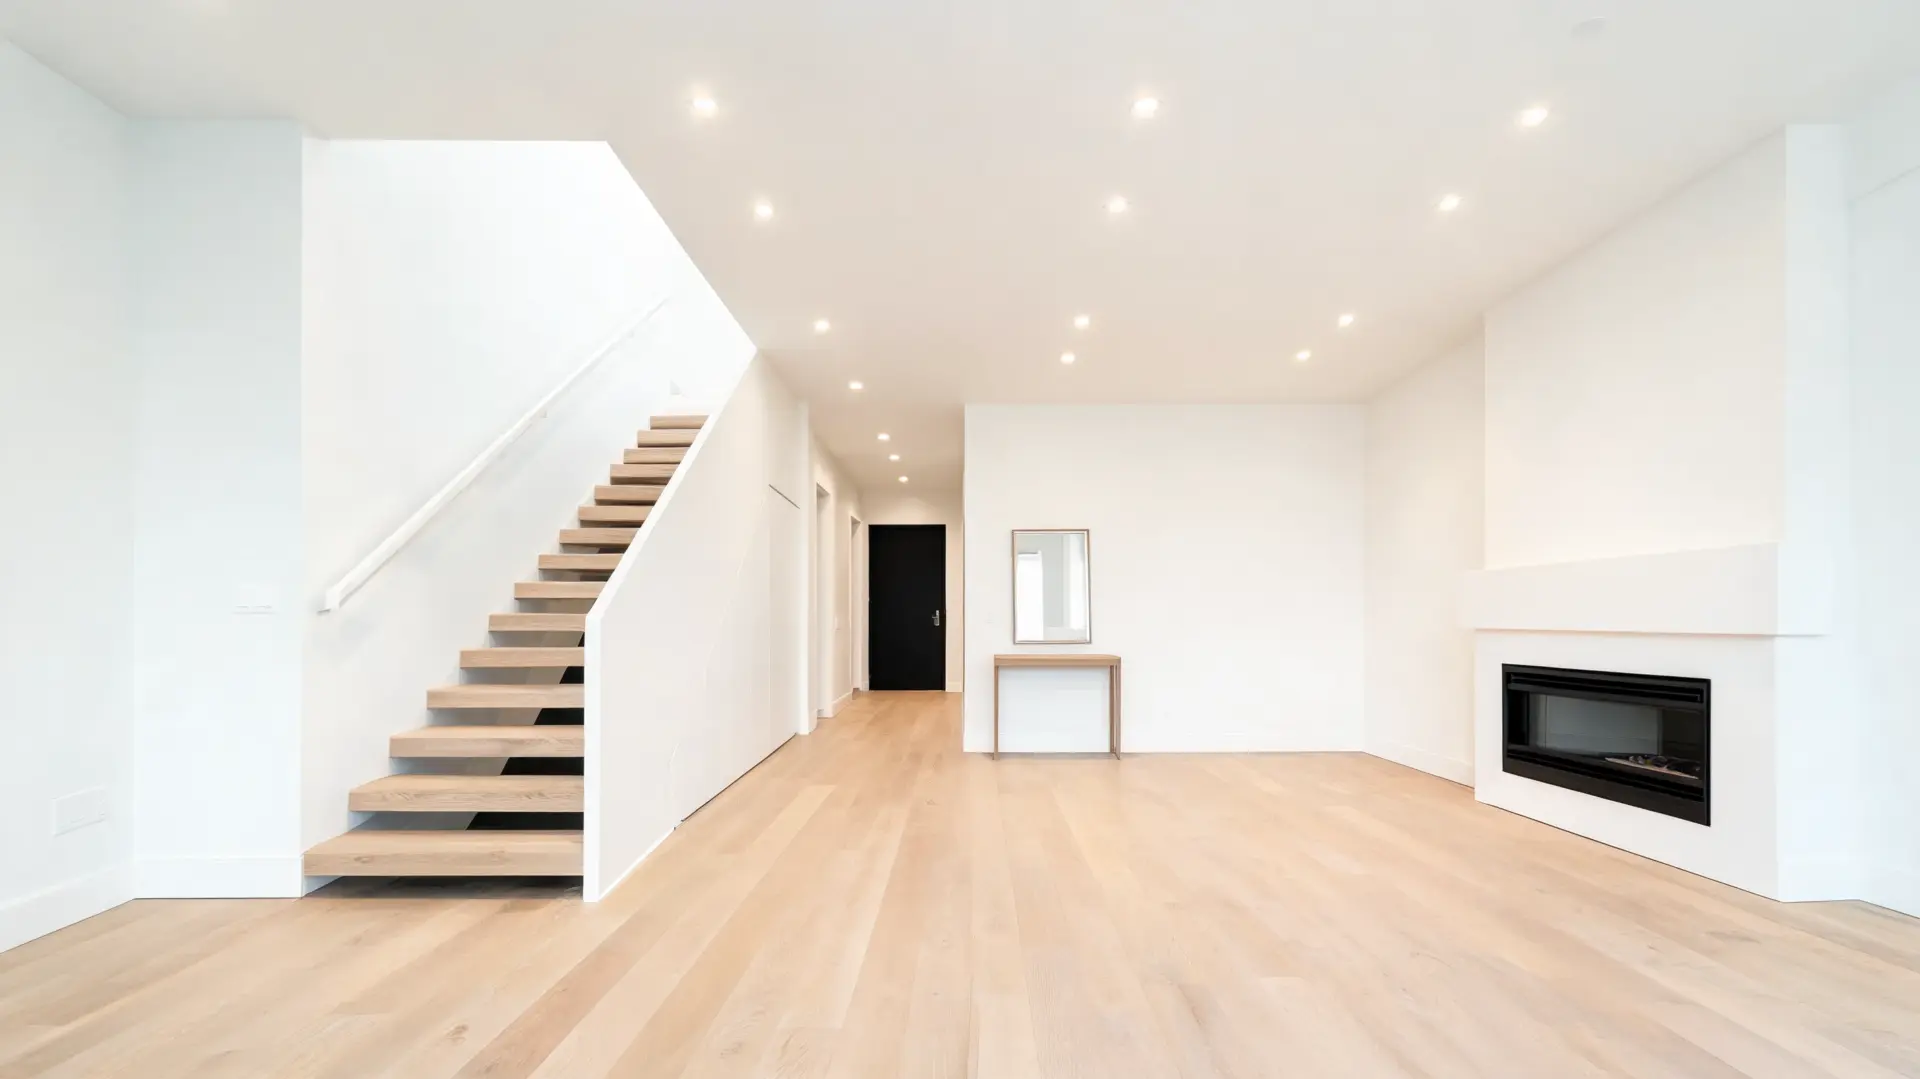

Recessed lighting installation remodels a flat, ordinary ceiling into something that actually feels designed.
No dangling fixtures, no harsh shadows, just clean, directed light exactly where you need it.
But pulling it off right means making a series of small decisions correctly: the right housing type, the right spacing, the right circuit load. Get one wrong, and you’re either back at the hardware store or staring at a buzzing dimmer.
This blog walks you through every step from choosing fixtures to installation for the first time.
Types, costs, layout methods, wiring, it’s all here, explained in simple terms.
What Recessed Lighting Actually Does in a Home
Recessed lights are installed in the ceiling rather than hanging from it.
Instead of noticing the fixture, you only notice the light hitting your kitchen counter, brightening a dark hallway, or washing across a wall. They work alongside lamps and pendants, not instead of them.
Together, that mix of light sources is what makes a room feel warm and intentional rather than just bright.
The 4 Main Purposes of Recessed Lighting
This lighting isn’t just about looks; it serves four distinct functions, and knowing which one you need shapes every decision that follows.
1. Ambient Lighting
The foundation layer of any room. It replaces that single center fixture with evenly distributed, shadow-free light across the entire ceiling.
Most living rooms, bedrooms, and hallways rely on this as their primary light source.
2. Task Lighting
Focused light aimed at a specific work area.
Think directly above a kitchen counter, a bathroom vanity, or a home office desk. Tighter beam angles and closer spacing keep the light concentrated where hands and eyes actually work.
3. Accent Lighting
Used to highlight something worth noticing, a painting, a fireplace, or an architectural detail.
Gimbal and eyeball trim styles make this possible by letting you angle the beam precisely toward the target.
4. Wall Wash Lighting
Placed close to a wall and angled slightly toward it, these lights evenly graze the surface.
It adds depth to a flat room and makes ceilings feel taller without changing any dimensions.
Recessed Lighting Installation Layout Rules
Layout is where most DIY installations go sideways, not at the wiring stage, not at the fixture stage, but right here, on paper, before a single hole gets cut.
- Lights placed too close to walls create harsh, scalloping, bright arcs on the wall that look unintentional.
- Lights spaced too far apart leave dark patches in the center of the room.
- Symmetry matters. Uneven spacing is immediately noticeable once the lights are on.
Start with ceiling height. That single number drives every spacing decision.
A 9-foot ceiling requires fixtures roughly 4.5 feet from the wall and 9 feet apart. Drop to 8 feet, and those numbers tighten accordingly. Also, account for joists before marking holes.
Finding a joist mid-cut forces a layout shift, throwing off the entire grid.
Tools and Materials Needed for Recessed Lighting Installation
Having the right tools before starting saves two unnecessary trips to the hardware store mid-job.
| Tool / Material | What it’s For |
|---|---|
| Hole saw (4” or 6” bi-metal) | Cuts clean ceiling openings for the housing |
| Non-contact voltage tester | Confirms power is off before touching any wire |
| Fish tape or fish sticks | Guides cable through closed ceiling cavities |
| Flex drill bit (long) | Drills through top plates when attic access isn’t available |
| Drywall saw | Cleans up rough cuts around housing edges |
| Stud finder | Locates joists before marking hole positions |
| Wire stripper | Removes insulation from cable ends cleanly |
| Drill + bits | Drives screws and bores pilot holes |
| Cable staples | Secures NM cable every 4.5 feet along the framing |
| Voltage meter | Double-checks wire connections after install |
| Safety glasses + gloves | Protection from drywall dust and wire ends |
Borrow what you’ll use once. Fish tape and flex drill bits are job-specific. Buying them for a single install rarely makes sense unless more electrical work is planned down the line.
New Construction and Remodel Methods: Step-By-Step Recessed Lighting Installation
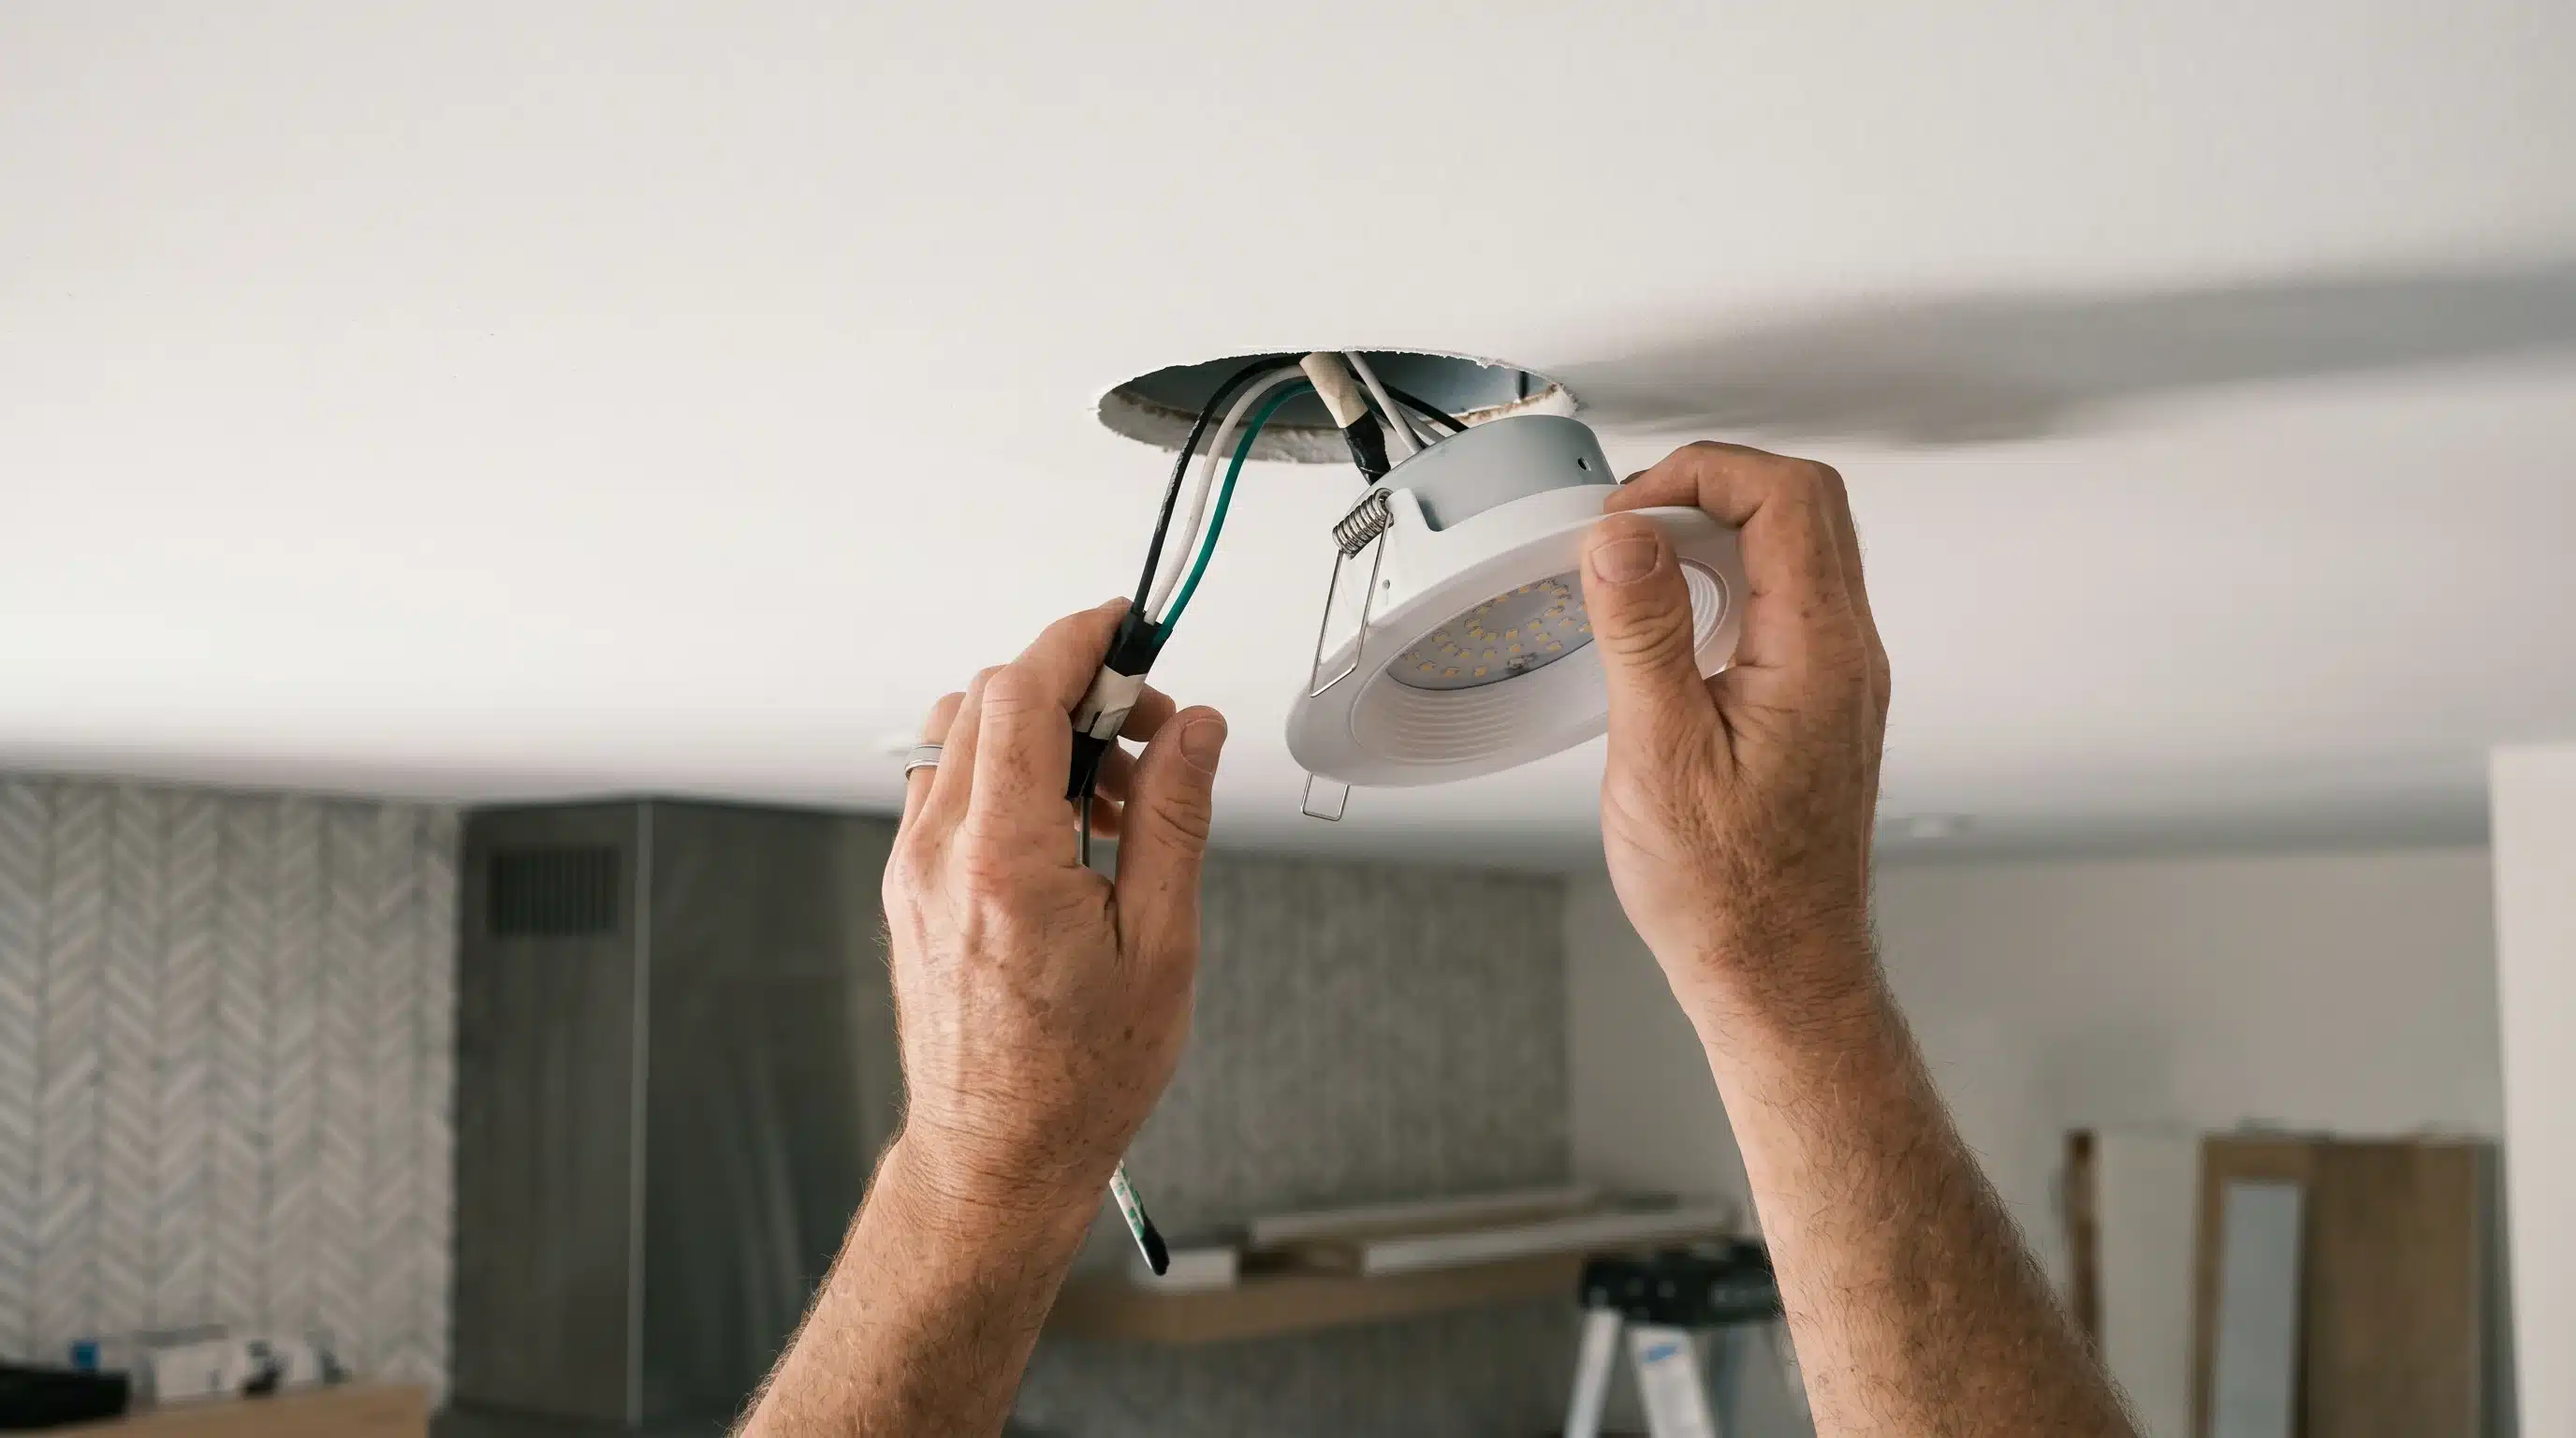
Every installation follows the same core sequence, but new construction and remodel ceilings differ in housing and cable runs. Here is a complete manual for installing recessed lighting.
Step 1: Turn Off Power and Verify
Go to the breaker panel and switch off the circuit you’re working on.
Then use a non-contact voltage tester at the outlet or switch you plan to tap. Test twice: once at the panel and once at the source. Power that feels off isn’t always off.
Step 2: Mark Your Layout on the Ceiling
Transfer your planned layout from paper to the ceiling using a pencil.
Use a stud finder to mark every joist first. Then position your light locations around them.
Use the housing template that comes with the fixture to trace the exact cut circle.
Step 3: Cut the Ceiling Holes
Attach the correct hole saw size to your drill, 4-inch or 6-inch, depending on your fixture. Score the circle lightly before cutting through completely. Cut slowly to avoid cracking drywall beyond the line.
Clear debris from the cavity before proceeding.
Step 4: Mount the Housing or Run Your Cable
New construction and remodel installations follow different paths, depending on if your ceiling is open or finished.
New Construction
Slide the bar hanger between two joists and extend it until both ends contact the framing.
Nail or screw it into place. Position the housing so the bottom edge sits flush with the finished drywall thickness below. Most bar hangers adjust for 14-inch and 16-inch joist spacing.
Remodel: Run Cable Through the Finished Ceiling
Choose your access route through the attic, down from a wall plate, or using a flex drill bit through the top plate. Feed the fish tape through the cavity first, attach the cable, then pull it back through.
Leave 8 inches of extra cable at each fixture location.
Step 5: Connect Wires at the Junction Box
Strip ¾ inch of insulation from each wire end.
Connect black to black, white to white, and bare copper to the ground terminal. Use wire nuts or push-in connectors; both work, but wire nuts hold more reliably in ceiling applications.
Tuck connections neatly inside the junction box.
Step 6: Secure the Housing into the Ceiling
For remodel housings, fold the mounting clips inward before inserting the can into the hole.
Once inside, the clips spring outward and grip the drywall from above. Press firmly until the housing flange sits flat against the ceiling surface. A properly seated housing won’t shift or rattle.
Step 7: Attach the Trim and Fixture
For spring clip trim, compress the springs, insert them into the slots inside the housing, and release.
For torsion spring trim, hook each spring end into the designated holes.
If using a gimbal or eyeball trim, set the beam direction before fully seating; adjusting after is harder.
Step 8: Wire the Dimmer Switch
Turn off the power at the panel again before touching the switch box.
Connect the black wire to the black dimmer lead, the white wire to the white dimmer lead, and the ground wire to ground. Smart dimmers need a neutral wire, often a bare white wire in older switch boxes.
If it isn’t there, use a neutral-compatible smart dimmer.
Step 9: Restore Power and Test
Switch the breaker back on and test each light individually.
A light that doesn’t come on usually points to a loose wire nut. Check connections at that fixture first.
Flickering points to dimmer incompatibility. Buzzing means the dimmer’s low-end trim screw needs adjusting, or the fixture isn’t on the dimmer’s compatibility list.
What Recessed Lighting Installation Costs: Fixture Prices and Electrical Work
The price varies based on fixture type and whether you add a new circuit or tap into an existing one.
| Item | DIY Cost | Hired Out |
|---|---|---|
| Budget canless LED wafer | $8–$15 per unit | $75–$120 installed |
| Mid-range remodel can + integrated LED | $20–$45 per unit | $100–$150 installed |
| Premium dimmer-compatible fixture | $50–$90 per unit | $130–$200 installed |
| 14/2 NM cable (per foot) | $0.45–$0.80 | Included in labor |
| Compatible dimmer switch | $25–$60 each | $60–$120 installed |
| New circuit (if required) | $200–$400 materials | $400–$900 with labor |
| 6-light living room (mid-range) | $180–$380 total | $600–$1,100 total |
One thing worth noting: Your fixture choice impacts long-term costs. Integrated LED units cost more initially but eliminate bulb replacements. Socket fixtures are cheaper upfront but incur ongoing bulb costs.
How to Plan Your Recessed Lighting Installation Layout: Beam Angle Method
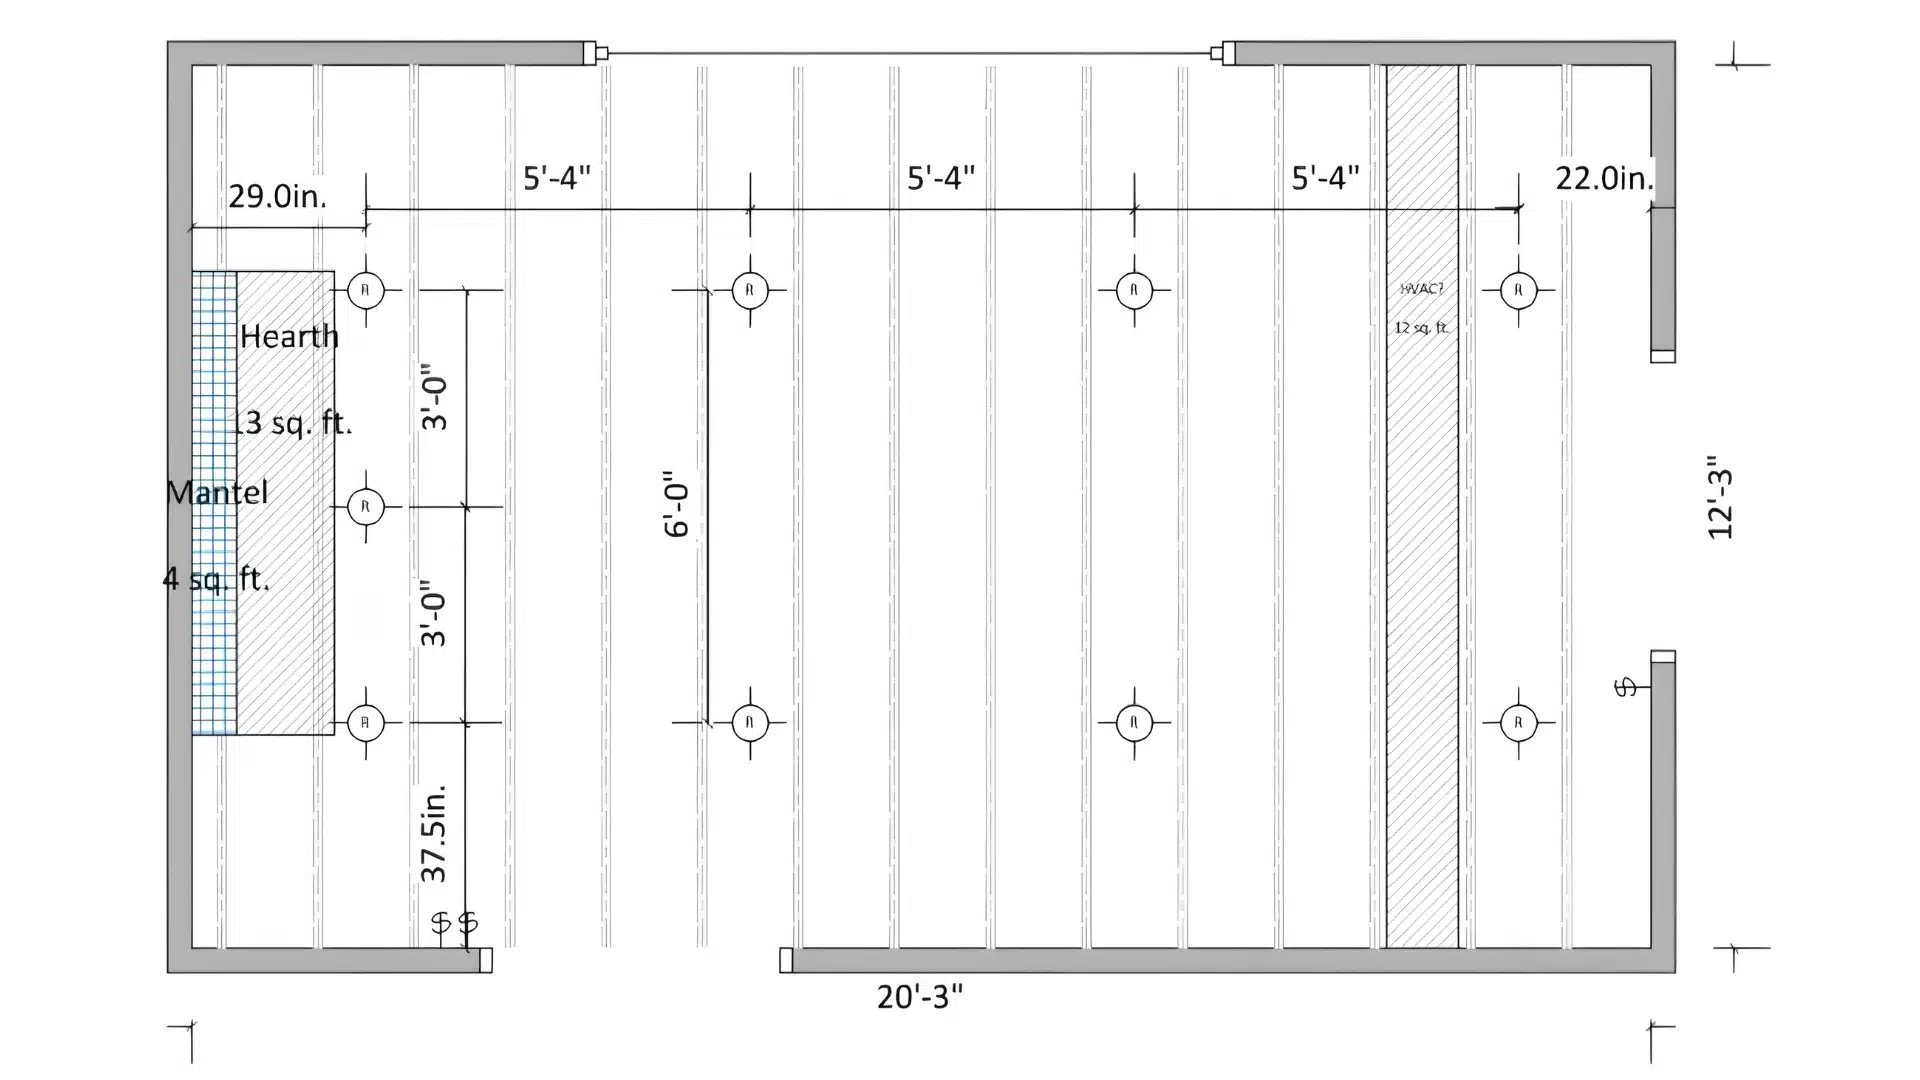
Beam angle determines where light actually lands, not just how bright it is. Each room has different demands, and the fixture angle you choose should match the job that room needs done.
Living Room
Pick a 60-degree beam angle for general ambient coverage.
At a 9-foot ceiling, the light spreads across roughly a 10-foot diameter on the floor. Overlap those circles by about 30 percent between fixtures.
This removes dark patches without making the room feel like a retail store.
Kitchen
Go with a 40-degree beam angle that works better here. It keeps light focused on countertops and the cooking surface rather than spilling across the floor.
Position fixtures 24 inches from the cabinet face to avoid casting shadows onto the counter from above.
Bathroom
A 45-degree angle hits the right balance. Place fixtures 36 inches from the vanity wall so light falls on faces, not the top of heads.
A shadow on the face usually means the fixture is sitting too far back.
Hallway
A narrow 30-degree beam angle suits hallways well.
Space fixtures equal to the ceiling height, so an 8-foot ceiling gets fixtures every 8 feet down the length. This keeps the light controlled and avoids spill onto the walls.
Home Office
Use a 45-degree beam angle directly above the desk surface.
Keep fixtures at least 18 inches away from monitor positions. Light hitting a screen straight on creates glare that no brightness setting fixes.
Electrical Safety and Code Compliance: Mistakes that Cause Failed Inspections
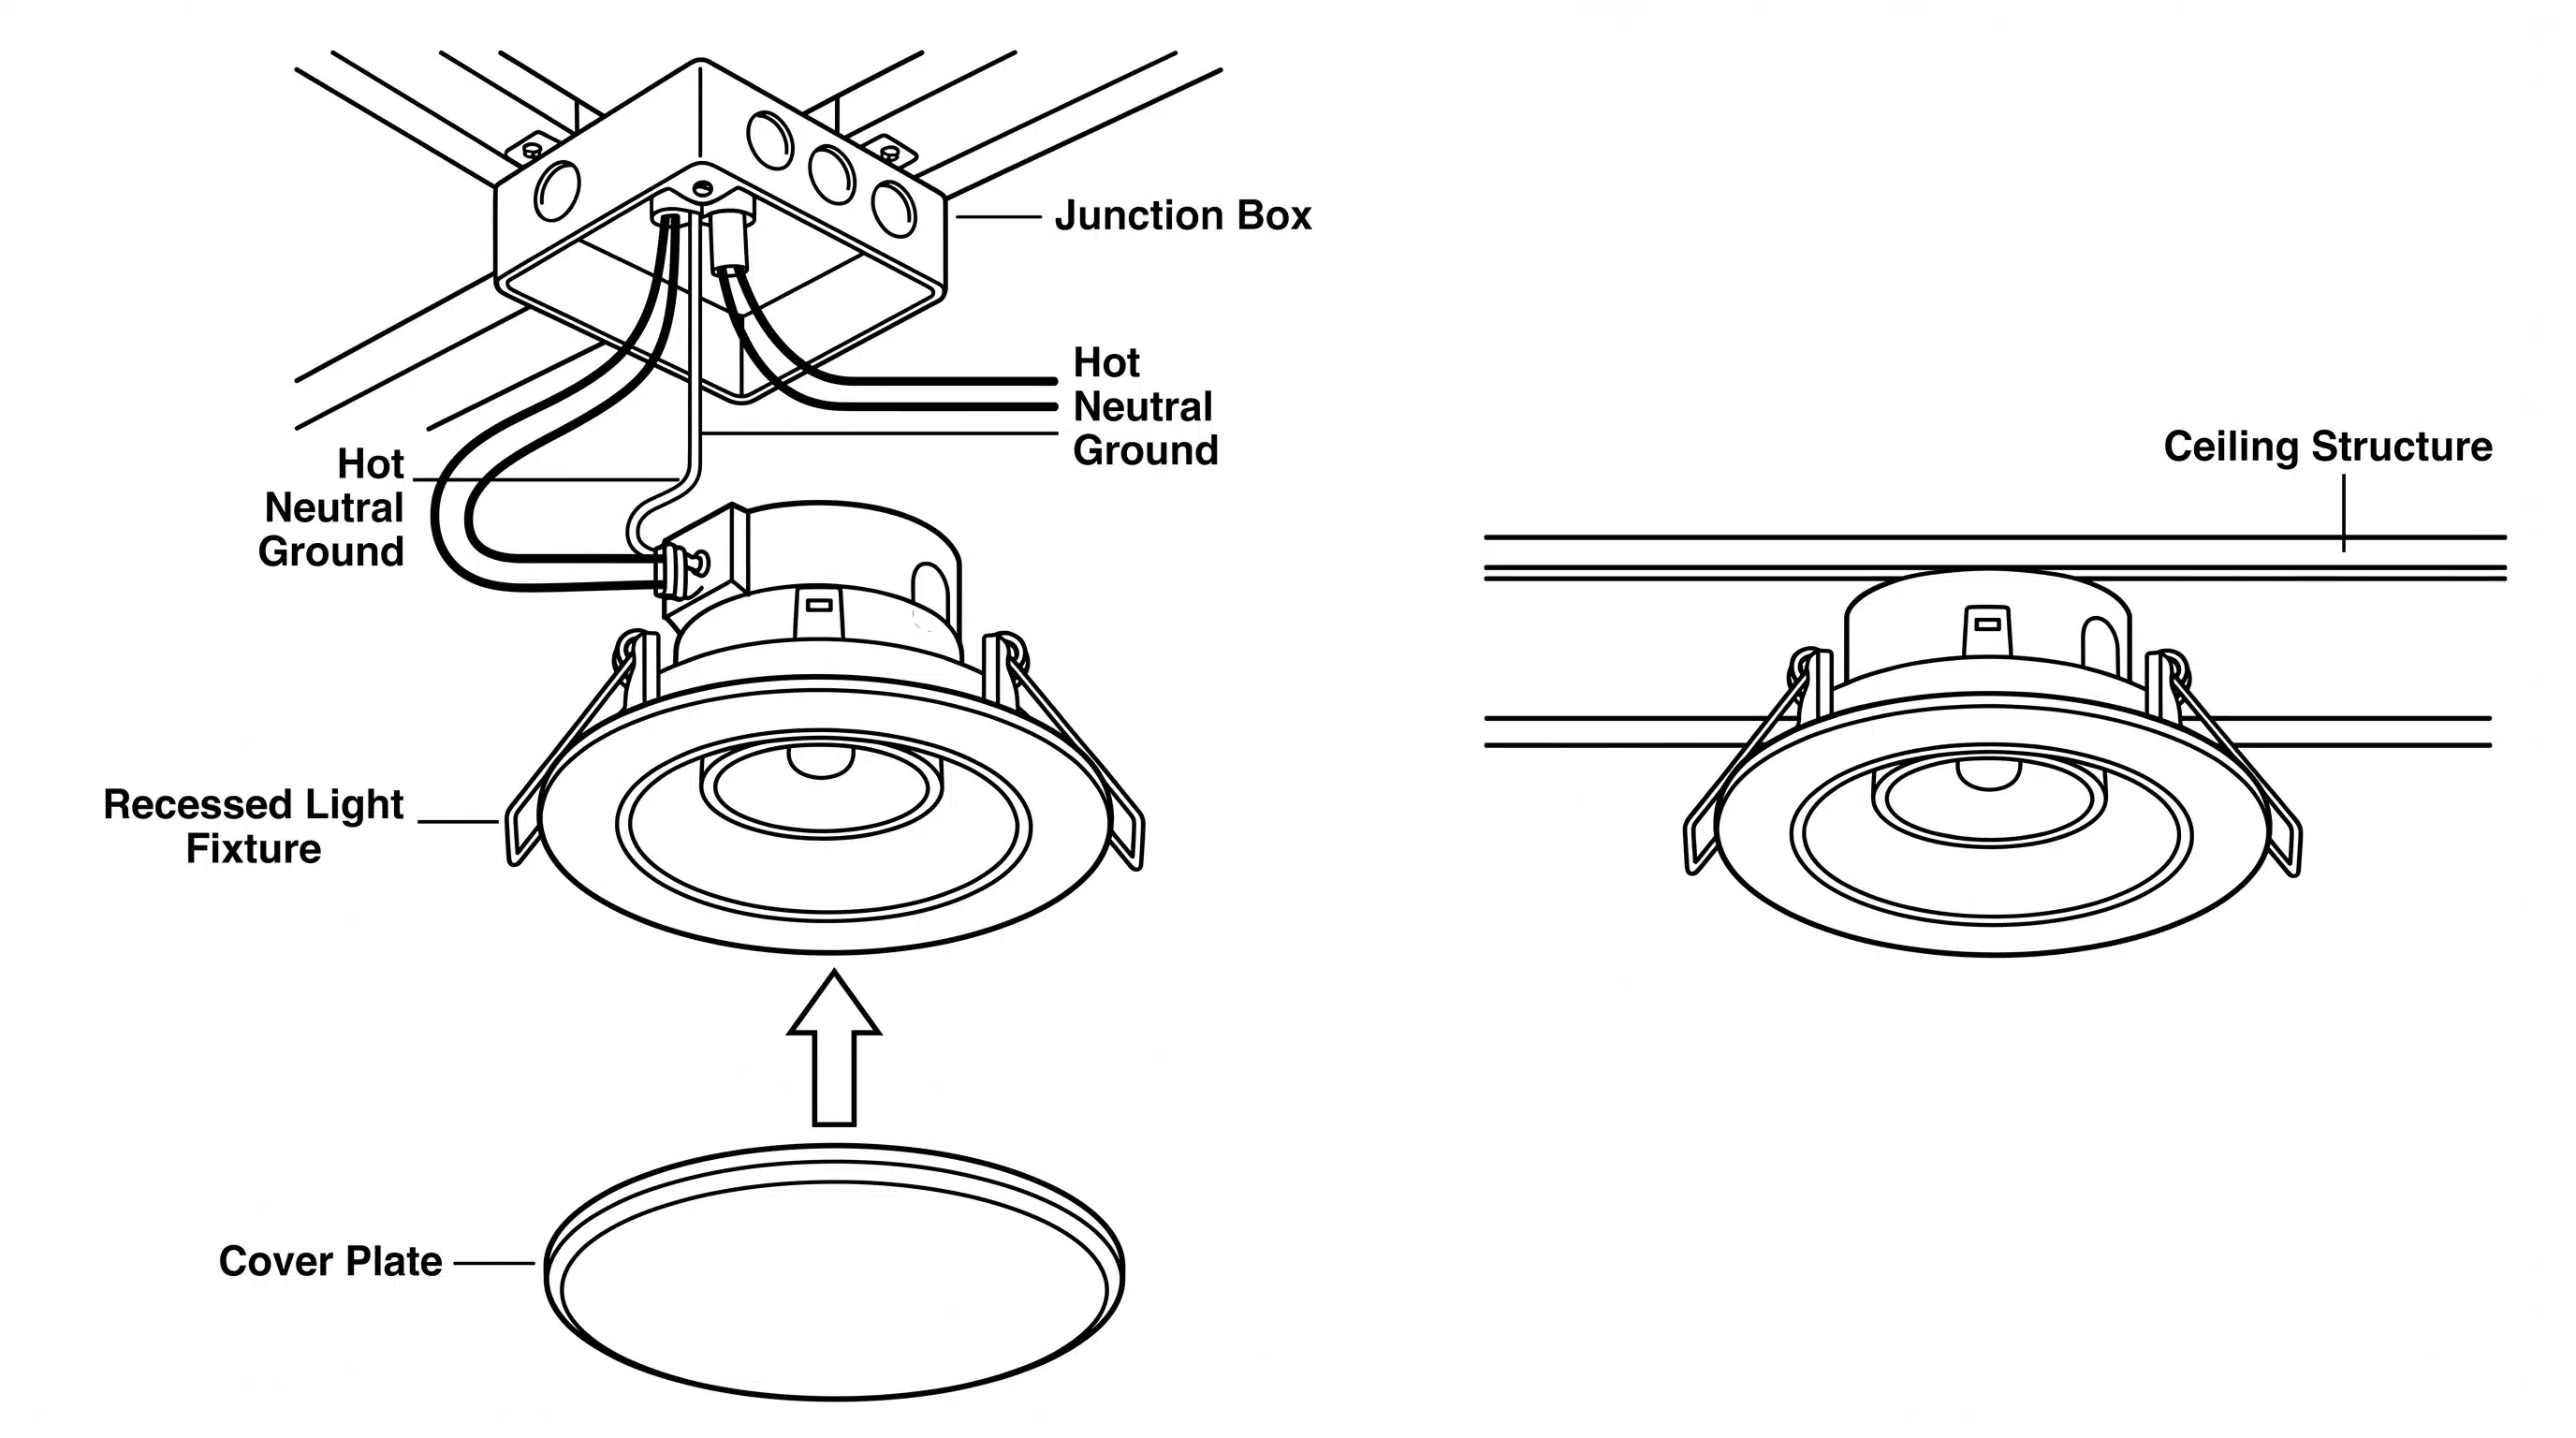
Skipping safety steps risks fire hazards and wiring faults that appear months later, when they’re harder to trace.
Mistake 1: Using the Wrong Housing Near Insulation
Non-IC housing that touches insulation can trap heat in the ceiling cavity, creating a fire risk over time.
Always check the housing label before installing IC-rated units are clearly marked.
Mistake 2: Overloading the Circuit
Too many fixtures on a single circuit cause breakers to trip under full load. Stay under 1,200 watts on a 15-amp circuit to keep a safe working margin.
Mistake 3: Skipping the Airtight Housing Requirement
Many local energy codes require airtight (AT) housing in conditioned ceilings.
A non-AT fixture creates a direct air gap between the living space and the attic, greatly increasing energy costs.
Mistake 4: Wrong Fixture in a Bathroom
Any fixture installed in a shower zone must be wet-rated.
Damp-rated fixtures cover the general bathroom area only. Check the IP rating on the packaging before purchasing.
Mistake 5: Skipping the Permit
New circuits almost always require a permit. Inspectors check housing type, cable-stapling intervals, and box-fill compliance. Unpermitted electrical work is consistently flagged at resale.
Wiring Methods Explained in Simple Terms
Understanding how to wire recessed lighting isn’t complicated once you know the two basic approaches and which one applies to your setup.
- Daisy-chain wiring: runs one cable from the switch to the first light, then loops it through the fixtures.
- Home-run wiring: runs a separate cable from each fixture back to a central junction box.
Daisy-chaining is the standard approach for most residential installs.
It uses less cable and fewer connections overall. Home-run suits situations where individual fixture control matters, like accent lighting on separate switches.
- Each connection point needs its own wire nut or push-in connector; never splice two joints at the same terminal.
- Cable must be stapled within 12 inches of every junction box and every 4.5 feet along the run.
Keep the wiring method consistent throughout the install.
Mixing approaches mid-circuit creates confusion during troubleshooting and makes future changes harder.
Recessed Lighting Installation Design Tips from Real Installers
Set recessed lights on a dimmer from the start; retrofitting one later means revisiting every fixture for compatibility.
Warm white (2700K) suits bedrooms and living rooms, while cool white (3000K–4000K) works better in kitchens and bathrooms. During new construction, rough in one extra fixture and cap it off.
It costs nothing upfront and saves important effort if the layout needs to be adjusted later.
Measure spacing twice before cutting uneven gaps.
DIY vs Hiring an Electrician: Recessed Lighting Installation
Some parts of this job are clear to handle yourself, others are worth handing off depending on your ceiling.
| DIY | Hire an Electrician |
|---|---|
| Adding to an existing circuit | Running a brand new circuit |
| Attic access available | No attic access, finished ceiling |
| Standard remodel housing install | Aluminum wiring in an older home |
| Single-pole dimmer swap | Panel upgrade required |
| Basic daisy-chain wiring | Permit-required new circuit |
The dividing line is usually the panel and circuit. Fixture installation and wiring are clear with standard tools and care. Anything involving the breaker panel, new circuits, or old aluminum wiring requires a licensed electrician.
End Note!
Recessed lighting installation is one of those projects that rewards preparation more than skill.
Get the housing type right, plan the layout before cutting a single hole, and keep the circuit load within safe limits.
The actual installation follows naturally from those three decisions.
The tools are basic, the wiring is clear, and the results are permanent.
A ceiling done well doesn’t need revisiting. Whether the job is a single hallway or an entire floor, the process stays the same: measure carefully, work methodically, and the finished result speaks for itself.
Frequently Asked Questions (FAQ’s)
1. How Many Recessed Lights Do I Need per Room?
One light per 4–6 square feet of ceiling space is a good starting point.
2. Can Recessed Lighting Be Installed in Any Ceiling?
Yes, as long as you match the housing type to your ceiling condition.
3. How Long Does it Take to Install Recessed Lighting?
A six-light room typically takes a first-timer 4 to 6 hours.
4. Do Recessed Lights Use a Lot of Electricity?
LED recessed fixtures use 8–15 watts each, significantly less than traditional bulbs.
5. Can Recessed Lighting Work without a Dimmer Switch?
Yes, but a compatible dimmer gives far better control over ambiance and brightness.

James McLaren, with a rich background in architecture from the University of Manchester, has been contributing his expertise to the world of creative construction and home innovation for over 20 years. His journey began as a project manager for a leading construction firm, where he honed his skills in bringing complex designs to life. James joined our platform as a freelancer in 2019, quickly becoming a favorite for his insightful and practical advice. He has been a pivotal force to our wing ever since, bringing our readers a blend of technical know-how and creative flair. Beyond his professional life, James is an avid woodworker and enjoys restoring vintage furniture, a hobby that complements his professional insights beautifully.