
Tray ceilings have a quiet way of doing a lot of heavy lifting in a room’s design. Most people focus on walls, floors, and furniture, but the ceiling is the one surface that gets ignored.
Adding a tray ceiling changes that instantly; it pulls the eye upward, gives the room a sense of structure, and makes plain spaces feel considered and put-together.
You do not need a full renovation or a big budget to make it work. Whether your home is modern, traditional, or somewhere in between, there is a style that fits.
In this blog, you will find some of the most practical and good-looking tray ceiling ideas, put together to help you pick the one that actually suits your space, style, and budget.
How to Pick the Right Tray Ceiling Design?
Start with the floor plan, a narrow room calls for a long rectangular tray that follows the length, while a square room opens up nicely with a centered box shape.
Ceiling clearance is another factor that cannot be ignored; anything below nine feet tends to feel boxed in rather than open.
As you sort through tray ceiling ideas, consider finish details such as crown molding thickness, paint contrast, and placement of built-in lighting.
A darker inner color adds visual weight, while a lighter one keeps things airy. Matching these choices to your room’s existing woodwork and wall tones ties everything together cleanly.
Tray Ceiling Ideas That Change How a Room Looks
From subtle paint choices to bold material combinations, these tray ceiling ideas give every room a finished and considered look from the top down.
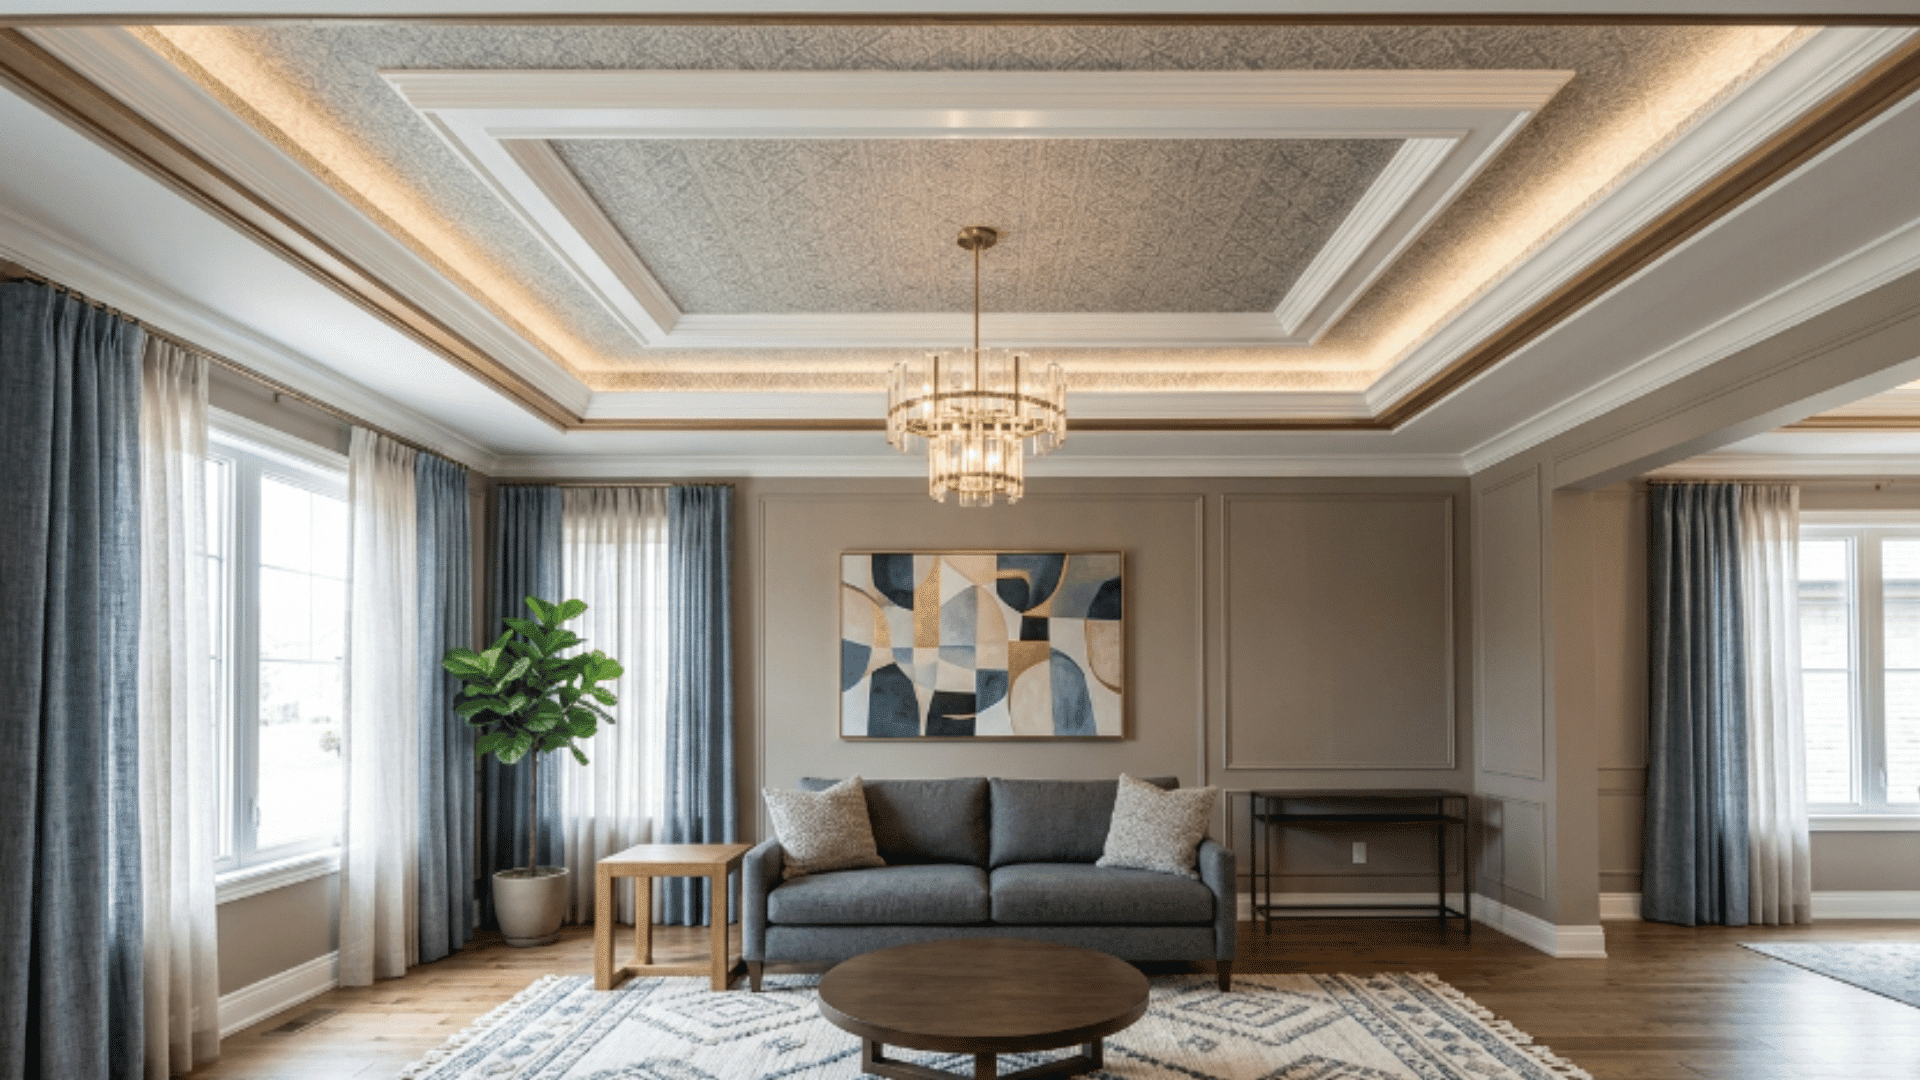
1. Bold Wallpaper Tray Ceiling
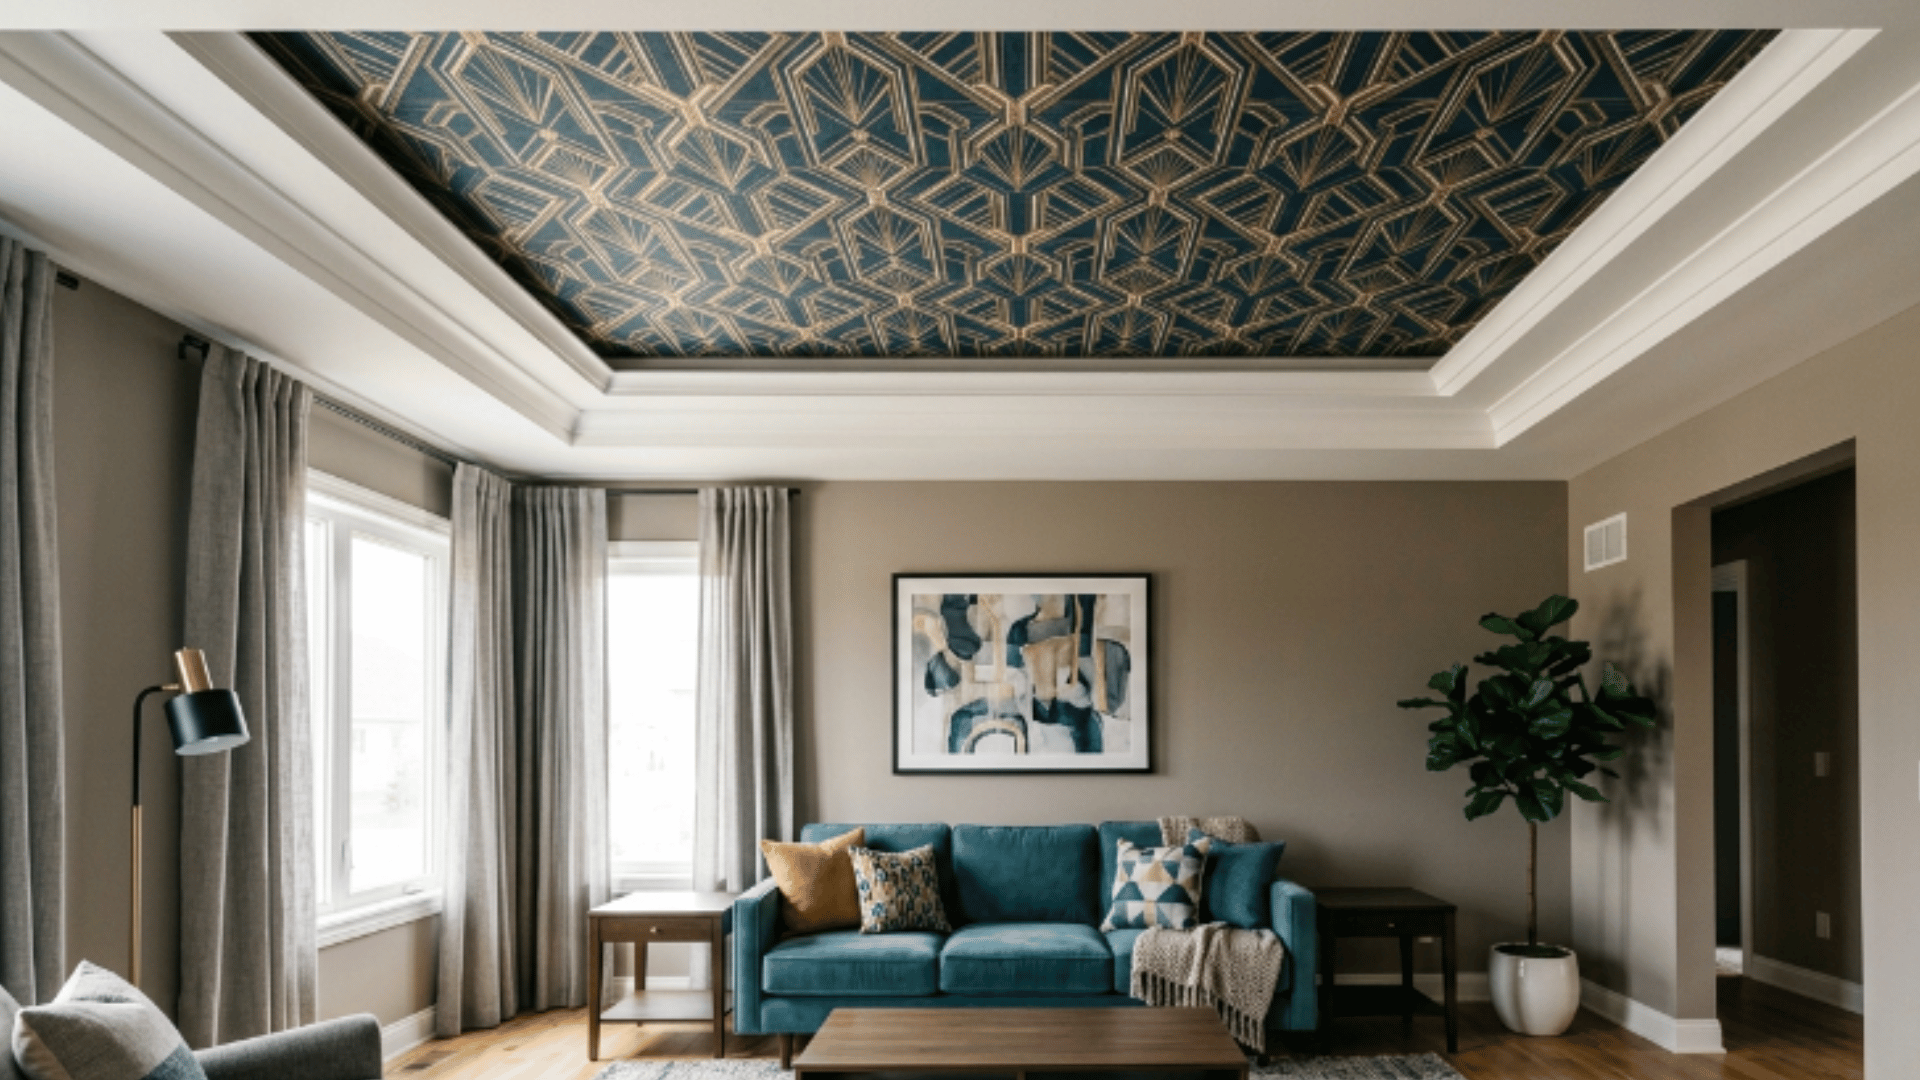
Patterned wallpaper inside the tray instantly draws the eye upward and gives the ceiling a strong visual identity.
- Choose a wallpaper pattern that contrasts with the surrounding wall color for maximum impact
- Apply the wallpaper only to the flat inner surface of the tray, leaving the stepped edges painted
- Use a bold geometric or floral pattern to make the tray feel like a framed piece of art
- Seal the wallpaper edges with a thin bead of caulk to keep them clean and lifted
- Keep the rest of the room decor simple so the ceiling remains the focal point
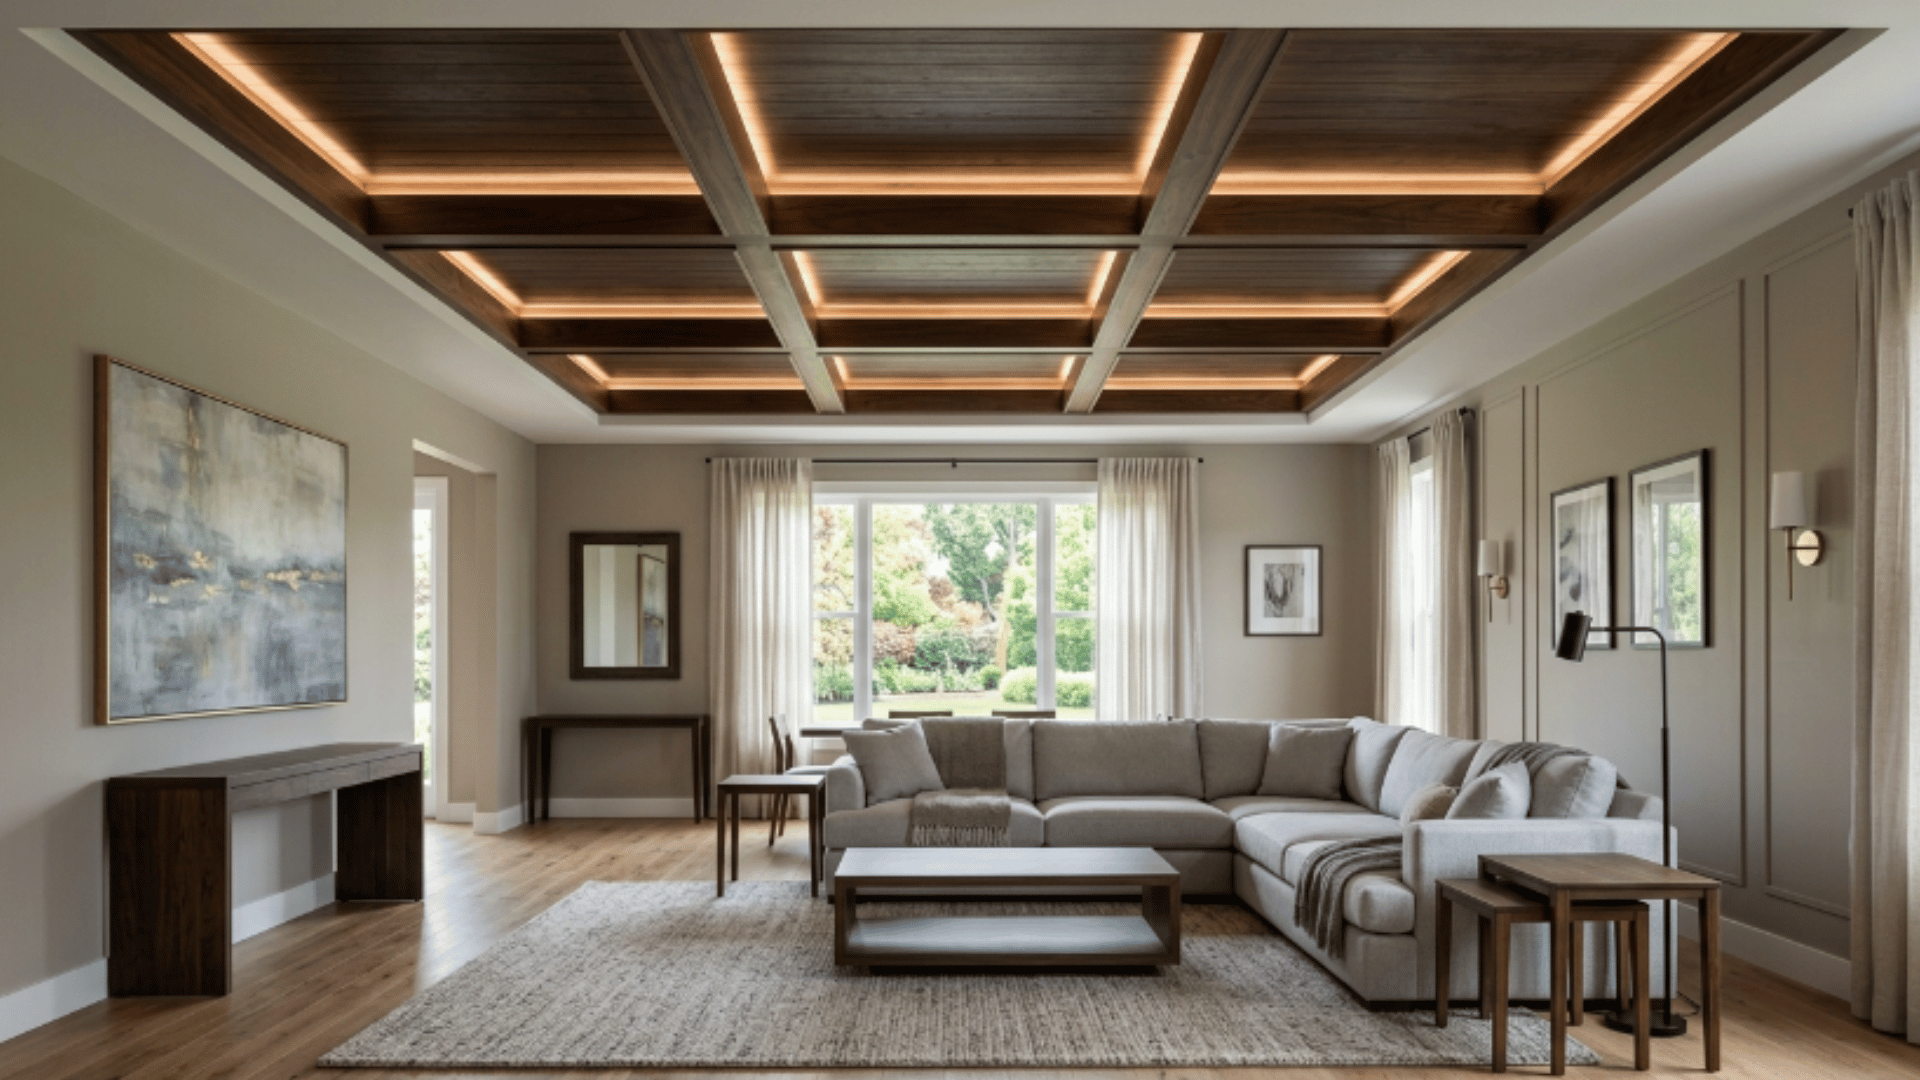
2. Hardwood Plank Tray Ceiling
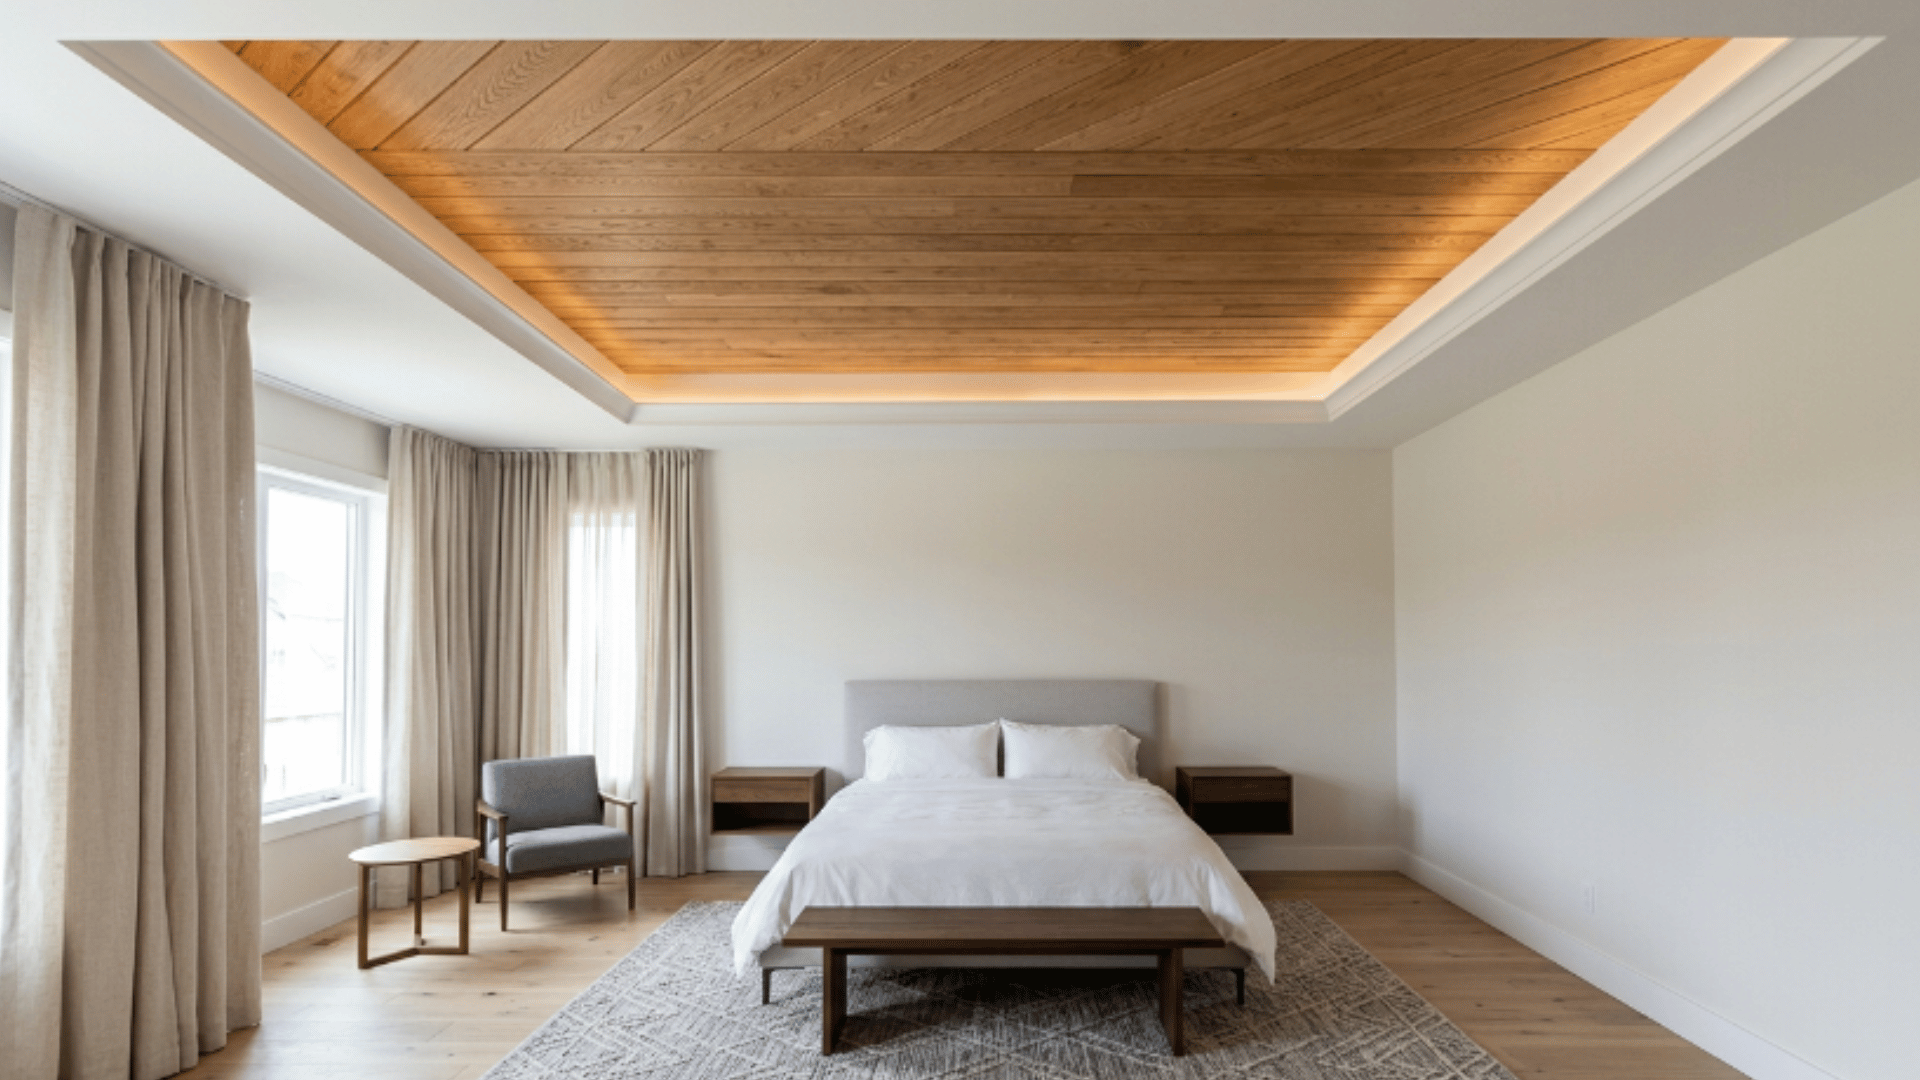
Wood planks lining the inner tray bring warmth and natural texture to a space that plain paint cannot replicate.
- Select hardwood planks in a consistent width for a clean and structured finish
- Install the planks running in one direction across the full inner surface of the tray
- Sand and stain the wood before installation for a richer and more polished result
- Leave small gaps between planks for a more rustic and relaxed wood ceiling feel
- Pair with warm-toned lighting to bring out the grain and depth of the wood
3. Decorative Molding Tray Ceiling
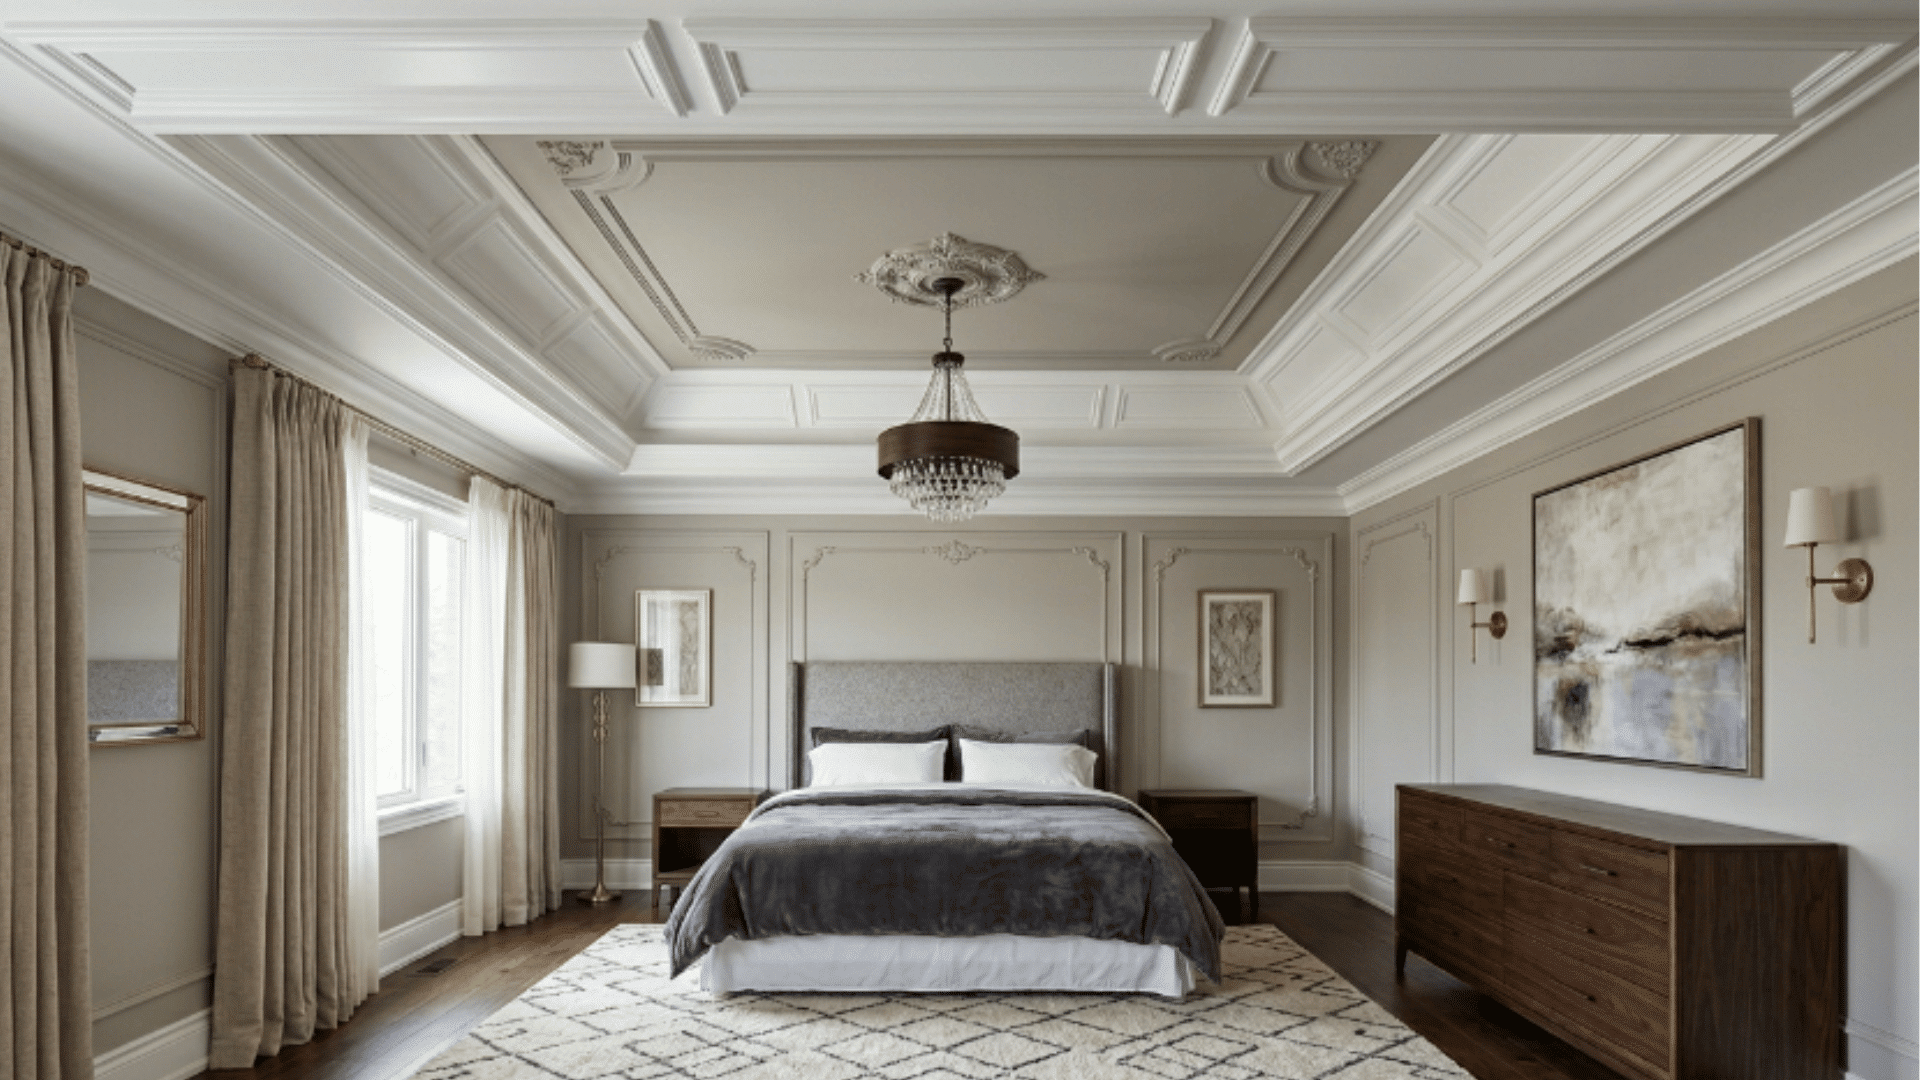
Detailed molding layered inside the tray adds a classic architectural element, giving the room a more formal, finished character.
- Choose molding profiles that complement the existing trim and baseboards throughout the room
- Layer two or three molding sizes at the tray edges to build up a more detailed and structured border
- Paint all molding in the same shade as the ceiling for a subtle tone-on-tone effect
- Use a contrasting color on the molding if a bolder and more defined look is preferred
4. High-Contrast Trim Tray Ceiling
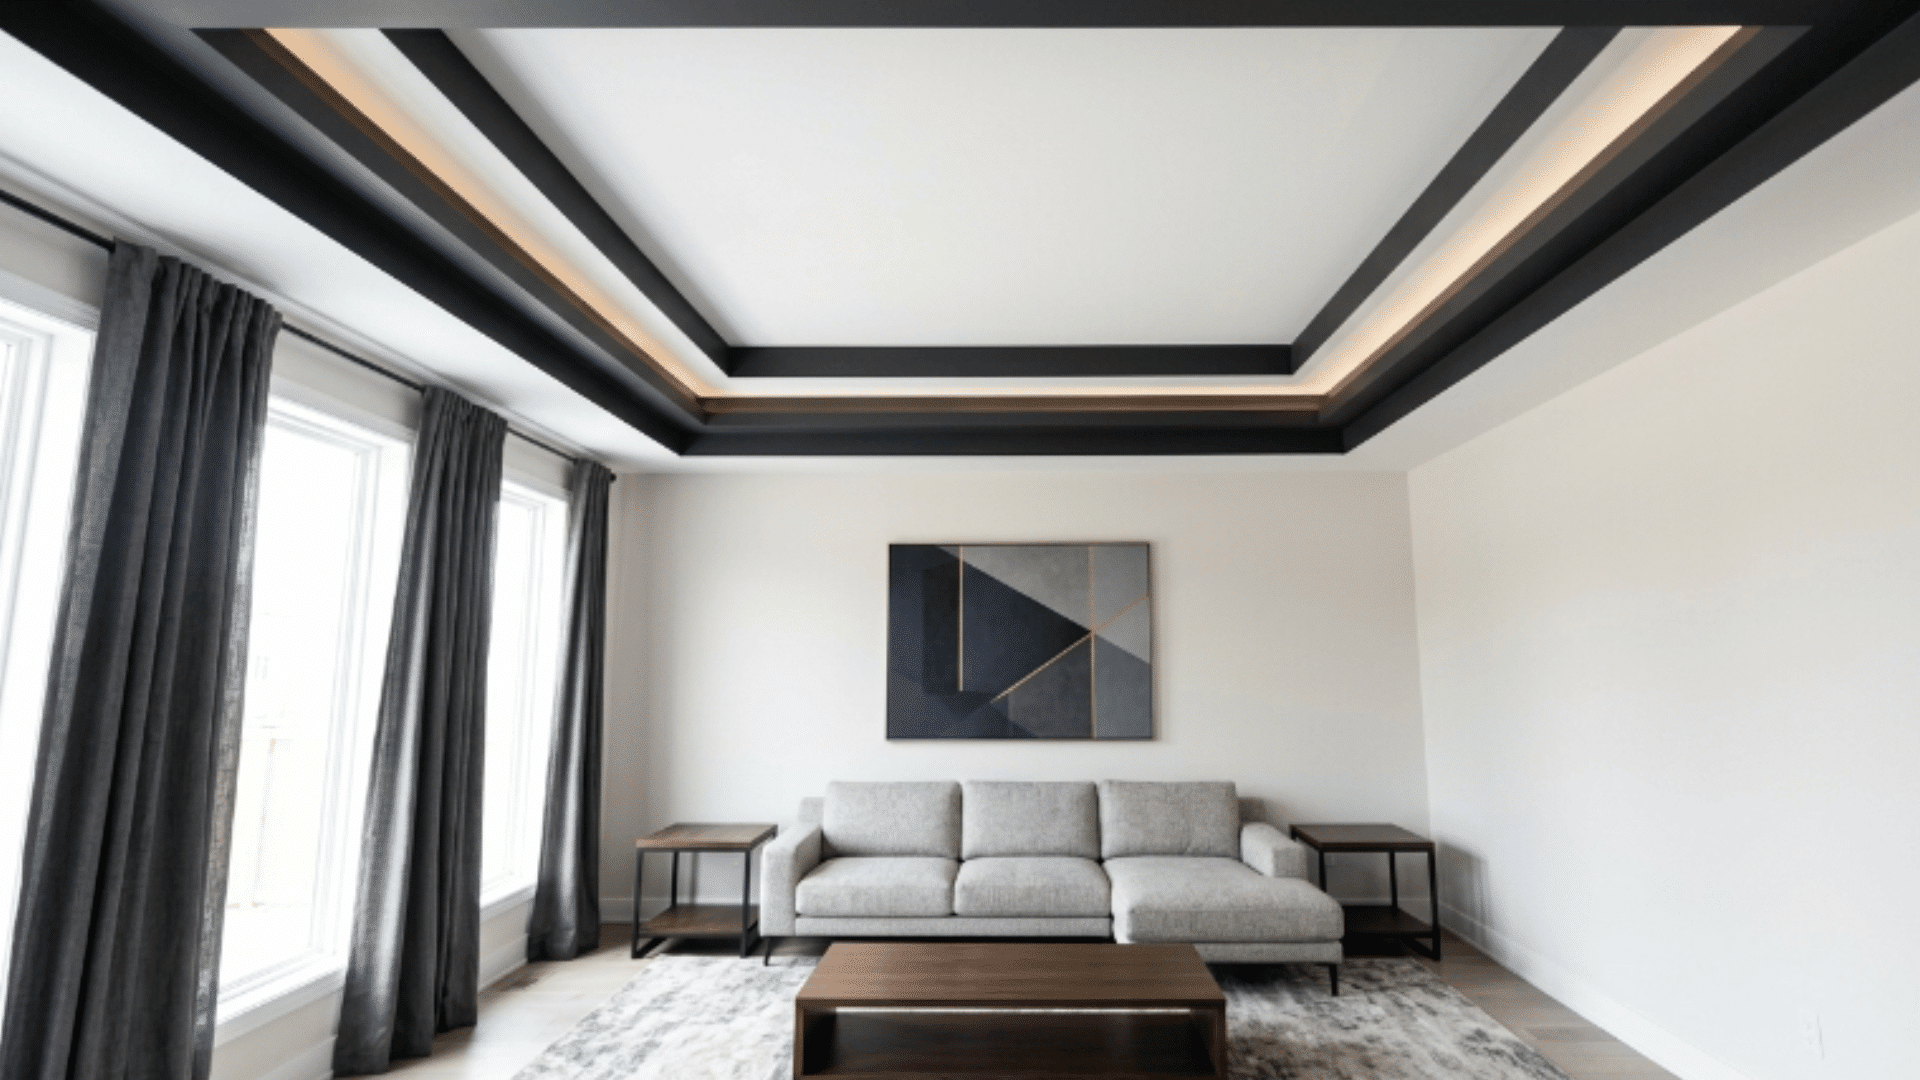
Painting the trim darker than the ceiling highlights the tray structure and gives the room a sharp, deliberate look.
- Choose a trim color that is two to three shades darker than the main ceiling tone
- Apply the darker color only to the stepped vertical edges of the tray, not the inner flat surface
- Use painter’s tape along every edge for a clean and precise color transition
- Pair with neutral walls so the ceiling contrast does not compete with the rest of the room
- Finish with a satin or semi-gloss paint on the trim to separate it visually from the flat ceiling above
5. Circular Tray Ceiling Design
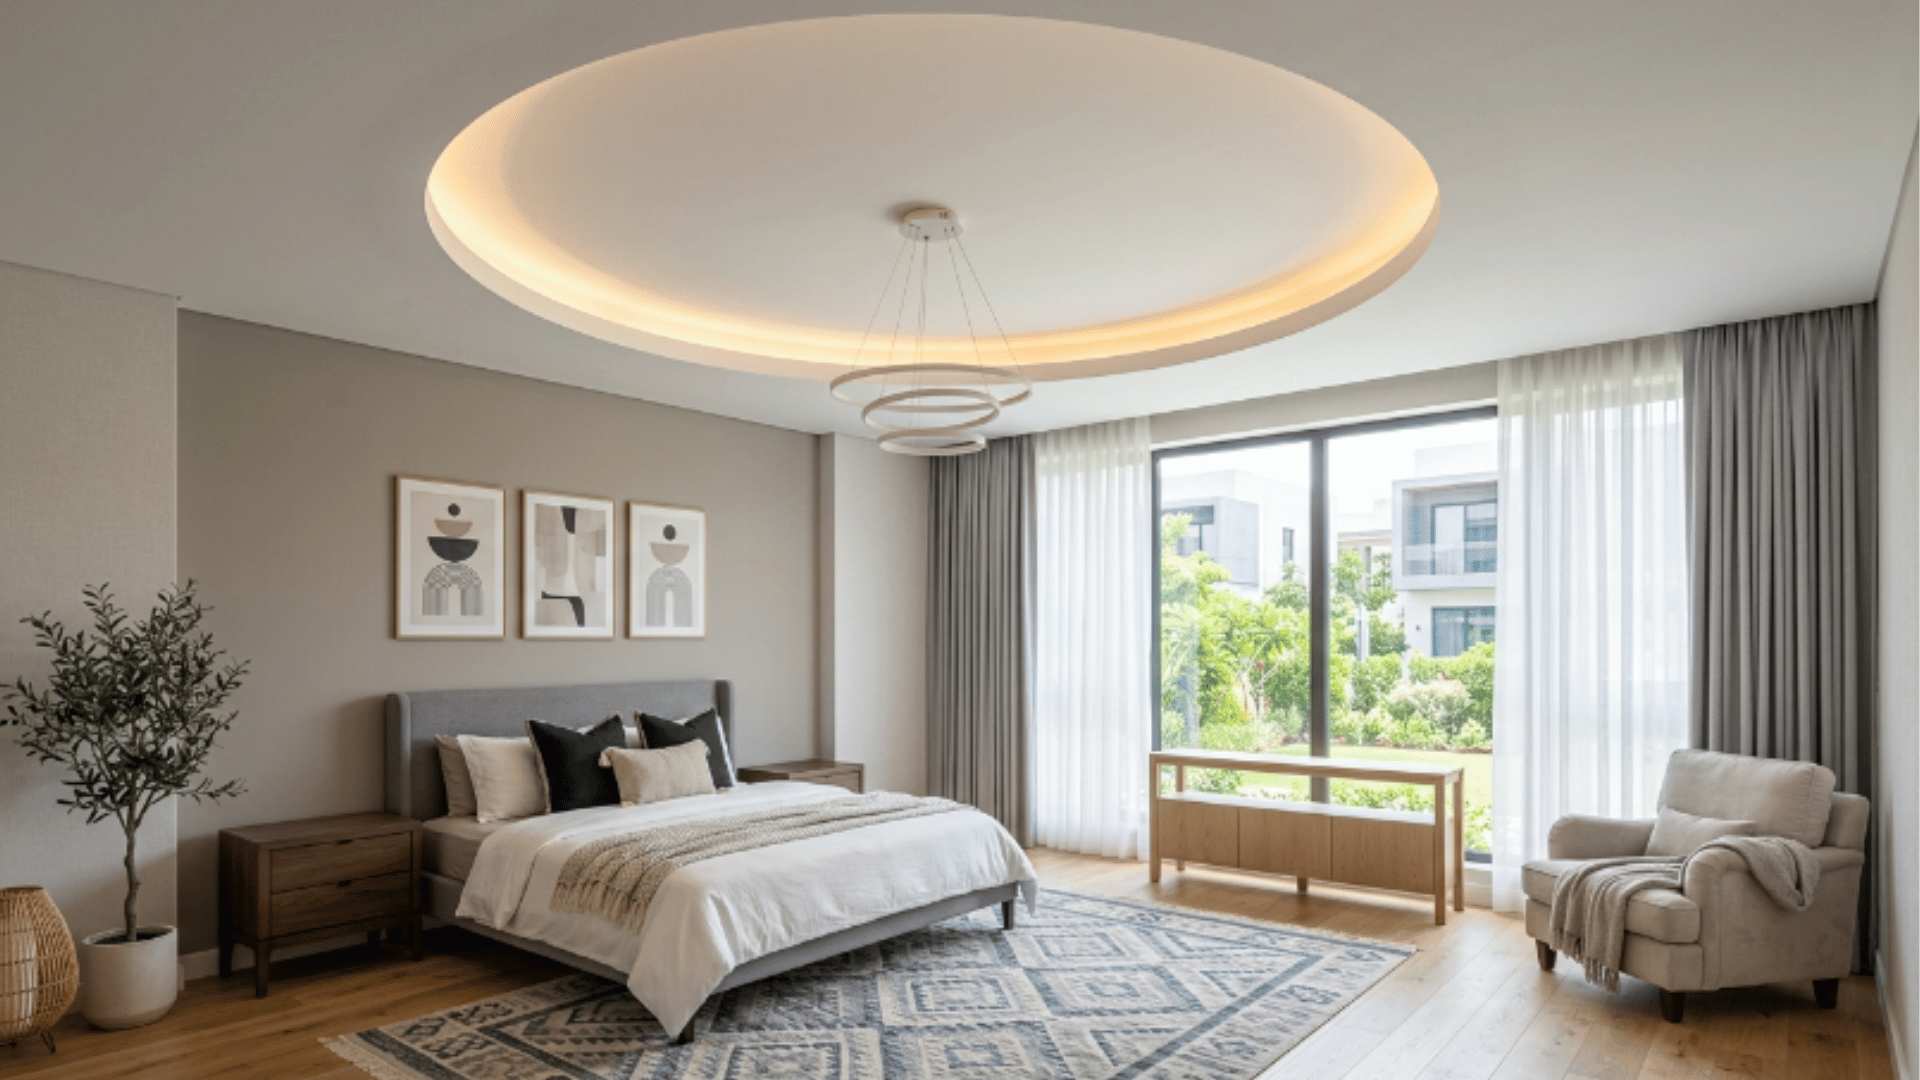
A round tray shape softens the overall feel of the room and works particularly well in dining rooms and formal sitting areas.
- Keep the inner circle painted in a soft neutral tone to avoid making the shape feel heavy
- Add a central pendant or chandelier that matches the circular shape of the tray
- Use subtle cove lighting around the inner edge to reinforce the circular outline at night
- Avoid adding any additional ceiling detail so the round shape stays the clear focal point
6. Slatted Wood Tray Ceiling
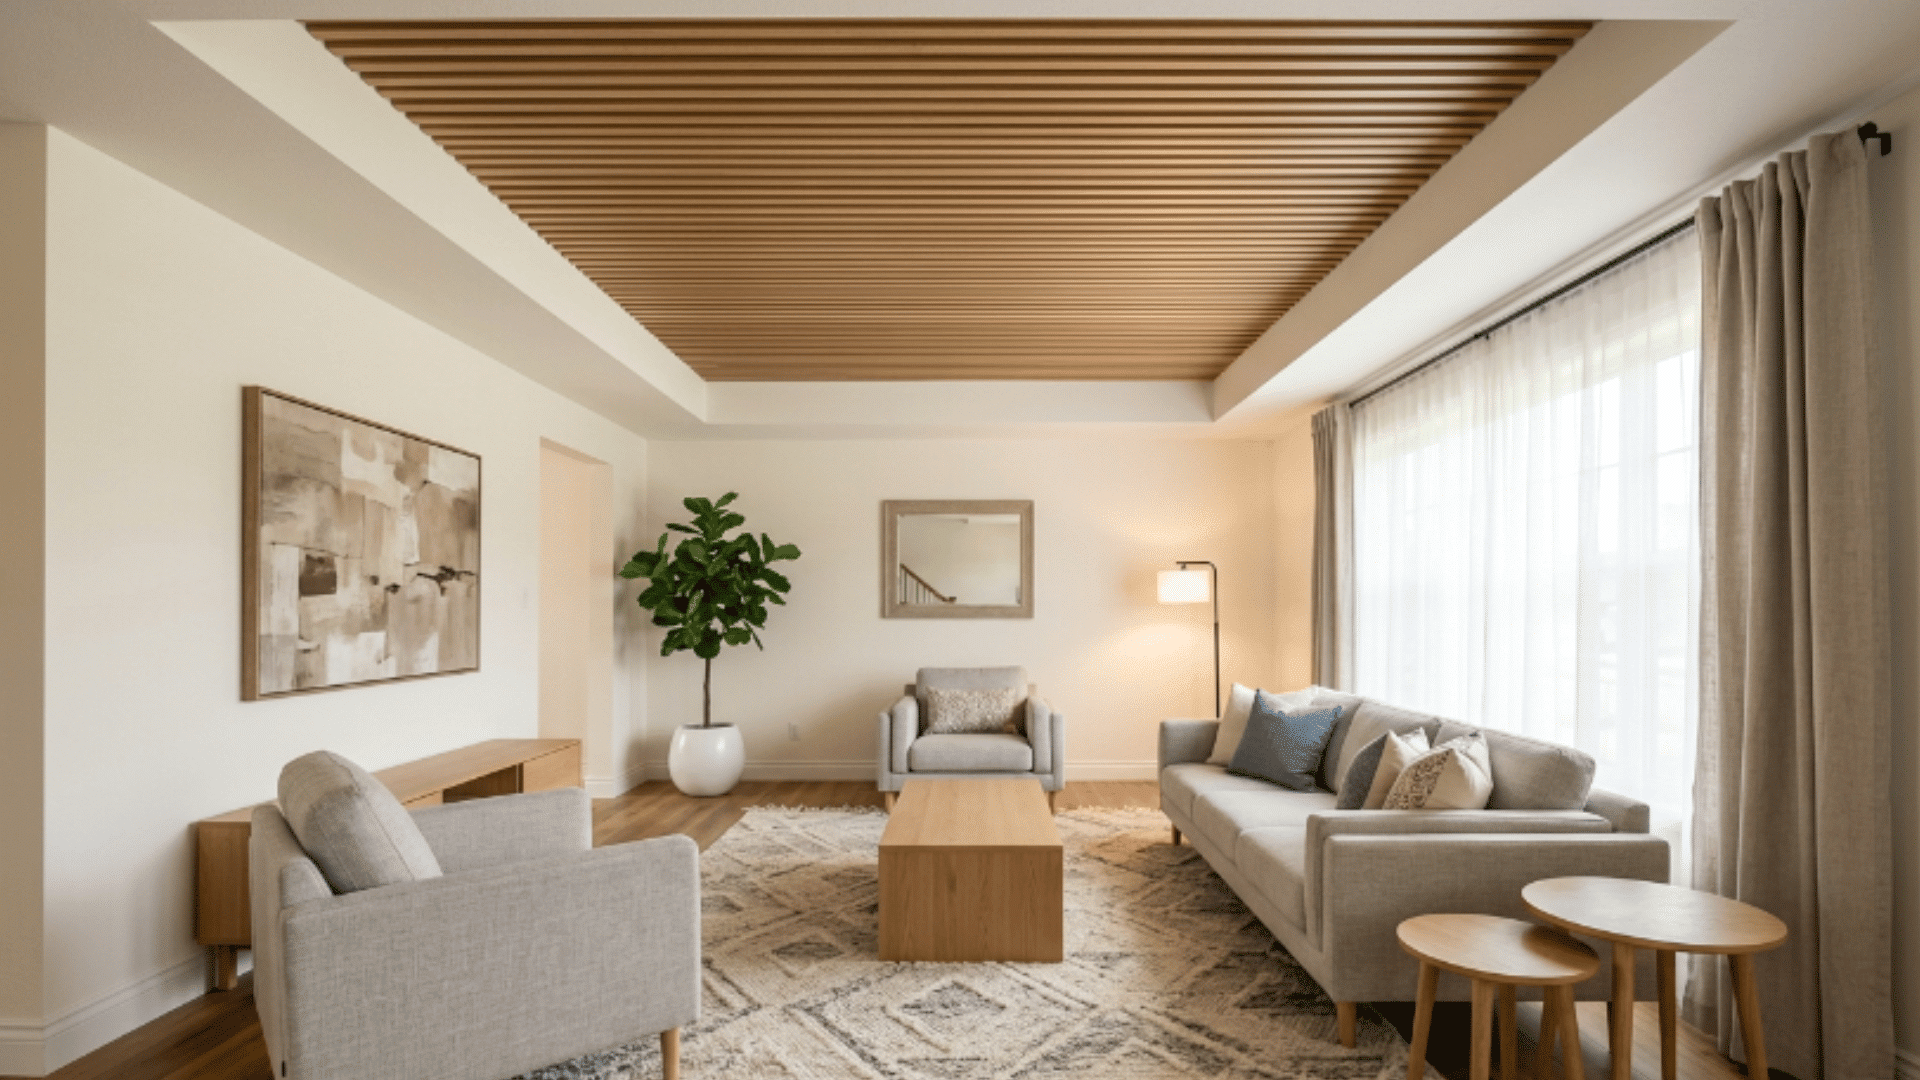
A soft neutral tray ceiling adds architectural depth to a room without introducing any additional color or visual complexity.
- Choose slats in a consistent width and space them evenly across the full inner surface of the tray
- Install the slats running in one direction so the pattern reads cleanly from below
- Leave a small, consistent gap between each slat so the open texture effect comes through clearly
- Stain or paint the slats before installation for a more finished and polished result
- Use recessed lighting behind or between the slats to add depth and warmth to the ceiling
7. Shiplap Tray Ceiling Pattern
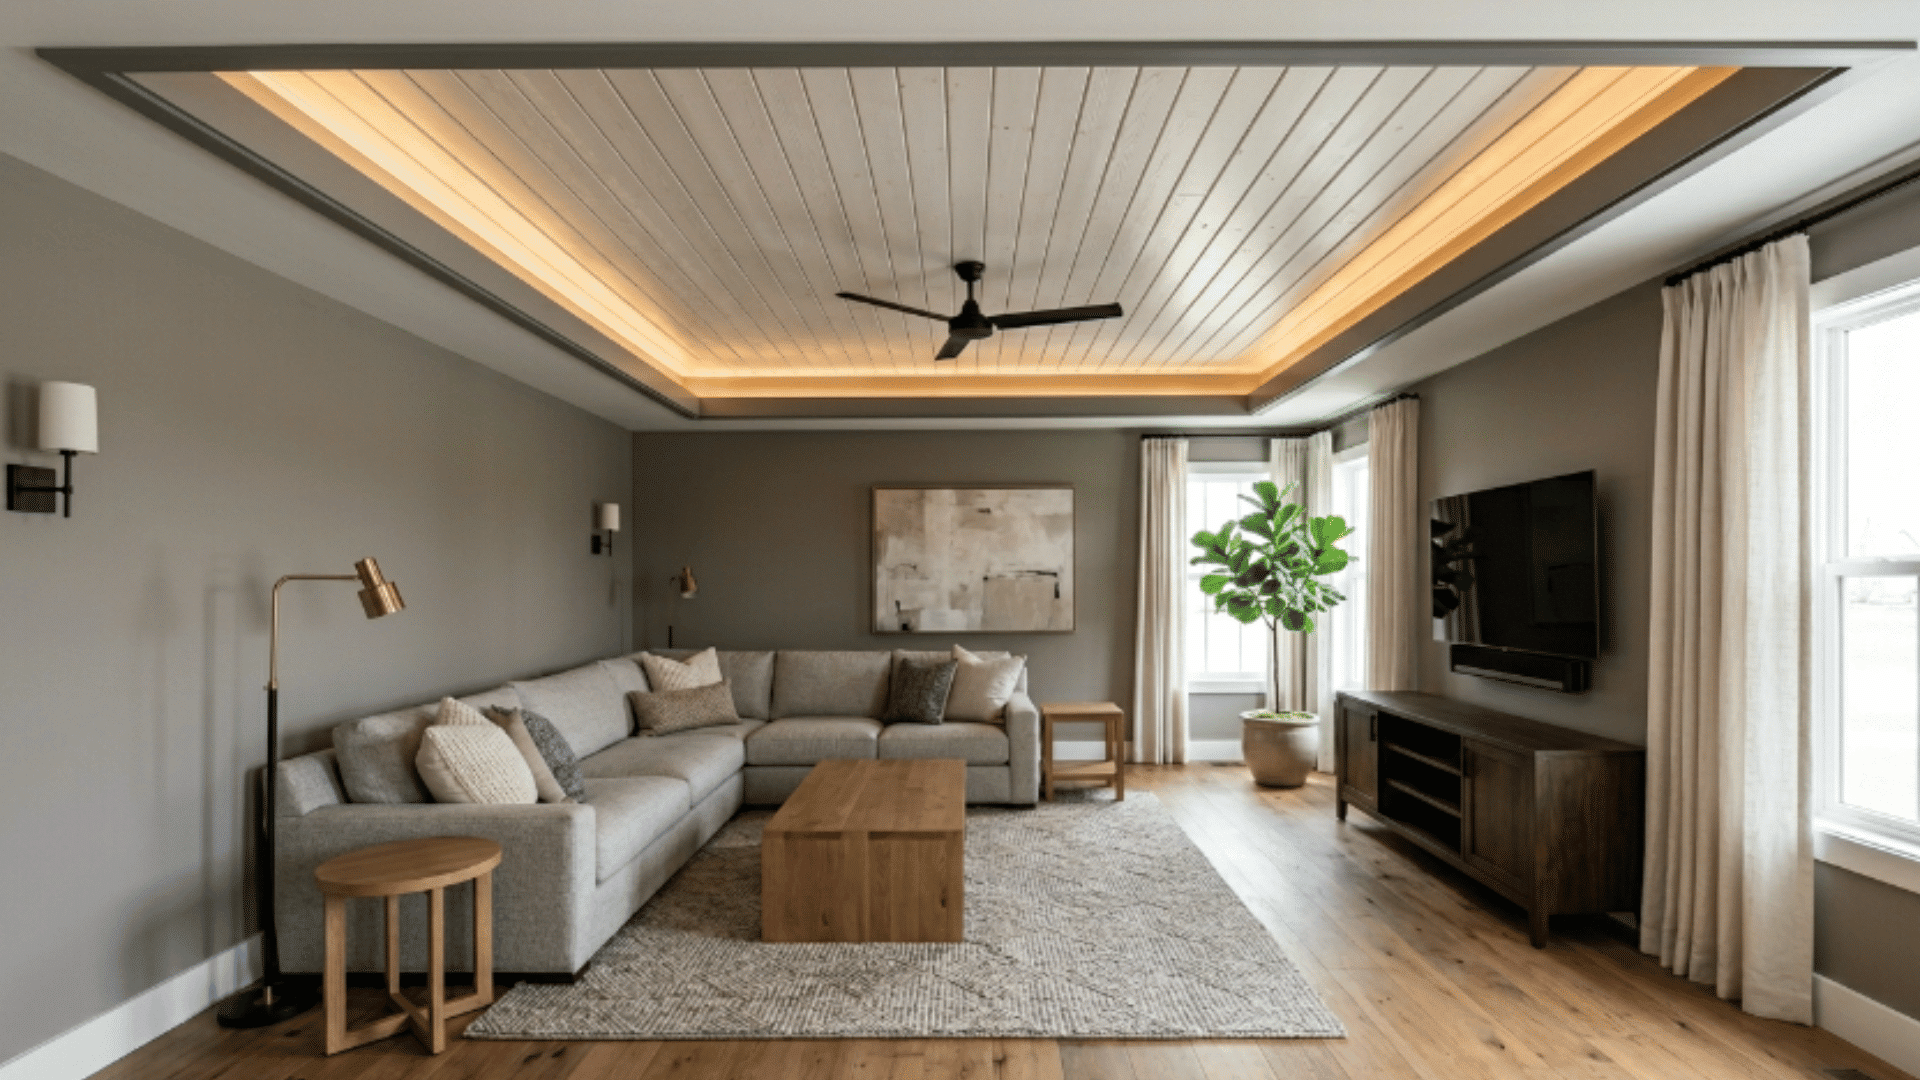
Shiplap boards installed inside the tray add a relaxed, textured finish that works across both modern and casual interior styles.
- Install shiplap boards horizontally across the full inner surface of the tray for a classic look
- Try a diagonal layout instead for a more contemporary and less expected result
- Paint the shiplap in crisp white or soft off-white to keep the texture light and airy
- Fill all nail holes and gaps before painting for a cleaner and more finished surface
- Pair with simple trim and neutral walls so the shiplap texture carries the visual interest on its own
8. Grid Pattern Tray Ceiling
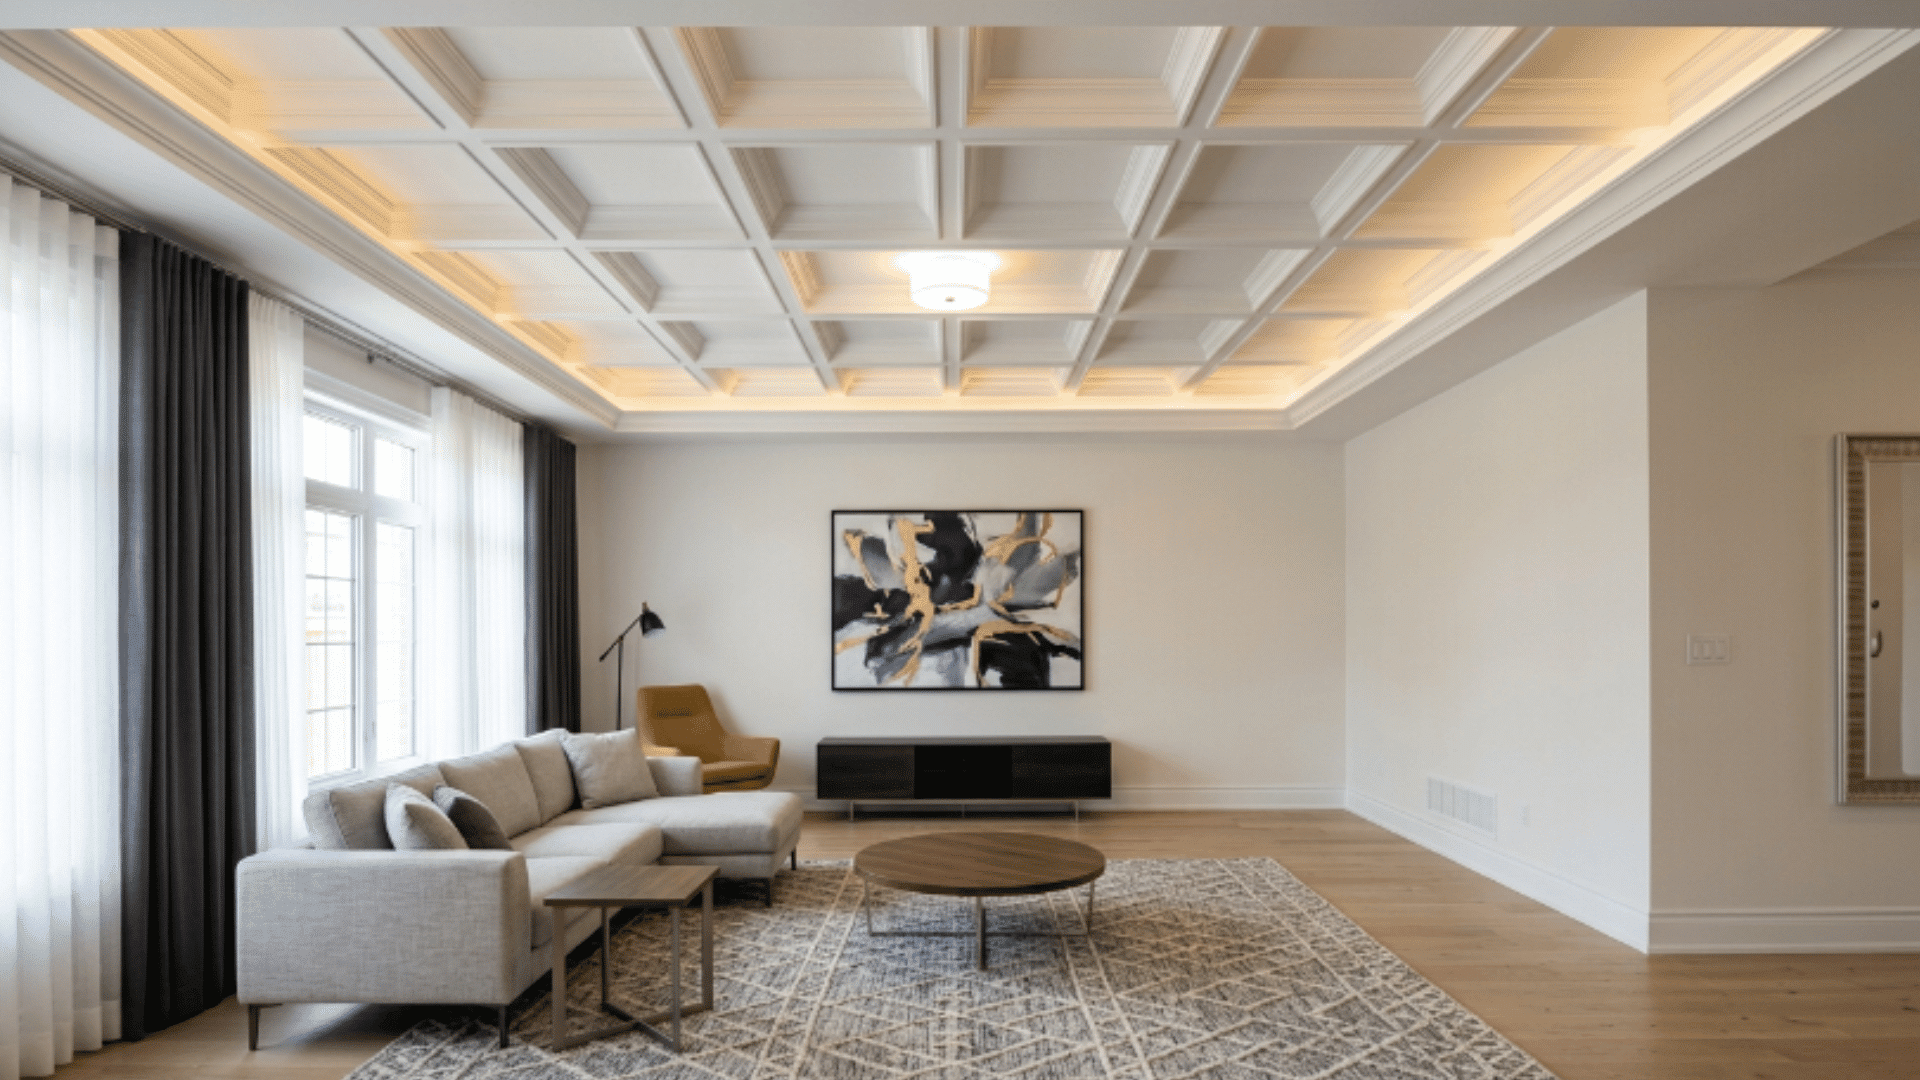
Dividing the tray into sections using molding creates a structured grid that adds visual depth and a formal quality to the ceiling.
- Map out the grid layout on paper first so the spacing between sections is consistent throughout
- Use flat molding strips of equal width to form each grid section across the tray surface
- Paint the entire ceiling and molding in the same color for a tone-on-tone paneled effect
- Use a contrasting color inside each grid section for a more graphic and defined look
- Keep the surrounding walls simple so the grid ceiling reads as the main architectural feature
9. Rustic Beam Tray Ceiling
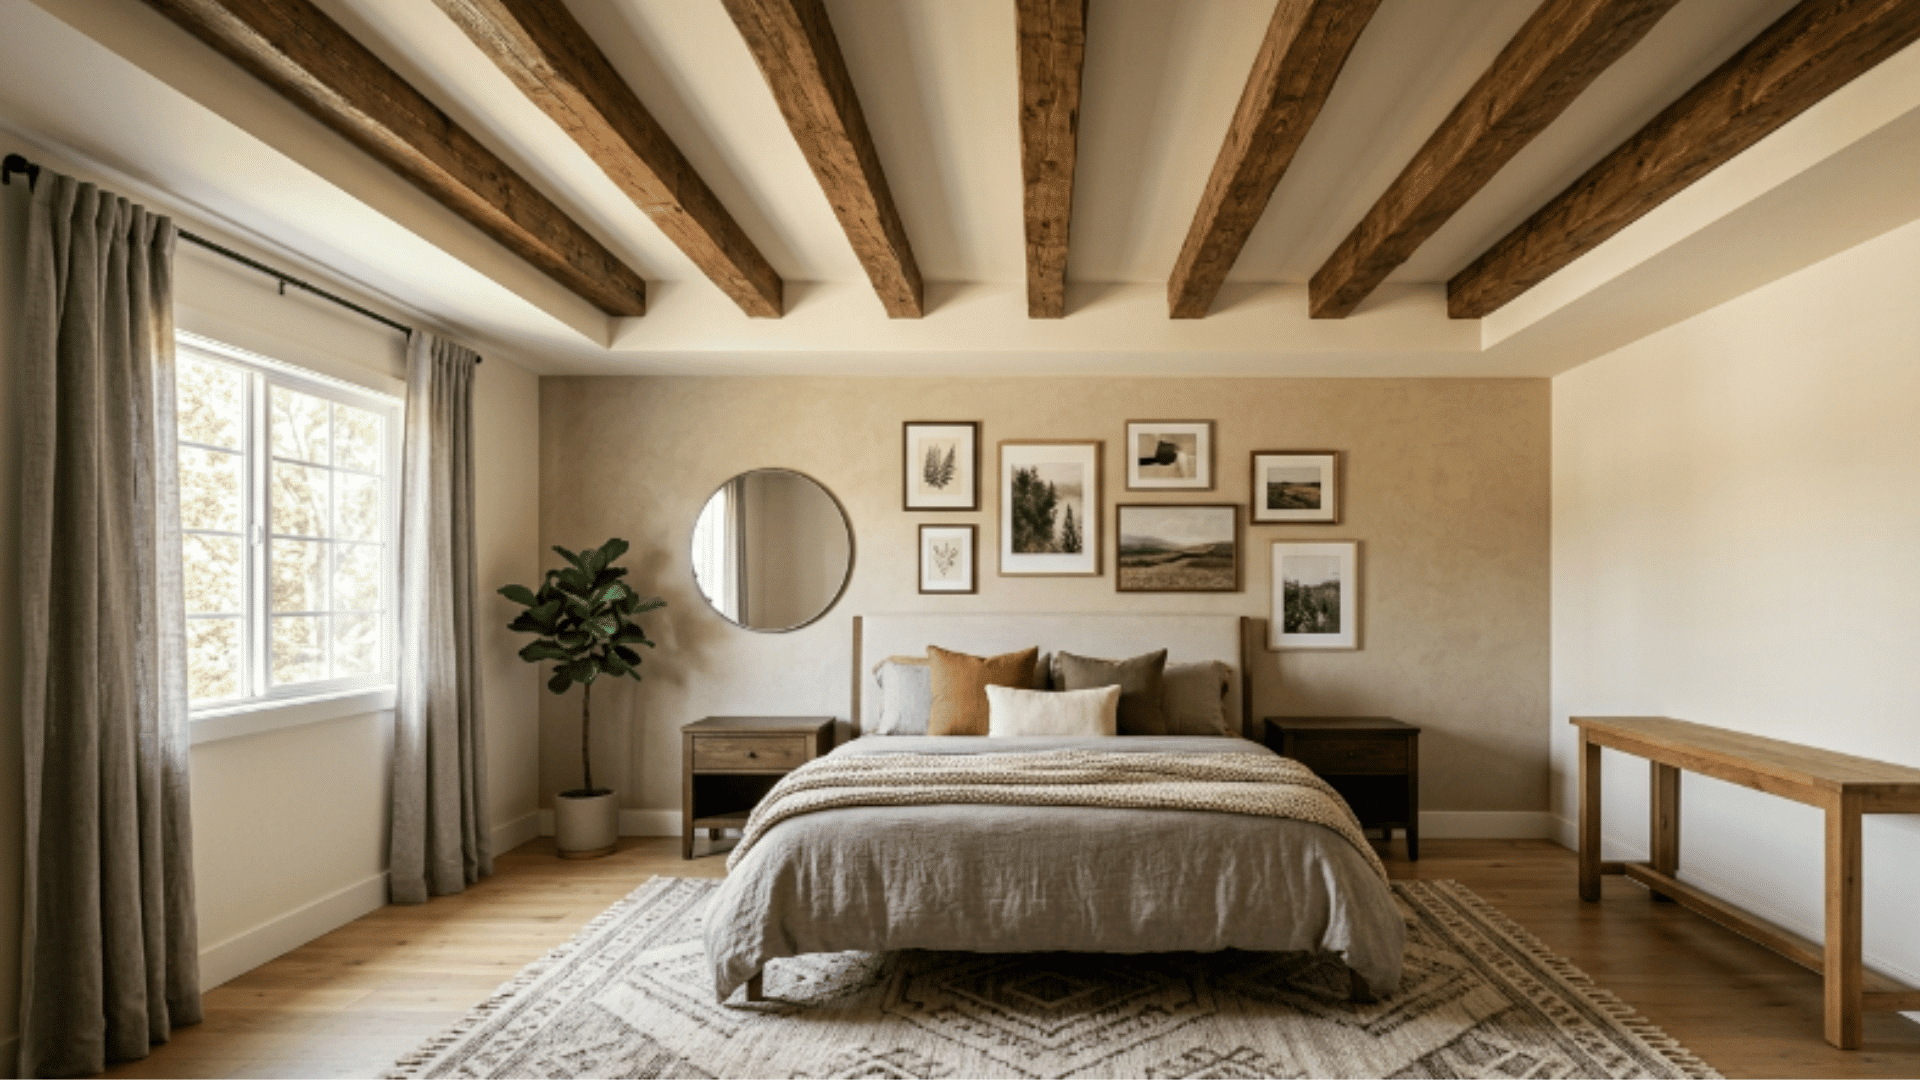
Exposed wooden beams inside the tray add farmhouse character to the ceiling, which works well in open-plan and casual living spaces.
- Use reclaimed or faux wood beams for an authentic and textured rustic finish
- Space the beams evenly across the tray so the layout feels structured rather than scattered
- Leave the beams in their natural wood tone or stain them darker for a more dramatic result
- Paint the tray ceiling white or cream around the beams to keep the space feeling open and light
- Pair with natural materials throughout the room to carry the rustic feel beyond the ceiling
10. Geometric Beam Tray Ceiling
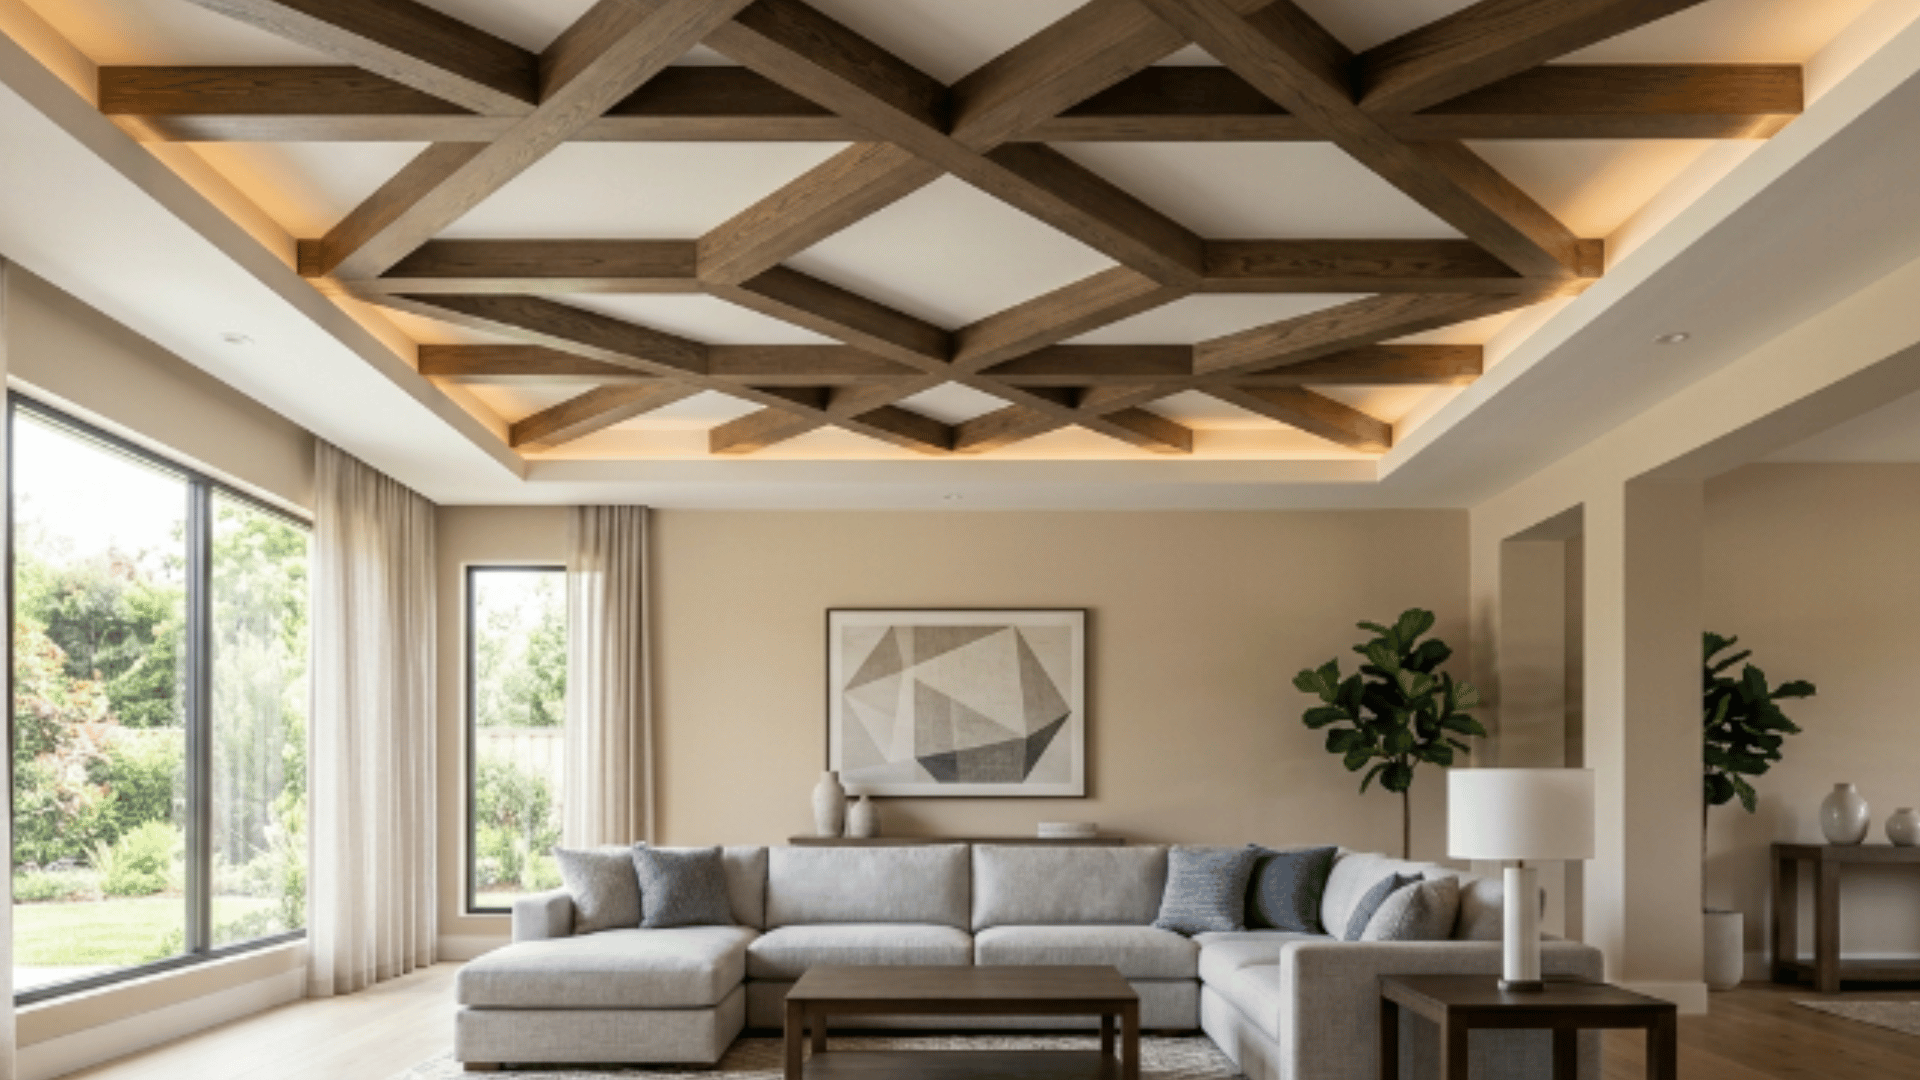
Arranging beams in angular geometric patterns rather than straight parallel lines creates a ceiling that feels far more considered and custom.
- Plan the geometric layout on paper before installation to make sure the angles work within the tray shape
- Use beams of a consistent thickness so the pattern reads cleanly without any variation in depth
- Paint the beams in a contrasting tone to the ceiling so the geometric lines stand out clearly
- Choose a simple repeating pattern like diamonds or chevrons for a result that is bold but not overwhelming
- Keep lighting minimal and directional, so it highlights the geometry without flattening the pattern
11. Wood Veneer Tray Ceiling
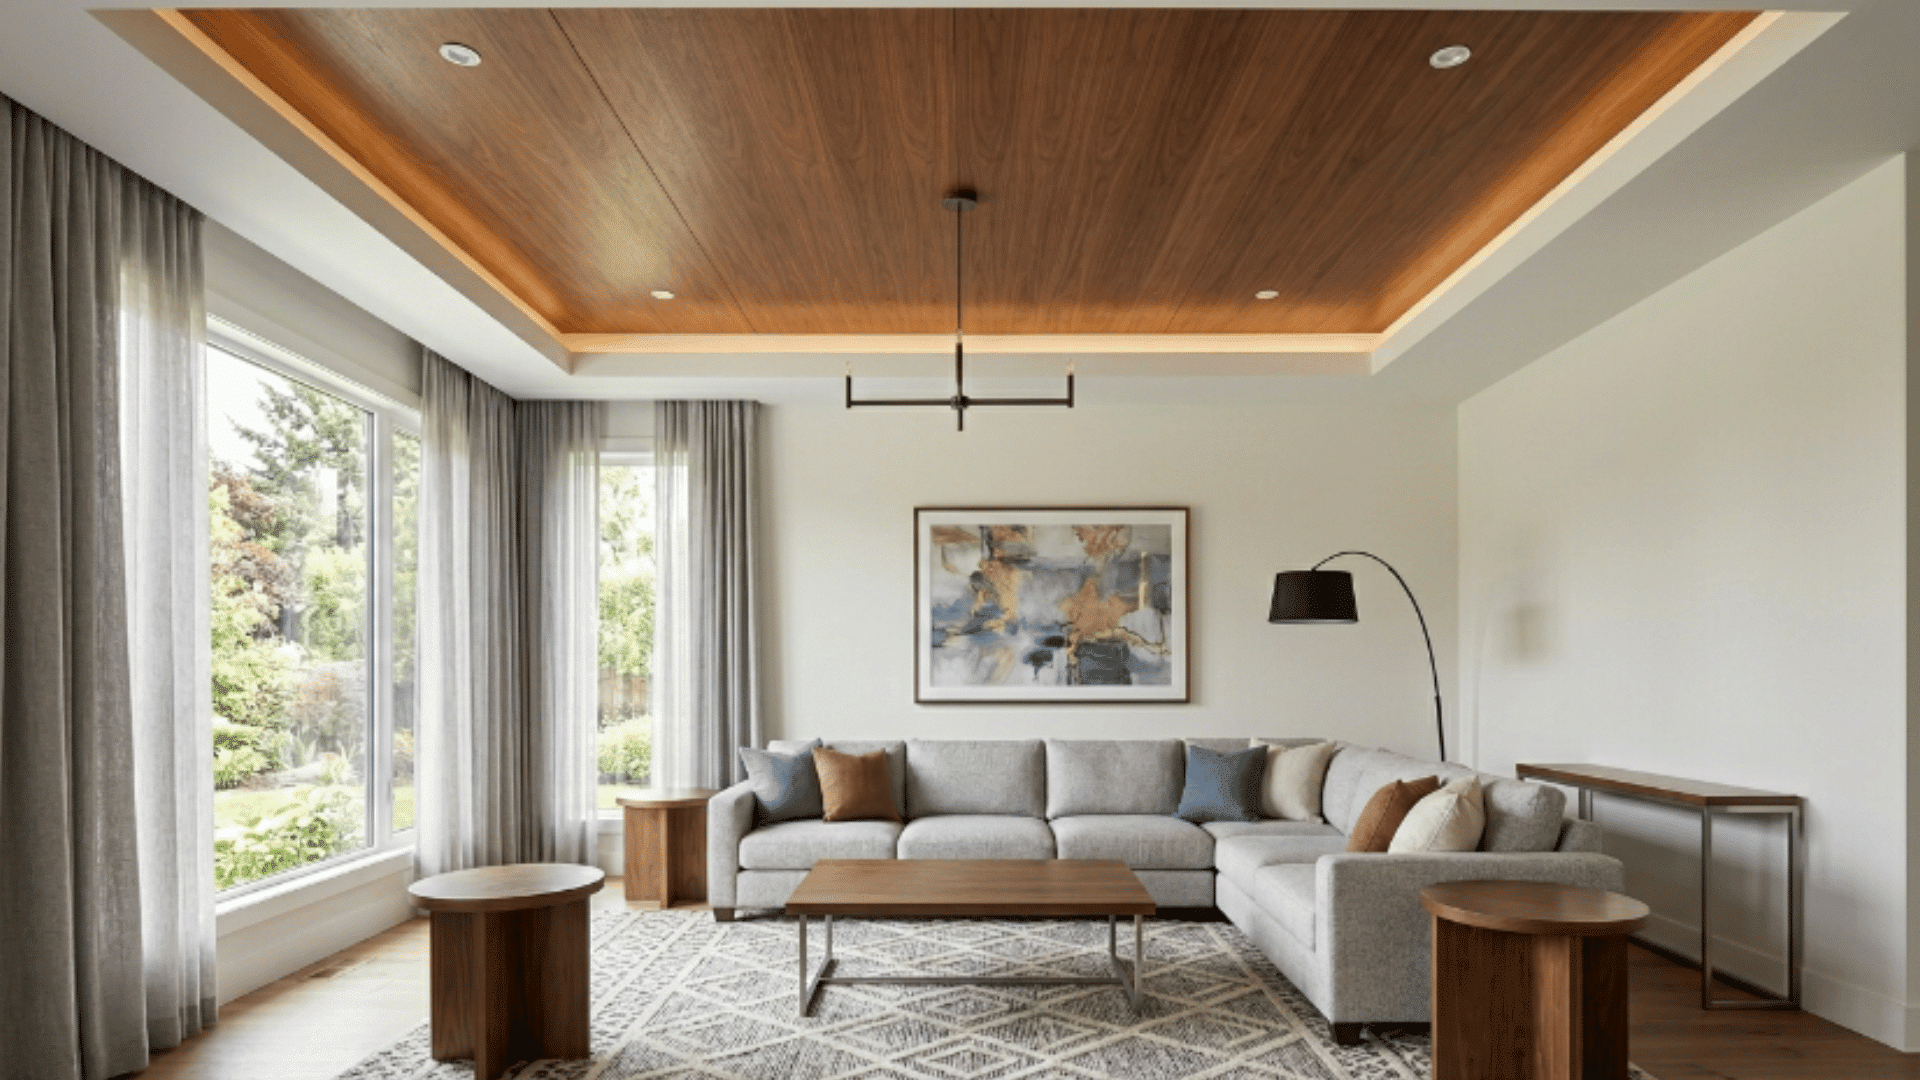
Covering the entire tray with wood veneer panels gives the ceiling a rich and layered finish that feels far more substantial than paint alone.
- Choose a veneer with a consistent and clean grain pattern for a more polished overall result
- Install the panels running in the same direction across the full inner surface of the tray
- Apply a clear satin finish over the veneer to protect the surface and bring out the natural tone
- Keep the stepped edges of the tray painted in a neutral that complements the wood tone
- Use recessed lighting inside the tray to highlight the veneer texture and add warmth to the space
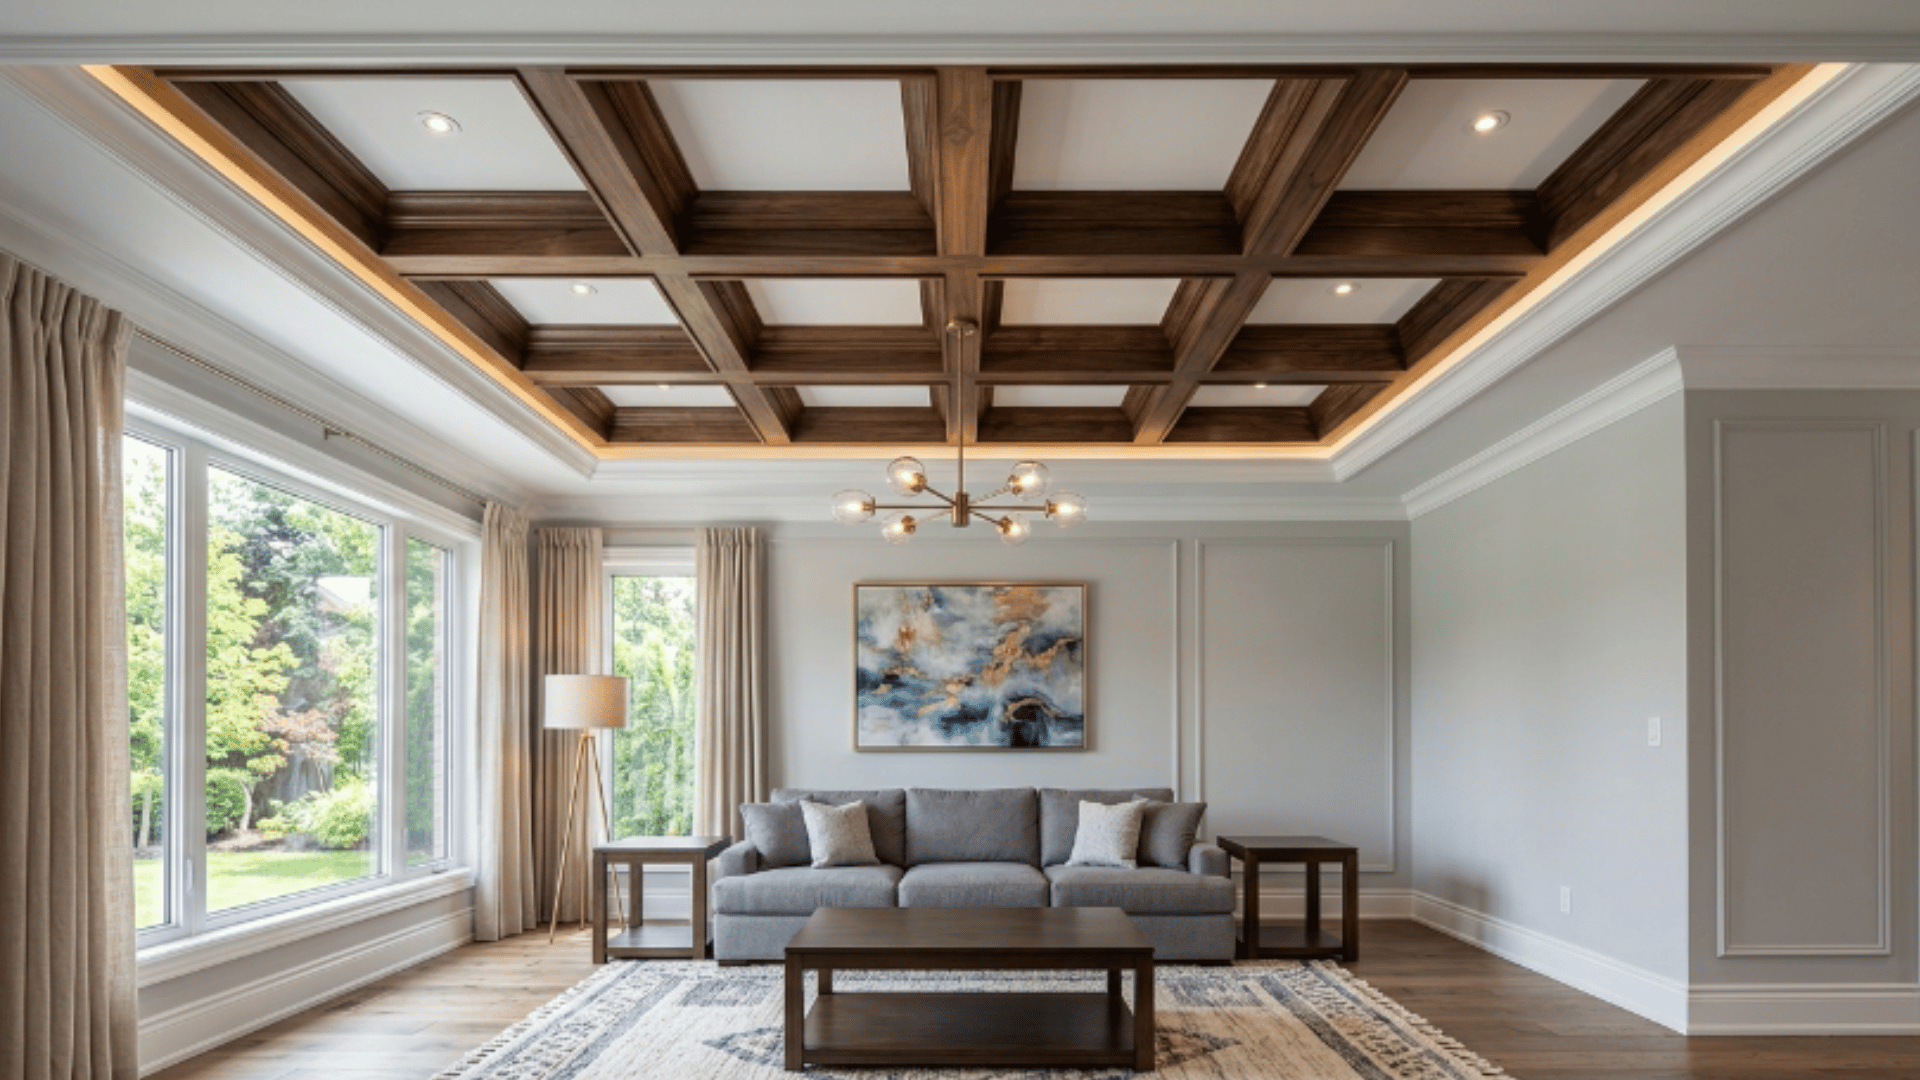
12. Box Frame Beam Tray Ceiling
Beams arranged to form rectangular or square frames within the tray create a structured, architectural ceiling pattern that feels more formal than parallel-beam layouts.
- Plan the box frame layout on paper first, so all rectangular sections are proportional and consistent
- Use beams of the same width and depth throughout so the frame pattern reads cleanly from below
- Paint the beams in a contrasting tone to the tray surface so each box frame stands out clearly
- Keep the spaces inside each box frame plain and uncluttered so the beam structure remains the main feature
- Pair with a recessed light centered inside each box frame to reinforce the structured grid pattern
13. Mixed Texture Tray Ceiling
Combining wallpaper, paint, and trim within a single tray creates a ceiling with real visual depth and a collected, layered quality.
- Apply wallpaper to the flat inner surface of the tray as the main decorative element
- Frame the wallpapered section with a simple molding border where the tray steps down
- Paint the stepped edges and surrounding ceiling in a neutral tone that complements the wallpaper
- Keep the pattern scale of the wallpaper in proportion with the size of the tray
- Limit the combination to three elements maximum so the ceiling feels layered rather than cluttered
14. Hexagonal Tray Ceiling
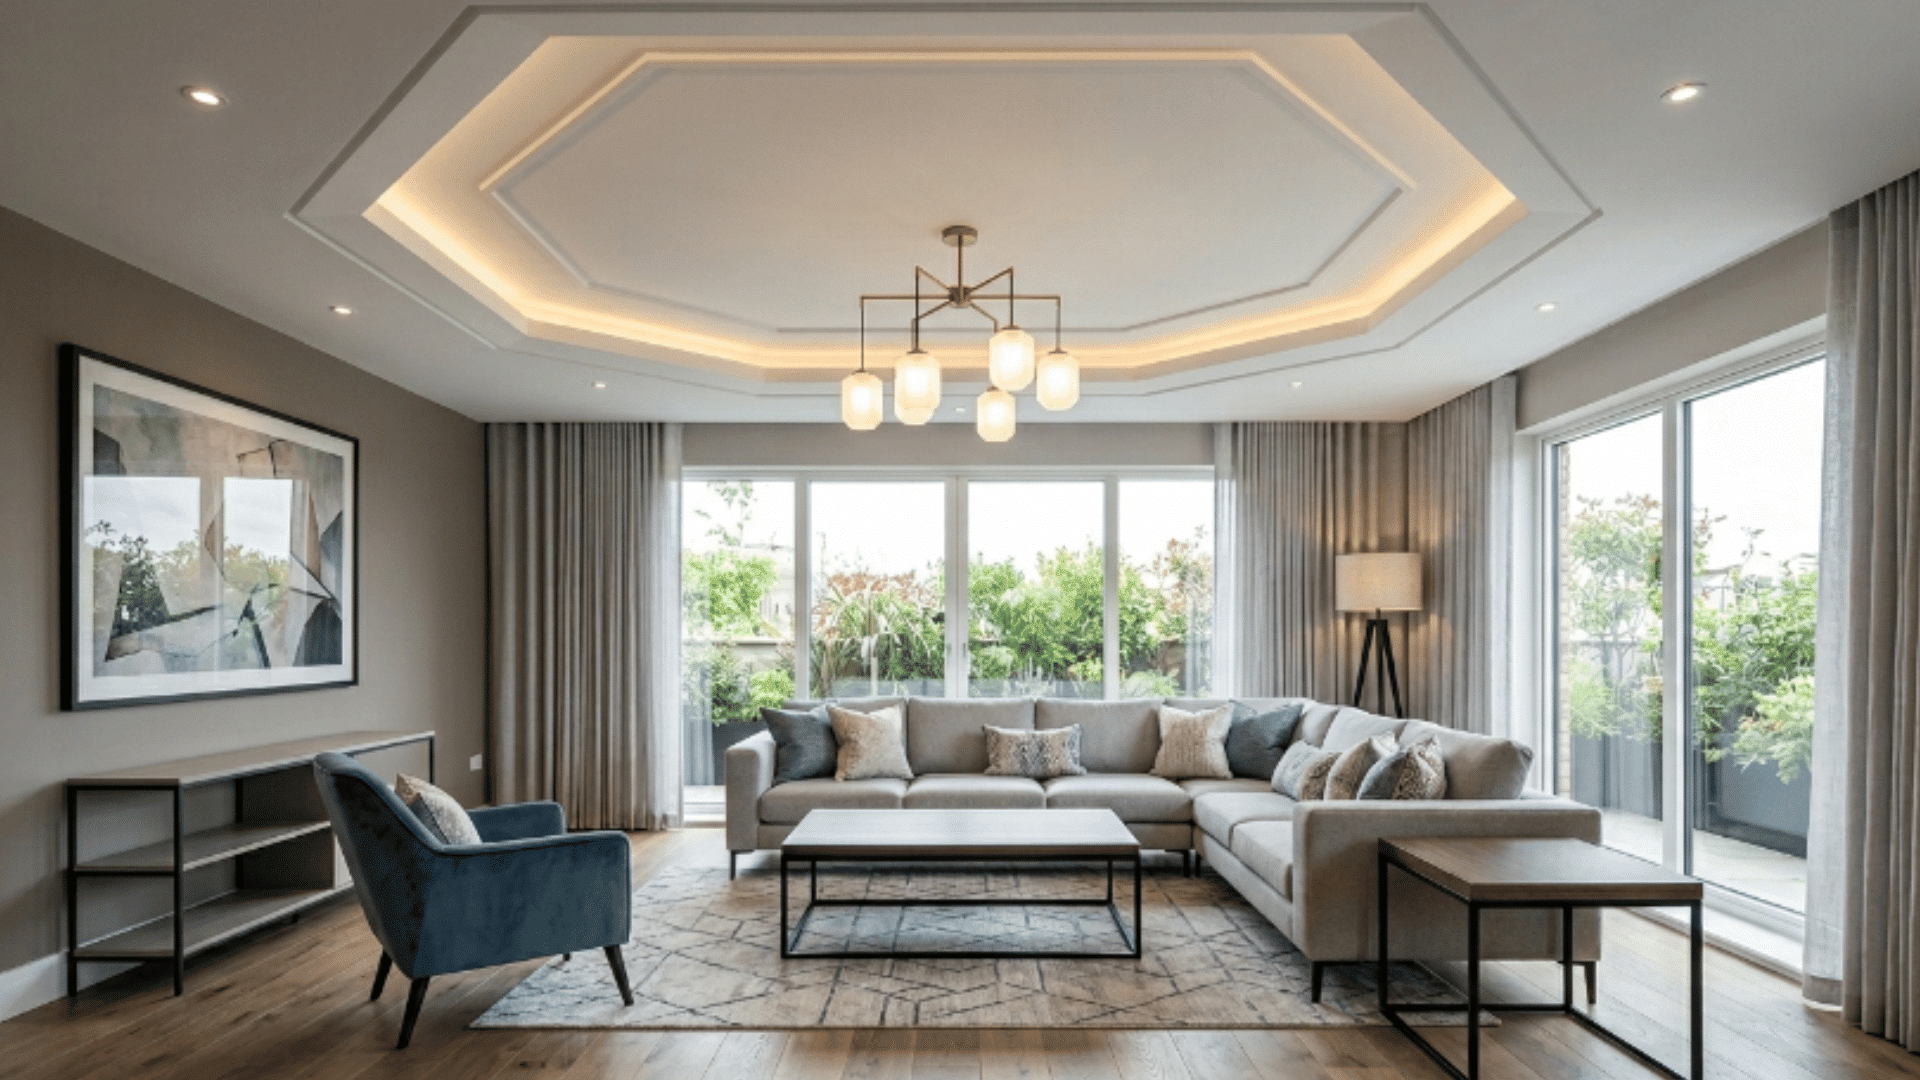
A hexagonal tray breaks away from the standard rectangular format, creating a genuinely distinctive ceiling feature.
- Paint the inner surface in a contrasting color to make the shape stand out from the surrounding ceiling
- Add a central light fixture that echoes the hexagonal shape for a more cohesive overall look
- Keep the walls and surrounding ceiling plain so the unusual shape remains the clear focal point
- Use cove lighting around the inner edge of the hexagon to reinforce the shape at night
15. Coffered Tray Ceiling
Recessed square or rectangular sections within the tray create a structured and layered ceiling layout that adds strong architectural character to any room.
- Plan the coffered grid layout on paper first so all sections are equal in size and evenly spaced
- Use flat molding strips to form the borders of each recessed section across the tray surface
- Paint the recessed sections in a slightly deeper tone than the surrounding tray for added depth
- Keep all molding and trim in a consistent finish so the coffered pattern reads as one cohesive design
- Pair with a central chandelier or pendant that sits within one of the larger recessed sections
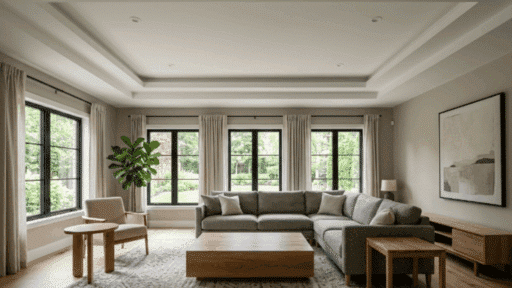
16. Clean Rectangular Tray Ceiling
A simple rectangular tray with clean edges and a single paint color adds quiet architectural character without drawing too much attention.
- Keep the tray proportions balanced within the room so it does not feel too large or too small
- Paint the inner surface and stepped edges in the same color for a seamless and understated result
- Avoid adding any molding, lighting, or material detail so the clean shape does the work on its own
- Use a flat or matte finish paint throughout the tray for a soft and consistent surface appearance
17. Matte Vs Gloss Tray Ceiling

Using the same paint color in two different finishes creates a subtle tonal contrast within the tray, adding depth without introducing a second color.
- Apply a flat or matte finish to the surrounding ceiling as the base surface throughout the room
- Use a gloss or semi-gloss finish on the flat inner surface of the tray in the exact same color
- Keep the stepped tray edges in the matte finish so the gloss inner surface stands apart clearly
- Choose a mid-tone paint color so the finish difference reads well under both natural and artificial light
- Avoid adding any other detail so the finish contrast remains the sole decorative element of the ceiling
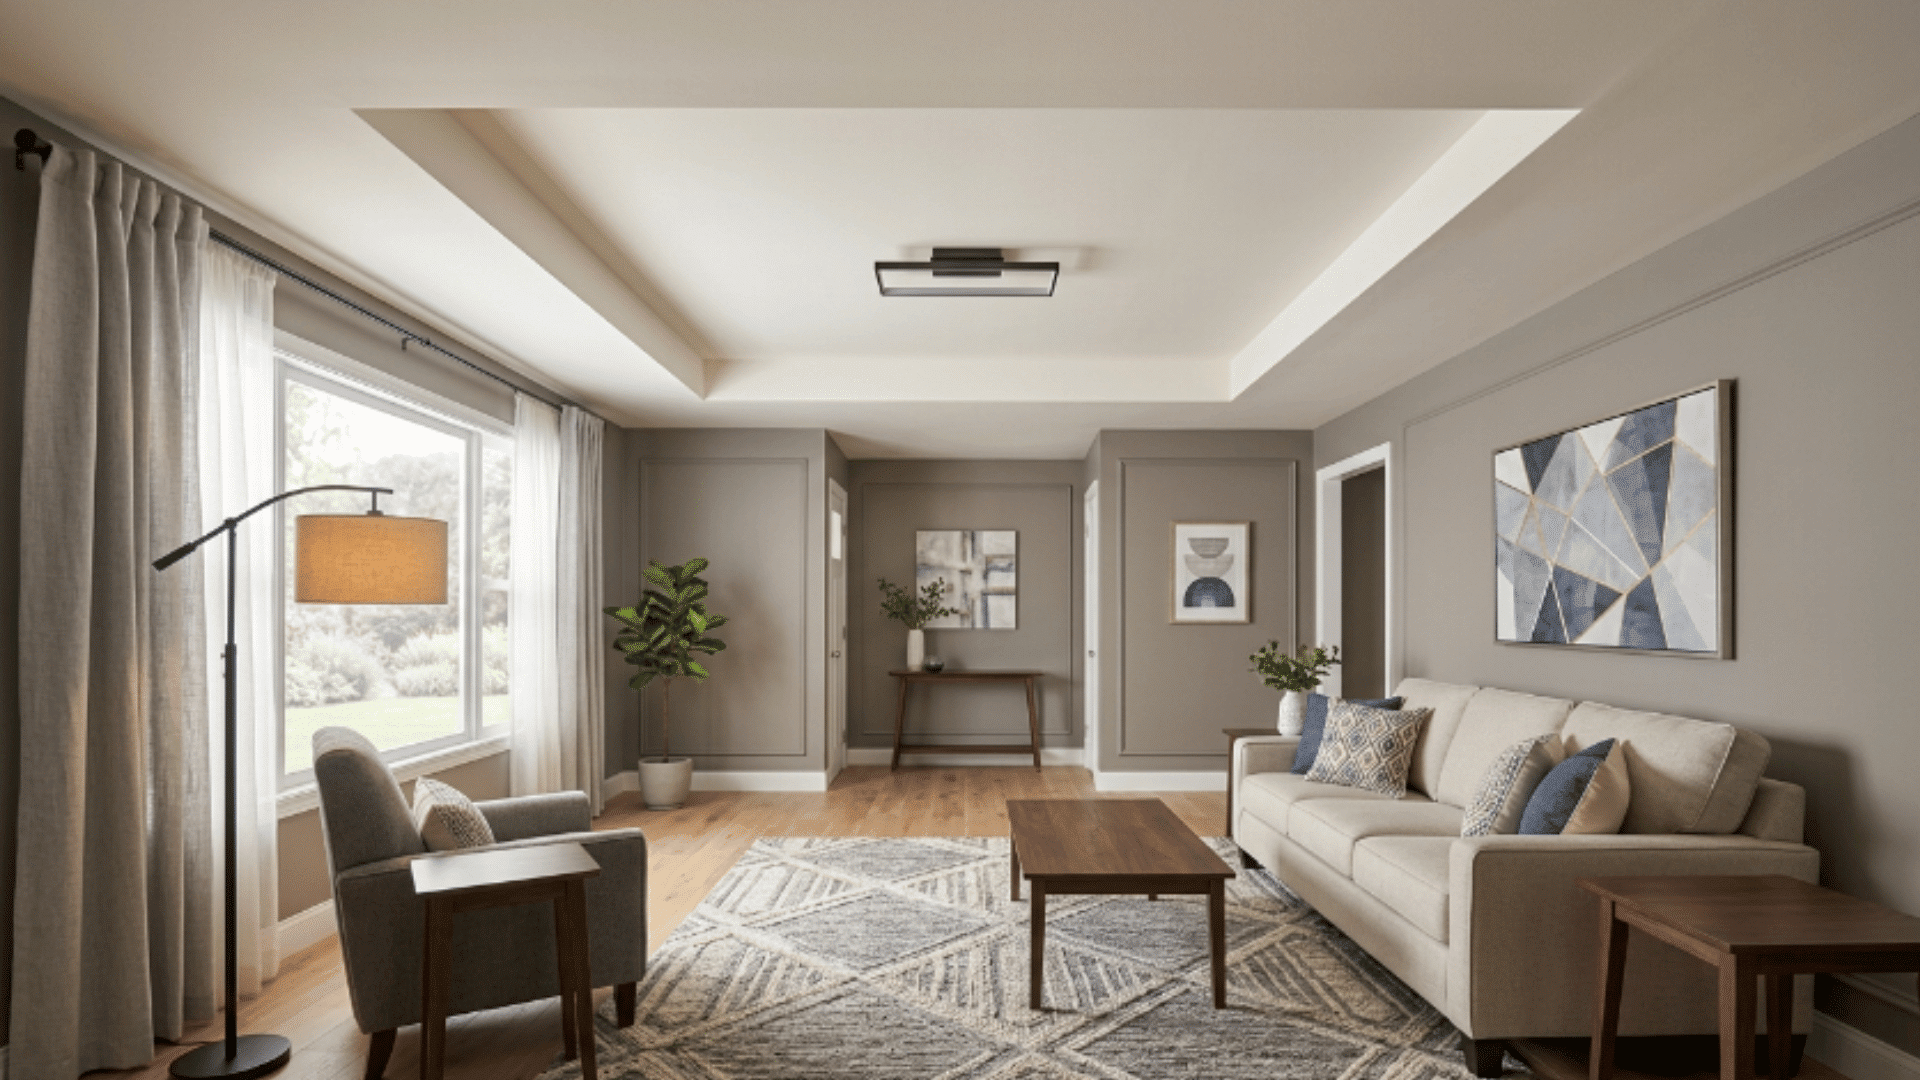
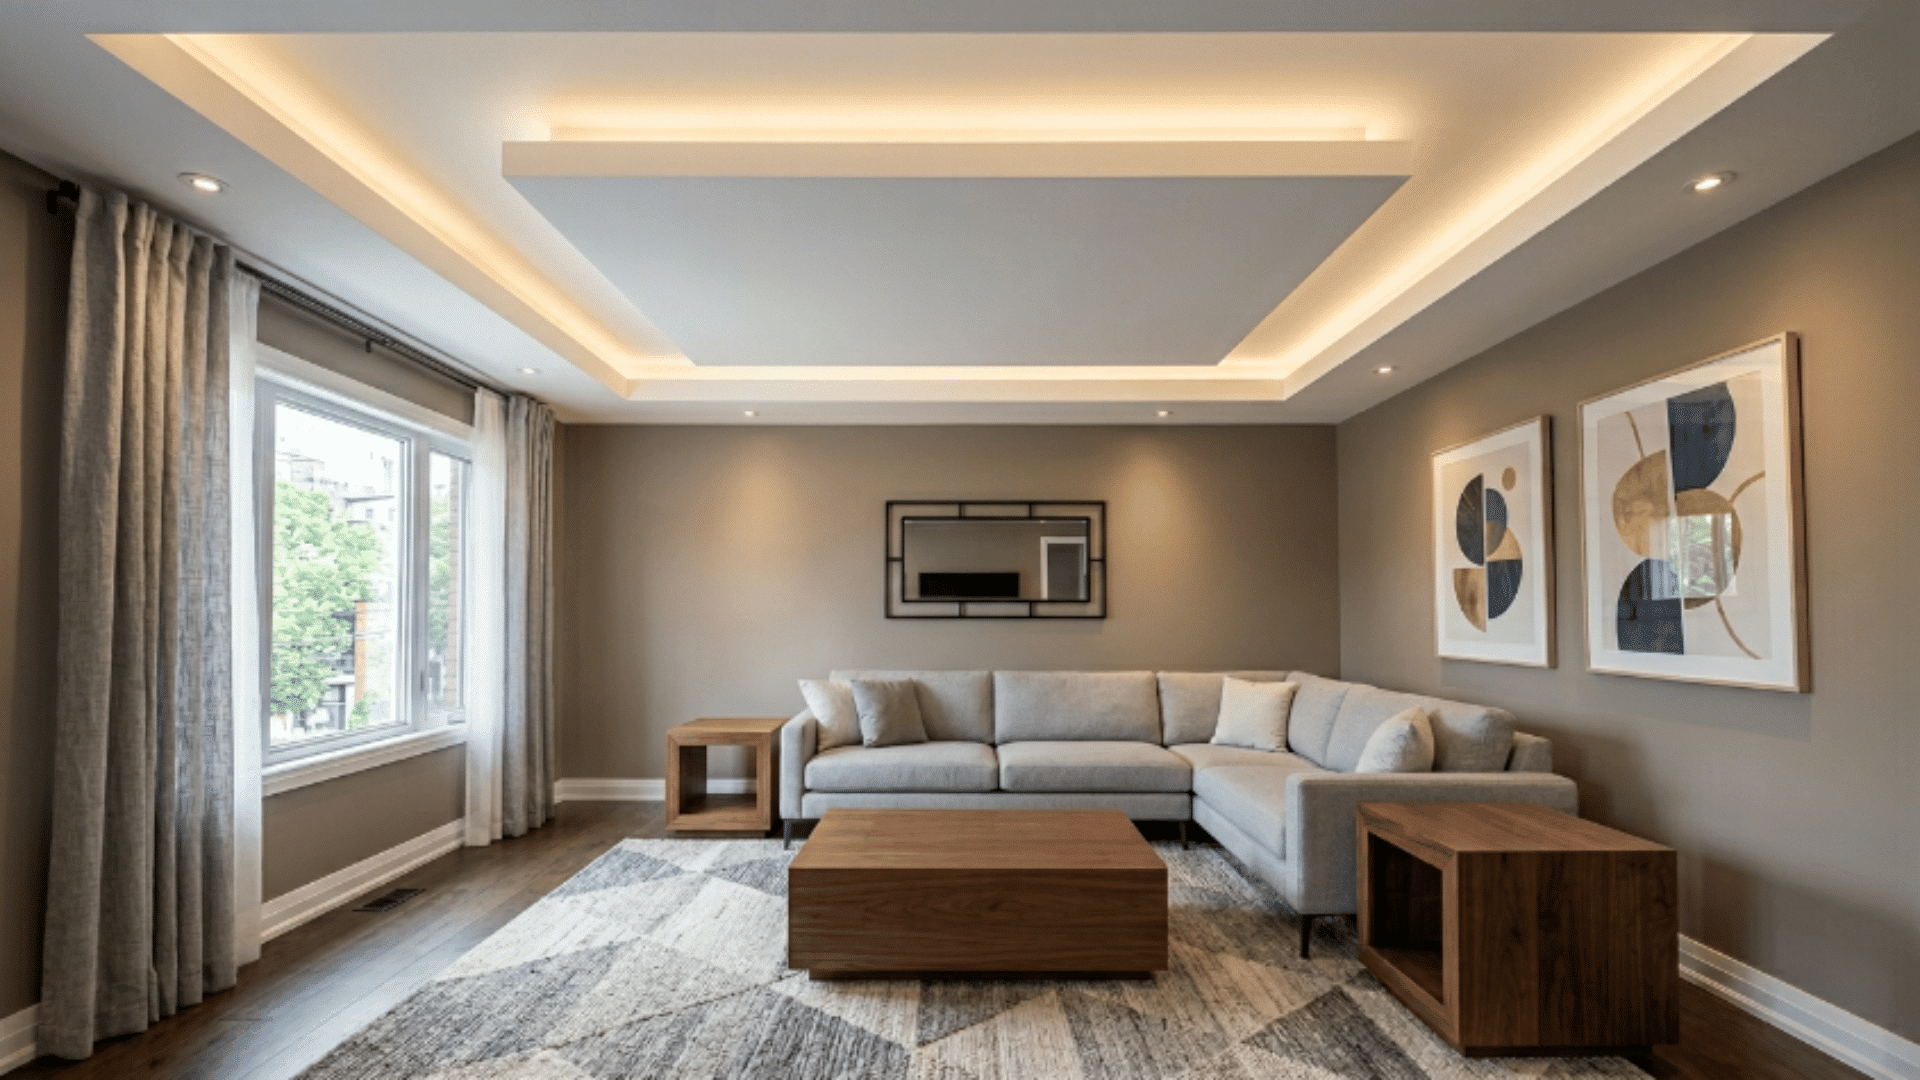
18. LED Cove Lighting Tray Ceiling
Hidden LED lighting installed along the inner edges of the tray creates a soft ambient glow that makes the ceiling feel lifted and warm.
- Install LED strip lights along the inner ledge of the tray so the light source itself stays hidden
- Choose warm white LEDs rather than cool white for a softer and more inviting glow
- Use a dimmer switch so the cove lighting can be adjusted based on the time of day and mood
- Paint the inner tray surface in a light neutral so the LED glow reflects cleanly without distortion
- Avoid adding any other ceiling detail so the lighting effect remains the single focal point
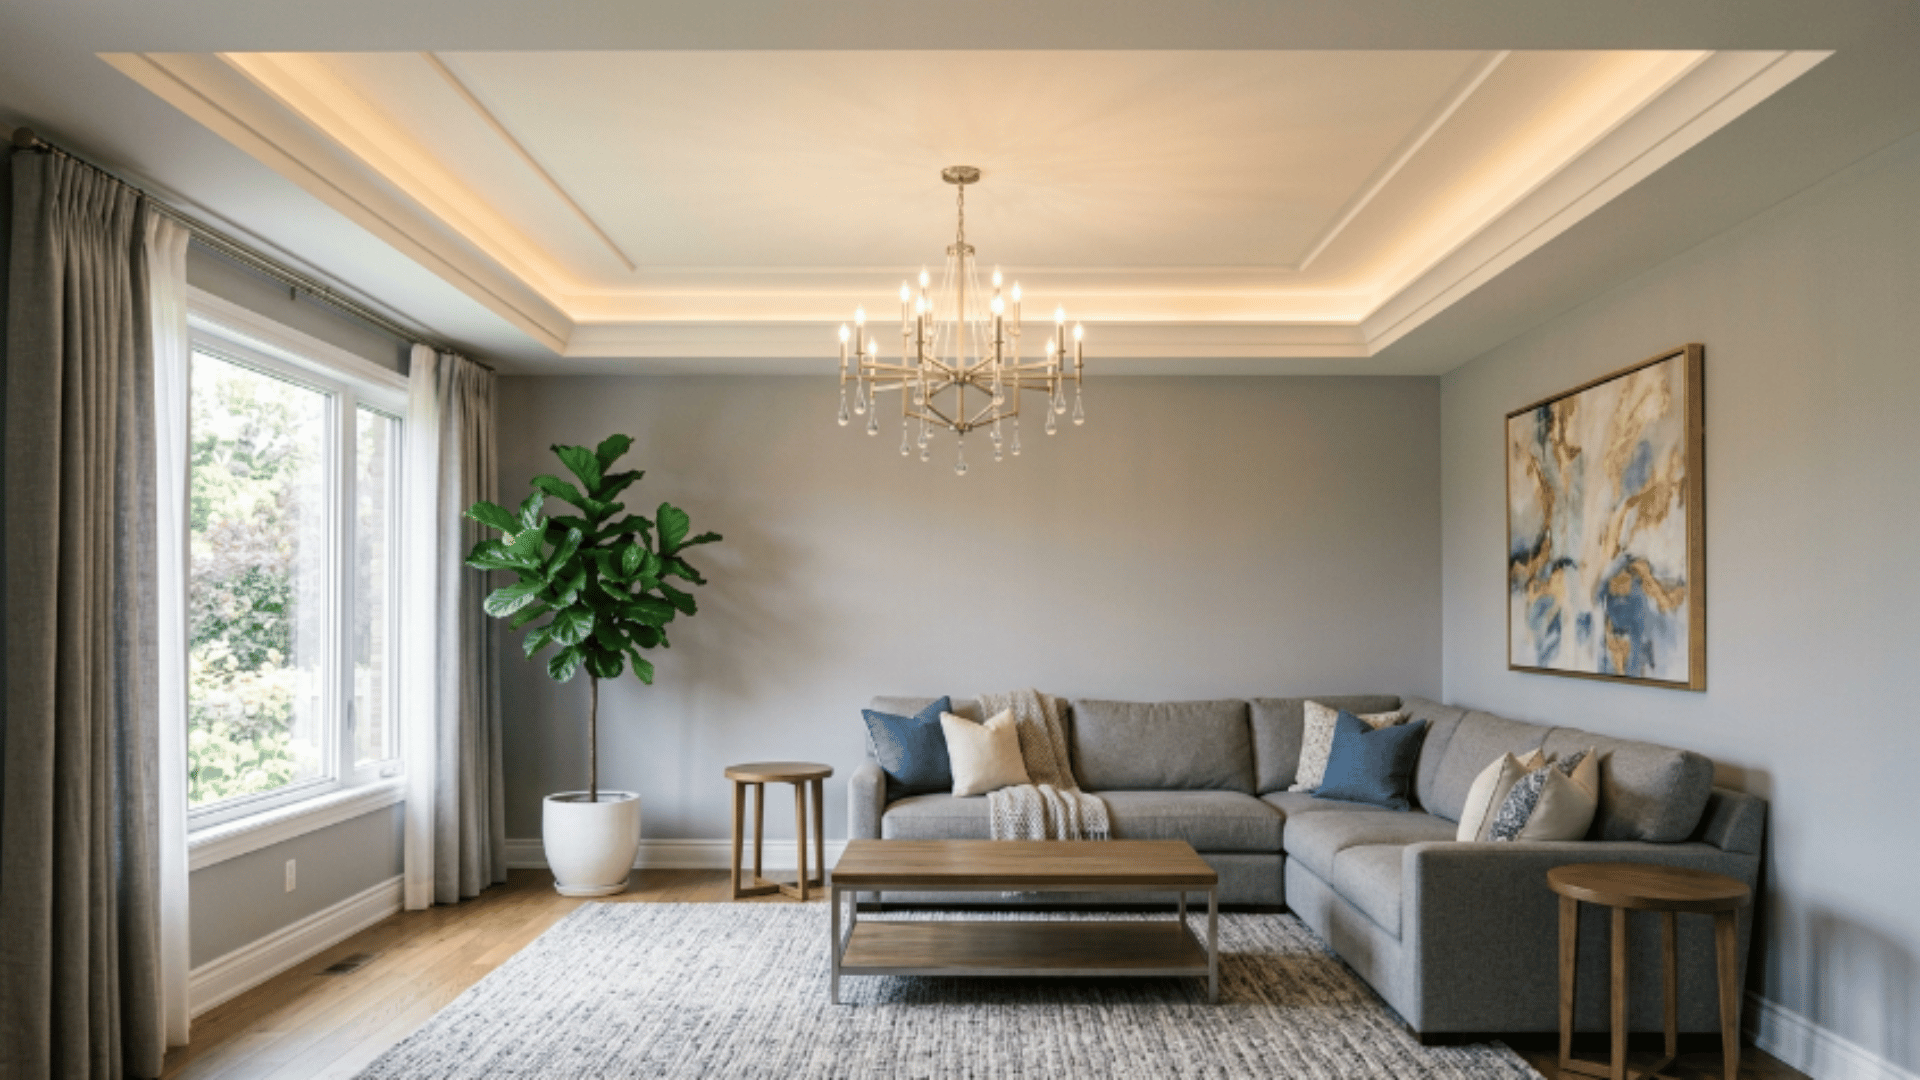
19. Chandelier-Focused Tray Ceiling
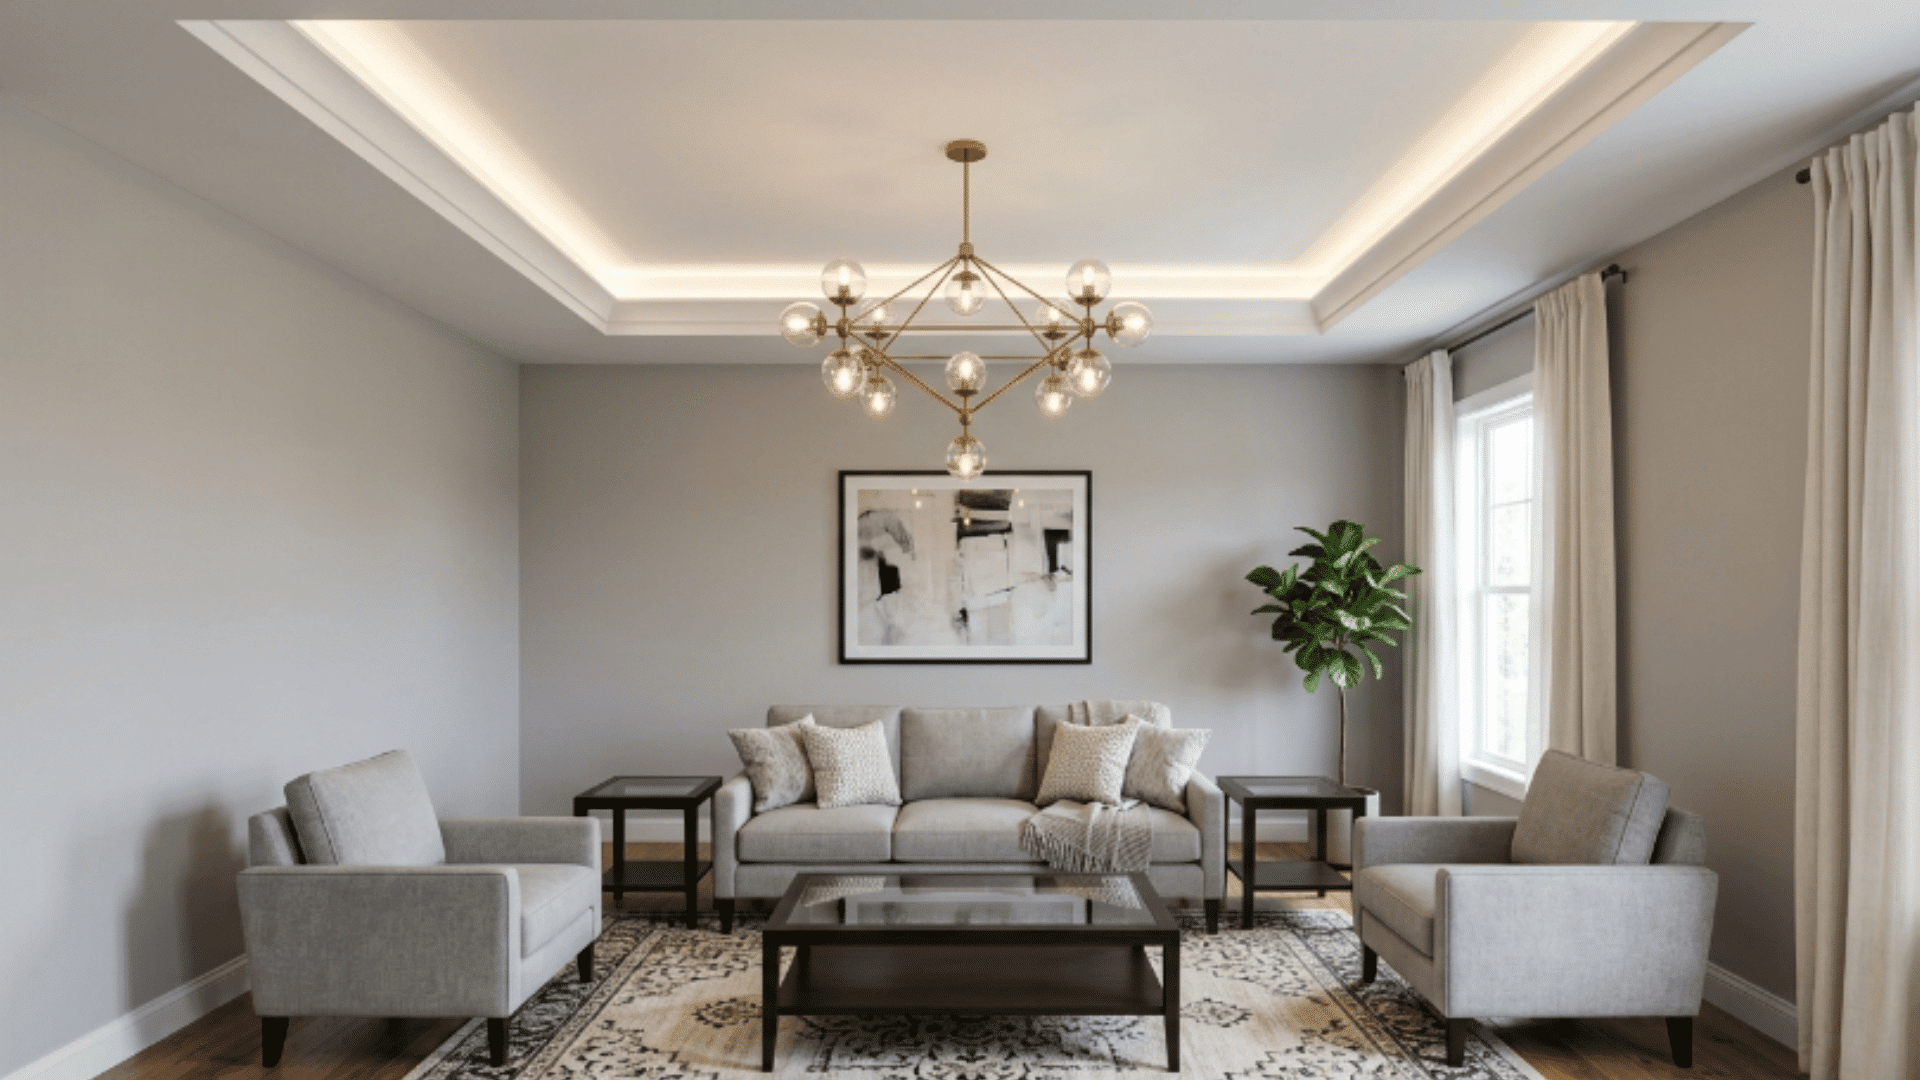
Designing the tray around a central chandelier makes the light fixture the main feature and gives the ceiling a clear, intentional focal point, one of the most classic tray ceiling ideas for rooms.
- Center the tray directly above the main seating or dining area so the chandelier placement feels natural
- Choose a chandelier with a scale that fills the inner tray without touching the stepped edges
- Paint the inner tray in a deeper tone than the surrounding ceiling to frame the chandelier from above
- Keep the tray design simple and uncluttered so the chandelier remains the clear main feature
- Use the chandelier as the primary light source and avoid adding additional ceiling fixtures nearby
20. Gray Tone Tray Ceiling
Gray shades applied to the tray create a subtle contrast that reads as modern and considered without relying on bold color choices.
- Choose a gray that is two shades deeper than the surrounding ceiling for a quiet but clear contrast
- Apply the gray only to the flat inner surface of the tray, leaving the stepped edges in the ceiling color
- Use a flat or matte finish so the gray reads as a soft tonal shift rather than a strong color statement
- Pair with light walls and flooring so the gray ceiling feels grounding without making the room feel heavy
- Add recessed lighting inside the tray to keep the gray surface well-lit and the room feeling open
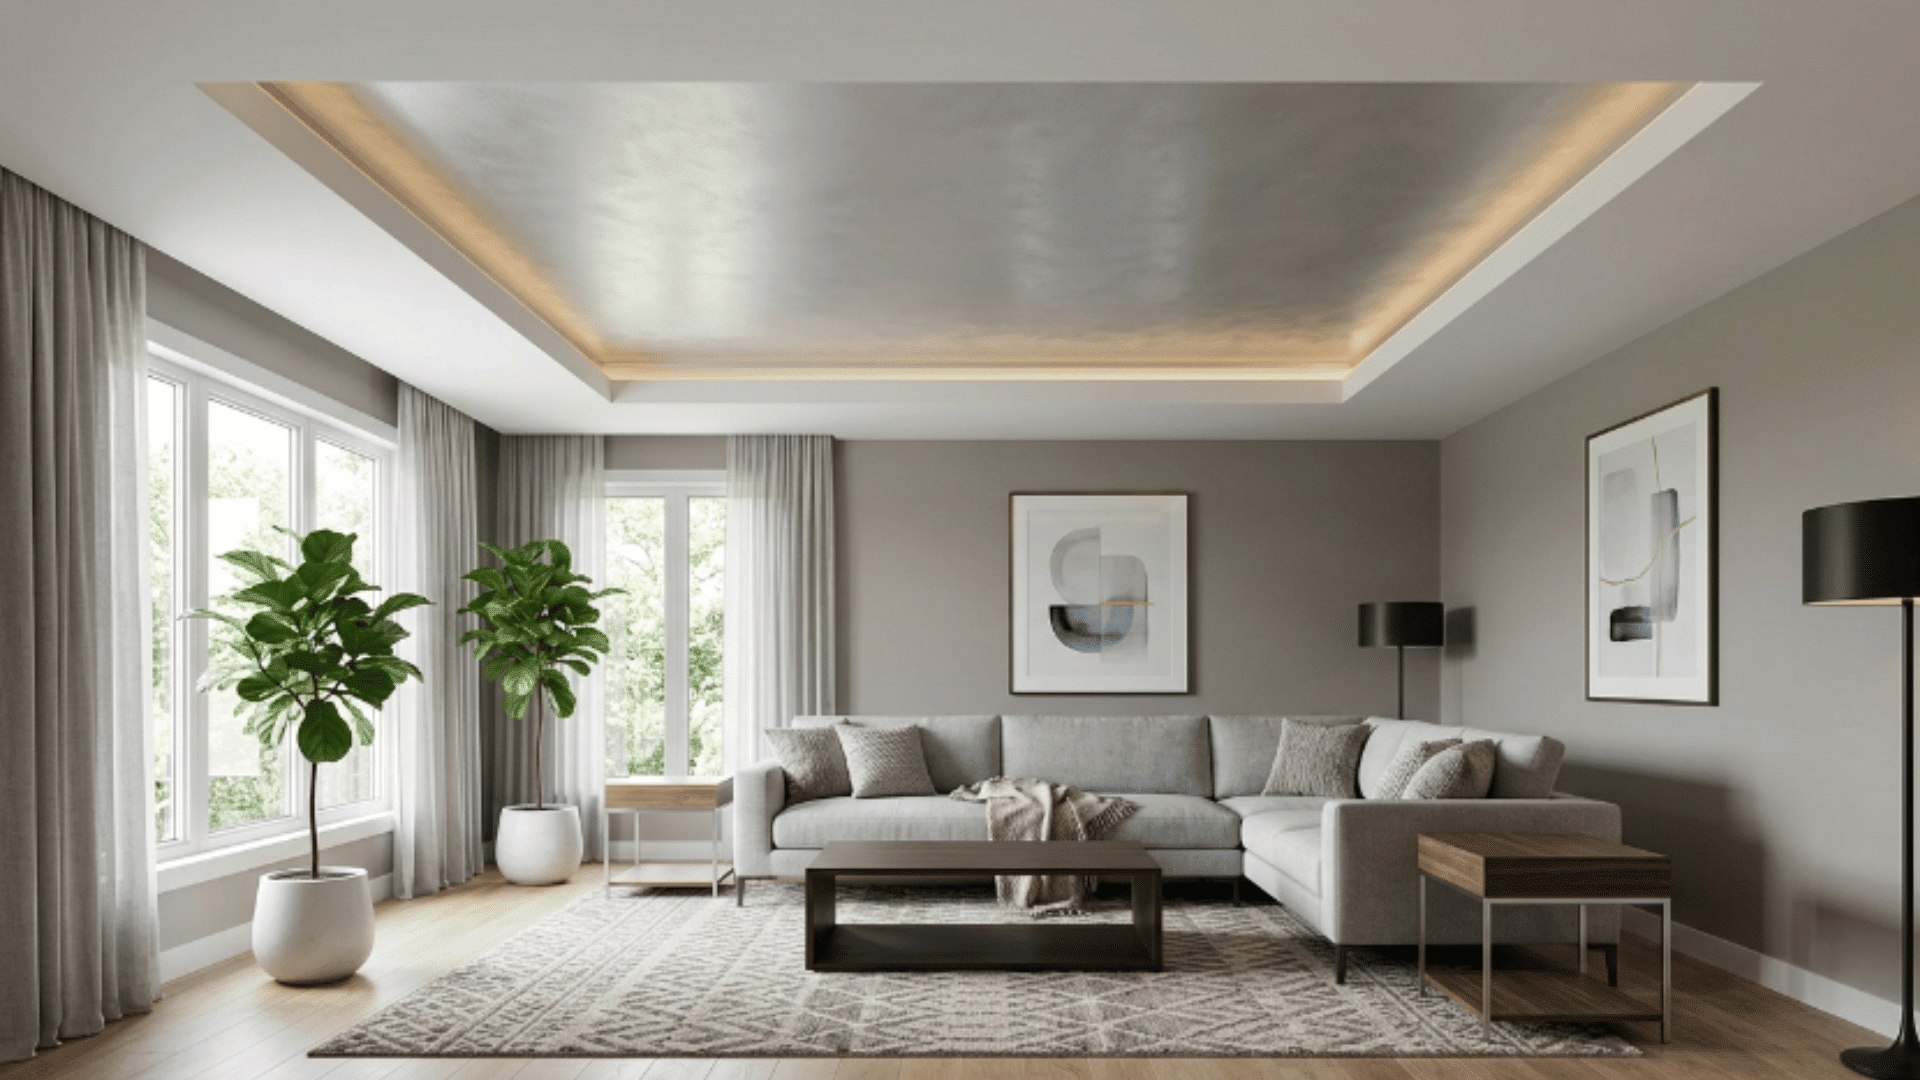
21. Gold Accent Tray Ceiling
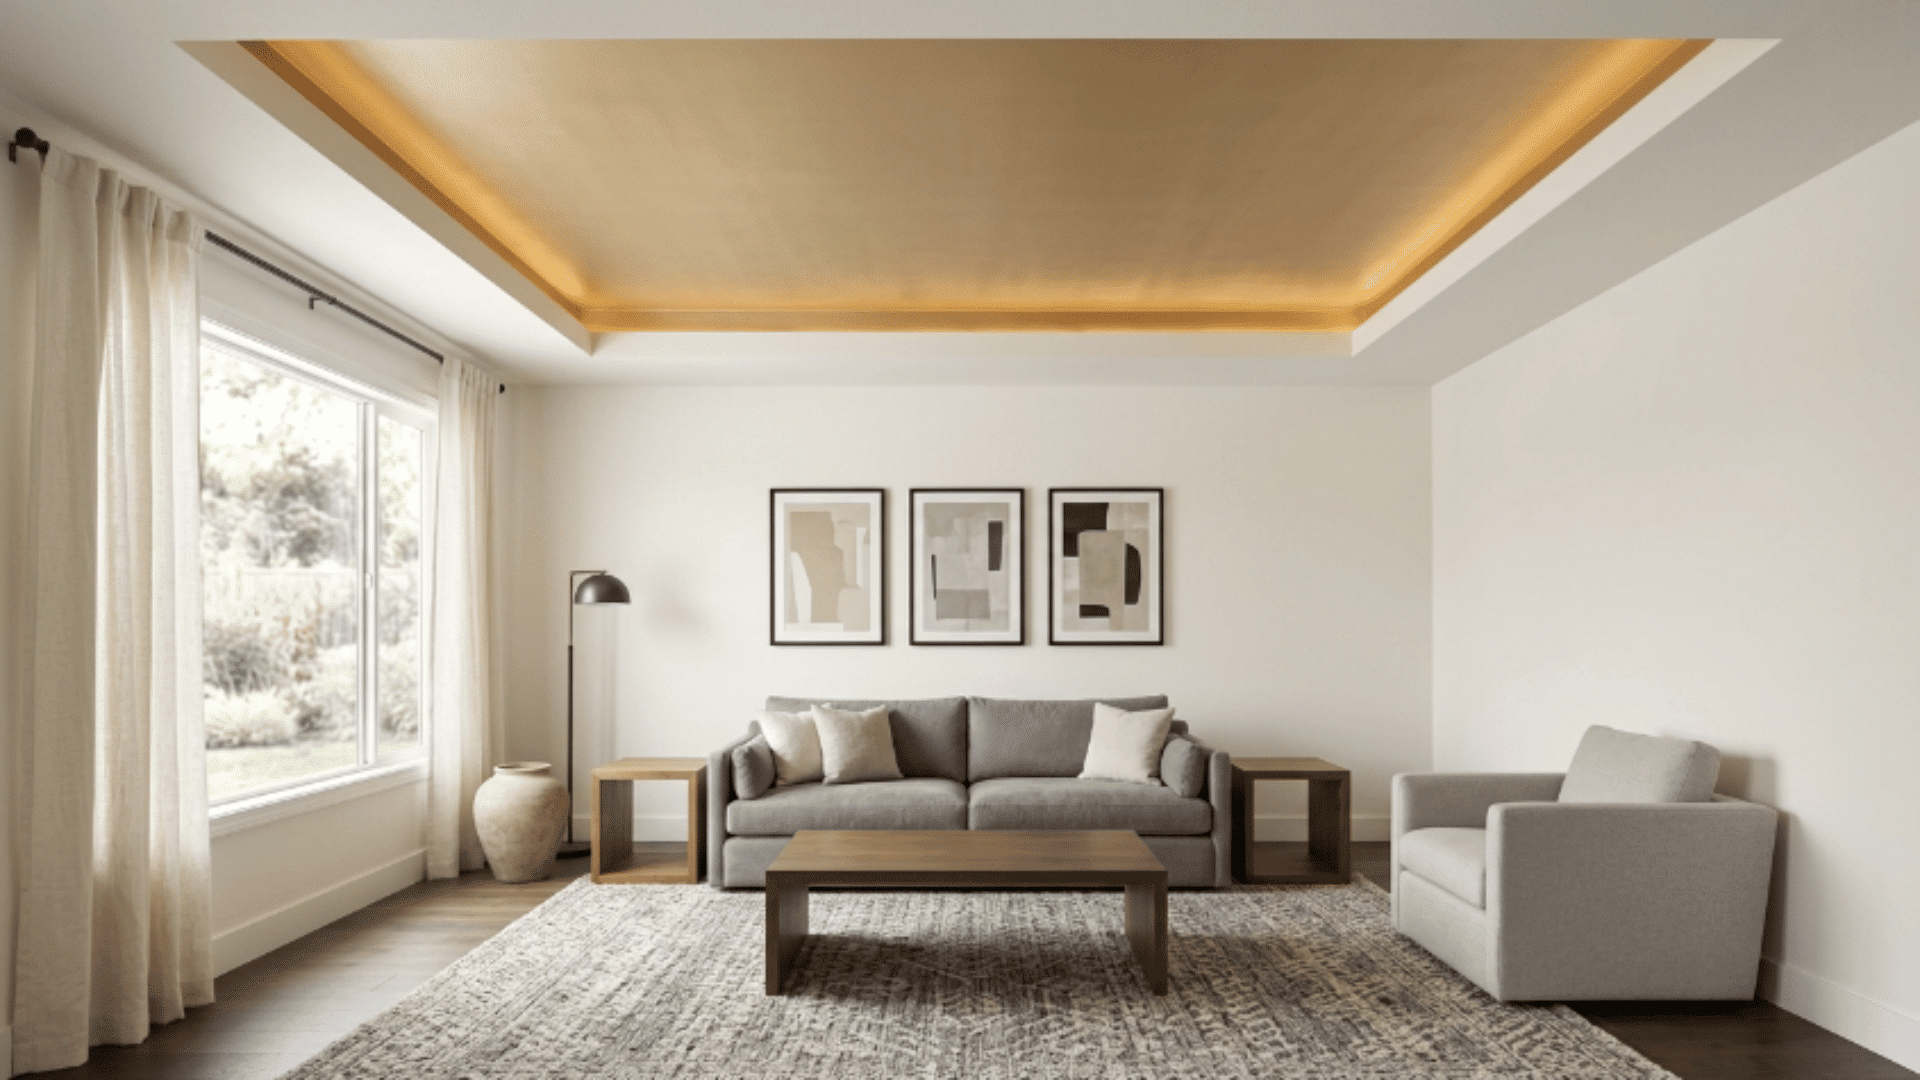
Gold leaf or metallic paint applied inside the tray adds a layer of richness and warmth that works particularly well in formal and dining spaces.
- Apply gold leaf or metallic paint only to the flat inner surface of the tray for maximum impact
- Use a deep base color on the stepped edges to frame the gold section and prevent it from looking flat
- Seal the gold surface with a clear protective coat to prevent tarnishing and surface wear over time
- Pair with dark or jewel-toned walls so the gold ceiling reads as warm and rich rather than loud
- Keep all other ceiling and room details simple so the gold accent carries the full decorative weight
22. Dark Stained Wood Tray Ceiling
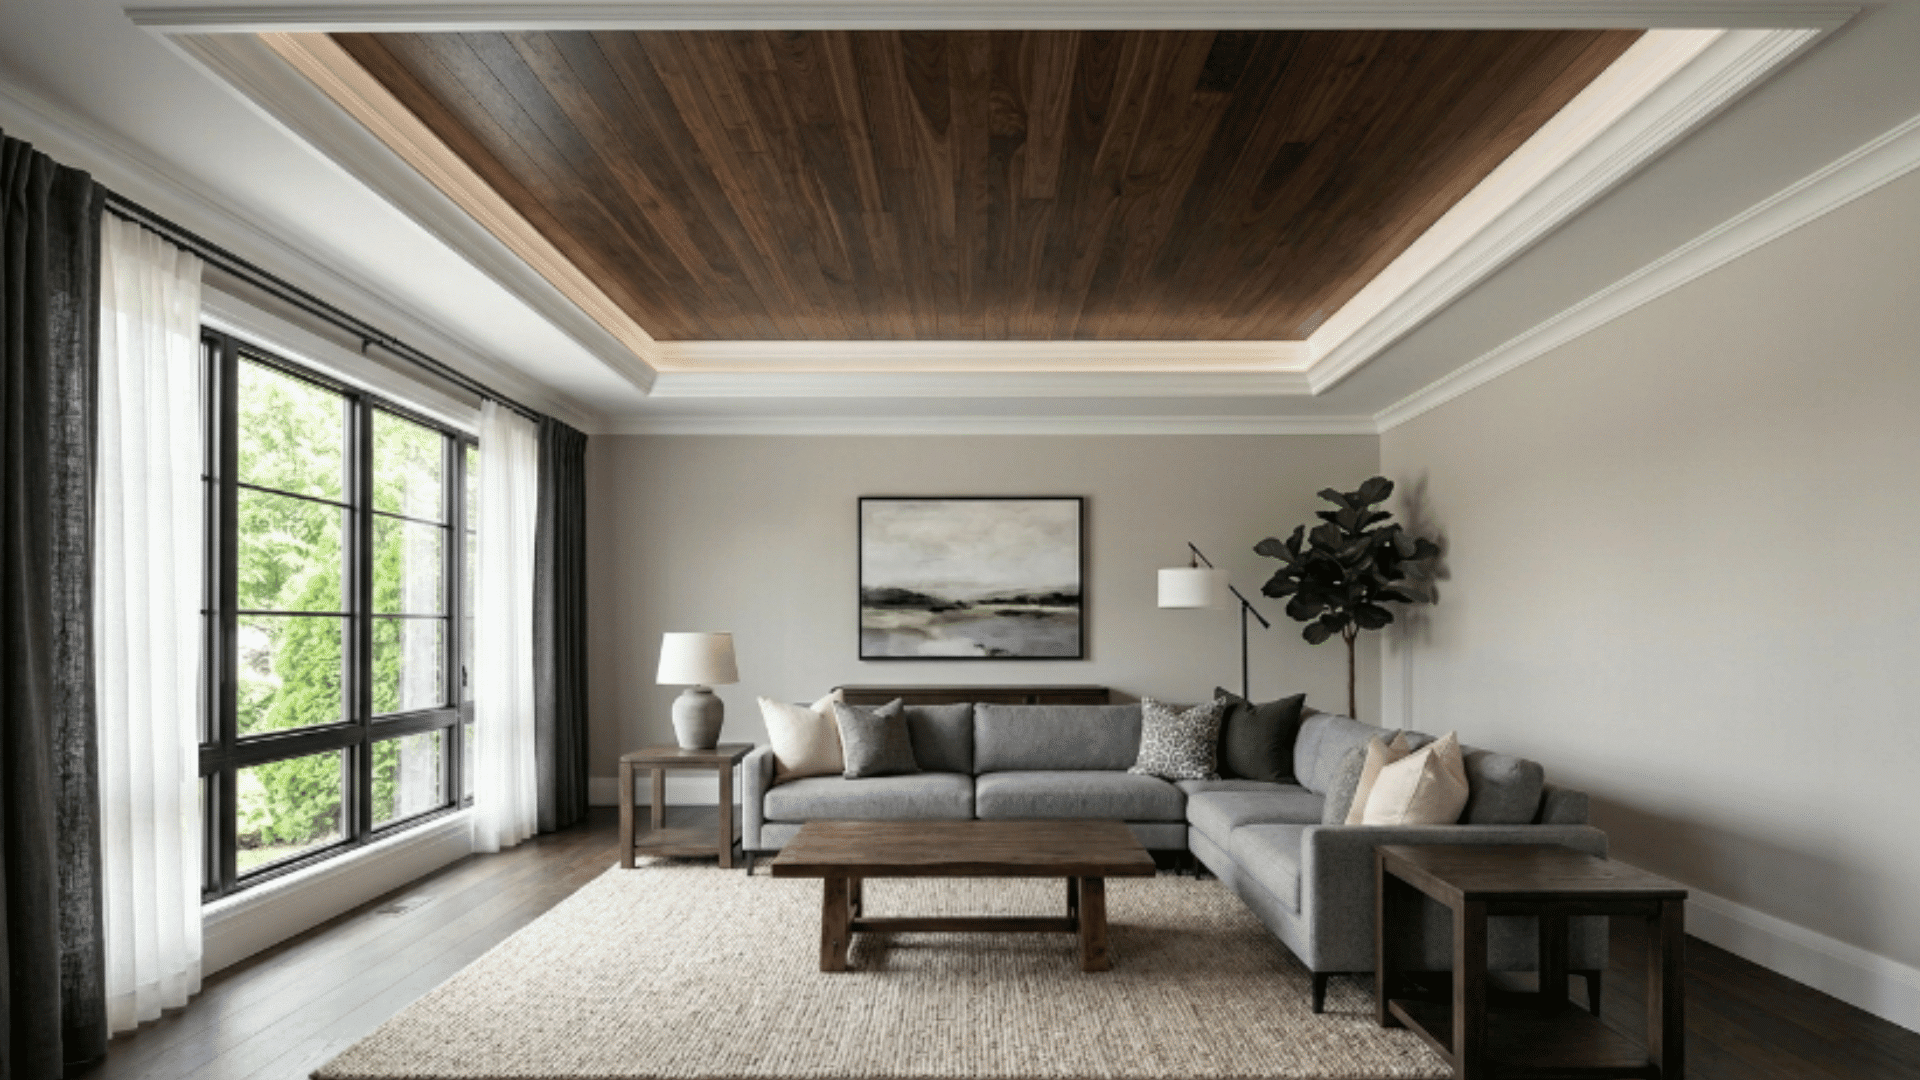
Deep wood tones inside the tray create a rich contrast against a lighter surrounding ceiling, giving the room a grounded, considered character.
- Choose a dark wood stain in ebony, walnut, or deep mahogany for maximum contrast effect
- Apply the stain evenly across all panels before installation for a consistent and clean finish
- Keep the surrounding ceiling and stepped tray edges in a light neutral to maximize the contrast
- Use warm recessed lighting inside the tray to bring out the depth of the dark wood tone
- Keep the rest of the room in lighter tones so the dark tray ceiling becomes the clear focal point
23. Farmhouse Style Tray Ceiling
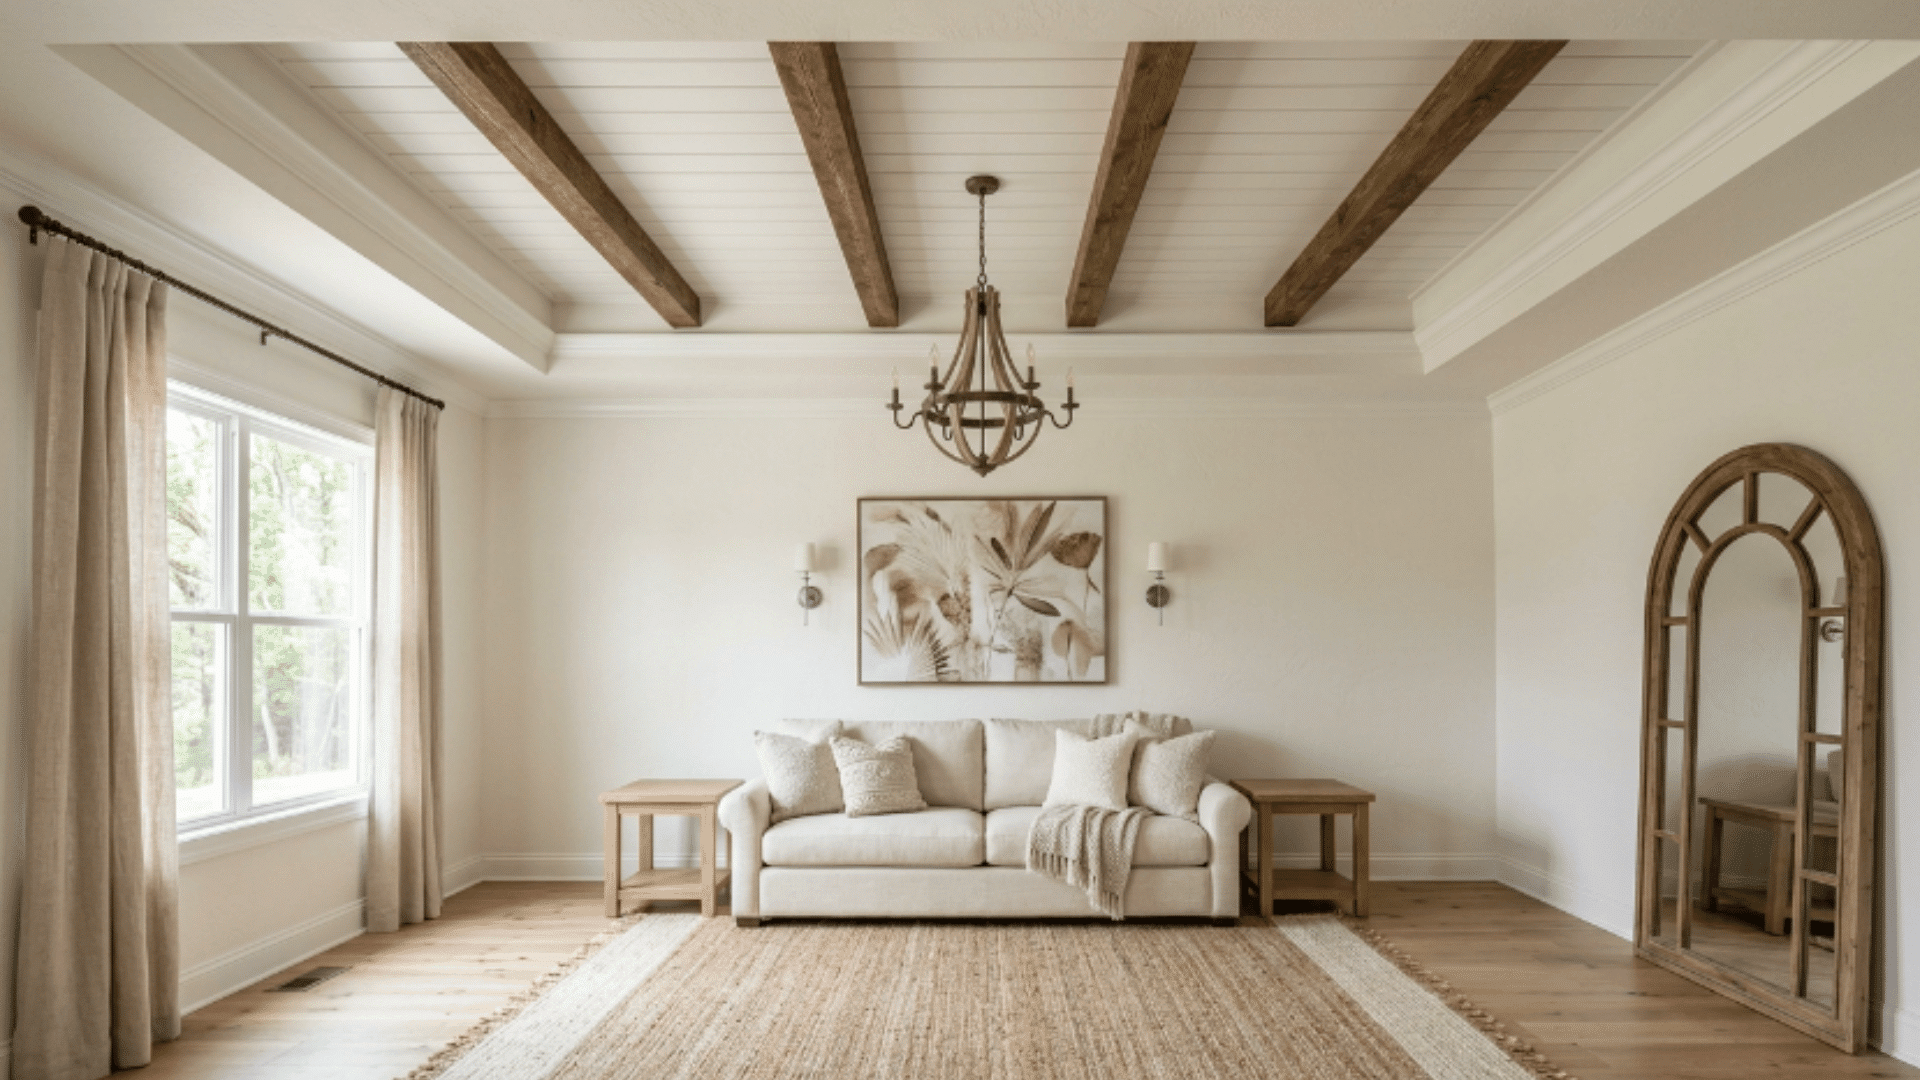
Combining beams, shiplap, and white paint in a tray creates a cozy, grounded ceiling that works well in open-plan farmhouse interiors.
- Install shiplap boards across the full inner surface of the tray as the base layer of texture
- Add two or three evenly spaced beams on top of the shiplap running across the tray width
- Paint everything in crisp white or soft off-white to keep the layered elements feeling light
- Keep the stepped tray edges painted in the same white tone for a seamless farmhouse finish
- Pair with natural wood furniture and simple textiles below to carry the farmhouse feel throughout
24. Shadow Line Tray Ceiling
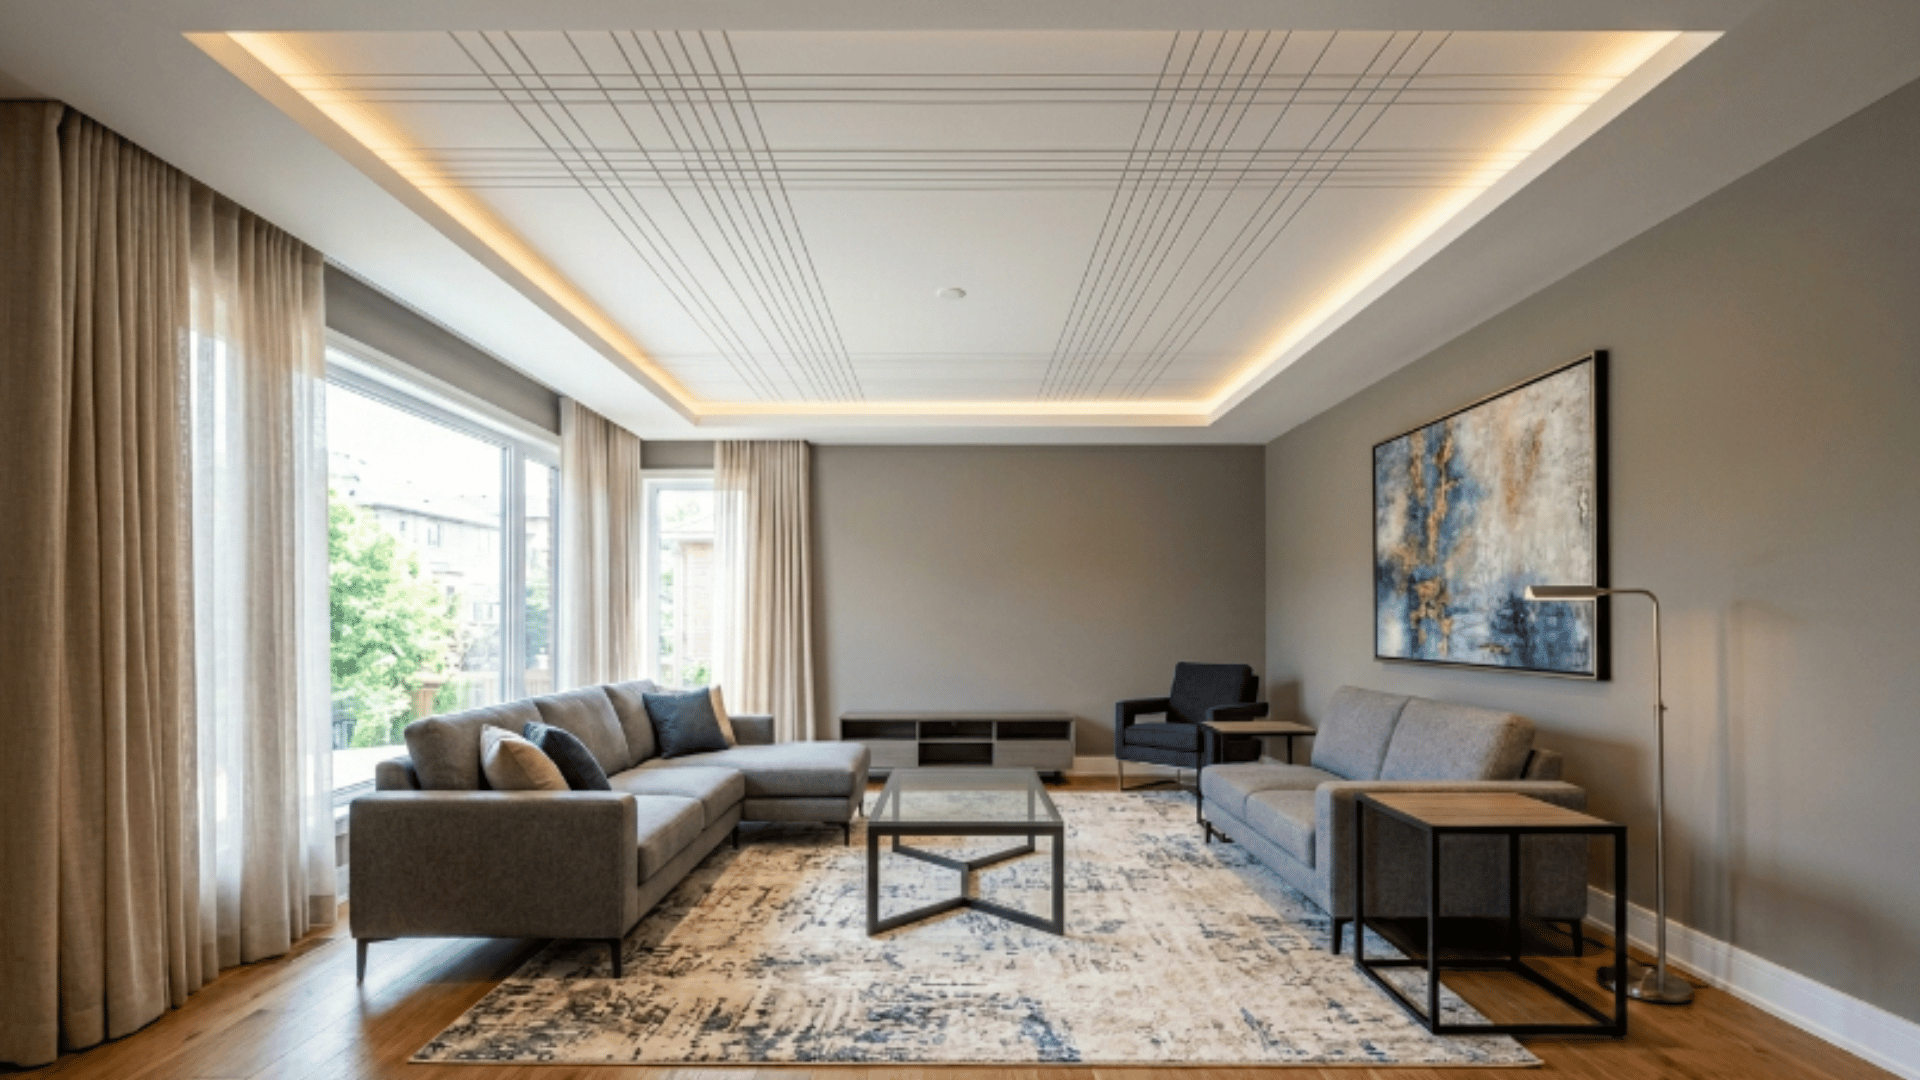
Thin lines added within the tray surface create a sense of depth and architectural detail without requiring any additional materials or decorative elements.
- Keep all lines consistent in depth and width so the pattern reads evenly across the full ceiling area
- Paint the inside of each recessed line in a slightly darker tone to make the shadow effect visible
- Space the lines evenly across the tray so the overall pattern feels structured and deliberate
- Use a flat ceiling finish throughout, so the shadow lines provide the only surface variation
25. Inverted Tray Ceiling Design
Flipping the standard tray design so the center drops rather than rises creates an unexpected and architecturally interesting ceiling feature.
- Paint the lowered center section in a deeper tone than the surrounding ceiling to emphasize the drop
- Use recessed lighting around the outer raised perimeter to draw attention to the inverted center
- Keep the room furniture and walls neutral so the inverted ceiling shape reads clearly from below
- Avoid adding any material or molding detail inside the dropped section, so the form speaks for itself
26. Mirrored Tray Ceiling
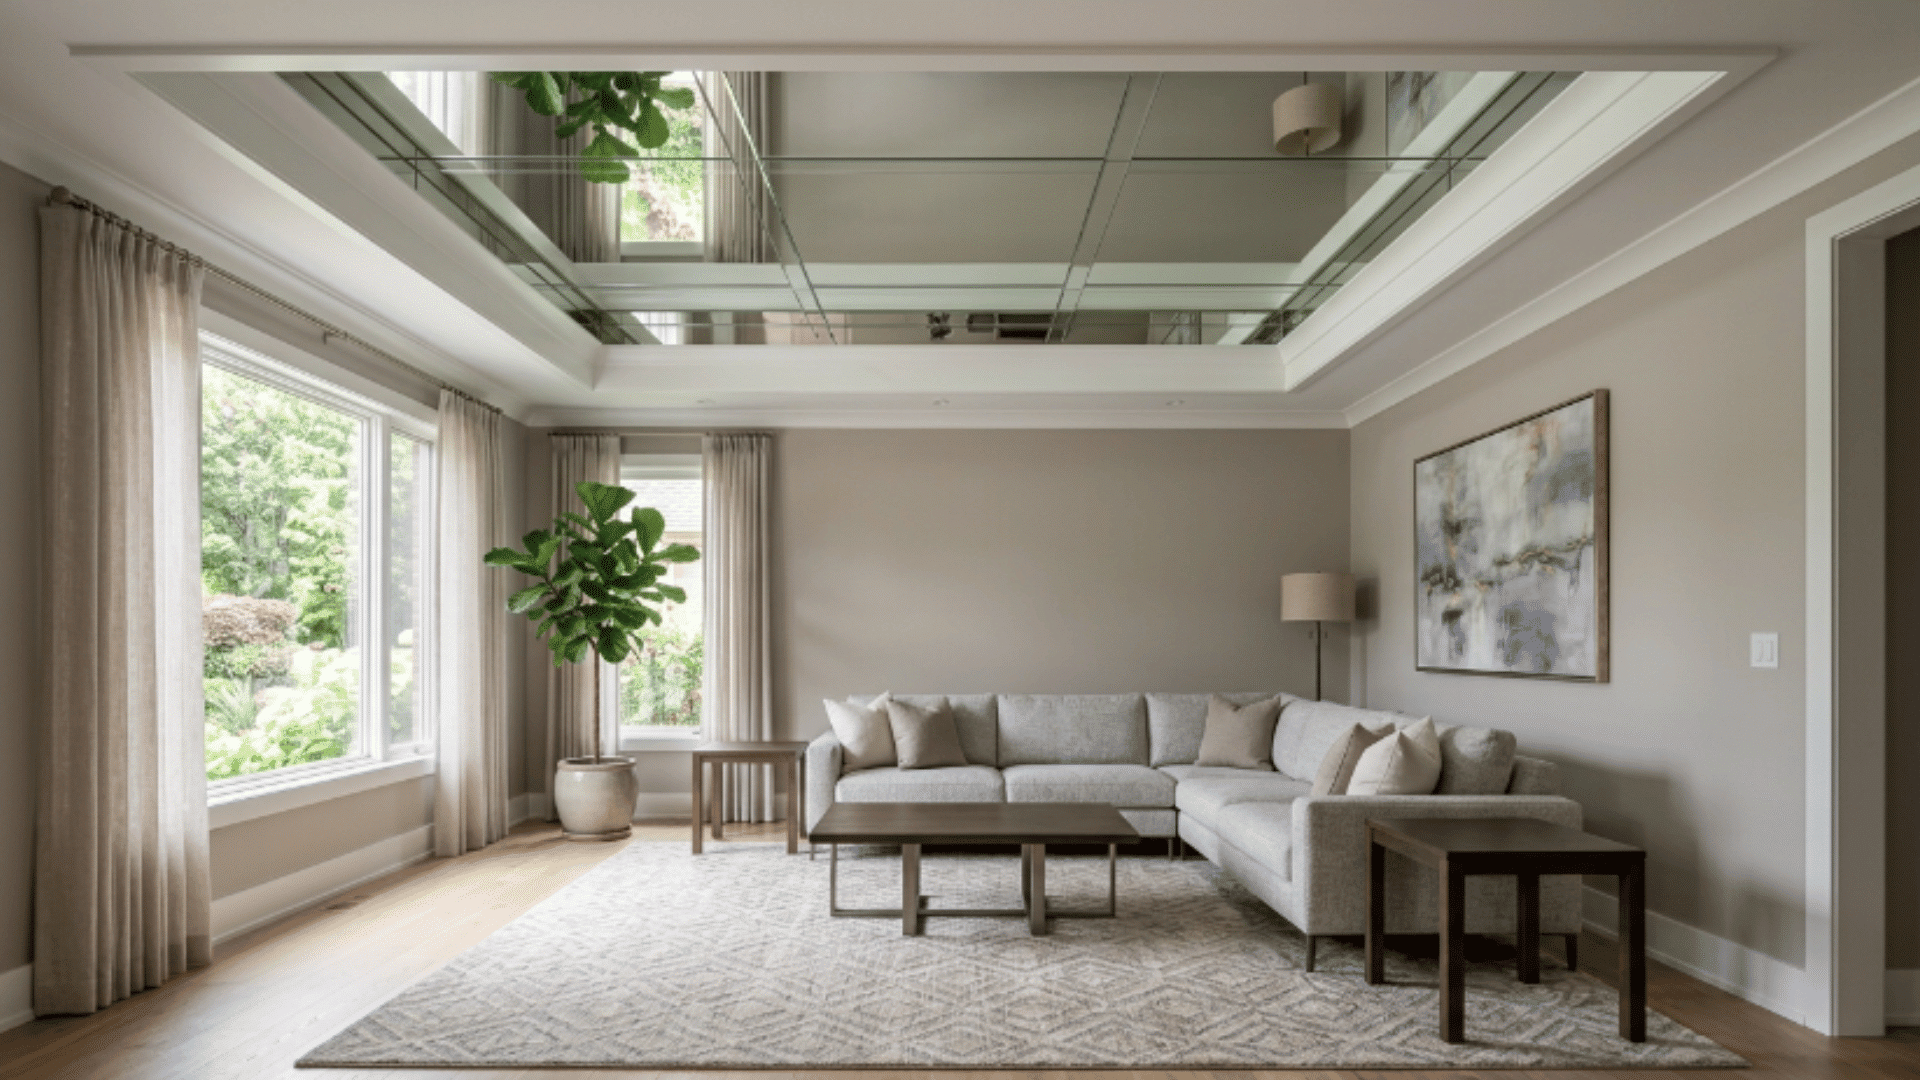
Mirror panels installed inside the tray reflect light, visually increasing the sense of height and space in a room.
- Use mirror tiles or a single large mirror panel cut to fit the inner tray dimensions precisely
- Secure all mirror sections with a strong construction adhesive rated for ceiling applications
- Keep the stepped tray edges painted in white or a light neutral to frame the mirror cleanly
- Position the room lighting so it reflects well in the mirror without creating harsh or uneven glare
- Pair with light walls and furniture so the mirror reflects a bright and open version of the room
27. Vaulted Tray Ceiling Combo
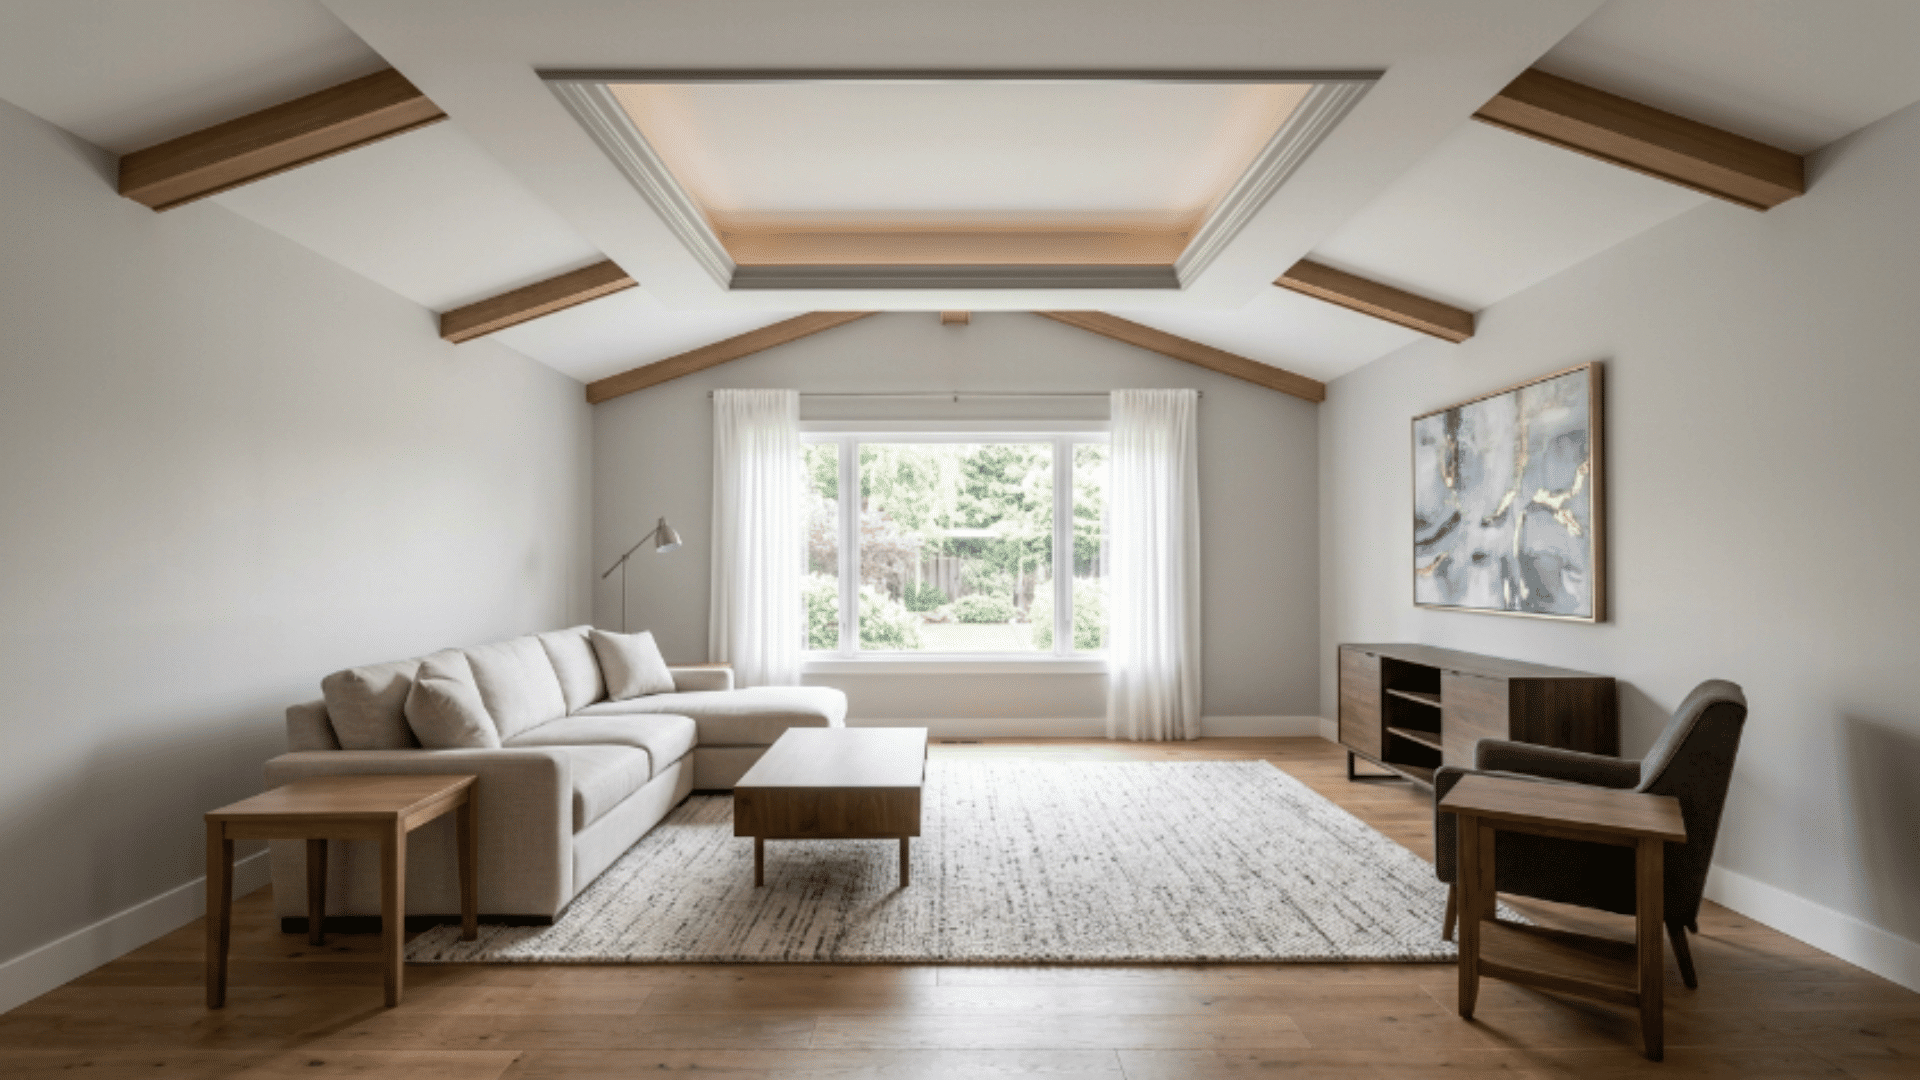
Combining a tray ceiling with a vaulted ceiling adds both height and architectural complexity to a room, in a way neither feature can achieve on its own, making it one of the most impactful tray ceiling ideas for larger living and bedroom spaces.
- Paint the vaulted sections and the tray’s inner surface in the same tone for a unified and seamless result
- Use cove lighting along the tray edges to separate the tray detail from the vaulted ceiling above
- Choose a central pendant or chandelier that hangs at a height suited to the combined ceiling structure
- Keep walls and furnishings simple so the combined ceiling shape remains the dominant feature of the room
Tools You Can Use to Plan Your Tray Ceiling
Planning a tray ceiling design becomes easier when you can see how it will look before starting. These tools help you test ideas, adjust layouts, and choose finishes with more confidence.
- Room Visualizer: Use online visualizer tools to preview tray ceiling designs, colors, and finishes in a digital space before making final design decisions.
- Design Apps: Use interior design apps to test different tray ceiling styles, layouts, and color combinations so you can compare options and choose what best fits your space.
- Color Tools: Use paint tools to check how different shades will look on tray ceilings under different lighting conditions before applying them in real spaces.
- Layout Planner: Use floor and ceiling planning tools to map tray ceiling dimensions, proportions, and placement so the design fits well within the room structure.
- Material Sample: Use physical or digital samples to compare wood, paint, and finishes, ensuring the final tray ceiling design looks balanced and consistent.
Wrapping It Up
A ceiling is never just a ceiling; it is the one surface that sets the entire character of a room. The right design choice up top can shift how spacious, warm, or polished a space feels without touching a single wall.
This blog showed a range of tray ceiling ideas from bold materials and contrasting colors to simple shapes and hidden lighting.
Each option works differently depending on your room, your budget, and the finish you are after. The key is picking one direction and committing to it with clean execution.
Ready to give your ceiling the attention it deserves? Pick your favorite idea and get building today.

With a Master in Architectural Studies from University of Pennysylvania, Marwa Haydar has pioneered living spaces since 2005. Her expertise, initially honed in a prestigious architectural firm, is evident in her approach to creating environments. Marwa became part of our team in 2019 and has since been a driving force in our home improvement section, known for her practical yet stylish solutions. She’s been spearheading our design workshops since then, infusing her passion for teaching into her work. In her leisure time, Marwa enjoys exploring historic architecture and is an enthusiastic pottery hobbyist, further enriching her understanding of form and texture.